

Craft a Heartfelt Celebration: Your Guide to the DIY Fringed Love Cake Topper
Transform any ordinary cake into a centerpiece of affection with this charming DIY Fringed Love Cake Topper. Perfect for Valentine’s Day, anniversaries, birthdays, or simply a spontaneous gesture of love, this easy-to-make decoration adds a playful, personalized touch to your desserts. Forget generic store-bought toppers; unleash your creativity and craft a unique message that truly speaks from the heart.
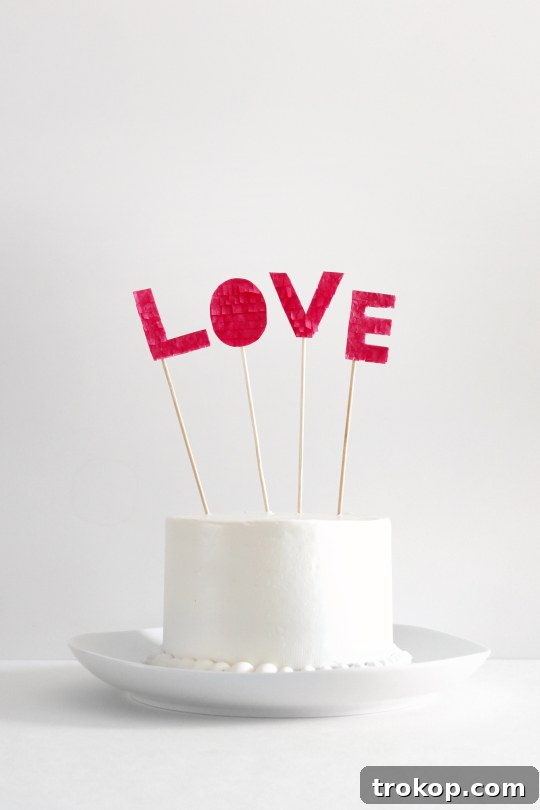
With Valentine’s Day often creeping up faster than expected, you might find yourself in a last-minute dash for a meaningful yet simple way to show your appreciation. This DIY Fringed Love Cake Topper is your secret weapon. Whether you’re a seasoned crafter or a complete beginner, this project is designed to be quick, fun, and incredibly rewarding.
Imagine this: a beautifully decorated cake, adorned with a handmade topper spelling out “LOVE” or any special word, awaiting your significant other when they walk through the door. It’s a thoughtful gesture that requires minimal time (about 30 minutes from start to finish!) but leaves a lasting impression. Plus, you get to enjoy a delicious cake afterward—it’s truly a win-win situation. As a passionate advocate for personal touches, I believe these small, handmade efforts make the biggest impact and demonstrate genuine care.

Table of Contents
The Charm of DIY Cake Toppers: Why Go Handmade?
In a world of mass-produced items, there’s something truly special about a handmade gift or decoration. A DIY cake topper isn’t just an embellishment; it’s a statement of effort, love, and creativity. Opting for a homemade topper offers several distinct advantages over purchasing one from a store:
- Personalization Beyond Compare: With a DIY topper, you’re not limited to pre-designed phrases or colors. You can choose any word, name, or short message that holds special meaning to you and your loved one. Select specific colors of tissue paper that match their favorite hues or the theme of your celebration. This level of customization ensures your gift is truly one-of-a-kind.
- Budget-Friendly Brilliance: Crafting at home often means significant savings. The materials for this fringed cake topper are inexpensive and readily available, allowing you to create a high-impact decoration without breaking the bank. This makes it an excellent option for celebrating on a budget without compromising on thoughtfulness.
- A Fun and Relaxing Activity: Engaging in a simple craft project can be a wonderful way to unwind and express your creativity. The process of cutting, fringing, and gluing can be quite therapeutic, turning preparation into part of the celebration itself. It’s a rewarding experience that builds anticipation for the main event.
- Impressive Results with Minimal Effort: Despite its sophisticated and festive appearance, this fringed cake topper is surprisingly easy to make. The technique is straightforward, and even those new to crafting will find it simple to follow. The result is a professional-looking decoration that will impress anyone who sees it, making you look like a crafting guru!
- Versatility for All Occasions: While initially designed for Valentine’s Day, the concept is universally adaptable. Think “HAPPY” for birthdays, “BABY” for showers, “CONGRATS” for graduations, or even “THANKS” for a host gift. The possibilities are endless, making this a skill you’ll use again and again.
Gathering Your Supplies: Materials and Tools Needed
One of the best aspects of this DIY project is the simplicity of its material list. You likely have most of these items around your house already, making it even easier to start crafting right away. Here’s what you’ll need:
- Red or pink tissue paper: Essential for that vibrant, festive fringe. You can experiment with other colors like gold, silver, pastels, or even a mix to match your chosen theme. Ensure it’s good quality so it doesn’t tear too easily during fringing.
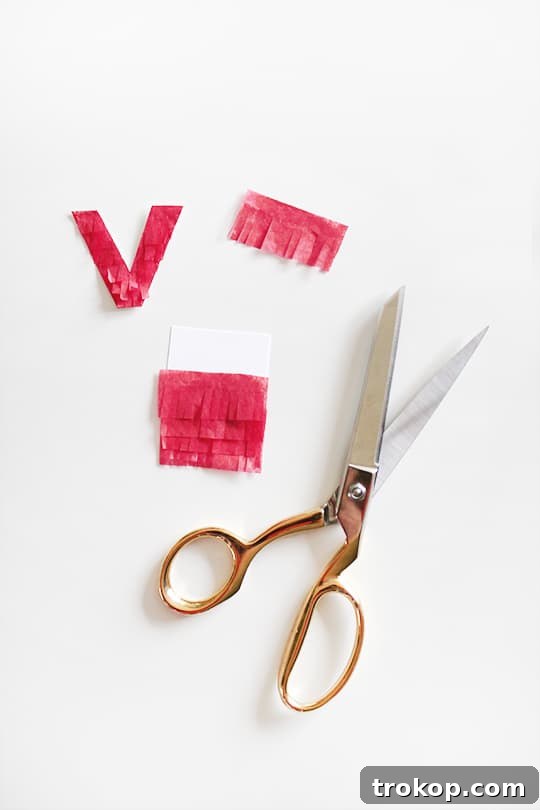
- Fringing scissors: These specialized scissors create multiple cuts at once, making the fringing process incredibly fast and uniform. If you don’t have them, regular sharp scissors will work, but prepare for a bit more patience and time.
- Regular scissors: For cutting cardstock and general trimming.
- Cardstock: This will be the base for your letters, providing stability. Choose a color that either matches or contrasts nicely with your tissue paper, or simply use white for a clean look. The sturdiness of cardstock prevents your letters from wilting.
- Glue: A good quality craft glue or glue stick will work best. Make sure it dries clear and holds well to both tissue paper and cardstock. Liquid glue applied sparingly can give a strong bond without soaking the delicate tissue.
- Kabob sticks: These will serve as the supports for your cake topper letters. Wooden or bamboo kabob sticks are ideal as they are sturdy enough to hold the letters upright in the cake. You can also use thin wooden dowels or even sturdy paper straws for a different aesthetic.
Crafting Your Masterpiece: How to Make a DIY Fringed Love Cake Topper
Follow these detailed steps to create a beautiful and memorable fringed cake topper. Take your time, and enjoy the creative process!
-
Prepare Your Cardstock Bases: Begin by cutting four uniform squares from your chosen cardstock. The size of these squares will determine the size of your letters, so consider the dimensions of your cake. For an average 8-inch round cake, squares of about 3×3 inches work well. Ensuring they are uniform will help create a cohesive look for your final message.
-
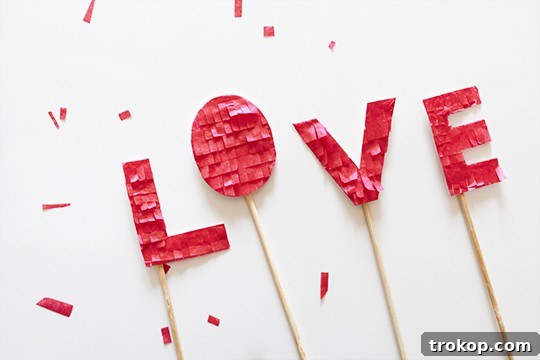
Create Your Tissue Paper Fringe: Take your red or pink tissue paper and cut it into small, straight strips. The width of these strips should be about 1-2 inches, and the length should be slightly longer than the width of your cardstock squares. Using your fringing scissors, carefully cut fringe along one long edge of each tissue paper strip. If you’re using regular scissors, make small, even cuts about two-thirds of the way up the strip. Patience is key here to achieve a delicate and fluffy fringe.
-
Attach the First Layer of Fringe: Apply a thin line of glue along the bottom edge of one cardstock square. Carefully align the unfringed edge of your first tissue paper strip with this glued line and press it down securely. Make sure the fringe hangs downwards, extending slightly beyond the bottom of the cardstock square.
-
Layer the Fringe for Fullness: Continue applying fringe strips, working your way upwards on the cardstock square. Apply glue just above the previously attached strip, and overlap the new strip slightly over the fringe of the one below it. This layering technique is crucial for creating that beautiful, fluffy, and full fringed effect. Ensure each layer is securely glued before moving to the next. Repeat this process until the entire cardstock square is covered in fringe.
-
Allow for Complete Drying: Once all four cardstock squares are covered with fringe, set them aside to dry completely. This is a critical step, as attempting to cut or handle them too early can result in smudged glue or torn tissue paper. Depending on your glue, this could take anywhere from 15 minutes to an hour. Move onto your next square while the previous one dries.
-
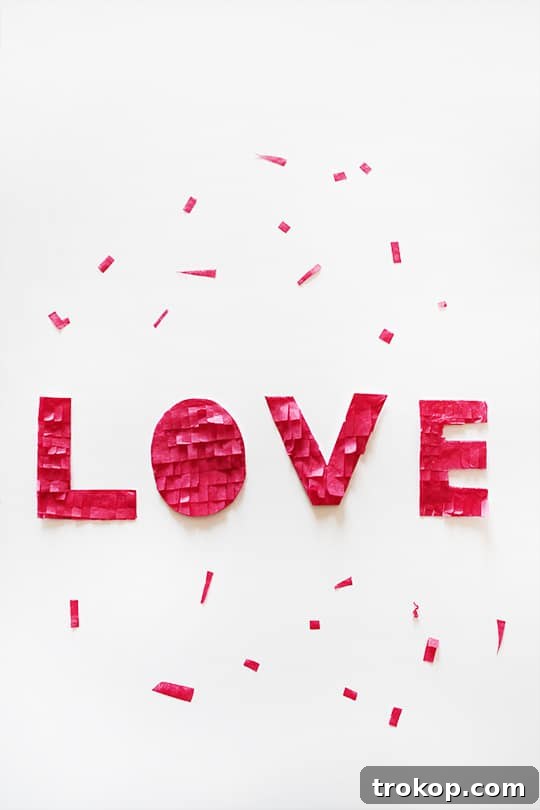
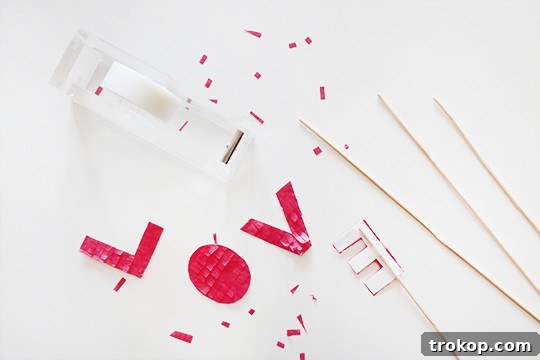
Cut Out Your Letters: Once the fringed squares are fully dry, it’s time to cut out your letters. For those less confident in freehand cutting, turn each fringed square over to the plain cardstock side. Using a pencil, lightly trace your desired letter (e.g., L, O, V, E) in reverse. This way, when you cut it out, the letter will be correctly oriented on the fringed side. Alternatively, if you’re comfortable, carefully freehand cut your letter shapes directly from the fringed side. Remember to cut slowly and precisely to maintain clean edges and avoid damaging the fringe. Consider fun words like “BABE,” “YAY,” or “MY BOO” for different messages!
-
Prepare the Kabob Sticks: If your kabob sticks are longer than needed or inconsistent in length, carefully cut them in half or to your desired height using regular scissors or wire cutters (for thicker wooden sticks). Aim for lengths that will allow the letters to stand tall above your cake without being too wobbly.
-
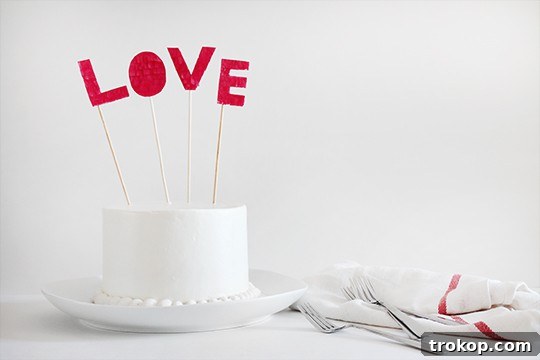
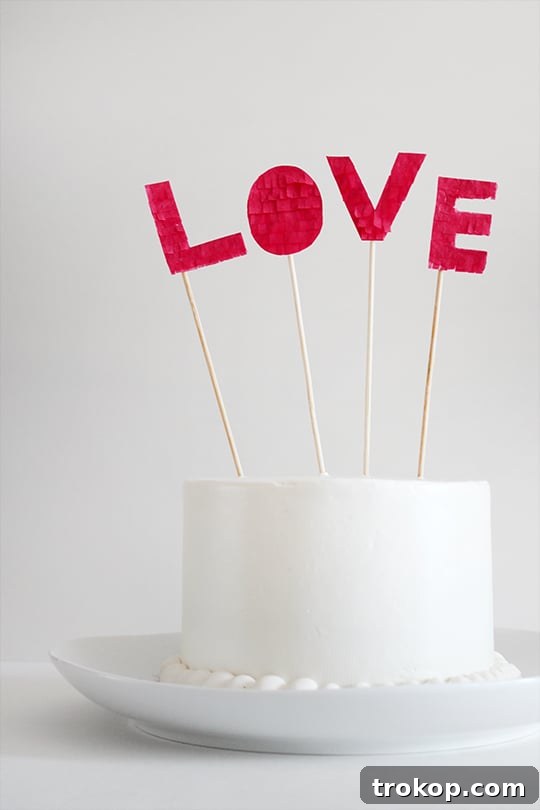
Attach Letters to Sticks: Finally, with your letters cut and sticks ready, it’s time to assemble. Securely tape or glue the back of each fringed letter onto the top of a kabob stick. For extra stability, you can use a strong clear tape or apply a generous dab of hot glue (if you have a glue gun). Ensure the stick is centered at the bottom of each letter so it hangs evenly. Once attached, simply stick them into your cake! Arrange them creatively, perhaps slightly angled or staggered, to add visual interest.
Expert Tips for a Flawless Fringed Topper
Achieving that perfectly fluffy and uniform fringe is easier with a few insider tips. Keep these in mind as you work on your cake topper:
- Sharp Scissors are Your Best Friend: Whether you’re using fringing scissors or regular ones, ensure they are sharp. Dull scissors can tear delicate tissue paper, leading to uneven and messy cuts.
- Practice Makes Perfect (Fringe): If you’re new to fringing, do a few practice cuts on a scrap piece of tissue paper. Experiment with the depth and spacing of your cuts until you achieve the desired look. Consistency in fringing is key for a polished result.
- Less Glue is More: When attaching the tissue paper strips, use glue sparingly. Too much glue can saturate the tissue paper, making it stiff, lumpy, and prone to tearing. A thin, even line is all you need for a secure bond.
- Press Gently but Firmly: After applying each fringe strip, gently press it down onto the cardstock to ensure it adheres properly. Avoid pulling or tugging, which can distort the fringe.
- Consider Cardstock Weight: While any cardstock will do, a slightly heavier weight (e.g., 80-100 lb) will provide more rigidity for your letters, preventing them from bending or flopping when inserted into the cake.
- Embrace Imperfection: Remember, this is a handmade item! Small imperfections add to its charm and character. Don’t strive for absolute perfection, but rather for a result that reflects your personal touch.
Beyond Valentine’s Day: Customizing for Every Occasion
The beauty of this DIY fringed cake topper lies in its incredible versatility. While “LOVE” is a classic choice for Valentine’s Day, you can easily adapt this project to suit virtually any celebration or personal message. Here are some ideas to spark your imagination:
- Birthdays: Spell out “HAPPY B-DAY,” “YAY,” or even the birthday person’s age (e.g., “30”). Use bright, vibrant colors like neons, metallics, or a rainbow spectrum.
- Anniversaries: Beyond “LOVE,” consider “FOREVER,” “MR & MRS,” or “YEARS” followed by the number of years you’re celebrating. Gold or silver tissue paper would add an elegant touch.
- Baby Showers: Create toppers that say “BABY,” “OH BOY,” “OH GIRL,” or even the baby’s name if it’s already decided. Soft pastels like baby blue, pink, mint, or yellow would be perfect.
- Graduations: Congratulate the graduate with “CONGRATS,” “GRAD,” or the year of graduation (e.g., “2025”). Use school colors for a personalized touch.
- Holidays: For Easter, think “HOPPY” or “SPRING.” For Christmas, “NOEL” or “JOY.” The color palette can easily align with seasonal themes.
- Party Themes: If you’re hosting a themed party, integrate a word or phrase that matches. A tropical party could feature “ALOHA,” while a rustic celebration might have “HAPPINESS.”
- Get Well Soon: A simple “GET WELL” or “SMILE” topper on a cake can be a wonderfully thoughtful way to cheer someone up.
Don’t be afraid to mix and match colors, or even use patterned tissue paper for an extra pop. The size of your letters can also be adjusted to fit smaller cupcakes or larger tiered cakes. The only limit is your imagination!
Pairing Your Topper with the Perfect Cake
A stunning cake topper deserves an equally appealing cake! Whether you’re a baking enthusiast or prefer the convenience of a store-bought dessert, here are some ideas for pairing your fringed topper:
- Store-Bought Elegance: Don’t underestimate the power of a quality store-bought cake. A simple frosted cake in white, pink, or chocolate can be instantly elevated with your handmade topper. Look for cakes with smooth frosting for easy insertion of the kabob sticks.
- Classic Homemade Options:
- Vanilla or Chocolate Cake: These timeless favorites provide a neutral canvas for your colorful topper.
- Red Velvet Cake: The vibrant red hue of red velvet perfectly complements the “LOVE” theme, especially with pink or white fringe.
- Cupcakes: For individual servings or a dessert bar, make smaller versions of the letters or use single fringed shapes (hearts, stars) for each cupcake.
- Consider the Frosting: Smooth buttercream or cream cheese frosting provides the best surface for your topper to stand securely. Avoid very delicate or liquid-like frostings.
- Color Coordination: Choose cake and frosting colors that either match or contrast beautifully with your fringe. A bright pink topper on a dark chocolate cake, or a red topper on a white cake, creates a striking visual.
- Presentation Matters: Once your topper is in place, consider adding other simple edible decorations like sprinkles, fresh berries, or a dusting of cocoa powder to complete the look.
Remember, the goal is to create a cohesive and joyful presentation that delights the recipient. Your fringed cake topper will undoubtedly be the star of the show!
Conclusion: A Sweet Gesture Made Simple
Crafting this DIY Fringed Love Cake Topper is more than just a craft project; it’s an opportunity to inject personality, thoughtfulness, and a touch of handmade charm into your celebrations. It’s an easy, budget-friendly, and highly customizable way to make any cake extraordinary. Whether you’re celebrating Valentine’s Day, a birthday, an anniversary, or just showing someone you care, this topper is sure to bring a smile to their face. So, gather your materials, get creative, and prepare to delight with a truly unique dessert decoration!
Baileys Tiramisu Crepe Cake Recipe
Infused with Baileys and using crepes as a twist on a classic tiramisu, this recipe offers a decadent no-bake dessert option perfect for any celebration. It’s an ideal choice when you want an elegant dessert without turning on the oven.
Continue ReadingBaileys Tiramisu Crepe Cake Recipe
40 Delicious Easter Desserts to Sweeten Your Celebration
Get inspired by these festive and easy-to-make Easter desserts that will add the perfect sweet finish to your holiday meal. From classic bakes to no-fuss treats, there’s something for everyone to enjoy.
Continue Reading40 Delicious Easter Desserts to Sweeten Your Celebration
34 Decadent Desserts for Valentine’s Day
Sweeten up your celebration with these irresistible desserts for Valentine’s Day. From rich chocolates to fruity delights, find the perfect treat to share with your loved ones and make the day extra special.
Continue Reading34 Decadent Desserts for Valentine’s Day
Gingerbread Muffin Recipe with Lemon Glaze
Add a touch of spice to your breakfast or snack time with this delightful gingerbread muffin recipe, perfectly complemented by a zesty lemon glaze. These warm, comforting muffins are ideal for holiday gatherings or a cozy morning treat.
Continue ReadingGingerbread Muffin Recipe with Lemon Glaze