
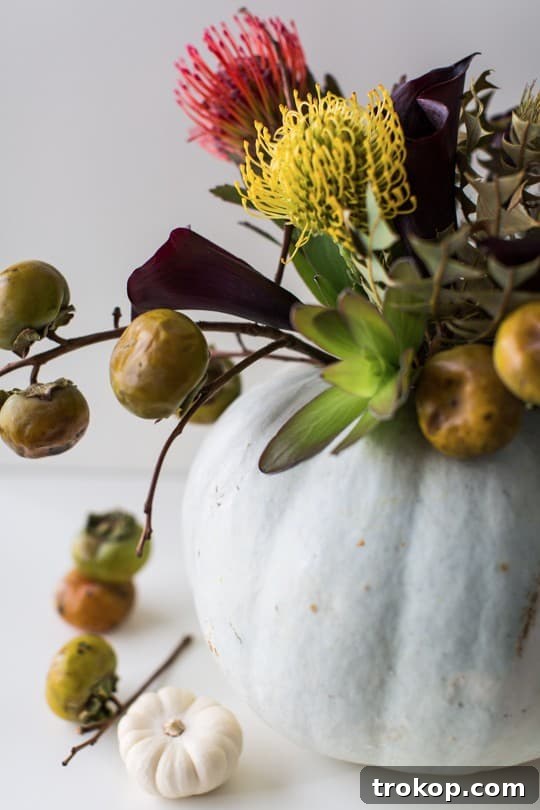
Crafting a Spooky Chic DIY Halloween Floral Centerpiece: Eerie Elegance for Your Fall Table
Transform your autumn decor with a perfectly eerie yet elegant DIY Floral Halloween Centerpiece. This project embraces the beauty of the season’s darker side, artfully combining cheer with just a touch of the macabre. It’s also a fantastic, sustainable way to breathe new life into your dried flowers, giving them a starring role long after their initial bloom has faded.
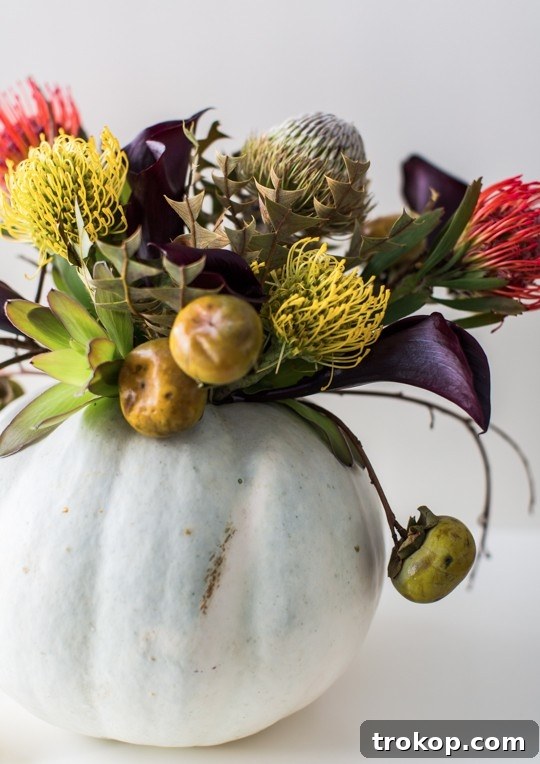
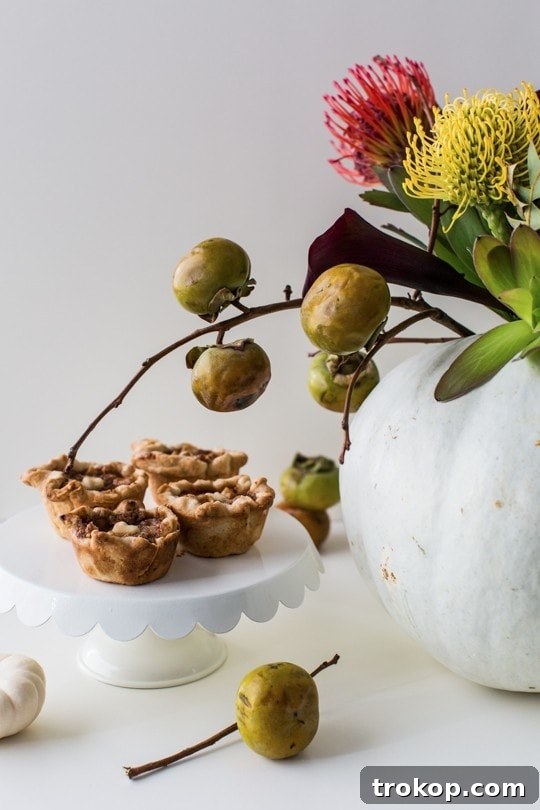
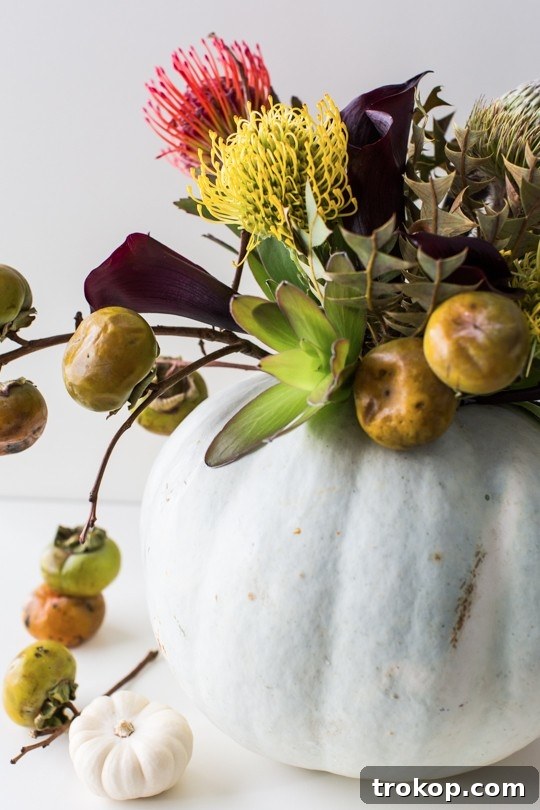
Who knew a less-than-green thumb could be an asset? We’re thrilled to showcase our collection of dried persimmons and wilting blooms, elevating them from garden casualties to captivating works of art. The inspiration for this distinctive Halloween decor struck when we discovered a selection of moody, twisted stems at a local market. Their muted tones and dried textures exuded an authentic haunted charm. By thoughtfully pairing them with a small, pristine white pumpkin, we achieved an arrangement that offered just enough brightness to temper the inherent eeriness. The result is a DIY Floral Halloween Centerpiece that’s an unexpected blend of spooky and chic, perfect for adding sophisticated intrigue to your seasonal display.
There’s a unique satisfaction in leaning into the dramatic, darker aesthetic of fall decor, especially when it doesn’t demand perfectly fresh, costly floral arrangements. This centerpiece is a celebration of imperfection and the subtle beauty of decay, styled in the most elegant way possible. It offers an ideal solution for anyone aiming for a Halloween tablescape that feels refined and artistic, yet still delightfully unsettling. This approach allows for incredible creative freedom, moving beyond traditional vibrant oranges and purples to explore a more muted, natural palette that feels inherently autumnal and haunting.
To infuse a dash of playful glam into your ghostly tablescape, consider complementing this arrangement with a DIY sequin polka dot pumpkin. A touch of sparkle ensures that even your most ghoulish gathering maintains a celebratory, unexpected shimmer. This juxtaposition of rustic, dried elements with glittering accents creates a truly memorable visual statement, inviting guests to admire the artful balance between the spooky and the stylish.
Materials and Tools Needed for Your Spooky Floral Creation
Gathering the right components is the first step towards crafting your unique Halloween floral centerpiece. We focus on materials that not only contribute to the aesthetic but also offer practical benefits for longevity and ease of assembly. Here’s what you’ll need:
- White Pumpkin: Opt for a firm white pumpkin with a noticeably long stem. A longer stem often indicates a “younger” pumpkin, which tends to be more resilient and will last longer. Inspect for any blemishes, soft spots, or signs of decay to ensure maximum freshness. While we adore the crisp brightness of a white pumpkin for its striking contrast with dark florals, don’t hesitate to use an orange pumpkin or even one you’ve painted to match your decor. The key is a sturdy base for your arrangement.
- Waterproof Floral Tape: This essential tool, often clear or green, is crucial for creating a stable grid across your vase opening. The color isn’t critical as it will be largely hidden, but clear tape is less noticeable. This grid is what will allow you to precisely position your flowers and branches, preventing them from clumping together and ensuring a beautifully structured arrangement.
- Drinking Glass: Any sturdy drinking glass that fits snugly inside your pumpkin’s carved opening will work perfectly. This acts as your water reservoir, keeping your living florals hydrated while protecting the pumpkin from moisture and decay.
- Sharp Knife: A reliable, sharp knife is necessary for carefully carving the pumpkin. Ensure it’s suitable for the task, allowing for clean cuts and easy removal of the pumpkin’s interior. Safety first!
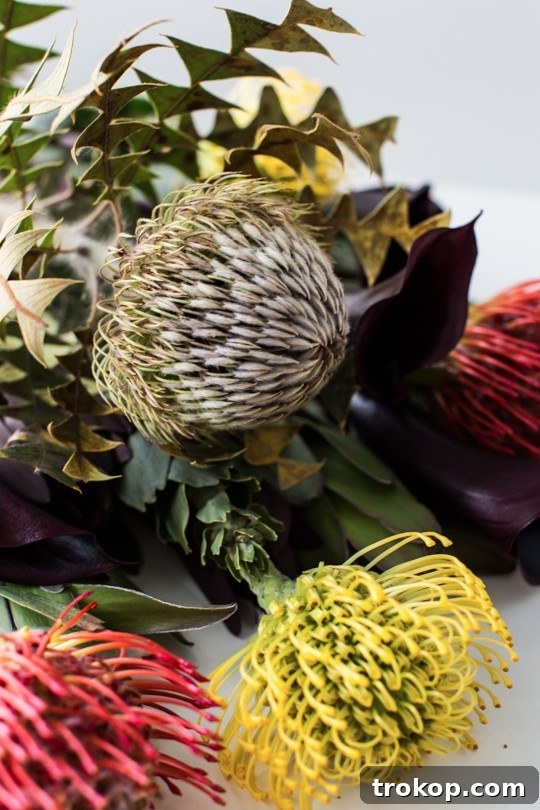
- Florals of Your Choice: This is where your creativity truly shines! For our centerpiece, we utilized striking elements like Banksia Speciosa Protea, dramatic Protea Pincushions, sleek and sculptural Black Calla Lilies (known for their deep purple-black spathes), and twisted Persimmon branches. These selections offer rich textures and dark, mysterious hues perfect for a haunting aesthetic. Below, you’ll find an expanded list of our favorite deep and dark florals, ideal for injecting a touch of drama and moodiness into any Halloween-themed arrangement. Consider sourcing both fresh and dried elements to achieve a rich, layered look.
Halloween Flowers: A Guide to Moody Blooms
To truly capture the essence of Halloween in your floral centerpiece, selecting blooms with deep, mysterious colors and intriguing textures is key. Forget bright pastels; we’re embracing the dark romance of autumn. Here are some top picks that evoke a wonderfully spooky vibe:
- Black Dahlias: With their velvety petals in shades of deep burgundy or nearly black, these dahlias are statement blooms that command attention. Their intricate form adds a touch of gothic elegance.
- Chocolate Cosmos: These small, dark maroon blooms are not only visually captivating but also carry a faint, enchanting scent reminiscent of chocolate, adding a sensory layer to your arrangement.
- Scabiosa ‘Black Knight’: Offering rich purple-black hues and delicate, pincushion-like textures, these flowers bring an element of old-world charm and mystery.
- Burgundy Ranunculus: The lush, layered petals of burgundy ranunculus exude an air of vintage romance, their deep tones perfectly suited for a moody fall display.
- Dark Hellebores (Lenten Roses): Featuring dusky plum or blackish blooms, hellebores feel inherently mysterious and ethereal, ideal for a centerpiece with depth.
- Smoke Bush (Cotinus): The airy, plum-toned foliage of the smoke bush creates a cloud-like effect, lending an illusion of mist or ghostly presence to your arrangement.
- Amaranthus (Red or Bronze): With its dramatic draping tendrils, amaranthus in deep red or bronze can mimic drops of blood or ancient, decaying vines, adding a dynamic, slightly unsettling element.
- Black Ti Leaves: These glossy, dark leaves provide excellent structural support and a striking contrast to lighter elements, anchoring your arrangement with bold foliage.
- Berries or Pods: Incorporate elements like privet berries, hypericum berries, or dried lotus pods for unique, eerie textures and unexpected visual interest. They add a natural, autumnal, and slightly decaying feel.
- White Anemones with Black Centers: These flowers offer a striking contrast, their bright white petals against a dark center creating a ghostly yet sophisticated visual.
- Dusty Miller: The silvery, soft foliage of Dusty Miller feels almost frosted or cobweb-covered, adding a delicate, ethereal quality that perfectly complements darker blooms.
How to Make a DIY Floral Halloween Centerpiece: Step-by-Step Guide
Creating this bewitching centerpiece is simpler than you might think. Follow these easy steps to bring your eerie floral vision to life:
Step 1: Prepare Your Pumpkin Base
Begin by carefully carving an opening at the top of your chosen pumpkin. This opening should be just large enough to comfortably fit and insert your drinking glass. Once the lid is removed, scoop out all the stringy guts and seeds, much like you would when preparing a pumpkin for carving. Ensure the inside is clean and relatively dry to minimize decay.
Step 2: Create a Floral Grid
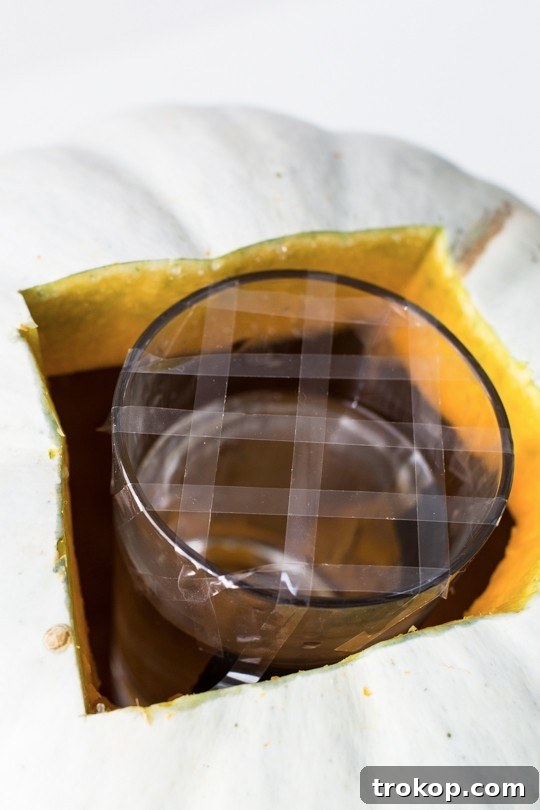
Take your waterproof floral tape and create a grid pattern across the rim of your drinking glass. Apply strips of tape horizontally and vertically, spaced about an inch apart, to form a stable lattice. This ingenious grid is crucial; it will allow you to easily manipulate and secure the placement of individual flowers and branches, preventing them from bunching up and ensuring a beautifully distributed, professional-looking arrangement.
Step 3: Hydrate and Insert
Fill the drinking glass with fresh water, approximately three-quarters of the way full. This provides ample hydration for your fresh flowers without risking overflow. Carefully insert the water-filled glass into the carved opening of your pumpkin. Make sure it sits securely at the bottom and doesn’t wobble.
Step 4: Begin Your Floral Arrangement
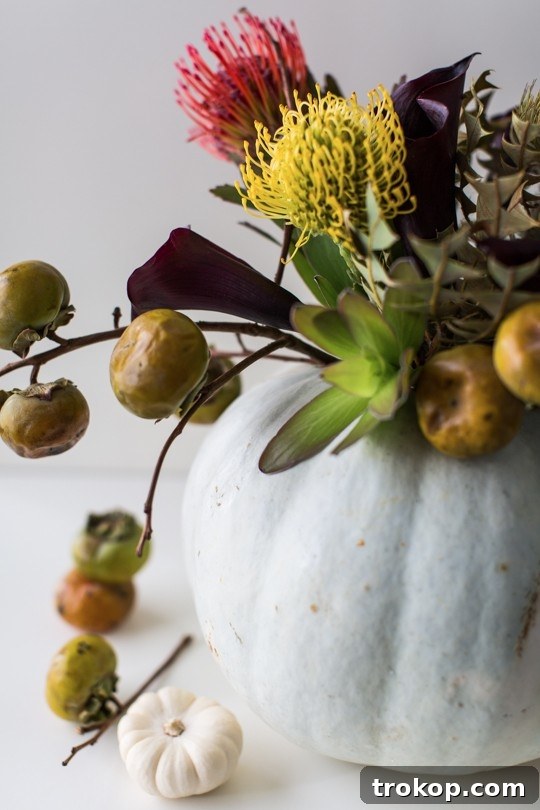
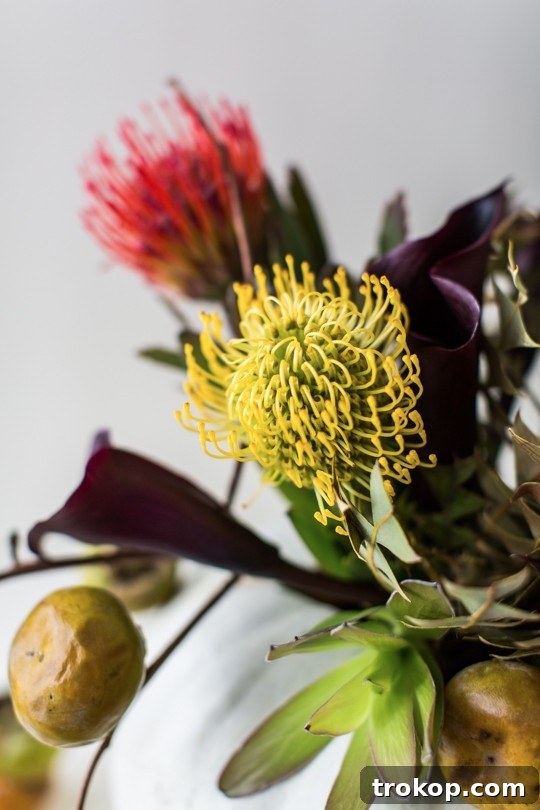
Now, let your artistic instincts guide you. Start inserting the stems of your chosen florals into the various sections of the tape grid. Don’t worry about achieving perfect symmetry or precise placement; the charm of this “creepy chic” aesthetic lies in its slightly wild and unkempt nature. Experiment with different lengths and angles to create depth and movement. Aim for an arrangement that looks a little rough around the edges, embodying the natural beauty of decay and the untamed spirit of Halloween.
Step 5: Add Finishing Touches with Branches
Once you are satisfied with the placement of all your water-dependent florals within the glass, it’s time to incorporate the persimmon or other chosen branches. These woody elements do not require water, so you can artfully insert them into the gap between the drinking glass and the inner wall of the pumpkin. This technique allows for a magnificent “hanging” or “cascading” effect around the edges of your pumpkin, adding another layer of organic texture and visual drama. This step is key to achieving that perfectly wild, slightly overgrown look that enhances the spooky charm.
How to Make Your Pumpkin Vase Last Longer: Preservation Tips
While an intact pumpkin can remain fresh for several months, a pumpkin that has been carved, even slightly, will naturally have a shorter lifespan—typically around 12-14 days indoors. To maximize the life of your gorgeous pumpkin vase and keep your DIY Halloween floral centerpiece looking fresh for as long as possible, consider these effective preservation techniques:
- Bleach Bath Pre-Treatment: Before you even begin carving, thoroughly wash your pumpkin with a diluted bleach solution (about 1 tablespoon of bleach per quart of water). This crucial step helps to kill any surface bacteria, mold spores, or fungi that could accelerate decomposition once the pumpkin is cut. Let it air dry completely before proceeding.
- Natural Preservation Alternatives: If you prefer a more natural approach, spray the exterior and interior (after scooping) of your pumpkin with diluted lemon juice or white vinegar. Both are natural acids that can inhibit bacterial and fungal growth, offering an eco-friendly way to extend its freshness.
- Seal Carved Edges with Petroleum Jelly: After carving the opening for your glass vase, apply a thin layer of petroleum jelly (like Vaseline) around all the cut edges. This creates a protective barrier, sealing in moisture and preventing the pumpkin flesh from drying out and shriveling prematurely.
- Rehydrate Overnight: If your pumpkin starts to look a bit limp or dehydrated after a few days, you can try rehydrating it. Submerge the entire pumpkin (minus the florals, of course) in a tub of cold water overnight, or place it in the refrigerator. This allows the pumpkin to absorb moisture, firming up its flesh and extending its display life.
- Consider a Craft Pumpkin for Longevity: For an absolutely maintenance-free and truly long-lasting centerpiece, consider using a craft pumpkin. These artificial pumpkins come in various sizes and colors, can be carved just like real ones, but won’t rot, wilt, or attract pests. They offer the perfect solution if you want to reuse your centerpiece year after year or need it to last throughout the entire Halloween season.
More Halloween Ideas to Complete Your Celebration
This exquisite floral centerpiece provides a magnificent focal point for your Halloween table, but it’s just the beginning of creating a truly immersive and festive atmosphere. Pair it with a few thoughtfully chosen decorations and DIY projects to craft an unforgettable spooky celebration. Scatter a few mini pumpkins around its base, perhaps a complementary black and white skull centerpiece, or even a whimsical haunted house skeleton hand reaching out from the shadows. Drape twinkling string lights to cast an ethereal glow, and strategically hang classic spider webs and other Halloween props for a touch of traditional fright. For an extra touch of personalized charm, this simple DIY pumpkin place card holder can be whipped up in under five minutes, adding a thoughtful detail right before your guests arrive. With these elements combined, you’ll have a beautifully decorated and festive table that guests will adore!
For even more Halloween-inspired DIY projects, creative indoor and outdoor decoration ideas, and delightful recipes perfect for your Halloween dinner party or gathering, delve into some of our treasured favorites from the archives. We’ve curated a collection that covers everything from elegantly subtle to delightfully spooky:
- Not So Spooky Halloween Front Door Ideas: Discover sophisticated and tasteful Halloween decorations for your front door that are even HOA-approved. Who knew Halloween decor could be described as classy and pretty? These ideas break the mold, offering elegant alternatives to traditional scare tactics.
- Easy Pumpkin Decal for Glassware: Add a custom, festive touch to your Halloween drinkware with a simple 5-minute temporary DIY decal. Perfect for personalization without the commitment.
- Spooky DIY Floral Bar Cart: Elevate your entertaining with a themed bar cart. Learn how to decorate a bar cart with spooky floral arrangements and accessories, making it a stylish hub for your Halloween libations.
- DIY Melting Ghost Halloween Macarons: Create an adorable yet eerie scene on your macarons, cookies, or cupcakes with these easy-to-make melting ghost dessert toppers. A sweet treat with a spooky surprise!
- Ghoul’s Guts Ice Cream Cake Shots Recipe: A delightfully gruesome and delicious treat! This recipe is a showstopper for any Halloween party. Simply omit the alcohol to make them kid-friendly, ensuring everyone can enjoy these unique dessert shots.
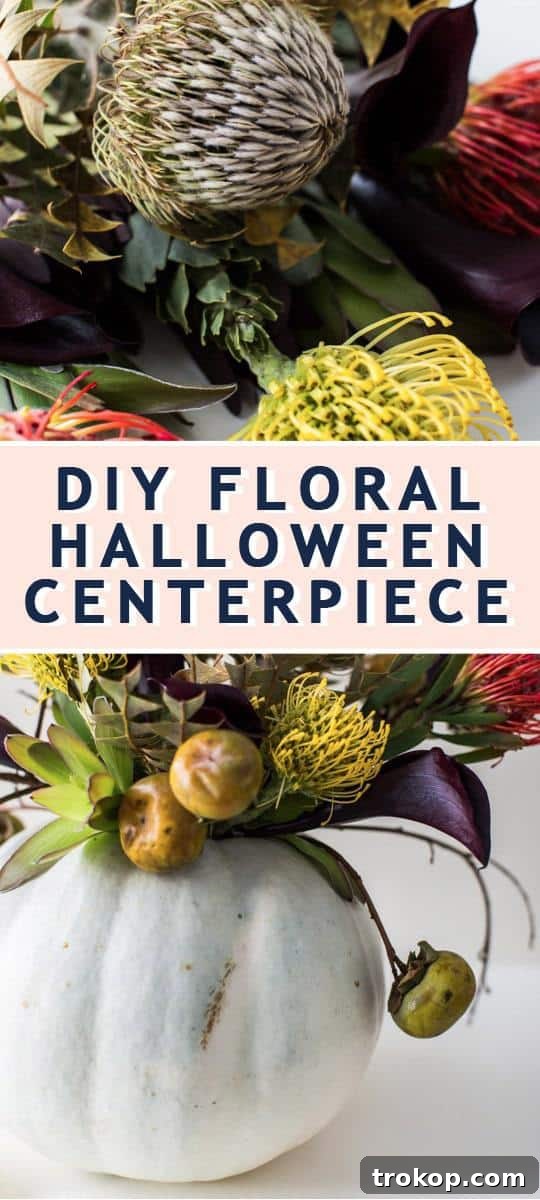
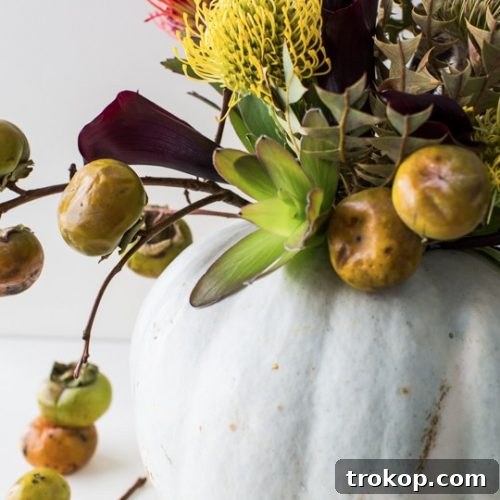
DIY Halloween Floral Centerpiece
A perfectly creepy DIY Halloween Floral Centerpiece idea that’s cheerful with just a touch of eerie. It’s a great excuse to expand the lifespan of your dried flowers and create unique seasonal decor.
Total Time: Approximately 30 minutes
Course: DIY
Category: Tablescape, Halloween Decor
Equipment Required
- Knife
Materials List
- 1 white pumpkin (select for longevity)
- 1 roll waterproof floral tape
- 1 drinking glass (to hold flowers)
- Flowers of your choice (consider Banksia Speciosa Protea, Protea Pincushions, Black Calla Lilies, Persimmon branches, and other spooky florals listed above)
Assembly Instructions
- Carve an opening on top of the pumpkin, making it just large enough to fit and insert the drinking glass. Scoop out all the pumpkin guts and seeds thoroughly.
- Tape a grid pattern along the rim of the drinking glass using the waterproof floral tape. This grid will help you easily manipulate and secure the placement of your flowers and branches, preventing them from bunching up.
- Fill the glass with water, about three-quarters of the way full. Carefully insert the water-filled glass into the carved pumpkin opening.
- Begin inserting the stems of your chosen florals randomly into the sections of the tape grid. Don’t aim for perfect symmetry; a slightly rough, organic look enhances the eerie charm of this centerpiece.
- Once all water-dependent florals are placed, insert persimmon branches (or other dry branches) into the gap between the glass and the pumpkin wall. Since branches do not need water, this placement allows for a cool, natural hanging effect around the edges of the pumpkin, adding depth and texture.
Important Notes for Your Centerpiece
The estimated cost for this project is highly dependent on the type and quantity of florals you choose. The wonderful advantage of this DIY is that dried brown flowers and branches work exceptionally well for a Halloween/fall themed centerpiece, often being more affordable and sustainable than fresh, exotic blooms.
Estimated Cost: $30 (variable based on floral selection)
Keywords: Halloween centerpiece, DIY Halloween, spooky decor, floral arrangement, pumpkin vase, fall tablescape
50 Best Halloween Food Ideas for a Spooky Party
Continue Reading50 Best Halloween Food Ideas for a Spooky Party
33 Easy DIY Pumpkin Painting Ideas
Continue Reading33 Easy DIY Pumpkin Painting Ideas
45 Alcoholic Desserts to Liven Up Your Next Party
Continue Reading45 Alcoholic Desserts to Liven Up Your Next Party
Pumpkin Spice White Russian Recipe
Continue ReadingPumpkin Spice White Russian Recipe