
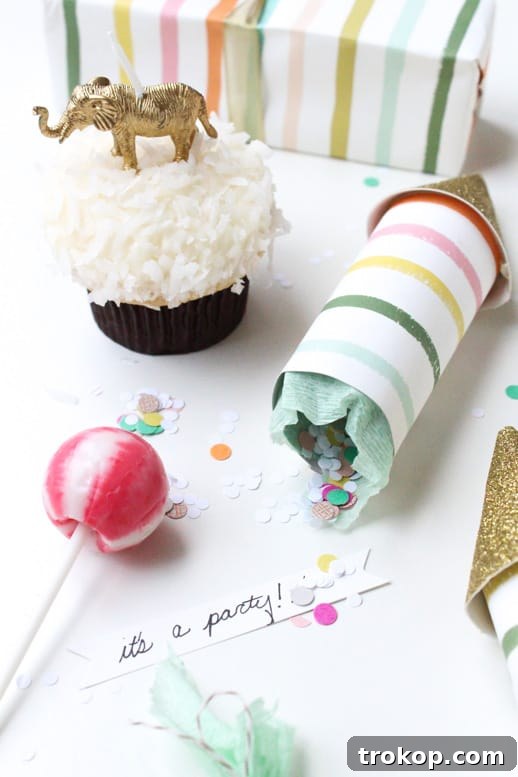
Unleash the Fun: Crafting Your Own DIY Surprise Party Poppers
There’s an undeniable magic in a shower of confetti, a burst of sparkle, and the joyous anticipation of a hidden surprise. If you, like us, believe every occasion deserves a touch of vibrant celebration, then get ready to dive into the delightful world of DIY Surprise Party Poppers. Inspired by the creative genius of Martha Stewart’s Kids Crafts Book, we’ve taken a classic concept and infused it with our own flair, making these miniature marvels perfect for adding a personalized pop to any event. Forget generic store-bought favors; these handmade treasures promise an unforgettable experience, brimming with charm and tailored to your unique celebration.
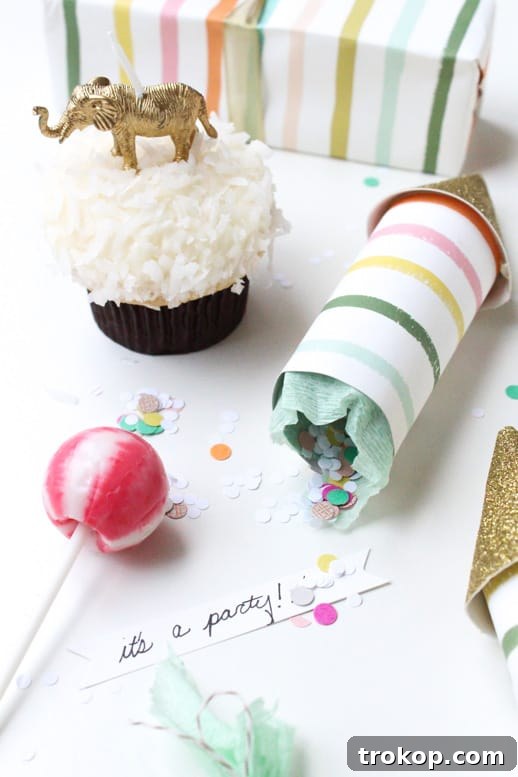
For those who adore the shimmer of glitter and the playful explosion of confetti, crafting these personalized party poppers is an absolute dream. This project offers an exciting opportunity to transform simple materials into captivating party essentials that are sure to delight guests of all ages. Whether you’re planning a birthday bash, a festive holiday gathering, or simply want to spread a little cheer, these easy-to-make poppers are the ultimate accessory. They serve as a wonderful, more intimate version of larger confetti cannons, offering a delightful personal surprise for each recipient. Imagine pairing them with a table full of colorful cupcakes and whimsical lollipops – you’ll have a display that’s not just picture-perfect, but also brimming with anticipation!
Get ready to unleash your inner craft enthusiast. We’re about to guide you through every step of creating these charming DIY party poppers, ensuring your next celebration is packed with unforgettable moments and custom-made joy. Let’s get started on bringing these festive creations to life!
Essential Materials for Crafting Your DIY Party Poppers
Creating these delightful surprise poppers requires a selection of readily available craft supplies. The beauty of this project lies in its flexibility, allowing you to choose materials that perfectly match your party’s theme and color scheme. Here’s a detailed list of what you’ll need to gather before you begin:
- Printed Card Stock: Opt for sturdy card stock with fun patterns, polka dots, stripes, or any design that complements your event. This will form the main body of your popper, so choose a weight that can hold its shape.
- Glittered Card Stock: Add an extra touch of sparkle and festivity with glittered card stock. This can be used for the cone top or decorative accents, ensuring your poppers truly stand out.
- Scissors: A sharp pair of craft scissors is essential for precise cutting of your card stock and crepe paper. If children are assisting, ensure adult supervision or provide child-safe scissors.
- Double-Sided Tape: This adhesive is perfect for creating clean, seamless edges when forming the cylindrical body of your poppers. It provides a strong, invisible bond.
- Glue Gun and Glue Sticks: A hot glue gun is invaluable for quickly and securely attaching the cone tops and any embellishments. Remember to exercise caution when using a hot glue gun, especially around children.
- Twine: Natural jute twine, colorful baker’s twine, or even thin ribbon can be used to cinch the bottom of your poppers, adding a rustic charm and securing the contents.
- Confetti, Lollipops, and Other Goodies: This is where the real fun begins! Think beyond just confetti. Small candies, temporary tattoos, miniature toys, stickers, tiny notes, or even small pieces of jewelry can all be fantastic surprises. Consider the size and weight of your chosen fillings.
- Crepe Paper or Tissue Paper: Crepe paper is recommended for its strength and stretch, making the popper more robust, especially if you plan to include heavier items like lollipops. However, delicate tissue paper works beautifully for lighter fillings and offers a softer aesthetic.
- Printed Templates: For consistent results and ease of assembly, using printable templates is highly recommended. These often accompany tutorials from craft books, like Martha Stewart’s, providing the exact shapes needed for the body and cone of your poppers.
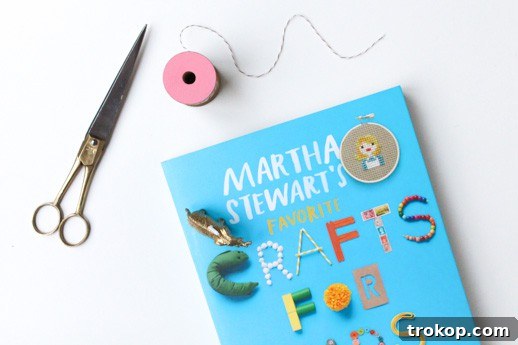
*This creative project is thoughtfully adapted from a delightful craft featured on page 293 of Martha Stewart’s Kids Crafts Book, bringing a touch of her signature style to your celebrations.
Step-by-Step Guide to Assembling Your Surprise Poppers
With all your materials gathered, it’s time to embark on the creative journey of assembling your DIY party poppers. Follow these detailed steps to ensure beautiful and functional results:
Step 1: Preparing Your Card Stock Shapes
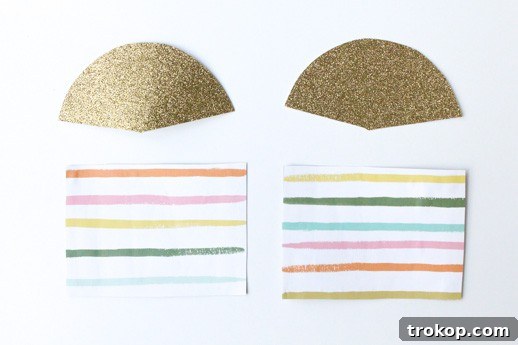
Begin by accessing the printable templates provided in the Kids Crafts Book extras here or similar resources. Carefully print these templates onto standard paper. Once printed, cut out the template shapes. Now, lay these paper templates onto your chosen card stock – both the printed and glittered varieties. Trace around the edges of each template piece with a pencil. Accuracy is key here for a well-formed popper. Once traced, meticulously cut out all the card stock shapes. Take your time to achieve clean, crisp edges, as this will contribute to the professional finish of your final product.
Step 2: Reinforcing the Base with Crepe or Tissue Paper
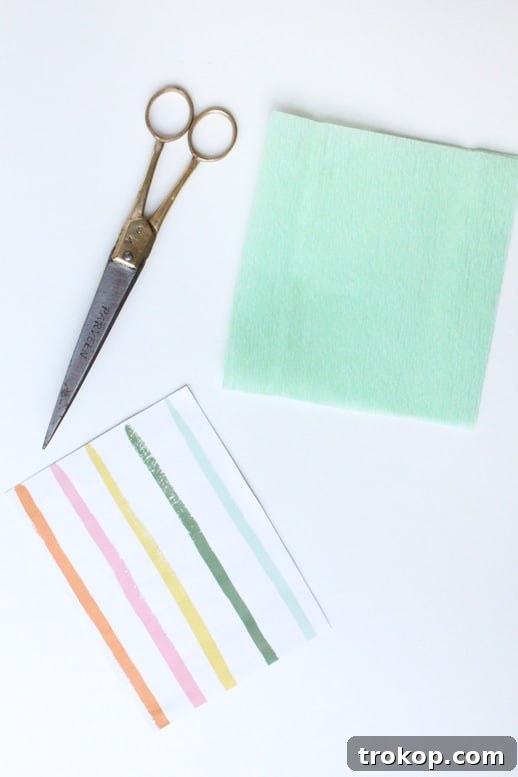
For this crucial step, cut a rectangular piece of crepe paper measuring approximately 4 inches in height by 5 1/2 inches in length. This piece will form the bottom closure of your popper and add strength. Take your main rectangular card stock piece (which will form the body of the popper) and apply a thin strip of double-sided tape along one of its longer inside edges. Carefully align the crepe paper along this taped edge, ensuring it extends slightly below the card stock. Press firmly to secure it. This inner layer of crepe paper is essential; it not only makes the popper stronger and more resilient, allowing it to hold heavier items like small candies or lollipops without tearing, but also provides the mechanism for the “pop.” While crepe paper offers superior durability and elasticity, tissue paper can also be used for lighter fillings, providing a more delicate feel.
Step 3: Forming the Cylinder and Securing the Base
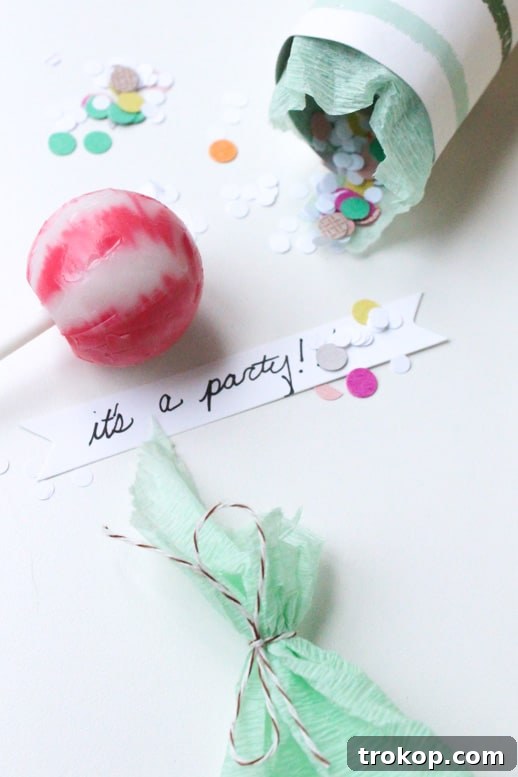
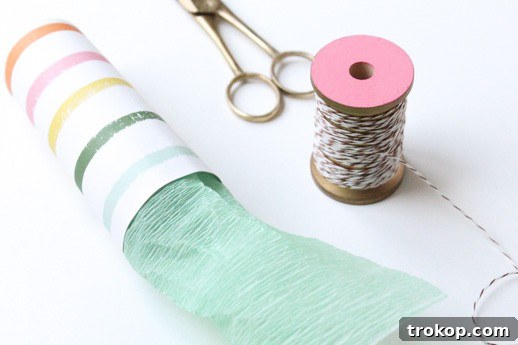
Once your crepe paper is securely taped along the inside of the card stock, it’s time to shape the body of your popper. Carefully roll both the card stock and the attached crepe paper into a tight cylindrical shape. Ensure the edges meet neatly to form a clean seam. Apply another strip of double-sided tape along the inner edge of one side of the cylinder and press the overlapping edge firmly to secure it, creating a robust, hollow tube. Next, take the excess crepe paper extending from the bottom of the cylinder. Gather it gently and pinch it closed. Wrap a piece of twine tightly around this cinched portion of the crepe paper, creating a secure knot. This not only seals the bottom of your popper but also forms the ‘pull tab’ for revealing the surprise. Leave a small tail of twine for easy grabbing.

Step 4: Crafting the Cone Top
Now, take your half-circle template piece, which you’ve cut from either printed or glittered card stock. Carefully roll this piece into a cone shape. Ensure the tip is pointed and the base forms a neat circle that will fit snugly over the top of your cylinder. Once you are satisfied with the shape, apply a small bead of hot glue along one of the overlapping edges of the cone. Press the other edge firmly against it to create a secure bond. Hold it in place for a few seconds until the glue sets. This cone will serve as the decorative top and the final seal for your surprise popper.
Step 5: Filling and Sealing Your Surprise Poppers
This is arguably the most exciting part! With the body and cone prepared, it’s time to fill your popper with all the delightful goodies you’ve chosen. Carefully drop in your confetti, mini lollipops, small candies, stickers, temporary tattoos, or any other tiny treasures. Be mindful not to overfill, leaving enough space for the items to shift when the popper is activated. Once filled, apply a thin line of hot glue around the inner rim of your card stock cylinder. Carefully place the prepared cone top onto this glued rim, ensuring it sits flush and creates a secure seal. Press gently and hold until the glue hardens, ensuring that the surprises inside are completely concealed until the moment of revelation.
Unleashing the Delight: Presentation and Activation
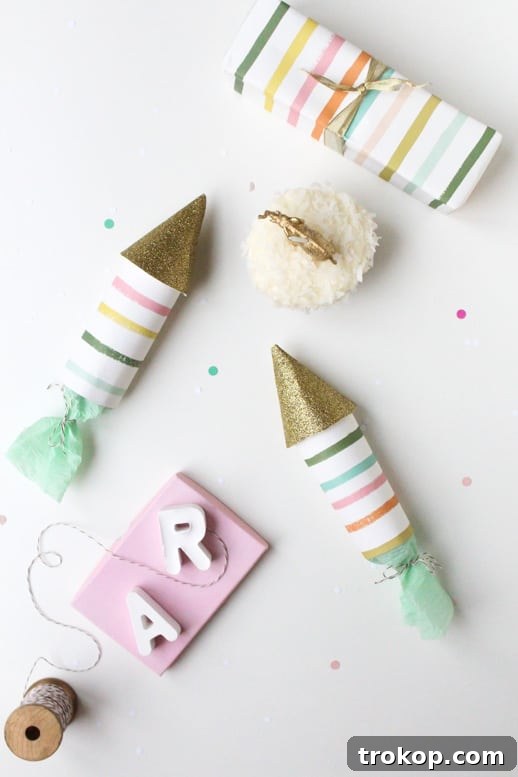
Once your DIY Surprise Party Poppers are filled, sealed, and ready, the possibilities for their use are endless. Arrange them artfully on a dessert table, nestle them into gift bags as personalized party favors, or distribute them at each place setting to add an element of playful anticipation to your gathering. They make excellent “thank you” tokens for guests, memorable additions to holiday celebrations, or even unique ways to hide special messages, small proposals, or gender reveal clues. The true magic unfolds when your guests engage with them. All they need to do is give the secured crepe paper tail at the bottom a gentle yet firm tug. This action will cause the bottom to tear open, releasing a shower of confetti and revealing the delightful surprises hidden within!
Tips for Success and Creative Variations
- Personalize Everything: Don’t stop at just choosing themed card stock. Add handwritten labels, stickers, glitter glue accents, or even small ribbons around the base or cone for an extra touch of charm.
- Theme It Up: For birthdays, use age-appropriate colors and fillings. For holidays like Christmas, opt for red and green paper with jingle bells or mini candy canes inside. Halloween poppers could hold plastic spiders or spooky stickers.
- Filling Flexibility: Consider the audience. For younger children, soft candies, small bouncy balls, or temporary tattoos are perfect. For adults, a small lottery ticket, a mini gourmet chocolate, or a handwritten positive affirmation can be a wonderful surprise.
- Batch Production: If you’re making many poppers for a larger event, set up an assembly line. Complete all the cutting, then all the taping, then all the rolling, and so on. This makes the process much more efficient.
- Storage: Store your completed poppers upright in a cool, dry place to prevent any deformation or damage to the delicate crepe paper bottom.
- Eco-Friendly Options: Use recycled card stock or opt for biodegradable confetti to make your poppers more environmentally conscious.
Crafting these DIY Surprise Party Poppers is more than just a craft; it’s an act of creating joy and lasting memories. The personal touch and the thrill of the unexpected make these handmade favors truly special. So gather your materials, ignite your creativity, and get ready to add a spectacular “pop” to your next celebration. We can’t wait to see the incredible surprises you’ll create!