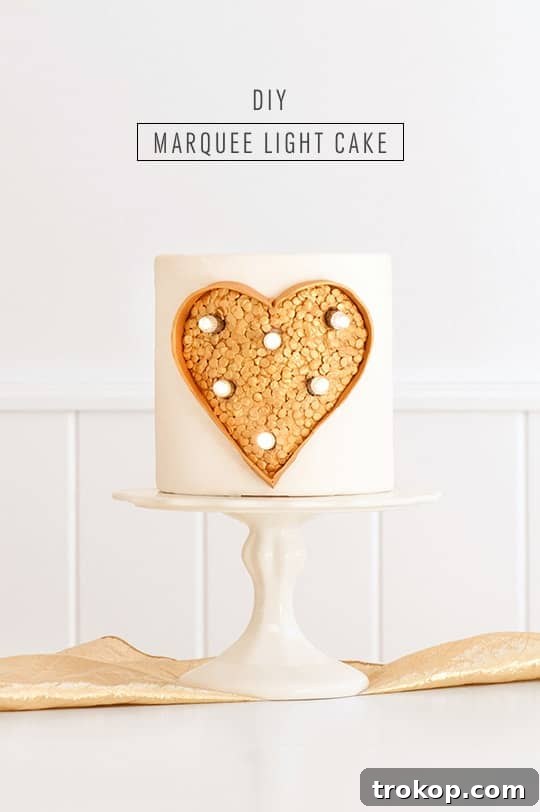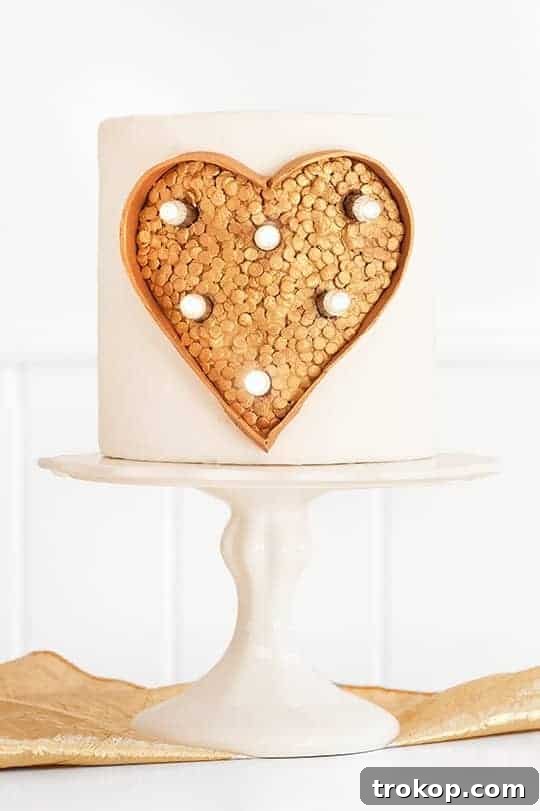
DIY Marquee Light Cake: Craft a Dazzling, Light-Up Dessert for Any Occasion
Prepare to enchant and amaze your guests with a dessert that truly shines – quite literally! The DIY Marquee Light Cake is an innovative confectionery masterpiece that expertly combines the playful shimmer of edible sequins with the captivating glow of small LED lights. This isn’t just a cake; it’s a showstopper, a radiant centerpiece, and an unforgettable treat that promises to be the dazzling highlight of any celebration. Imagine the delight on faces as a beautifully decorated cake, adorned with a sparkling sequin heart, pulsates with a soft, inviting light. It’s a unique creation that defies conventional cake design, bringing a touch of whimsical magic to birthdays, anniversaries, Valentine’s Day, or any event worthy of extra sparkle. Follow along as we guide you through crafting your very own illuminated dessert that will leave a lasting impression.
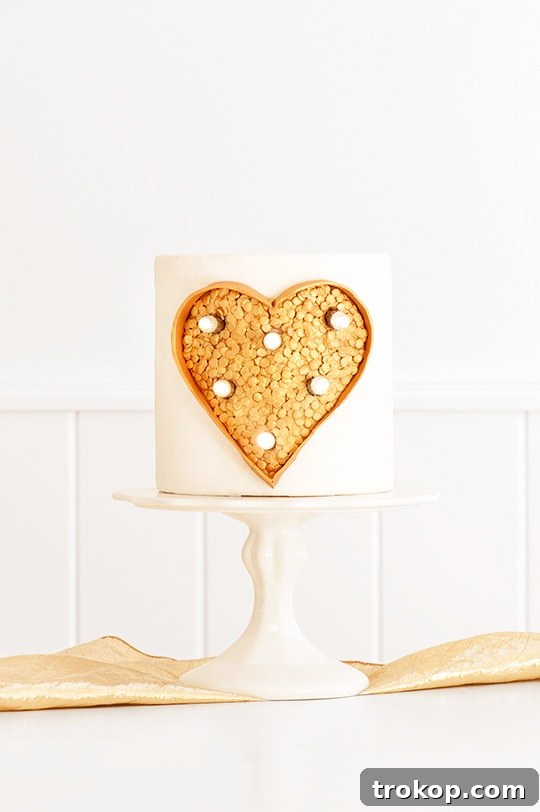
The Sparkle Behind the Inspiration for a Light-Up Cake
My name is Lindsay, and I’ve always held a special fascination for sequins. There’s an undeniable joy and glimmer they bring to anything they adorn, instantly elevating the ordinary to extraordinary. This love for all things sparkly led me to discover Ashley’s incredibly creative DIY Sequin Marquee Heart project. I was absolutely captivated by the concept of a glittering, illuminated heart, and my mind immediately started buzzing with possibilities for how to incorporate such a charming element into my own creations.
It wasn’t long before inspiration struck: why not take that captivating marquee heart and integrate it into an edible creation? Thus, the idea for the DIY Marquee Light Cake was born. Merging the distinctive charm of a sequined, lit-up decorative element with a delicious cake seemed like the perfect way to create something truly unique and memorable for any special occasion.
Embarking on this project was a delightful adventure, filled with creative challenges and immensely rewarding moments. I’ll admit, waiting for the sequin heart to fully dry required a bit of patience—a virtue I don’t always possess in abundance! However, the final reveal made every minute of waiting absolutely worthwhile. The harmonious blend of the sparkling sequin heart and the subtle, enchanting glow of the small LED lights transforms this cake into an absolute masterpiece, guaranteeing gasps of delight and admiration from anyone who sees it. It’s a testament to how simple elements can combine to create something truly magical and visually stunning.

Table of Contents
Essential Ingredients and Tools for Your Dazzling Marquee Light Cake
Before you dive into the exciting world of illuminated cake decorating, gathering all your materials is key. This project requires a thoughtful blend of standard baking supplies and a few specialized items to achieve that signature marquee effect. Ensure you have everything laid out and ready to go for a smooth, efficient, and enjoyable crafting experience. High-quality ingredients and appropriate tools will ensure your DIY Marquee Light Cake turns out exactly as envisioned.
- 6″ Cake Covered in Buttercream: A perfectly baked and frosted cake forms the delicious foundation for your creation. A 6-inch cake is ideal for showcasing the marquee heart without overwhelming it, providing a balanced visual. Buttercream, when properly chilled, offers a smooth, stable surface that fondant adheres to beautifully. For best results, ensure your buttercream is firm and your cake is well-chilled before you begin applying decorations.
- Fondant: This versatile, pliable sugar dough is absolutely crucial for creating the marquee heart and its structural elements. Fondant allows for precise cutting and shaping, giving your design a professional and polished finish. Opt for a good quality fondant that is easy to roll, doesn’t crack easily, and has a pleasant taste.
- Exacto Knife (or Small Craft Knife): For the intricate cutting required for the fondant heart and later for creating divots in the buttercream, an Exacto knife provides unparalleled precision. Always handle this tool with extreme care due to its sharpness.
- Round Piping Tip (or Small Circular Cutter): Essential for punching out uniform holes in the fondant heart, which will elegantly house your LED lights. The chosen size of the tip will directly determine the size of your light apertures, so choose one that complements the overall scale of your heart.
- Confetti Sprinkles: These vibrant, flat sprinkles are key to creating the dazzling “sequin” effect that makes your marquee heart truly sparkle. Choose colors that complement your cake design, or opt for classic gold or silver for maximum glamour and reflectivity.
- Piping Gel: A clear, sticky gel used primarily as an edible adhesive for attaching sprinkles and various fondant elements. It sets relatively quickly and provides a strong, reliable hold, ensuring your decorations stay perfectly in place.
- Small Paint Brush (Food-Safe): Designate a small, clean paintbrush solely for culinary use. This brush will be used for liberally applying piping gel and meticulously painting with the petal dust mixture.
- Gold Petal Dust: An edible dusting powder that imparts a luxurious, metallic finish to your marquee heart. While gold offers a classic, opulent look, feel free to experiment with silver or other metallic colors to match specific themes or personal preferences.
- Vodka (or Lemon Extract): This clear, high-proof alcohol acts as a crucial medium to dilute the petal dust, transforming it into a vibrant, edible paint. The alcohol evaporates quickly, leaving behind a rich, shimmering luster without affecting the taste of your fondant. Lemon extract is an excellent non-alcoholic alternative.
- Small LED Lights (Battery Operated): The magical ingredient that brings your cake to life! Look for small, battery-operated fairy lights or dedicated cake lights that are explicitly safe for food contact. It’s imperative that the battery pack can be discreetly hidden or positioned away from direct contact with edible parts of the cake.
Optional but Highly Recommended Tools:
- Rolling Pin: For consistently and evenly rolling out your fondant to the desired thickness.
- Parchment Paper or Silicone Mat: These are invaluable for preventing fondant from sticking to your work surface and making cleanup significantly easier.
- Heart-Shaped Cookie Cutter: While an Exacto knife can achieve a heart shape with a template, a cookie cutter ensures a perfectly symmetrical and clean cut, saving time and effort.
- Drying Rack: A simple wire rack is incredibly useful for allowing painted fondant pieces to dry thoroughly and evenly, promoting better air circulation.
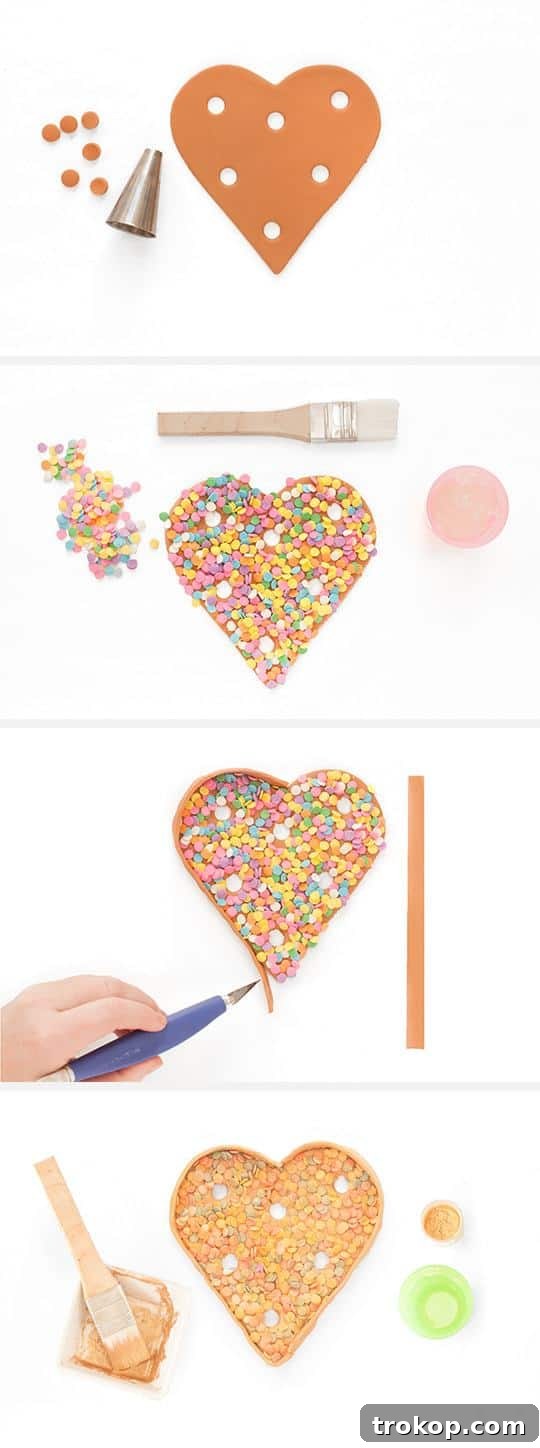
Step-by-Step Guide: Crafting Your Sequin DIY Marquee Light Cake
Now that you have all your supplies meticulously gathered, let’s embark on the exciting and rewarding journey of bringing your illuminated cake to life. Each step is crucial for achieving that stunning, professional finish that will truly make your DIY Marquee Light Cake sparkle.
Phase 1: Creating the Marquee Heart Structure
- Roll Out and Shape the Fondant Heart: Begin by lightly dusting a clean work surface (or a silicone mat) with cornstarch or powdered sugar to prevent sticking. Roll out your fondant to an even thickness, ideally about 1/8 to 1/4 inch. This thickness provides the necessary stability for the marquee structure and helps prevent tearing. Use a heart-shaped cookie cutter for a perfectly symmetrical shape, or if freehand, use a printed template and an Exacto knife to carefully cut out your heart. Ensure all edges are smooth and clean.
- Prepare Holes for Lights: With your chosen round piping tip, carefully press it into the fondant heart to create evenly spaced holes. These apertures will later house your tiny LED lights. Pay attention to your spacing to ensure a beautiful and balanced distribution of light across the heart; aiming for symmetry will yield the best visual result. Gently remove any excess fondant that might remain within the punched-out holes.
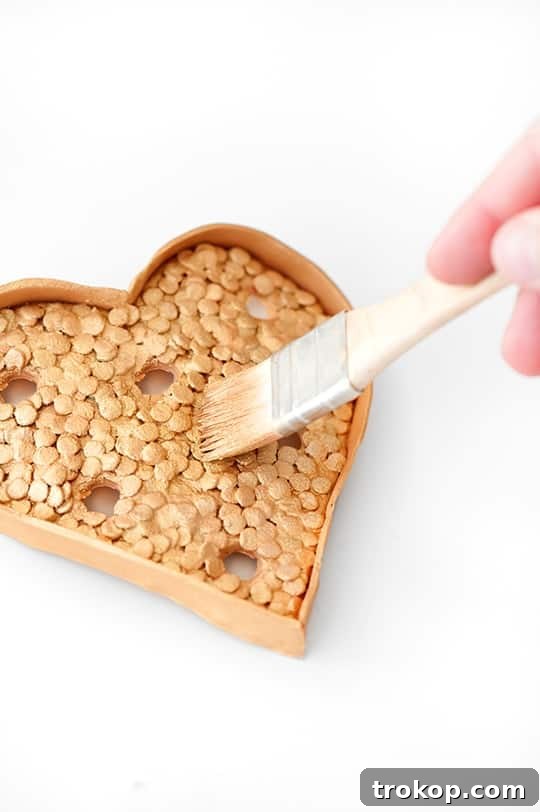
- Apply the Dazzling Sequin Effect: Using your small, food-safe paintbrush, liberally apply a thin, even layer of piping gel over the entire surface of your fondant heart. Work relatively quickly, as the gel can start to set. Immediately after applying the gel, generously cover the heart with your confetti sprinkles. Gently press the sprinkles into the gel with your fingertips to ensure they adhere firmly and evenly. Once covered, carefully lift the heart and gently shake off any excess sprinkles. Place the heart on a drying rack and allow it to dry for a significant period – at least a few hours, or ideally overnight, to ensure the sprinkles are completely set and firmly attached. Patience here is absolutely key for a successful sequin finish!
- Construct the Marquee Sides for Dimension: Roll out two long, thin strips of fondant. These strips will form the “sides” or “depth” of your marquee heart, giving it a three-dimensional effect, much like a real marquee sign. Using more piping gel, carefully attach these fondant strips around the base and outer perimeter of your sequined heart. This step adds crucial dimension and creates a more realistic marquee sign appearance. Trim any excess fondant neatly and gently smooth any seams where the strips meet. Allow this entire structure to dry and firm up completely before proceeding to the next phase. This drying time is essential for the structural integrity of your marquee element.
Phase 2: Adding the Luxurious Metallic Finish
- Mix the Gold Petal Dust “Paint”: In a small, clean, food-safe dish, combine a generous amount of gold petal dust with just a few drops of vodka or lemon extract. Use your small paintbrush to mix these components thoroughly until you achieve a smooth, paint-like consistency. The goal is a rich, opaque metallic paint that will adhere well and provide vibrant coverage. Add the liquid very sparingly, drop by drop, to avoid making the mixture too thin.
- Paint the Marquee Heart with Shimmer: Using your small paintbrush, carefully and evenly paint the entire fondant heart structure with the gold petal dust mixture. Ensure you cover both the sequined surface and the fondant strips forming the sides. Focus on achieving an even, shimmering coat. You will most likely need to apply at least two coats, allowing the first coat to dry completely before gently applying the second, to ensure full, vibrant coverage and a truly lustrous finish. This step is where the “marquee” look truly comes to life, radiating elegance and sparkle.
Phase 3: Assembling and Illuminating Your Cake
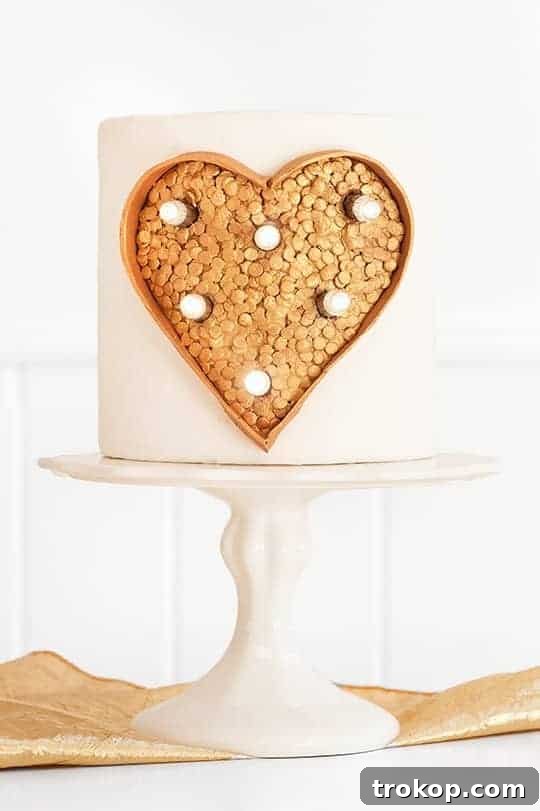
- Attach the Marquee Heart to the Cake: Once your painted marquee heart is completely dry, firm, and stable, apply a small amount of fresh piping gel or a dab of buttercream to the back of the heart. Carefully position the heart onto the side or top of your chilled, buttercream-covered cake. Gently press it into place and hold for about a minute to ensure it adheres securely. Take your time to get the positioning just right for maximum visual impact.
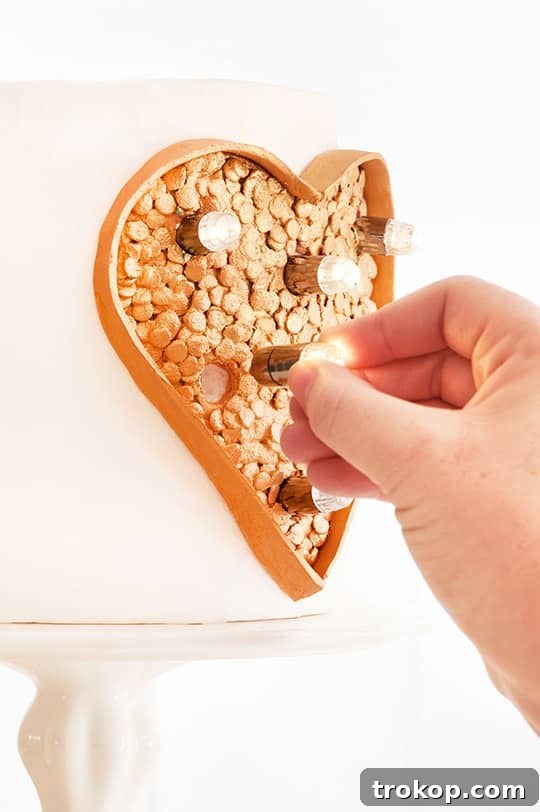
- Prepare the Cake for Lights: Using your Exacto knife (or a small, clean skewer), carefully dig out shallow divots or small tunnels in the buttercream directly behind where the holes of your marquee heart are located. These small excavations will create just enough space for the LED lights to sit flush against the cake, allowing their enchanting glow to emanate beautifully through the fondant holes. Be mindful not to dig too deep, just enough to securely nestle each light.
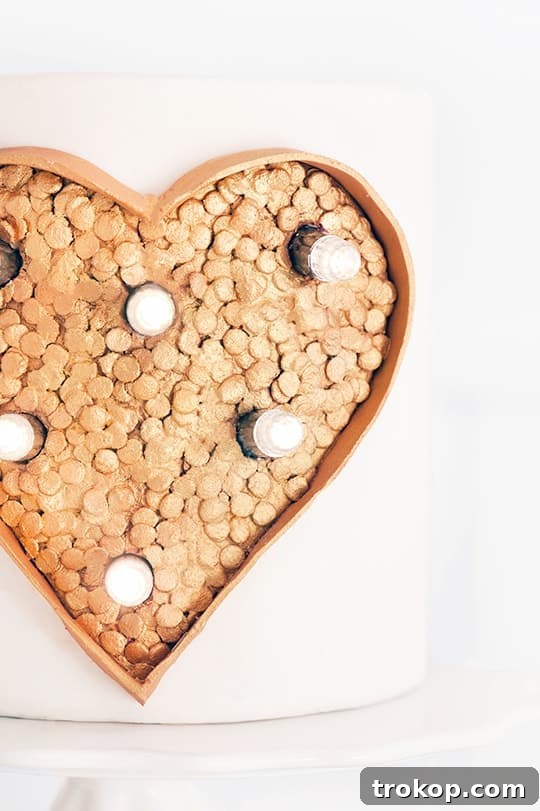
- Insert the Lights and Watch the Magic Unfold: This is the moment the magic truly happens! Gently thread your small LED lights through the prepared holes in the fondant heart and carefully push them into the divots you created in the buttercream. Secure the lights gently, ensuring they are stable. Discreetly arrange the wires behind the marquee heart, tucking them into the buttercream where possible to hide them from view. Position the battery pack at the back of the cake, ensuring it’s completely hidden from sight but easily accessible if you need to turn the lights on/off or replace batteries. Double-check that all lights are positioned so they shine directly through their respective holes for the best illuminating effect.
Expert Tips for Success & Creative Variations for Your Light-Up Cake
To ensure your DIY Marquee Light Cake is an absolute triumph and stands out as a true masterpiece, consider these expert tips and creative variations:
- Patience is Your Best Ingredient: This project thrives on careful execution and adequate drying times. Allow ample time for the piping gel, sprinkles, and especially the petal dust paint to dry completely between steps. Rushing can lead to smudges, sprinkles falling off, or an uneven metallic finish.
- Mastering Fondant Handling: If your fondant becomes sticky during rolling or shaping, lightly dust your work surface and hands with cornstarch or powdered sugar. If it feels too stiff, knead it gently for a few minutes to make it more pliable. Always keep unused fondant tightly wrapped to prevent it from drying out.
- Explore Alternative Shapes: While a heart shape is universally adored and perfect for many romantic or celebratory occasions, don’t limit your creativity! Consider other shapes like elegant stars, individual initials, or even numbers for milestone birthdays and anniversaries to personalize your cake further.
- Experiment with Color Play: While classic gold petal dust exudes opulence, feel free to experiment! Silver petal dust can create a chic, modern look, while iridescent sprinkles can add an ethereal glow. You could even use different colored LED lights to match specific party themes or create a multi-hued light effect.
- Prioritize Safety with Lights: Always, without exception, use small, battery-operated LED lights that are designated as food-safe or can be safely used in close proximity to food. Ensure the wires and especially the battery pack do not come into direct contact with the cake’s edible parts for extended periods. Wrapping battery packs securely in food-grade cling film or placing them on a small piece of parchment paper or a foil barrier can add an extra layer of protection and hygiene.
- Occasion Versatility: The DIY Marquee Light Cake is incredibly versatile. It’s an ideal choice for Valentine’s Day, engagements, weddings, anniversaries, milestone birthdays, glamorous baby showers, or any event where you want to add an extra layer of sparkle and unforgettable charm.
- Pre-Bake Your Cake: To simplify the process on the day of decoration, consider baking and frosting your cake a day in advance. Store it chilled in the refrigerator, allowing it to firm up perfectly for fondant application.
Frequently Asked Questions (FAQ) About Light-Up Cakes
Q: Are the LED lights safe to use with food?
A: Yes, it is absolutely crucial to use small, battery-operated LED fairy lights that are specifically designated as food-safe or can be safely used in very close proximity to food items. Always take precautions: ensure the battery pack is not directly touching edible portions of the cake, and consider wrapping it securely in food-grade plastic wrap for an additional layer of safety and hygiene. The wires themselves should also be managed to minimize direct contact with the cake.
Q: Can I make the sequin heart in advance?
A: Absolutely! The fondant marquee heart, once it is completely dry, painted, and sealed (if using a sealant), can be made several days, or even a week, in advance. Store it in an airtight container at room temperature, away from direct sunlight and humidity. This pre-preparation can significantly reduce stress and time constraints on the day of your event, allowing for a more relaxed assembly process.
Q: What if I don’t have vodka for the petal dust?
A: Lemon extract or clear vanilla extract (if you don’t mind a very subtle scent) are excellent and commonly used substitutes for vodka when mixing petal dust. Any high-proof, clear alcohol that evaporates quickly, leaving no residue or taste, will work effectively. The key function of the liquid is to dissolve the dust into a paintable consistency and then evaporate, leaving behind a vibrant, lasting shimmer.
Q: How do I attach the marquee heart securely to the cake?
A: Piping gel is a fantastic edible adhesive for fondant elements. Apply a thin, even layer to the back of the dried marquee heart and gently press it onto your chilled buttercream-covered cake. For extra security, especially if your heart is particularly large or heavy, you can discreetly insert a few small, food-safe dowels or toothpicks (ensure guests are informed about their presence!) through the back of the heart and into the cake for added stability.
Q: Can I use different types of sprinkles to achieve a different look?
A: While confetti sprinkles yield the most authentic “sequin” effect due to their flat, reflective surface, you are certainly encouraged to experiment! Edible glitter, sanding sugar, or even nonpareils could offer a different texture and unique shine, allowing you to create a customized and distinct look for your light-up cake that perfectly matches your vision.
Q: How long do the LED lights typically last once inserted?
A: Most small LED fairy lights run on compact button cell batteries and can last anywhere from 24 to 72 hours of continuous use, depending on the specific brand, quality of the batteries, and the number of lights. It’s always a wise practice to test your lights beforehand and have spare batteries on hand, especially if your event is lengthy or if you plan to display the cake for an extended period.
If you’re looking to truly impress your guests and create a memorable, picture-perfect moment, this DIY Marquee Light Cake is undeniably the way to go. It’s not every day you encounter a dessert that literally lights up a room, creating an atmosphere of wonder and celebration! This project is a fantastic blend of creativity, confectionery artistry, and a touch of innovative flair that will make your special occasion truly unforgettable.
So, gather your supplies, channel your inner cake artist, and get ready to bake a masterpiece that will leave everyone sparkling with delight. We encourage you to try this captivating project and share your illuminated creations with us – we’d absolutely love to see how your unique DIY Marquee Light Cake shines!