
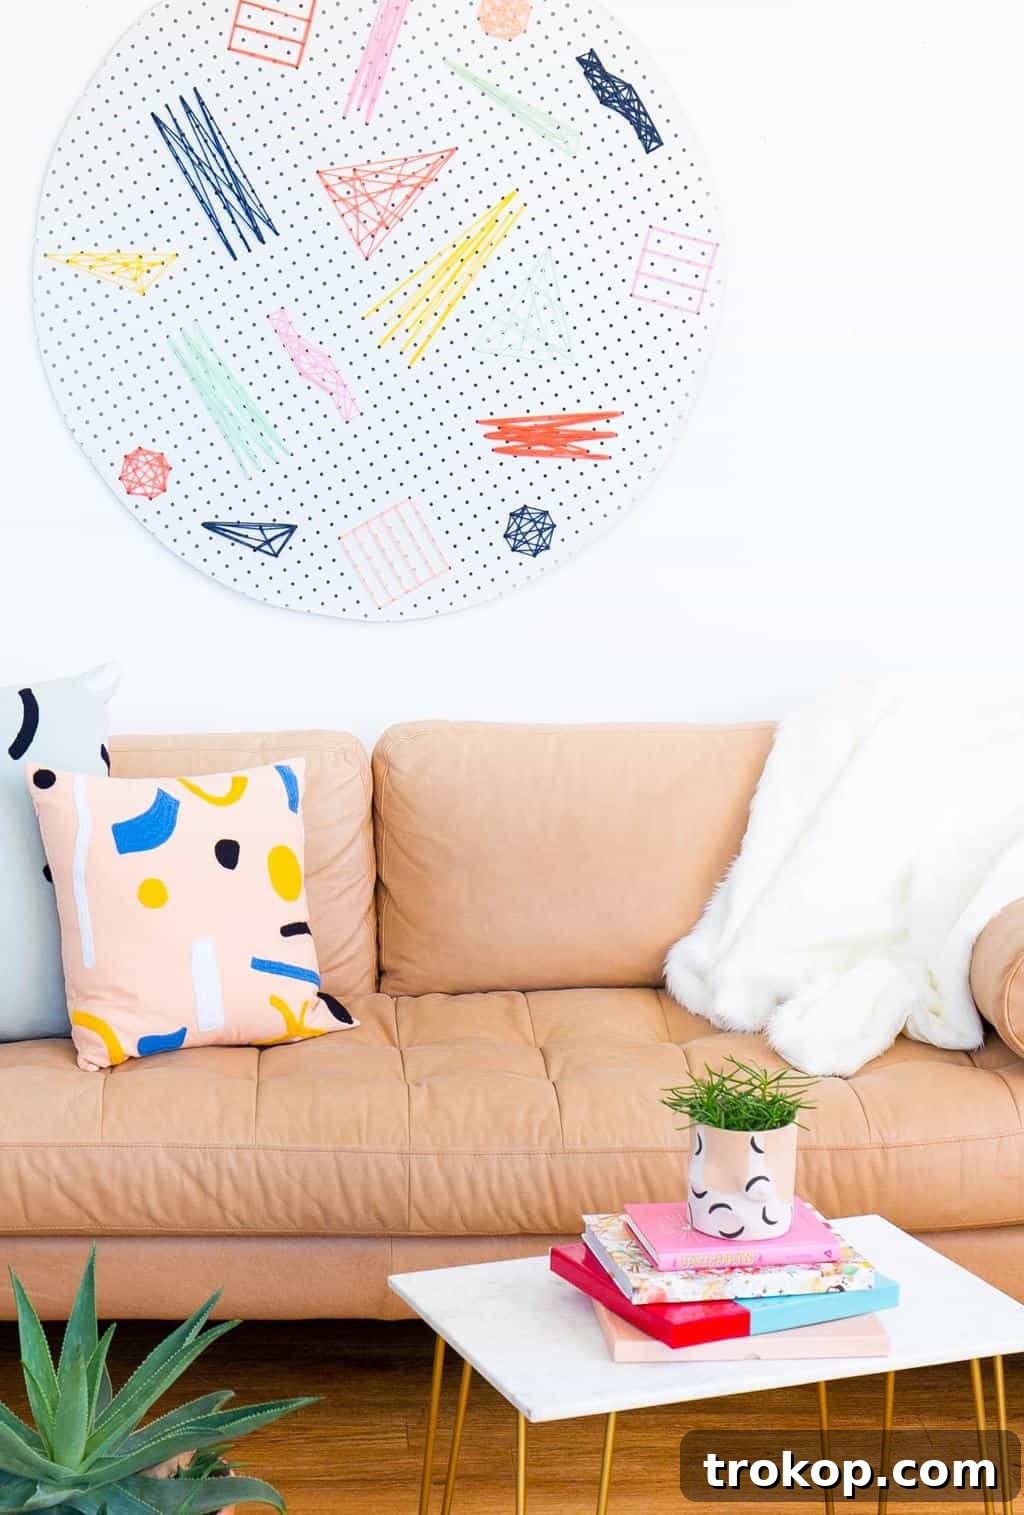
This DIY Pegboard Art is a statement piece that you can make your own with whatever colors, shapes, or seasons you want!
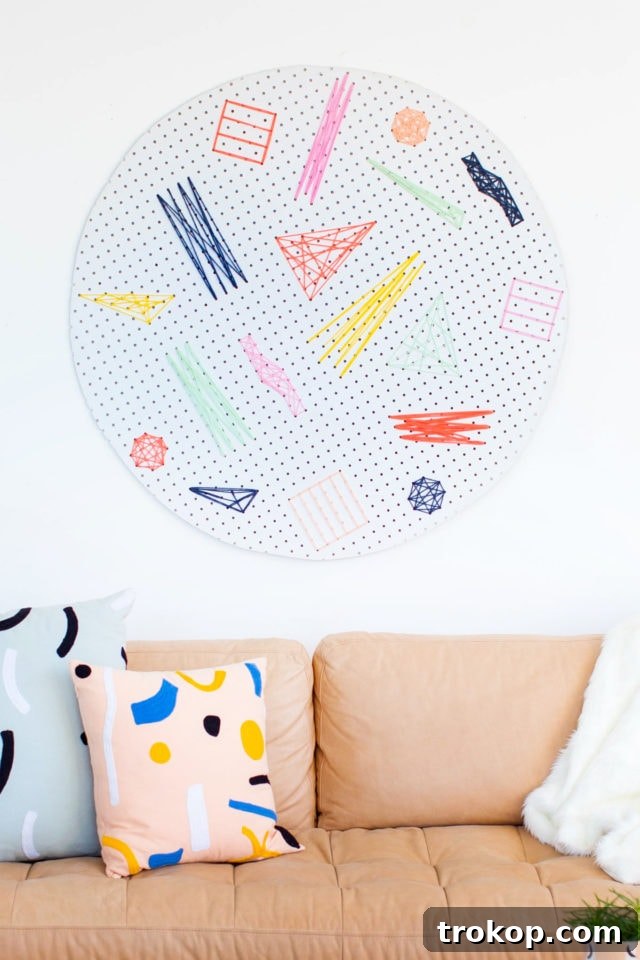
DIY Pegboard Art: Crafting Personalized Wall Decor with Yarn
Elevate your space with a touch of personal flair using our comprehensive guide to crafting a custom DIY pegboard art piece. In the dynamic world of home decor, few projects offer the ideal blend of personalization, cost-effectiveness, and artistic versatility quite like DIY pegboard art. Move beyond the conventional uses of pegboard; we’re about to show you how to transform this humble material into a captivating focal point that truly reflects your unique style and aesthetic.
Whether you’re someone who loves to refresh their home decor with the changing seasons, or you’re simply searching for an impactful yet budget-friendly way to introduce new textures and vibrant colors, this creative project is tailor-made for you. It’s an ideal solution for those who appreciate minimal commitment and investment while desiring maximum visual appeal in their living spaces.
Traditionally, pegboard has been primarily associated with practical storage solutions in garages, workshops, or craft rooms. However, we’re here to challenge that notion and unlock its immense potential as a canvas for striking, modern art. We’re absolutely obsessed with this unconventional pegboard idea of repurposing it into a dynamic and ever-changing piece of wall decor. The true beauty of this concept lies in its boundless adaptability; you can craft it into virtually any design, embrace any color scheme, or manifest any artistic vision that speaks to you, making it a truly one-of-a-kind addition to any room in your home.
The Allure of Pegboard Art: Beyond Functional Storage
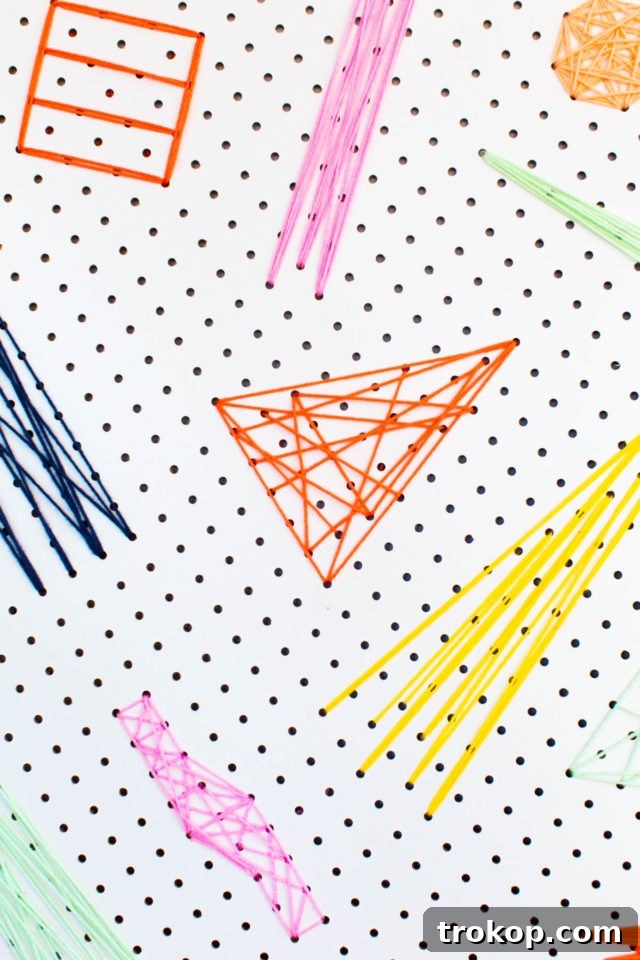
Why should pegboard be your next artistic medium? The answer is rooted in its inherent structure and surprising versatility. The symmetrical grid of perfectly spaced holes isn’t merely for hanging tools or accessories; it serves as a ready-made framework for intricate weaving, bold graphic designs, and subtle textural creations. Unlike a daunting blank canvas, pegboard provides a guiding pattern, making the creative process accessible and enjoyable even for novice crafters or those new to DIY art projects.
A Canvas for Unrestricted Personal Expression
This project empowers you to fully embrace your inner artist. Imagine crafting bespoke wall art that flawlessly matches your existing decor, perfectly complements your seasonal floral arrangements, or proudly showcases your favorite color palette. From vibrant abstract patterns that energize a living room to subtle monochromatic designs that add sophisticated texture to a bedroom, the possibilities for personal expression are truly limitless. It’s an incredibly satisfying way to infuse personality and bespoke charm into your living room, bedroom, nursery, home office, or even a chic entryway.
Cost-Effective & Environmentally Conscious Decorating
One of the most compelling aspects of DIY pegboard art is its remarkable affordability. Pegboard sheets are relatively inexpensive and widely available at nearly all hardware stores. When paired with yarn, which can be sourced in a vast array of colors and textures without a hefty price tag, you can create a high-impact piece of decor without straining your budget. Furthermore, by repurposing a common, utilitarian material like pegboard, you’re actively contributing to a more sustainable approach to home decorating, giving new life and artistic purpose to an otherwise functional item.
Effortless Seasonal & Style Transformations
Do you find joy in updating your decor with the changing seasons, or do you simply love refreshing your interior style frequently? Pegboard art offers unparalleled flexibility. The inherent beauty of yarn art lies in its adaptability; if you ever grow tired of a particular design, wish to update your color scheme, or want to embrace a new seasonal theme (think cozy reds and greens for winter holidays, bright pastels for spring, or cool blues for summer), you can simply unthread the existing yarn and weave in new colors and patterns. This minimal commitment and ease of transformation make it an ideal choice for renters, those who enjoy frequent decor updates without permanent alterations, or anyone seeking a dynamic art piece.
Materials and Tools Needed to Make a DIY Pegboard Art
Gathering your supplies is the exciting first step in translating your creative vision into a tangible art piece. Most of these items are readily available at local hardware stores, craft shops, or through online retailers. Here’s a comprehensive and detailed list to ensure you have everything required to get started:
- Pegboard: Select the dimensions and thickness that best suit your desired art piece. Standard hardboard pegboard is a popular and economical choice, but you might also find metal or even plastic versions for different aesthetics. Consider whether you prefer the natural brown side for an organic feel or the white pre-finished side for a brighter base.
- Jigsaw and Blade: This power tool is essential for accurately cutting your pegboard into custom shapes. Ensure you select a blade specifically designed for cutting wood or composite materials cleanly. Always prioritize safety by wearing appropriate protective gear, such as safety glasses, and carefully following the manufacturer’s operating instructions.
- Yarn in the Colors of Your Choice: This is where your artistic expression truly comes to life! Select a diverse palette of colors, and don’t hesitate to experiment with different yarn textures (e.g., chunky, fine, metallic, fuzzy) to add unique depth, visual interest, and tactile appeal to your artwork. Acrylic, wool, cotton, or even blends are all excellent choices.
- Yarn Needle (or Tapestry Needle): A needle with a large, blunt tip and a sizable eye is crucial for easily threading thicker yarn through the pegboard holes without snagging or splitting the fibers. Double-check that the eye of the needle is sufficiently large for the thickness of the yarn you plan to use.
- Sharp Scissors: High-quality, sharp scissors are indispensable for making clean, precise cuts in your yarn, which helps prevent fraying and ensures a neat finish to your woven patterns.
- Pencil and Ruler/Template: These tools are necessary for accurately marking your desired shape onto the pegboard before you begin cutting. For more complex designs, creating a paper template first can be incredibly helpful.
- Optional: Fine-Grit Sandpaper: After cutting the pegboard, using fine-grit sandpaper can effectively smooth out any rough edges or minor splinters, resulting in a cleaner, more professional finish and making the board safer and more pleasant to handle.
- Optional: Primer and Paint: If you intend to paint your pegboard before threading your yarn, choose an all-purpose primer to ensure good paint adhesion, followed by acrylic or spray paint in your desired base color. This offers another layer of customization and can significantly impact the final look.
- Optional: Hanging Hardware: Depending on the size and weight of your completed art piece, you will need appropriate wall anchors, sturdy screws, or heavy-duty picture hangers to secure it safely to your wall.
How to Make a DIY Pegboard Art: A Detailed Step-by-Step Guide
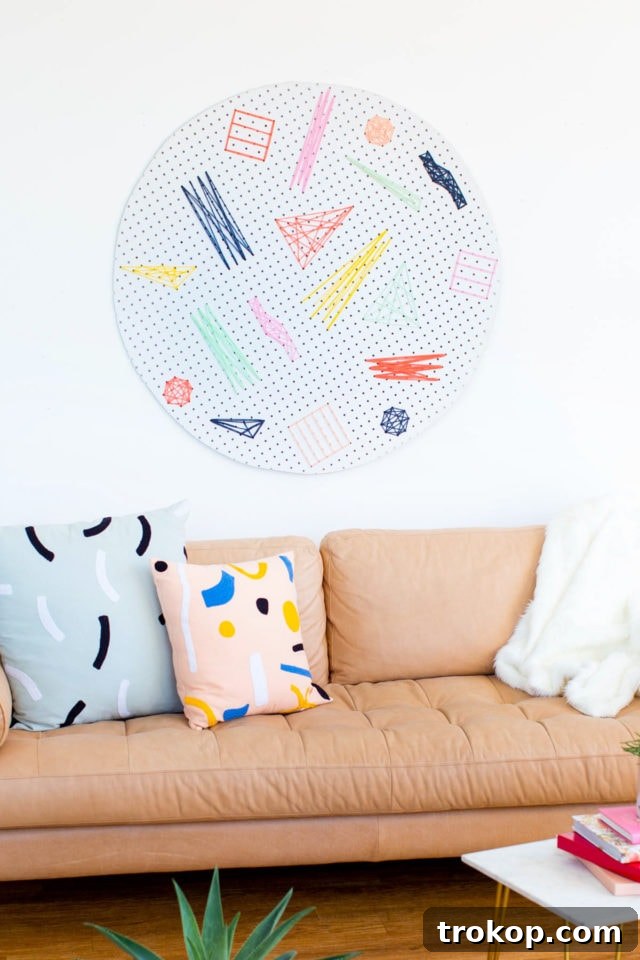
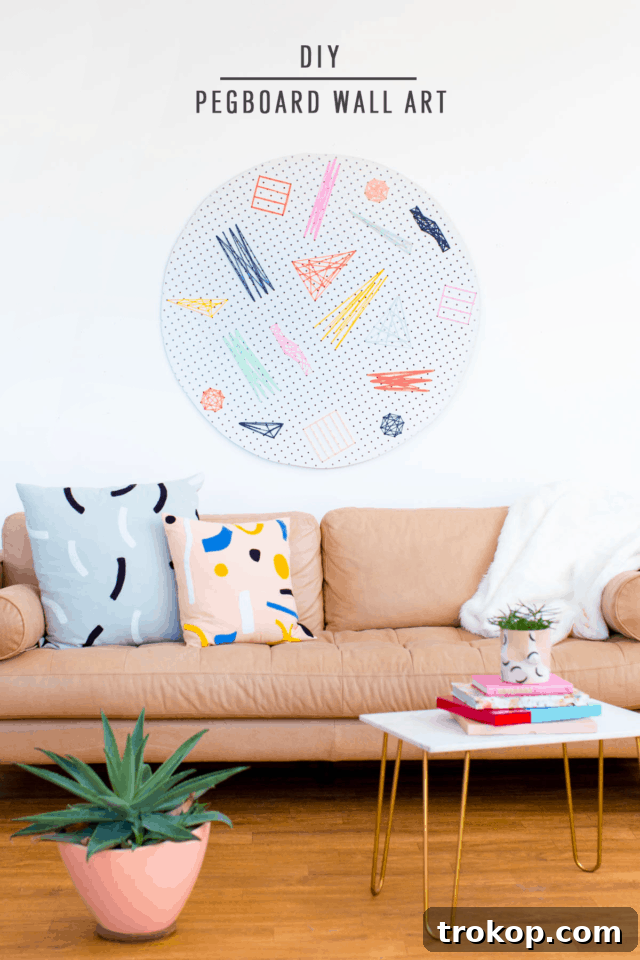
With all your materials meticulously gathered, it’s time to immerse yourself in the enjoyable and creative process. While the example image might showcase a beautifully finished pegboard circle, we will guide you through each essential step from the very beginning to the final display, ensuring you achieve a professional-looking and stunning result that you’ll be proud to show off.
Step 1: Preparing Your Pegboard Canvas
- Mark Your Shape Accurately: Begin by precisely drawing your desired shape onto the pegboard using a pencil. For intricate or symmetrical designs, it’s highly recommended to create a paper template first. If you’re aiming for a perfect circle, as depicted in many examples, find a large round object to trace or carefully use a compass.
- Cut the Pegboard Safely: With utmost care and attention, cut out your marked shape using a jigsaw. Always prioritize safety by wearing appropriate safety glasses and adhering strictly to the manufacturer’s instructions for your specific power tool. Take your time, especially when navigating curves or complex angles, to ensure clean, smooth edges. For large pieces, such as the impressive 5-foot art piece mentioned in the original context, consider having a helper to assist in stabilizing the board during the cutting process.
- Smooth the Edges (Optional but Highly Recommended): Once your shape is cut, utilize fine-grit sandpaper to gently smooth away any rough edges, burrs, or splinters. This crucial step not only creates a more refined and professional finish but also makes the pegboard safer and more comfortable to handle during the subsequent threading stages.
- Paint the Pegboard (Optional Customization): If your artistic vision includes a colored background that either contrasts sharply with or subtly complements your chosen yarn colors, now is the ideal time to paint. Apply an even coat of all-purpose primer, allow it to dry thoroughly, and then follow with one or two even coats of your preferred acrylic or spray paint color. Ensure ample drying time between each coat and before proceeding to the next step. As highlighted in the original content, sometimes a natural brown pegboard background can offer more striking contrast than a white-on-white scheme, so consider your base color carefully.
Step 2: Designing Your Yarn Pattern
Before you even begin threading, it is immensely beneficial to visualize and perhaps even sketch your intended pattern. You can lightly draw your design directly onto the pegboard with a pencil (don’t worry, the yarn will cover it!), or practice your pattern on a piece of graph paper that represents the pegboard’s grid. Consider these design elements:
- Geometric Patterns: Straight lines, bold triangles, perfect squares, or intricate diamond motifs are relatively straightforward to execute and create a distinctively modern and minimalist aesthetic.
- Abstract Shapes: Allow your creativity to flow freely with organic, free-form designs, sweeping swirls, or fluid, irregular shapes that add a unique artistic touch.
- Color Blocking Techniques: Strategically use different colors of yarn to fill distinct, pre-defined areas of your design, creating bold visual separation and impact.
- Layering and Texture: Experiment with layering different yarn colors or varying yarn thicknesses to add incredible depth, dimension, and tactile richness to your finished artwork.
Step 3: Expertly Threading Your Design with Yarn
This is the magical stage where your prepared pegboard truly transforms into a captivating piece of art. This step, while often repetitive, is incredibly meditative and deeply rewarding as your vision takes shape before your eyes.
- Prepare Your Yarn Lengths: Cut a manageable length of yarn, typically between a few feet and a couple of yards, to avoid frustrating tangles and knots. Using yarn that is too long can become unwieldy, while yarn that is too short will require frequent tying off.
- Thread the Yarn Needle: Carefully guide one end of your chosen yarn through the eye of your yarn needle.
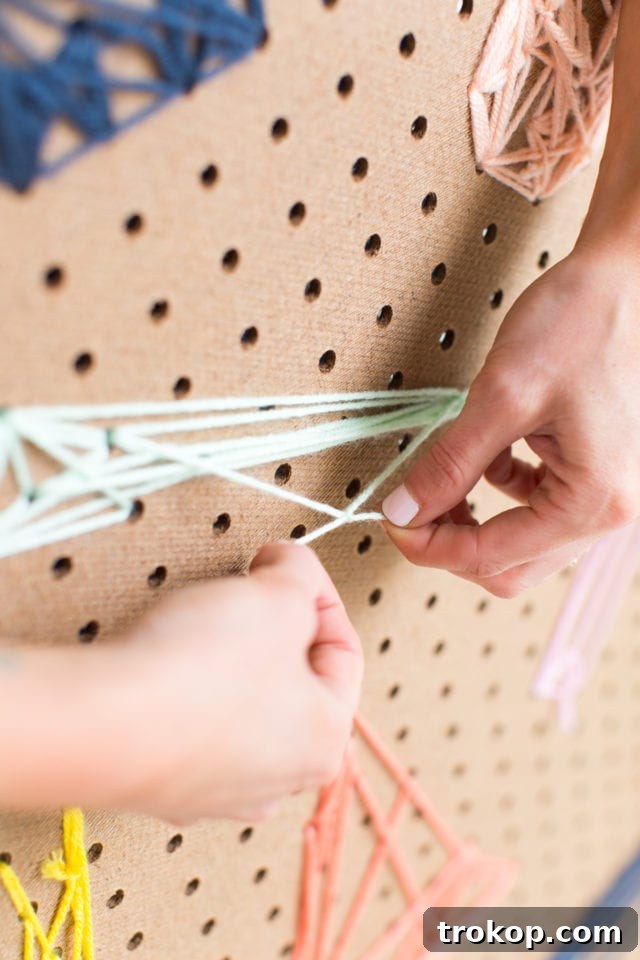
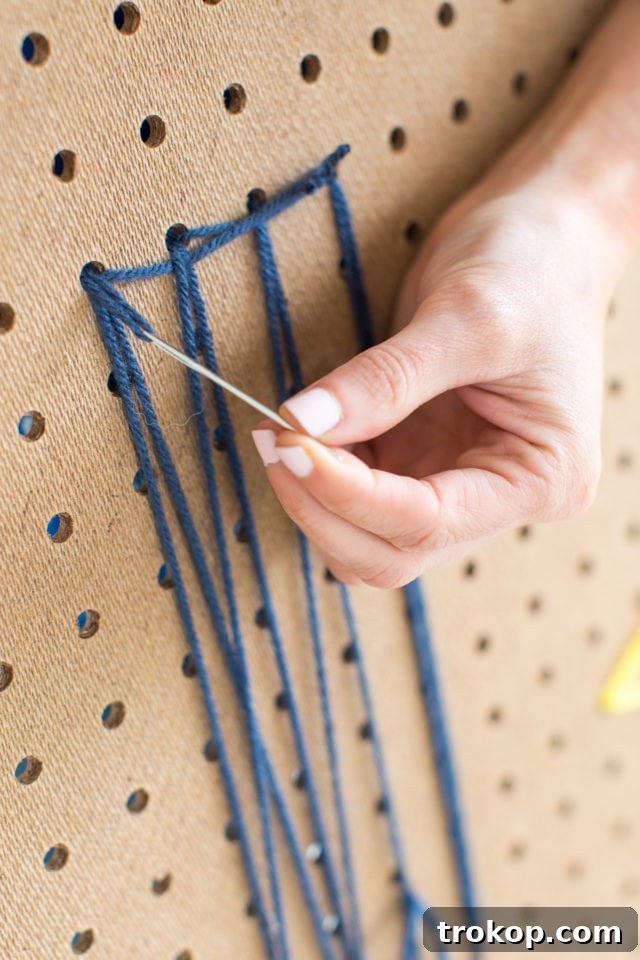
- Initiate the Weaving Process: Begin by pushing the needle through a pegboard hole from the back of the board to the front. Leave a small tail of about 2-3 inches on the back side and secure it with a simple, neat knot, or by carefully weaving it underneath existing threads on the back of the board. This technique ensures a clean and polished appearance on the front of your artwork.
- Create Your Intended Pattern: Meticulously follow your pre-planned design by threading the yarn through the various pegboard holes. You can create crisp straight lines by going directly from one hole to another, or weave more complex and intricate patterns by skipping multiple holes. The crucial element here is to maintain consistent tension on the yarn throughout the process; this ensures that your design looks exceptionally neat, uniform, and professional. Feel free to experiment with different densities of threading; some areas might be densely filled for a bold effect, while others remain sparse to create visual contrast and interest.
- Changing Colors or Finishing a Length: When it becomes necessary to change to a new color or when your current length of yarn is nearly depleted, bring the yarn end to the back of the pegboard. Securely tie it off with a firm knot, trim any excess, and then seamlessly start your new color or fresh length of yarn using the same initial starting method.
- Continue Until Finished: Persistently continue stringing and weaving shapes, lines, and patterns over and over through the pegboard holes with your yarn needle until your entire design vision is thoroughly complete. Be aware that larger projects, such as the impressive 5-foot art piece from the original example, will naturally require a greater time commitment and sustained focus.
Tips for Success and Customization
To ensure your DIY pegboard art truly shines as a masterpiece and to inspire further creative exploration, consider incorporating these additional tips and customization ideas:
- Experiment with Diverse Yarn Types: Do not limit your creativity to just one type of yarn. Explore chenille for an incredibly soft and luxurious feel, metallic threads for a subtle shimmer and glamour, or even jute twine for a rustic, natural, and textured aesthetic. Each yarn type can add unique dimensions and character to your artwork.
- Incorporate Complementary Elements: While yarn serves as the primary medium, consider thoughtfully adding small wooden beads, weaving tiny LED string lights into the pattern for a magical glow, or attaching miniature faux flowers or leaves for an organic touch. These additions can elevate your art to new levels of visual interest.
- Effortless Seasonal Swaps: As previously highlighted, one of the most remarkable advantages of this art form is its impermanence. For holiday celebrations or seasonal decor changes, simply and carefully unthread your existing design and re-weave with a fresh palette of colors and patterns. This ingenious flexibility allows for endless decor transformations without the need to purchase entirely new art pieces.
- Strategic Background Color Choices: The original post mentions a preference for the natural brown side of the pegboard over white for better contrast with white yarn. This crucial insight underscores the importance of your background color selection. A dark pegboard can dramatically make bright yarns pop and command attention, while a light pegboard offers a subtle, airy, and contemporary feel.
- Explore Various Pegboard Sizes and Shapes: While a grand, large circular piece undoubtedly makes a magnificent statement, do not shy away from smaller squares, elegant rectangles arranged in a captivating gallery wall, or even unique, abstract, and irregular shapes for a decidedly modern and edgy look.
- A Thoughtful Gift Idea: A meticulously handmade pegboard art piece makes an exceptionally thoughtful and deeply personalized gift for housewarmings, birthdays, significant anniversaries, or any special occasion. It’s a gift that carries genuine sentiment and artistic effort.
Displaying Your Pegboard Art
Once your personalized masterpiece is complete, the exciting final step is to proudly display it for all to admire. Proper mounting and thoughtful placement will ensure your art is securely fastened, beautifully presented, and makes the maximum visual impact.
- Selecting the Right Mounting Hardware: For lighter and smaller art pieces, simple picture nails or adhesive strips might suffice. However, for larger or heavier pegboard art, it is imperative to use robust screws with appropriate wall anchors to ensure complete security. You can also find specialized pegboard stand-offs that create an elegant floating effect, adding a sophisticated, modern dimension to your display.
- Leveraging Existing Holes for Mounting: Conveniently, the pegboard comes with pre-drilled holes, which significantly simplifies the mounting process. As noted in the original article, you can opt for heavy-duty white nails that seamlessly blend with white pegboard for an understated look, or choose contrasting hardware for an intentional industrial or bold aesthetic.
- Ensuring Perfect Level Placement: Always utilize a spirit level to guarantee that your finished art piece hangs perfectly straight on the wall. This seemingly minor detail makes a considerable difference in the overall polished and professional presentation of your artwork.
- Strategic Placement Considerations: Carefully consider where your pegboard art will have the most profound impact. A grand, oversized piece can serve as an undeniable focal point above a sofa, a bed, or in a prominent entryway. Smaller pieces can be artfully grouped together to compose a dynamic and visually engaging gallery wall. Furthermore, take into account the natural and artificial lighting in the room; proper illumination can beautifully enhance the intricate textures and vibrant colors of your yarn.
Conclusion: Unleash Your Inner Artist
Creating your own DIY pegboard art is far more than just a simple craft project; it’s a magnificent opportunity to infuse your personal living space with unique personality, boundless creativity, and a profound sense of accomplishment. From the initial selection of your pegboard and yarn to the meticulous and meditative threading of each vibrant strand, every single step in this process allows for deep personal expression, culminating in a truly one-of-a-kind piece of wall decor that is authentically yours. The inherent versatility and adaptability of this project ensure it remains fresh, exciting, and perpetually relevant, effortlessly adapting to your evolving tastes, interior design trends, and seasonal decor requirements.
Throughout this comprehensive guide, we’ve explored the entire transformative journey: from a simple, utilitarian sheet of pegboard to a stunning and dynamic visual statement. We’ve emphasized the unparalleled benefits of customization, its impressive cost-effectiveness, and the sheer, unadulterated joy that comes from crafting handmade decor. Whether you choose to opt for bold, eye-catching geometric patterns, soft and flowing abstract swirls, or a vibrant explosion of color, your meticulously crafted pegboard art will undoubtedly become a captivating conversation starter and a lasting testament to your boundless creative spirit.
So, gather your essential materials, allow your imagination to take magnificent flight, and confidently embark on this incredibly rewarding DIY adventure. What do you think?! Are you truly ready to transform a commonplace, functional item into a beautiful, personalized, and inspiring work of art that brightens your home? Give it a try – yay or nay?
We eagerly invite you to share your magnificent creations with us – we’d absolutely love to see how you interpret and bring to life this unique and versatile art form!