
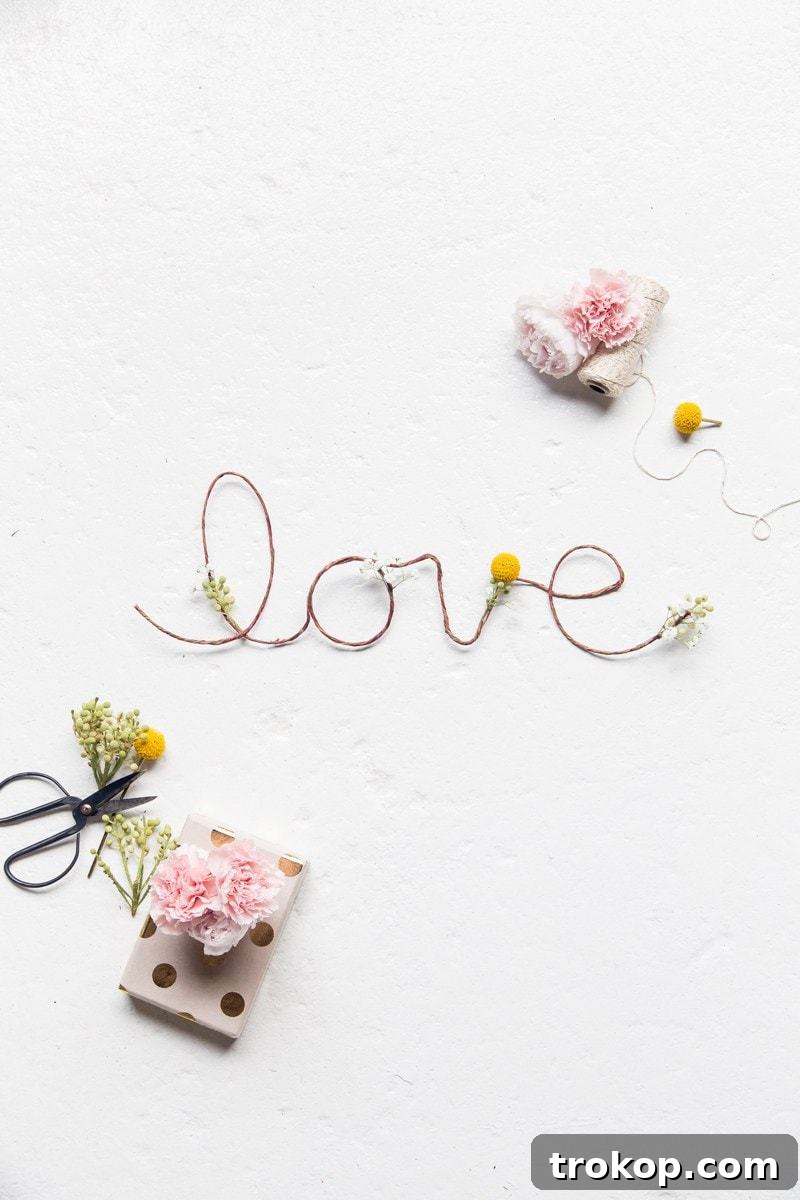
Crafting a Beautiful DIY Fresh Flower Love Sign: A Heartfelt Gift Idea
Unleash your creativity with an easy-to-make DIY Fresh Flower Love Sign, designed to add a touch of heartfelt beauty to any celebration. Whether you’re commemorating a birthday, expressing love on a holiday, or simply surprising a cherished loved one, this handmade floral sign is an exquisite gesture. And did we mention it fills the air with a delightful natural fragrance?
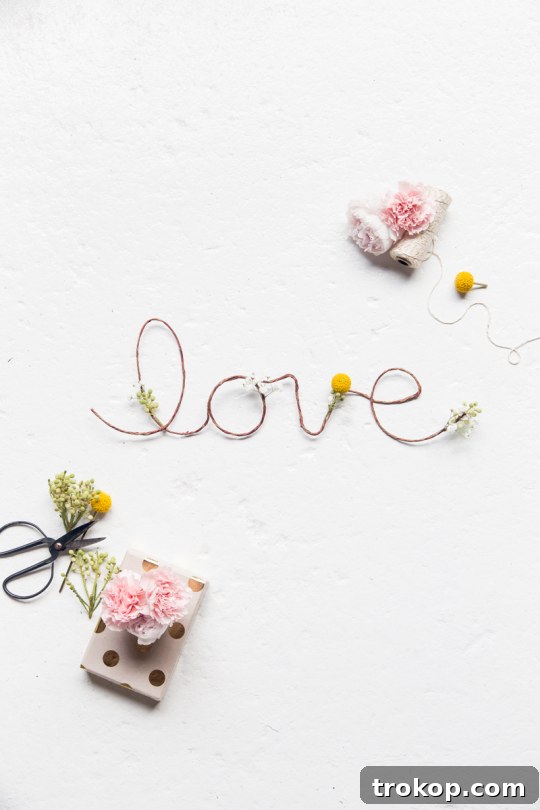
As a child, I often wished for some helpful guidance in the realm of handmade gifts. My well-intentioned but often questionable creations, like painted rocks or collages made from “borrowed” family photos (sorry about that, mom!), rarely hit the mark as truly cherished keepsakes. It took a while to discover the magic of simple, elegant DIY gift ideas.
Thankfully, with a project like this DIY Fresh Flower Love Sign, creating something genuinely beautiful and meaningful is both accessible and enjoyable. It’s a fantastic way to teach kids the value of crafting with love, offering a tangible result that’s truly worth saving—and certainly won’t involve any tears over irreplaceable memories!
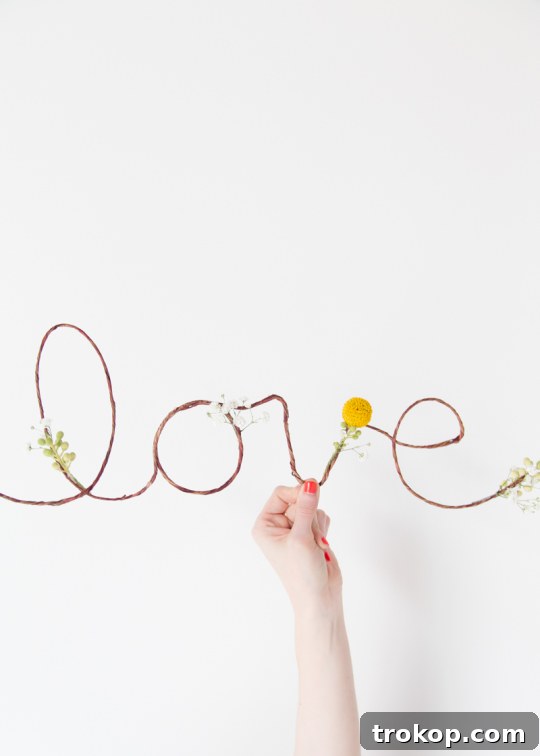
Table of Contents
Why Choose a DIY Fresh Flower Love Sign?
In a world full of mass-produced gifts, a handmade creation stands out. A DIY Fresh Flower Love Sign isn’t just a craft project; it’s a personalized expression of affection. Its benefits are numerous:
- Personalized Touch: You choose the word, the flowers, and the arrangement, making it uniquely suited for the recipient or occasion.
- Sensory Delight: Beyond its visual appeal, the natural fragrance of fresh flowers adds an extra layer of charm, creating a pleasant atmosphere wherever it’s displayed.
- Cost-Effective: Compared to elaborate floral arrangements or custom signage, this DIY option is budget-friendly without compromising on beauty.
- Mindful Crafting: The process of bending wire and carefully attaching flowers can be a relaxing and rewarding activity, perfect for a quiet afternoon or a fun family project.
- Versatility: Suitable for a wide range of events and people, from romantic gestures for Valentine’s Day to a thoughtful Mother’s Day gift, or even as unique wedding decor.
- Eco-Friendly Potential: By choosing locally sourced flowers and reusable wire, you can make this a more sustainable crafting choice.
Materials And Tools Needed To Create Your Fresh Flower Love Sign
Gathering your supplies is the first exciting step in bringing your floral vision to life. Here’s what you’ll need, along with some helpful tips for selection:
- Vine-Wrapped Floral Wire: This type of wire is ideal because its natural, rustic appearance blends seamlessly with the flowers. It’s flexible enough to bend into shapes but sturdy enough to hold them. If vine-wrapped isn’t available, standard floral wire can be used and later wrapped with natural twine or ribbon for a similar aesthetic.
- Wire Cutter: Essential for cleanly cutting the floral wire to your desired length. Ensure you have a pair designed for cutting wire to avoid damaging regular scissors.
- Floral Scissors or Shears: These are specifically designed for cutting flower stems without crushing them, which helps the flowers absorb water and stay fresh longer. If you don’t have floral scissors, a sharp pair of regular scissors can work in a pinch.
- Glue Gun and Hot Glue Sticks: A low-temperature glue gun is recommended, especially if children are helping, to prevent burns. Hot glue provides a strong, quick-drying bond that’s perfect for securing the wire shape and attaching flowers.
- Fresh Flowers of Your Choice: This is where you can truly personalize your sign! Consider flowers with relatively sturdy heads that can withstand gluing.
- Popular choices: Roses, carnations, mums, hydrangeas (use smaller clusters), or even smaller varieties like spray roses.
- Filler flowers & greenery: Baby’s breath, eucalyptus, dusty miller, or ferns can add texture and volume.
- Color palette: Think about the occasion or the recipient’s favorite colors. A monochromatic scheme offers elegance, while a mix of vibrant hues can be playful.
- Selection tip: Choose flowers that are fresh and vibrant. Avoid any with wilting petals or discolored leaves.
Step-by-Step Guide: How To Craft Your DIY Fresh Flower Love Sign
This project is straightforward, but remember, younger crafters will benefit from a helping hand, especially with wire bending and hot glue application.
1 — Prepare Your Wire: Begin by unspooling approximately three feet of vine-wrapped floral wire. Use your wire cutters to make a clean cut. The exact length may vary depending on the word you choose and its desired size. It’s always better to start with a bit more wire than you think you’ll need.
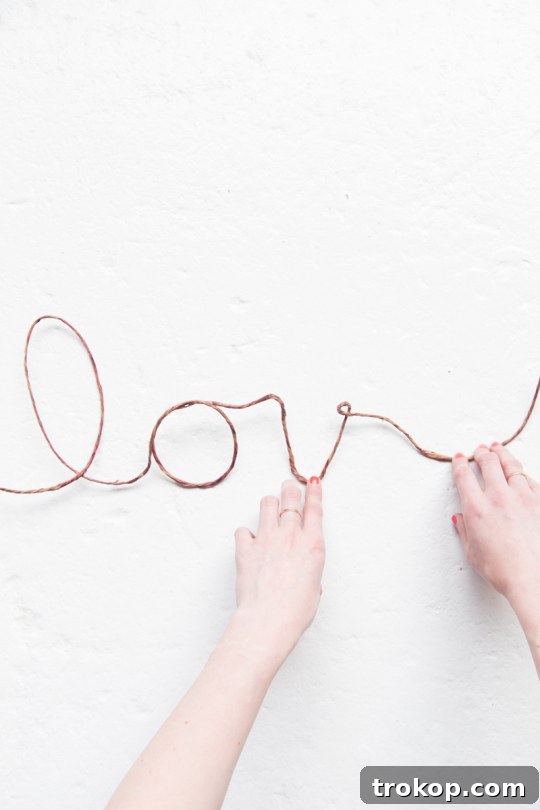
2 — Form Your Word: Carefully start bending the wire, letter by letter, to form your chosen word (e.g., “LOVE”). The key is to try and create the entire word from a single, seamless piece of wire, if possible. This gives the sign a more cohesive and professional look. If your word requires multiple pieces, overlap and twist the ends securely. You might find it helpful to sketch out your word on paper first as a guide for the bends and curves.
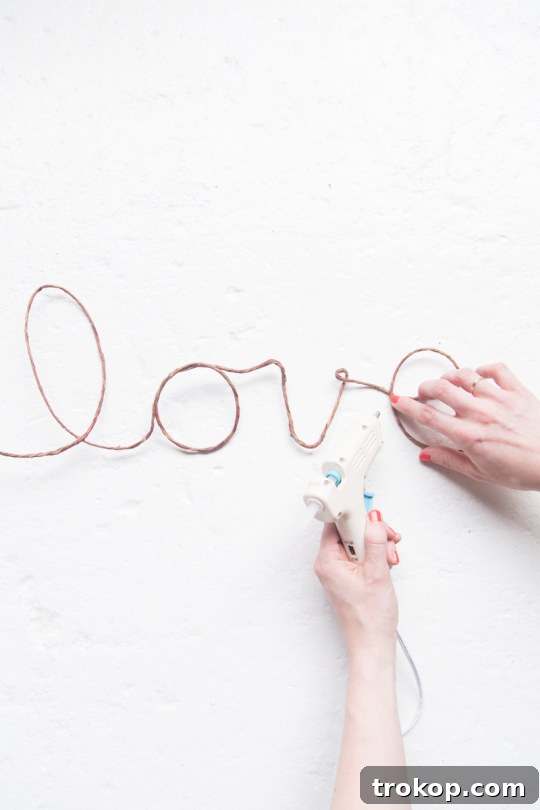
3 — Secure the Wireframe: Once you’re happy with the shape of your word, apply small dabs of hot glue to the back of any letter joints or overlapping wire sections. This crucial step ensures the wireframe maintains its shape permanently and won’t unravel or distort over time. Allow the glue to cool and set completely before moving on.
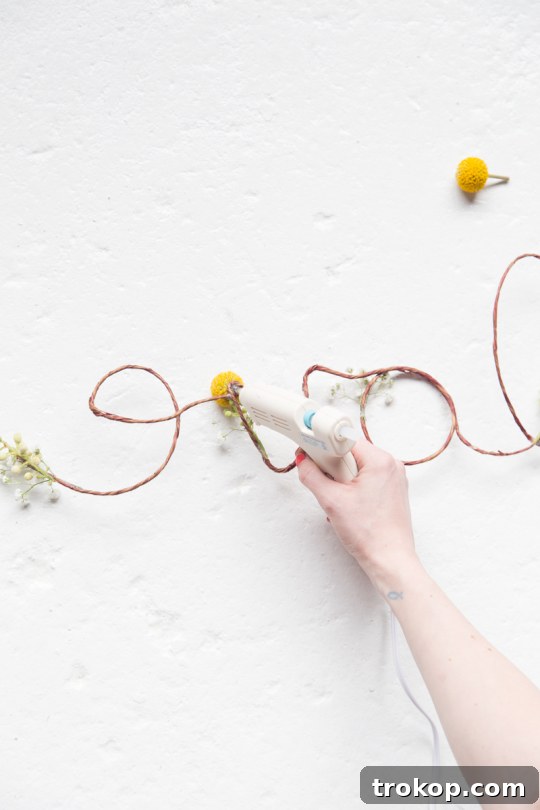
4 — Select and Prepare Your Florals: Now for the fun part! Lay out your chosen fresh flowers and greenery. Using your floral scissors, carefully trim the stems of each bloom to a short length, leaving just enough stem to create a good gluing surface. Remove any excess leaves or thorns that might get in the way or detract from the aesthetic. For flowers with multiple small blooms (like baby’s breath or hydrangeas), you can separate them into smaller clusters if desired.
5 — Attach Your Fresh Flowers: With your hot glue gun ready, apply a small dot of hot glue to the trimmed back of each flower or cluster. Carefully press the glued portion onto your wire sign, holding it in place for a few seconds until the glue sets. Work systematically, perhaps starting with larger focal flowers and then filling in gaps with smaller blooms and greenery. You can opt for a minimalist look with just a few strategically placed flowers, or cover the entire word for a lush, full effect. Experiment with different arrangements before gluing to find what you like best!
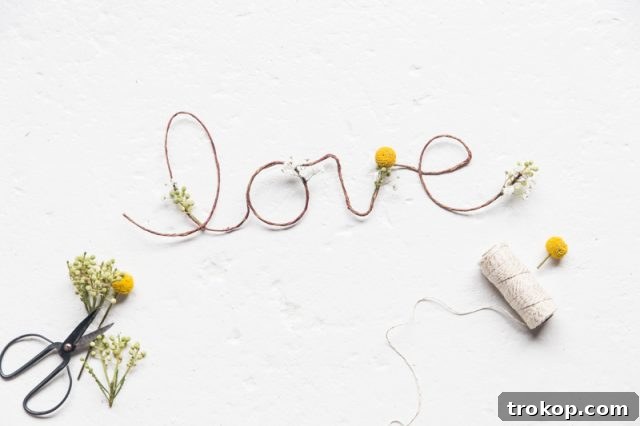
While a minimalist design can be wonderfully chic, feel free to add as many flowers as your heart desires to create a full, vibrant display. Involving children in the flower-picking and attachment process can make this an even more memorable and enjoyable family activity!
Creative Variations and Display Ideas
The beauty of this DIY project lies in its adaptability. Beyond a simple “LOVE” sign, consider these creative twists:
- Personalized Gift Tags: Create miniature versions of the sign with initials or short words like “XOXO” to attach to gifts. They pair beautifully with DIY XOXO Wrapping Paper for an extra special touch.
- Wedding & Event Decor: Imagine elegant floral words like “MR & MRS,” “JOY,” or even individual guest names as unique place settings. These signs can also be charming accents for backdrops, dessert tables, or paired with DIY Floating Flower Table Displays for a cohesive floral theme.
- Seasonal Home Decor: Craft words like “FALL,” “MERRY,” or “SPRING” to celebrate different seasons. Use seasonal blooms and colors to match your home’s aesthetic.
- Photo Props: Large floral signs can serve as stunning props for engagement photos, wedding announcements, or maternity shoots.
- Nursery Decor: A child’s name or a sweet word like “DREAM” crafted from delicate flowers can add a whimsical and personal touch to a nursery.
Display your finished sign by hanging it on a wall using clear fishing line, leaning it against a shelf or mantelpiece, or using it as a striking centerpiece for a special meal.
Extending the Beauty: Tips for Flower Longevity
While fresh flowers are naturally ephemeral, you can maximize the lifespan of your DIY floral sign with a few simple care tips:
- Mist Regularly: Gently mist the flowers with water a few times a day to keep them hydrated, especially in dry environments.
- Avoid Direct Sunlight & Heat: Place your sign in a cool spot away from direct sun, heating vents, or drafty areas, which can cause flowers to wilt faster.
- Humidity: A humid environment helps flowers stay fresh. Consider placing the sign in a room with a humidifier if available.
- Swap Blooms: If an individual flower starts to wilt, carefully remove it and replace it with a fresh one to keep the entire sign looking vibrant.
- Floral Adhesive: For enhanced adhesion and some moisture retention, consider using a specialized floral adhesive designed for fresh cut flowers instead of or in addition to hot glue.
Explore More Floral DIY Projects
If you loved creating this fresh flower sign, you’ll be thrilled to discover more ways to incorporate the beauty of blooms into your crafting:
- DIY Fresh Flower Gift Box: Combine gifts with gorgeous florals.
- DIY Floral Headpieces: Perfect for festivals, weddings, or garden parties.
- DIY Paper Flower Backdrop: Create stunning, lasting decor with paper.
- DIY Giant Paper Flower Bouquet: Make a grand statement that never fades.
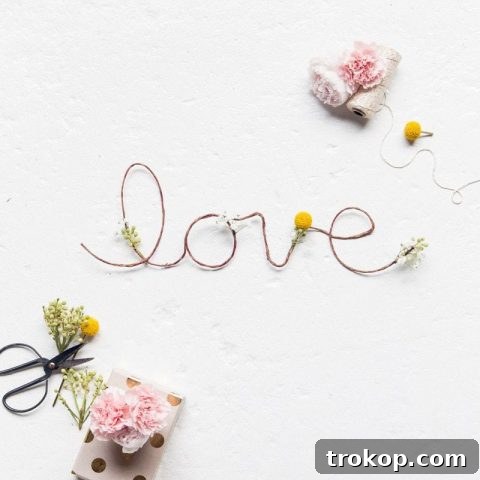
DIY Fresh Flower Love Sign
30
30
DIY
Equipment
-
Wire cutter
-
Floral scissors
-
Glue gun
Materials
-
Vine wrapped floral wire
-
Fresh flowers
of your choice - Hot glue sticks
Instructions
-
Cut about three feet of vine-wrapped wire off the spool with wire cutters.
-
Begin bending the wire letter by letter to form your desired word from the same piece of wire, aiming for a seamless design.
-
As you form the letters, apply small dabs of hot glue on the back of any letter joints to ensure the wireframe maintains its shape permanently.
-
Choose the fresh flowers and greenery you’d like to use and trim their stems to a short length suitable for gluing.
-
Hot glue the prepared flowers onto the wire sign, applying a dot of glue to the back of each bloom and pressing it firmly onto the frame. Arrange them to your aesthetic preference.
$10
diy flower love sign, fresh flower craft, handmade gift

We absolutely adore seeing your beautiful creations! Be sure to share your DIY Fresh Flower Love Sign with us on Instagram using the hashtag #sugarandclothloves. We can’t wait to see how you’ve personalized your floral masterpiece!
More DIY Signs
DIY Printable Inspiration Artwork Prints
DIY Gold Foil Wall Art With Free Printables
Printable Fabric Flag Word Art
DIY Green Foliage Sign
Easy Balloon Decoration Ideas – Faux DIY Balloon Letter Garland
DIY Faux Boxwood Wall & Neon Sign