
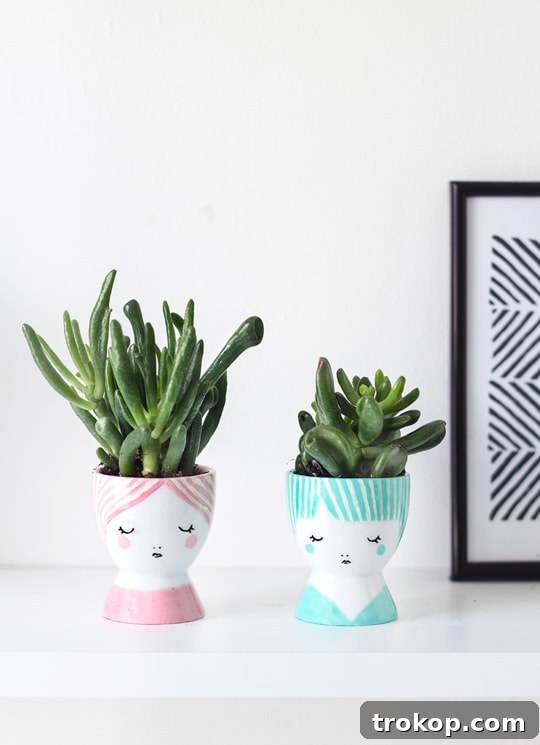
Transform ordinary egg cups into enchanting works of art with our comprehensive guide to crafting DIY Mini Face Planters. Perfect for adding a touch of personalized charm to your tabletop decor, these whimsical planters are ideal for succulent gardens, tiny houseplants, or even as miniature terrariums. Dive into this simple yet incredibly creative project and discover how easy it is to bring a burst of personality and greenery into any space!
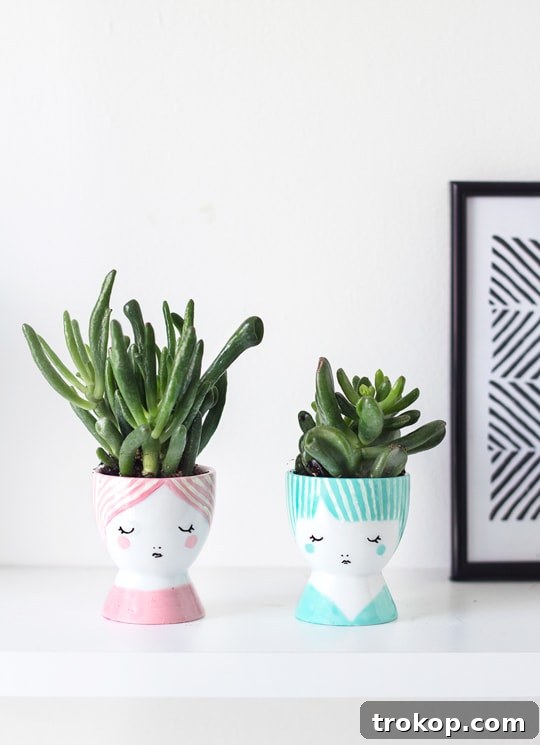
Craft Your Own Whimsical World: The Ultimate Guide to DIY Mini Face Planters
Hello, fellow craft enthusiasts! I’m Teri, and like many of you, I have an undeniable obsession with planters. There’s something incredibly satisfying about introducing a splash of green into the home, especially when housed in a pot that’s as unique and charming as the plant itself. This particular project transports me back to my childhood, evoking fond memories of growing cress in eggshells – a simple joy that sparked a lifelong appreciation for small, verdant creations.
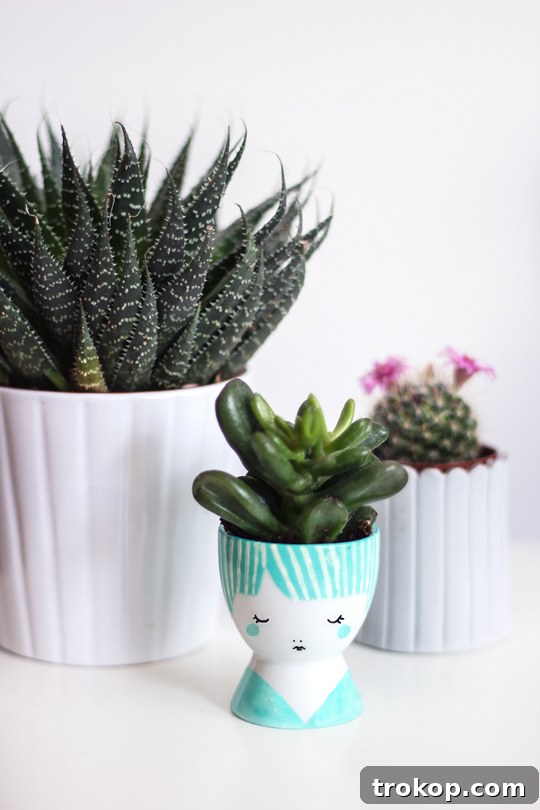
It was a delightful moment of rediscovery (profound, I know!) when I realized the humble egg cup, often relegated to the back of the cupboard after breakfast, holds immense potential. These miniature vessels are not just for perfectly poached eggs; they are the perfect canvas for crafting the most adorable DIY Mini Face Planters. And why faces, you ask? Because, let’s be honest, everything is infinitely more endearing with a cute little face!
This tutorial is designed to be effortlessly simple, yet it offers boundless opportunities for creativity. You’ll love experimenting with different plant “hairstyles” and giving each planter its own unique personality. Get ready to embark on a fun, rewarding project that will add a touch of handcrafted magic to your home or make for an unforgettable personalized gift.
Why Create DIY Mini Face Planters? Beyond Just Decor
Beyond their undeniable cuteness, DIY Mini Face Planters offer a multitude of benefits that make them a truly worthwhile craft project:
- Unleash Your Creativity: This project is a fantastic outlet for artistic expression. From choosing vibrant hair colors to designing unique facial expressions, each planter becomes a canvas for your imagination. No two face planters will ever be exactly alike, ensuring a truly personalized piece of decor.
- Personalized Home Decor: Tired of generic mass-produced items? These mini face planters allow you to inject character and charm into your living space. They can complement existing decor themes or stand out as quirky conversation starters. Imagine a whole family of these little personalities adorning your windowsill or desk!
- Thoughtful & Unique Gifts: Handmade gifts carry a special sentiment. A DIY face planter, customized with the recipient’s favorite colors or a playful expression, makes for a truly heartfelt and memorable present for birthdays, housewarmings, or just because.
- Bringing Nature Indoors: Incorporating plants into your home improves air quality, reduces stress, and boosts overall well-being. These mini planters make it easy to introduce small bursts of green into even the most compact spaces, enhancing your connection to nature.
- Eco-Friendly Upcycling: By transforming readily available egg cups, you’re engaging in a sustainable craft that gives new life to everyday items. It’s a wonderful way to practice upcycling and reduce waste, turning potential discards into delightful decorations.
- Fun for All Ages: This project is simple enough for beginners and engaging enough for experienced crafters. It’s a fantastic activity to do with children, fostering their creativity and introducing them to the joy of gardening and crafting.
Choosing Your Canvas: The Perfect Egg Cup
The foundation of your charming mini face planter is the egg cup itself. While any egg cup can work, plain white porcelain egg cups are highly recommended. Their smooth, non-porous surface provides an ideal canvas for porcelain paints, allowing colors to pop and details to be drawn with precision. You can often find similar plain white egg cups here, and sometimes even in various other colors if you prefer a different base.
Consider the size and shape – traditional egg cups are perfect for tiny succulents, air plants, or cress, offering just enough space for a small plant to thrive without overwhelming your tabletop. Look for sturdy designs that will hold up well to painting and potting. If you’re feeling adventurous, you might even scour thrift stores for unique vintage egg cups to give your planters an extra layer of character.
Essential Materials & Tools for Your Face Planter Project
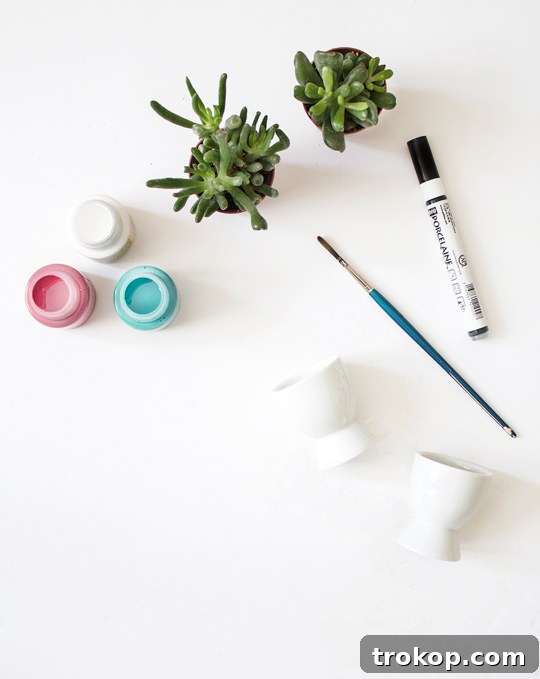
Gathering your supplies is the first exciting step in bringing your DIY mini face planters to life. Here’s everything you’ll need:
- Plain White Porcelain Egg Cups: As mentioned, these are your primary canvases. Their smooth surface ensures optimal paint application and vibrant colors.
- Porcelain Paint in Colors of Your Choice: Opt for high-quality porcelain paints that are designed to be baked for durability and dishwasher resistance. This ensures your designs last for years to come. You can find a great selection of colors here. Consider matte or glossy finishes to add different textures to your designs.
- White and Black Fine-Tip Porcelain Paint Pens: These pens are absolutely crucial for achieving crisp, neat facial features. A fine tip allows for intricate details like eyes, eyelashes, and small mouths, making the process much easier and more precise than using a paintbrush for these tiny elements.
- Paint Brush: A small, soft paintbrush will be useful for applying larger areas of color, such as the base of the “hair” or any decorative elements on the body of the egg cup.
- Mini Potting Plants: The “hair” of your face planter! Succulents, small cacti, air plants, and even cress seeds (for a nostalgic nod to childhood) are perfect choices. Consider plants that stay compact or have interesting textures and colors that can mimic different hairstyles.
- Baking Tray: For curing your painted egg cups in the oven.
Step-by-Step: Bringing Your Mini Face Planters to Life
Follow these easy instructions to create your charming DIY mini face planters. Remember, creativity is key, so feel free to adapt these steps to match your unique vision!
- Prepare Your Workspace and Egg Cups: Start by ensuring your egg cups are clean and completely dry. Any dust or residue can interfere with paint adhesion. Preheat your oven to the temperature suggested on your porcelain paint instructions – this is crucial for setting the paint and making it durable.
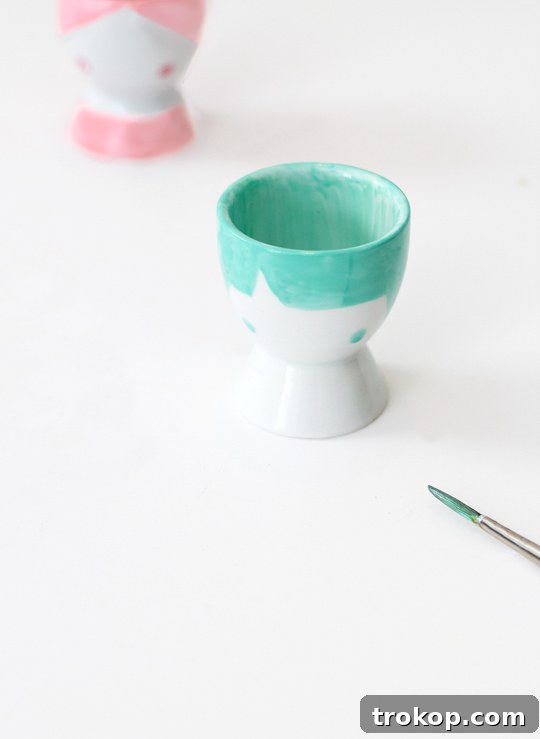
- Paint the Hair Base: Select one of your porcelain paint colors to create the base of your planter’s “hair.” Using a small paintbrush, carefully apply the paint to the upper portion of the egg cup. You can create various styles – a simple fringe (bangs), a side part, or even a full, rounded top. Don’t worry about perfection at this stage; we’ll add detail later.
- Define the Face and Neckline: Next, using a different color or the same color, paint two distinct “cheeks” fairly low down and spaced apart on the egg cup. This provides a guide for your facial features. Then, add a decorative “neckline” at the bottom rim of the egg cup, if desired. This could be a simple band of color or a more intricate design.
- Add Hair Details (Once Dry): Once the base hair color is completely dry to the touch, use your paintbrush with some white (or a contrasting) paint to create lines within the hair. These lines will add texture and depth, mimicking strands of hair or playful highlights. Experiment with different brush strokes for curly, wavy, or straight hair effects.
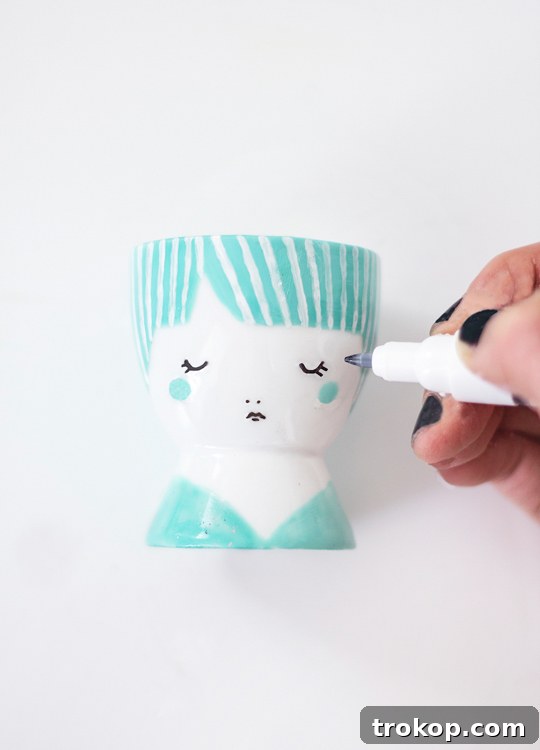
- Draw the Expressive Eyes: Now it’s time for the most captivating feature! Using your black fine-tip porcelain pen, carefully draw the eyes just above the painted cheeks. For open eyes, simple dots or small ovals work well. To create closed, sleepy eyes, draw a shallow ‘u’ shape and add two small lines for delicate eyelashes. Feel free to experiment with different eye shapes and sizes to convey various moods.
- Complete the Facial Features: With your black fine-tip pen, add two tiny dots for nostrils and then draw on some lips. You can give your planter a cheerful smile, a contemplative pout, or a surprised ‘O’ shape. For extra character, add small freckles with the white pen or rosy cheeks with a touch of pink paint. Once all the painting is done, leave the egg cups to dry completely. For best results and to be safe, allow them to air dry for up to 24 hours before baking.
- Bake for Durability: Carefully place your fully dried face planters on a baking tray. Bake them in the preheated oven for the time specified on your porcelain paint instructions. This baking process cures the paint, making it permanent and, depending on the paint brand, dishwasher resistant. Once baked, turn off the oven and allow the planters to cool completely before handling.
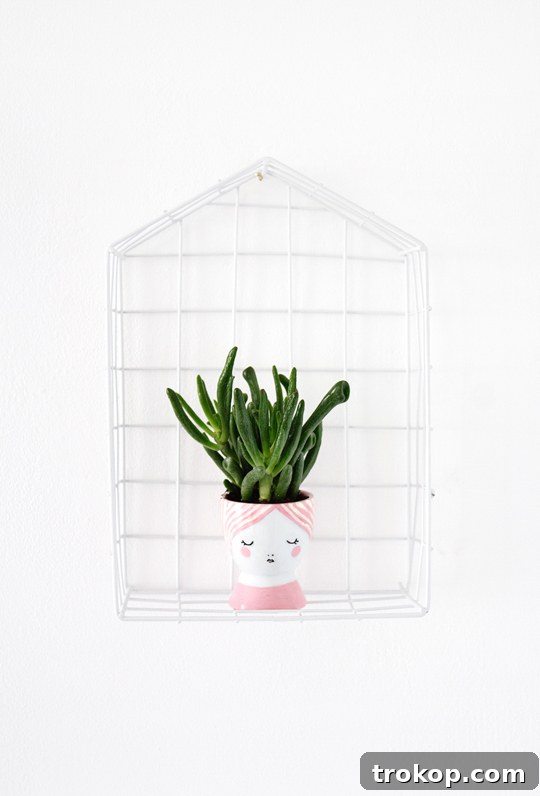
- Plant Your Green “Hair”: Your DIY Mini Face Planters are now ready for their leafy locks! Carefully plant your chosen mini plants, giving them a fabulous green hairdo. Ensure you use appropriate potting mix for your plant type.
Unleash Your Creativity: Design Ideas & Personalization
The beauty of these DIY mini face planters lies in their limitless potential for personalization. Don’t stop at just one design; let your imagination run wild!
- Express Yourself: Experiment with a spectrum of emotions! Create happy, sleepy, mischievous, or surprised faces. Subtle changes in eye shape or mouth curvature can drastically alter the planter’s mood.
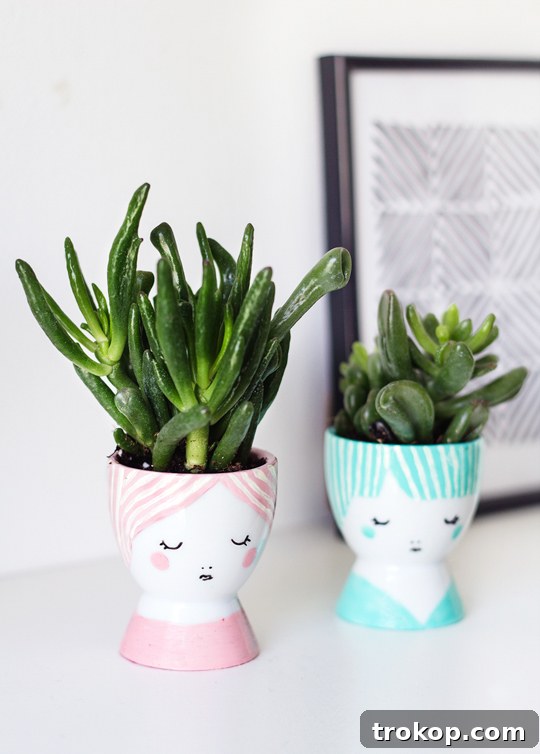
- Hairstyle Extravaganza: The plant you choose is the ultimate hairstyle. A spiky succulent can mimic a punk rock ‘do, trailing ivy can be long flowing locks, and a fluffy moss can create a soft, rounded bob. Consider different plant colors and textures for added flair.
- Accessorize Away: Think beyond just painted features. You can glue tiny felt glasses onto a scholarly face, attach a miniature bow near the “ear” for a chic look, or even fashion a small paper hat for a festive touch.
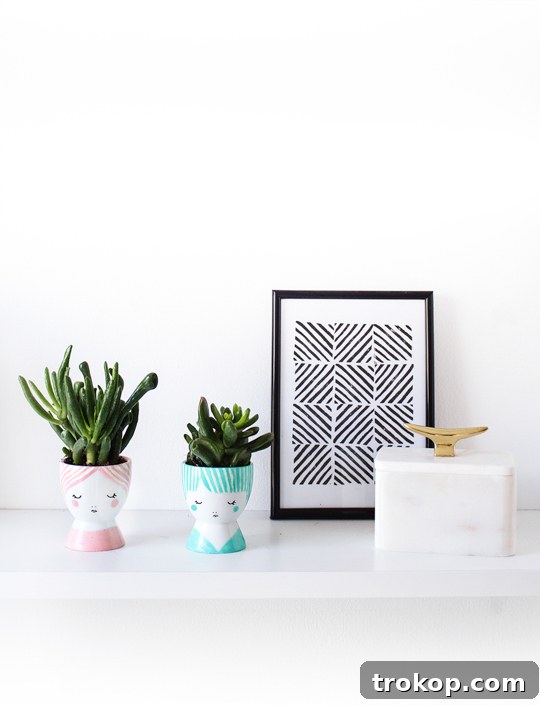
- Create a Planter Family: Why make just one? Craft a collection of face planters, each with distinct features and “hairstyles,” to create a charming “family” or a diverse crowd of plant personalities. They look fantastic grouped together on a shelf or windowsill.
- Seasonal Themes: Adapt your planters for holidays or seasons. Give them spooky faces for Halloween, festive colors for Christmas, or pastel hues for spring.
- Pattern Play: Don’t limit the paint to just faces. Add stripes, polka dots, or abstract patterns to the body of the egg cup for extra visual interest.
Basically, embrace the joy of crafting and have endless fun making these not-so-edible little treats that are sure to bring a smile to anyone’s face!
Expert Tips for Long-Lasting DIY Face Planters
To ensure your charming DIY face planters thrive and bring you joy for a long time, consider these important tips:
- Allow for Complete Drying: This step cannot be overstated. Before introducing any plants or soil, ensure your painted egg cups are absolutely bone dry and fully cured according to the porcelain paint’s instructions. This prevents moisture from seeping under the paint, which could cause chipping or peeling over time, ensuring your designs remain vibrant and intact.
- Strategic Plant Selection: Choose plants that are well-suited for small containers and low-drainage environments. Succulents and cacti are excellent choices due to their minimal watering needs and compact growth habits. They are forgiving and relatively easy to care for, even for novice gardeners. For an even simpler option, consider air plants, which require no soil at all and can simply rest inside your egg cup, needing only occasional misting.
- Address Drainage Challenges: Egg cups typically lack drainage holes, which is a critical consideration for plant health. To mitigate this, place a layer of small pebbles or activated charcoal at the bottom of the egg cup before adding soil. This creates a small reservoir that prevents roots from sitting directly in standing water. Alternatively, select plants that prefer consistently moist soil or, as mentioned, utilize air plants to bypass the drainage issue entirely.
- Mindful Watering Techniques: Due to the small size and lack of drainage, overwatering is the biggest threat to plants in egg cup planters. Water sparingly, using a small dropper or a watering can with a thin spout to deliver water directly to the soil without saturating it. Allow the soil to dry out almost completely between waterings. For succulents, err on the side of underwatering rather than overwatering.
- Optimize Lighting: Place your face planters in a location where your chosen plants will receive adequate light. Most succulents and cacti thrive in bright, indirect sunlight, while some tiny ferns or mosses might prefer shadier spots. Research the specific light requirements of your plants to ensure their long-term health.
- Personalize with Extra Flair: Once your plants are settled, you can further enhance your DIY face planter. Add decorative stones around the base of the plant, tiny figurines, or even a small painted sign with a witty plant-related pun. Let your creativity guide you in adding those final touches that make each planter truly yours.
More Inspiring DIY Planter & Vase Projects
If you’ve enjoyed creating these charming face planters, you might love exploring other DIY projects to bring more handmade beauty into your home. Here are some ideas to spark your next crafting adventure:
- Colored Glazed Stacked Vases
- Mini Copper Planters
- Confetti Vases
- Mid Century Planters
DIY Mini Face Planters: At a Glance
This quick guide summarizes the key details for crafting your own adorable Mini Face Planters.
- Course: DIY, Craft
- Category: Plants, Home Decor, Gift Ideas
- Keywords: diy mini face planters, egg cup planters, tabletop decor, succulent pots, unique gifts, home decor diy, easy craft project, plant art
- Active Time: Approximately 40 minutes (for painting and initial setup)
- Dry Time: Up to 24 hours (crucial for paint curing)
- Total Time: Approximately 1 day (including drying time)
- Estimated Cost: Around $40 (depending on paint and plant choices)
Equipment
- Paint brush
- Baking tray
Materials
- Plain white porcelain egg cups
- Porcelain paint (dishwasher resistant, in colors of your choice)
- White fine-tip porcelain paint pen
- Black fine-tip porcelain paint pen
- Mini potting plants (e.g., succulents, cacti, air plants)
- Potting soil (if needed for your chosen plants)
- Small pebbles or activated charcoal (for drainage, optional)
Instructions
- Preheat your oven to the temperature specified on your porcelain paint instructions.
- Paint the base color for your planter’s “hair” on the top portion of the egg cup.
- Paint two cheeks, placed fairly low and wide apart, and add a neckline design at the bottom.
- Once the base colors are dry, use a paintbrush with white paint to create delicate lines and textures in the “hair.”
- Employ your black fine-tip porcelain pen to draw the eyes just above the cheeks. For closed eyes, use a shallow ‘u’ shape with two small lines for lashes.
- Add two tiny dots for nostrils and carefully draw the lips. Feel free to give your planter a cheerful smile. Allow your creation to dry completely for up to 24 hours.
- Place the dried egg cups on a baking tray and bake them for the recommended time on your paint instructions. Once baked, let them cool completely before handling and planting.

We hope this guide inspires you to create your own collection of delightful DIY Mini Face Planters! They truly are a charming way to personalize your home and inject a bit of playful character into your plant decor. Don’t forget to share your amazing creations with us on Instagram using the hashtag #sugarandclothloves. We absolutely love seeing your unique designs and celebrating your crafting success!