
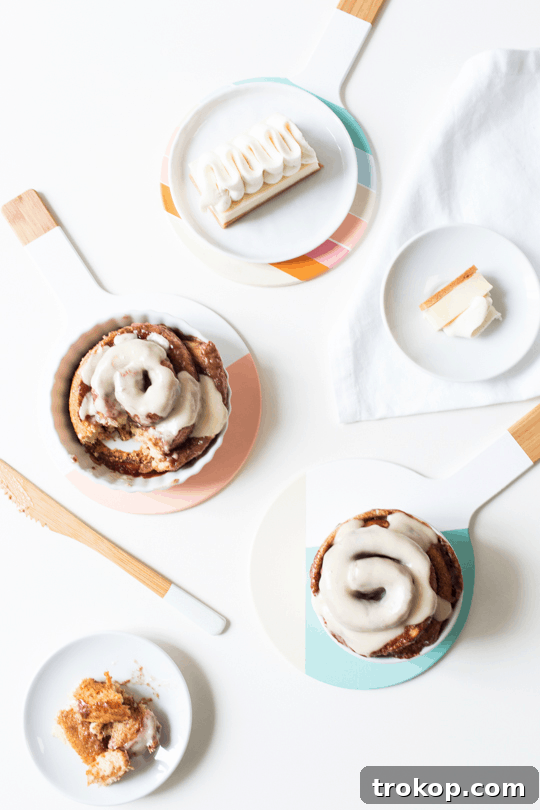
Elevate Your Table Setting: DIY Color Block Trivets for the Stylish Hostess
Transform your dining experience and infuse your home with a burst of personalized charm using these captivating DIY color block trivets. Whether you’re hosting a grand holiday feast or simply enjoying a weeknight meal, these handmade accents are more than just functional — they are a statement. They subtly announce to your guests that you are, indeed, the hostess with the mostest, someone who pays attention to every detail, creating an inviting and stylish atmosphere with ease.
In a world often dominated by mass-produced items, there’s an undeniable allure to crafting something with your own hands. Not only does it allow for complete customization to perfectly match your aesthetic, but it also adds a unique, heartfelt touch that elevates your home decor. These color block trivets are the perfect project to add that personal flair, offering both practical utility and undeniable style to any kitchen or dining area.
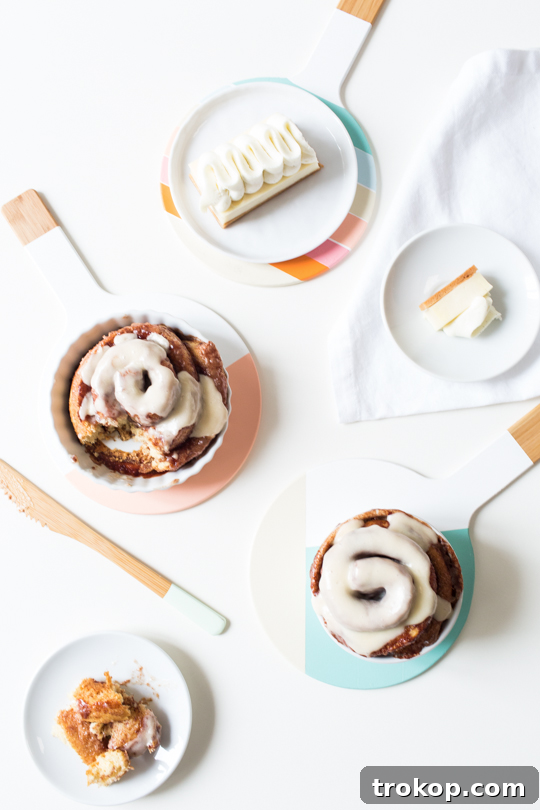
The beauty of DIY lies in its ability to bring a fresh perspective to everyday items. After a refreshing trip, it’s wonderful to channel renewed energy into creative pursuits. What better way to celebrate the joy of home than with a project that combines the warmth of hospitality with a splash of vibrant colors? Especially as the holidays approach, our thoughts turn to endless food and delightful crafting sessions – truly what many of us live for each year!
These DIY color block trivets perfectly marry those two passions. They are designed to help you effortlessly spice up your dining room table or kitchen countertops, ensuring that your beautiful surfaces are protected while adding a chic, modern touch. Their presence instantly elevates your serving style, making every dish feel like a special occasion.
For a truly cohesive look, these trivets are an ideal companion for a DIY Paper Color Block Table Covering. Imagine a beautifully coordinated table, where every element reflects your personal style. You have complete freedom to unleash your creativity with these little guys – choose any colors, shapes, or patterns you desire. All you need to start is a blank slate trivet and your reliable ScotchBlue™ Painter’s Tape to define your design.
To further impress your guests and complete your entertaining ensemble, pair these trivets with some cute and unique DIY Geometric Coasters. The coordinated craftsmanship will surely leave a lasting impression and gather many compliments!
Crafting Your Own Style: Essential Materials & Tools for DIY Color Block Trivets
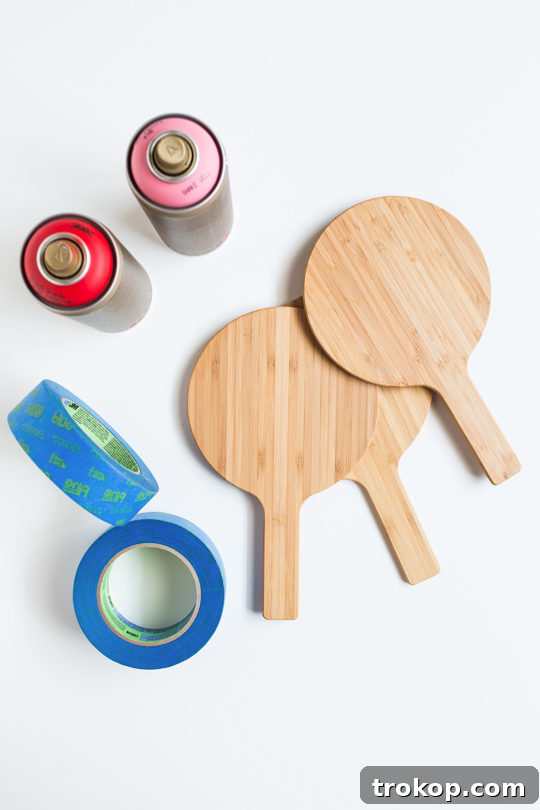
Embarking on any DIY project begins with gathering the right tools and materials. For these stylish color block trivets, selecting quality items is key to achieving a professional and durable finish. Here’s what you’ll need to bring your vision to life:
- Bamboo Trivets: Opt for sturdy bamboo trivets as your base. Bamboo is an excellent choice due to its natural heat resistance, durability, and sustainable nature. Its smooth surface also provides an ideal canvas for painting.
- ScotchBlue™ Painter’s Tape Multi-Surface with Advanced Edge-LockTM Paint Line Protector 2093EL: This painter’s tape is crucial for achieving crisp, clean lines in your color block design. Its Edge-Lock technology prevents paint bleed, ensuring sharp divisions between colors.
- Heat Tolerant Paint or Spray Paint: This is perhaps the most important material, ensuring your trivets can withstand the heat of hot dishes. I recommend Montana Gold Acrylic Spray Paints for their vibrant colors and excellent coverage. Whatever paint you choose, double-check that it is heat resistant up to at least 120 degrees Celsius (250 degrees Fahrenheit) to prevent damage or off-gassing when hot items are placed on them. Acrylic enamel paints are often a good choice for durability and heat resistance.
- White Base Coat Primer (Optional but Recommended): A good quality primer can improve paint adhesion and ensure your chosen colors appear true and vibrant, especially if your trivets are made of a darker material.
- Fine-Grit Sandpaper: For light sanding before painting, which helps the paint adhere better.
- Clear Sealant (Optional): A heat-resistant clear sealant can add an extra layer of protection and durability to your finished trivets, enhancing their lifespan and resistance to wear and tear.
- Old Newspaper or Drop Cloth: To protect your work surface from paint spills.
- Gloves and Mask: Especially when working with spray paints, ensure proper ventilation and wear protective gear for your safety.
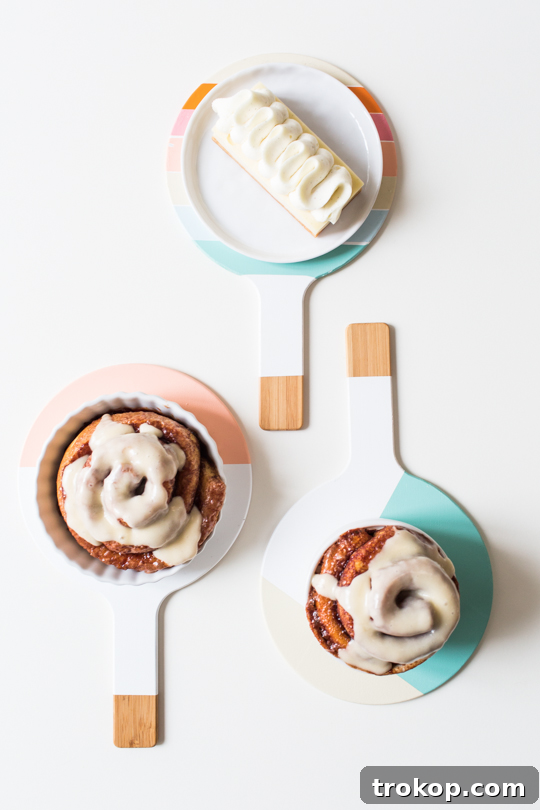
Step-by-Step Guide: How to Create Your Own DIY Color Block Trivets
Creating these vibrant color block trivets is a straightforward and rewarding process. Follow these steps carefully to ensure a beautiful and lasting finish for your handmade kitchen essentials.
Step 1: Prepare Your Trivets with a Base Coat
Begin by preparing your bamboo trivets. If your trivets have handles and you wish to leave a natural bamboo accent, use your ScotchBlue™ Painter’s Tape to carefully tape off a small section at the end of the handles. This will ensure that part remains unpainted. Next, apply a uniform white base coat to the entire trivet surface. This initial layer provides an even foundation for your vibrant colors and helps them pop. Allow this base coat to dry completely according to the paint manufacturer’s instructions, typically for at least 2-4 hours, or overnight for best results.
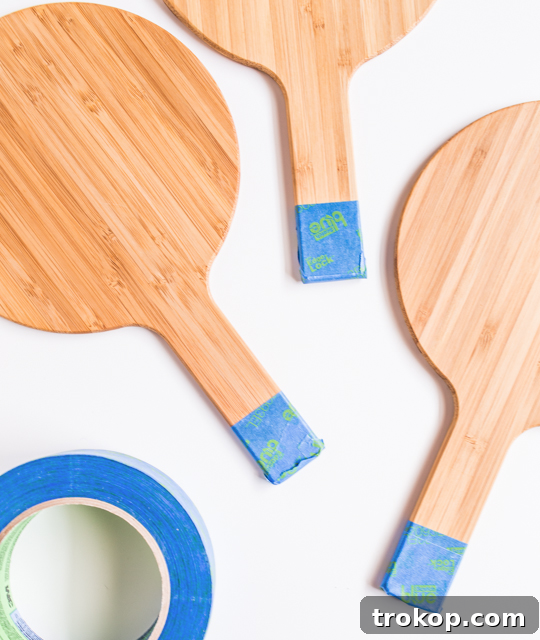
When it comes to taping and painting over freshly painted surfaces, the type of painter’s tape can make a significant difference. While ScotchBlue Multi-Surface tape generally yields great results, for ultimate precision and to prevent lifting of your base coat, consider using ScotchBlue Delicate Surfaces tape (after the base coat has cured for at least 24 hours). This specialized tape is designed for recently painted areas, providing an even cleaner edge.
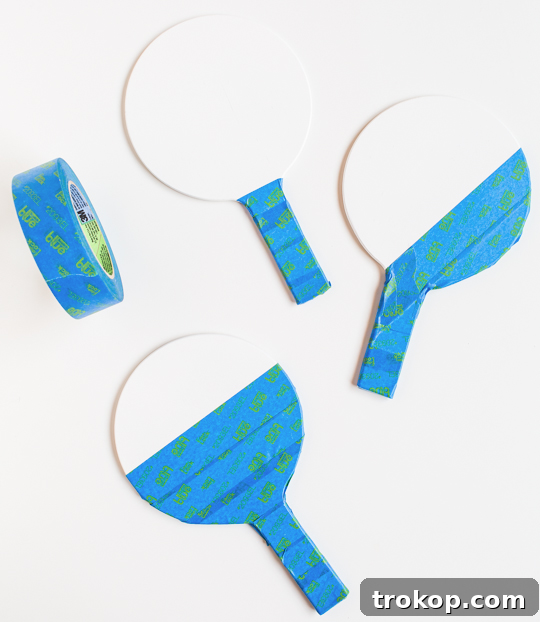
Step 2: Define Your First Color Block with Tape
Once your base coat is thoroughly dry, it’s time to tape off the sections for your first color block. Carefully apply the painter’s tape to create the desired shape or line, ensuring that only the area you intend to paint with your next color is exposed. Press down firmly along all tape edges to create a tight seal, which will prevent paint from bleeding underneath and help you achieve those coveted sharp lines.
Step 3: Apply Your First Color and Let it Dry
With your first section taped, apply your chosen heat-tolerant paint. For spray paint, use light, even coats to avoid drips and achieve smooth coverage. If using brush-on paint, ensure even strokes. Allow this layer to dry completely according to the paint’s instructions. Patience here is key to a flawless finish.
Step 4: Remove Tape and Allow to Cure
Once the paint is dry to the touch, carefully remove the painter’s tape. Peel it off slowly and at a 45-degree angle for the cleanest lines. Let this painted layer dry and cure for at least an hour, or until it’s completely sealed and non-tacky to the touch. This prevents smudging or damage when you apply the next layer of tape.
Step 5: Repeat for Additional Colors or Patterns
Now, re-tape your trivet for your next color block. This might involve taping over previously painted areas, so ensuring the previous layer is dry is paramount. Apply your next color, let it dry, remove the tape, and allow to cure. Continue this process for as many colors or layers as your design requires.
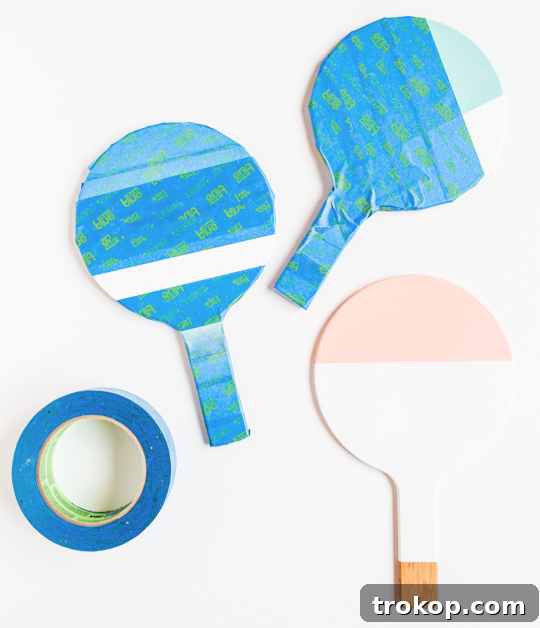
You can create a simple single color block tip, experiment with one or two overlapping colors for a dynamic effect, or even create intricate stripes across the entire surface. The possibilities are endless!
Once you are finished with all your desired colors and have removed all the tape, allow your trivets to seal and cure for a full 24 hours before putting them to use. This final curing time ensures the paint is fully hardened and ready to withstand heat and daily wear.
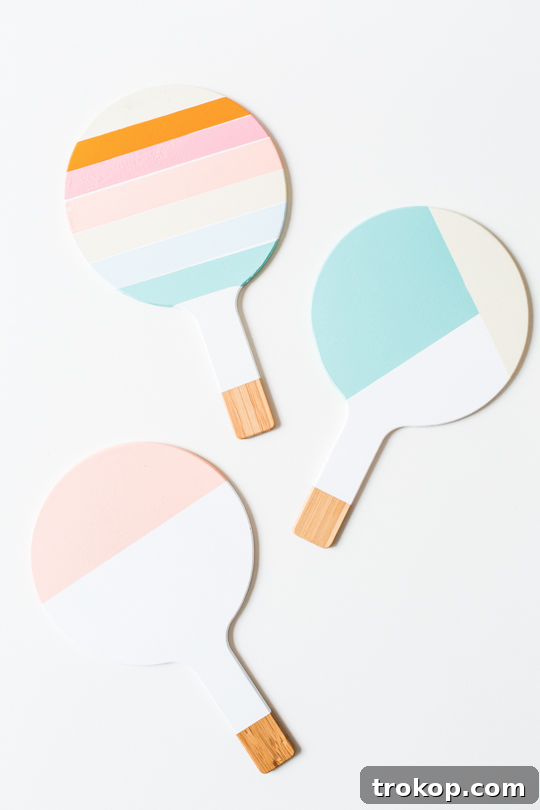

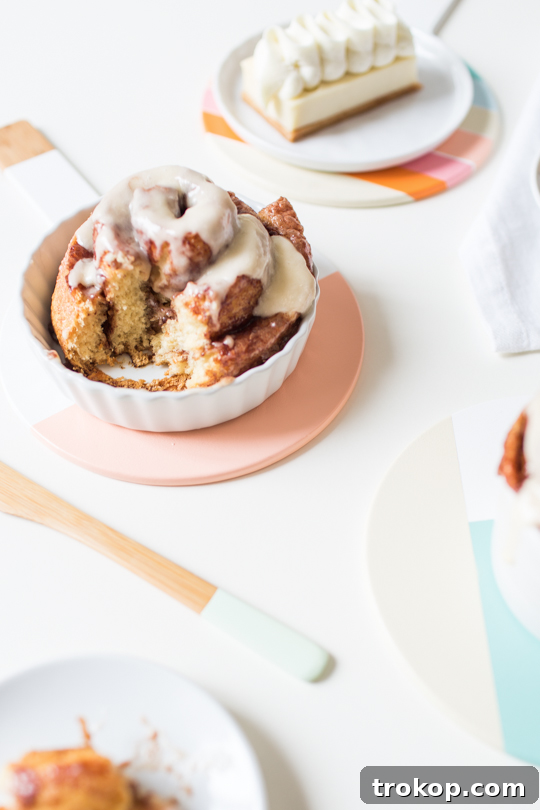
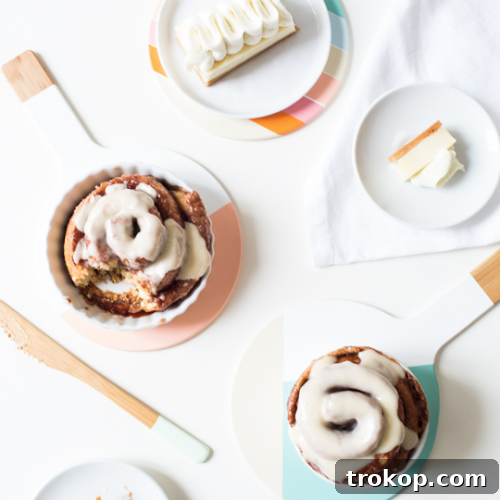
Now, when your delicious baked goods or comforting casseroles are fresh out of the oven and ready to be served, simply place them atop your new colorful trivets. Not only will they protect your precious table surfaces from heat damage, but they will also add a captivating pop of color and visual interest to your holiday tabletops and everyday meals. It’s these small, thoughtful details that truly make a house a home and a hostess shine!
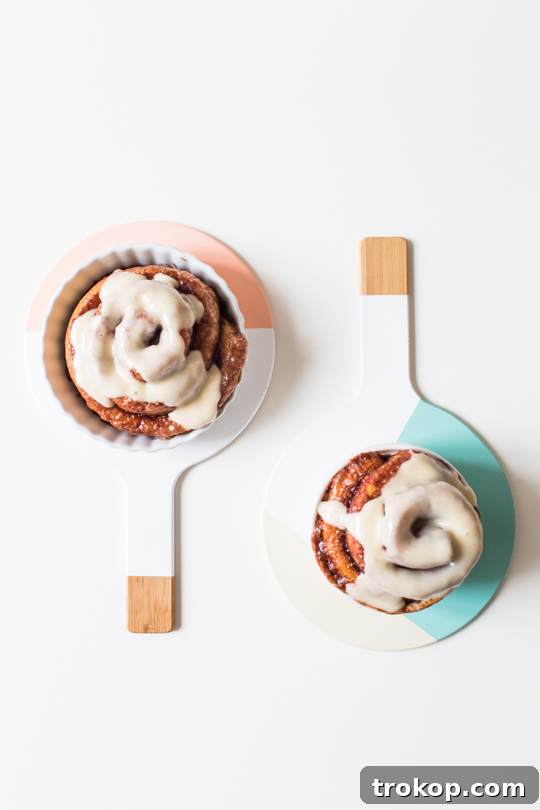
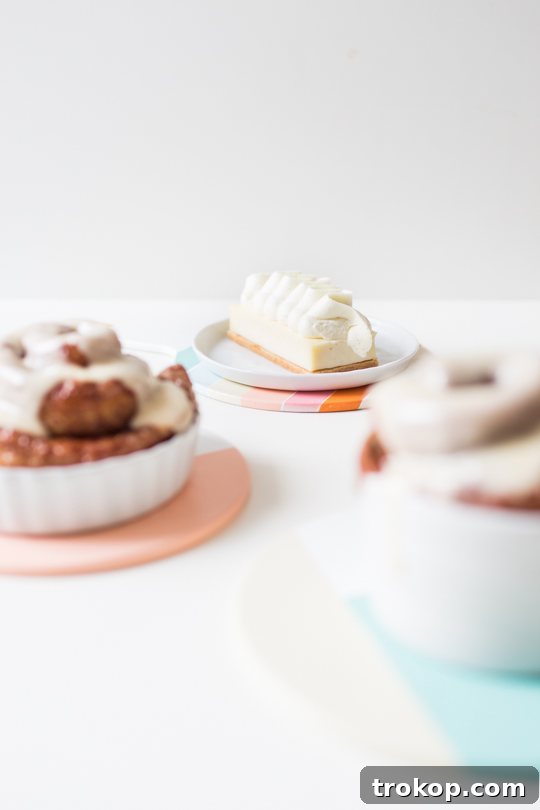
And speaking of deliciousness, doesn’t that dessert look absolutely divine? There’s a special joy in pairing a beautiful DIY project with something equally delightful, like these treats. I always find immense satisfaction in DIY projects that perfectly complement the sweet moments in life!
Expert Tips for Flawless DIY Trivets
Achieving stunning results with your DIY trivets goes beyond just following the steps. Here are some pro tips to help you get the best possible finish and ensure your creations are both beautiful and durable:
- Choose the Right Material: As mentioned, bamboo is excellent, but wood, cork, or even ceramic tiles can work. Always ensure your chosen base material is naturally heat-resistant or can be made so with appropriate sealants.
- Precision in Measurements and Taping: Before applying any tape, carefully plan your design. Use a ruler and pencil to lightly mark out your color blocks. When applying painter’s tape, press firmly along the edges to create a strong seal. This is the single most critical step for achieving crisp, bleed-free lines.
- Take Your Time with Each Layer: Rushing through the process is the quickest way to end up with smudges, uneven coats, or compromised paint adhesion. Allow ample drying time between coats and before removing tape for each color.
- Apply Multiple Thin Coats of Paint: Instead of one thick coat, which can lead to drips, uneven coverage, and longer drying times, opt for two or three thin coats. This technique provides a smoother, more professional-looking finish and allows each layer to cure properly.
- Work in a Well-Ventilated Area: Especially when using spray paint, ensure you’re in a space with good airflow. This protects your health and helps the paint dry more efficiently.
- Gentle Tape Removal: Once the paint is dry to the touch, peel off the painter’s tape slowly and at a sharp angle (around 45 degrees). This technique minimizes the risk of lifting any underlying paint.
- Consider a Top Coat or Sealer: For added durability and to protect your beautiful design from moisture and wear, apply a heat-resistant clear top coat or sealant once all paint layers have fully cured. This will extend the life of your trivets significantly.
- Practice Makes Perfect: If you’re new to painting or intricate taping, consider practicing your technique on a scrap piece of wood or an extra trivet before tackling your main project.
Discover More DIY Inspiration for Your Home
The world of DIY home decor is vast and full of exciting possibilities. If you’ve enjoyed creating these colorful trivets, you’ll love exploring other projects that add charm and personality to your living space. Here are a few more inspiring ideas to get your creative juices flowing:
- DIY Hanging Marble Serving Board For Under $5: Craft an elegant and functional serving board that doubles as a stylish kitchen display piece.
- DIY Basket Pendant Light – How To Make A Basket Light Fixture: Add a touch of natural texture and warmth to any room with a unique, handmade pendant light.
- DIY Mini Wooden Serving Boards: Perfect for appetizers, desserts, or individual place settings, these small boards are versatile and chic.
- DIY Footed Display Bowls: Elevate your decor with custom-made bowls that can hold anything from fruits to decorative items, adding a touch of sophistication.
This post is sponsored by ScotchBlue™ Painter’s Tape. All opinions are my own and additional products used in the project were selected by me. Thanks for supporting the brands that allow us to bring you bigger and better content!
Follow us on: Pinterest // Twitter // Facebook
DIY Color Block Trivets
These fun and colorful trivets are a great way to add a pop of color to your kitchen. Plus, they’re easy to make!
Active Time: 6 hours
Sealing Time: 1 day
Total Time: 1 day 6 hours
Course: DIY
Category: Entertaining Decor
Equipment
- ScotchBlue™ Painter’s Tape Multi-Surface with Advanced Edge-LockTM Paint Line Protector 2093EL
- Heat tolerant paint or spray (I used Montana Gold Acrylic Spray Paints. Make sure that the paint you select is heat resistant up to 120 degrees.)
Materials
- Bamboo trivets
Instructions
- If you’d like to leave a little of the bamboo showing, first tape off a small section of the end of the handles. Then, paint the trivets with a white base coat. For best results on freshly painted surfaces (24 hours old), consider ScotchBlue Delicate Surfaces tape for subsequent taping steps.
- Tape off the other remaining sections, leaving only the part you’d like to paint with your next color showing.
- Paint your next color on and let dry completely.
- Remove the tape and let that layer dry for an hour or so until completely sealed to the touch.
- Re-tape for your next layer and repeat the painting and drying process. Once you’re finished with all colors, remove all tape and let the trivets seal for 24 hours before using.
Estimated Cost: $20
Keywords: diy color block trivets

Don’t forget to share your amazing DIY color block trivets with us on Instagram using the hashtag #sugarandclothloves. We always love seeing all of your creative projects and how you bring them to life in your own homes! Looking for even more interior design inspiration and hands-on projects? You can find all of our home decor tutorials and creative ideas right here on our blog.
See More DIY Posts
Create a rustic yet chic clothing rack using natural branches, perfect for displaying garments or adding a unique decorative touch to your bedroom or entryway.
Continue Reading
Elevate your party decor with these whimsical frill balloons, adding a playful and festive atmosphere to any celebration.
Continue Reading
Showcase your beloved plants in style with a custom-built acacia wood plant stand, bringing natural elements and warmth into your home.
Continue Reading
Transform a simple IKEA TV unit into a chic, high-end piece with a trendy rattan hack, adding texture and sophistication to your entertainment area.
Continue Reading
Combine crafting with culinary delight by making your own ombre fry stands and pairing them with a delicious parmesan garlic recipe, perfect for entertaining.
Continue Reading
Design a versatile and customizable pegboard headboard for your bedroom, offering both a unique decorative element and practical storage solutions.
Continue Reading