
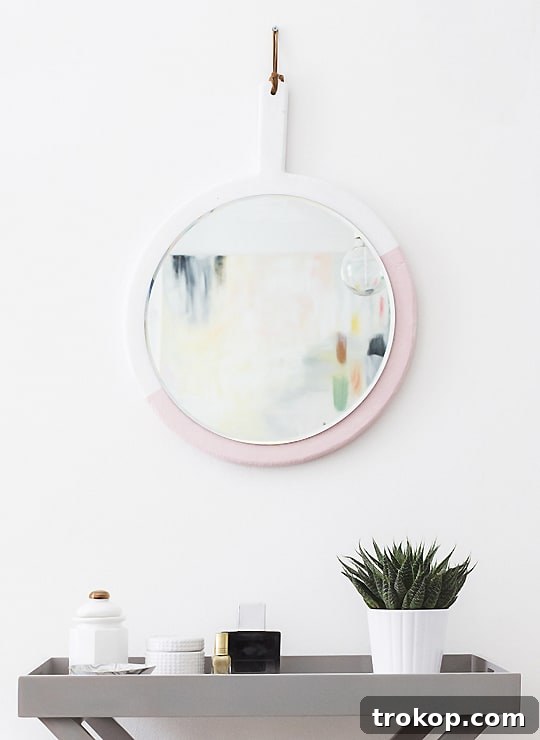
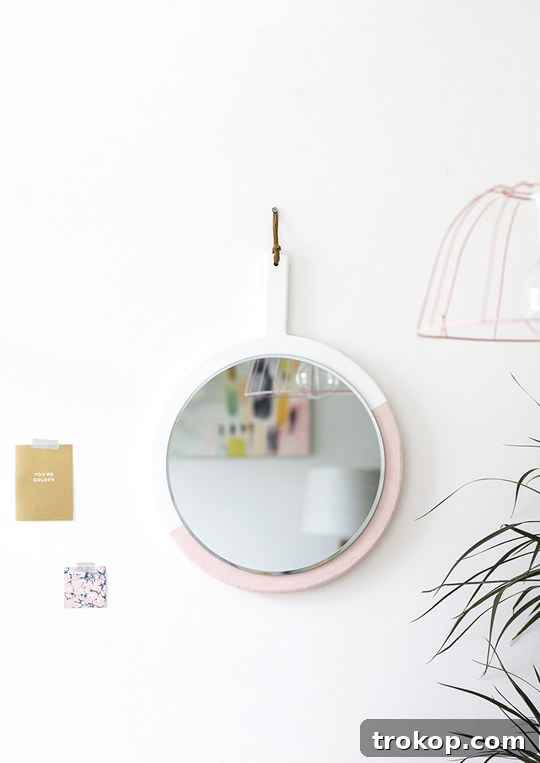
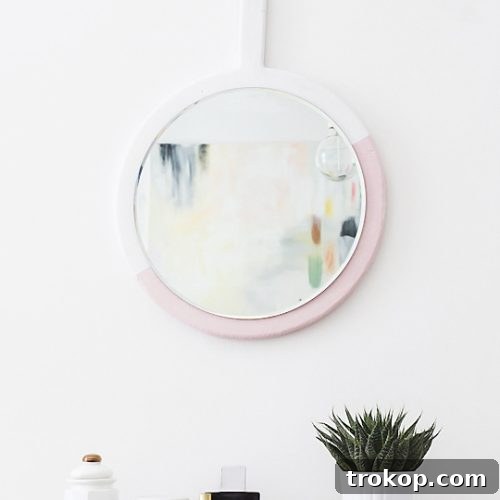
Who knew a simple kitchen cutting board could be transformed into a stunning piece of wall art? This creative DIY project takes an ordinary item and elevates it into a vibrant, color-blocked hanging wall mirror, blending practicality with personalized style. Say goodbye to plain walls and hello to a unique statement piece that reflects your individual taste.
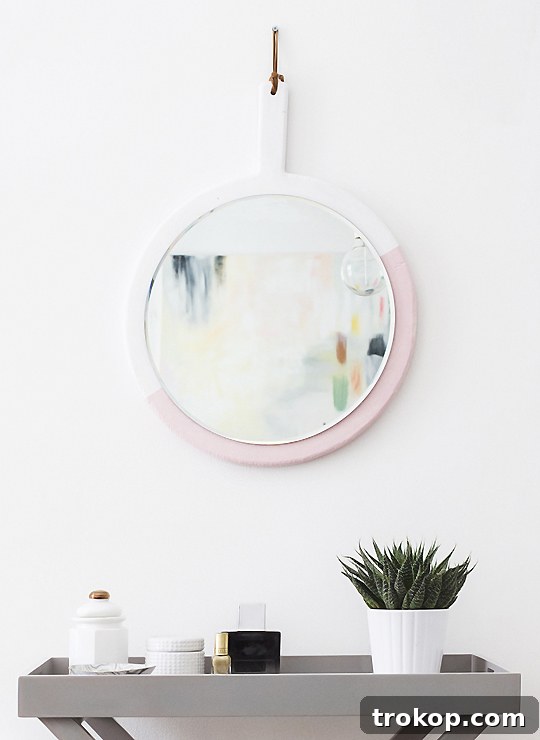
Hello fellow DIY enthusiasts! Teri here, excited to share a truly enjoyable and impactful project that will add a serious touch of charm to any room. It’s no secret that round mirrors are currently a major trend in home decor, offering a chic and contemporary aesthetic. I’ll confess, I’ve succumbed to the allure and bought a few myself. However, I soon found myself pondering: could I craft my own version, infusing it with a unique personality that truly stands out? The answer, as you’re about to discover, is a resounding yes!
The ingenious foundation for this project is a handled wooden chopping board, especially one that conveniently features a pre-drilled hanging hole. This little detail is a huge bonus, as it means no drilling is required – always a win for simplifying any DIY endeavor. The true beauty of this project lies in its customization potential: you get to handpick the colors, decide on the finish, and select the perfect mirror size to seamlessly complement your existing decor and personal style. After some creative experimentation to pinpoint the most effective method for securely attaching the mirror, I perfected a technique that is not only straightforward and robust but also incredibly beginner-friendly. Are you ready to dive in and create your very own custom hanging mirror?
Embarking on a DIY journey allows you to craft pieces that are not only functional but also deeply personal. This upcycled cutting board mirror project is a testament to sustainable creativity, giving a new lease of life to an everyday object. It’s an ideal weekend craft that promises a high-impact decorative result without a hefty price tag or complicated tools. Let’s gather our supplies and begin transforming an unassuming chopping board into a captivating focal point for your home.
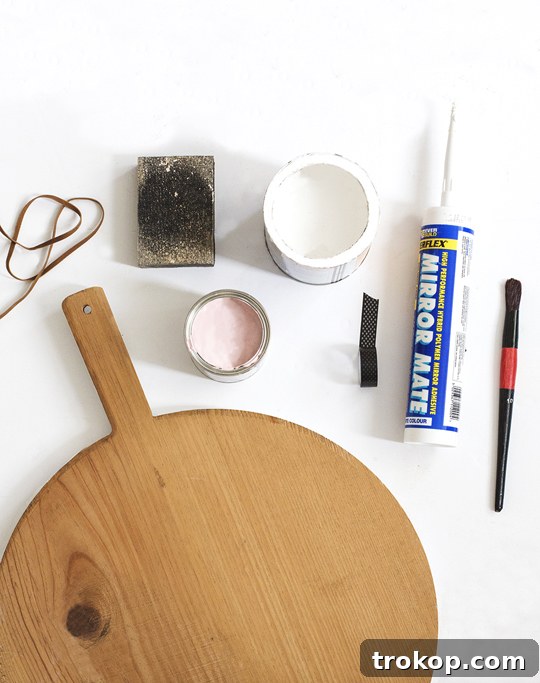
Table of Contents
Materials and Tools Needed
Gathering your materials is the exciting first step in any DIY project. For this charming hanging mirror, most items are readily available at craft stores or online. Remember, quality materials ensure a lasting and beautiful result.
- Wooden Cutting Board with Handle: The star of our show! We recommend a round or paddle-shaped pizza serving board, like this pizza serving board. Opting for one with a pre-drilled hanging hole will save you a step. If your board has a glossy, sealed, or heavily oiled finish, it’s crucial to sand it down thoroughly to create a rough surface. This rough texture will allow the paint and mirror adhesive to bond much more effectively, preventing peeling or detachment over time. Pay special attention to the central area where the mirror will be placed.
- Round Craft Mirror: Select a mirror that is 1 to 1.5 inches smaller in diameter than your cutting board. This proportion ensures a visible and aesthetically pleasing painted border around the mirror. You can find similar options here. Consider a mirror with a smooth, polished edge for safety and a refined look.
- Painter’s Tape: High-quality painter’s tape is essential for creating crisp, clean lines for your color-blocked design. Choose a tape designed for delicate surfaces if your board has any intricate details you wish to protect, or standard blue tape for general use.
- Two Paint Colors: The creative heart of your project! Choose two colors that either beautifully contrast or subtly complement each other for a sophisticated color-blocked effect. One color can serve as your base coat, covering a larger section of the board. Acrylic craft paints or chalk paints work wonderfully for their vibrant pigments and good coverage on wood.
- Paint Brush: A good quality synthetic brush will provide smooth, even coverage. Have a smaller brush on hand for any touch-ups or intricate areas.
- Cord or String for Hanging: This element not only provides functionality but also adds to the mirror’s aesthetic. Suede cord offers a lovely texture and rustic appeal, but sturdy leather cord, macrame rope, or even thick decorative twine can also be used. For added strength and visual impact, it’s advisable to double up the cord, especially for larger or heavier mirrors.
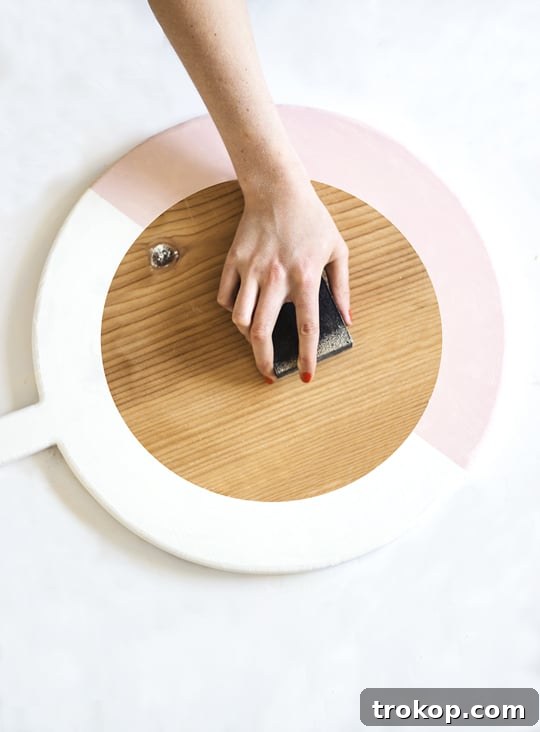
- Sanding Block or Sandpaper: As mentioned, this is only needed if your chopping board has a glossy, sealed, or very smooth finish. A medium-grit sanding block (120-180 grit) is generally sufficient to prepare the surface for paint and adhesive.
- Mirror Adhesive: This is a non-negotiable item! It’s imperative to use an adhesive specifically formulated for mirrors, as many general-purpose adhesives can damage the silvering on the back of a mirror, causing unsightly dark spots over time. We recommend a strong, flexible mirror adhesive like this one. A caulking gun will be required for secure and precise application of most mirror adhesives.
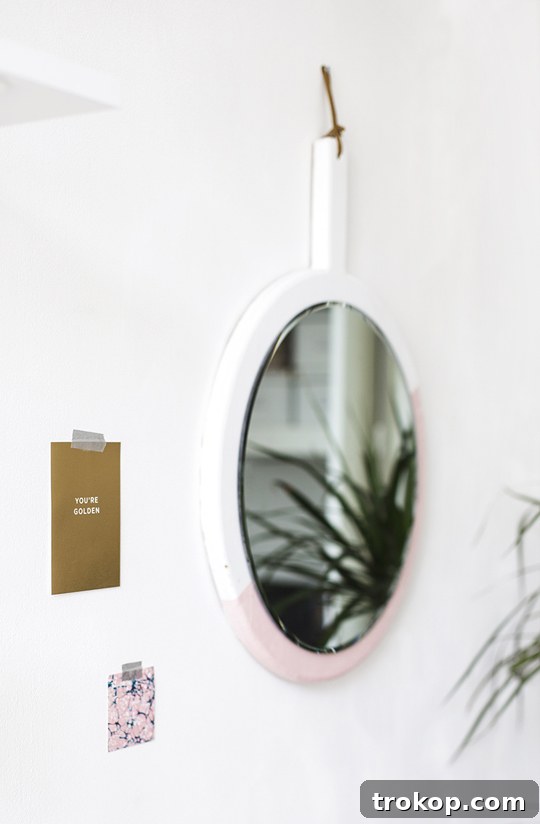
How to Make a Color Block DIY Hanging Wall Mirror
Creating your custom hanging mirror is a rewarding process. Follow these detailed steps to achieve a professional and stylish finish.
Step 1: Prepare Your Cutting Board & Mark the Mirror Area
If your wooden cutting board has any sort of sealant, glossy finish, or is exceptionally smooth, begin by lightly sanding its entire surface with your sanding block. This creates tooth for the paint and adhesive to grip onto. Once sanded, wipe away any dust with a damp cloth and let it dry completely.
Next, carefully mark out a central circular area on your board that is slightly smaller than the diameter of your round craft mirror. You can achieve this by placing the mirror face down on the board, tracing around it with a pencil, and then drawing a second, smaller circle about 0.25 inches inside the first. This inner circle defines the area that will remain unpainted, ensuring the mirror adhesive bonds directly to the raw, prepped wood for maximum strength. If you prefer a more organic look, you can skip precise marking and simply estimate the unpainted center by eye.
Step 2: Apply Painter’s Tape for Color Blocking
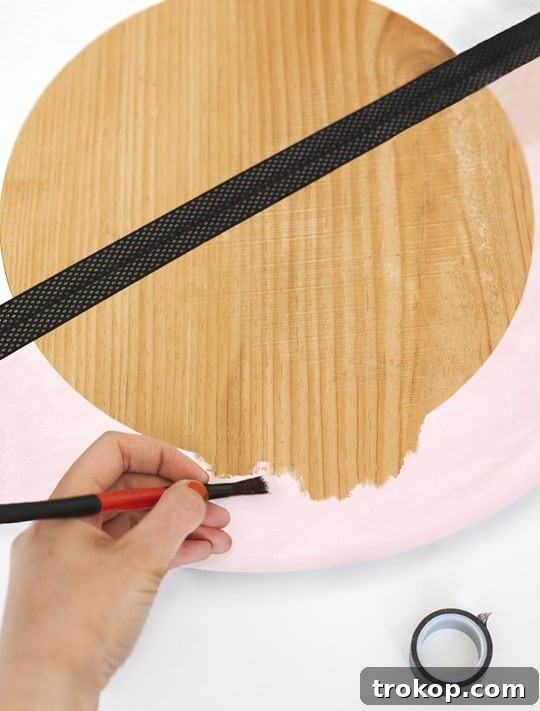
With your center mirror area established (mentally or physically), it’s time to create your color-blocked design. Take your painter’s tape and carefully apply it across the board to form a clean, diagonal line, or any other geometric pattern you envision. Ensure the tape adheres firmly to the wood, especially along the edges of the line, to prevent paint bleed. Press it down with a credit card or your fingernail for a crisp edge.
Step 3: First Coat of Paint
Using your chosen first paint color, carefully paint one section of the board, making sure to include the sides and even the back if you desire a fully finished look. Be mindful not to paint over the tape where it will form your color block line, nor over the central area where the mirror will eventually sit. Allow this first coat of paint to dry completely according to the manufacturer’s instructions. Depending on your paint type and desired opacity, you may need to apply a second coat for a rich, even finish. Always let each coat dry thoroughly before applying the next.
Step 4: Second Coat of Paint & Drying
Once your first paint section is completely dry and tape is still in place, apply your second paint color to the remaining section of the board. Again, ensure that the central mirror area remains unpainted. Just like with the first color, extend the paint to the sides and back for a polished look. Let this second coat dry fully. If necessary, apply a second coat of this color as well, allowing adequate drying time in between. Patience during drying is key to preventing smudges and ensuring vibrant, even colors.
Step 5: Remove Tape & Final Sanding (If Necessary)
With both paint sections completely dry to the touch, carefully and slowly peel away the painter’s tape. Pull it back at a 45-degree angle for the cleanest lines. Admire your perfectly crisp color block! Now, double-check the exposed central area where the mirror will attach. If you haven’t already, or if it feels less smooth than desired, give it a final light sanding to ensure it’s perfectly smooth, clean, and free of any paint residue. The adhesive needs a pristine, untreated wood surface to create a strong bond.
Step 6: Secure the Mirror
Using your mirror adhesive and caulking gun, apply a generous but even bead of glue within the bare middle area of the board. Do not apply it too close to the edge, as it may squeeze out when the mirror is pressed down. Work relatively quickly, as some adhesives set fast. Carefully center your round craft mirror over the glued area and firmly press it into place. Ensure the painted border around the mirror is even on all sides. Apply steady pressure for a few moments. Now, it’s crucial to let the mirror set fully according to the adhesive’s specific drying time, which can range from a few hours to overnight. Do not disturb the mirror during this critical curing period.
Step 7: Create the Hanging Loop
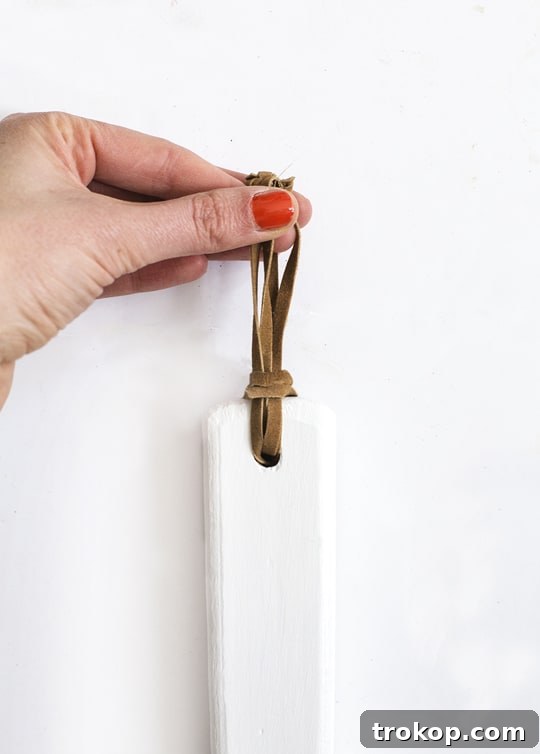
This final step brings your mirror to life as a hanging decor piece. Cut two equal lengths of your chosen suede cord (or other string material). The length will depend on how low you want the mirror to hang. For most applications, 12-18 inches per piece is a good starting point. Take each length and tie it into a small, secure loop using a double knot. These loops will be the anchor points. Thread both loops through the pre-drilled hanging hole in the cutting board, pulling them through from the front to the back. Then, take the long, main hanging cord (which can be a single piece or a doubled piece for extra strength) and thread it through both of these smaller loops. Pull the main cord tight to secure the loops against the back of the board. This creates a robust and stylish hanging mechanism.
Given that our example mirror was quite large and therefore heavier, we doubled up the main hanging cord for extra security and peace of mind. This step is particularly important for ensuring the longevity and safety of your DIY hanging wall mirror. Now, your beautifully personalized mirror is ready to be hung and admired!
Tutorial Notes and Expert Tips
To ensure your DIY hanging wall mirror project goes smoothly and results in a stunning piece, keep these crucial tips in mind:
- The Importance of a Clean, Untreated Center: This is paramount for the mirror’s longevity. Reiterate: the wood surface under the mirror *must* be clean, smooth, and free of paint, oil, or sealant. Mirror adhesives rely on direct contact with a porous surface for proper bonding. Any barrier could compromise the adhesion and cause the mirror to detach over time. If in doubt, sand a little extra.
- Customize Your Colors for Maximum Impact: This project is your canvas! Don’t just pick any two colors; thoughtfully consider your existing room decor. Do you want the mirror to be a bold focal point with high-contrast shades (e.g., navy and coral, black and white)? Or would you prefer a more subtle, harmonious addition using tone-on-tone shades (e.g., light grey and charcoal, sage green and olive)? You can also experiment with metallic accents or a single, striking color for a minimalist look.
- Secure Hanging is Non-Negotiable: Safety first! Before hanging your new mirror, assess the weight of the completed piece. If it’s on the heavier side, or if you’re hanging it in a high-traffic area, always use an appropriate wall anchor or plug. Standard nails or picture hooks might not be sufficient. Invest in a sturdy anchor that can support the mirror’s weight for peace of mind. Always ensure the hanging cord itself is strong and securely knotted.
- Beyond Color Blocking: While the color block design is chic, don’t limit your creativity! Consider other decorative techniques:
- Stenciling: Add intricate patterns or motifs.
- Distressing: Create a vintage or farmhouse look by lightly sanding painted edges.
- Natural Wood: Forgo paint entirely and seal the beautiful wood grain with a clear varnish for a minimalist, rustic feel.
- Decoupage: Apply decorative paper or fabric scraps for a truly unique finish.
- Experiment with Cord Types: The hanging cord is part of the design. Think about how different materials can change the look: rustic twine, sleek leather, soft macrame, or even a chain for an industrial vibe.
- Placement Perfected: A hanging mirror can brighten a dark corner, create the illusion of more space in a small room, or serve as a functional piece in an entryway for a last-minute check before heading out. Consider it in your bathroom, bedroom, living room, or even a home office.
- Care and Maintenance: To keep your mirror looking pristine, wipe the mirror surface with a streak-free glass cleaner. For the painted wood, a soft, dry cloth is usually sufficient. Avoid harsh chemicals on the painted or sealed surfaces to preserve their finish.
More Living Room Decor Inspiration
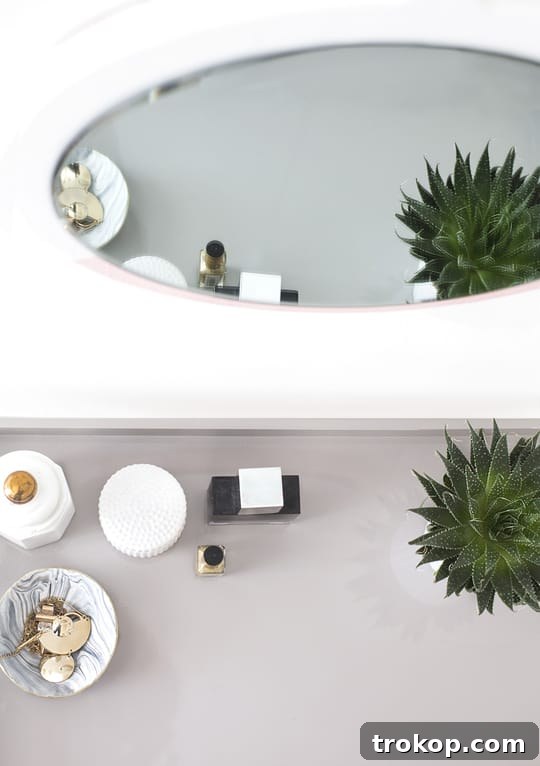
There you have it – a magnificent, custom-made hanging wall mirror, born from a humble chopping board! Whether you envision this stylish accent piece for your bathroom for quick touch-ups, your living space to add depth and light, or in your bedroom for morning preparations, it will undoubtedly infuse any room with a delightful focal point. Who knew a simple kitchen utensil could unlock such creative potential beyond culinary adventures?
Ready for more exciting home decor projects and ideas? Explore these fantastic resources to continue transforming your space:
- Inspiring Ikea Kallax Hacks for Every Room
- 20 Creative DIY Pillow Ideas to Personalize Your Sofa
- DIY Faux Terrazzo Coffee Table: A Modern Craft Project
- DIY Watercolor Printable Wall Art: Add Artistic Flair Easily
Color Block DIY Hanging Wall Mirror: Project Summary
1 hour
1 hour
Equipment for Your DIY Mirror
-
Sandpaper or sanding block
-
Painter’s tape
-
Paint brush
-
Industrial strength mirror adhesive and caulking gun
Essential Materials
- 1 wooden cutting board with handle (sanded down if it has a glossy or sealed finish)
- 1 round craft mirror (1–1.5 inches smaller in diameter than your board)
- Paint (any 2 colors of your choice)
- Strong decorative string or cord for hanging (e.g., suede, leather, macrame)
Instructions
-
Optional: Lightly mark out a center circle slightly smaller than your mirror. This center area must remain unpainted for proper adhesive bonding to raw wood. If your board is sealed, sand it lightly first.
-
Use painter’s tape to create a clean diagonal line across the board, defining your color-block sections. Press tape firmly.
-
Paint one section of the board with your first chosen color, including the sides and back. Allow it to dry completely. Apply a second coat if needed.
-
Apply your second paint color to the other section of the board, again leaving the central mirror area bare. Let dry completely, and apply a second coat if needed.
-
Carefully peel away the painter’s tape once paint is dry. Ensure the exposed center is smooth, untreated, and clean for mirror adhesion.
-
Apply mirror-safe glue within the bare middle area of the board. Quickly center and press the mirror into place, ensuring an even border. Allow it to set fully according to the adhesive’s drying time.
-
Cut two equal lengths of cord and tie each into a small, secure loop. Feed both loops through the board’s hanging hole from front to back. Then, thread your main hanging cord through both loops and pull tight to secure. Double up the main cord for heavier mirrors.

43 Top Amazon Wall Decor Ideas for Every Room in Your Home
Discover a curated selection of gorgeous Amazon wall decor that promises to make a significant impact on your home’s aesthetic, perfect for any room and budget.
Continue Reading43 Top Amazon Wall Decor Ideas for Every Room in Your Home
28 Decorative Wall Mirrors You’ll Wish You Bought Sooner
Searching for the ideal wall mirror to complete your space? Dive into our comprehensive roundup featuring the most captivating decorative wall mirrors that you’ll adore.
Continue Reading28 Decorative Wall Mirrors You’ll Wish You Bought Sooner
60+ Affordable Amazon Bathroom Decor Finds
From luxurious shower curtains to functional bath mats, discover how to effortlessly elevate your bathroom’s style with over 60 affordable finds from Amazon.
Continue Reading60+ Affordable Amazon Bathroom Decor Finds
37 Best Beach Toys for Vacation Fun
Uncover the ultimate collection of beach toys perfect for kids, toddlers, and families, ensuring endless vacation fun and memorable seaside adventures.
Continue Reading37 Best Beach Toys for Vacation Fun