
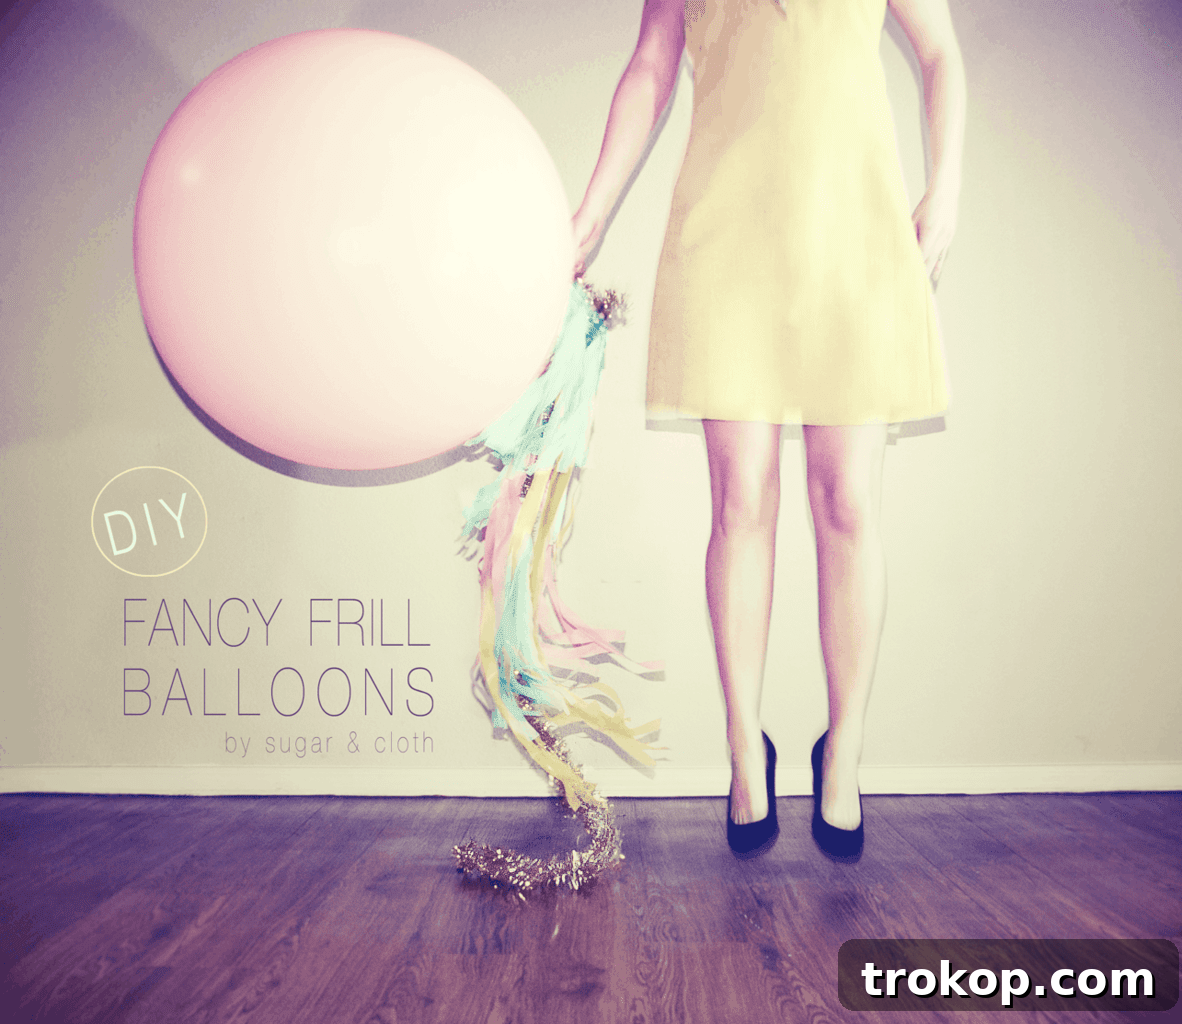
Elevate Your Celebrations with DIY Giant Tassel Balloons: A Geronimo-Inspired Guide
Are you tired of ordinary party decorations? Do you long for that show-stopping, whimsical element that instantly transforms any space or photoshoot? If you’ve ever admired the stunning, oversized balloons adorned with luxurious, flowing tassels, often seen gracing high-end events and stylish celebrations, you know the magic they possess. While professional designers like Geronimo Balloons in California set the gold standard (and if you’re lucky enough to be in California, we wholeheartedly recommend you experience Geronimo!), achieving that same breathtaking aesthetic is entirely possible through a fun and rewarding DIY project. No need for complex techniques or expensive bespoke items; with a little creativity and some readily available materials, you can craft your own magnificent giant tassel balloon right at home.
Forget the notion of settling for a “plain jane” balloon. This guide is all about embracing the unique, the handmade, and the utterly delightful. We’re diving into the world of DIY, inspired by the captivating elegance of bespoke creations, to bring you a step-by-step tutorial for crafting your very own Geronimo-style giant tassel balloon. Prepare to add a touch of sophisticated whimsy and undeniable charm to your next gathering, photoshoot, or simply elevate your everyday decor. The best part? The satisfaction of creating something truly special with your own hands is an experience unlike any other.
Why Choose DIY Giant Tassel Balloons?
Beyond the sheer visual appeal, crafting your own giant tassel balloons offers a multitude of benefits:
- Cost-Effective Elegance: Achieve a high-end look without the designer price tag. Many materials can be found at craft stores or even around your home, making this an incredibly budget-friendly option for luxurious decor.
- Unleash Your Creativity: From selecting unique color palettes to experimenting with different textures and materials for your tassels, this project allows for endless customization. You’re not limited by store inventory; your imagination is the only boundary.
- Perfectly Personalized: Tailor your balloon to perfectly match your event’s theme, your brand’s colors for a launch, or your home’s aesthetic. Every element can be chosen to reflect your personal style and vision.
- Eco-Friendly Potential: By choosing sustainable materials or repurposing items, you can make this project more environmentally conscious.
- Immense Satisfaction: There’s a profound sense of accomplishment in crafting something beautiful from scratch. Your guests will not only be impressed by the balloon itself but also by your creative prowess.
- Versatile Decor: Ideal for birthday parties, baby showers, weddings, engagement announcements, photo backdrops, product launches, or simply as an eye-catching focal point in any room.
Getting Started: Essential Materials for Your DIY Masterpiece
Before you embark on this exciting creative journey, gathering all your supplies is crucial. One of the joys of DIY projects is the flexibility in material selection, allowing you to tailor the look and feel to your specific desires and budget. Here’s a comprehensive list of what you’ll need, along with tips for selection:
What You’ll Need:
- 36-inch Giant Balloon(s): The Foundation of Your Design
- Opt for high-quality latex balloons designed for helium. Cheaper balloons might not float as long or reliably.
- Choose a color that complements your tassel scheme. White, clear, metallic gold, or silver are versatile choices, but vibrant colors can also make a bold statement.
- Consider purchasing an extra balloon or two, just in case one pops during inflation or handling.
- Tassel Material: Unleash Your Creativity
- Tissue Paper: This is a classic choice, offering a light, airy, and soft look. It comes in a vast array of colors, making it easy to create intricate palettes. For durability, choose thicker tissue paper.
- Metallic Sheets: For a glamorous, celebratory, or festive vibe, metallic foil sheets (often found in party supply stores) are perfect. They catch the light beautifully and add a touch of sparkle.
- Plastic Tablecloths: A surprisingly durable and cost-effective option, especially if you need a large quantity of tassels. Plastic tablecloths are weather-resistant and add a unique texture, providing a more robust and structured tassel. This is what I personally used for this project, and it worked wonderfully!
- Other Options: Consider crepe paper streamers for a more delicate feel, fabric scraps for a bohemian look, or even Mylar for extra shine. The key is to select something that can be easily cut into strips and has a bit of body.
- Ribbon or Tinsel Garland: The Connecting Strand
- This will be the main string from which your tassels will hang.
- Choose a strong, decorative ribbon (satin, grosgrain, or even baker’s twine) or a festive tinsel garland. The length will depend on how long you want your tassel cluster to be, typically 4-6 feet is a good starting point.
- Ensure it’s strong enough to support the weight of multiple tassels and won’t easily fray.
- Sharp Scissors: Precision is Key
- Good quality, sharp scissors are essential for clean cuts, especially when working with multiple layers of paper or plastic. This will ensure your tassels look neat and professional.
- Stapler: For Secure Attachments
- A standard office stapler will work perfectly for securing the tops of your tassels and attaching ribbons. Make sure it’s loaded with fresh staples.
- Optional but Recommended:
- Craft Glue or Double-Sided Tape: For extra secure attachments or a cleaner finish than staples.
- Ruler or Measuring Tape: To ensure consistent tassel lengths and cuts, though freehand works too for a more organic look.
- Cutting Mat and Rotary Cutter: If you’re making many tassels, these can significantly speed up the cutting process and ensure straight lines.
- Helium Tank: Unless you plan to have your balloon inflated at a local party supply store, a small personal helium tank can be a convenient investment.
Step-by-Step Guide: Crafting Your Geronimo-Inspired Tassel Balloon
Now that you have all your materials assembled, it’s time to bring your vision to life. The process involves two main parts: crafting the individual tassels and then assembling them onto your giant balloon. Take your time with each step, and don’t be afraid to experiment with colors and lengths to add dynamic dimension to your creation. Remember, the beauty of DIY lies in its imperfections and unique charm!
Part 1: Crafting Your Tassels (Repeat for Multiple Tassels)
You’ll want to make several tassels to achieve that full, fluffy, and luxurious look. A good starting point is anywhere from 10 to 20 tassels, depending on their size and how dense you want the garland to appear.
Step 1: Prepare Your Tassel Material
Begin by taking your chosen tassel material—be it tissue paper, metallic sheets, or a plastic tablecloth. Carefully fold it in half lengthwise. Depending on the desired length of your finished tassel, you might fold it again. Once folded, lay it flat and begin cutting long, parallel slits from the folded edge towards the open edge. Crucially, leave about a 1 to 1.5-inch uncut area at the top of the fold. This uncut strip will be the foundation for assembling your tassel; it’s what holds all the fringe pieces together. Ensure your cuts are as even as possible for a neater look, but a slight variation can also add to the handmade charm.
Step 2: Create the Tassel Loop
Once your material is fully fringed, take a separate piece of thin ribbon – this will be used to create the loop that attaches your tassel to the main balloon strand. Lay the cut tassel material flat. Take the ribbon and wrap it around the very center of the uncut top section, directly over where the slits begin. Tie a secure knot with the ribbon, forming a small loop. This loop is essential as it will be your point of attachment later, making it easy to hang your finished tassel onto the main garland. Make sure the knot is tight so the ribbon doesn’t slip.
Step 3: Form the Tassel Body
Now, it’s time to give your tassel its characteristic shape. Starting from one of the cut edges, begin folding the sides of your fringed paper inward, gathering the material towards the center. Continue folding and rolling until you have about a 1-inch width gathered securely in the middle. This creates the voluminous top part of the tassel, giving it a neat and organized appearance before the fringe spreads out. This step can feel a bit delicate, especially with tissue paper, so work slowly and gently to avoid tearing.
Step 4: Secure the Tassel Top with Ribbon
To keep your gathered tassel top secure and add another decorative touch, take another piece of ribbon. Place one end of this ribbon against the fold on the very top of your tassel (where you just gathered the material). Securely staple this ribbon end to the gathered fold. Once stapled, begin carefully wrapping the excess length of this ribbon around the stapled piece, covering the raw edges and the staples. This not only reinforces the tassel’s top but also gives it a polished and finished look, reminiscent of professionally made tassels.
Step 5: Finalize and Secure Your Tassel
After wrapping the top of the tassel with ribbon, you need to secure that wrapping so it doesn’t unravel. You have a few options for this: you can either staple the end of the wrapping ribbon discreetly, tie it into a small knot, or carefully weave it back into the wrapped section to secure the hold. The goal is to make sure the wrapped ribbon stays in place. (Remember to repeat steps 1 through 5 for as many tassels as you’d like! Experiment with varying the lengths of your cuts and using different colors of material to add incredible dimension and visual interest to your overall balloon garland.)
Part 2: Assembling Your Giant Tassel Balloon
With your collection of beautiful tassels ready, it’s time for the exciting final assembly. This is where your creation truly begins to take shape, transforming a simple balloon into a magnificent display.
Step 6: Inflate Your Balloon and Prepare the Main Strand
Carefully inflate your 36-inch giant balloon with helium. Ensure it’s fully inflated but not overfilled to prevent popping. Once inflated, tie it off securely. Next, take your main garland or ribbon – this will be the central string from which all your tassels will hang. Tie one end of this main strand securely to the knot of your inflated balloon. Make sure the knot is tight and reliable, as it will support the entire tassel garland. Allow the balloon to float freely for a moment to gauge the length and drape of your main strand.
Step 7 & 8: Attach the Tassels to the Main Strand
Now for the fun part: attaching your tassels! Starting from the top, near the balloon, or from the bottom, whichever you prefer, begin attaching your crafted tassels to the main strand. Use the ribbon loop you created in Step 2 for each tassel. Simply thread the main strand through this loop and secure it. You can tie each tassel to the main strand with a simple knot or use a small piece of double-sided tape or craft glue to hold them firmly in place. Continue this process, spacing your tassels evenly or in clusters, until your main strand is completely adorned and your balloon is beautifully “fluffy” with vibrant tassels cascading below it. Don’t be afraid to adjust the placement as you go, ensuring a balanced and aesthetically pleasing arrangement.
Pro Tips for a Flawless Finish and Creative Variations
To truly elevate your DIY giant tassel balloon and make it uniquely yours, consider these expert tips and creative variations:
- Vary Tassel Lengths: Instead of making all tassels the same length, cut some longer and some shorter. This creates a more organic, dynamic, and professional-looking garland with added visual interest and movement.
- Mix Materials and Textures: Combine tissue paper with metallic foil or plastic tablecloth tassels for a rich, multi-dimensional effect. The contrast in textures will make your garland stand out.
- Strategic Color Placement: Plan your color scheme in advance. You can create an ombre effect, rainbow pattern, or alternate colors for a striking visual. Grouping similar shades together can also create a cohesive, elegant look.
- Secure Attachments: While staples are quick, consider reinforcing them with a dab of craft glue or a piece of clear tape for extra durability, especially if the balloon will be handled frequently or used outdoors.
- Ribbon Wraps: For a super clean finish on your tassels, use a thin strip of matching paper or ribbon and a tiny dot of hot glue to create a seamless wrapped top instead of visible staples.
- Indoor vs. Outdoor Use: If your balloon will be outdoors, choose more weather-resistant materials like plastic tablecloths for tassels. Be mindful of wind, as delicate tissue paper can tear easily.
- Storage for Leftovers: If you have extra tassel material, store it flat or rolled to prevent creases. Unused tassels can be flattened and stored for future projects.
- Consider a Weight: Attach a decorative balloon weight to the end of your tassel garland to keep your giant balloon from floating away, especially if it’s placed in an open area.
- Personalized Touches: Add small, lightweight embellishments to your tassels, like glitter, small bells, or custom tags, for an extra layer of personalization.
Showcase Your Creation: Ideas for Using Your Giant Tassel Balloon
Once your magnificent giant tassel balloon is complete, the possibilities for showcasing it are endless. Here are a few ideas to inspire you:
- Photoshoot Prop: The ultimate backdrop for engagement photos, maternity shoots, children’s portraits, or even product photography. Its size and beauty provide an instant wow factor.
- Party Centerpiece: Let it float above a dessert table, gift table, or dance floor at any celebration. It instantly elevates the ambiance and sets a festive mood.
- Entrance Decor: Greet guests with a grand statement by placing your balloon at the entrance of your event venue or home.
- Room Decor: Add a playful and chic touch to a nursery, child’s room, or even a living space. It’s a temporary art installation that brings joy.
- Gift Alternative: Instead of a bouquet of flowers, present a giant tassel balloon as a memorable and unique gift for birthdays, congratulations, or special announcements.
- Product Launch or Brand Event: Use branded colors and attach custom tags to create eye-catching decor for business events or store openings.
Creating your own Geronimo-inspired giant tassel balloon is more than just a craft project; it’s an opportunity to infuse your celebrations and spaces with unparalleled charm and personality. With this detailed guide, you have everything you need to transform simple materials into a stunning, show-stopping piece of decor. Don’t shy away from the challenge; embrace the joy of DIY, let your creativity soar, and prepare to impress everyone with your beautifully handcrafted masterpiece. Happy crafting!