
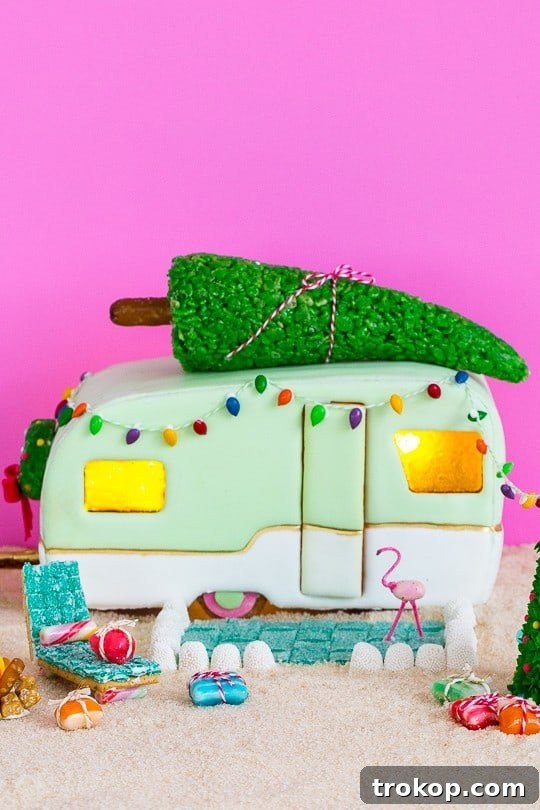
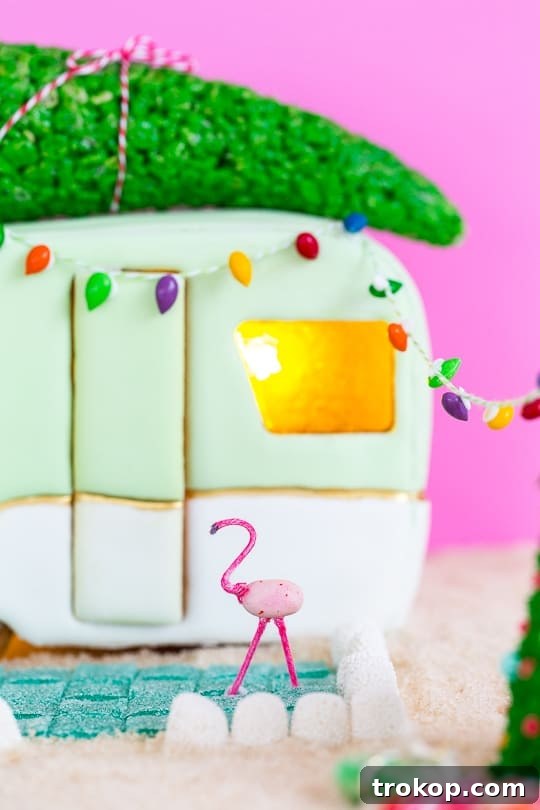
Craving a delightful and unique twist on traditional gingerbread houses this holiday season? Imagine crafting a whimsical gingerbread camper, a charming edible masterpiece that brings a touch of adventure to your festive decorations. This comprehensive guide, complete with a free template and robust recipe, will walk you through every step of creating a delicious and sturdy gingerbread camper house that will amaze your family and friends.
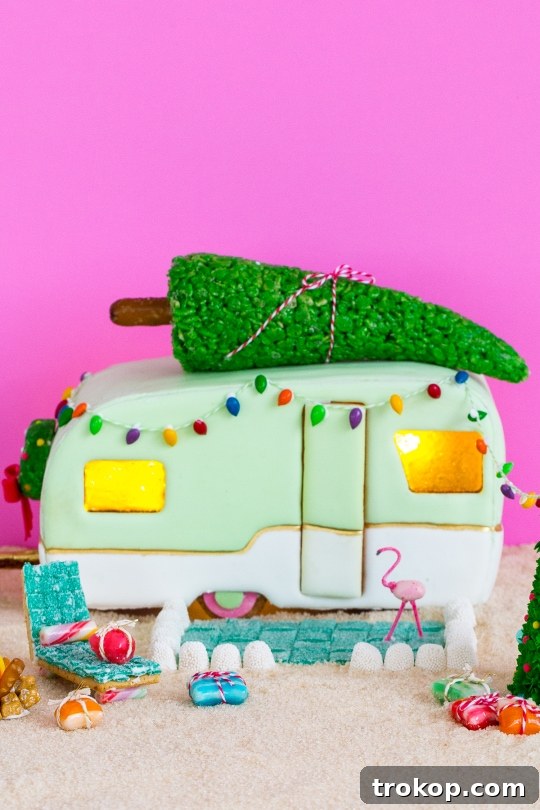
The holiday season is synonymous with cherished traditions, and building a gingerbread house is certainly one of the most beloved. However, if you’re looking to break free from the conventional gingerbread cottage and embark on a creative journey, our gingerbread camper project is exactly what you need. This delightful undertaking combines the warmth of holiday baking with the nostalgic charm of a retro camper, making it a perfect centerpiece for your celebrations or a thoughtful handmade gift.
We initially conceived this “crazy idea” to construct a gingerbread camper, and fortunately, our incredibly talented friend Monica from Paper Flour Ink stepped in to transform our vision into reality. Monica, known for her meticulous attention to detail and creative genius, also masterminded the magnificent Eiffel Tower gingerbread house, proving her exceptional skill in edible architecture. With her expertise and our easy-to-follow instructions, crafting this adorable edible camper has never been more accessible.
So, gather your ingredients, roll up your sleeves, and prepare for a fun-filled baking experience. This project promises to be an engaging activity for all ages, resulting in a show-stopping gingerbread creation that highlights your culinary artistry and brings immense joy to your holiday home.
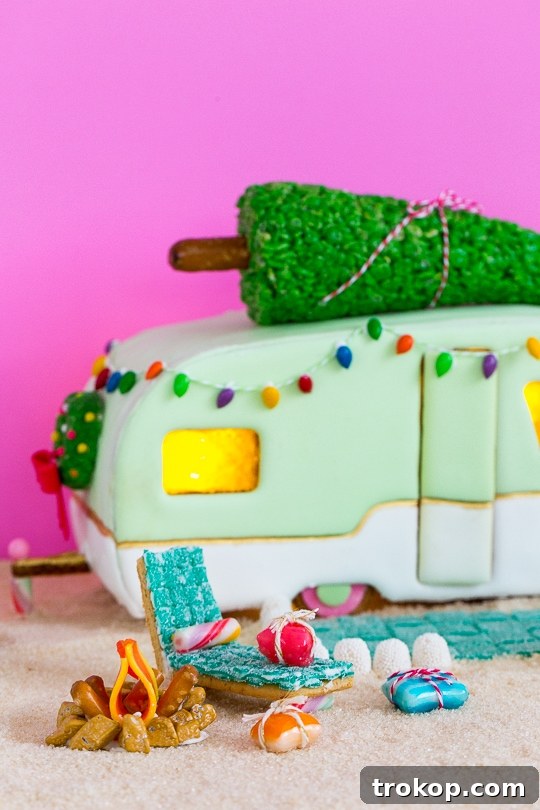
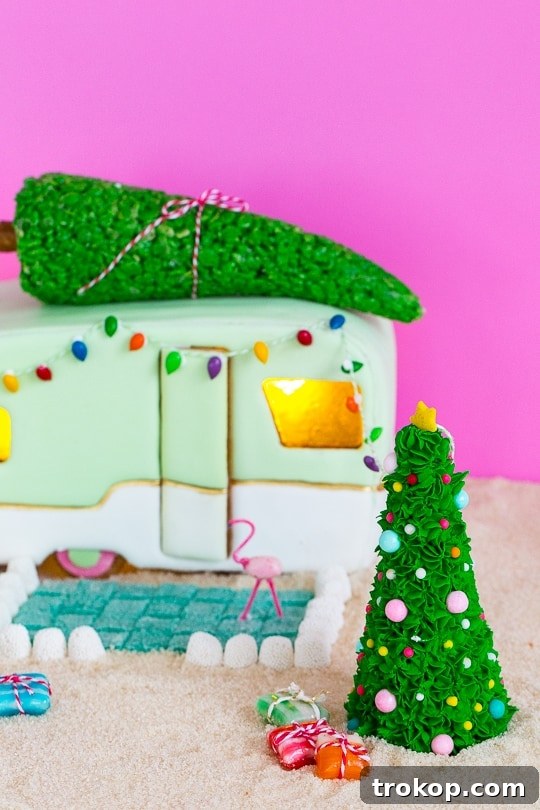
Table of Contents
Essential Ingredients for a Gingerbread House
When it comes to building a gingerbread house, not all gingerbread recipes are created equal. The key to a successful, structurally sound gingerbread camper lies in using a “construction grade” gingerbread recipe. This specific type of dough is designed to be firm and durable, ensuring that your edible walls and roof hold their shape without collapsing, even when adorned with layers of icing and candy. While primarily intended for building, this recipe is still perfectly edible and delicious!
Here are the core ingredients you’ll need for this robust gingerbread dough:
- All-purpose flour: The fundamental building block, providing structure. (Be sure to have extra for flouring your work surface!)
- Honey: Adds moisture, flavor, and helps bind the dough, contributing to its sturdiness.
- Granulated sugar: For sweetness and to aid in caramelization during baking.
- Eggs: Act as a binder, adding richness and helping the dough achieve its firm texture.
- Warm spices: A classic gingerbread blend for that signature festive aroma and taste.
- Cinnamon
- Ground cloves
- Nutmeg
- Ground ginger
Crafting a Sturdy Construction Grade Gingerbread
Achieving the perfect consistency for your gingerbread dough is crucial for a successful build. This construction-grade recipe ensures your camper stands tall and proud. Follow these steps carefully:
1. Start with the Wet Ingredients: In a stand mixer fitted with a dough hook (not a paddle attachment, as the dough will be very stiff), cream together the eggs and granulated sugar until well combined and light in color. This step incorporates air, contributing to a smoother dough.
2. Introduce the Flavors: Next, add the honey and all the aromatic spices: cinnamon, ground cloves, nutmeg, and ground ginger. Mix thoroughly until the spices are evenly distributed and the mixture is fragrant, ensuring every bite of your camper has that classic gingerbread warmth.
3. Gradually Add Flour: Begin incorporating the all-purpose flour, adding it one cup at a time. Mix on low speed, allowing each addition to be fully absorbed before adding more. As you continue, you’ll notice the dough becoming progressively very stiff. Continue mixing until all the flour is integrated and a firm dough forms. Do not be alarmed by its stiffness; this is intentional for structural integrity.
4. Chill the Dough: Once the dough is ready, wrap it tightly in plastic wrap and chill it in the refrigerator for at least one hour. This chilling period is essential as it allows the gluten to relax, making the dough easier to roll, and prevents it from becoming too sticky. It also helps the spices meld, enhancing the flavor.
5. Prepare Your Workspace and Roll the Dough: To prevent the dough from sticking, lightly wipe down your counter with a wet paper towel, then place a large piece of foil or parchment paper on top. The water helps the foil or parchment stay securely in place. Lightly flour your working surface, then transfer a portion of the chilled dough onto it. Using a rolling pin, roll out the dough evenly to a thickness of approximately 1/8 inch. Consistency in thickness is vital for even baking and proper assembly.
6. Cut Out Your Camper Pieces: Carefully place your printed gingerbread camper template onto the rolled-out dough. Using a sharp pizza cutter or a small knife, meticulously cut around the template shapes. Remember to cut out all the windows and door openings as well; these will later be filled with delicious candy “glass.”
7. Bake the Flat Pieces: Transfer the foil or parchment paper with the cut-out gingerbread pieces onto a baking sheet. Start by baking the flat side pieces of your camper. Bake them at 325ºF (160ºC) for 15-20 minutes, or until they turn a beautiful golden brown and are firm to the touch. Once baked, let them cool completely on the baking sheet to maintain their shape.
8. Bake and Curve the Edge Pieces: For the pieces that require a curve (such as the roof or rounded corners of a retro camper), bake them for a shorter period, about 8-9 minutes, just until they begin to darken slightly. The trick here is to work quickly: while these pieces are still warm and pliable, carefully bend them over a cylindrical object (like a rolling pin or a wide can) to create the desired curve. Hold them in place until they cool and set in their new shape. This step requires precision and speed to ensure the curves are smooth and accurate.
9. Cool and Prepare for Assembly: Allow all baked gingerbread pieces to cool thoroughly to room temperature. This is a critical step; assembling warm pieces with icing will lead to melting and structural failure. Once completely cool, they are ready to be “glued” together with a sturdy royal icing. Let the royal icing harden for a solid 4-5 hours (or even overnight) before attempting any further decoration. This ensures maximum stability for your gingerbread camper.

Free Downloadable Gingerbread Camper Template
The secret to perfectly shaped gingerbread camper pieces lies in accurate templates. Our free downloadable and printable templates simplify the cutting process, ensuring all your gingerbread components fit together seamlessly. Remember to print these templates to scale for precise results.
- Download Camper Template (PDF)
- Download Edge Pieces Template (PDF)
Pro Tip for Icing: Before you begin assembling the structural pieces of your gingerbread camper, consider “flooding” the flat sides of the gingerbread with thinner royal icing. It’s significantly easier to achieve a smooth, even layer of colored icing on a flat surface before the camper is constructed. This method allows for cleaner lines and a more professional finish to your gingerbread camper’s exterior.
How to Create and Assemble Gingerbread Camper Windows
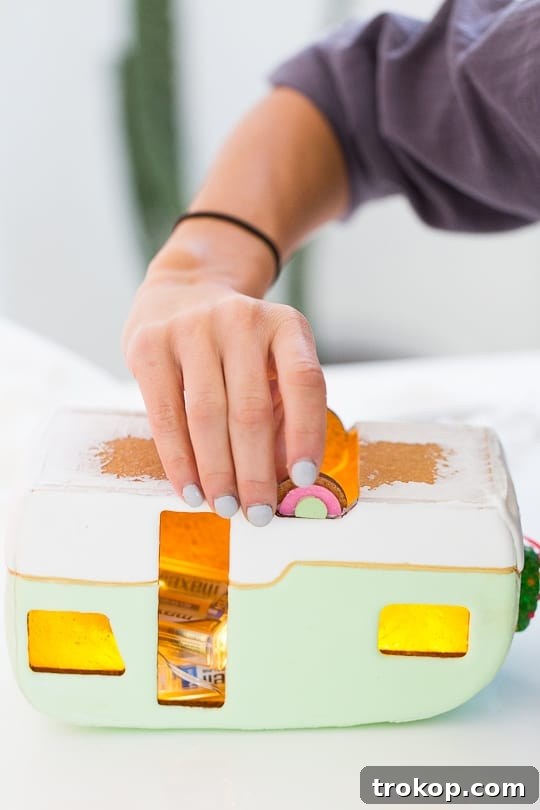
One of the most enchanting features of this gingerbread camper is its edible, translucent windows, which can even be illuminated! The secret to these charming “glass” panes lies in crushed hard candy. Here’s how to create them:
1. Pre-Cut Windows: As instructed in the gingerbread dough preparation, use your camper template to cut out all window and door openings from the gingerbread dough *before* baking. Bake the gingerbread pieces as specified in the construction-grade recipe instructions.
2. Prepare Candy “Glass”: Once your gingerbread pieces are baked and cooled, place the pieces that require windows back onto a baking sheet lined with foil. Fill the empty window openings with a thin layer of crushed butterscotch hard candy. You can crush the candy by placing it in a Ziploc bag and gently tapping it with a rolling pin or hammer until it breaks into small fragments.
3. Melt the Candy: Place the baking sheet with the candy-filled gingerbread pieces into a preheated oven at 350ºF (175ºC) for approximately 5 minutes, or until the crushed candy has completely melted and spread evenly within the window openings. Keep a close eye on it to prevent burning.
4. Cool for Clarity: Remove the baking sheet from the oven and allow the candy windows to cool thoroughly. For the best results and to ensure the candy hardens completely and doesn’t stick, it’s highly recommended to let them cool overnight. Once fully set, carefully peel the gingerbread pieces from the foil. Voilà – beautifully translucent, edible windows!
5. Add Illumination (Optional): To truly bring your gingerbread camper to life, place small, battery-operated twinkle lights inside the assembled camper. These delicate lights will cast a warm glow through your candy windows, creating a magical, inviting ambiance that will surely captivate anyone who sees it.
Perfect Royal Icing for Gingerbread House Construction
For this intricate gingerbread camper project, you’ll benefit from two different consistencies of royal icing. A thick royal icing is essential for structural stability, acting as the “mortar” to bond your gingerbread pieces together. A thinner royal icing, on the other hand, is ideal for “flooding” and decorating the flat surfaces of your camper before assembly, allowing for smooth, vibrant colors.
Ingredients for Royal Icing:
- 3 tablespoons meringue powder
- 4 cups powdered sugar (confectioners’ sugar)
- 6 tablespoons water (adjust as needed for desired consistency)
Royal Icing Instructions:
1. Combine Ingredients: In a large mixing bowl (or a stand mixer with a whisk attachment), combine the meringue powder, powdered sugar, and water. Beat on low speed until the ingredients are just combined. Then increase the speed to medium-high and beat for 7-10 minutes, or until the icing is very thick, glossy, and holds stiff peaks. This indicates it’s perfect for structural work.
2. Storage: If you’re not using the icing immediately, transfer it to an airtight container. Cover the surface of the icing directly with plastic wrap to prevent a crust from forming, then seal the container. This recipe yields approximately 3 cups of robust icing.
3. Applying Structural Icing: Use this thick royal icing to “glue” the sides and roof of your gingerbread camper together. Pipe generous lines along the edges of your gingerbread pieces and hold them firmly in place for a few moments until the icing begins to set. Allow adequate drying time (4-5 hours) for the icing to harden completely before continuing with decorations.
4. Thinning for Decoration: To create a thinner royal icing suitable for flooding larger areas or delicate piping, simply add additional tablespoons of water to a portion of the thick icing, one teaspoon at a time, until you reach your desired consistency. A good flooding consistency will allow the icing to spread smoothly and self-level, but not run off the edges.
Mastering royal icing is a fantastic skill, useful for many other desserts beyond gingerbread houses. For another creative application, explore our paintable royal icing recipe, perfect for intricate edible designs!

Creative Decorating Ideas for Your Homemade Gingerbread Camper
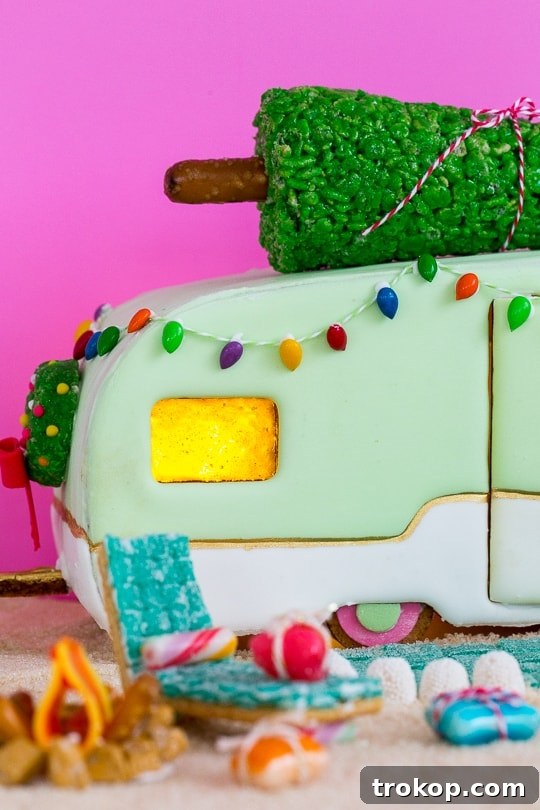
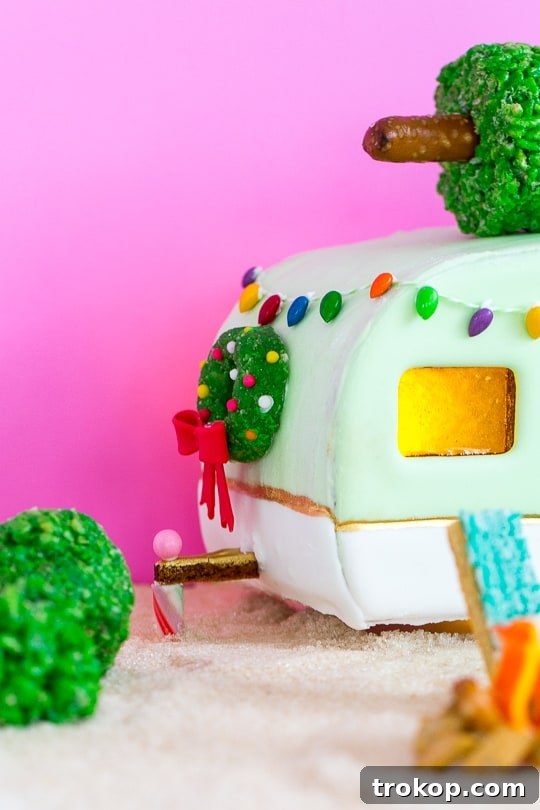
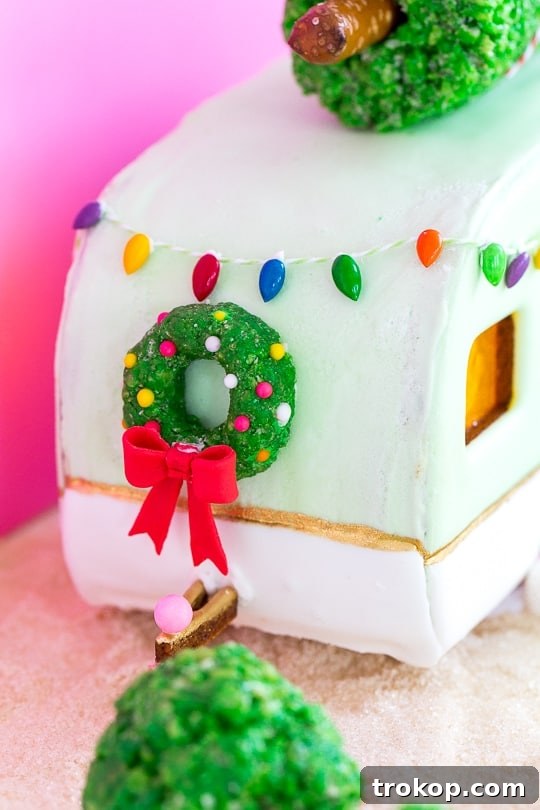
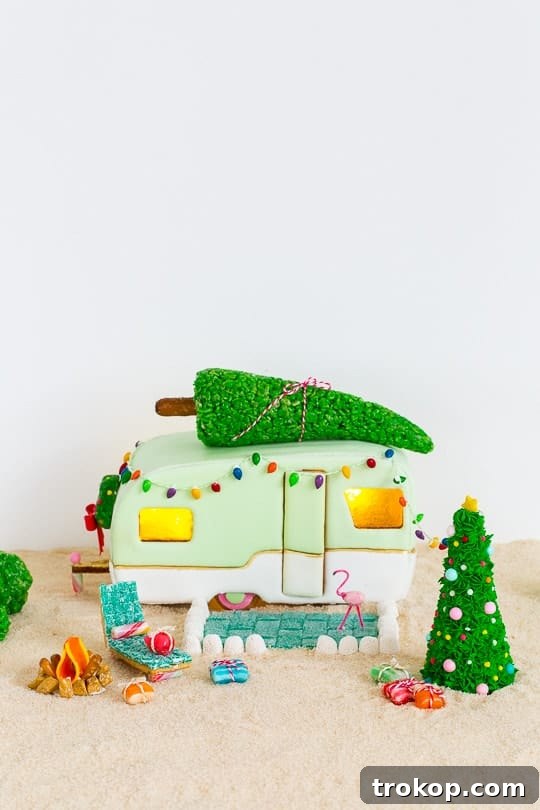
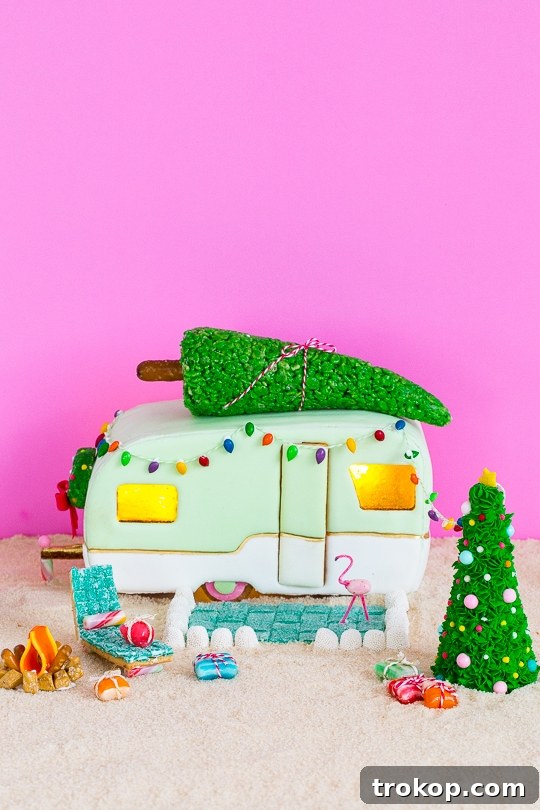
The true magic of creating a gingerbread camper lies in the decorating! This is where your imagination can run wild. Think beyond simple gumdrops and get creative with candies, cookies, and even small craft items to bring your miniature holiday scene to life. Here’s a glimpse into the whimsical decor elements we used for our gingerbread camper, inspiring you to craft your own unique scene:
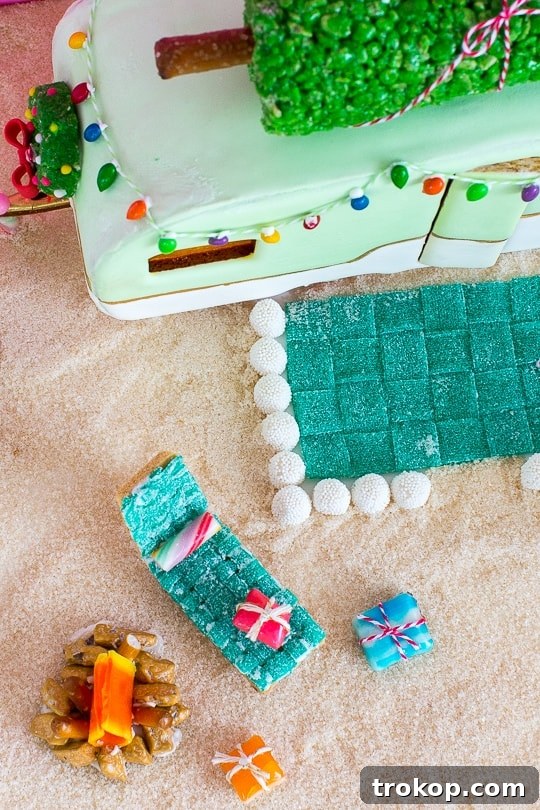
- Outdoor Rug and Fence: We used vibrant green sour belts to create a cozy rug in front of the camper, and Champagne bubble jelly beans for charming, whimsical fence posts.
- Miniature Pine Tree: A waffle ice cream cone, inverted and covered in green royal icing, then adorned with colorful sprinkle “bulbs,” makes a perfect festive tree.
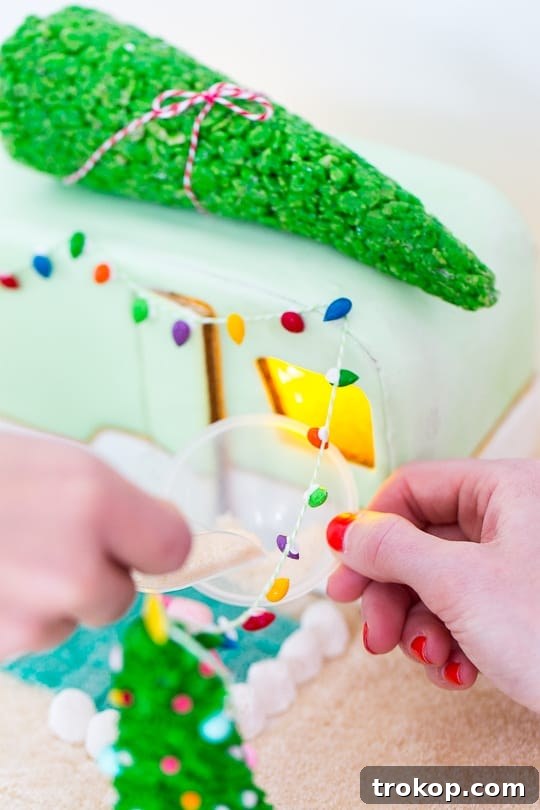
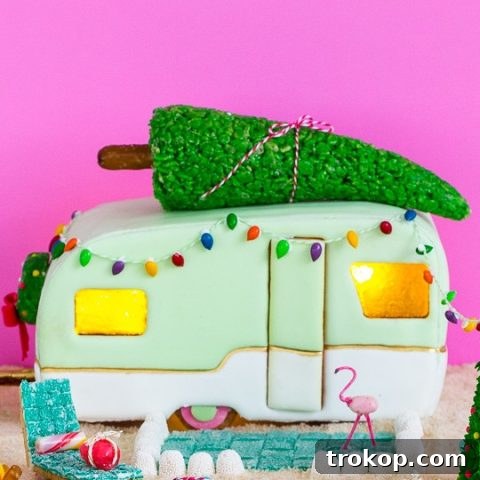
- Camper Roof Tree: For a tree atop the camper, we crafted a green Rice Krispies treat, gave it a sturdy pretzel rod trunk, and wrapped it with fine twine for added detail.
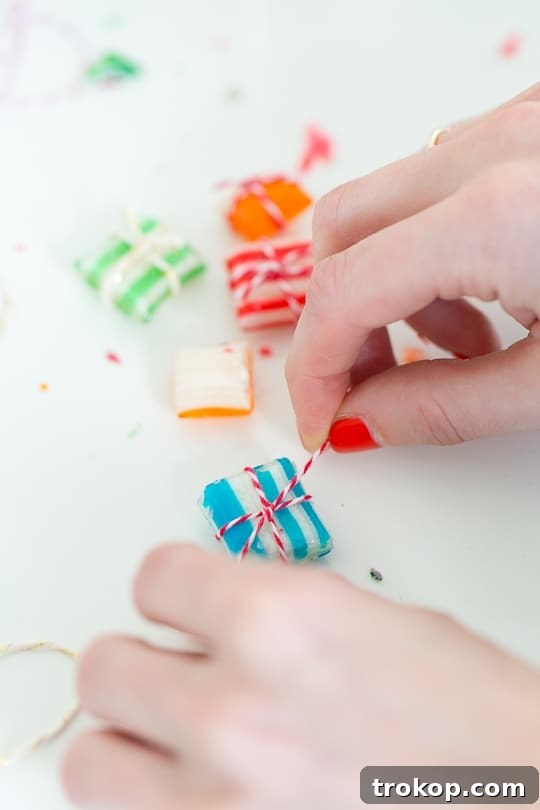
- Tiny Presents: Small, old-fashioned candy mix pieces, thoughtfully wrapped in delicate twine, resemble tiny gifts waiting to be opened.
- Charming Wreath: A small green Rice Krispies treat, shaped into a circle, embellished with sprinkles, and finished with a tiny red fondant bow, creates an adorable wreath for the camper door.
- Functional Wheels: Gingerbread cookie circles form the base of the wheels, while pink melting chocolates and jumbo confetti circles add delightful hubcap details.
- Playful Flamingo: A pink jelly bean forms the body of a whimsical flamingo, supported by white floral stems for legs, with details added using a pink food marker.
- Tow Hitch: A small gingerbread “V” shape, combined with a striped candy cane for the connecting bar and a pink sprinkle accent, creates a cute tow hitch.
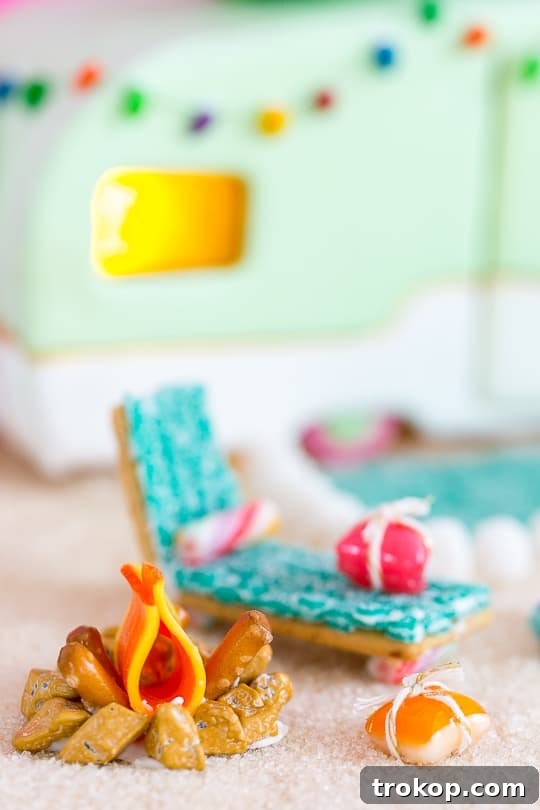
- Cozy Campfire: Miniature candy rocks form the fire pit, pretzel sticks act as logs, and pieces of orange and yellow ribbon candy cleverly simulate flickering flames.
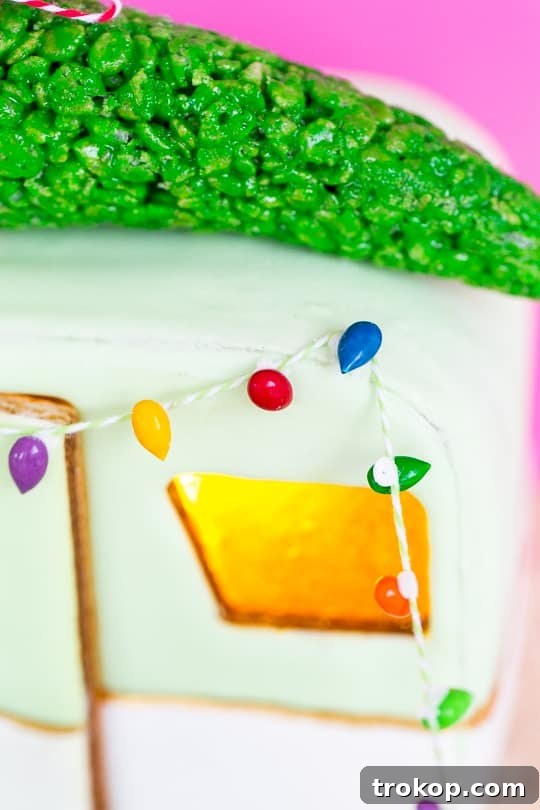
- Twinkling String Lights: Delicate lime green twine strung between pretzel rods (or small candy sticks) with candied sunflower seeds “glued” on with royal icing, creates a charming string of outdoor lights.
- Relaxing Lawn Chair: Woven sour belts form the seat and back, while graham cracker pieces make up the frame. Candy cane feet, held together with royal icing, complete this miniature lounge spot.
- Realistic Sand/Ground: A simple yet effective mixture of brown sugar and coarse organic sugar creates a textured, sandy ground for your camper scene.
Showcasing Your DIY Gingerbread Camper House
Once your magnificent gingerbread camper is assembled and fully decorated, the final step is to proudly display your creation. Proper display not only showcases your hard work but also protects your edible art. To create a stable and visually appealing base for your camper and its accompanying decorations, you can adhere them all to a sturdy foamboard or a thin sheet of wood using generous amounts of royal icing. This creates a solid foundation that prevents your display from shifting.
For our Christmas party, we took an extra step to ensure our display was contained and elegant. We actually placed our entire gingerbread camper scene within a chic white lacquer tray. This method was particularly effective for containing the “sand” (our mixture of brown and coarse organic sugar) and added a polished touch to the overall presentation. A tray also makes it easy to move your display from one festive location to another, or simply to clear counter space when needed.
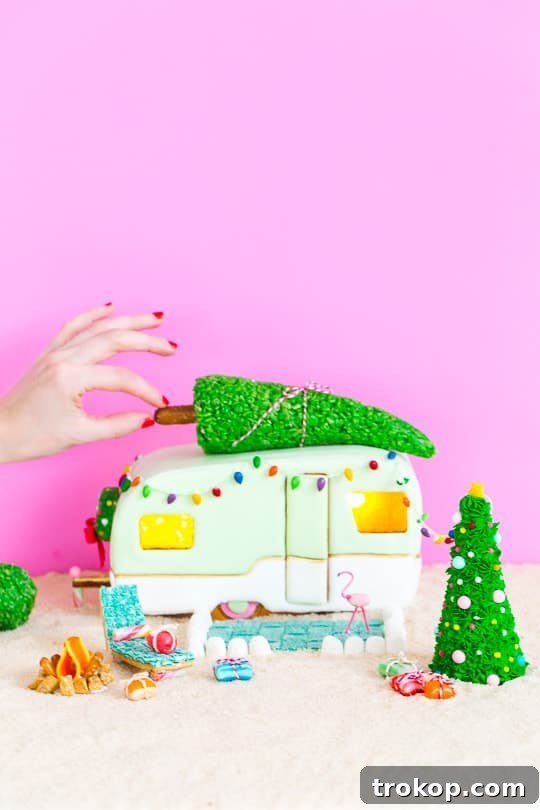
While we acknowledge that creating this intricate gingerbread camper can be quite an undertaking, the sense of accomplishment and the sheer joy it brings are incredibly rewarding. If the thought of spending hours on your own edible creation seems daunting, you can always bask in the awesomeness of ours and enjoy the festive spirit it evokes!
Interestingly, years after our original gingerbread camper creation, there has been a significant surge in the popularity of campers and RVs, sparking a delightful trend. This means you can now find several pre-made gingerbread camper house templates or kits in stores, making it even easier to join in the fun. For those who prefer a ready-made option or need a head start, here and here are some excellent places to explore and purchase gingerbread house kits. We’d love to know: what’s the most extraordinary gingerbread project you’ve ever undertaken in the spirit of a Merry Christmas?
More Fun Christmas Projects to Explore
If you’re new to our creative community or simply looking for more festive inspiration to complement your gingerbread house decorating, we have a treasure trove of holiday projects! Dive into these all-time favorite Christmas crafts and recipes:
- DIY Mini Wooden Christmas Trees: Adorable and easy-to-make wooden trees for a rustic touch.
- Jumbo (Over-the-Top) Balloon Tree: A spectacularly whimsical and grand Christmas tree made from balloons.
- This Very Playful Pom Pom Tree: A soft, colorful, and fun alternative to a traditional Christmas tree.
- Colorful DIY Confetti Christmas Tree: Sparkle and joy in a cone, perfect for a modern holiday aesthetic.
- Easy DIY Cactus Christmas Tree: A unique and playful take on the Christmas tree for desert-inspired decor.
- Bottle Brush Tree Centerpiece: A charming and elegant centerpiece for your holiday dining table.
- Super Easy DIY Gradient Foam Tree Cones: Quick and chic decorative trees with a modern gradient effect.
Gingerbread Camper House Recipe
Nothing says happy holidays like a homemade gingerbread house, and we’ve got the template and recipe to help you recreate your own gingerbread camper.
Equipment
- Printable for camper template
- Printable for camper edge pieces
- Stand mixer
- Rolling pin
- Foil or parchment paper
- Pizza cutter
- Baking sheet
Ingredients
For the construction grade gingerbread house:
- ½ cup honey
- 1 ½ cup white granulated sugar
- 3 eggs
- 5 cup all-purpose flour (and more for flouring surface)
- 1 ½ tsp cinnamon
- 1 ½ tsp ground cloves
- 1 ½ tsp nutmeg
- 1 tbsp ground ginger
For the candy windows:
- Crushed butterscotch candies
For the thick royal icing for assembling:
- 3 tbsp meringue powder
- 4 cup powdered sugar
- 6 tbsp water
Instructions
For the construction grade gingerbread house:
- Cream eggs and sugar together in a stand mixer with a dough hook rather than the paddle attachment. Then, add honey and spices. Mix in flour, 1 cup at a time until mixed. Note that the dough will be very stiff. Wrap in plastic wrap and chill for 1 hour.
- Lightly wipe down the counter with a wet paper towel and place a large piece of foil on top. (The water helps it stay put). Flour your working surface and roll out the dough with a rolling pin to 1/8” thick on the foil or parchment paper.
- Place your printed template on the gingerbread dough and cut with a pizza cutter. Be sure to cut out all the windows and doors too!
- Transfer the foil to a baking sheet and bake the sides of the house pieces first and let them cool. Bake at 325ºF for 15-20 minutes for side pieces (until golden brown).
- For the edge pieces that you will curve, bake for 8-9 minutes until they’re just starting to darken.
- With edge pieces, you’ll need to work quickly while the pieces are still warm and bend to create the curve of the camper before fully cooled.
- Let all pieces cool to room temperature before gluing them together with royal icing. Let the royal icing harden for 4-5 hours before decorating.
For the candy windows:
- When you’re using the gingerbread house template, cut out windows and doors before baking gingerbread dough. Then, bake the pieces per the instructions above.
- Once cooled, place the pieces needing “glass” on foil on a baking sheet. Fill with crushed butterscotch candy and bake at 350ºF for about 5 minutes, until candy has melted.
- Let them cool thoroughly, overnight is best, before removing from baking sheet/foil. Voila, you have edible windows!
For the thick royal icing:
- Mix all of the ingredients (meringue powder, powdered sugar and water) together. Then, store them in an air-tight container if not assembling right away. Makes 3 cups of icing.
Nutrition

47 Affordable Gifts Under $10 for Everyone
Shop budget-friendly gifts under $10 that look way more expensive.…
Continue Reading47 Affordable Gifts Under $10 for Everyone
Gingerbread Muffin Recipe with Lemon Glaze
Add a touch of spice to your breakfast or snack…
Continue ReadingGingerbread Muffin Recipe with Lemon Glaze
Funfetti Reindeer Cookies Recipe
Get into the festive spirit with our Funfetti Reindeer Cookies,…
Continue ReadingFunfetti Reindeer Cookies Recipe
25 Easy Christmas Cocktail Recipes to Try for the Holidays
Deck the halls with these delicious Christmas cocktail recipes! From…
Continue Reading25 Easy Christmas Cocktail Recipes to Try for the Holidays