
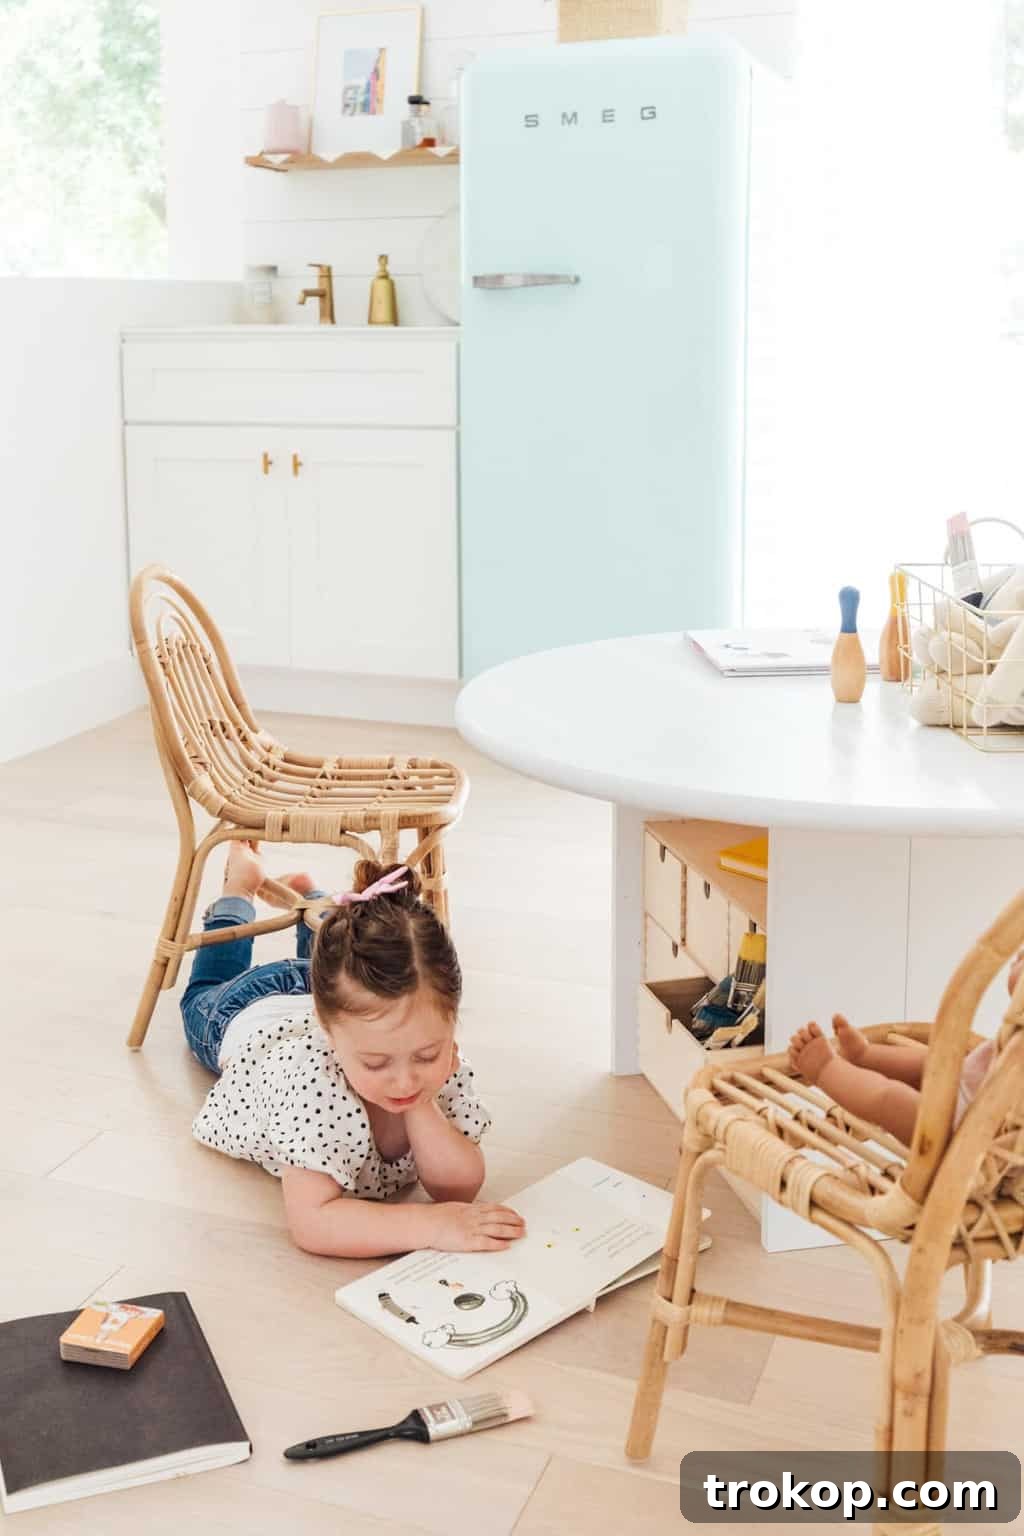
Welcome to the ultimate guide for creating a DIY Kids Play Table that perfectly blends functionality, style, and endless fun! Every parent dreams of a dedicated space where their little ones can unleash their creativity, learn, and play without clutter. This customizable children’s activity table is designed to fit seamlessly into any playroom, bedroom, or living area, offering a bespoke solution for organization and engagement. Forget standard, one-size-fits-all furniture; our easy-to-follow tutorial empowers you to build a versatile piece tailored to your child’s age, size, and interests, complete with ingenious storage for all their treasures.
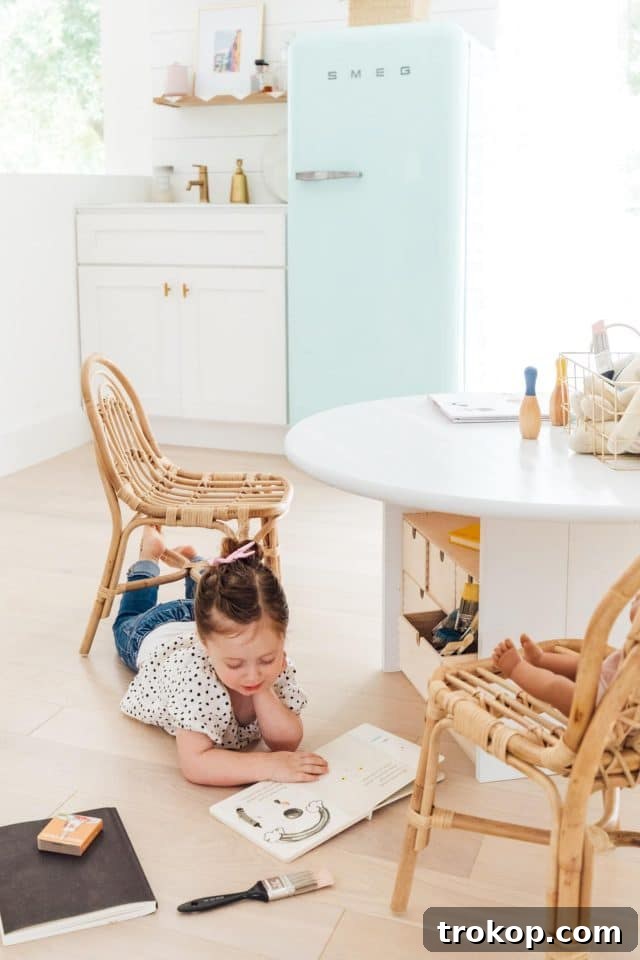
Inspired by our recent kids playroom makeover, this DIY play table is far simpler to construct than it appears. What makes it truly special is its integrated storage, offering a practical solution for keeping everything tidy. Imagine designated compartments for LEGOs, art supplies, magnetic letters, stickers, small toys, and more. The possibilities for organization are genuinely boundless when you have such ample and accessible storage space right within the table.
Beyond its practicality, this children’s activity table stands out for its adaptability. You can effortlessly customize it to match any room’s color scheme, perfectly fit a specific room size, or adjust its height to suit your child’s developmental stage and specific needs. Whether you need a low table for a toddler or a slightly higher surface for a school-aged child’s art projects, this DIY design offers unparalleled flexibility. It’s an investment in a piece of furniture that grows with your child, ensuring years of creative play and organized fun.
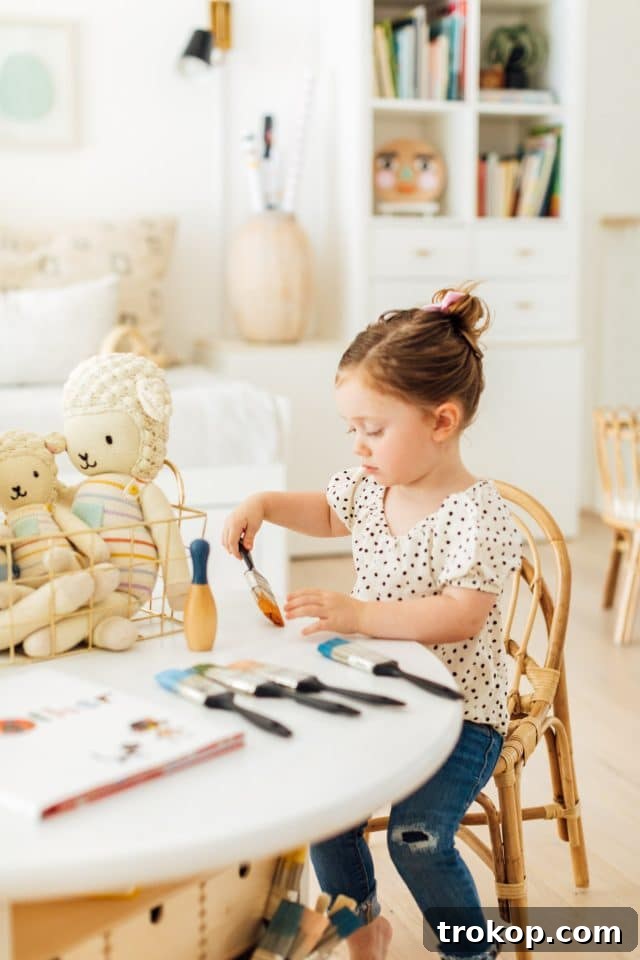
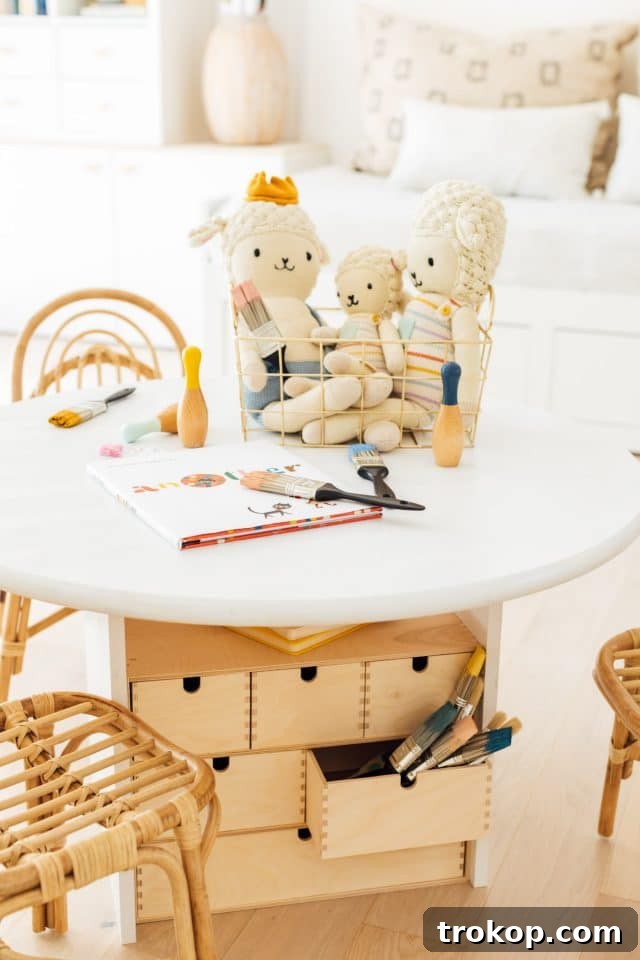
Determining the Optimal Height for Your DIY Kids Table
While a standard kids’ table typically stands around 20 inches tall, we believe in prioritizing comfort and ergonomics for your child. Our design takes into account existing playroom furniture, like our Ellie & Becks Co. rattan chairs, which require a slightly higher surface. Therefore, the overall height of our finished play table is approximately 24 inches once fully assembled. This extra height ensures that children can sit comfortably with their feet flat on the floor or a footrest, and their arms forming a comfortable angle while engaging in activities.
When planning your own DIY children’s table, consider the height of the chairs your child will be using. A good rule of thumb is to ensure there’s enough clearance for their legs, and that the tabletop allows for comfortable posture, reducing strain during prolonged play or study sessions. Customizing the height ensures that your table is not just a place to play, but a comfortable and supportive environment for developing skills and enjoying creative endeavors.
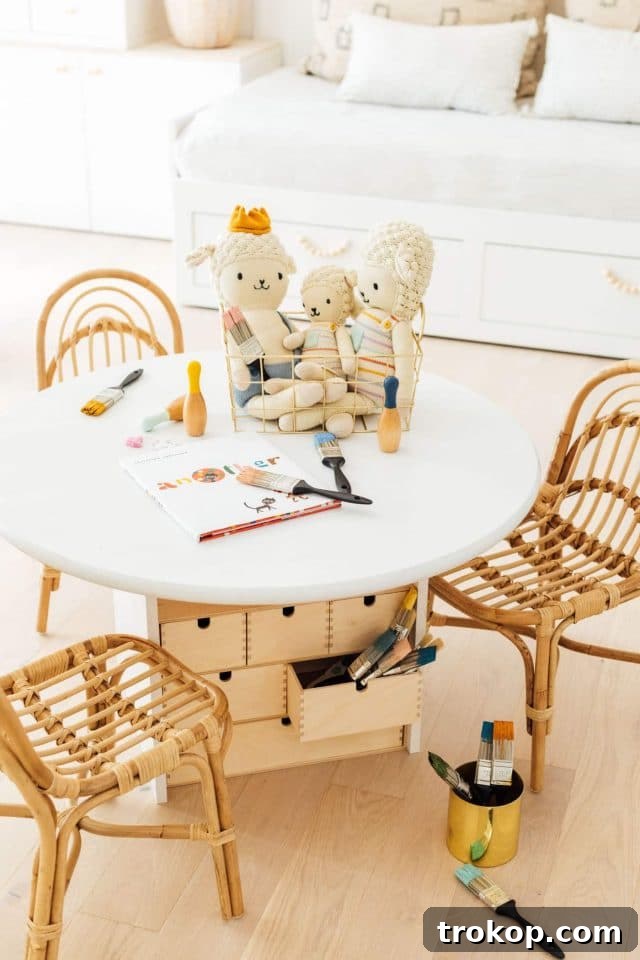
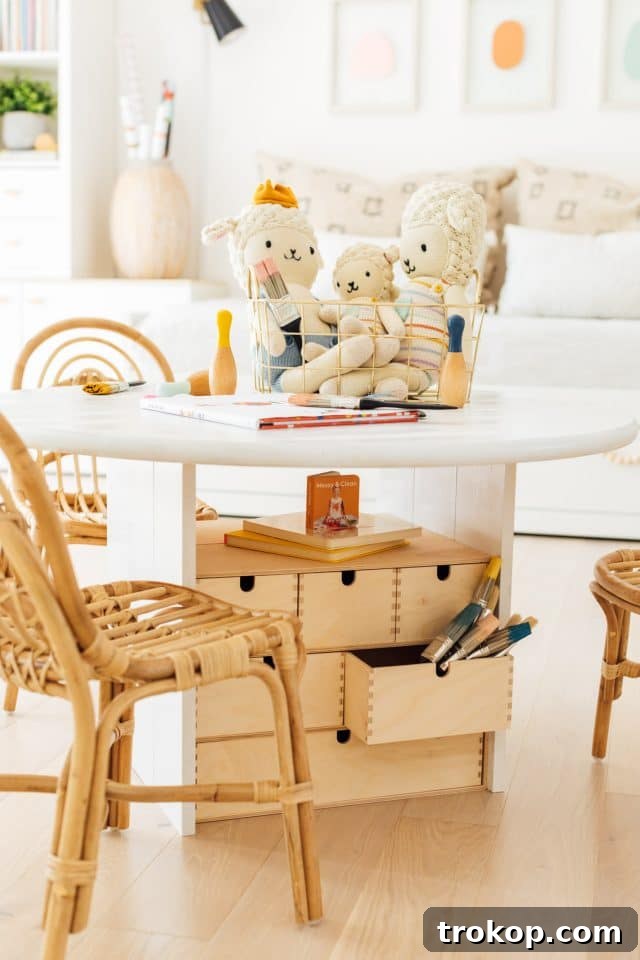
Essential Materials and Tools for Your DIY Kids Play Table
Don’t be intimidated by the idea of building your own children’s activity table! This IKEA kids table hack is surprisingly straightforward, relying on pre-cut wood pieces and simple assembly. The key to a sturdy and functional play table lies in selecting the right materials. Here’s a comprehensive list of everything you’ll need, along with helpful tips for sourcing:
- IKEA Moppe Mini Storage Chests (2): These versatile birch plywood chests form the core of our table’s storage system. Choose them or any other storage bins that suit your aesthetic and functional needs. We opted to leave ours unfinished for a cohesive, natural look that blends well with other wooden elements in the room, but they can easily be painted to match your chosen color scheme.
- 1″x6″ Wood Boards (6 pieces, each cut to 22 inches in length): These solid wood boards are crucial for creating a robust and stable base for your tabletop. Their thickness ensures durability and a reliable working surface. If you don’t own power tools, don’t worry! Most local home improvement stores, such as Home Depot, offer complimentary or low-cost wood cutting services. Simply provide them with the desired length, and they’ll prepare your pieces for you.
- Wooden Tabletop (1): We used a round tabletop with a 36-inch diameter, which offers ample space for various activities. You can choose any shape or size that best fits your play area. Ensure it’s made from a durable wood that can withstand the rigors of child’s play.
- High Gloss White Paint: Or any color of your choice! A high-gloss finish is highly recommended for kids’ furniture as it’s incredibly easy to clean and wipe down, making sticky messes a breeze to manage.
- BIN Shellac Finish (Optional): This product is fantastic for creating a food-safe, non-toxic, and durable finish. It’s an excellent choice for a kids’ table where snacks, drinks, and art supplies might come into contact with the surface, providing peace of mind for parents.
- Flat Head Screws (16, 3/4 inch in length): These screws are essential for securely attaching the storage chests to the wood boards. The 3/4 inch length is important to prevent them from protruding through the wood.
- Metal L Brackets (4): These brackets provide strong support for attaching the tabletop to the base. They typically come with their own screws. If not, you’ll need an additional 8 x 3/4 inch screws.
- Fine Sandpaper: Essential for smoothing out rough edges on your wood, ensuring a safe, splinter-free surface for little hands.
- Drill: A cordless drill will make assembly significantly faster and easier, especially for driving screws and pre-drilling holes.
- Paint Roller: For an even and smooth paint application on your wooden surfaces.
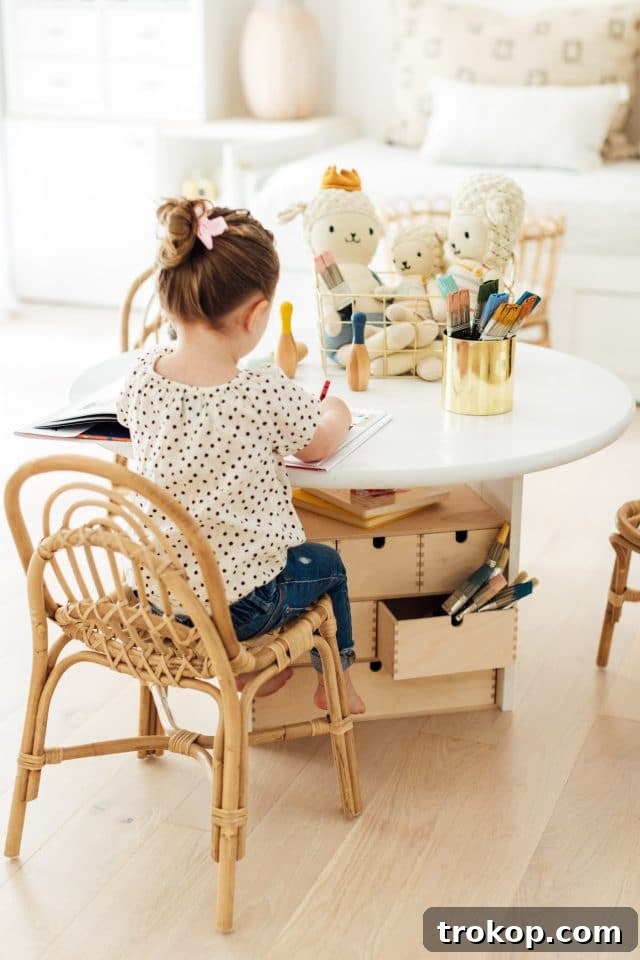
Easy DIY Kids Activity Table: Step-by-Step Assembly Guide
Get ready to bring your vision to life! Follow these simple steps to construct your beautiful and functional DIY kids play table:
To prep your wood:
- Smooth the Surfaces: Begin by taking your fine sandpaper and running it over all the edges of your 1″x6″ wood boards and the entire edge of your wooden tabletop. This crucial step removes any splinters or rough patches, ensuring a smooth, safe surface for your child to interact with.
- Prime and Paint: Once all surfaces are smooth, it’s time to add some color and protection. Paint the front and back of all six 1″x6″ boards, as well as the sides and underside of your tabletop. Apply an even coat using your paint roller for a professional finish. Allow all painted surfaces to dry completely before moving on. Patience here will prevent smudges and ensure a durable coating.
- Apply Protective Finish (Optional but Recommended): For an added layer of durability and child-safety, spray a thin, even coat of BIN Shellac finish onto the top and sides of the tabletop. This non-toxic finish provides excellent protection against spills and wear, making it easy to clean and maintain for years to come. Ensure proper ventilation during this step.
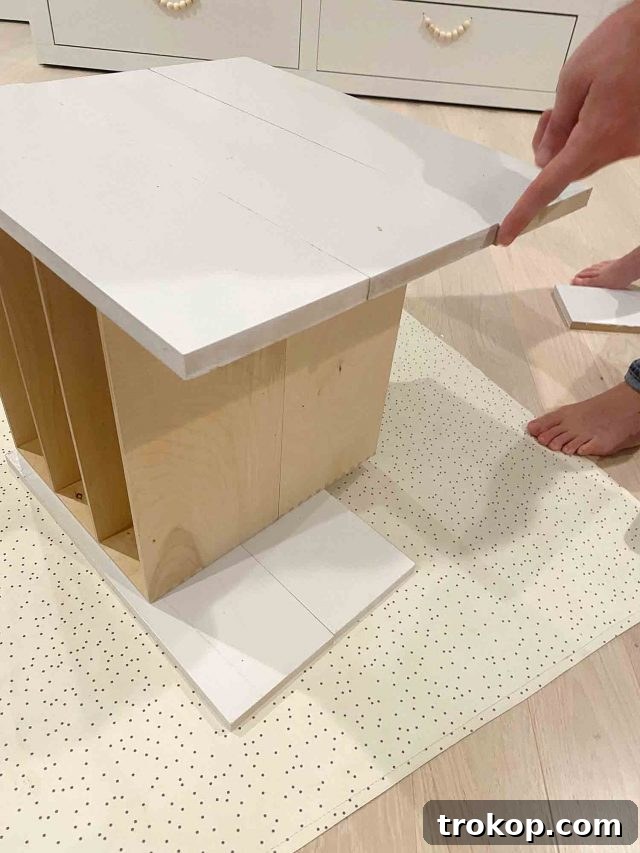
To assemble the sides of the table:
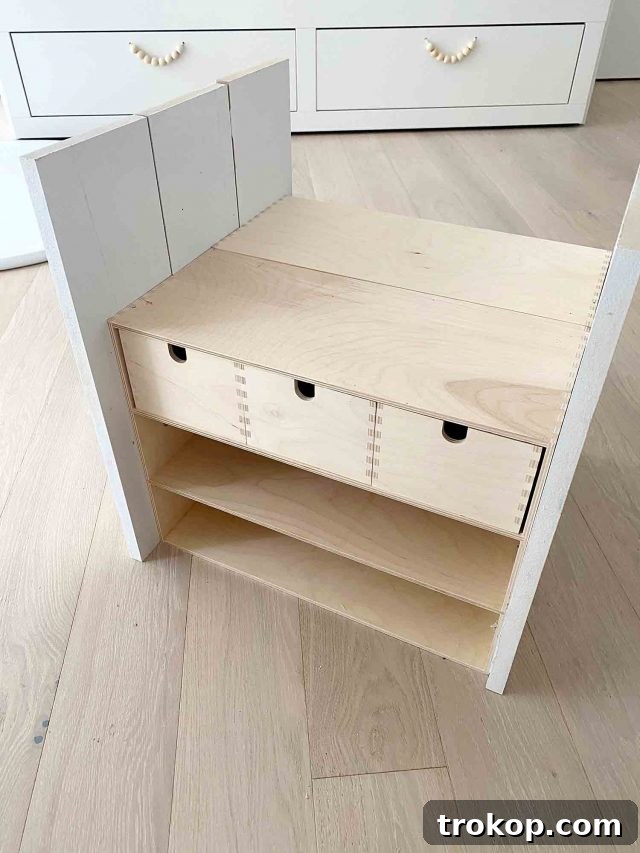
- Prepare the Base for Each Side: For each side of the table (you’ll have two sides), lay three of your 1″x6″ wood boards side by side on a flat, stable surface. Ensure they are aligned perfectly, as these will form the foundational walls for your storage units.
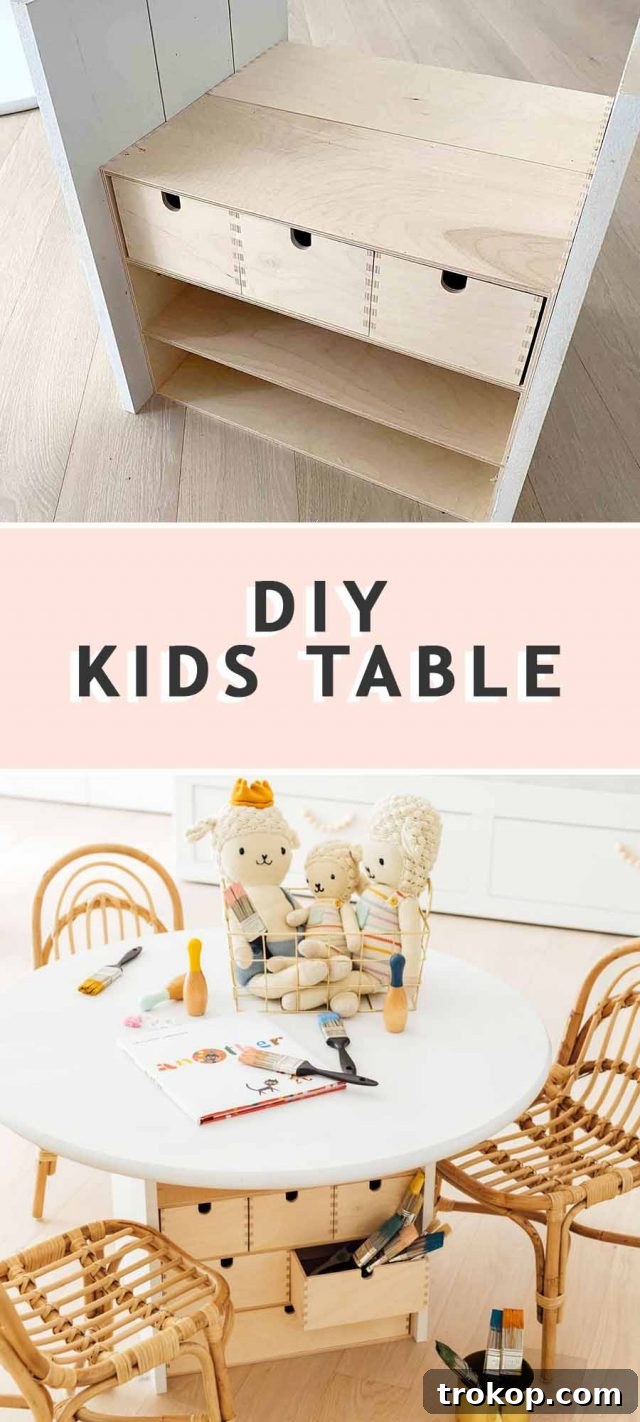
- Position the Storage Chests: Take your two IKEA Moppe mini storage chests and place them back-to-back on top of the laid-out wood boards. Make sure the storage chests are flush against each other and perfectly centered on the boards, resting at the very bottom. This arrangement will create the central storage compartment.
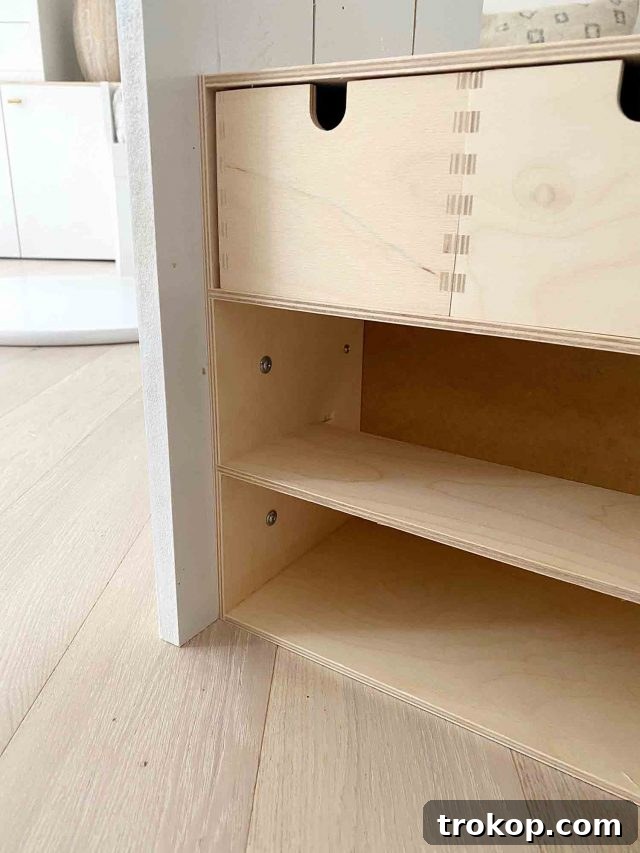
- Secure the Storage Chests: Carefully remove the individual storage bins from the Moppe chests. Using your drill and the 3/4 inch flat head screws, attach the Moppe chests to the 1″x6″ boards. Drive one screw into each of the four internal corners of the Moppe chests, going through the chest’s base into the wood boards below. It is critically important to ensure these screws are either completely flush with the Moppe’s internal surface or slightly inset. If they protrude even slightly, the storage drawers will not slide back into place properly.
To assemble the tabletop:
- Prepare the Tabletop for Attachment: Lay your round wooden tabletop on the floor with its top side facing downwards and the bottom surface facing up. This allows easy access for attaching the base.
- Align the Base: Carefully lift the assembled storage table base (the structure you just created with the Moppe chests and 1″x6″ boards) and flip it upside down. Place it centered on top of the inverted tabletop. Take your time to ensure it’s perfectly aligned to create a balanced and aesthetically pleasing table.
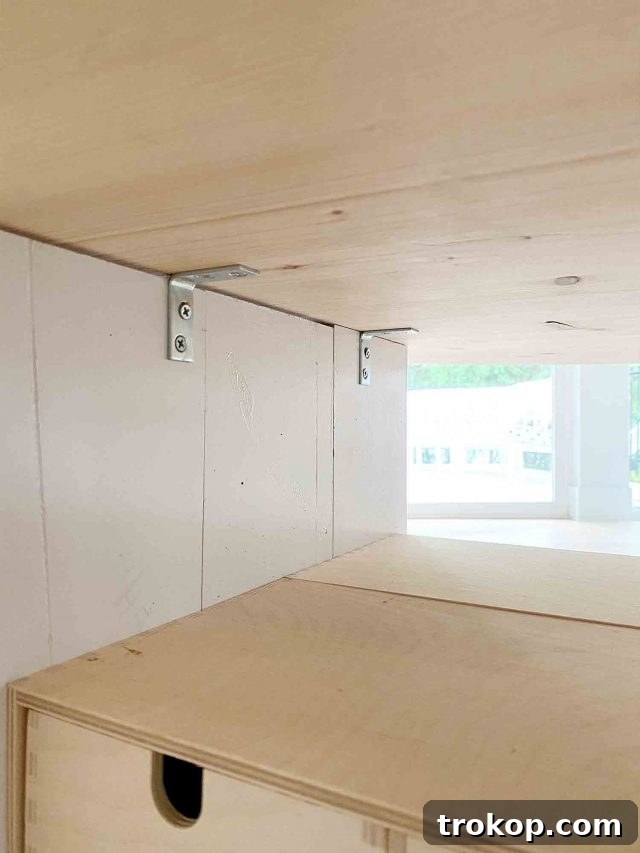
- Secure with L Brackets: Now, using the metal L brackets and the screws that came with them, attach the base to the tabletop. Position one L bracket in each of the four corners where the wood boards meet the tabletop. Screw them securely into place, ensuring a strong connection between the base and the top.
- Final Flip and Organize: Carefully flip the entire table upright, making sure it stands securely on its newly attached base. Finally, insert the storage bins back into the Moppe chests. Your customizable, storage-rich DIY kids play table is now complete and ready for action!
Beyond the Build: Maximizing Your Kids’ Play Table for Endless Creativity
Now that your DIY Kids Play Table is assembled, it’s time to fill it with imagination! This table is more than just a surface; it’s a dynamic hub for creativity, learning, and organized play. The integrated storage is a game-changer, making it incredibly easy for kids to access their favorite items and, just as importantly, to put them away when playtime is over. Think of it as a central command center for all your child’s activities.
The Moppe storage bins are perfect for segmenting different types of items. Dedicate one drawer to LEGO bricks, another to crayons and markers, a third to stickers and stationery, and so on. This categorization helps children develop organizational skills from a young age. It also makes cleanup less daunting, as every item has its designated home. Whether it’s for art projects, building blocks, puzzles, or even as a miniature dollhouse dining area, this table adapts to whatever your child dreams up.
While the IKEA Latt table is a popular choice for children’s furniture, our DIY solution offers significantly more storage and a more robust play surface. The ability to customize the height ensures it fits perfectly with your child’s ergonomic needs, promoting better posture and comfort during extended periods of play. Its sturdy construction means it can withstand enthusiastic play, providing a durable piece of furniture that will be a beloved part of your child’s playroom for years to come.
Total Time: 1 hr 30 mins
Course: DIY
Category: Babies & Kids
Equipment
- Drill
- Paint roller
Materials
- 1 wooden tabletop (ours has a 36″ diameter)
- 2 Ikea Moppe mini storage chest (or any storage bins of your choice)
- 6 1″x6″x22″ wood lumber (or any length of your desired height)
- 16 flat head screws (3/4″ length)
- 4 metal L brackets (if brackets do not come with screws you will need an additional 8 of the 3/4″ screws)
- High gloss white paint (or any color of your choice)
- Shellac finish (optional but creates food-safe non-toxic finish for kids)
- Fine sandpaper
Instructions
To prep your wood:
- Using fine sandpaper, run your hand over the edges of the wood to smooth the ends of your boards and the edge of the table.
- Once smooth, paint the front and back of the 1″x6″ boards and the tabletop sides. Allow them to dry completely.
- Spray a thin coat of the shellac finish on the top and sides of the table.
To assemble the sides the table:
- Lay 3 of your 1″x6″ wood boards side by side on a flat surface for each side of the table.
- Place the Ikea Moppe storage chests back to back on top of them. Make sure the storage chests are flush together and resting in the center at the very bottom of the boards.
- Remove the storage bins from the Moppe and use the 3/4″ screws to attach the Moppe to the 1″x6″ boards on the side in all four corners of the inside of the Moppe. Be sure to make the screws VERY flush or slightly inset in the wood. Otherwise, the storage drawers for the Moppe won’t close.
To assemble the tabletop:
- Place the top side of your round tabletop on the floor, with the bottom facing up.
- Flip the base of your storage table on top of the upside table, making sure that it’s centered.
- Attach the L brackets (with the screws that came with them on all four corners) underneath the tabletop.
- Flip the table upright and insert the storage bins for the Moppe back inside.
Notes
- A standard kids table height is about 20-inches. However, our table is 24-inches tall to accommodate our chairs.
- If you don’t own the proper power tools, your local home improvement store can cut your wood at any length.
Cost: $164
Keywords: childrens table, diy table, ikea hack, ikea kids table, kids activity table, kids art tabe

Discover More Creative Ideas for Kids’ Spaces and Family Fun
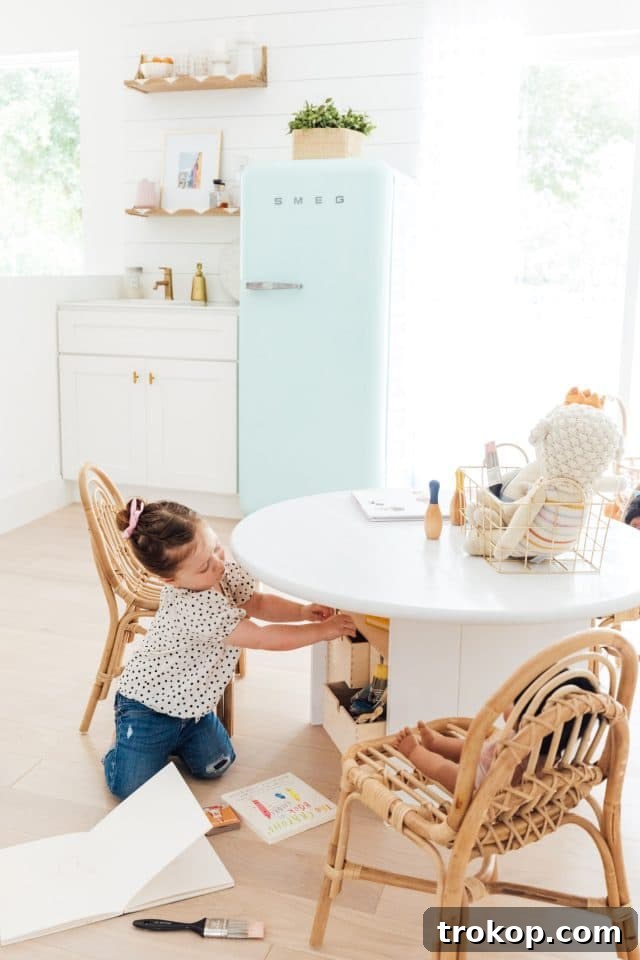
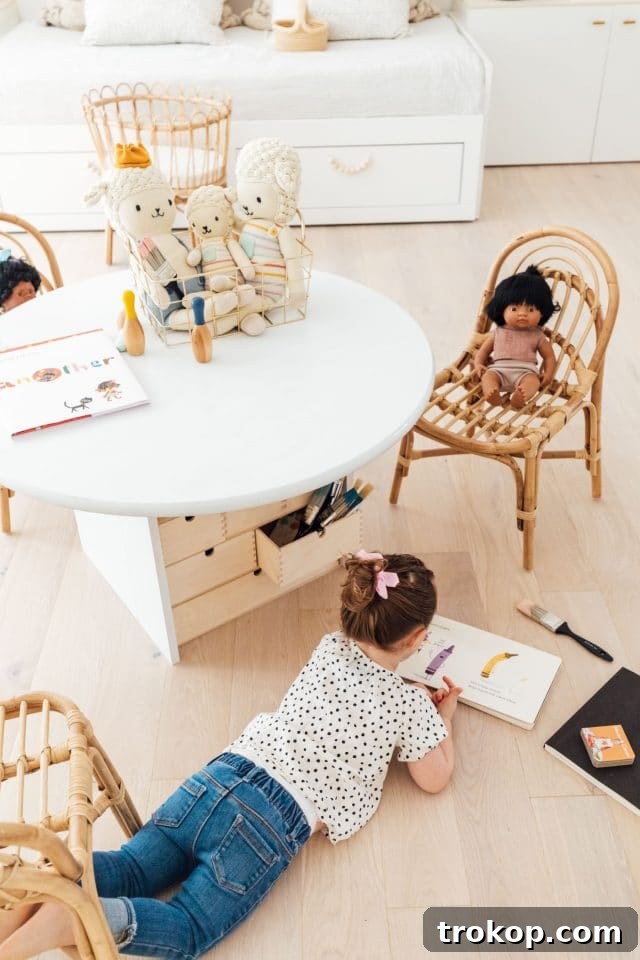
Our DIY art desk currently serves as a central art station for Gwen, occasionally transforming into a charming dining table for her dolls. If you love the idea of creating unique and functional spaces for children, explore some of our other favorite kids’ decor and play ideas from our archives. Each project is designed to inspire creativity and make your home more kid-friendly:
- Our Kids Playroom Makeover: Learn how we transformed an ordinary room into a vibrant, kid-friendly play space with ingenious faux built-in storage solutions that maximize every inch.
- Little Girl Room Ideas: See the stunning before-and-after transformation of Gwen’s big girl bedroom, filled with charming and practical design elements.
- DIY Book Nook: Create a magical and cozy reading corner that encourages your little bookworm to explore new stories and build a lifelong love for reading.
- DIY Flamingo Ring Toss: A super fun and easy outdoor game that provides entertainment for children and adults alike, perfect for parties or casual backyard play.
- DIY Cooling Neckerchiefs for Babies: A practical and thoughtful project for teething babies, offering comfort and style.
- Unique Birthday Gifts for Girls: Struggling with gift ideas? Our curated guide highlights 56 of the best and most unique birthday gifts that are sure to delight any girl.
- How to Host a Drive-Thru Baby Shower Parade: Innovative tips and ideas for celebrating life’s precious moments safely and creatively, perfect for modern times.
- How to Make an Easy DIY Kids Activity Table: A direct link back to this very project, allowing you to easily revisit the instructions!
We absolutely adore seeing your home decor projects! Don’t forget to share your creations with us on Instagram using the hashtag #sugarandclothloves. Your ingenuity and style always inspire us! For more fantastic interior design inspiration, innovative DIY projects, and helpful home decor tutorials, you can find them all right here on our site. Happy crafting!
DIY Ikea Play Kitchen Hacks to Make it One-of-a-Kind
Take your child’s pretend play to the next level with…
Continue ReadingDIY Ikea Play Kitchen Hacks to Make it One-of-a-Kind
16 Genius Ikea Desk Hacks You Need In Your Life
Discover the ultimate IKEA desk hack guide for a stylish…
Continue Reading16 Genius Ikea Desk Hacks You Need In Your Life
22 Home Office Ideas that Promote Productivity & Creativity
Tired of the same ol’ 9-5 grind? These home office…
Continue Reading22 Home Office Ideas that Promote Productivity & Creativity
15 Entryway Storage Ideas to Tame Your Cluttered Chaos
Say goodbye to chaos at the front door with these…
Continue Reading15 Entryway Storage Ideas to Tame Your Cluttered Chaos