
Photos by Jared Smith
DIY Ice Cream Cone Macarons: A Whimsical Dessert Delight
Are you ready for another delightful macaron adventure? We certainly hope you’re not tired of our obsession with these delicate French confections, because we’re about to unveil a project that combines two of the world’s most beloved treats: macarons and ice cream! Get ready to dive into the sweet world of DIY Ice Cream Cone Macarons – a whimsical, easy-to-make dessert that’s as charming to look at as it is delicious to eat.
Forget the challenges of intricate baking for a moment; this project focuses on the fun and creative aspects of transforming pre-made or your favorite homemade macarons into adorable mini ice cream cones. It’s a fantastic way to impress at parties, delight children (who might just believe they’re getting extra ice cream!), and add a unique twist to your dessert table without the fuss of actual scooping and melting. Unlike some of our more intricate pastry art projects, like the painted waffles or fruit macarons that require a steady hand and a keen eye, these ice cream cone macarons are surprisingly simple and incredibly rewarding. They’re perfect for bakers of all skill levels, offering a laid-back approach to dessert decorating.
So, whether you’re looking for a fun weekend activity, a unique party favor, or just a sweet escape into crafting, these Ice Cream Cone Macarons are your next must-try project. Let’s get creative and bring a little extra sweetness into our lives!
Why You’ll Love Crafting These Whimsical Treats
The appeal of macarons is undeniable: their delicate shells, chewy interiors, and vast array of flavors make them a sophisticated indulgence. But why stop there when you can turn them into something even more enchanting? Our DIY Ice Cream Cone Macarons project takes this classic French pastry and infuses it with playful charm, making it a standout for any occasion.
Perfect for Every Occasion
- Kid-Friendly Fun: This project is fantastic for involving younger helpers (with supervision, of course). It’s a creative outlet that results in a treat they’ll be thrilled to eat. Plus, as mentioned, it’s a clever way to offer a “dessert illusion” – less sugar, all the fun!
- Party Starters: Imagine a platter of these colorful treats at your next birthday party, summer picnic, or baby shower. They are instant conversation starters and an irresistible focal point for any dessert spread.
- Unique Gifting: Pack a few of these adorable macarons into a decorative box, and you have a unique, thoughtful, and absolutely delicious gift for friends, family, or teachers.
Simplicity Meets Creativity
One of the best aspects of this DIY is its accessibility. You don’t need professional baking skills to achieve stunning results. The emphasis here is on creative assembly and decorating, making it a joy for anyone who loves crafting with food. The steps are straightforward, ensuring a delightful experience from start to finish. You get to unleash your inner artist without the pressure of perfect macaron feet (unless you’re making your own from scratch, which adds another layer of satisfaction!).
A Feast for the Eyes and Palate
Beyond their ease of creation, these ice cream cone macarons are incredibly versatile. You can choose macaron flavors and colors to match any theme or personal preference. From vibrant fruity hues to classic chocolate or vanilla, each macaron offers a canvas for your creativity. This project guarantees a dessert that’s not just a treat for the taste buds but also a true feast for the eyes.
Gather Your Sweet Supplies: Materials You’ll Need
Before we embark on this delightful journey, let’s ensure you have all the necessary components for your Ice Cream Cone Macaron DIY. The beauty of this project lies in its simplicity, requiring just a few key items to transform your macarons into miniature works of art.
- Food Markers: These edible pens are your secret weapon for drawing intricate patterns and details on the fondant cones. Opt for a set with various colors to add vibrant touches to your “ice cream scoops” and classic waffle patterns.
- Brown Gel Food Coloring: Essential for adding depth and shading to your fondant cones, mimicking the baked appearance of a real waffle cone. A small amount goes a long way.
- Clear Food Extract: While not explicitly used in every step, a clear food extract (like vanilla, lemon, or even clear vodka for non-alcoholic options) is excellent for diluting gel food coloring to create edible paint. This allows you to brush on subtle tints or blend colors for a more realistic effect on your cones or macarons.
- Light Brown Fondant: This pliable sugar dough is crucial for shaping your edible ice cream cones. Its ability to hold shape once dried makes it perfect for this project. Ensure you have enough for all your macarons.
- Food Dedicated Paint Brush: It’s vital to have a small, clean brush specifically designated for food use. This prevents any cross-contamination and ensures your edible paint applications are precise and hygienic.
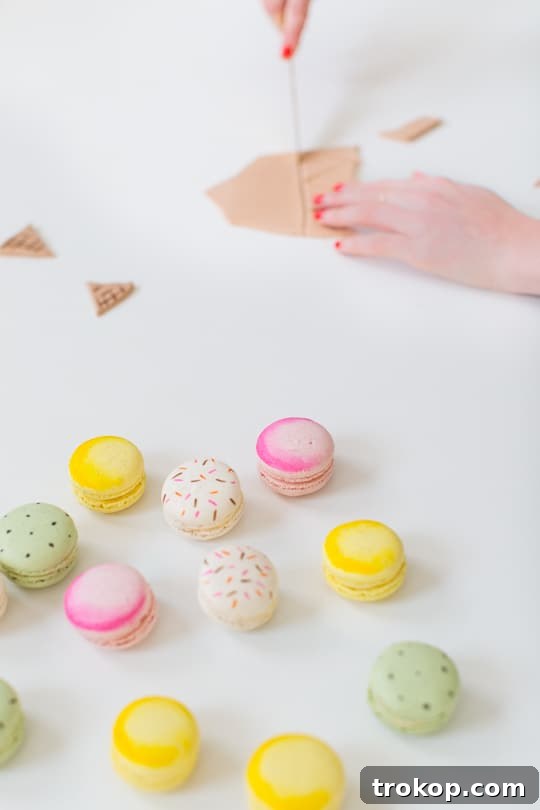
- Macarons in the flavors/colors of your choice!: The star of the show! You can bake your own macarons (if you’re up for the challenge) or, for ultimate convenience, purchase high-quality macarons from a local bakery. We sourced ours locally from Tout Suite, which offered a fantastic variety of colors and flavors. Choose vibrant colors that resemble your favorite ice cream flavors – mint green, pale pink, sunny yellow, or classic vanilla will all work wonderfully.
Additional Recommended Tools:
- Rolling Pin: For evenly rolling out your fondant.
- Sharp Knife or Fondant Cutter: To precisely cut out your cone shapes.
- Parchment Paper or Silicone Mat: A non-stick surface for working with fondant.
- Powdered Sugar or Cornstarch: For dusting your work surface to prevent fondant from sticking.
Step-by-Step Guide to Crafting Your Ice Cream Cone Macarons
Now that you have all your supplies, let’s embark on the fun part: creating these enchanting Ice Cream Cone Macarons! This process is designed to be enjoyable and straightforward, allowing your creativity to shine without unnecessary complexities.
Step 1: Prepare Your Macarons for Transformation
The beauty of this project is its flexibility with macaron types. Whether you’ve baked a fresh batch or picked up some gourmet delights from your local bakery, ensure your macarons are ready for their ice cream cone makeover. Choose a variety of colors and flavors to make your finished display even more appealing. For instance, we loved using:
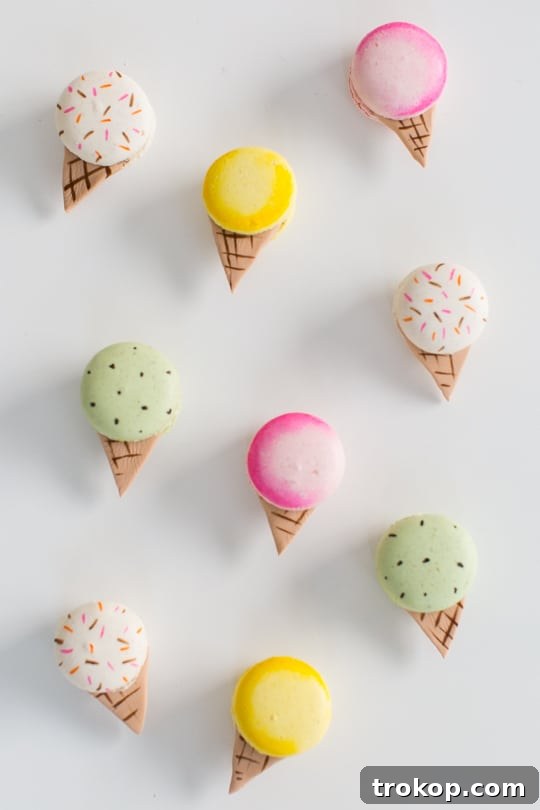
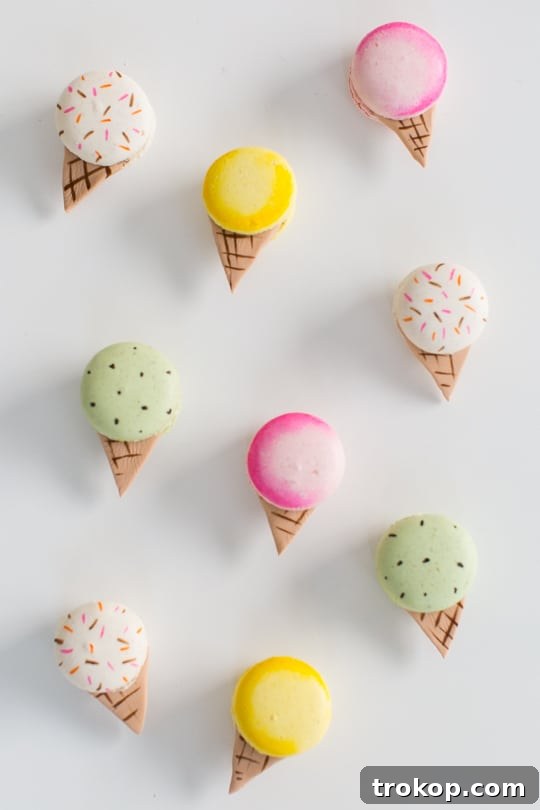
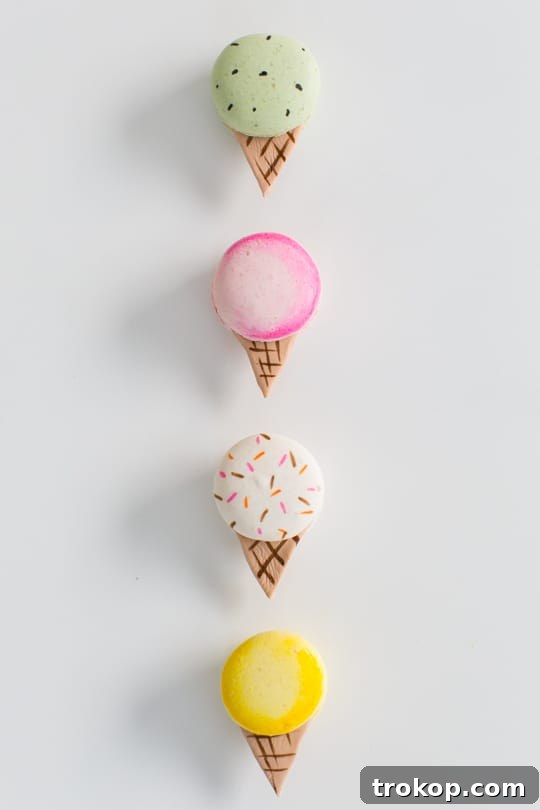
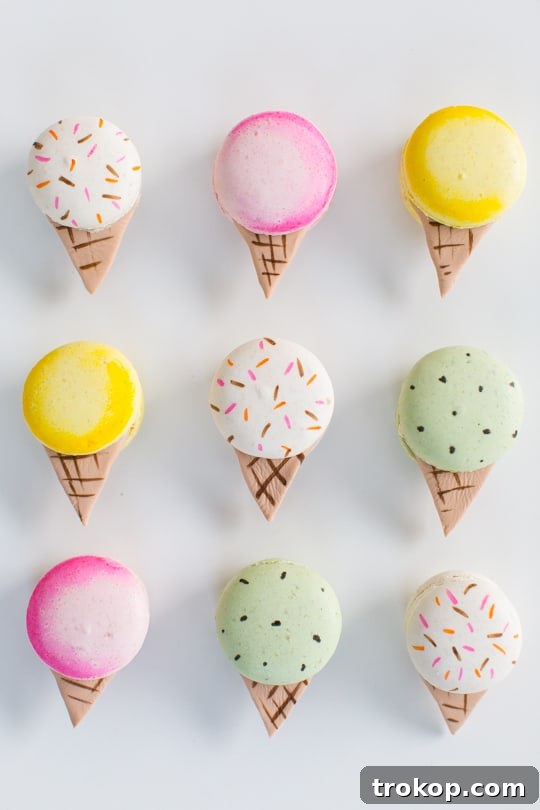
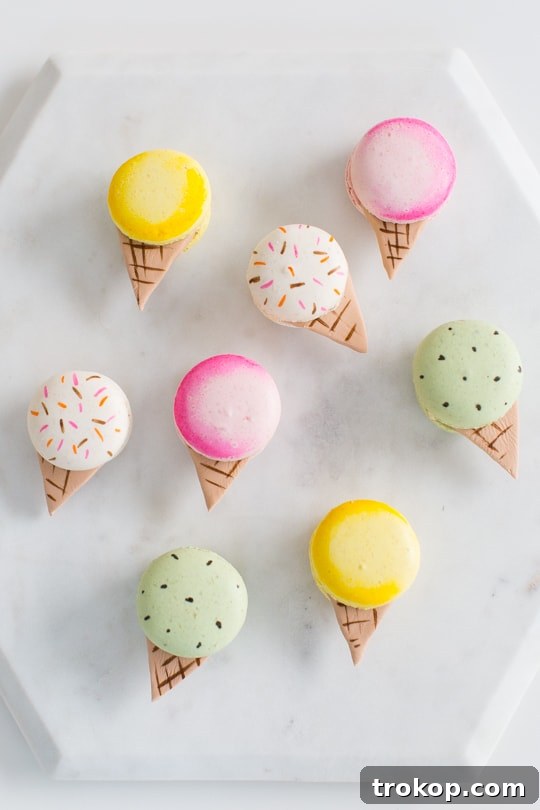
- Mint Green Macarons: These were adorned with small black edible marker dots to perfectly mimic “mint chocolate chip” ice cream.
- Yellow and Pink Macarons: We added bright yellow and pink shaded sides using edible markers, creating a vibrant, fruity sorbet effect.
- Plain Vanilla Macarons: A classic choice, these were elevated with a scattering of colorful sprinkles drawn on using various marker colors, giving them a fun, celebratory look.
Feel free to experiment with your own favorite “ice cream” flavors and decorative touches on the macaron shells themselves before adding the cone. A little edible glitter or some carefully placed edible beads can also add extra sparkle!
Step 2: Design and Detail Your Fondant Cones
This is where your plain macarons truly transform into ice cream dreams. The fondant cones provide the iconic shape and texture that makes these treats so special.
- Roll Out the Fondant: On a clean, smooth working surface lightly dusted with powdered sugar or cornstarch (to prevent sticking), roll out your light brown fondant. Aim for a consistent thickness, roughly 1/8 inch (about 3mm). This thickness ensures the cones are sturdy enough to hold their shape but not too bulky.
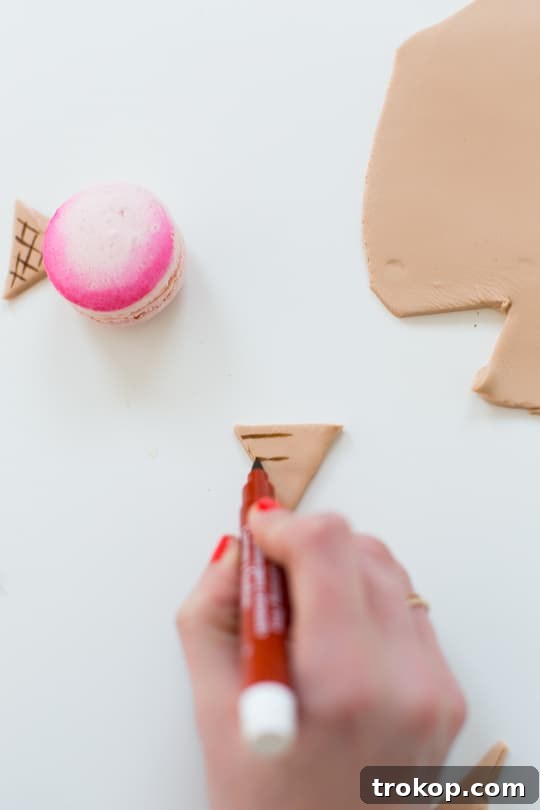
- Cut Triangle Shapes: Using a sharp knife or a fondant cutter, cut out triangle shapes. The size of your triangles will depend on the size of your macarons. A good rule of thumb is to make the base of the triangle slightly wider than the macaron’s diameter and the height sufficient to look like a mini ice cream cone peeking out. You can create a paper template first to ensure uniform sizes.
- Harden the Shapes: Carefully transfer your fondant triangles to a piece of parchment paper or a silicone mat. Leave them exposed to the open air for about 30 minutes to an hour. This allows the fondant to slightly firm up, making it easier to handle and draw on without distortion. The slight hardening is key to maintaining their structure once assembled.
- Draw the Waffle Pattern: Once the fondant triangles are firm to the touch, it’s time to add the classic waffle cone texture. Using your food markers (a brown one works best for authenticity), carefully draw little criss-cross lines across each triangle. Start by drawing diagonal lines in one direction, then cross them with lines in the opposite direction to create a grid or diamond pattern. Take your time to make the lines as neat and evenly spaced as possible for a realistic waffle cone effect. You can also use a mixture of brown gel food coloring and clear food extract with your food-dedicated paintbrush to paint subtle shadows and highlights, adding dimension to your cones.

Step 3: Assemble Your Sweet Creations
The final step brings everything together, transforming your individual components into irresistible ice cream cone macarons!
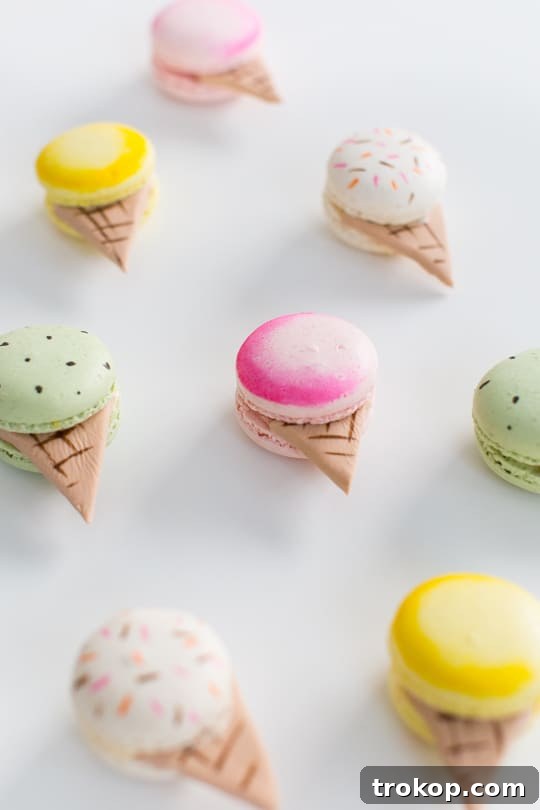
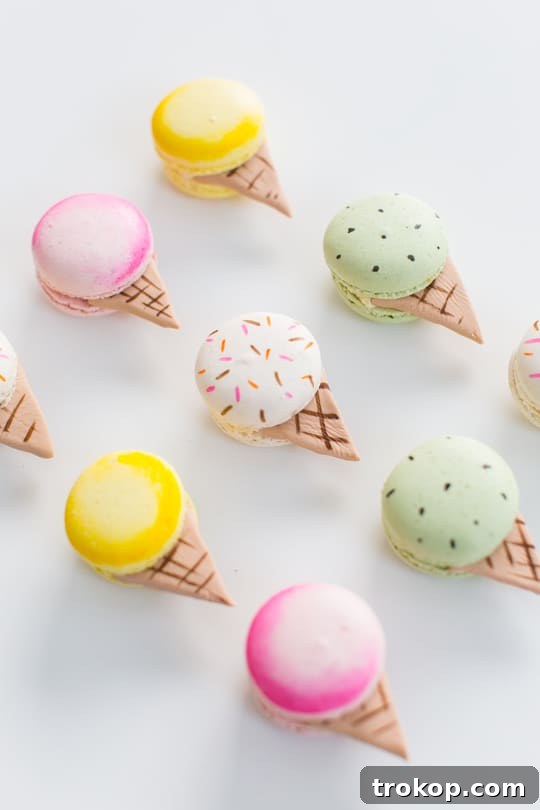
All you have to do is gently slip the decorated fondant cones in between the top and bottom shells of your macarons. The natural filling of the macaron (ganache, buttercream, jam) should provide enough tackiness to hold the fondant cone in place. If your macarons have a very thin filling layer, you can add a tiny dab of extra frosting or melted chocolate to secure the cone. Carefully adjust the cone so it’s centered and peeking out from the bottom, giving the illusion of a perfectly scooped ice cream cone. And just like that, you’re all set with a batch of unique and utterly charming sweet treats!

Creative Variations and Serving Suggestions
The beauty of these DIY Ice Cream Cone Macarons extends beyond their basic creation. There’s a world of possibilities to customize and present them, making them even more special for any event or craving.
Endless Flavor Combinations
Think beyond just mint chocolate chip or vanilla. Consider matching your macaron colors and flavors to classic ice cream combinations:
- Strawberry Shortcake: Pink macarons with a light pink cone and a hint of strawberry flavor.
- Chocolate Fudge: Dark brown macarons with a rich chocolate filling and a deep brown cone.
- Pistachio: Light green macarons, perhaps with small, finely chopped nuts (if you’re comfortable with adding texture).
- Blueberry Swirl: Purple or blue macarons with an abstract swirl pattern drawn on top.
The goal is to evoke the feeling of a real ice cream parlor, but in adorable, bite-sized macaron form!
Dazzling Toppings and Embellishments
Once your macarons are assembled, you can add extra edible flair.
- Edible Glitter: A dusting of edible glitter on the “ice cream scoop” can make them sparkle.
- Mini Sprinkles: Tiny sugar pearls or mini nonpareils can be lightly pressed onto the macaron shell for an authentic sprinkle look.
- Drizzle: A fine drizzle of melted white or dark chocolate can mimic fudge or a chocolate shell.
Serving with Style
Presentation is key! These treats are naturally photogenic, so showcase them beautifully:
- Dessert Platter: Arrange a colorful assortment on a tiered dessert stand for a stunning display at parties.
- Individual Servings: Place each macaron in a mini cupcake liner or a small treat bag for a charming party favor.
- Summer Theme: Perfect for summer gatherings, pool parties, or Fourth of July celebrations.
- Kid’s Birthdays: A fun and creative alternative to traditional birthday cake slices.
Tips for Macaron Success and Storage
Even though this project focuses on decorating, a few general tips can enhance your experience and the longevity of your delicious creations.
Handling Fondant Like a Pro
- Prevent Sticking: Always work on a clean, dry surface lightly dusted with powdered sugar or cornstarch. If your fondant becomes sticky, knead in a tiny bit more powdered sugar.
- Storing Leftovers: Any unused fondant should be tightly wrapped in plastic cling film and stored in an airtight container at room temperature. This will keep it fresh for future projects.
- Work Quickly: Fondant can dry out quickly, so try to work efficiently once it’s rolled out.
Keeping Your Macarons Fresh
- Refrigeration: Assembled ice cream cone macarons are best stored in an airtight container in the refrigerator. They will typically stay fresh for 3-5 days.
- Bring to Room Temperature: For the best flavor and texture, allow the macarons to come to room temperature for about 15-20 minutes before serving. This will soften the macaron shells and enhance the filling’s flavor.
These little details can make a big difference in the enjoyment of your beautifully crafted treats.
Share Your Sweet Success!
We are absolutely thrilled for you to try your hand at these adorable and delicious DIY Ice Cream Cone Macarons. They are genuinely do-able without needing an artistic background, proving that anyone can create something special with a little creativity and a few simple tools.
We can’t wait to see your unique interpretations! Be sure to share your magnificent creations with us on social media by tagging #mysugarandcloth. Your awesomeness inspires us, and we love seeing how you bring our projects to life. If you’re hungry for more macaron inspiration, you can find an entire collection of our macaron projects right here!
Thank you for joining us on this sweet adventure. We hope you have an absolutely fantastic weekend, filled with joy and perhaps some delightful baking. Until our next creative endeavor, we’ll see you back here!