
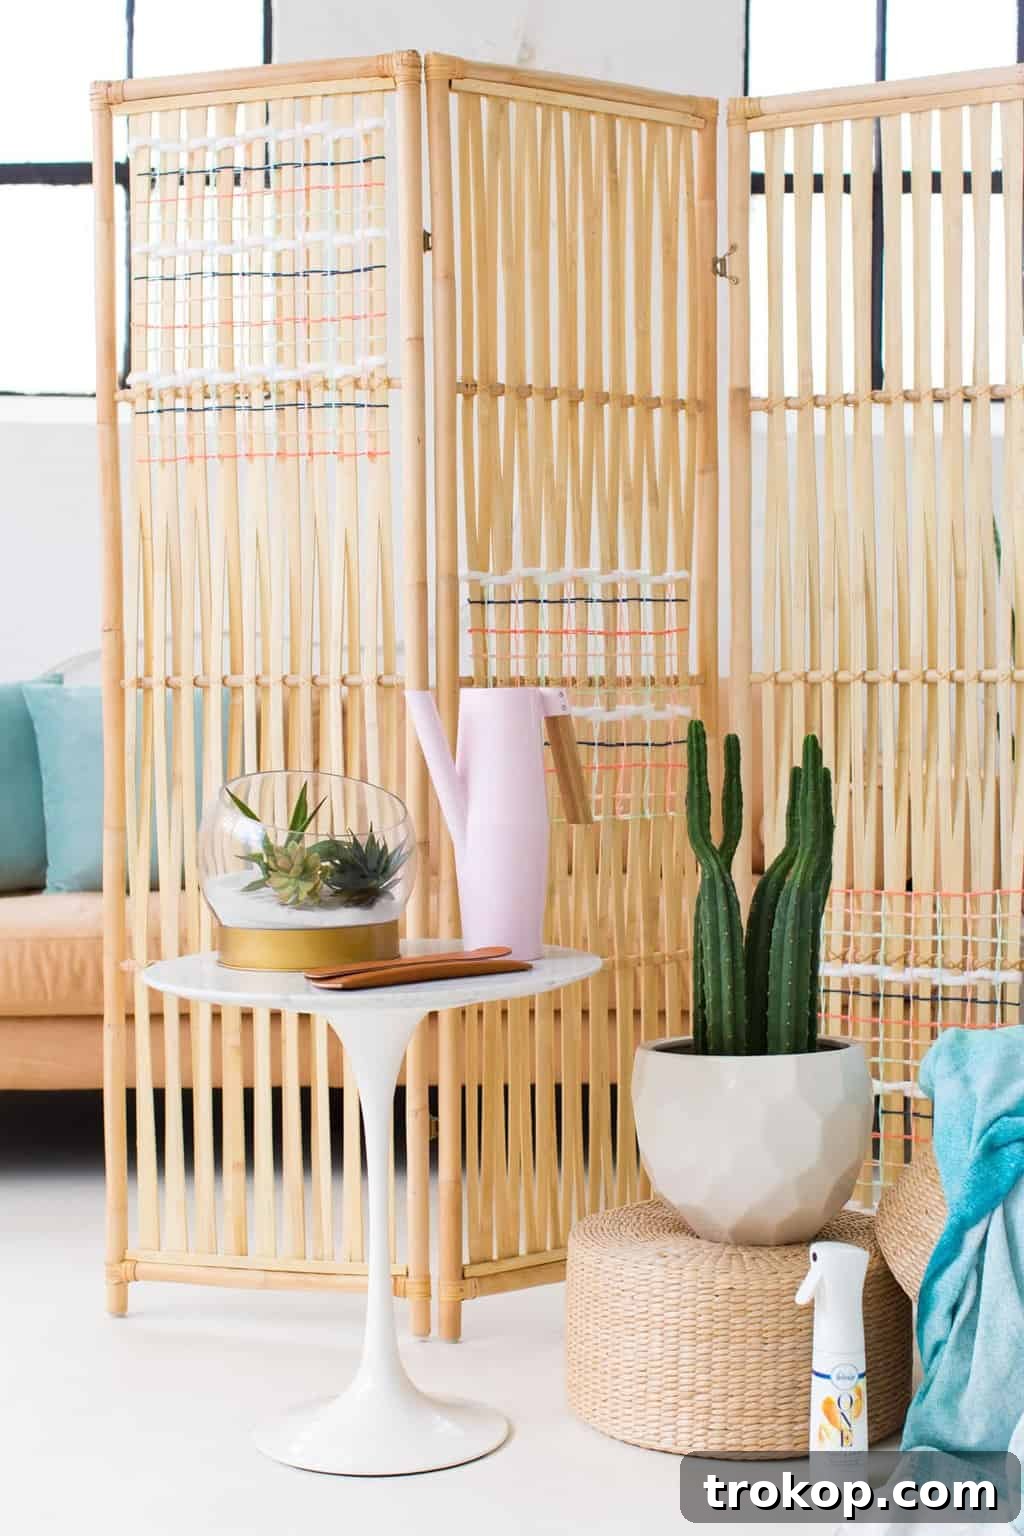
Are you looking to add a touch of personality and practicality to your home without breaking the bank? A DIY woven room divider could be the perfect solution! This creative project allows you to introduce vibrant colors, interesting textures, and functional separation to any space. It’s an ingenious way to elevate your home decor on a budget, offering both aesthetic appeal and practical benefits for modern living.
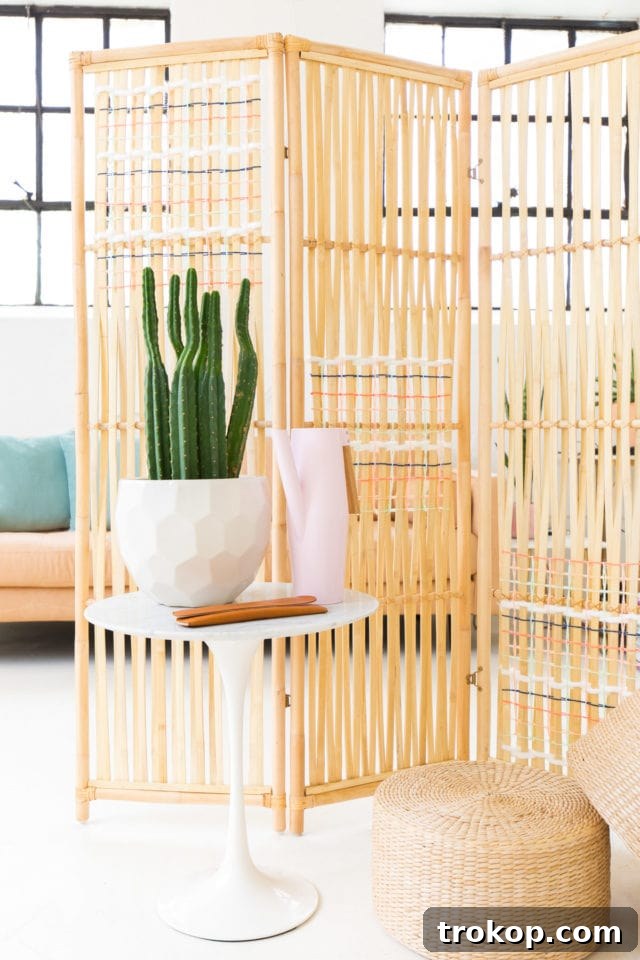
In today’s world of open-plan living and multi-purpose spaces, the need for flexible room division is more apparent than ever. Whether you’re working from home, hosting guests, or simply craving a quiet corner, a well-placed room divider can transform your environment. Our studio, bustling with activity, often finds itself in need of designated zones. This DIY woven room divider emerged from that very need – a fun, functional, and stylish way to create personal pockets within a larger area.
While you might not need a divider to “drown out coworkers” (though it certainly helps create mental boundaries!), it’s an ideal project for enhancing small space entertaining. Imagine needing a quick screen to conceal laundry or a cluttered workspace before unexpected guests arrive – this divider is your instant privacy solution. We specifically chose to enhance a rattan divider, embracing the popular and timeless cane and rattan decor trend, known for its natural warmth and textural appeal.
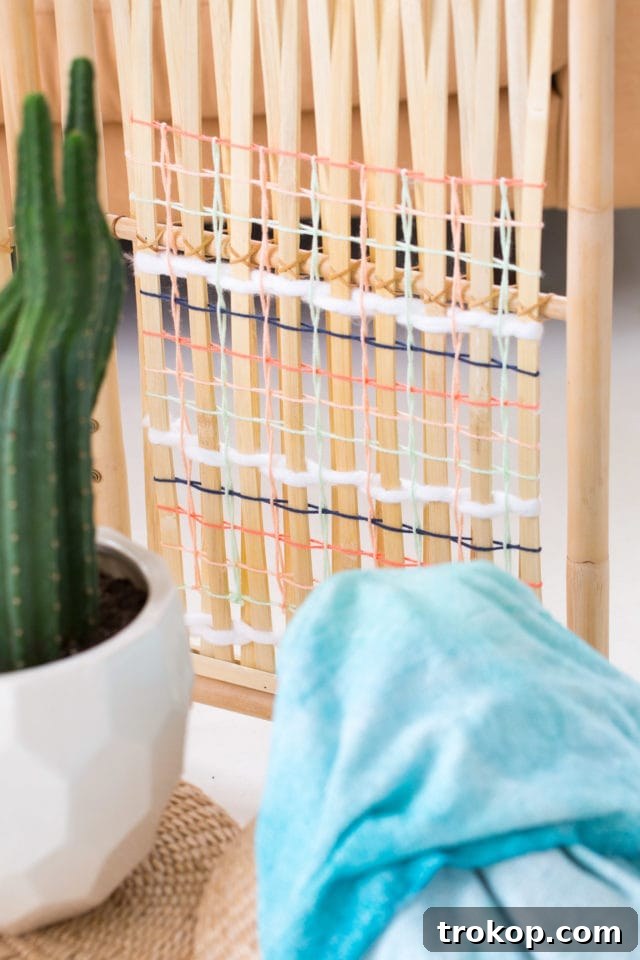
Table of Contents
Why a Room Divider is a Must-Have for Modern Homes
Room dividers are incredibly versatile pieces of furniture that offer numerous benefits, especially in smaller homes, studio apartments, or open-plan layouts. They serve as more than just decorative accents; they are functional tools for maximizing space and enhancing liveability. Here’s why a room divider, particularly a beautiful DIY woven one, is an invaluable addition to your home:
- **Instant Privacy:** The most obvious benefit is creating immediate privacy. Whether you need a temporary changing screen, a barrier for a sleeping area in a studio, or a visual separation during video calls, a divider offers a quick and easy solution.
- **Defining Zones:** In open-concept living, it can be challenging to delineate specific areas. A room divider helps to visually separate spaces like a living room from a dining area, a bedroom from a home office, or even a cozy reading nook from the main activity zone.
- **Concealing Clutter:** We all have those moments when unexpected guests arrive, and there’s a pile of laundry or a messy desk in plain sight. A room divider acts as a stylish camouflage, allowing you to quickly hide any “unmentionables” and maintain a tidy appearance.
- **Adding Aesthetic Appeal:** Beyond its utility, a DIY woven room divider is a statement piece. It introduces color, texture, and an artisanal touch that can complement existing decor or serve as a vibrant focal point.
- **Budget-Friendly Decor:** Compared to building permanent walls or installing complex partitioning systems, a DIY room divider is an incredibly cost-effective way to achieve similar results. You can transform an inexpensive base item with affordable yarn to create a high-end look.
- **Flexibility and Adaptability:** Unlike fixed walls, a portable room divider can be moved, folded, and reconfigured to suit changing needs. This flexibility makes it perfect for dynamic living spaces where functions might shift throughout the day or week.
The Timeless Appeal of Woven and Rattan Decor
Rattan and other woven natural materials have seen a significant resurgence in interior design, and for good reason. Their enduring popularity lies in their ability to bring warmth, organic texture, and a touch of global sophistication into any home. This trend aligns perfectly with a desire for more natural, sustainable, and handcrafted elements in our living spaces.
Rattan, a climbing palm, is renowned for its strength, flexibility, and lightweight nature, making it an ideal material for furniture and decorative items. When incorporated into a room divider, its open weave offers a delicate balance between separation and connectivity, allowing light and air to flow while still defining space. The addition of colorful yarn to a rattan base amplifies this appeal, creating a striking contrast between the natural tones of the rattan and the vibrant hues of the weaving. This DIY project taps into the beauty of this trend, allowing you to create a personalized piece that is both contemporary and timeless.
Materials and Tools Needed to Make a Woven DIY Room Divider
Creating your very own woven room divider is a straightforward project that requires only a few key materials. The beauty of this DIY lies in its adaptability; you can easily customize the look to match your personal style and existing home decor. Here’s what you’ll need to get started on this fun and rewarding hack:
- Rattan Room Divider: The foundation of this project. We used an IKEA Jassa Divider as our base for this “IKEA hack.” If you can’t find this specific model, don’t worry! Similar results can be achieved with other rattan or woven screens. Consider options like a vintage woven wood divider, a fiber weave divider, a wicker privacy screen, or even a metal privacy screen if you want to experiment with a different base material. The key is to have a framework with openings or strands that you can weave yarn through.
- Yarn in Various Colors: This is where your creativity truly comes to life! Choose an assortment of yarn colors that complement your room or create a bold contrast. Consider different fiber types – cotton for a natural feel, acrylic for vibrancy and durability, or wool for texture.
- Thick Yarn for Added Texture (Optional): To give your divider an extra dimension and visual interest, incorporate some thicker yarn or even roving. This creates a lovely tactile quality and helps certain sections stand out.
- Scissors: A good pair of sharp scissors is essential for cleanly cutting your yarn.
How to Make a Woven DIY Room Divider: Step-by-Step Guide
While this project might take a little time and patience, the process itself is incredibly simple and immensely satisfying. The best part? You have complete creative freedom to design a piece that is uniquely yours, choosing any pattern, shape, or color combination you envision.
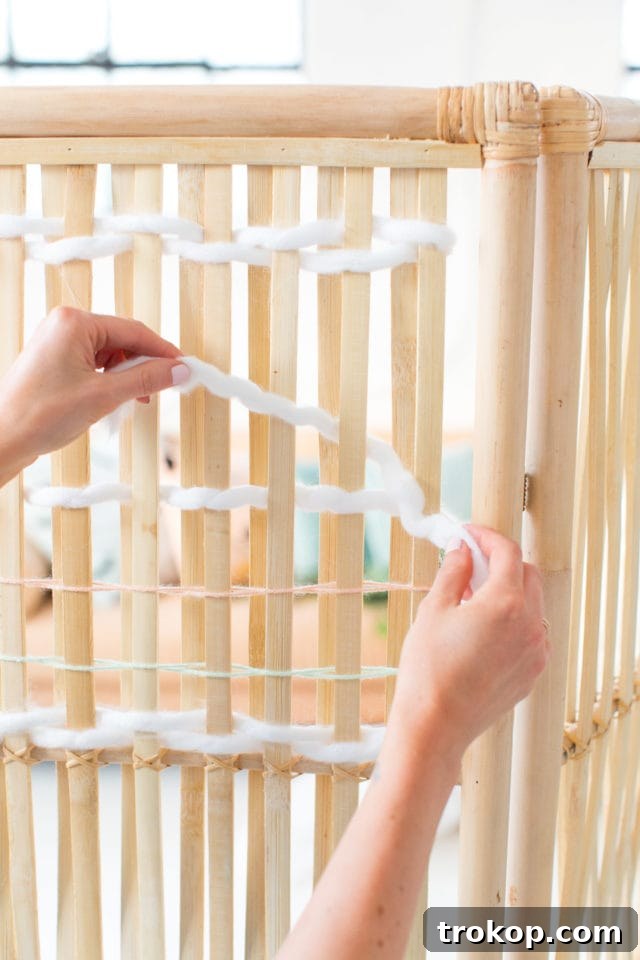
Step-by-Step Instructions:
-
Prepare Your Base: Start by ensuring your rattan (or chosen) room divider is clean and free of dust. Lay it flat or prop it up securely to make the weaving process comfortable and easy to access.
-
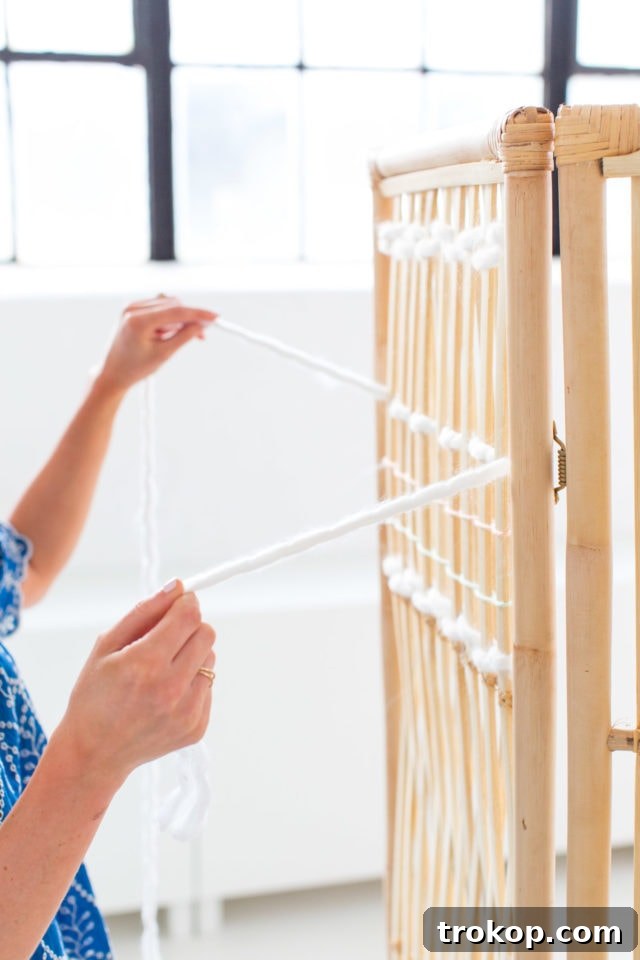
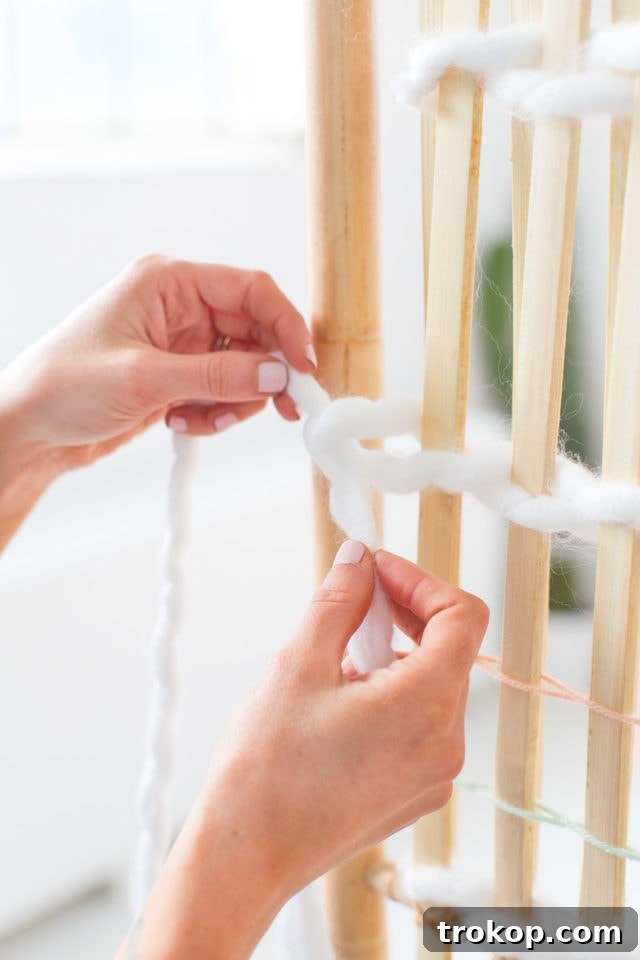
Begin Weaving with Your First Strand: Select your first yarn color. Take a single, manageable strand of yarn and secure one end to a vertical rattan stick on one side of the divider with a simple knot. Don’t make it too tight initially, as you may need to adjust the tension.
Now, begin weaving! Pass the yarn back and forth, alternating between going in front of and behind each vertical strand of wicker. This “over and under” technique is the fundamental principle of weaving. Maintain a consistent tension to ensure an even and neat appearance.
-
Continue and Secure Each Row: Once you’ve woven the yarn across the entire width of the panel, turn around and repeat the weaving process in the opposite direction. Continue this back-and-forth motion, building up your woven design row by row. When you reach the desired depth for that section or decide to switch colors, tie off the yarn securely to a vertical rattan strand with another neat knot.

-
Cut and Repeat: Trim any excess yarn close to the knot. Now, you can introduce a new color or continue with the same one. Repeat steps 2 and 3, building your design section by section until you achieve your chosen pattern and desired coverage on the divider.
-
Add Vertical Accents (Optional, for Enhanced Texture): To make your design truly pop and add another layer of texture, consider weaving vertical strands into your horizontal pattern. This can be done by simply threading yarn vertically through the already woven horizontal strands, creating an interesting cross-hatch effect. This step is entirely optional but can significantly enhance the visual complexity and artistry of your divider.
-
Experiment with Design and Texture: Don’t be afraid to experiment! You can create geometric shapes, abstract patterns, or a gradient of colors. Incorporate thick yarns for a bolder statement or mix different types of yarn for a rich, varied texture. The possibilities are endless, limited only by your imagination.
-
Final Touches: Once you are satisfied with your weaving, double-check all knots to ensure they are secure. Give your divider a gentle shake to ensure the weaving is firm and even.
-
Share Your Creation: We’d love to see your unique handiwork! When you’ve finished your custom room divider, be sure to share photos. Your creativity can inspire others in the DIY community!
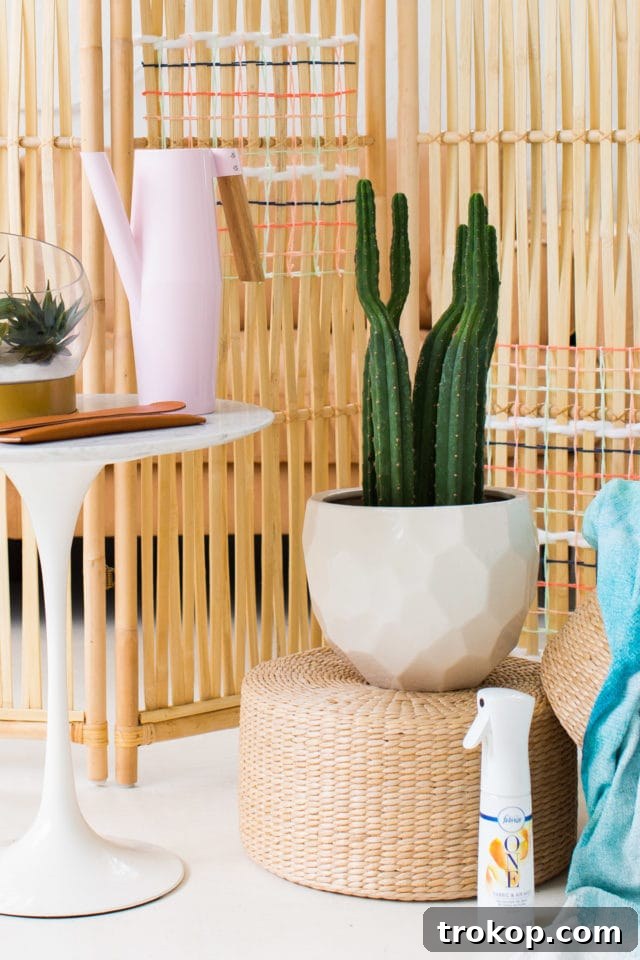
Creative Uses for Your New Woven Room Divider
Once your beautiful DIY woven room divider is complete, the fun truly begins as you integrate it into your home. Its versatility allows for a multitude of creative applications:
- **Open-Plan Living:** Use it to subtly define areas in a large, open-plan space. Separate the living room from the dining area or create a distinct entryway.
- **Home Office Nook:** In a shared living space, carve out a dedicated and private corner for your home office, offering a visual and mental boundary for focused work.
- **Bedroom Privacy:** Add a stylish screen to a bedroom for an extra layer of privacy, or to create a dressing area.
- **Concealment:** Perfect for hiding unsightly storage, utility areas, or a workstation when not in use.
- **Decorative Accent:** Even if you don’t need to divide a room, your woven creation can serve as a stunning piece of wall art or a vibrant backdrop.
- **Entryway Separation:** Place it in an entryway to create a more defined foyer and prevent direct views into your main living space.
Affordable Room Partitioning Ideas Beyond the Woven Divider
While our woven DIY room divider offers a fantastic blend of style and function, there are many other ways to partition a room cheaply and effectively. The key is to think creatively and utilize materials that are readily available or can be repurposed. Here are some ideas to consider:
- **Curtains or Drapes:** A simple and elegant solution. Install a ceiling-mounted track or tension rod and hang floor-to-ceiling curtains. Choose opaque fabrics for full privacy or sheer ones for light diffusion.
- **Bookshelves or Open Shelving Units:** These not only divide a space but also provide valuable storage or display opportunities. Ensure they are stable and consider anchoring them for safety, especially if they are tall.
- **Large Plants or Plant Walls:** Bring nature indoors! A row of tall, leafy plants or a tiered plant stand can create a living, breathable partition.
- **Repurposed Doors or Shutters:** Salvaged doors or old shutters can be hinged together and painted or decorated to create a rustic or bohemian divider.
- **Fabric Panels:** Stretch fabric over wooden frames or hang decorative textiles to create lightweight, customizable screens.
- **Pegboard Panels:** A pegboard can serve as a functional divider, allowing you to hang baskets, tools, or decorative items, making it useful in a craft room or home office.
- **DIY Screens from Simple Materials:** Think outside the box! You can construct simple screens using PVC pipes and fabric, chicken wire adorned with artificial flowers, or even braided ropes. The only limit is your imagination and a careful consideration of stability.
When embarking on any cheap partitioning project, always have a clear idea of your desired aesthetic and functional needs. This will help you select the right materials and methods, ensuring you achieve an impactful result without overspending or creating more clutter.
Maintaining Your DIY Woven Room Divider
To ensure your beautiful woven room divider remains a cherished part of your home decor for years to come, a little care goes a long way:
- **Dust Regularly:** Use a soft cloth or a feather duster to gently remove dust from both the rattan and the yarn. A vacuum cleaner with a brush attachment can also be effective for deeper cleaning.
- **Spot Clean as Needed:** For small spills or marks on the yarn, gently spot clean with a damp cloth and mild soap. Avoid saturating the yarn, as this can cause colors to bleed or the fibers to felt. Test on an inconspicuous area first.
- **Avoid Direct Sunlight:** Prolonged exposure to direct sunlight can fade the yarn colors and potentially weaken the rattan. Position your divider in a spot where it receives indirect light, or rotate it periodically.
- **Handle with Care:** While sturdy, excessive force or rough handling can damage the woven strands or the rattan frame.
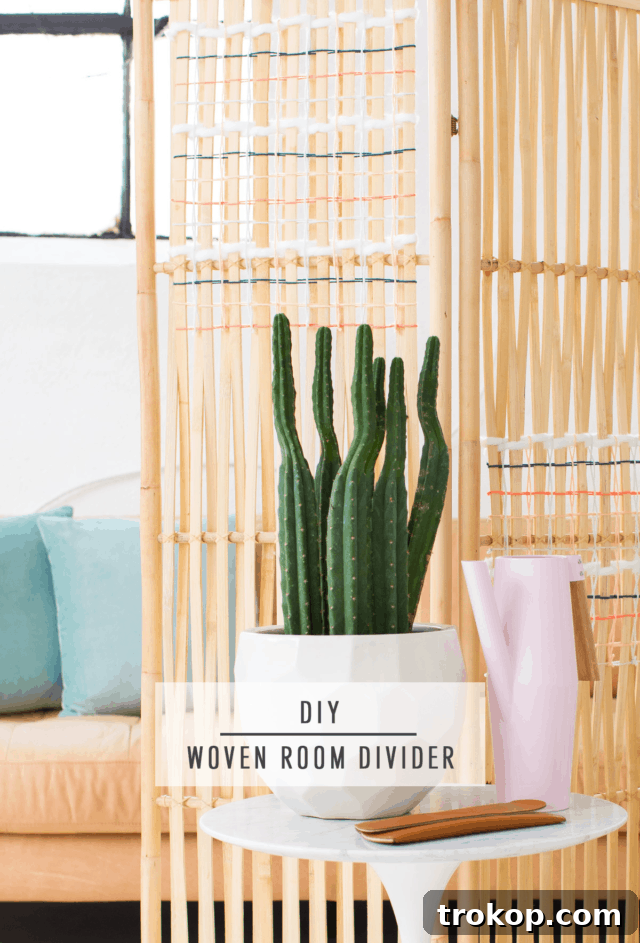
Woven DIY Room Divider
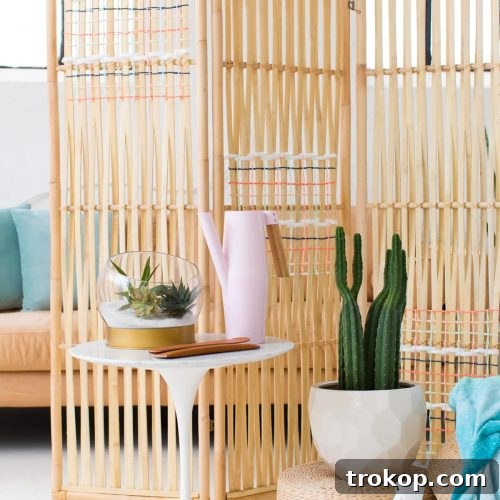
Easy DIY instructions for a woven, rattan-like room divider!
Prep Time: 2 hours
Total Time: 2 hours
Course: DIY
Category: Home Decor
Equipment
- Scissors
Materials
- 1 rattan room divider (IKEA Jassa Divider or similar: vintage woven wood divider, fiber weave divider, wicker privacy screen or metal privacy screen)
- Yarn in various colors (find here)
- Thick yarn for added texture (optional) (find here)
Instructions
- Start with a single strand of yarn on one end of the rattan, and begin weaving it back and forth (in front and behind) each vertical strand of wicker.
- Once you reach one end, repeat the weaving until you get back to the side you started on, then tie a knot to secure it.
- Cut the excess yarn and continue repeating this process with new strands and colors until you have the desired design.
- For a more elaborate look, you can also weave vertical strands into the horizontal ones, creating additional depth and pattern.
- Enjoy your customized room divider! Share your creations with us!
Estimated Cost: $80
Keywords: diy room divider, woven room divider, home decor

Explore More DIY Home Decor Projects!
If you enjoyed crafting this woven room divider, you’ll love these other creative and inspiring DIY home decor projects. Dive into more handmade transformations and personalize every corner of your living space!