
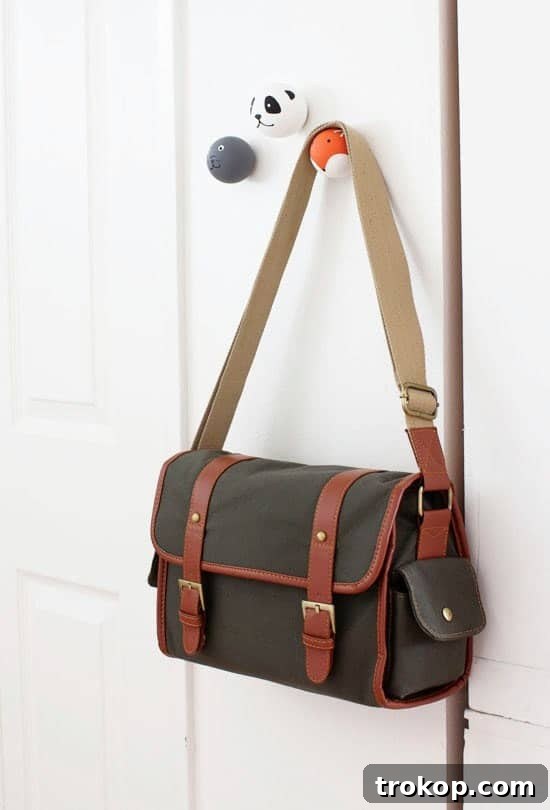
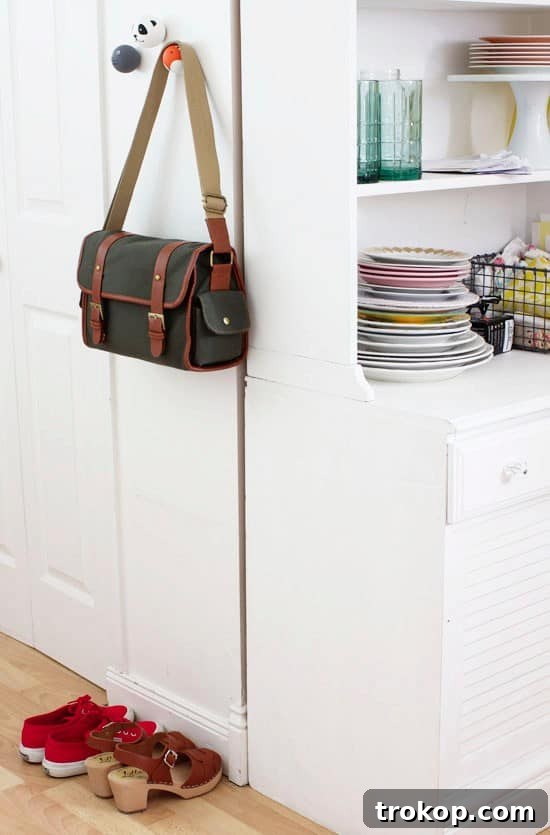
Transform ordinary spaces into realms of whimsy and charm with these utterly delightful DIY Animal Knobs. Whether you’re sprucing up a child’s bedroom, adding a playful touch to a nursery, or injecting character into an entryway, these customizable wooden pulls offer a unique blend of functionality and artistic expression. Far from being just simple hardware, each hand-painted knob becomes a miniature work of art, bringing smiles and a personalized feel to your home decor. Imagine a friendly fox peeking from a dresser drawer or a cheerful panda holding coats on a wall hook – the possibilities are as limitless as your imagination.
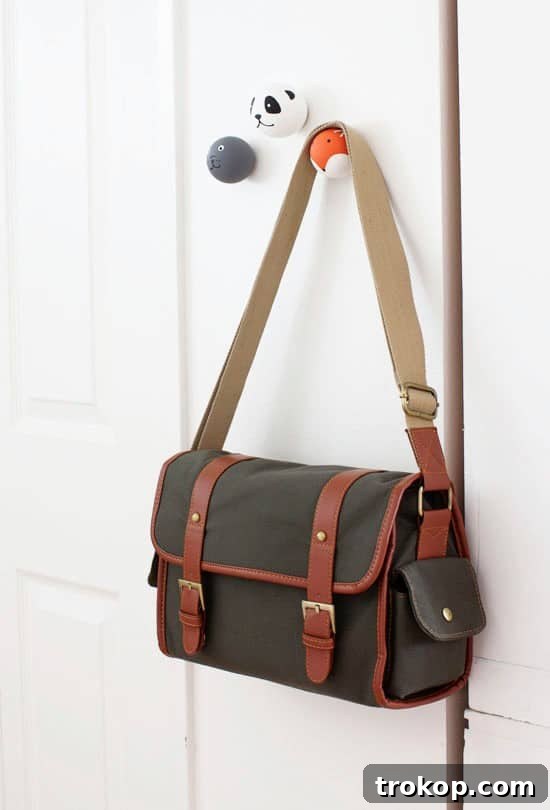
Crafting your own animal-themed drawer pulls is more than just a home improvement project; it’s an opportunity for creative expression and a chance to add truly bespoke elements to your living space. These charming knobs are perfect for a kids’ playroom, a boy’s bedroom, a girl’s bedroom, or even to lend a whimsical accent to an entryway storage unit. By transforming plain wooden balls into adorable animal faces with a splash of paint and a dash of creativity, you’ll create eye-catching decor that is both highly personal and wonderfully practical. This project makes for a fantastic weekend activity, suitable for all skill levels, and yields results that look professionally crafted and deeply cherished.
Inspired by the incredibly cute and customizable designs originally shared by Aileen of At Home In Love, this comprehensive guide empowers you to bring your favorite creatures to life. Let your inner artist (or your little ones!) choose their preferred animals, gather a few basic supplies, and embark on a rewarding journey to create unique wall hooks or drawer pulls that will be cherished for years to come. These DIY animal knobs aren’t just decorative; they serve as functional accents, adding personality to cabinets, dressers, or coat racks while organizing your space in the most charming way possible. They are a simple yet impactful way to infuse personality and warmth into any room.
Detailed Materials and Tools for Your Project
Embarking on this fun DIY project requires just a handful of readily available materials and tools. Choosing quality supplies will ensure your animal knobs are not only adorable but also durable and long-lasting, providing a charming accent to your decor for years to come. Here’s a closer look at what you’ll need:
- Unfinished Wood Ball Knobs: These form the perfect spherical canvas for your animal creations. They are widely available in various sizes at craft stores, hobby shops, hardware stores, or online retailers like Amazon. We recommend starting with sizes around 2-inch wood ball knobs or slightly larger 2.5-inch wood ball knobs, as these dimensions offer ample space for easier painting and detailing. Consider the scale of your furniture; larger knobs make bolder statements, while smaller ones offer more subtle accents. Ensure the knobs are smooth and free of splinters for the best painting surface. Many come pre-drilled, simplifying the attachment process.
- Acrylic Paint: The cornerstone of bringing your animals to life! Acrylic paints are the ideal choice for this project due to their quick-drying nature, vibrant pigmentation, and excellent adherence to wood surfaces. Stock up on a diverse range of colors that correspond to your chosen animals (e.g., classic black and white for a charming panda, various shades of brown and orange for a playful fox, or muted greys for a sleek seal). A basic set of primary colors, plus black and white, can be mixed to create an endless spectrum of hues.
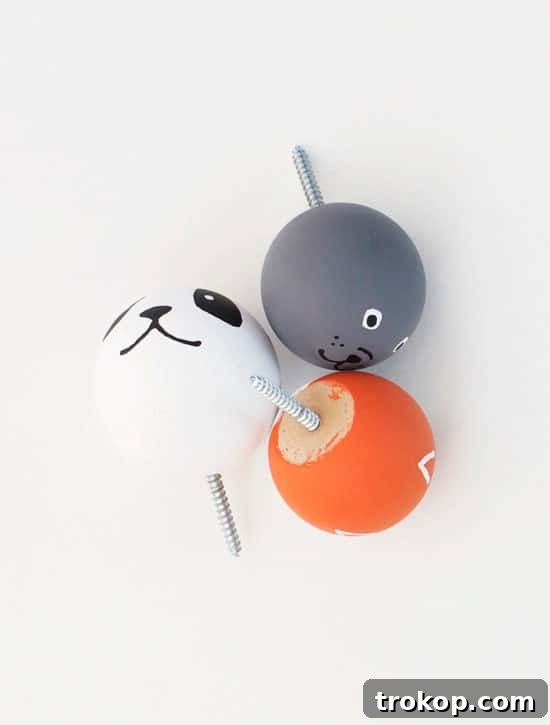
- Double-Sided Screws: These specialized screws are crucial for securely attaching your finished animal knobs to furniture or walls. One end is designed to screw firmly into the wooden ball knob, while the other end seamlessly integrates into your drawer, cabinet, or wall. It’s important to select screws with appropriate length and thread type that are compatible with both the depth of your knobs and the thickness of your furniture.
- Pencil: A standard graphite pencil is an indispensable tool for lightly sketching the animal features onto your base-coated wooden balls. This allows you to plan your design, ensure symmetry, and make any necessary adjustments with an eraser before committing to paint.
- Paint Brushes: A selection of brush sizes is vital for achieving different levels of detail. You’ll need a wider flat or round brush for applying smooth, even base coats across the entire sphere. For adding intricate features such as eyes, noses, mouths, and whiskers, a collection of fine-tipped brushes (like detail brushes, liner brushes, or even miniature round brushes) will provide the precision you need.
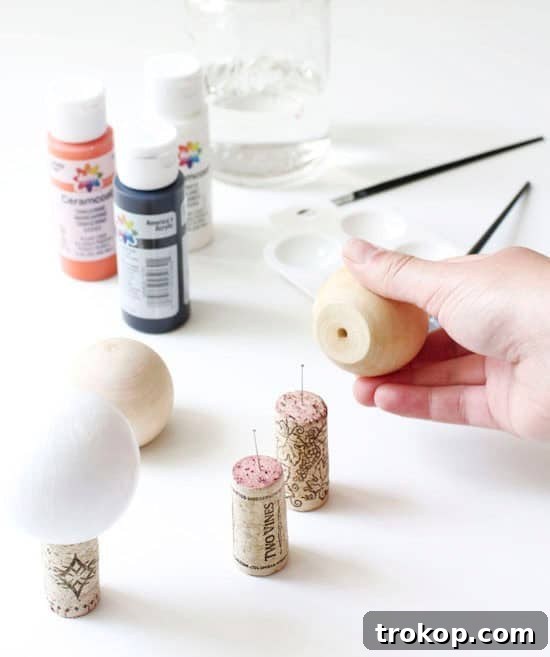
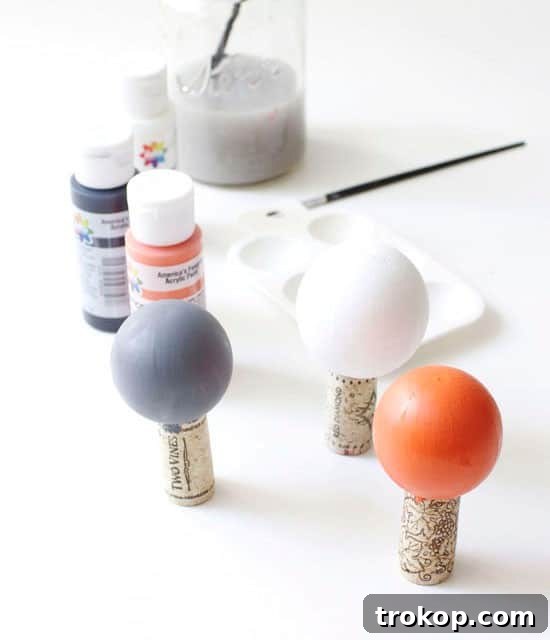
- Wine Corks and Straight Pins (Optional but Highly Recommended): This ingenious hack dramatically simplifies the painting and drying phases. By sticking a straight pin firmly into a wine cork and then gently placing the wooden ball knob on top of the pin, you create a stable, rotatable stand. This setup allows you to paint all sides of the knob without touching wet surfaces or getting paint on your fingers, and it provides a convenient way to let them dry undisturbed.
- Clear Sealant (Optional but Highly Recommended): For maximum durability and protection, especially if your custom animal knobs will be frequently handled on drawers or cabinets, a clear acrylic sealant or varnish is strongly advised. This protective layer shields your beautiful paintwork from scratches, chips, and moisture, ensuring your creations maintain their pristine look for years. Both spray-on and brush-on options are available.
- Fine-Grit Sandpaper (Optional): If your unfinished wood knobs have any rough spots, a light sanding with fine-grit sandpaper (around 220-grit) can create a perfectly smooth surface for painting, ensuring a professional finish.
Step-by-Step Guide: Crafting Your Own Adorable Animal Knobs
Creating these charming animal knobs is a straightforward and enjoyable process that breaks down into several manageable steps. Follow these instructions carefully for the best results, and don’t hesitate to infuse your own creative flair and personal touch!
Step 1: Preparation for Painting
Begin by ensuring your wooden ball knobs are clean and perfectly smooth. If they feel even slightly rough to the touch, gently sand them with fine-grit sandpaper (around 220-grit) until they are silky smooth. After sanding, wipe away any residual dust with a clean, dry cloth to ensure the paint adheres properly. If your wooden ball knobs feature a pre-drilled hole at the bottom (as is common), here’s an ingenious trick for hassle-free painting and drying: firmly stick a straight pin into a wine cork, then gently perch the wooden ball knob on top of the pin. This setup acts as a convenient handle and stable stand, allowing you to easily rotate the knob while painting all its surfaces without getting paint on your fingers or worrying about where to set it down to dry. This ensures a more uniform and cleaner finish.
Step 2: Applying the Base Color
With your knob securely positioned on its cork stand, begin applying a smooth, even base coat of acrylic paint over the entire surface of the wooden ball. This foundational color will typically represent the main fur or skin tone of your chosen animal. For example, use pristine white for a delightful panda, a soft grey for a serene seal, or a rich earthy orange for a clever fox. Depending on the opacity of your specific paint and the desired vibrancy and coverage, you might need to apply two thin coats. It is crucial to allow each layer to dry completely before applying the next to prevent smudging, streaking, and to achieve a uniform, professional-looking color. Acrylic paint generally dries quite quickly, but patience at this stage ensures a flawless foundation for your detailed work.
Step 3: Sketching the Animal Faces
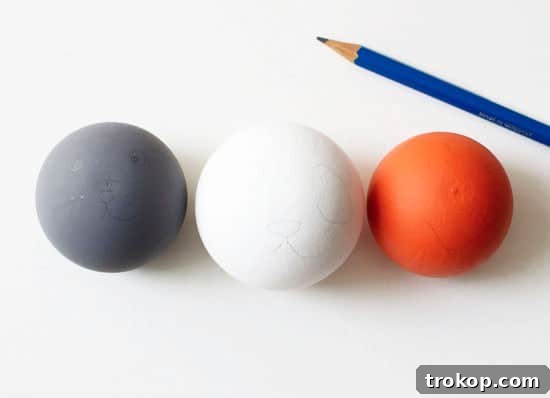
Once your base coat is thoroughly dry and solid, it’s time for the truly fun and creative part: sketching the animal faces! Using a light pencil, gently outline the key features of your chosen animal directly onto the wooden ball. Think in terms of simple, foundational shapes – circles or ovals for eyes, small triangles for ears, and perhaps a small inverted triangle or oval for a nose. For instance, if you’re crafting a cat knob, you might sketch two small triangles at the top for ears, a tiny nose, and two almond shapes for the eyes. Remember not to press too hard, as you want these pencil lines to be easily covered and erased if needed by the subsequent layers of paint. This preparatory step is excellent for planning your design and making any adjustments before committing with paint, ensuring you’re happy with the layout.
Step 4: Adding Fine Details and Features
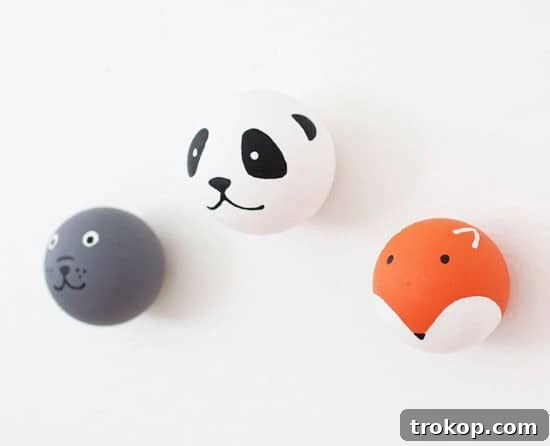
Now, grab your smaller, fine-tipped paint brushes and meticulously begin filling in the details you sketched. Take your time with this step, working carefully and with a steady hand to define each feature, bringing your animal character to life. For extremely fine details like tiny pupils, delicate mouths, or individual whiskers, a clever and effective trick is to dip the very tip of a pencil, a toothpick, or even a straightened paperclip into a small amount of paint. This method provides exceptional control, allowing you to draw precise lines and dots with ease. Layer colors as needed – for example, paint the white of an eye, then, once it’s dry, add a black pupil on top. Always allow each color application to dry completely before adding adjacent or overlapping details to prevent colors from bleeding into one another and to ensure crisp, clean lines. This stage truly adds personality and charm to your custom animal knobs.
Step 5: Attaching Your New Knobs
After your paintwork is completely dry and, if desired, sealed with a clear protective coat for enhanced durability, it’s time to install your new custom animal knobs. Take a double-sided screw and firmly twist one end into the pre-drilled hole at the base of your DIY knob. If your knobs are not pre-drilled, you may need to carefully drill a small pilot hole first to guide the screw. Once the screw is securely embedded in the knob, align the other end of the screw with the desired mounting point on your wall, cabinet door, or drawer. Carefully screw the knob into place, rotating it until it is tight and stable, but avoid overtightening which could damage the wood or paint. If attaching to solid wood furniture, drilling a small pilot hole (slightly narrower than the screw diameter) in your furniture beforehand can prevent the wood from splitting and make the installation process much smoother and easier. Step back and admire your personalized, functional art that adds a unique touch to your home!
Expert Tips for Success with Your DIY Animal Knobs
To ensure your DIY animal knobs turn out perfectly and last for a long time, consider these additional tips and tricks from experienced crafters. These insights will help you achieve a professional finish and maximize the longevity of your charming creations:
- Seal for Enhanced Durability: This step is paramount, especially if your knobs will experience frequent handling. Applying a clear sealant, such as a spray-on acrylic sealer, brush-on varnish, or Mod Podge, over your finished and completely dried knobs is crucial. This protective layer forms a barrier that guards the paint against scratches, chips, and moisture, making them ideal for high-traffic areas like drawers, cabinets, or entryway coat hooks. You can choose between a matte or satin finish to preserve a natural wood look, or a glossy finish to add a vibrant sheen and extra protection.
- Mastering Small Details with Precision Tools: Precision is absolutely key when painting intricate animal features. Invest in a dedicated set of fine-tipped brushes, including liner brushes, round brushes, and detail brushes. For incredibly tiny elements like miniature pupils, delicate mouths, or individual whiskers, don’t shy away from alternative tools. A toothpick, the tip of a straightened paperclip, or even the back end of a small paintbrush can provide surprising control and allow for exceptionally fine lines when dipped carefully into paint.
- Drill Pilot Holes for Effortless Installation: If you’re attaching the knobs to wooden surfaces such as dresser drawers, cabinet doors, or wall planks, drilling small pilot holes before screwing in the knobs can make the installation process significantly easier and safer. A pilot hole, slightly narrower than the screw diameter, guides the screw straight, prevents the wood from splitting, especially in hardwoods, and ensures a tighter, more secure fit for your new hardware.
- Practice Makes Perfect: If you’re new to painting small, intricate details, consider dedicating a spare wooden ball or even a piece of scrap paper for practice. This allows you to get a feel for the paint consistency, brush control, and experiment with different strokes before working on your final knobs. It can significantly boost your confidence and improve your final results.
- Patience with Layering and Drying Times: Always allow each layer of paint to dry completely before applying the next. This fundamental rule prevents colors from bleeding into one another, ensuring crisp lines and vibrant, distinct features. While acrylic paints dry relatively quickly, using a hairdryer on a low, cool setting can gently speed up drying times between coats, allowing you to progress more efficiently without compromising the paintwork.
- Embrace Unique Character: Remember, these are handmade items! Embrace the unique character and slight imperfections that naturally come with DIY projects. These subtle variations contribute to the charm and individuality of each knob, telling the story of your creative effort and making them truly one-of-a-kind.
Design Inspiration & Creative Variations for Your Animal Knobs
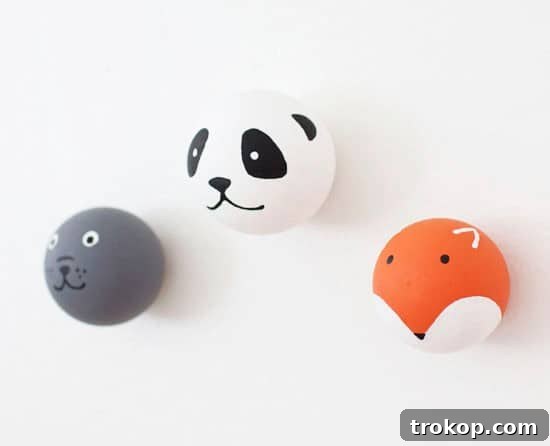
While this tutorial specifically features charming seals, playful pandas, and clever foxes, the realm of animal-inspired design is wonderfully vast and open to your boundless creativity. Don’t limit yourself to just these examples! Here are some additional ideas to spark your imagination for creating truly unique and customizable wooden knobs that perfectly complement your space and personal style:
- Enchanting Woodland Creatures: Beyond foxes, delve into the enchanting world of the forest. Consider owls with their big, watchful eyes, curious squirrels gathering nuts, fluffy bunnies with twitching noses, or majestic deer with elegant antlers. Use natural, earthy tones like rich browns, soft greens, muted oranges, and subtle greys to capture an authentic woodland aesthetic.
- Vibrant Jungle & Safari Animals: Brighten up a child’s room or add an exotic touch with vibrant jungle and safari animal knobs. Experiment with the bold patterns of a zebra, the intricate spots of a leopard, the majestic presence of a lion, the gentle giants like elephants, or playful monkeys. These designs offer a fantastic opportunity to incorporate bright, contrasting colors and dynamic patterns.
- Classic Farmyard Friends: Timeless and irresistibly adorable, farm animal knobs like cheerful pigs, friendly cows, fluffy sheep, or clucking chickens can add a delightful rustic charm. These are particularly well-suited for a country-themed nursery, a playful kitchen, or a mudroom.
- Serene Oceanic Wonders: Bring the calming beauty of the ocean indoors with marine-inspired knobs. Think graceful seahorses, playful dolphins, vibrant tropical fish, or even a sleepy whale. These designs are perfect for a bathroom, a beach-inspired room, or any space where you want to evoke a sense of tranquility.
- Mythical Beasts & Fantasy Creatures: For something truly magical and imaginative, challenge yourself to create knobs resembling dragons, elegant unicorns, or other fantastical creatures from mythology and folklore. These can be particularly inspiring for older children’s rooms or themed play areas, adding a touch of wonder.
- Minimalist & Abstract Designs: Not every animal needs intricate, realistic details. Sometimes, a simpler approach is more effective and modern. Consider a minimalist design using just a bold silhouette, or perhaps just a pair of eyes and a nose in contrasting colors against the base. Abstract animal patterns or geometric interpretations can also offer a sophisticated yet playful look.
- Beyond Animals – Fruits, Planets, & Patterns: While the core idea revolves around animals, remember that these wooden knobs can be painted to resemble almost anything! Consider vibrant fruits, distant planets, whimsical abstract patterns, or personalized monograms. The possibilities for customization are truly endless, allowing you to match any decor theme imaginable.
- Experiment with Color Palettes: Don’t be afraid to play with different color schemes. For a cohesive and harmonious look, stick to a limited palette of 2-4 colors. For a playful, eclectic vibe, mix and match bright, contrasting colors to create a truly eye-catching collection. You can also try subtle ombre effects or gradients for added depth and artistic flair.
Project Summary: DIY Animal Drawer Knobs
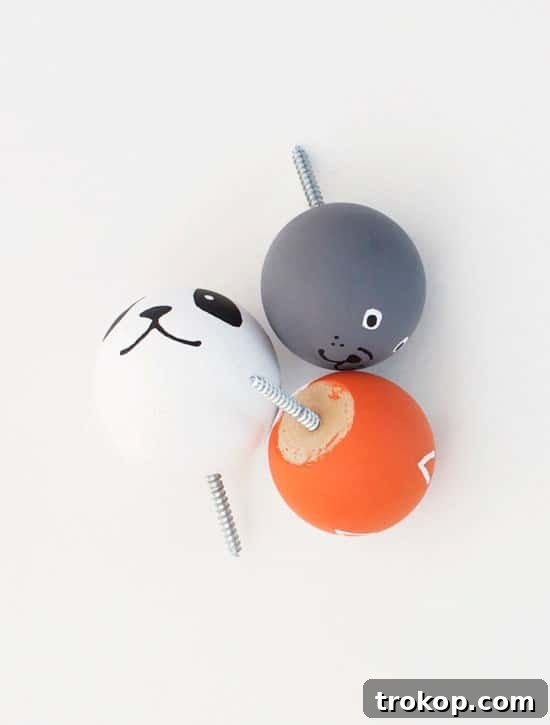
DIY Animal Drawer Knobs
A super cute and simple way to add character and charm to your walls, doors, or cabinets with these customizable wooden animal knobs, perfect for any room.
Equipment
-
Pencil
-
Paint brushes (in various sizes, including fine-tipped)
-
Double-sided screws
-
Wine cork (optional, for painting stand)
-
Straight pins (optional, for painting stand)
-
Clear Sealant (optional, for durability)
-
Fine-grit sandpaper (optional, for preparation)
Materials
- 3 unfinished wood ball knobs
- Acrylic paint (in various colors depending on your chosen animals)
Instructions
-
Preparation: (Optional but recommended) Lightly sand and clean your wooden ball knobs. For easier painting, stick a straight pin into a wine cork and place the wooden ball on top.
-
Apply Base Color: Paint the entire wooden ball with a base color representing your animal’s fur or skin. Allow it to dry completely. Apply a second coat if needed.
-
Sketch Faces: Using a pencil, lightly sketch the key features of each animal face onto the base-coated knobs.
-
Add Details: With smaller, fine-tipped brushes or a pencil/toothpick dipped in paint, carefully paint the details of the animal faces. Allow each layer of paint to dry before adding adjacent colors.
-
Attach Knobs: Once dry (and sealed, if desired), screw one end of a double-sided screw into the painted knob, then screw the other end securely into your wall, cabinet, or drawer. Consider drilling pilot holes for smoother installation.

More Animal-Themed DIY Projects To Explore
If you’ve thoroughly enjoyed the creative process of crafting these charming animal knobs, we encourage you to dive deeper into the world of animal-inspired craft projects! Extend the playful and personalized theme throughout your home or discover new creative outlets with these fantastic DIY ideas:
- Upgrade Your Pup’s Digs with These Creative DIY Dog Houses
- Craft Adorable Animal Memo Holders as Gifts or Desk Decor
- Create Whimsical Animal Ears Cake Toppers for Your Next Celebration
- Host Fun with a DIY Flamingo Ring Toss Yard Game for Outdoor Entertainment
Continue Your Decor Journey: Related Home Decor Ideas
Looking for more ways to infuse charm and personality into your living spaces? Explore these complementary articles for additional inspiration and DIY projects:
43 Top Amazon Wall Decor Ideas for Every Room in Your Home
Find gorgeous Amazon wall decor that makes a big impact and elevates your home’s aesthetic without breaking the bank.
Continue Reading
28 Decorative Wall Mirrors You’ll Wish You Bought Sooner
Looking for the perfect wall mirror? Explore our roundup of stunning decorative wall mirrors that will instantly elevate any room.
Continue Reading
DIY Ikea Play Kitchen Hacks to Make it One-of-a-Kind
Take your child’s pretend play to the next level with these creative and fun DIY Ikea Play Kitchen hacks to make it truly unique.
Continue Reading
30 Baby Room Ideas for Your New Bundle of Joy
From themed nurseries to gender-neutral designs, explore a variety of beautiful and functional baby room ideas to welcome your new bundle of joy.
Continue Reading