
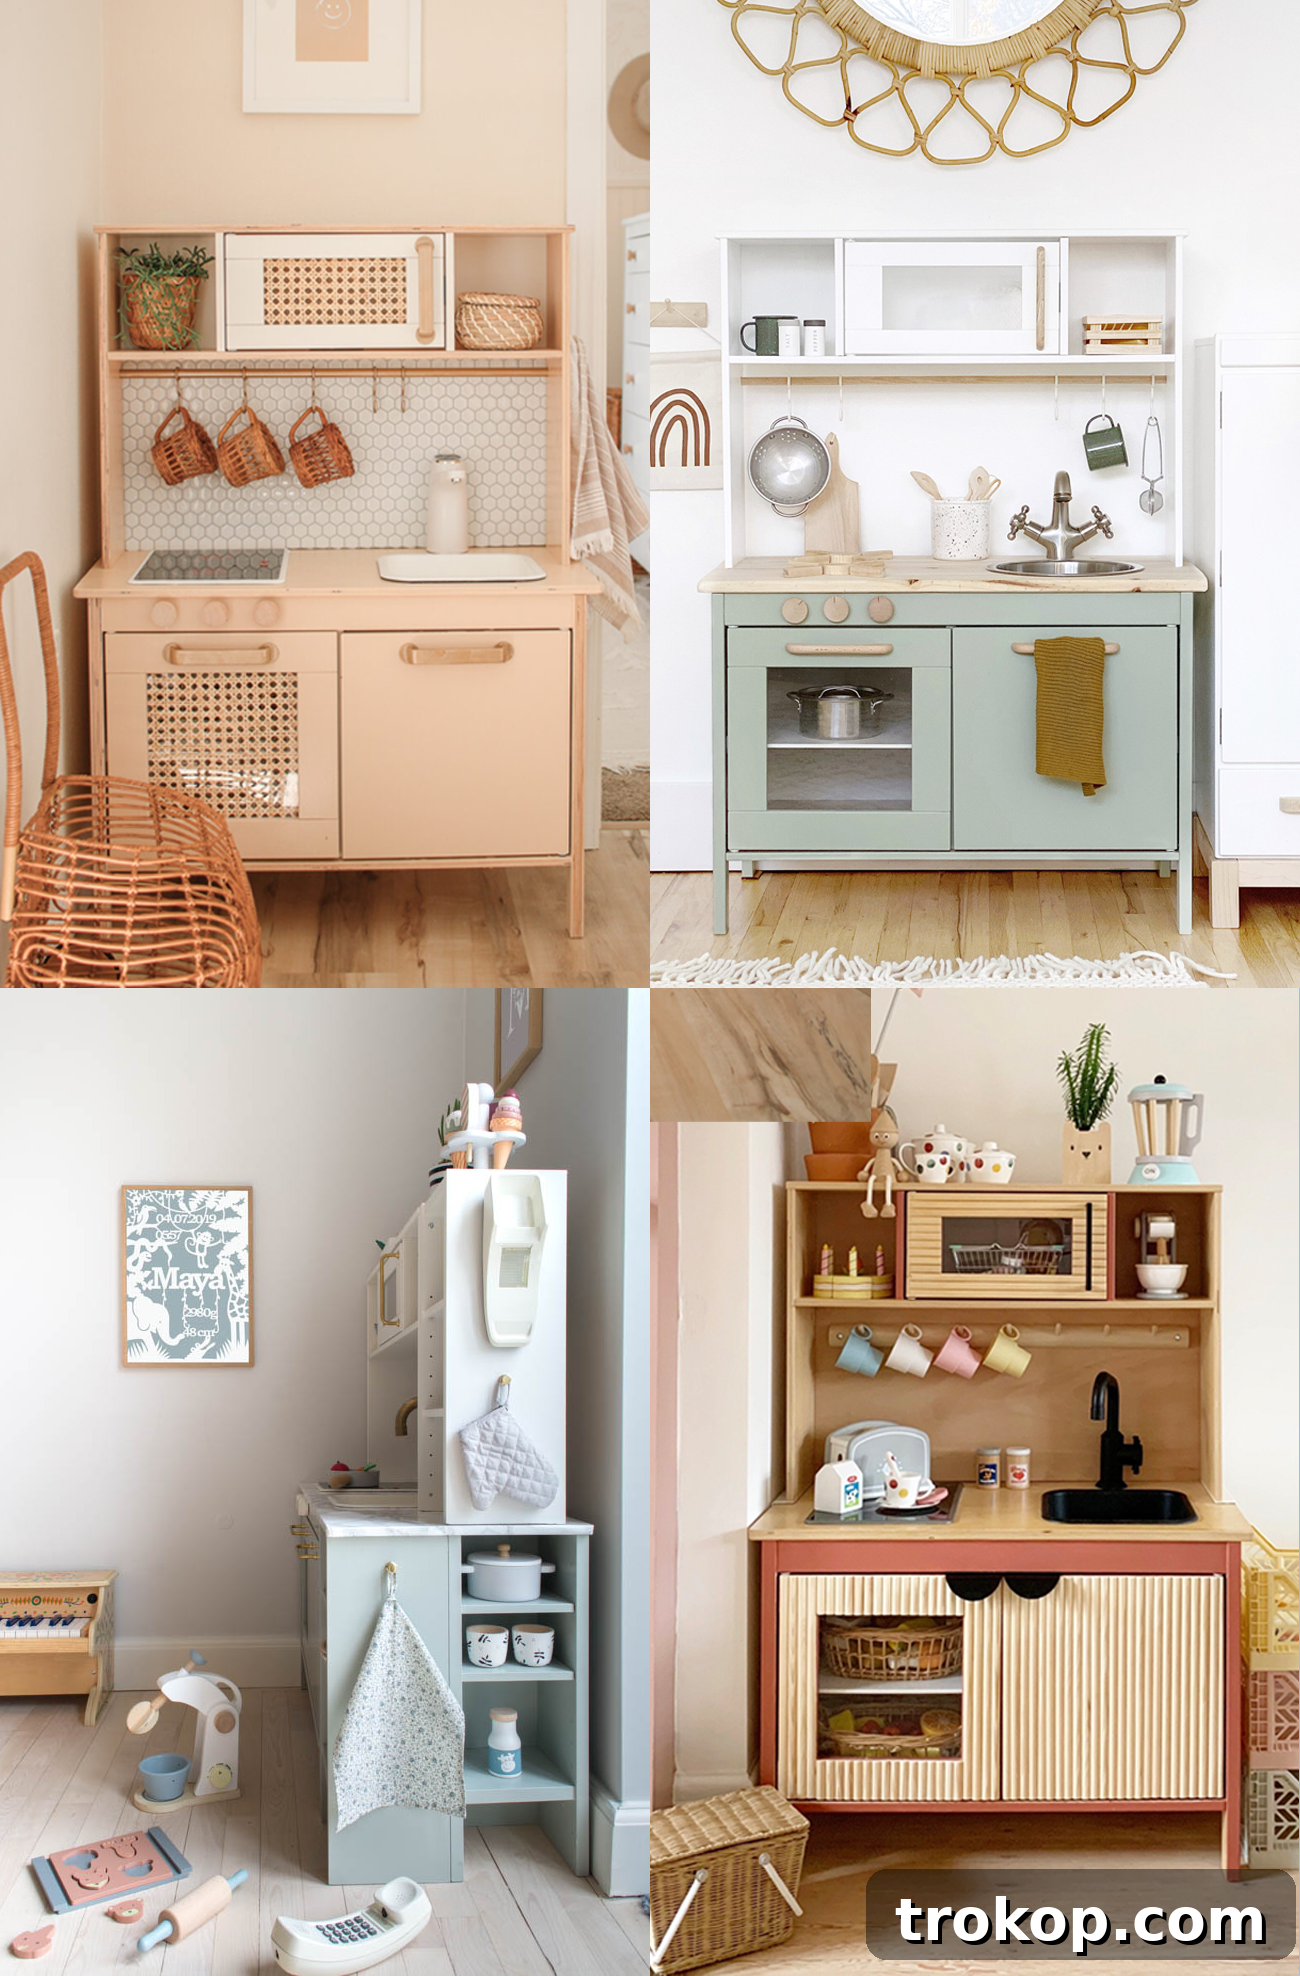
Elevate your child’s imaginative playtime and transform their beloved IKEA Duktig play kitchen into a personalized masterpiece with these ingenious hacks. Far more than just a toy, the IKEA Duktig is a blank canvas, renowned for its simple, sturdy design and incredible customization potential. It’s no wonder this classic has captured the hearts of families worldwide.
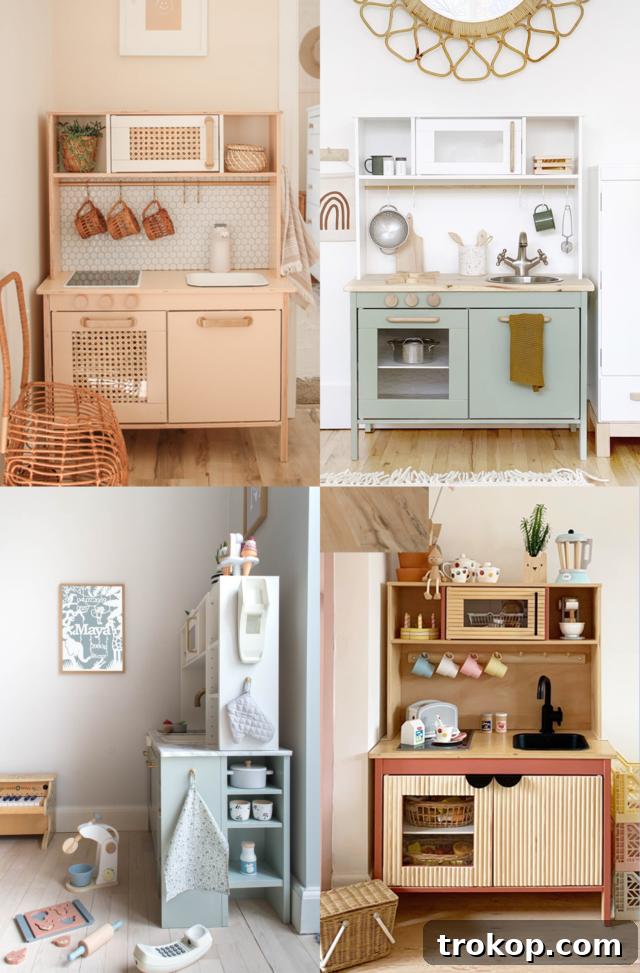
Unlock a world of possibilities to revamp your Duktig, from subtle personal touches to complete design overhauls. This affordable and versatile piece of furniture offers endless opportunities for creativity. Whether you’re aiming for a quick and easy cosmetic update or a full-scale renovation to create a dream play space, you’ll find inspiration here that’s perfect for any kid’s playroom, little girl’s bedroom, or boy’s bedroom.
Get ready to unleash your inner DIY enthusiast! Gather your materials, roll up your sleeves, and embark on a fun and rewarding adventure. With a dash of imagination and a whole lot of love, you can craft a custom play kitchen that your child will adore and cherish for countless hours of imaginative play.
Table of Contents
Creative IKEA Duktig Hacks
1 — Paint the play kitchen to match your child’s room or personality.
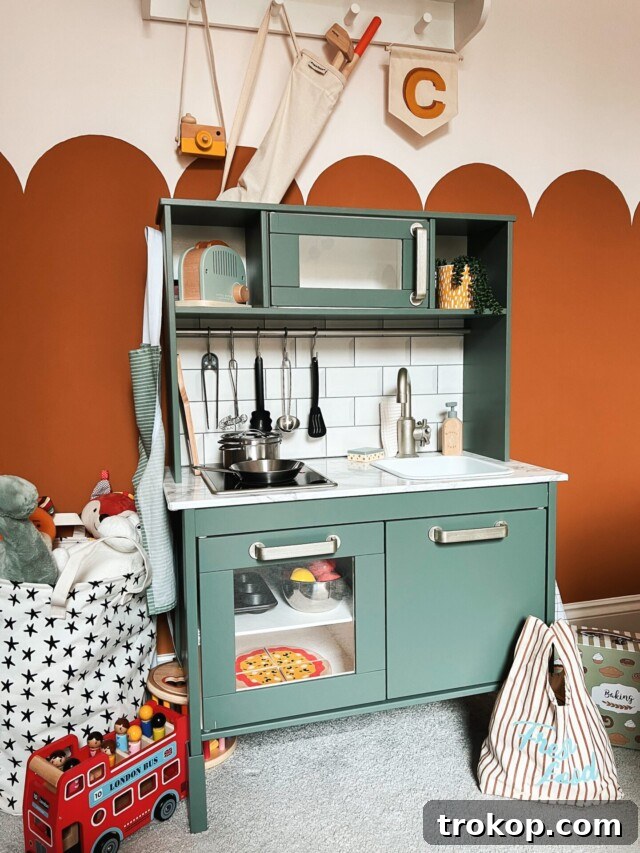
A fresh coat of paint is arguably the most impactful and straightforward way to personalize your IKEA Duktig play kitchen. Choose a non-toxic, child-safe paint that aligns with your child’s room decor or their favorite colors. For a smooth, even finish, you can use a brush or roller, applying primer first for better adhesion and durability. Alternatively, spray paint offers an easy, streak-free option, though it requires proper ventilation and masking. This simple step can transform the kitchen from its original plain wood into a vibrant, modern, or charming vintage piece that perfectly complements its surroundings, offering endless opportunities for imaginative play in a beautifully customized setting.
2 — Transform the look with decals.
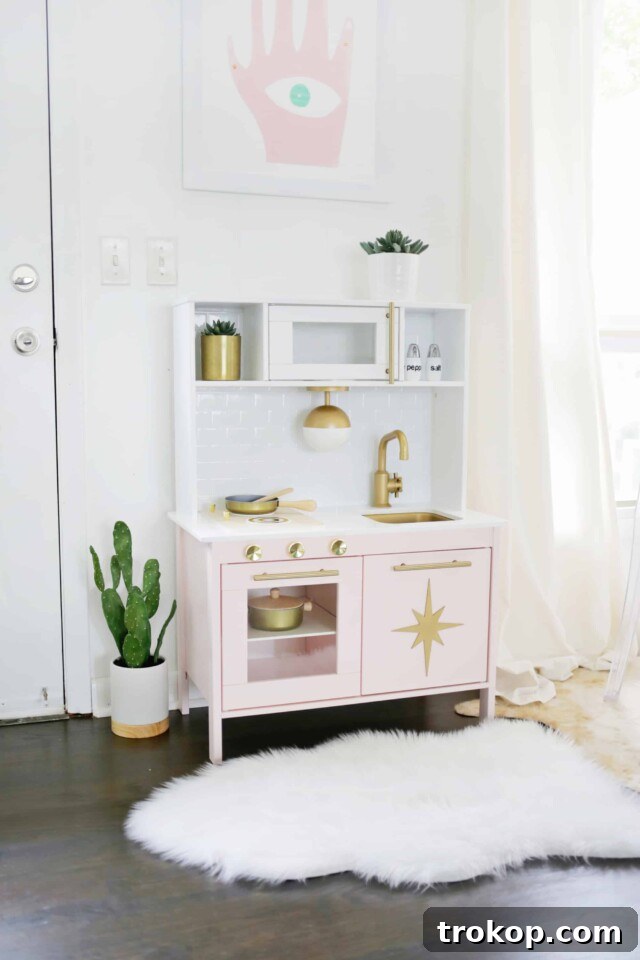
Decals offer a quick, non-permanent, and highly versatile way to infuse personality into the Duktig kitchen. You can find decals in a vast array of fun patterns or themes, from whimsical animals and adventurous space motifs to practical transportation designs. Something as simple as a geometric pattern or a stylish wood star decal can instantly elevate the Duktig from a minimalist toy to a charming mid-century modern statement piece. Look for high-quality vinyl decals that are easy to apply and remove, allowing for updates as your child’s interests evolve. This hack is perfect for adding intricate designs without the commitment of paint or specialized artistic skills.
3 — Upgrade with a backsplash using tiles, wallpaper, or even contact paper.
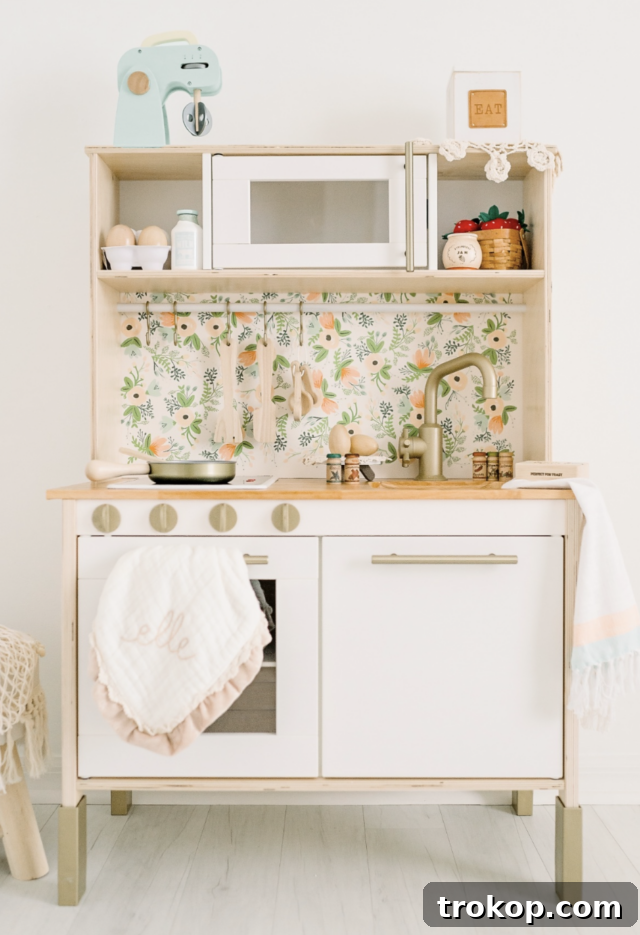
Add a significant splash of personality and realistic detail to your IKEA Duktig kitchen by installing a custom backsplash. You have several material options: opt for modern peel-and-stick subway tiles for a chic, contemporary look, or choose vibrant wallpaper for a bold boho or vintage feel. Even contact paper can work wonders, offering endless patterns and textures at an affordable price. Measuring and cutting accurately are key, and for peel-and-stick options, ensure a clean, smooth surface for optimal adhesion. A well-chosen backsplash not only enhances the kitchen’s aesthetic appeal but also provides a more authentic backdrop for your child’s culinary adventures. Check out our roundup of bold wallpaper designs for even more fun ideas.
4 — Change the countertop.
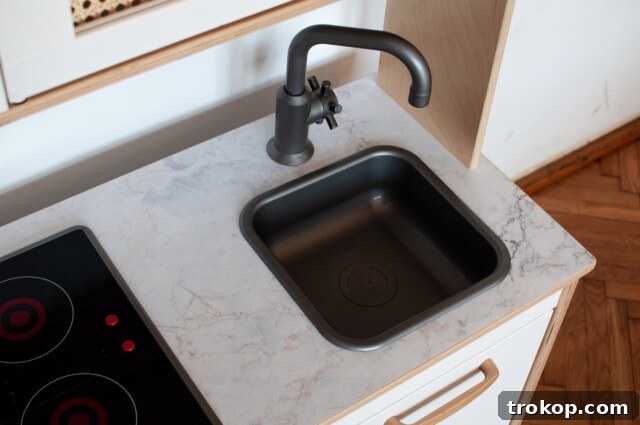
For a truly transformative IKEA Duktig hack, consider replacing the existing countertop entirely. This allows you to introduce different materials that drastically alter the kitchen’s style and feel. Popular choices include solid wood planks for a rustic or modern farm-house look, elegant marble-effect contact paper for a luxurious touch, or even cutting small pieces of actual laminate or butcher block. While a full DIY might involve cutting and securing a new surface, there are plenty of prefabricated and precut replacement options available on platforms like Etsy, simplifying the process. A new countertop instantly elevates the play kitchen, making it feel more realistic and stylish, while also providing a durable surface for all sorts of imaginative cooking.
5 — Replace the glass doors.
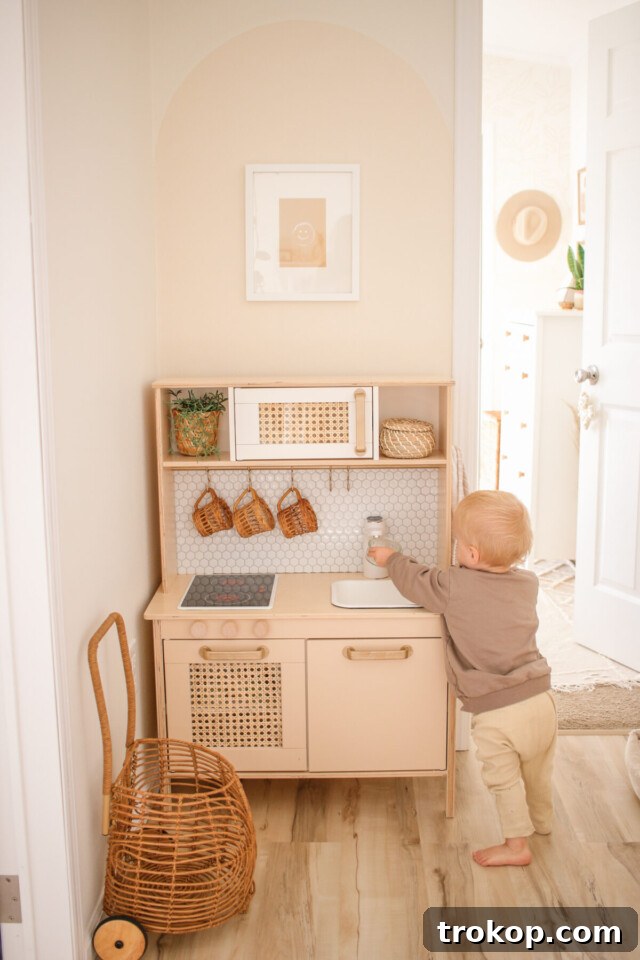
Replace the plain clear plastic (often referred to as ‘glass’) doors of the IKEA Duktig with something more unique to add a touch of vintage charm, texture, or a completely new aesthetic. Rattan or cane panels are a fantastic option, adding warmth and a chic boho vibe that complements cane decor trends. You can either purchase pre-caned panels to fit the door frames or embark on a more intricate DIY project to cane the doors yourself. Other options include frosted acrylic for a modern look, fabric inserts for softness, or thin wooden panels for a solid, custom feel. This DIY project is an excellent way to personalize your play kitchen, giving it a unique character and enhancing the overall design. We even applied a similar IKEA hack project to our IKEA drawer fronts.
6 — Swap out the existing fixtures.
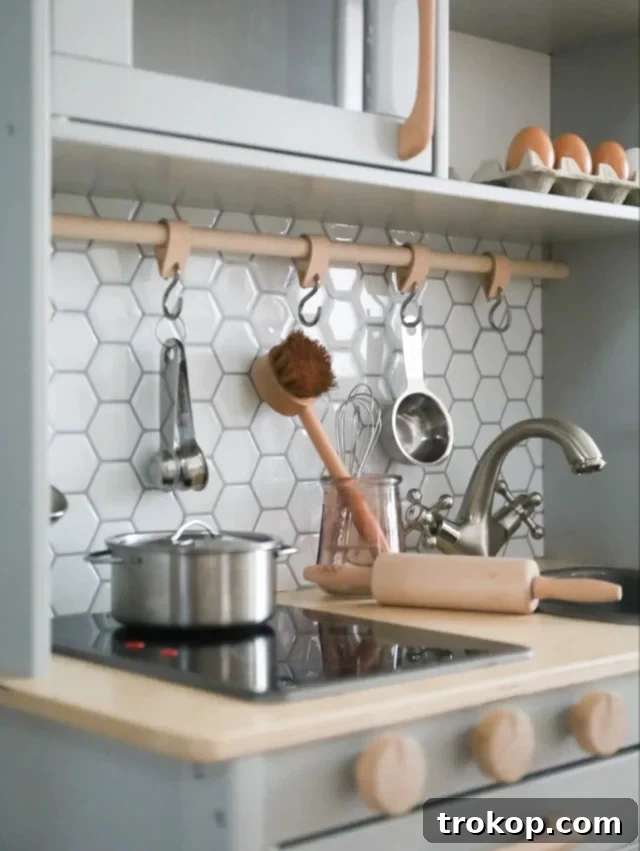
The original plastic handles, rod, and faucet of the IKEA Duktig are functional but can be easily upgraded to elevate the kitchen’s aesthetic. A simple and cost-effective approach is to paint the existing fixtures using spray paint in a metallic finish (like gold or matte black) or a bold color. For a more sophisticated look, you can completely replace these plastic elements with more realistic, colorful, or decorative ones found at hardware stores, craft shops, or online marketplaces. Think miniature metal faucets, ceramic knobs, or sleek wooden pulls. Swapping out fixtures adds an immediate touch of realism and style, making the play kitchen feel more like a real, functioning appliance and encouraging more immersive imaginative play.
7 — Enhance with additional new hardware.
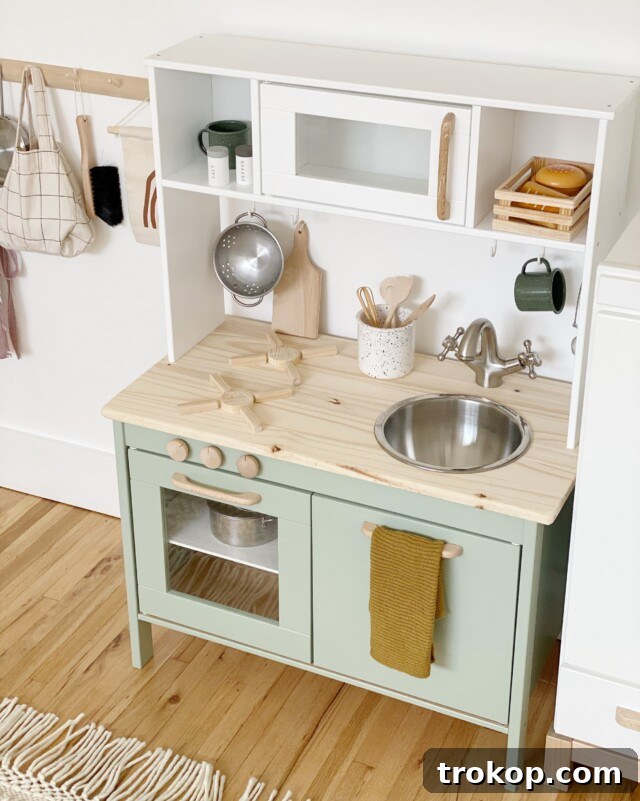
Take realism to the next level by adding additional hardware that mimics a full-sized kitchen. Consider installing stove knobs that genuinely turn and click, providing satisfying tactile feedback for little hands. You can source these from old appliance parts, craft stores, or specialty toy parts suppliers. Swap out one of the interior shelves for a more realistic play oven rack, or even install a play gas stove top with faux realistic burners made from painted wood circles or LED lights. These interactive additions significantly improve your child’s imaginative play experience, allowing them to engage with the kitchen in a way that feels more authentic and engaging, making pretend cooking even more delightful.
8 — Build a realistic microwave.
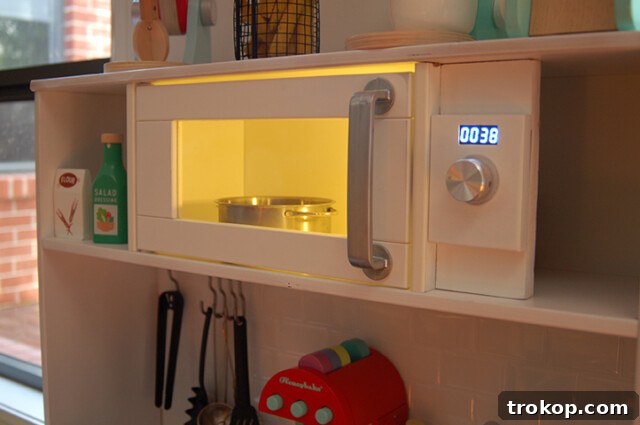
Give your IKEA Duktig play kitchen a truly realistic and interactive touch by customizing the microwave. You can create a functioning light inside (using battery-powered LEDs for safety), add a timer display using a simple digital clock or a printed decal, and install a turning knob for realistic control. For the ultimate hack, some tutorials even guide you through building an actual working microwave with a spinning plate and interior light, albeit a simplified, child-safe version. This level of detail makes playtime incredibly immersive, allowing children to mimic real-life cooking processes and enhance their understanding of kitchen appliances.
9 — Install a functioning faucet with plumbing.
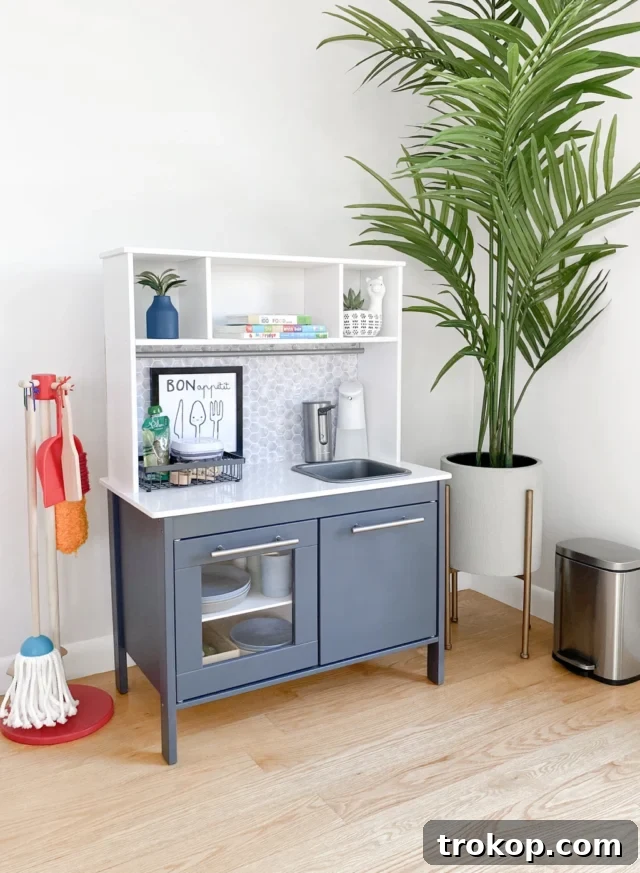
For an unparalleled level of realism and sensory play, swap out the plastic play faucet with an actual functioning faucet complete with a simple plumbing system. This innovative DIY project imitates a regular plumbing setup by using an automatic water pump (easily purchased on Amazon) connected to a hidden water supply using plastic tubing. The water can then drain into a hidden reservoir beneath the sink. This creates a fully interactive feature that allows children to wash their play dishes, fill pots, and engage in realistic kitchen tasks. It’s a fantastic way to enhance imaginative play, develop fine motor skills, and introduce concepts of water conservation, all in a safe and controlled environment.
10 — Change out the sink.
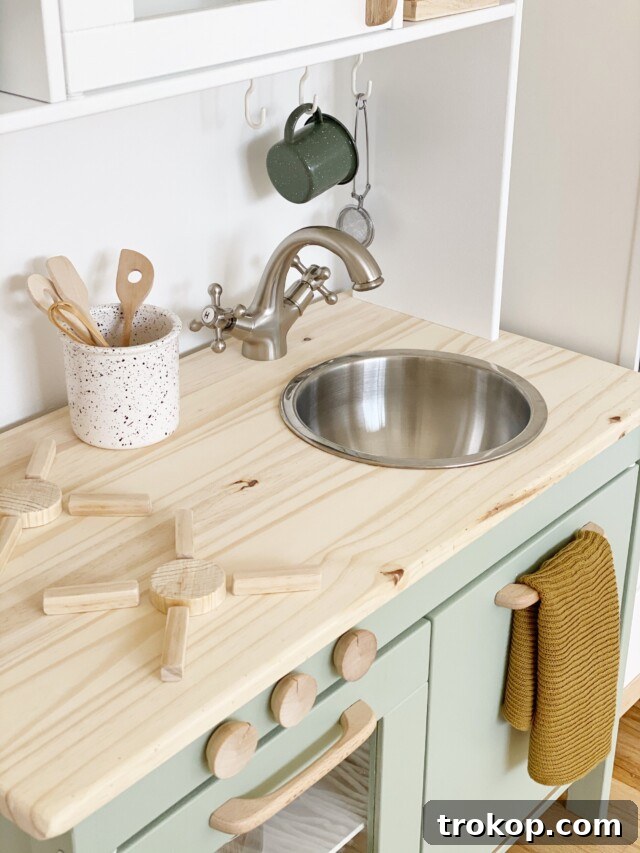
While painting the existing toy sink is a common and easy hack, you can go above and beyond by replacing the entire sink with one of your own in a different shape, size, or material. This often works best if you’re also changing the countertop, as it allows you to cut a new, perfectly sized hole. Consider using a small stainless steel bowl, a ceramic dish, or even a sturdy plastic container to create a more realistic basin. Ensure that all the screws and pieces line up securely, and if installing a functioning faucet, make sure the sink material is compatible with water. A new sink dramatically enhances the play kitchen’s realism and durability, making dishwashing and food prep activities feel much more authentic.
11 — Attach a small refrigerator or cooler to the side of the kitchen.
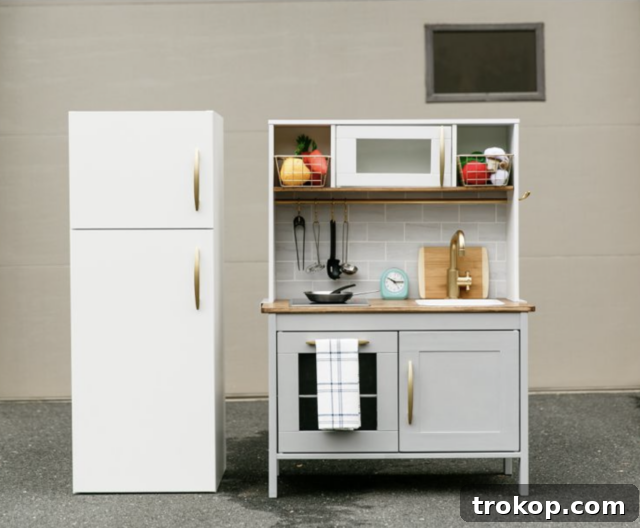
Expand the functionality and realism of your IKEA Duktig play kitchen by attaching a small refrigerator or cooler to its side. This provides dedicated storage for play food, enhancing the culinary role-play experience. You can use a purpose-built toy refrigerator, or get creative by modifying another small IKEA cabinet (as seen in this example), or even adapting a real mini-cooler. Secure the addition firmly to the side of the Duktig for stability. Fill it with an assortment of play fruits, vegetables, and drinks to encourage healthy eating habits and complex imaginative scenarios, from grocery shopping to meal prep. This addition transforms the kitchen into a more complete culinary center.
12 — Turn a cabinet into a play oven.
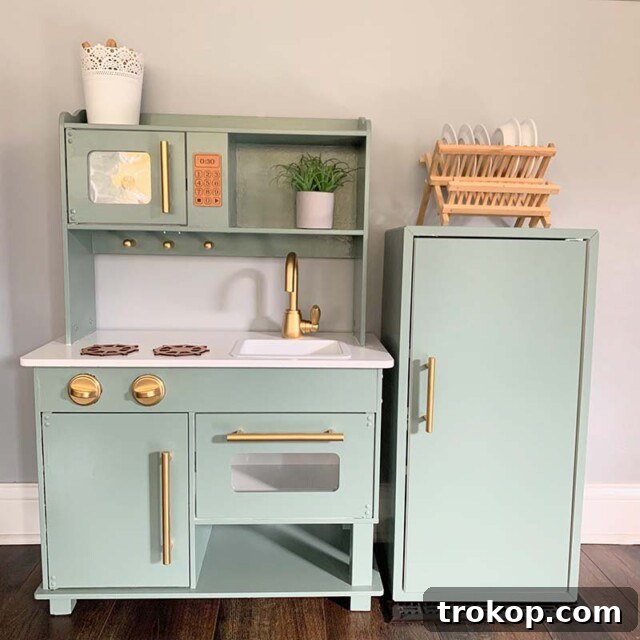
Transform one of the existing cabinets of the IKEA Duktig into a functional-looking play oven. This hack is excellent for adding realism and another interactive element to the play kitchen. You can achieve this by combining realistic toy oven knobs that turn and click with cleverly designed oven decals that mimic a digital display or a traditional temperature gauge. For an even more authentic look, consider adding a clear acrylic panel to the door to simulate an oven window, and perhaps even battery-powered LED lights inside to create a glowing interior. This encourages children to “bake” and “roast,” expanding their culinary role-play scenarios.
13 — Dish it out with a DIY dishwasher.
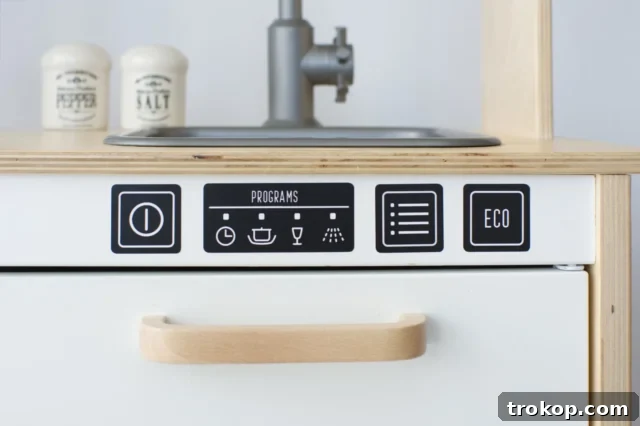
Integrate a “dishwasher” into your IKEA Duktig play kitchen to introduce a new element of household chores and role-play. The easiest way to achieve this is by applying a kitchen dishwasher button sticker set to the front of one of the cabinets. These stickers instantly create the illusion of a control panel and can make the cabinet appear to be a functioning appliance. For a slightly more involved DIY, you could add small, non-turning knobs or even create a pull-down door with an internal rack using simple wire or wood dowels. This easy hack is perfect for those looking to customize their play kitchen without a lot of effort or expense, while subtly teaching children about keeping a tidy kitchen.
14 — Integrate fluted panels.
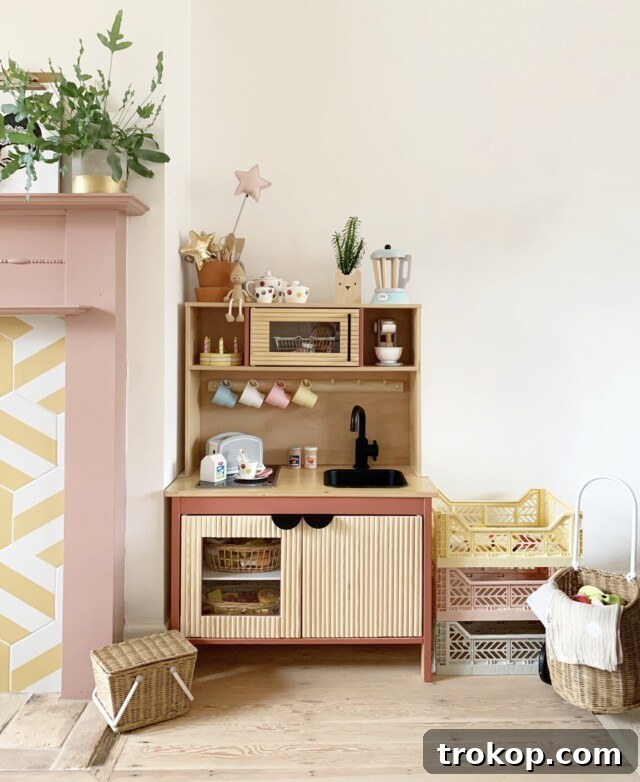
For a sophisticated, modern, and stylish upgrade, integrate ribbed or fluted panels into your IKEA Duktig kitchen. This design element adds texture and visual interest, transforming the neutral toy kitchen into a chic statement piece. Start by lightly sanding down the cabinet doors for better adhesion. You’ll need a saw to cut the wooden or MDF fluted strips to size, ensuring precise measurements for a clean look. Once cut, the panels can be easily applied to the front of the cabinet doors with strong wood glue. After the glue dries, you can paint or stain the entire piece to create a cohesive and high-end finish that fits various design aesthetics, from minimalist to art deco.
15 — Construct additional cabinets or shelves for storage.
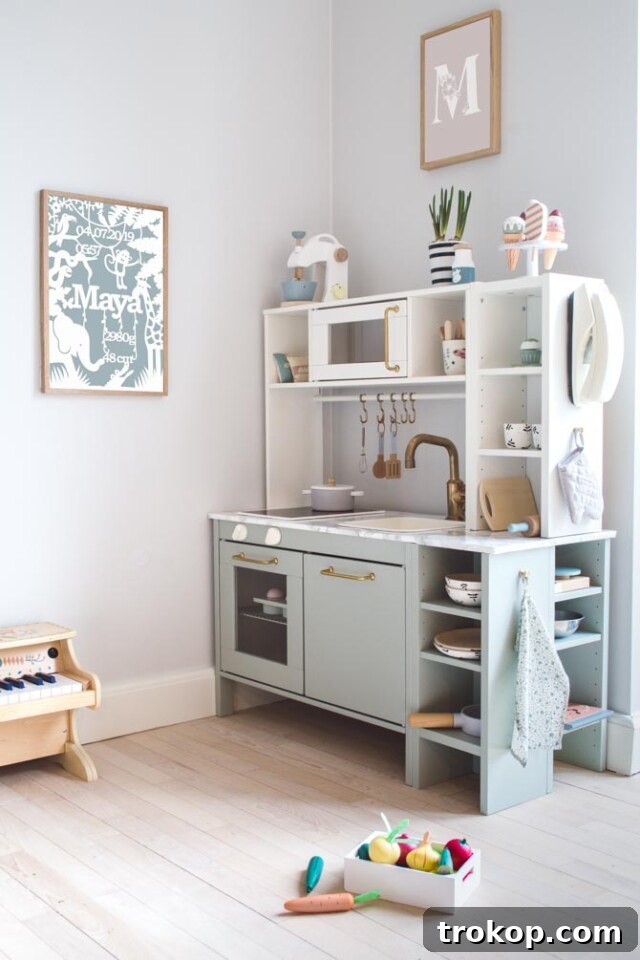
Maximize the utility of your IKEA Duktig play kitchen by constructing additional cabinets or shelves. Increased storage space is invaluable for keeping play food, dishes, and accessories organized and within easy reach. You can use simple materials like wood, MDF, or even sturdy cardboard to construct custom storage solutions that fit your kitchen’s dimensions and your child’s needs. Ideas include building open shelving above the main unit for displaying play ingredients, adding a small spice rack, or creating extra closed cabinets to hide clutter. This DIY project is a fantastic way to enhance the play kitchen’s functionality, making it feel more like a real kitchen while also providing practical benefits for keeping the play area tidy and stimulating organized play.
16 — Light up the IKEA toy kitchen.
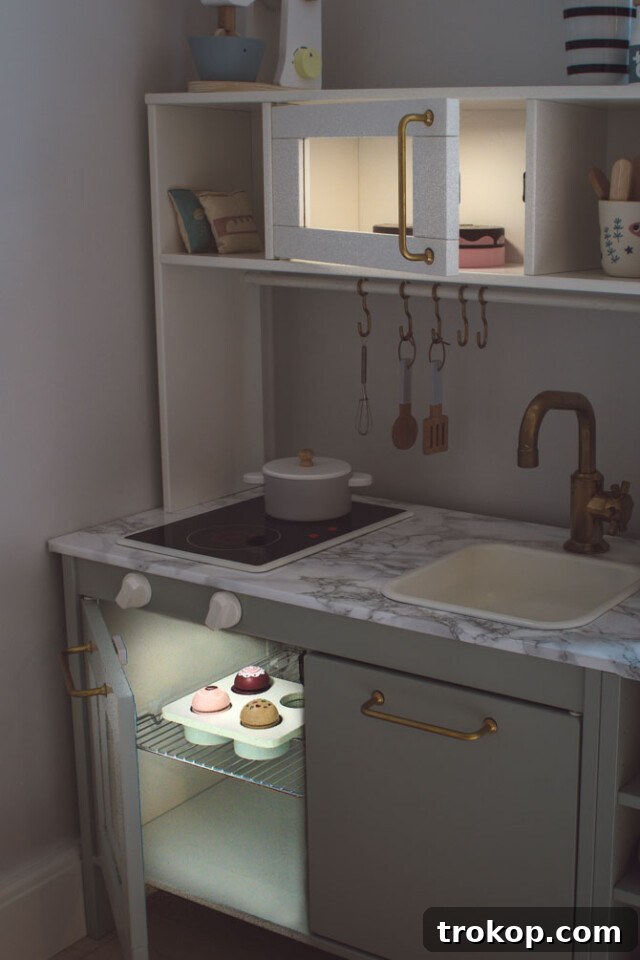
Adding lighting transforms the IKEA Duktig toy kitchen from a static prop into a dynamic, inviting play space. Install battery-powered LED lights inside the microwave and oven to simulate cooking and baking, creating a warm glow that delights children. For under-cabinet lighting, use adhesive LED strips or small puck lights to illuminate the countertop, making food prep activities feel more realistic. You can even add small red LEDs to the stovetop burners to mimic a hot cooktop. Ensure all lights are securely attached and child-safe (low heat, enclosed batteries). This simple yet effective hack enhances the kitchen’s ambiance, drawing children in and making their imaginative play even more immersive and magical.
17 — Elevate the attachments.
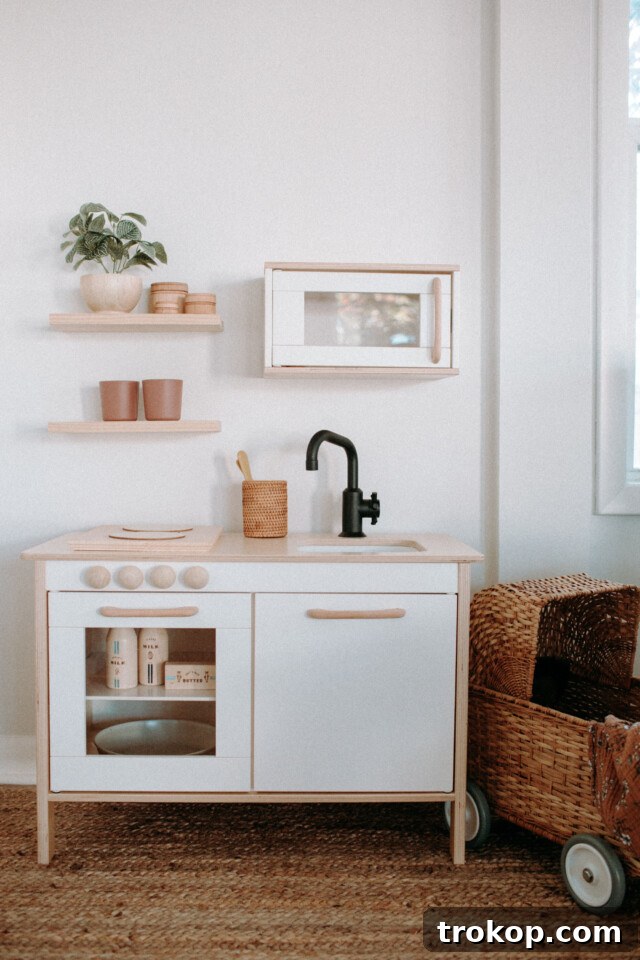
For a sleek, modern, and minimalist aesthetic, consider literally “elevating” the Duktig by removing its attached top shelves and microwave unit. This creates a more open and spacious feel, making the play kitchen less bulky and better suited for contemporary interiors or smaller spaces. Once you’ve removed these components, you can “float” the main play kitchen unit against the wall, securely mounting it at a child-friendly height. The removed shelves can then be repurposed as separate wall-mounted floating shelves above the main unit, offering vertical storage and display space without cluttering the play surface. This hack offers a sophisticated and adaptable design solution that complements a simpler aesthetic.
18 — Transform the play kitchen into a cozy cafe.
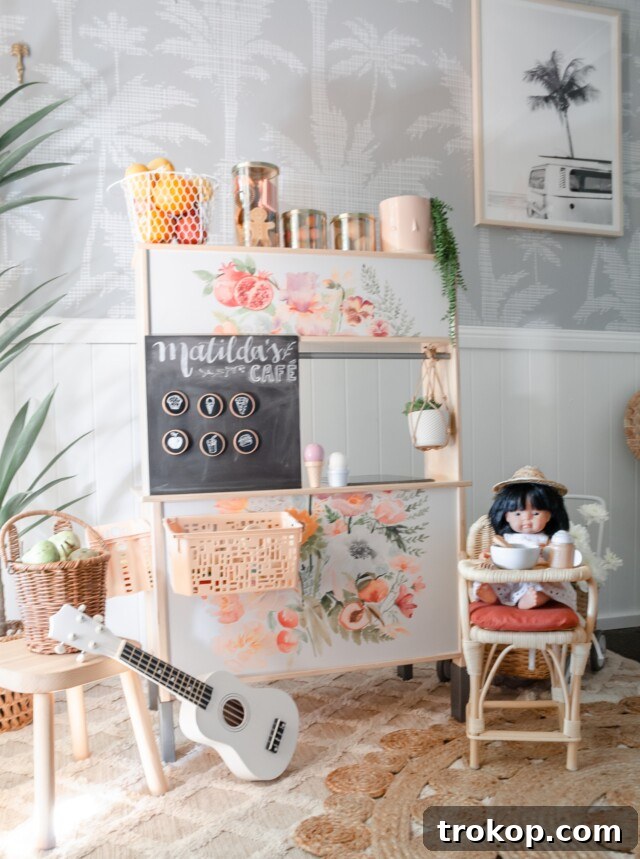
Reimagine your IKEA Duktig play kitchen as a charming cafe for endless pretend play fun! This imaginative hack involves adding accessories like a toy coffee machine, a working cash register, and small menu boards or chalkboards to create a realistic cafe atmosphere. Decorate with miniature cups, saucers, and play pastries. Encourage your child to play barista, serving up delicious imaginary drinks and treats to their friends and family. This transformation not only sparks creativity and imagination but also helps develop social skills like taking orders, serving, and handling pretend money, providing hours of delightful entertainment and educational value.
19 — Chill out with an ice cream shop.
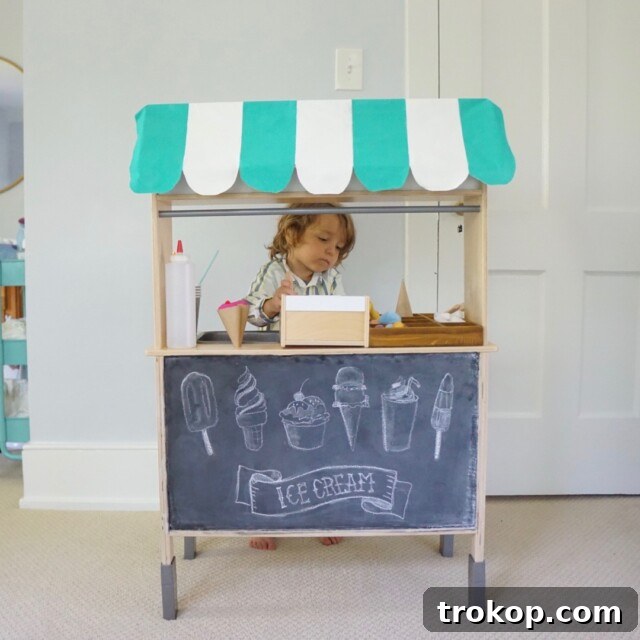
Turn your IKEA Duktig play kitchen into a delightful ice cream shop, perfect for sweet pretend play! This hack involves painting the kitchen in cheerful, pastel colors and adding elements that evoke a classic parlor. Include a toy ice cream maker, a variety of ice cream cones, and colorful play toppings like sprinkles and cherries. You can also craft a menu board displaying various “flavors” and “prices.” This setup encourages creative storytelling, counting skills, and social interaction as children take orders and serve up their favorite frozen treats. It’s a wonderfully engaging way to transform the kitchen into a specialized imaginative play zone.
20 — Convert it into a mobile coffee cart.
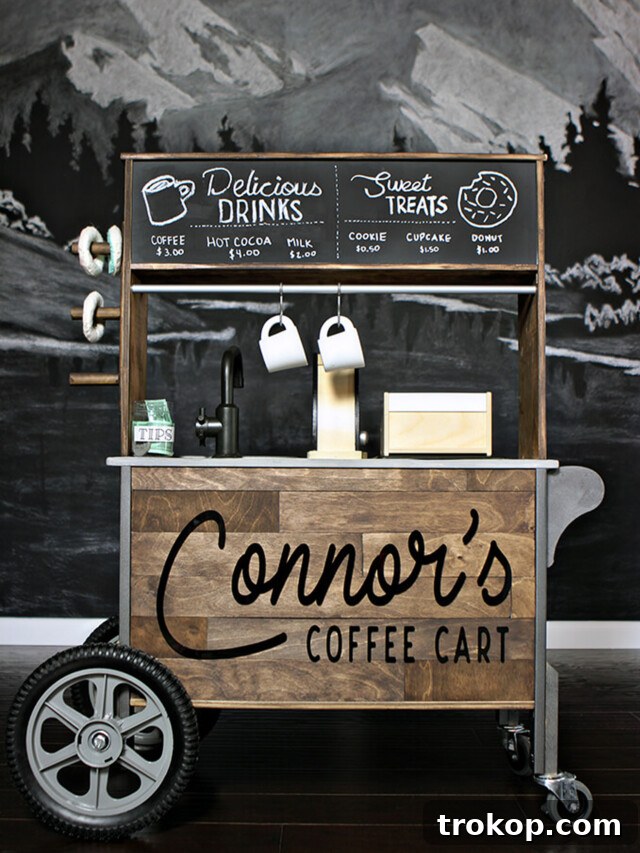
Give your child a fun and dynamic play experience by transforming their IKEA Duktig play kitchen into a movable coffee cart. This hack is perfect for little entrepreneurs on the go! Attach sturdy wheels to the base for easy portability, and add a push bar to one side for steering. On the other side, consider attaching a charming donut holder or display case for other “baked goods.” Your aspiring barista can then serve up delicious imaginary coffee and donuts to friends, family, and even their favorite stuffed animals. This versatile setup promotes imaginative scenarios, social interaction, and even physical activity as they push their cart around.
More IKEA Hacks
Looking for more ingenious ways to personalize your IKEA furniture and truly make it your own? Dive into these creative and budget-friendly IKEA hacks below to discover how you can transform other popular IKEA pieces into unique, functional, and stylish additions to your home.
- 16 Genius IKEA Desk Hacks You Need In Your Life
- Genius IKEA Besta Hacks for a Stylish & Functional Home
- Inspiring IKEA Kallax Hacks for Every Room
- 19 Creative Ways to Hack Your IKEA Malm Dresser
43 Top Amazon Wall Decor Ideas for Every Room in Your Home
Find gorgeous Amazon wall decor that makes a big impact…
Continue Reading43 Top Amazon Wall Decor Ideas for Every Room in Your Home
28 Decorative Wall Mirrors You’ll Wish You Bought Sooner
Looking for the perfect wall mirror? Explore our roundup of…
Continue Reading28 Decorative Wall Mirrors You’ll Wish You Bought Sooner
30 Baby Room Ideas for Your New Bundle of Joy
From themed nurseries to gender-neutral designs, explore a variety of…
Continue Reading30 Baby Room Ideas for Your New Bundle of Joy
Cool Boys Bedroom Paint Ideas for Every Personality
Create a cool and cozy ambiance in your son’s room…
Continue ReadingCool Boys Bedroom Paint Ideas for Every Personality