
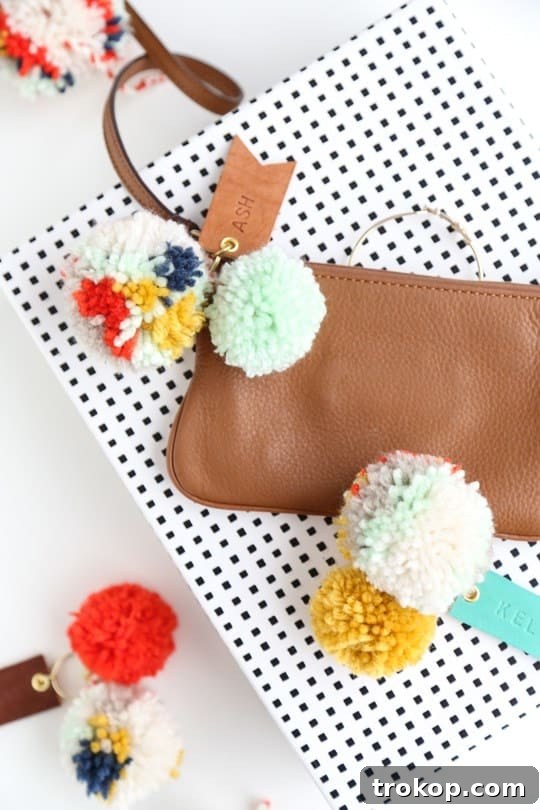
DIY Pom Pom & Leather Luggage Tags: Personalize Your Travel Style
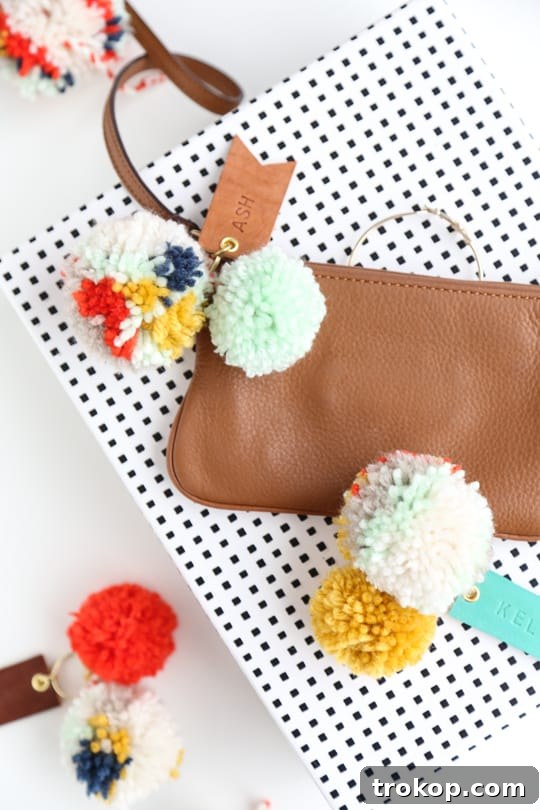
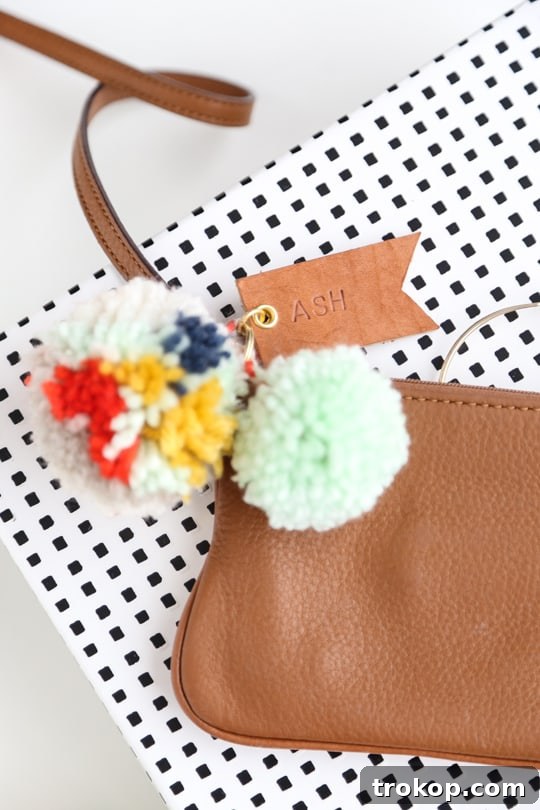
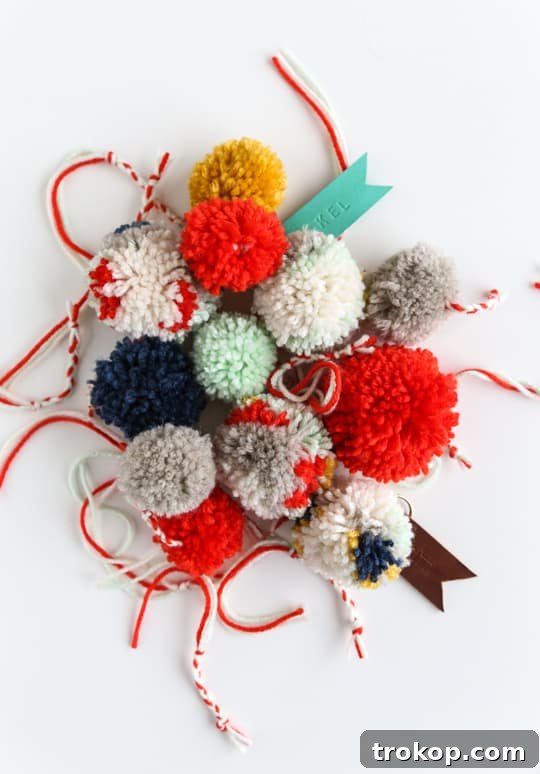
Embarking on new adventures is always exciting, but the journey itself can sometimes be a little less glamorous, especially when trying to spot your luggage amidst a sea of similar bags. For years, a simple polka dot ribbon lovingly tied by my dad helped me identify my suitcase with ease, a tradition I’ve cherished. Now, I’m thrilled to introduce a vibrant, personalized upgrade: DIY pom pom and leather luggage tags! These handmade beauties not only continue the tradition of easy identification but also add a unique flair that truly reflects your personal style. Get ready to transform your travel gear from bland to brilliant with this fun and surprisingly simple crafting project.
Whether you’re a seasoned globetrotter, a weekend getaway enthusiast, or simply looking for a charming way to personalize everyday items, these tags are incredibly versatile. They aren’t just for suitcases; imagine them adorning kids’ school bags, adding a playful touch to a baby bag, or giving a unique identity to your favorite clutch or overnight tote. The beauty of this DIY project lies in its simplicity and the endless possibilities for customization. Don’t be intimidated by the materials list; many components can be purchased pre-made, making this an accessible craft for everyone, regardless of your crafting expertise. Plus, it’s the perfect excuse to combine a riot of colors into one delightful fluff ball!
Why DIY Your Luggage Tags? The Benefits of Personalized Travel Accessories
In a world of mass-produced goods, creating your own personalized items offers a unique sense of satisfaction and several practical advantages. Handmade leather and pom pom luggage tags are more than just a craft project; they’re an expression of your individuality and a smart travel hack rolled into one.
- Unmatched Personalization: Say goodbye to generic luggage tags! With DIY, you have complete control over the colors, textures, and personalized details. Stamp your initials, your name, or even a fun travel quote onto the leather. Choose pom poms that reflect your favorite hues, school colors, or match your personality.
- Stand Out from the Crowd: Retrieving your luggage from the carousel can be a stressful experience. A distinctive, vibrant tag featuring fluffy pom poms and a custom leather piece will make your bag instantly recognizable, saving you time and preventing mix-ups.
- Cost-Effective: High-quality, personalized luggage tags can be expensive. By crafting your own, you can achieve a bespoke look for a fraction of the cost, especially if you utilize leather remnants or leftover yarn.
- Creative Outlet: This project is a wonderful way to unleash your creativity. It’s relaxing, rewarding, and results in a functional item you’ll be proud to use on every journey.
- Thoughtful Gifts: Handmade luggage tags make incredibly thoughtful and practical gifts for fellow travelers, students, or new parents. They show you put effort and care into selecting a unique present.
Beyond travel, these tags can also serve as unique identifiers for instrument cases, gym bags, or even as decorative keychains. The possibilities are truly endless when you embrace the power of DIY!
Materials You’ll Need for Your Custom Luggage Tags
Gathering your supplies is the first exciting step in bringing your personalized luggage tags to life. While the list might seem extensive, many items are standard crafting tools, and some can even be purchased pre-made to simplify the process.
- Leather Remnant Pieces: You’ll need pieces at least 3×2 inches per tag. Opt for genuine leather for durability and a classic look, or choose faux leather for a vegan-friendly option. Various colors and textures can add extra personality.
- Rotary Cutter (Optional): Ideal for achieving perfectly straight, clean cuts on leather, especially if you’re making multiple tags. A sharp pair of scissors can also work.
- Xacto Knife (Craft Knife): Essential for precision cuts, particularly for shaping the flag end of your leather tag. Always use with a cutting mat.
- Straight Edge (Ruler): A metal ruler is best for guiding your rotary cutter or Xacto knife, ensuring straight lines and accurate dimensions.
- Leather Alphabet Punch Kit: This allows you to stamp names, initials, or custom messages onto your leather tags. A mallet or hammer is used in conjunction with the punches.
- Mallet/Hammer: To firmly strike the leather alphabet punches, creating clear, crisp impressions.
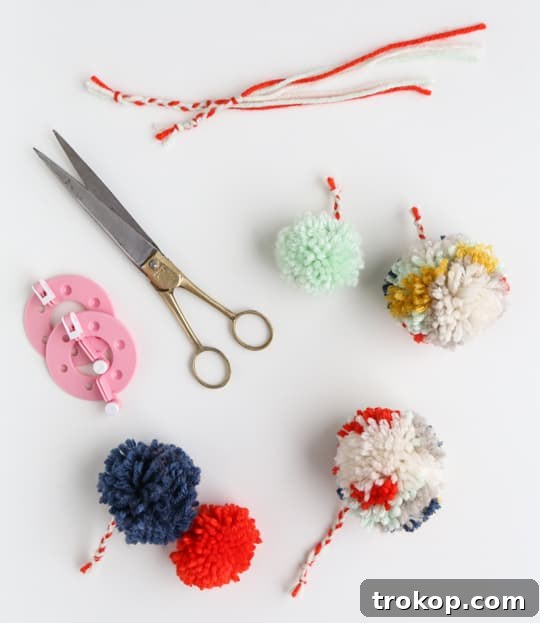
- Pre-made Pom Poms or Pom Pom Maker: If you prefer to make your own pom poms, a pom pom maker (available in various sizes) is invaluable. Otherwise, you can purchase pre-made ones from craft stores or online marketplaces like Etsy.
- Yarn of Your Choice: If making your own pom poms, select various colors and textures of yarn. Acrylic, wool, or cotton blends all work well. Consider using braided yarn for the tie-off strings for added strength.
- Leather Rotary Hole Punch: Crucial for punching clean holes in the leather for eyelets and attachments. Ensure it has various size settings.
- Brass Eyelets and Setting Kit: Eyelets reinforce the punched hole, preventing the leather from tearing. The setting kit helps secure them neatly.
- Brass Jump Rings: Small metal rings used to connect different components of your tag, such as the leather piece and the keyring.
- Brass Split Rings (Keyrings): The main ring that will attach your finished tag to your luggage. Choose a sturdy one.
- Round Nose Pliers: Essential for opening and closing jump rings cleanly without damaging them.
- All-Purpose Cement (Leather Glue): A strong adhesive suitable for leather to secure eyelets and other embellishments.
Step-by-Step Guide: Crafting Your Personalized Luggage Tags
Let’s dive into the crafting process! Follow these steps to create your own distinctive pom pom and leather luggage tags.
1. Crafting Your Vibrant Pom-Poms
The pom poms are the heart of this project, adding a playful burst of color. You have two main options: making them yourself or purchasing pre-made ones.
- Buying Pre-made Pom Poms: This is the quickest route! Look for various sizes and colors online or at craft stores. Ensure they have a sturdy string attached for easy tying. Websites like Etsy offer a wide array of handmade options.
- Making Your Own Multi-Colored Pom Poms:
- Choose Your Yarn: Select several different colors of yarn. Mixing textures can also add interest. For durability, especially where the pom pom attaches to the keyring, consider using braided yarn or a stronger fiber for the tie-off string.
- Wrap the Maker: Open your pom pom maker. Begin wrapping different colors of yarn around each arm of the maker. Alternate colors, wrap thickly for denser poms, and experiment with patterns. The more yarn you wrap, the fuller and fluffier your pom pom will be.
- Cut the Loops: Once you’re satisfied with the wrapping, close the maker. Carefully cut through the yarn loops along the groove on both sides of the pom pom maker.
- Tie Off Securely: Take a strong piece of yarn (preferably braided for extra strength, about 6-8 inches long) and snugly tie it around the center groove of the pom pom maker, between the two halves. Tie a double knot to ensure it’s very secure. This string will be used to attach the pom pom to your keyring.
- Release and Trim: Open the pom pom maker and gently remove your new pom pom. Give it a good shake and then use scissors to trim any uneven strands, shaping it into a perfect, fluffy ball. Don’t be afraid to give it a good haircut to achieve a uniform, round shape.
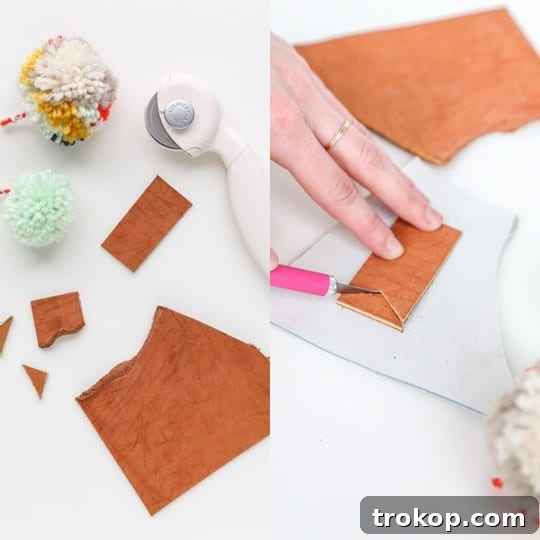
2. Designing and Cutting Your Leather Tag
The leather tag provides a classic, sturdy foundation for your personalized identifier.
- Cut the Base Rectangle: Place your leather remnant on a cutting mat. Using a rotary cutter (or Xacto knife) and a straight edge, carefully cut a rectangle measuring approximately 1×2.5 inches. This size is ideal for readability and proportion with the pom pom. Ensure your cuts are precise for a professional finish.
- Create the Flag Shape: To give your tag a distinctive flag appearance, use an Xacto knife to cut a small triangle from one of the shorter ends of the rectangle. Start from one corner and cut diagonally to a point about 0.5 inches in, then cut from the opposite corner to the same point. This creates a neat V-shape.
- Personalize with Stamping:
- Plan Your Layout: Before stamping, lay out the letters of your name or chosen word on the leather to visualize spacing and centering.
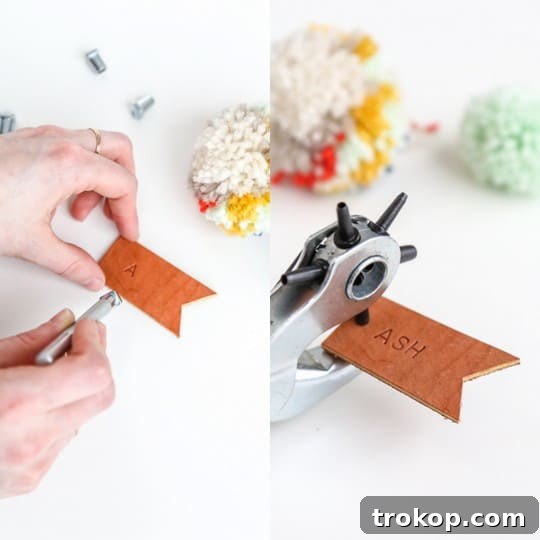
- Stamp Your Name: Using your leather alphabet punch kit, carefully position each letter where you want it on the leather tag. Hold the punch firmly and strike it once or twice with your mallet or hammer to create a clear impression. Practice on a scrap piece of leather first to get a feel for the required force.
- Punch the Attachment Hole: Select a setting on your leather rotary hole punch that matches the diameter of your eyelets. This ensures a snug fit. Punch a clean hole at the top center of your leather flag, about 0.25 inches from the edge. This hole is where the eyelet will be inserted.
3. Reinforcing and Assembling Your Tag
This final stage brings all the components together, ensuring your luggage tag is durable and ready for travel.
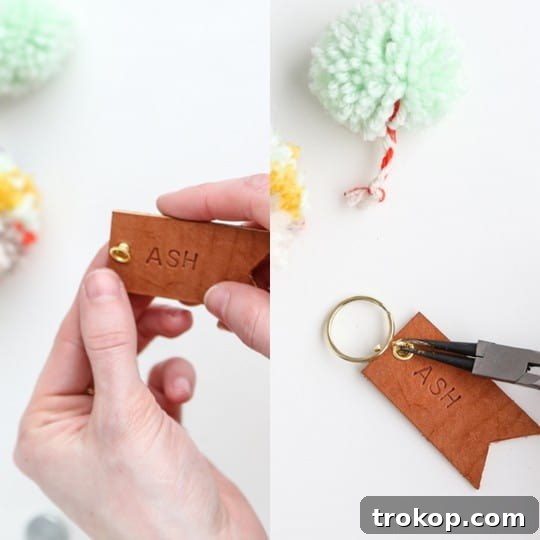
- Insert and Set the Eyelet: Apply a tiny bit of all-purpose cement around the edges of the punched hole on your leather tag. Insert an eyelet into the hole. Use your eyelet setting tool and mallet/hammer to firmly set the eyelet, reinforcing the hole and giving it a professional finish. This step is crucial for the tag’s longevity, preventing the leather from stretching or tearing with repeated use.
- Attach the Leather Tag to the Keyring: Use your round nose pliers to carefully open a brass jump ring. Thread one side of the open jump ring through the eyelet of your leather tag and the other side onto your brass split ring (keyring). Close the jump ring securely with your pliers, ensuring there are no gaps.
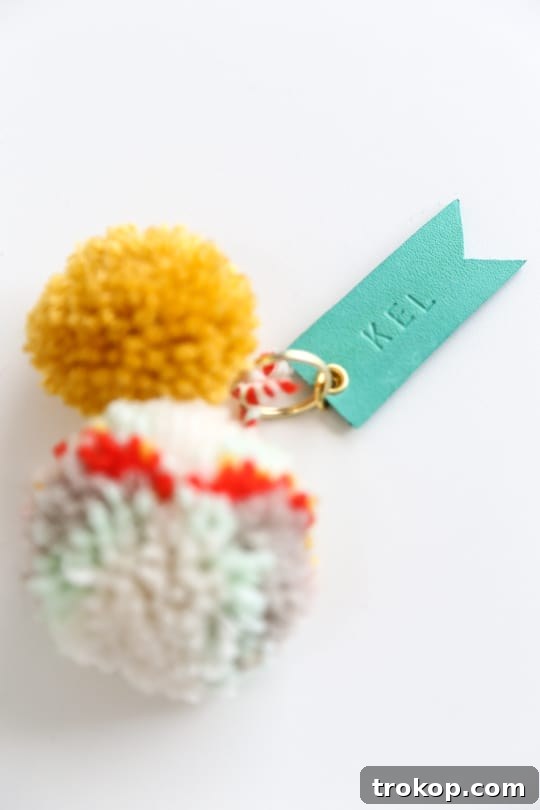
- Attach the Pom Pom(s) to the Keyring: Take the strong yarn string from your pom pom. Tie a double knot at the very end of the string. Then, thread the string through the braid of the split keyring, just beneath the knot, and tie another secure double knot. This method helps to anchor the pom pom firmly without it easily slipping off. If you’re using multiple pom poms, repeat this step for each.
- Final Attachment: Twist the completed keyring assembly onto the handle or a sturdy loop of your bag or luggage. Test all connections to ensure everything is secure.
Customization Ideas & Styling Tips
Your DIY luggage tags are a blank canvas for creativity! Here are some ideas to make them even more uniquely yours:
- Monograms and Symbols: Instead of a full name, stamp a elegant monogram (e.g., “J.D.”) or a small, recognizable symbol like a star, heart, or airplane onto your leather tag.
- Multi-Pom Power: Don’t limit yourself to one pom pom per tag! Attach two or three poms of varying sizes and colors for an extra fluffy and eye-catching accessory.
- Leather Variations: Experiment with different leather colors, from classic browns and blacks to vibrant reds, blues, or even metallic finishes. You can also try different leather textures, like pebbled or smooth.
- Add-Ons: Incorporate other charming elements like small tassels, wooden beads, or metal charms onto your keyring for even more personality.
- Two-Tone Leather: Cut two pieces of leather in contrasting colors and glue them back-to-back before punching and stamping for a reversible design.
- Themed Tags: Create tags with specific themes. For a beach vacation, use blue and white poms with a sandy-colored leather. For a city break, go for sleek black leather and muted poms.
Caring for Your Handmade Luggage Tags
To ensure your beautiful, handmade luggage tags withstand the rigors of travel and remain vibrant, a little care goes a long way:
- Spot Clean Leather: For any dirt on the leather, gently wipe with a damp cloth and mild soap, then dry immediately. Avoid harsh chemicals.
- Fluff Pom Poms: If your pom poms get compressed, gently fluff them with your fingers. For deeper cleaning, a light mist of water and a gentle shake can revive them.
- Check Connections: Periodically check the jump rings and knots to ensure they are still secure, especially after a long trip. Tighten or re-tie if necessary.
- Storage: When not in use, store your tags away from direct sunlight to prevent fading.
Ready for Takeoff with Your Personalized Travel Companions!
There you have it – a wonderfully creative and practical way to infuse your travels with a touch of handmade charm! These DIY pom pom and leather luggage tags are more than just identifiers; they are miniature works of art that reflect your unique style and make every journey a little more personal. From the joy of crafting them to the ease of spotting your bag on the carousel, you’ll appreciate the effort you put into making these custom accessories. So, gather your materials, unleash your inner crafter, and get ready to travel in style. As for their durability, I’m putting mine to the test on my upcoming trip and will certainly share an update. In the meantime, happy crafting and safe travels!