
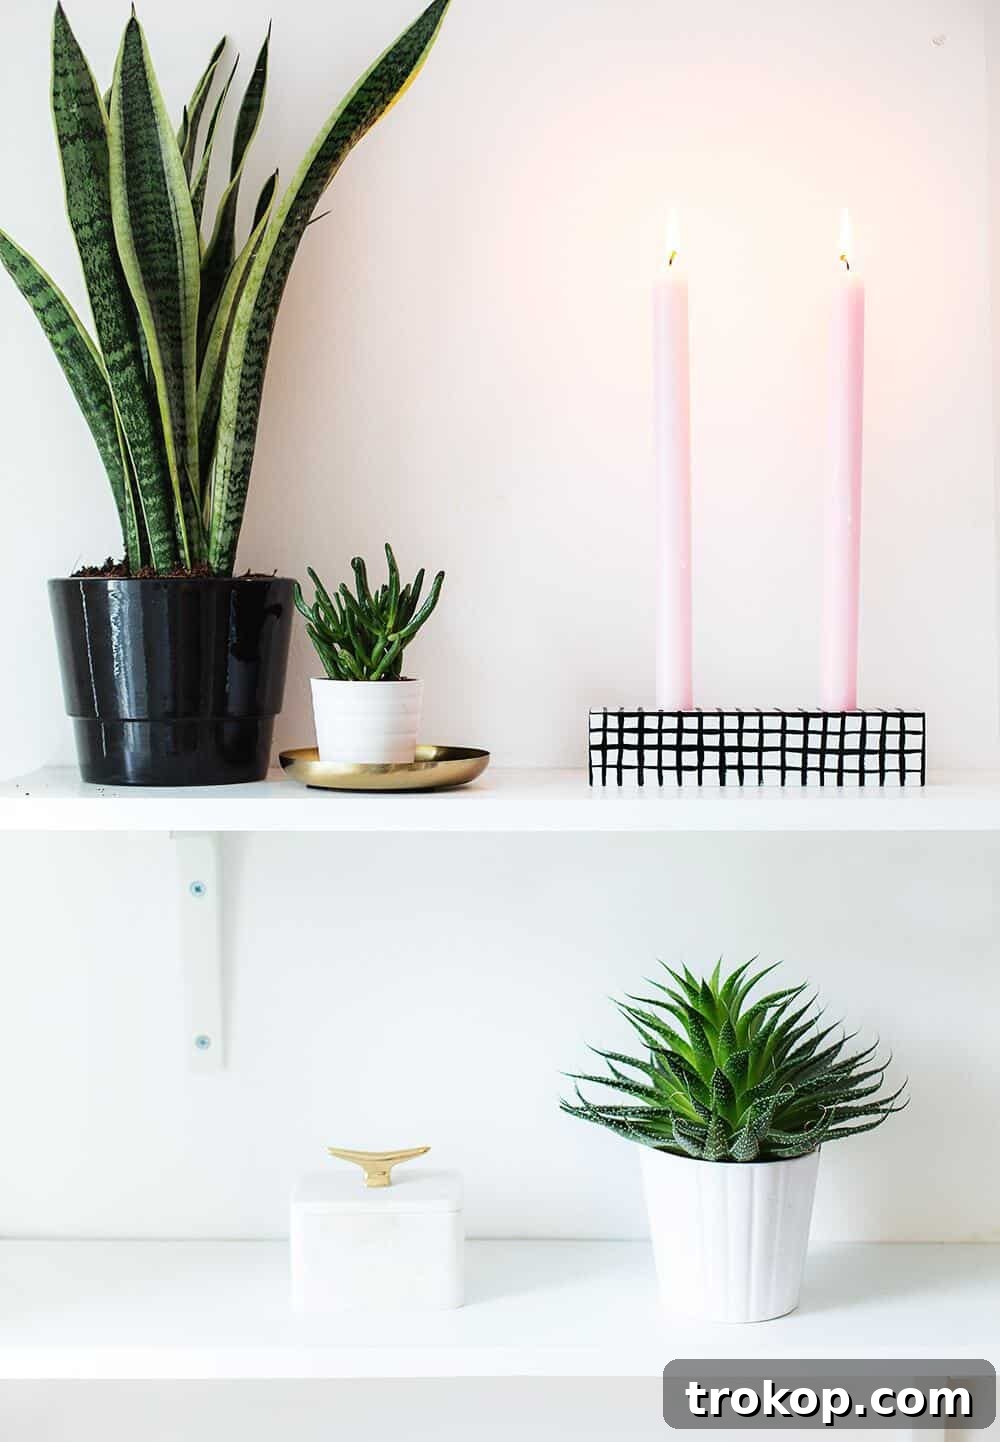
Craft Your Own Stylish Patterned DIY Candle Holder: A Step-by-Step Guide to Unique Home Decor
Infuse your living space with a touch of handmade charm and a warm, inviting glow with this versatile patterned DIY candle holder. Whether you’re setting a romantic scene for Valentine’s Day, creating a cozy ambiance for a family dinner, or simply looking to add a unique decorative accent to your shelves, this project offers endless possibilities for personalization. With just a few simple materials and an easy-to-follow guide, you can craft a stunning piece that reflects your personal style and elevates any occasion.
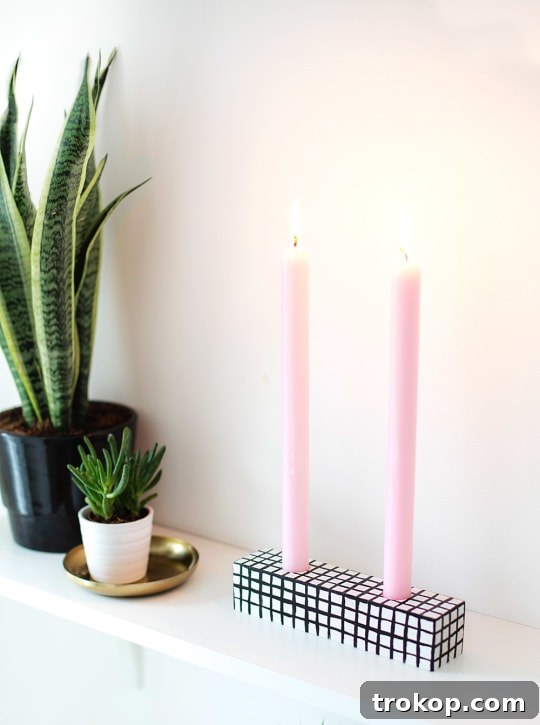
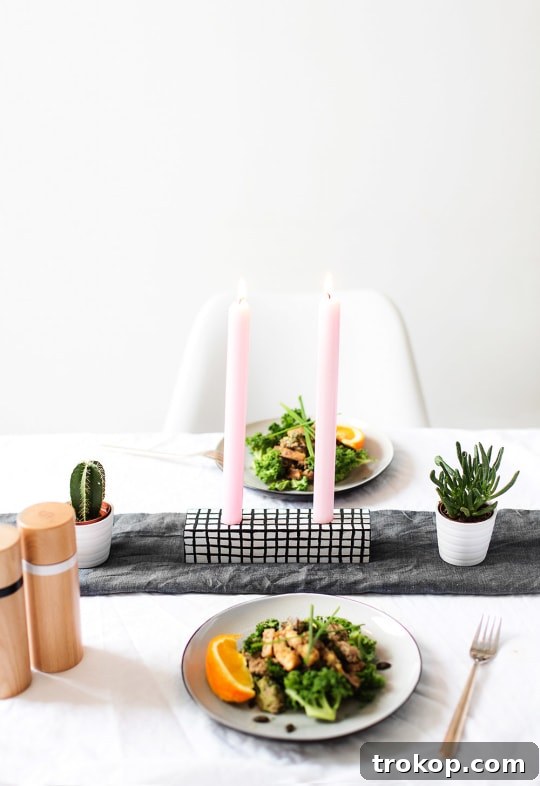
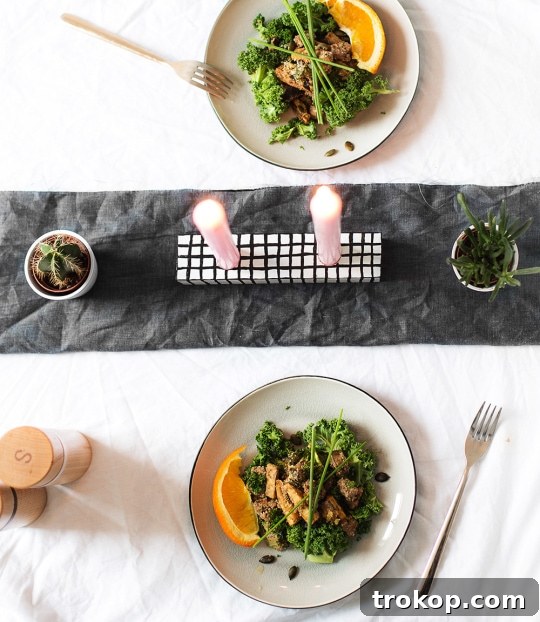
I find immense joy in entertaining guests and creating memorable dining experiences. There’s something truly special about a well-dressed table that sets the perfect mood, transforming an ordinary meal into an extraordinary event. From vibrant flowers and charming placemats to elegant table runners and, of course, a beautifully crafted Patterned DIY Candle Holder, these styling efforts instantly elevate the atmosphere. This particular DIY project is not only incredibly simple to make but also allows you to indulge your inner stylist, making your home feel a little more personal and special with minimal effort.
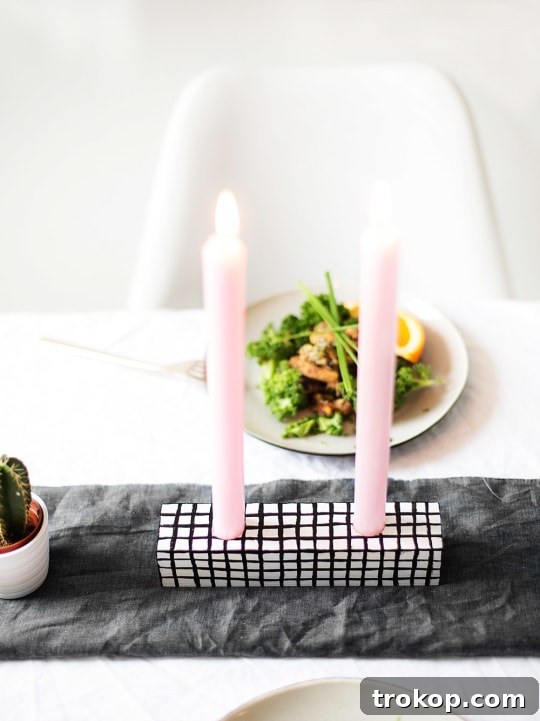
The beauty of this project lies in its simplicity and adaptability. Even if you’re not an experienced painter, the grid pattern is forgiving and looks fantastic even with slight imperfections, adding to its handcrafted appeal. The monochrome base provides a timeless foundation, allowing you to easily switch out your candle colors to match any mood, season, or holiday. Think delicate pink candles for a romantic Valentine’s Day dinner, vibrant hues for a summer gathering, or elegant gold and copper candles for an extra touch of luxury during the festive season.
Beyond its aesthetic appeal, a DIY candle holder is a testament to your creativity and a wonderful way to infuse your home with unique touches. If you’re passionate about adding distinctive elements and creating an inviting atmosphere, explore more Creative DIY Candle Holder Ideas To Give Your Home A Burst Of Color & Scent. For an innovative and quick solution to table coverings, consider this DIY Paper Color Block Table Covering, offering a modern alternative to traditional tablecloths.
Essential Materials and Tools for Your Patterned DIY Candle Holder
Before embarking on your crafting journey, gather these fundamental materials and tools. Choosing the right supplies will ensure a smoother process and a beautiful finished product:
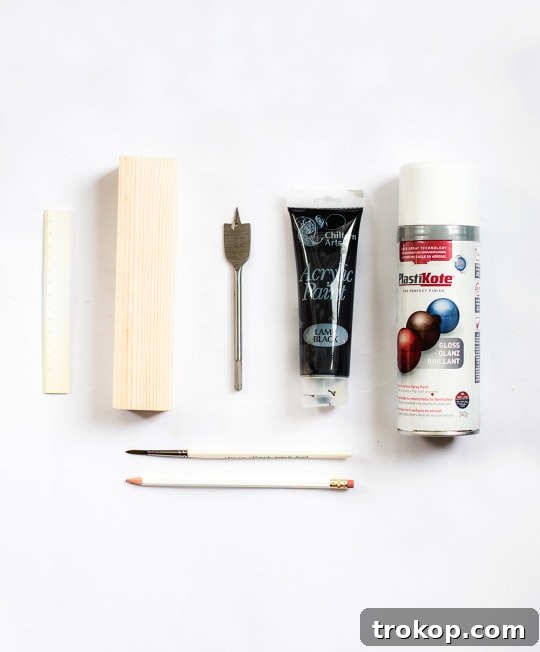
- Block of Balsa Wood: Approximately 10-12 inches long, 3-4 inches wide, and 1.5-2 inches thick. Balsa wood is highly recommended due to its softness, which makes drilling significantly easier, especially for beginners. However, any relatively soft wood type can be used. You can find suitable blocks at most craft stores or online (find balsa wood on Amazon).
- White Spray Paint: Choose a good quality spray paint for an even, durable base coat. A satin or matte finish often works best for a modern look. (Krylon Fusion for Plastic/All-in-One recommended)
- Black Acrylic Paint: For creating the distinct grid pattern. A contrasting color like black on white will make your design pop. (Arteza Black Acrylic Paint)
- Paintbrush: A fine-tipped or small flat brush will be ideal for painting precise lines for the grid pattern.
- Hand Drill: A reliable hand drill is crucial for creating the candle recesses. Ensure it’s comfortable to hold and operate. (explore hand drills)
- Wide Drill Bit: Select a drill bit that matches the diameter of your chosen candles. This ensures a snug and secure fit. Test the bit size with a spare candle if possible before drilling your main woodblock. (find wide drill bits)
- Pencil: For precise marking and measurements.
- Ruler: An essential tool for accurate measuring and ensuring your candle placements are symmetrical.
- Candles: Taper or pillar candles that fit your drill bit size. Consider different colors to match various themes and seasons. (shop for candles)
Crafting Your Patterned DIY Candle Holder: A Step-by-Step Guide
Follow these detailed instructions to create your beautiful patterned candle holder. Take your time with each step to ensure a professional and lasting finish.
Step 1: Preparing Your Wood Block for Candle Placement
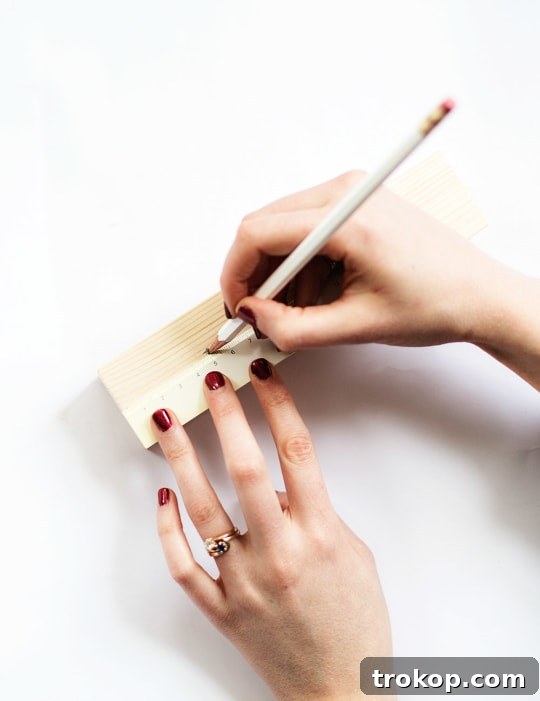
Accuracy in this initial step is key to ensuring your candles sit perfectly. Begin by measuring the center point along the length of your wood block. This will be your primary reference. Next, divide the distance from each long end to this middle point in half again. For example, if your wood block is 10cm from the end to the center, you’ll measure 5cm in from each end. Mark these points clearly with your pencil, ensuring they are perfectly in line with your central mark. These two marks indicate where your candles will be positioned, creating a balanced and symmetrical look.
Step 2: Drilling the Candle Recesses
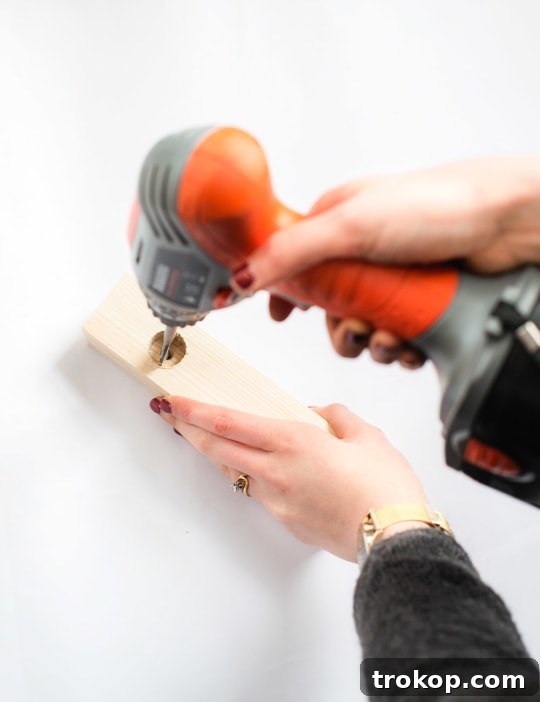
Safety first! Securely attach the appropriate wide drill bit to your hand drill. Find a stable surface and hold the wood block firmly with one hand, ensuring it doesn’t shift during drilling. Carefully align the drill bit with one of your pencil marks. Begin drilling directly into the wood from above, applying steady, even pressure. Continue drilling until you’ve created a recess deep enough for your candles to sit securely and upright. Repeat this process for the second pencil mark. After drilling, inspect the holes for any rough edges. If present, gently sand them down with fine-grit sandpaper to achieve a smooth finish.
Step 3: Applying the Base Coat
Now, it’s time for painting! Prepare a well-ventilated area and protect your work surface with newspaper or a drop cloth. Place your drilled wood block on this protected surface. Using your white spray paint, apply two to three light, even coats. Avoid applying a thick single coat, as this can lead to drips and an uneven finish. Instead, allow each coat to dry completely before applying the next. This layered approach will result in a smooth, professional-looking base that’s ready for your patterned design.
Step 4: Creating the Iconic Grid Pattern
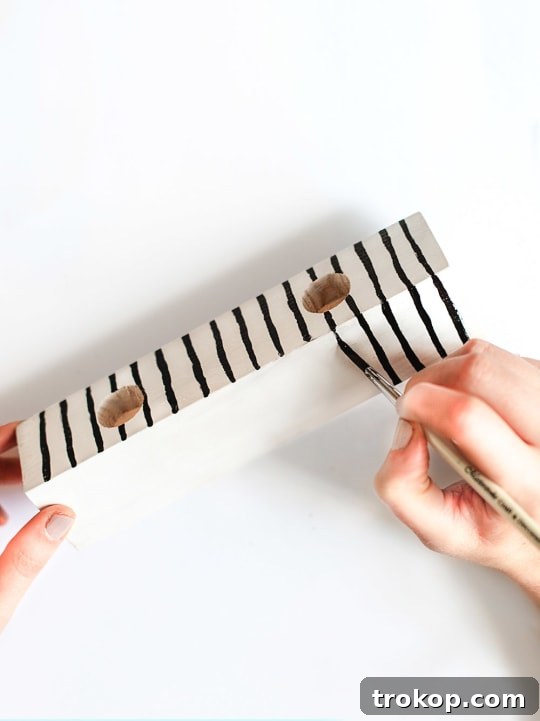
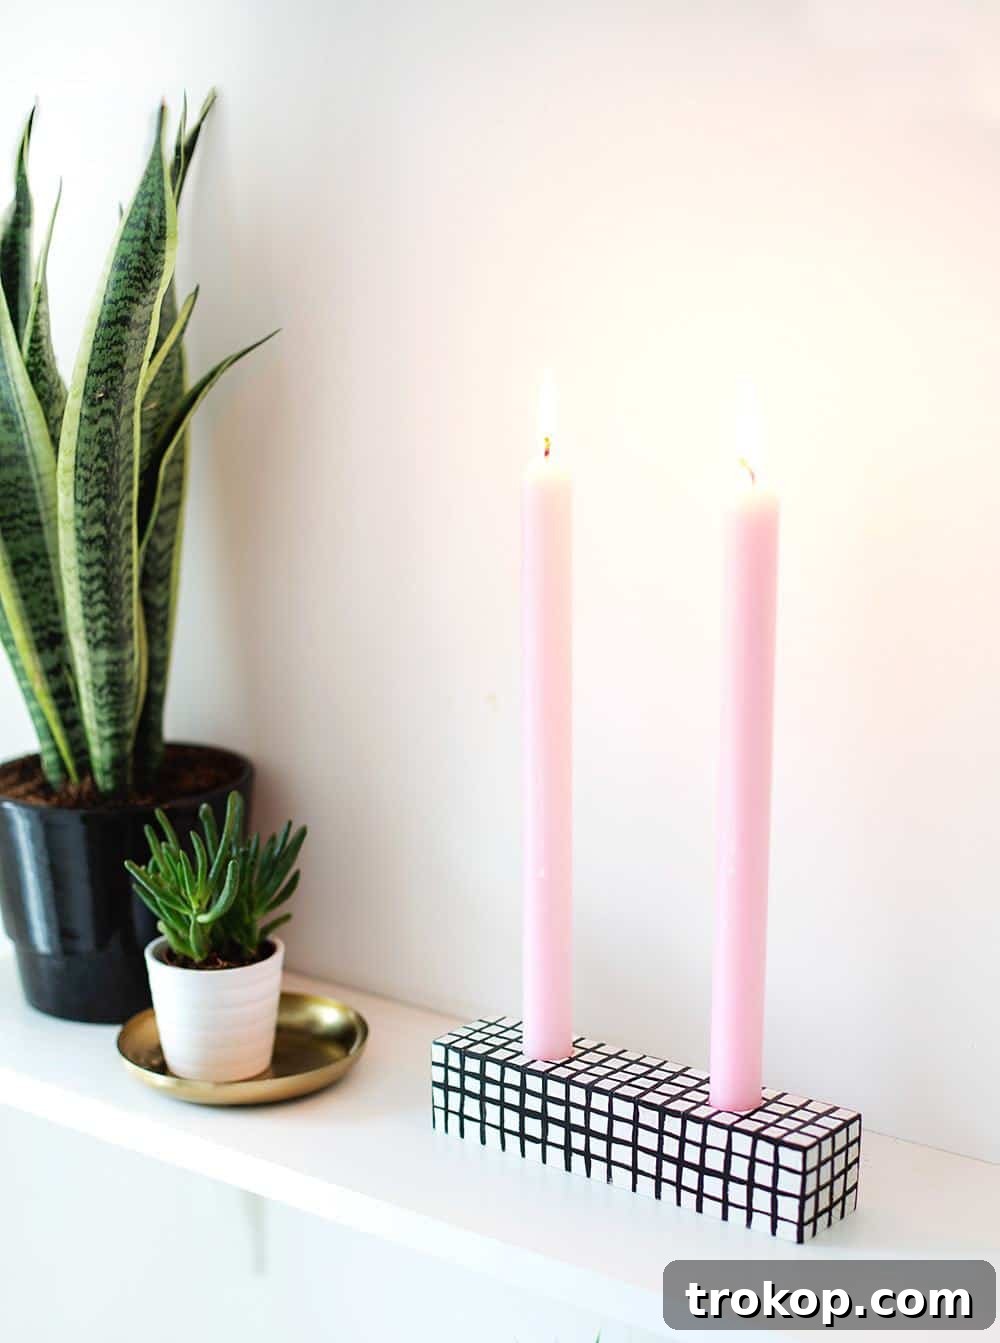
The grid pattern is where your candle holder truly comes to life! Using your black acrylic paint and fine paintbrush, begin by painting horizontal lines across one side of the wood block and along the top surface. Leave the opposite side free for now, allowing you to comfortably hold the block as you paint. While striving for relatively even spacing, remember that absolute perfection isn’t necessary; the slight unevenness and rough brush strokes contribute to the unique, handcrafted charm of the piece. A helpful tip is to start with a central line and work outwards. Once these painted sides are dry to the touch, rotate the wood block and paint the remaining unpainted side, matching up your lines to create a continuous pattern. Then, go back over all painted surfaces, adding vertical lines in the opposite direction to complete your grid. Don’t forget to paint the short sides of the block, ensuring the pattern wraps around seamlessly. There’s no need to paint the bottom unless you specifically desire it. Finally, test-fit your candles. You may find that some candles need a slight shave or trim around their base to fit snugly into the drilled holes. Once fitted, your beautifully patterned DIY candle holder is ready to illuminate your home!
Styling Your Patterned DIY Candle Holder for Every Occasion
The versatility of this patterned DIY candle holder makes it a fantastic addition to any home decor scheme. Its minimalist design with a contrasting grid allows it to seamlessly integrate into various aesthetics, from modern and Scandinavian to eclectic and bohemian. Here are some ideas for styling your new creation:
- As a Stunning Centerpiece: Place your candle holder at the heart of your dining table, especially for special meals. The warm glow of the candles, combined with the chic pattern, creates an intimate and inviting atmosphere for any gathering.
- Seasonal Decor: Easily adapt your candle holder for different holidays and seasons by simply swapping out the candle colors. Think vibrant reds and greens for Christmas, pastels for Easter, deep oranges for autumn, or the delightful pinks for Valentine’s Day.
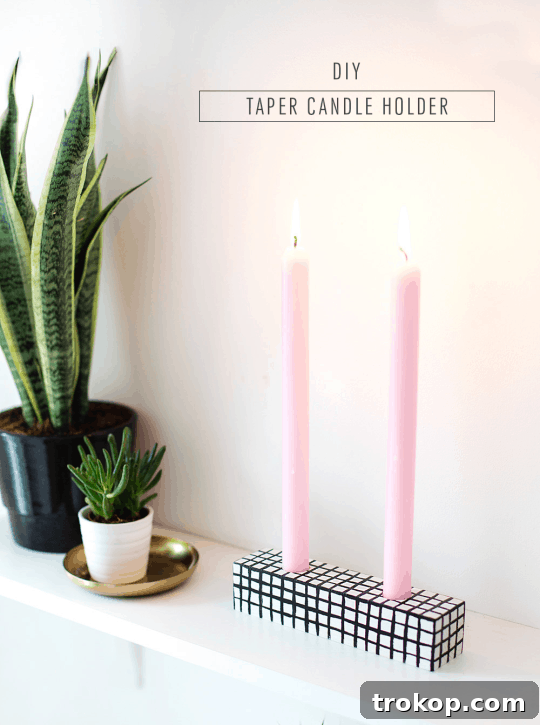
- Shelf or Mantel Accent: When not gracing your table, this piece makes a wonderful decorative accent on a bookshelf, mantelpiece, or console table. Pair it with other curated objects like small potted plants, books, or decorative trays to create a balanced and aesthetically pleasing vignette.
- Bathroom Ambiance: Create a spa-like retreat in your bathroom by placing the candle holder on a shelf or counter. Use scented candles to enhance relaxation and add a touch of luxury to your self-care routine.
- Bedroom Serenity: Position it on your bedside table for a soft, calming light in the evenings. The gentle flicker of candlelight can help unwind after a long day.
- Outdoor Entertaining: On a calm evening, bring your candle holder outdoors to illuminate your patio or balcony. Ensure it’s protected from wind and direct exposure to elements.
The possibilities are truly endless, limited only by your imagination. This DIY piece isn’t just a candle holder; it’s a blank canvas for your creative expression.
More Candle and Aromatherapy DIY Ideas to Explore
If you’ve enjoyed crafting this patterned candle holder and are looking for more ways to infuse your home with delightful scents and beautiful light, here are some of my favorite related DIY projects from the archives. These ideas will help you continue your creative journey and enhance your living space with personalized touches:
- Essential Oil Candles: How to Make Wax Candles with Rosemary and Grapefruit: Learn to create your own aromatherapy candles using natural essential oils for a truly unique scent experience.
- How to Make an Essential Oil Diffuser: DIY Reed Diffuser: Discover how to craft a simple yet elegant reed diffuser to continuously fill your rooms with your favorite fragrances.
- DIY Faux Wood Candle Holder: Experiment with different textures and finishes by creating a candle holder with a charming retro faux wood effect.
- DIY Copper Candleholder: Add an industrial chic touch to your decor with a striking copper candle holder, perfect for modern interiors.
- Rainbow DIY Taper Candle Holder: Inject a playful burst of color into your home with a vibrant rainbow-themed taper candle holder.
- DIY Citronella Candles: Perfect for outdoor gatherings, these citronella candles not only provide ambiance but also help keep pesky insects at bay.
Patterned DIY Candle Holder: Project Overview
This charming DIY candle holder is not just a functional item but a decorative statement, offering the perfect blend of simplicity and elegance. With its versatile design, it can easily be adapted for any holiday or occasion, making it a staple in your home decor collection. The project is quick, budget-friendly, and immensely satisfying.
Prep Time: 30 mins
Total Time: 30 mins
Course: DIY
Category: Decor
Equipment
- Hand drill
- Paint brush
- Pencil
- Ruler
- Wide drill bit to fit the candles
Materials
- White spray paint
- Black acrylic paint
- Candles
- Block of Balsa wood
Instructions
How to Make a Patterned DIY Candle Holder
- Measure the center of your piece of wood, and then divide the distance from each long end to the middle in half again.
- Mark that point with the pencil, in line with the middle point. For instance, if the middle was 10 cm, then you’d measure 5cm in from either end. This marks where your candles will sit.
- Attach the correct drill bit to your drill. Holding the wood steady with one hand, drill directly into the wood from above, guided by the two pencil marks you’ve made.
- Keep drilling until you’ve created enough depth for the candles to sit in firmly.
- If there are any rough edges, gently sand them down for a smooth finish.
Painting Your DIY Candle Holder
- Spray the wood white.
- Place the wood on a protected surface and cover with two or three light, even coats. Allow each coat to dry completely in between applications.
- Now for the grid pattern: Start by painting lines across one side and the top, leaving the other side free to hold. Try to keep the lines relatively evenly spaced, but there’s no need for exact measurements—a bit of unevenness adds to the charm.
- When those two sides are dry, paint the other side and then go back over with lines in the opposite direction to complete the grid.
- Don’t forget the sides of the block, but you don’t need to paint the bottom. Ensure you match up the black lines on all sides to achieve a continuous pattern.
- Your candles may need to be shaved slightly at the sides to fit snugly into the holes. Once fitted, your beautiful candle holder is ready to use!
Cost: $65 (estimated, depending on materials purchased)
Keywords: patterned diy candle holder, wooden candle holder, handmade decor, easy craft project, Valentine’s Day DIY

We absolutely love seeing your creative projects! Don’t forget to share your finished DIY Candle Holder with us on Instagram using the hashtag #sugarandclothloves. Your creations inspire us and our community!
Looking for even more interior design inspiration and DIY ideas to personalize your home? You can find all of our home decor tutorials and creative project ideas right here!
More Valentine’s Day Ideas to Sweeten Your Celebration
If you’re gearing up for Valentine’s Day or simply love projects that add a touch of romance and festivity to your home, explore these delightful ideas:
DIY Boob Macarons & Valentines Printables
Get playful this Valentine’s with these unique macarons and printable decorations.
DIY Valentine Arrow Cookie Picks
Add a charming touch to your Valentine’s cookies with these easy-to-make arrow picks.
Strawberry and Rose Sorbet Champagne
Toast to love with this elegant and delicious champagne cocktail, featuring strawberry and rose sorbet.
A Simple and Chic Galentine’s Table
Celebrate friendship this Valentine’s with a beautifully styled table for your Galentine’s gathering.
DIY Fresh Floral and Herbal Incense Bundles
Create fragrant and calming incense bundles using fresh flowers and herbs for a serene ambiance.
DIY Fabric Wrapped Bouquets for Gifting
Present flowers beautifully with these charming fabric-wrapped bouquets, perfect for any special occasion.