

DIY Nesting Desk Organizer: The Ultimate Guide to a Clutter-Free Workspace
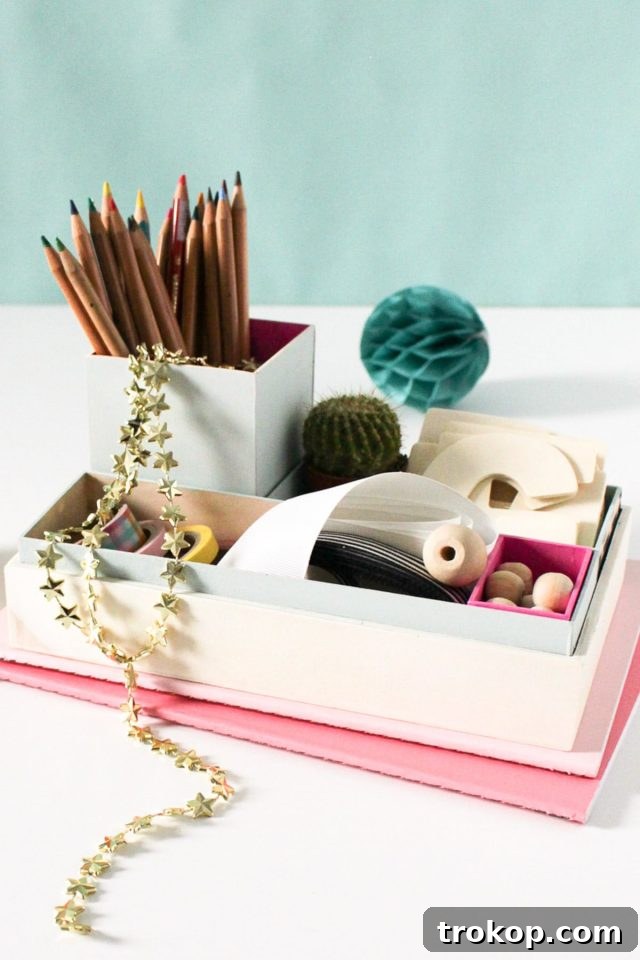
Is your workspace constantly battling an onslaught of pens, papers, and miscellaneous items? Do you find yourself sifting through piles just to find that one essential sticky note? You’re not alone. A cluttered desk can stifle creativity, reduce productivity, and make finding inspiration a challenge. But what if you could transform your chaotic desk into a beacon of organization with a stylish, customized solution? Enter the DIY Nesting Desk Organizer – an ingenious project that not only keeps everything in its place but also adds a touch of personalized elegance to your home office or craft studio.
This time of year is perfect for a refreshing spring cleaning, and what better place to start than your most used area? Whether it’s craft supplies, photography props, or daily blogging essentials, every creative space benefits immensely from thoughtful organization. This guide, brought to you by Anusha, will walk you through creating a versatile nesting desk organizer that fits together perfectly and provides a dedicated spot for every item. The beauty of this project lies in its simplicity and endless customization possibilities, allowing you to tailor it exactly to your aesthetic and functional needs.
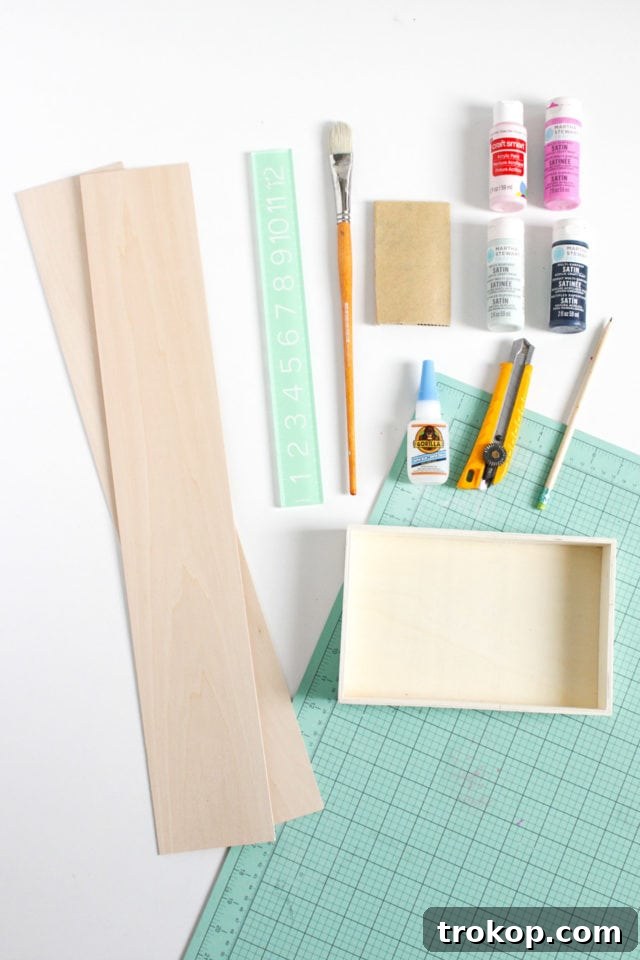
Materials Needed for Your DIY Nesting Desk Organizer
Gathering your materials is the first exciting step in any DIY project. For this nesting desk organizer, we focus on easily accessible and versatile items that allow for maximum customization. Here’s a detailed list:
- Basswood Panels: Opt for panels measuring approximately 1/16″ x 4″ x 24″. Basswood is an excellent choice for crafting due to its fine, even grain and soft texture, making it easy to cut and work with. The exact dimensions can be adjusted based on the size of your main wooden tray and the number of nesting boxes you plan to create.
- Wooden Box or Tray: This will serve as the foundation for your nesting organizer. A wooden box or tray measuring around 9″ x 6″ x 1.5″ is a great starting point, similar to what was sourced from Hobby Lobby for this project. However, feel free to choose any size available at your local craft store like Michaels, ensuring it fits your desk space and storage needs. The beauty is in its adaptability.
- Acrylic Paint: Select a palette of your favorite colors to personalize your organizer. Acrylic paints are perfect for wood surfaces, offering vibrant hues and quick drying times. This is where your creativity can truly shine, whether you prefer bold statements, subtle pastels, or a minimalist natural wood finish.
- Superglue: A strong adhesive is crucial for securely assembling the basswood pieces. Superglue (cyanoacrylate adhesive) provides a fast and firm bond, essential for creating durable boxes.
- Sandpaper: Keep fine-grit sandpaper on hand to smooth out any rough edges or imperfections after cutting and gluing. This step ensures a professional finish and prevents splinters.
- X-Acto Knife (or Craft Knife): A sharp X-Acto knife is indispensable for precise cutting of the basswood panels. Its fine blade allows for intricate work and clean edges.
- Ruler: An accurate ruler is vital for precise measurements and straight cuts, ensuring your nesting boxes fit perfectly within the main tray and each other. A metal ruler is recommended for use with an X-Acto knife to prevent cutting into the ruler itself.
- Cutting Mat: Protect your work surface and prolong the life of your X-Acto blade with a self-healing cutting mat. This provides a stable base for cutting and measuring.
Step-by-Step Guide: How To Make A DIY Nesting Desk Organizer
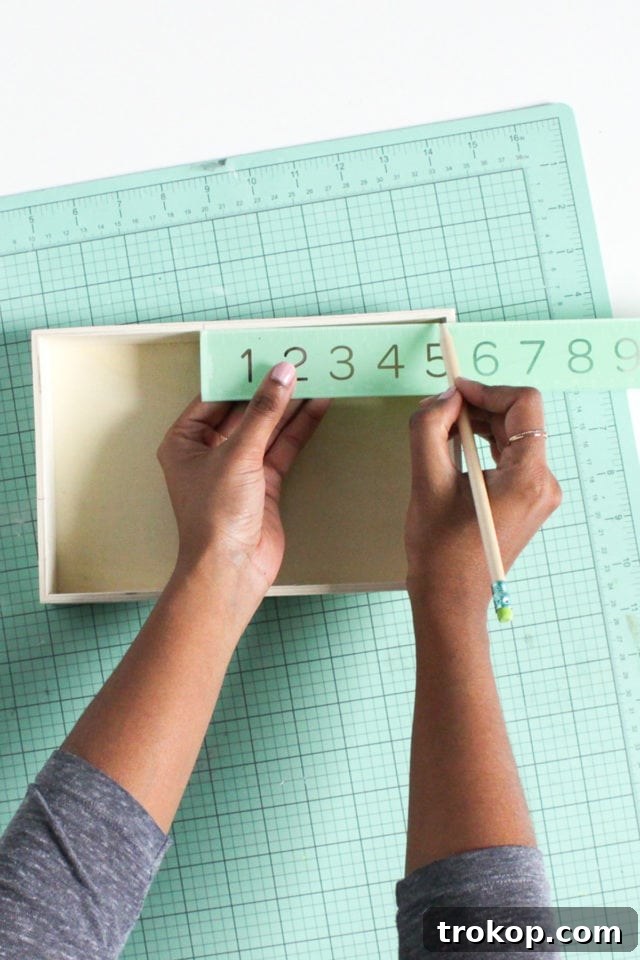
Creating your DIY nesting desk organizer is a rewarding process that combines precision with creativity. Follow these detailed steps to build functional and beautiful storage compartments:
- Plan Your Box Sizes: Begin by carefully measuring the interior dimensions of your main wooden box or tray. This will be your guiding perimeter for designing the nesting boxes. Take into account any existing dividers or your desired layout. Jot down the specific dimensions you’ll need for each individual nesting box. Our example project used the following sizes, but feel free to adjust them to suit your needs and the supplies you plan to store:
- Tall box: 3″ x 4″ x 3″ (Height x Width x Depth) – Ideal for pens, markers, or taller tools.
- Long box: 8.75″ x 1.5″ x 2.5″ – Perfect for sticky notes, small rulers, or narrow items.
- Medium box: 5.5″ x 1.75″ x 3″ – Great for paper clips, erasers, or craft embellishments.
- Tiny box: 2.25″ x 1.25″ x 1.5″ – Excellent for small hardware, thumbtacks, or tiny trinkets.
Remember, the goal is to maximize your organizer’s utility, so think about the items you want to store.
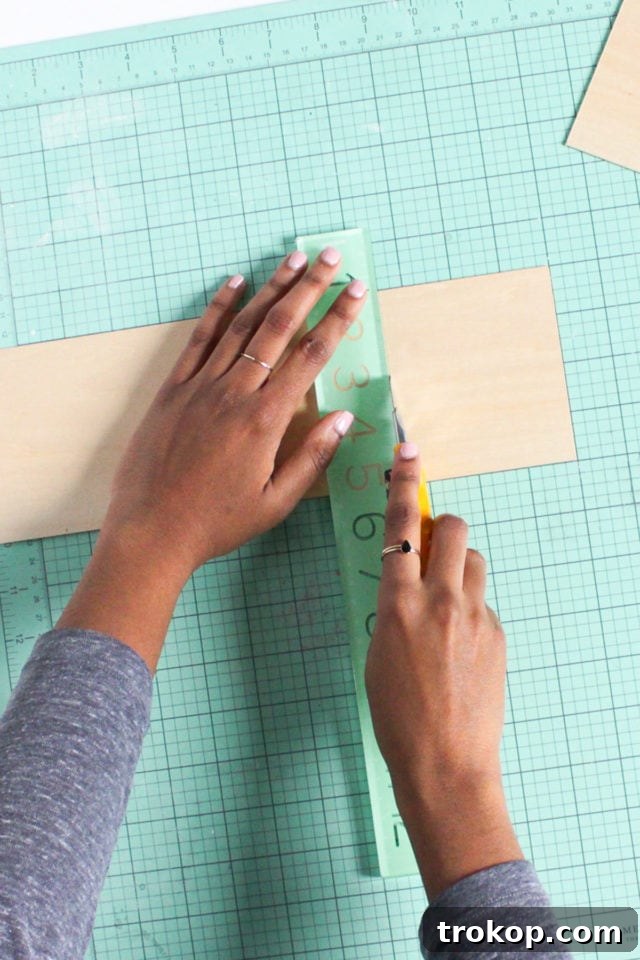
- Cut the Basswood for Your First Tall Box (Sides): For the tall box (or whichever box you choose to build first), take your X-Acto knife and ruler. Cut two pieces of basswood to measure 3″ x 4″. When cutting basswood, remember to lightly score the wood multiple times along your measurement line. This technique ensures a clean, straight cut with minimal effort and prevents the wood from splintering, allowing the knife to gradually deepen the cut until it goes all the way through.

Cut the Basswood for Your First Tall Box (Parallel Sides): Next, cut two more pieces of basswood that measure 2.75″ x 4″. These will form the parallel sides of your box. It’s important to note that these shorter pieces will be glued *inside* the longer sides, creating a sturdy butt joint. This method ensures that the visible exterior dimensions are consistent.- Cut the Bottom Piece: Finally, cut a single piece of basswood for the bottom of this box. This piece will measure 3″ x 3″, providing a solid base for your items.
- Optional: Paint the Interior (Before Assembly): If you envision a pop of color inside your organizer, now is the ideal time to apply acrylic paint to the interior surfaces of your cut basswood pieces. Painting before assembly is much easier and ensures an even coat without messy edges. Allow ample drying time before proceeding.
Assemble the Sides with Superglue: Using superglue, carefully join the sides of your box together. Employ a butt joint technique, where the end of one piece of wood is placed directly against the surface of another to form a corner. Apply a thin, even bead of glue to one edge, then press the corresponding piece firmly against it. Hold for a few seconds to allow the glue to set.
Allow Each Side to Dry: Patience is key in this step. Allow each glued side to dry completely before attaching the next one. Rushing this process can lead to weak joints and a wobbly box. Ensure the corners are square and stable.- Reinforce the Corners: Once the initial bonds are dry, add a small bead of glue into the interior corners of the box. This reinforcement significantly strengthens the structure, making your organizer more durable and long-lasting.
- Attach the Bottom: Apply superglue to the edges of the bottom piece and carefully position it onto the assembled sides. Ensure it aligns perfectly and press firmly. Allow it to dry completely.
- Sand Any Rough Edges: With the box fully assembled and dry, use sandpaper to gently smooth out any rough edges or areas where the wood might not be perfectly flush. This creates a clean, professional finish.
- Optional: Paint the Exterior: Now that your box is structurally sound and smooth, you can choose to paint the exterior. This is a great opportunity to match your organizer to your room’s decor or add vibrant accents. Let the paint dry thoroughly.
- Repeat for All Nesting Boxes: Follow these steps for each of the remaining nesting boxes you planned. This iterative process allows you to build a complete set of custom organizers that fit snugly into your main tray, creating a truly bespoke storage solution.
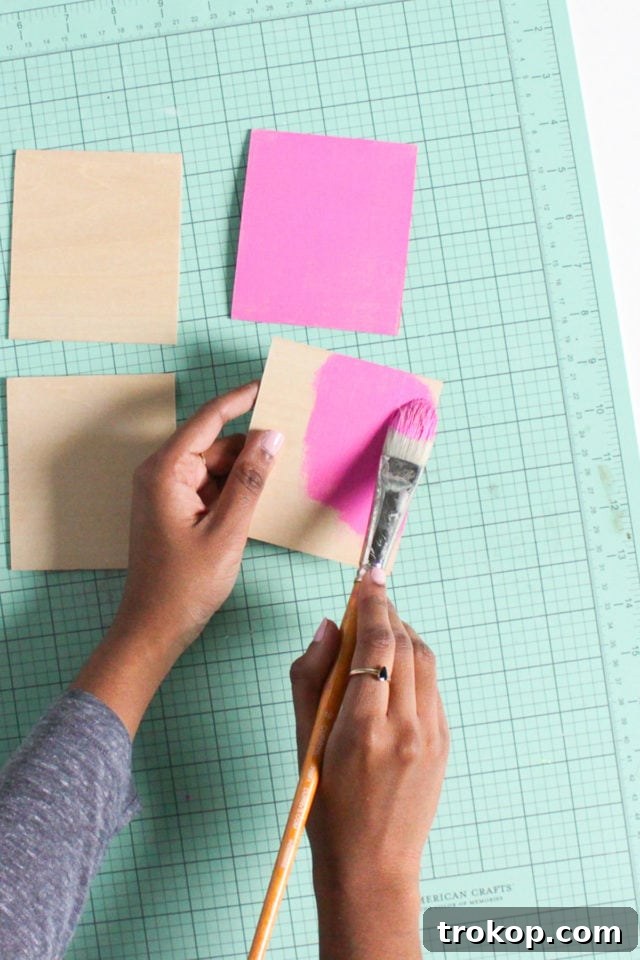
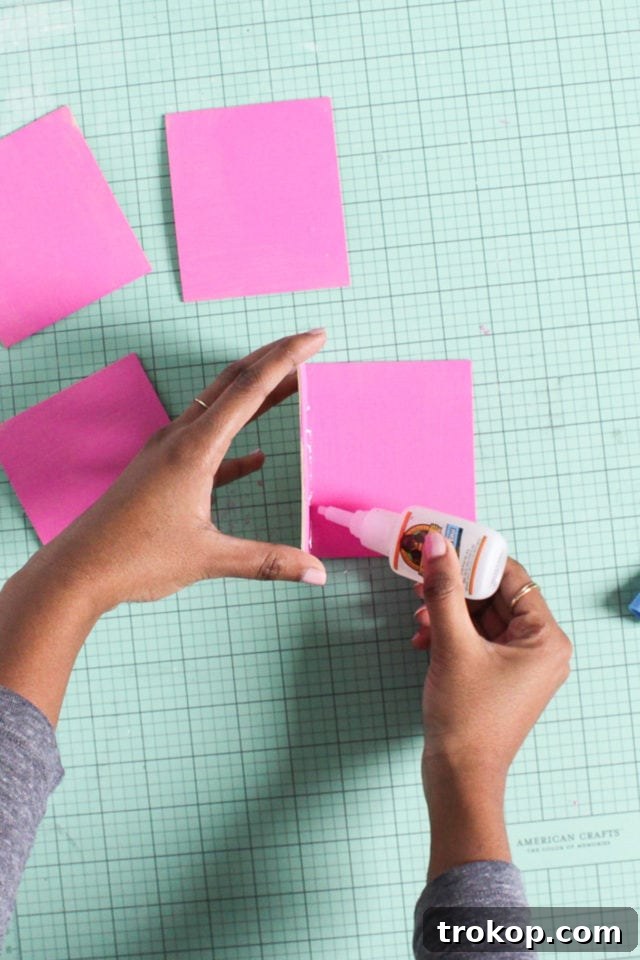
Customizing and Personalizing Your Organizer
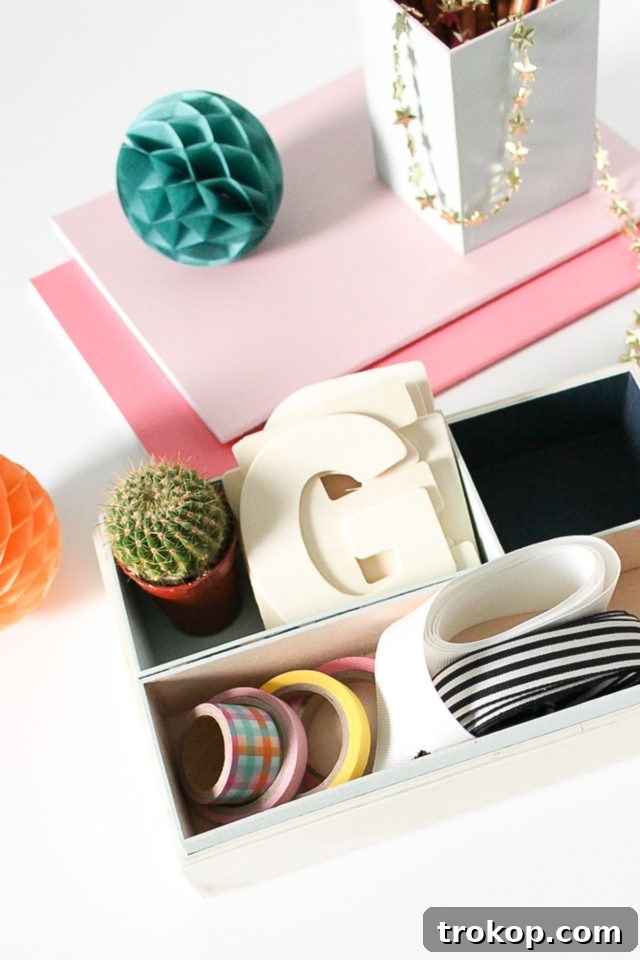
The true joy of a DIY project like this nesting desk organizer is the freedom to personalize it. Beyond painting, consider these ideas to make it uniquely yours:
- Color Blocking: Instead of solid colors, try painting different boxes or even different sides of a single box with contrasting or complementary colors.
- Patterns and Stencils: Use stencils to add geometric patterns, stripes, or polka dots. Masking tape can help you achieve crisp lines for stripes or chevron designs.
- Textural Elements: Adhere decorative paper, fabric scraps, or even thin cork sheets to the outside of the boxes for added texture and visual interest.
- Labels: Add small, stylish labels to each box to clearly indicate its contents. This not only aids in organization but also adds a charming, intentional look.
- Functional Additions: Consider gluing small magnets to the bottom of some boxes if your main tray is metallic, or adding felt pads to prevent scratching your desk surface.
Imagine finally having a dedicated home for your colorful washi tapes, delicate ribbons, or even a tiny succulent! What treasures will find their perfect spot in your custom-made desk organizer?
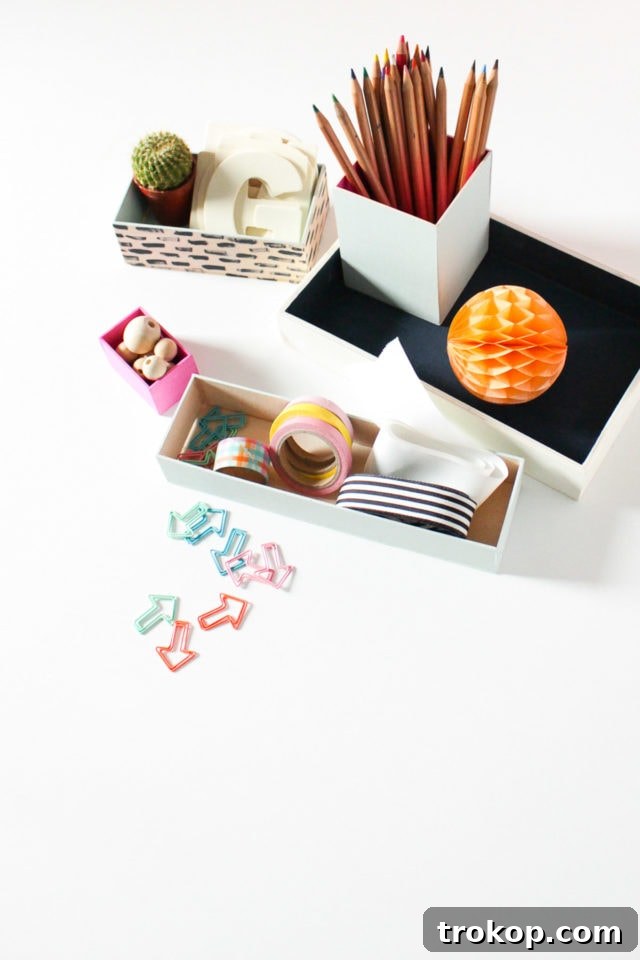
More Office & Desk Decor Ideas & DIY’s
If you’ve enjoyed creating this DIY Nesting Desk Organizer, you’ll love exploring more ways to enhance your workspace. Here are some other easy office projects and inspiring makeovers from our archives to keep your creativity flowing and your desk looking fabulous:
- DIY Desk Organizer with a Cork Board Back: A brilliant way to combine storage with a functional display area for notes, photos, and inspiration.
- A Home Office Design Makeover: Get inspired by a complete transformation that proves even small changes can make a huge impact on your work environment.
- Hexagonal Desktop Storage Organizer for Pens and Supplies: A chic and modern way to keep your writing tools and smaller items neatly contained.
- Desktop Dry Erase Board Made from a Photo Frame: An incredibly simple yet effective solution for quick notes, reminders, and brainstorming sessions right at your fingertips.
- The Before & After of Our Study Room Makeover: Witness a stunning renovation that shows how thoughtful design can turn an ordinary room into a motivating study space.
- How to Make Geometric Chalkboard Surfaces for Your Desk: Add a playful and changeable element to your desk with custom chalkboard areas, perfect for doodling, notes, or inspirational quotes.
DIY Nesting Desk Organizer: Project Summary
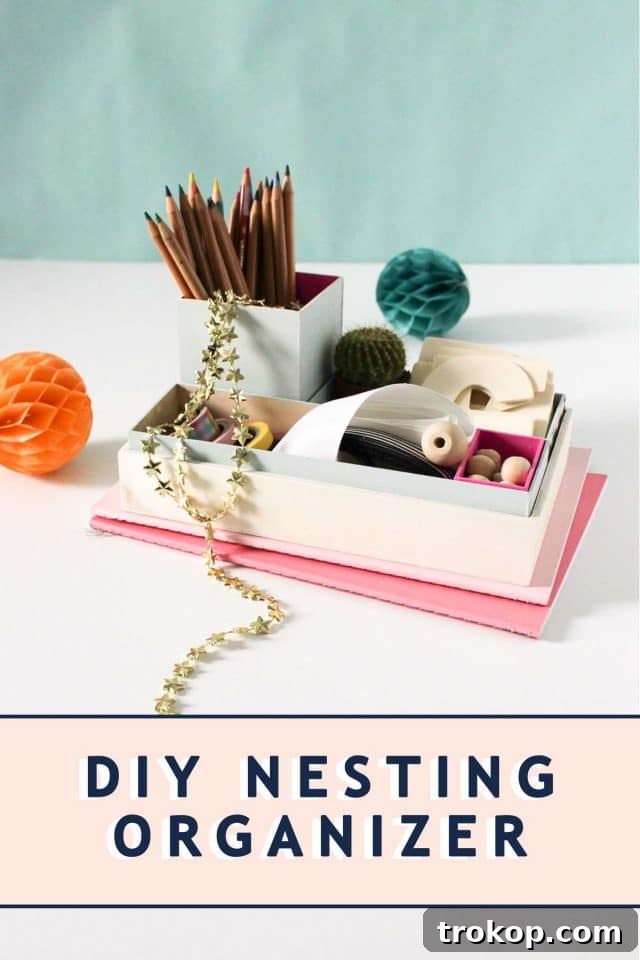
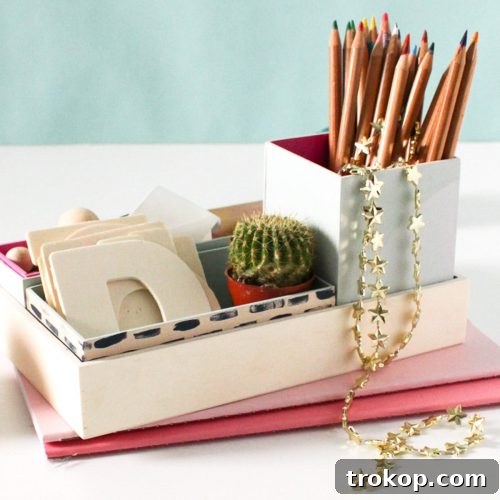
DIY Nesting Desk Organizer
An easy to make and easy to customize DIY nesting desk organizer that fits together perfectly and provides a dedicated spot for everything.
Total Time: Approximately 2 hours (including drying time)
Course: DIY
Category: Office Organization
Equipment
- X-Acto knife or Scalpel
- Ruler
- Cutting mat
- Superglue (Wood glue also works for a slower, stronger bond)
- Sandpaper (fine-grit)
Materials
- 2-3 Wooden Boxes or Trays: Recommended size 9″ x 6″ x 1.5″, or adjust to your desired dimensions. This serves as the main outer container.
- 3 Basswood Panels: Approximately 1/16″ x 4″ x 24″, or sized according to your custom nesting boxes. Basswood is excellent for its ease of cutting and smooth finish.
- Acrylic Paint: Optional, for adding color and personalization to your organizer.
Instructions
- Measure and Plan: Begin by measuring the interior of your main wooden tray. Based on this, plan the dimensions for your individual nesting boxes. Consider the items you want to store to optimize box sizes.
- Cut Basswood Sides (First Box): For your first inner box, cut two pieces of basswood (e.g., 3″ x 4″) using an X-Acto knife and ruler. Score the wood lightly several times for a clean cut.
- Cut Parallel Sides: Cut two additional pieces for the parallel sides (e.g., 2.75″ x 4″). These will be glued inside the longer pieces.
- Cut Box Bottom: Cut one piece for the bottom of this box (e.g., 3″ x 3″).
- Interior Painting (Optional): If desired, paint the inside surfaces of your cut basswood pieces now, before assembly, for a cleaner finish. Allow to dry completely.
- Glue Sides: Apply superglue to the edges and join the sides using a butt joint (one piece against another).
- Allow to Dry: Let each joint dry completely before proceeding to the next side to ensure maximum strength.
- Reinforce Corners: Once dry, add small beads of glue to the interior corners for extra durability.
- Attach Bottom: Glue the bottom piece securely to the assembled sides and allow it to dry.
- Sand Edges: Gently sand any rough edges for a smooth, finished look.
- Exterior Painting (Optional): Paint the outside of the box if you wish, once all glue is dry.
- Repeat: Follow these steps to build all your remaining nesting boxes according to your initial plan.
Notes
The example project created the following nesting box sizes to fit a 9″ x 6″ x 1.5″ wooden tray:
- Tall box: 3″ x 4″ x 3″
- Long box: 8.75″ x 1.5″ x 2.5″
- Medium box: 5.5″ x 1.75″ x 3″
- Tiny box: 2.25″ x 1.25″ x 1.5″
Adjust these dimensions to perfectly fit your chosen main tray and specific organization needs.
Estimated Cost: $25 (approximate, depending on materials purchased)
Keywords: desk accessories, desktop organizer, office organization, craft organizer, DIY storage, nesting boxes, workspace declutter