
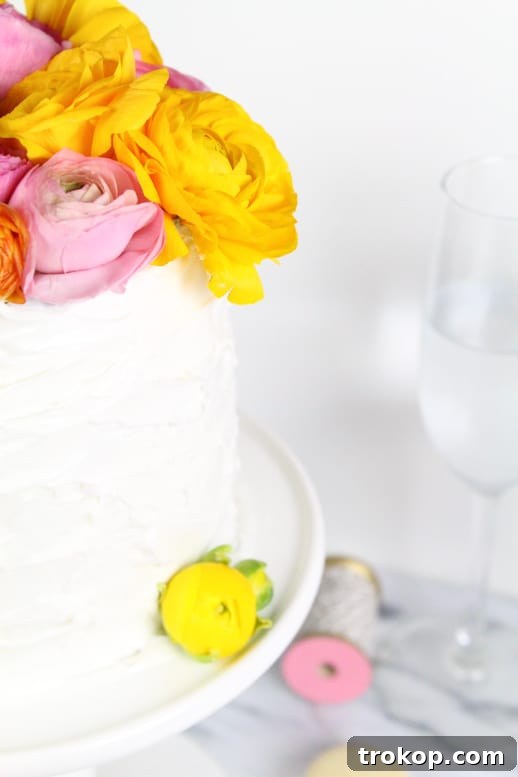
Transforming an ordinary cake into an extraordinary masterpiece is easier than you think. Nothing captures the essence of celebration and beauty quite like the natural charm of fresh flowers. Whether it’s for a spring gathering, a birthday, a baby shower, or just a delightful treat for yourself, a DIY Fresh Flower Cake Topper offers an instant touch of elegance and whimsy. In this comprehensive guide, we’ll walk you through creating your own stunning floral display using just a few simple supplies, ensuring your cake becomes the undeniable centerpiece of any event.
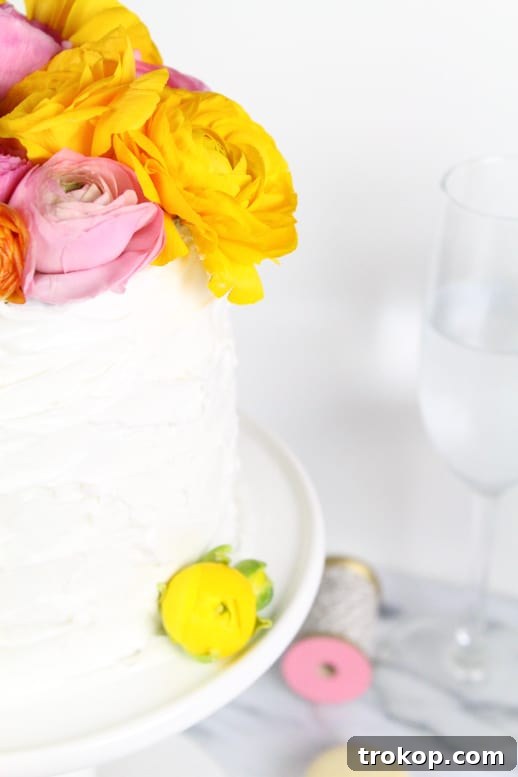
If you’ve been searching for a DIY project that combines beauty, simplicity, and deliciousness, then you’ve come to the right place. This project brings together the joy of baking (or buying!) a cake, the delightful crunch of macarons, and the vibrant appeal of fresh blooms. Get ready to unleash your inner florist and confectioner, because we’re about to create something truly magical.
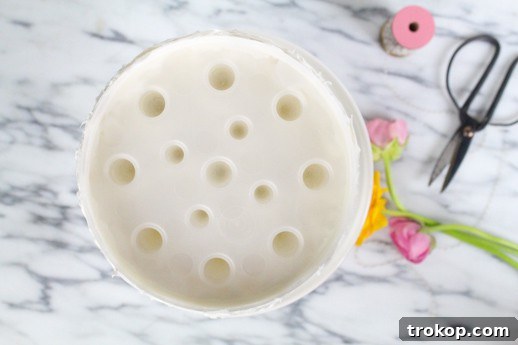
Many people might hesitate at the thought of placing fresh flowers directly onto a cake due to concerns about food safety or the complexity of arranging them. However, a brilliant tool called a cake vase (sometimes known as a flower spike or flower tube for cakes) completely changes the game. This ingenious device acts as a protective barrier and a mini-arrangement vessel, making the process incredibly straightforward and safe. Literally, all you do is stick flowers in it, and voilà—instant beauty!
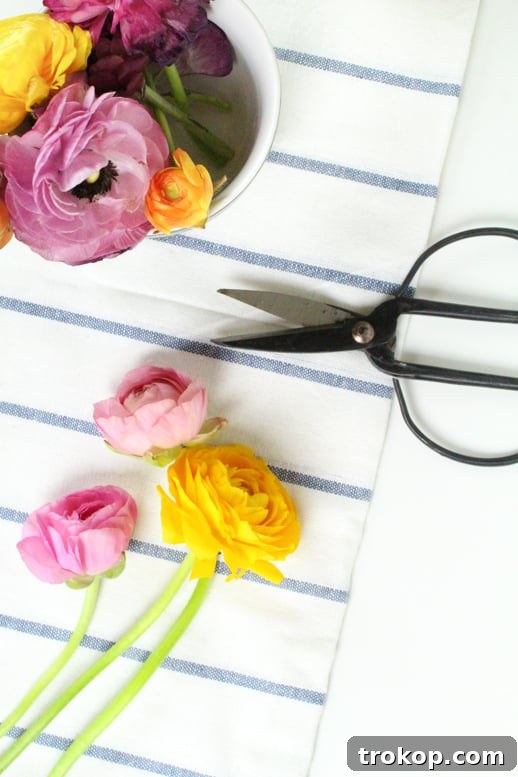
Table of Contents
The Allure of Fresh Flower Cake Toppers
Fresh flower cake toppers bring an undeniable charm and sophistication to any dessert. Unlike artificial decorations, real flowers offer vibrant colors, unique textures, and a subtle, natural fragrance that can elevate the entire presentation. They perfectly encapsulate the beauty of nature, making your cake feel less like a confection and more like a piece of edible art. This DIY approach not only allows for complete customization to match your event’s theme or color palette but also provides a budget-friendly alternative to elaborate fondant work or custom-made toppers. The freshness they impart is truly unmatched, promising a delightful visual and aromatic experience for you and your guests.
Choosing the Right Flowers for Your Cake
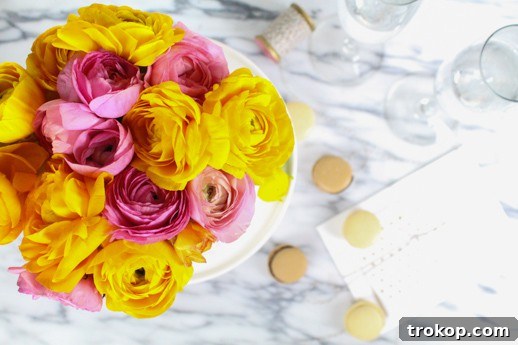
Selecting the perfect flowers is crucial for both aesthetics and safety. When choosing blooms for your cake, prioritize those that are non-toxic and food-safe. Popular and beautiful choices include roses, peonies, ranunculus, carnations, spray roses, orchids, and small daisies. Always avoid flowers that have been chemically treated with pesticides, as these can be harmful. It’s best to source flowers from a reputable florist who can confirm they are suitable for food contact or grow your own organically. Consider the size and shape of your cake when selecting flowers; smaller blooms work well for intricate designs, while larger flowers can make a bold statement. Think about your overall color scheme and theme as well – soft pastels for a baby shower, bright hues for a birthday, or elegant whites and greens for a wedding.
Materials and Tools Needed to Make a DIY Fresh Flower Cake Topper
Gathering your supplies is the first exciting step in bringing your floral cake vision to life. You’ll be surprised at how few items you actually need for such a dramatic impact!
- Cake Vase: This is the star of our show. A food-safe, multi-hole vase designed specifically for cake decoration. It keeps flowers hydrated and prevents direct contact with the cake.
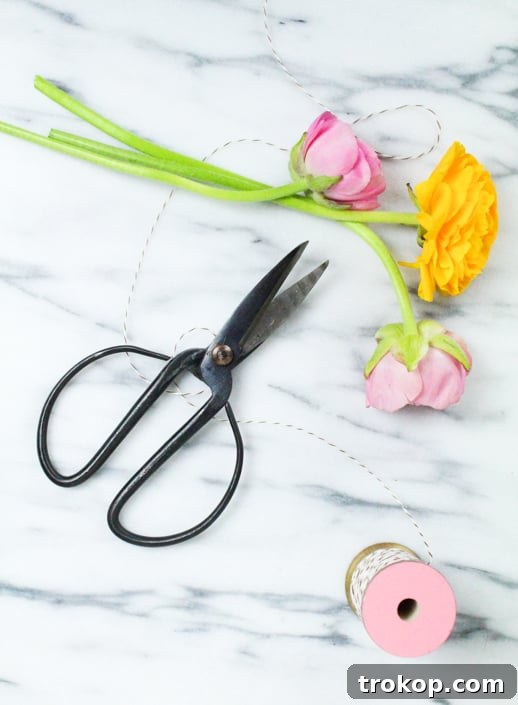
- Scissors or Floral Snips: Essential for precisely trimming flower stems to the desired length.
- Fresh Flowers: Your chosen assortment of beautiful, non-toxic, and food-safe blooms. Variety in size and shape can add depth.
- Water: To fill the cake vase and keep your flowers fresh and vibrant throughout the event.
- Cake: The canvas for your floral art! This can be a delicious homemade creation (we have plenty of recipes for inspiration!) or a convenient store-bought cake.
Speaking of cakes, if you’re feeling ambitious and want to bake your own, we have a wonderful collection of recipes to inspire you. From rich and creamy options to fun and fruity delights, you’ll find something perfect for any palate. Consider our keto cheesecake for a low-carb indulgence, a festive funfetti cookie cake for a playful touch, an elegant chai crepe cake for a unique dessert, or a whimsical unicorn strawberry cake for a magical celebration. The possibilities are truly endless!
How To Make A DIY Fresh Flower Cake Topper
Now for the fun part! Follow these simple steps to assemble your breathtaking fresh flower cake topper. The process is quick, intuitive, and incredibly rewarding.
Step 1: Position the Cake Vase
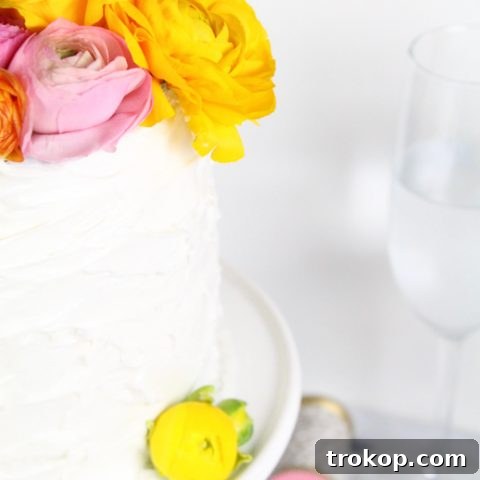
Carefully place the cake vase directly on top of your beautifully iced cake. Ensure it’s centered and stable. The vase typically has a flat base that sits gently on the frosting, creating a secure foundation for your floral arrangement. A freshly chilled cake can also provide a firmer surface for placement.
Step 2: Fill with Water and Prepare Flowers
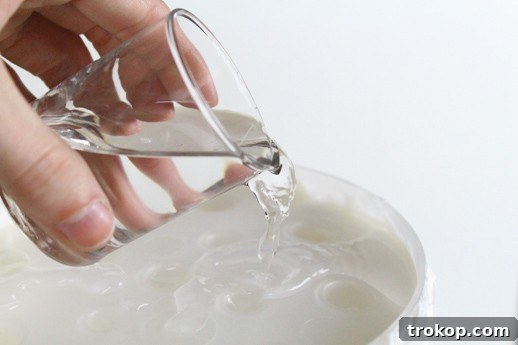
Next, fill the cake vase with a small amount of fresh water. You only need enough to reach the bottom of the flower stems once they are inserted into the various holes. Avoid overfilling, as you don’t want water to spill onto your cake.
Now, prepare your flowers. Using your scissors or floral snips, cut the stems of your flowers short. The exact length will depend on the size of your cake vase and how high you want the flowers to stand. Aim for stems that are long enough to reach the water but short enough to create a dense, full arrangement. Begin placing the trimmed flowers into the holes of the vase. A helpful technique I’ve found is to start from the outside perimeter and work your way inwards. While some instructions might suggest starting from the center, working from the outside in allows the inner flowers to stand a bit taller, creating a beautiful domed effect and adding more dimension to your arrangement. This method also helps you establish the overall shape and fullness more easily.
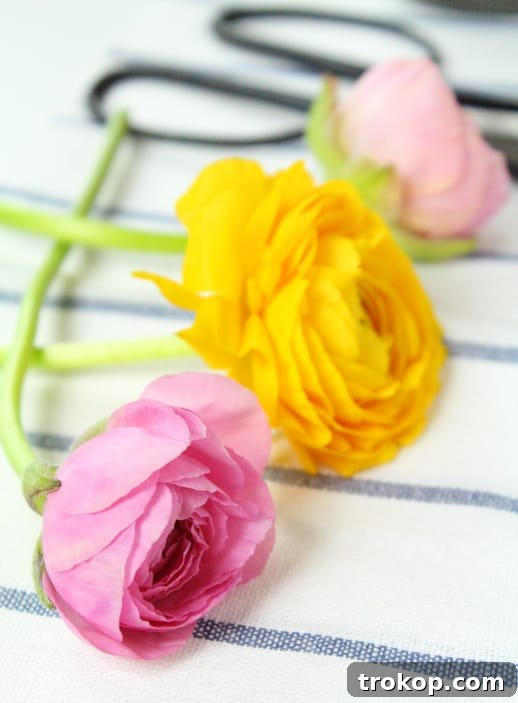
As you insert each flower, gently rotate the cake or move around it to ensure an even distribution of colors and textures. Don’t be afraid to experiment with angles to give your topper a natural, organic look. Think about creating a harmonious balance, but also allow for a bit of playful asymmetry. This is where your creativity truly shines!
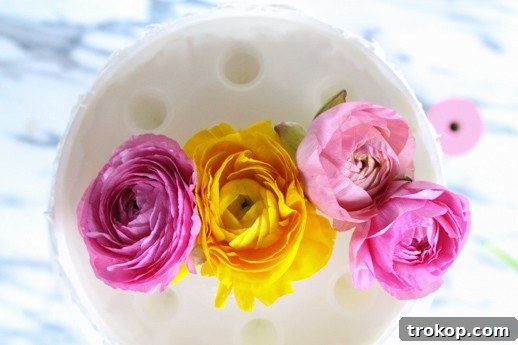
Step 3: Fill Any Gaps with Smaller Buds and Greenery
Once all of the primary flowers are positioned in the holes, step back and assess your arrangement. You might notice small gaps or areas that look a bit sparse. This is the perfect opportunity to use smaller buds, delicate filler flowers (like baby’s breath or waxflower), or sprigs of greenery (such as eucalyptus or ruscus) to fill in these spaces. These smaller elements add depth, texture, and a more professional, finished look to your topper. They also help to unify the entire arrangement, making it appear lush and abundant.
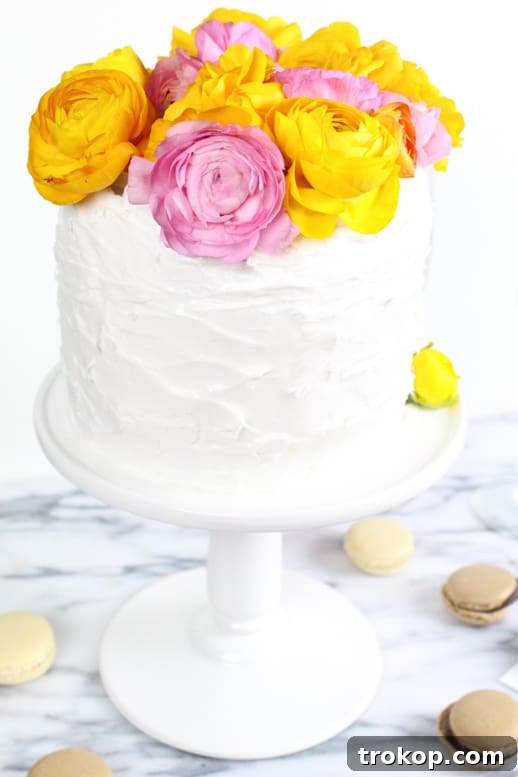
Tips for Flower Cake Topper Longevity and Safety
To ensure your beautiful floral cake topper stays fresh and safe for your event, consider these important tips:
- Food Safety First: Always use non-toxic, food-safe flowers. If you’re unsure about a particular flower, it’s best to avoid it. Ensure your flowers are free from pesticides or any chemical treatments. Gently wash flower heads under cool water before trimming.
- Keep Flowers Hydrated: The cake vase helps immensely with this. Make sure there’s always enough water in the vase to cover the trimmed ends of the stems. If preparing the topper in advance, keep it in a cool, dark place or refrigerate (if possible and if flowers tolerate it) until just before serving.
- Trim Stems Properly: Cut stems at an angle under running water, if possible, to maximize water absorption. Remove any leaves that would sit below the waterline in the vase to prevent bacterial growth.
- Consider the Environment: Fresh flowers are sensitive to heat. If your event is outdoors or in a warm room, put the topper on the cake just before presentation.
- Alternative Protection: For extra caution, or if you aren’t using a cake vase, you can wrap the cut ends of stems with floral tape or cling film before inserting them directly into the cake (though a cake vase is highly recommended for ease and safety).
- Remove Before Serving: Always remove the entire flower topper (including the vase) before cutting and serving the cake to ensure no flower bits or water drips onto the slices.
More DIY Dessert Topper & Decorating Ideas
The best part about diving into DIY cake decorations is realizing the endless possibilities! This fresh flower topper is just the beginning. The creativity that goes into making these beautiful adornments often results in lovely “leftovers” or sparks ideas for your next project. For those who love to personalize every detail, here are a few more of our favorite DIY cake topper and decorating ideas from our archives. Each offers a unique way to elevate your desserts, making them truly unforgettable:
- How to Watercolor on Cake: Discover artistic techniques to paint stunning abstract designs directly onto your cake frosting, turning it into an edible canvas.
- Balloon Garland Topper: Create a whimsical and festive mini balloon garland that brings a playful touch and pops of color to any celebration cake.
- Paper Flower Topper: Learn to craft intricate paper flowers that offer a durable and long-lasting alternative to fresh blooms, perfect for themed parties.
- DIY Marquee Light Cake: Combine dazzling sequins with cake decorating for a glamorous and eye-catching marquee light effect that truly shines.
- Fringed Lover Letter Topper: Personalize your cake with fringed letter toppers, ideal for anniversaries, engagements, or simply expressing affection.
- How to Make a DIY Macaron Cake: Stack delicate macarons to form an impressive and delicious cake structure, a unique twist on traditional layered cakes.
DIY Fresh Flower Cake Topper
Learn how to make a simple, elegant cake topper using fresh flowers, perfect for any celebration.
Equipment
- Scissors or Floral Snips
Materials
- Cake vase
- Fresh Flowers (non-toxic, food-safe)
- Water
- Cake (store-bought or homemade, e.g., keto cheesecake, funfetti cookie cake, chai crepe cake, unicorn strawberry cake)
Instructions
- Place the Cake Vase: Carefully place the cake vase centrally on top of your iced cake, ensuring it is stable.
- Fill & Arrange: Fill the cake vase with a small amount of water, just enough to fill the holes and keep stems hydrated. Cut flower stems short with scissors. Begin placing the flowers into the holes of the vase, starting from the outside and working your way inward. This technique helps the center flowers stand a bit higher, creating a lovely, full dome.
- Fill Gaps: Once the primary flowers are in place, use smaller buds or sprigs of greenery to fill in any visible gaps, adding fullness and refining the overall shape of your topper.
Cost: ~$20 (depending on flower selection)
Keywords: diy fresh flower cake topper, floral cake topper, cake decoration, fresh flowers, cake vase

Creating your own fresh flower cake topper is a wonderfully rewarding project that adds a personalized and sophisticated touch to any dessert. It’s an easy, impactful DIY that proves you don’t need to be a professional florist or baker to create stunning edible art. We absolutely adore seeing your creative endeavors! Don’t forget to share your DIY Fresh Flower Cake Topper with us on Instagram using the hashtag #sugarandclothloves. Your unique designs inspire us all! Looking for more inspiration to beautify your home or event? You can find all of our home decor tutorials and styling ideas right here, waiting to spark your next project.
Ideas On How to Decorate Your Cake
Elevate your dessert presentation with these creative and easy-to-make cake stand ideas.
Continue Reading
Master the art of silky smooth and stable Italian meringue buttercream for flawless cakes.
Continue Reading
Add a festive touch with a charming balloon garland and learn techniques for painting on frosting.
Continue Reading
Unleash your artistic side by creating a unique abstract floral pattern on your next cake.
Continue Reading
Craft adorable animal ear toppers to give your cakes a fun and playful character.
Continue Reading
Discover festive and elegant ways to decorate cheesecakes for the winter season.
Continue Reading