
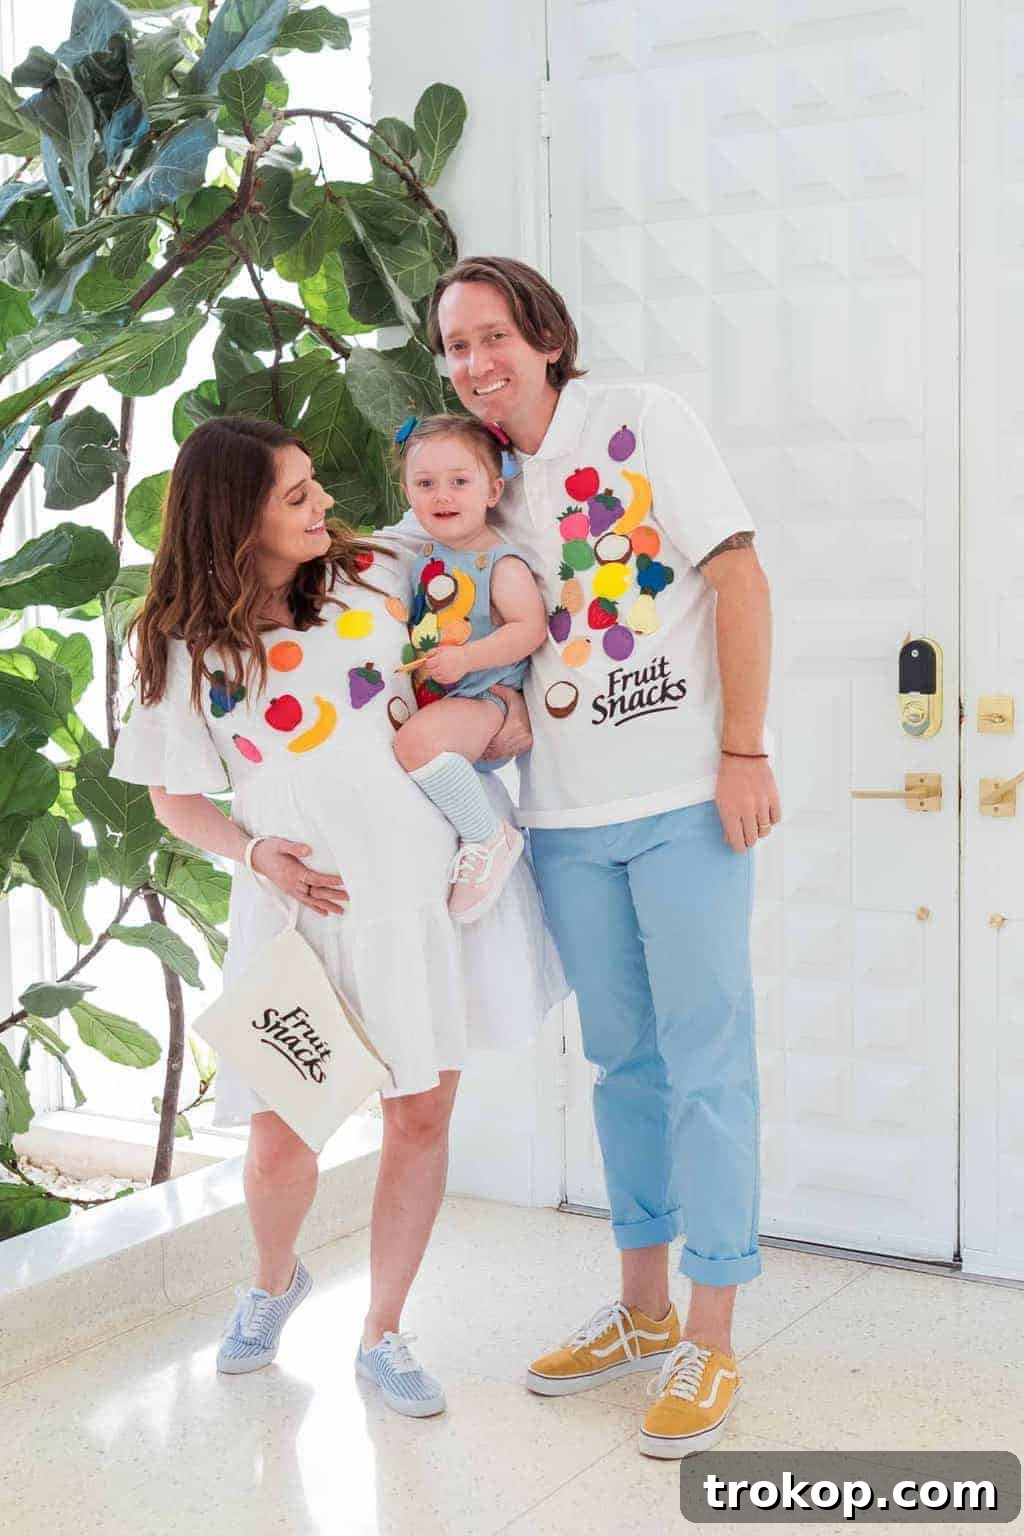
Are you scrambling for a last-minute Halloween costume idea that’s both adorable and incredibly easy to assemble? Or perhaps you’re simply on the hunt for a unique, family-friendly ensemble that stands out from the crowd? Look no further! This DIY Fruit Snacks Food Costume is a delightful, no-stress solution that promises to bring a sweet touch to your spooky celebrations.

The inspiration for this charming costume came from a very personal place: my daughter Gwen’s undeniable obsession with fruit snacks. Of all the things she adores most in the world (besides her Mama and Dada, of course!), fruit snacks consistently top her list. It was only natural, then, to weave this very real and very cute theme into our family Halloween costumes. The idea was to transform a beloved childhood treat into a wearable, heartwarming costume that truly reflects a piece of her personality.
I must admit, I’m not one for elaborate Halloween costumes that require hours of intricate crafting or uncomfortable attire. While I deeply admire those who go all out with their Pinterest-worthy creations, my priority has always been comfort and ease, especially when it comes to family costumes. With a spirited toddler in tow, I needed something that was simple to wear, allowed for unrestricted movement, and wouldn’t be constantly tugged at. The opinionated toddler stage, as many parents know, can escalate quickly!
This fruit snacks concept perfectly bridges the gap between abstract creativity and practical wearability. It’s wonderfully cute, surprisingly easy to recreate, and guarantees that you won’t encounter another family sporting the exact same unique fruit snacks food costume on Halloween night. It’s about celebrating individuality, comfort, and the simple joys that make childhood (and parenthood!) so special.
If you’re already inspired by the idea of food-themed or playful costumes, you might also love these other unique DIY projects:
- Add a touch of elegance and whimsy with these DIY Fruit Loop Costume Glasses, which are surprisingly sophisticated and perfect for Halloween.
- Or perhaps embrace a burst of color with this vibrant and distinctive DIY Hungry Hippos Costume concept, a fun and engaging project that wasn’t overly challenging to make.
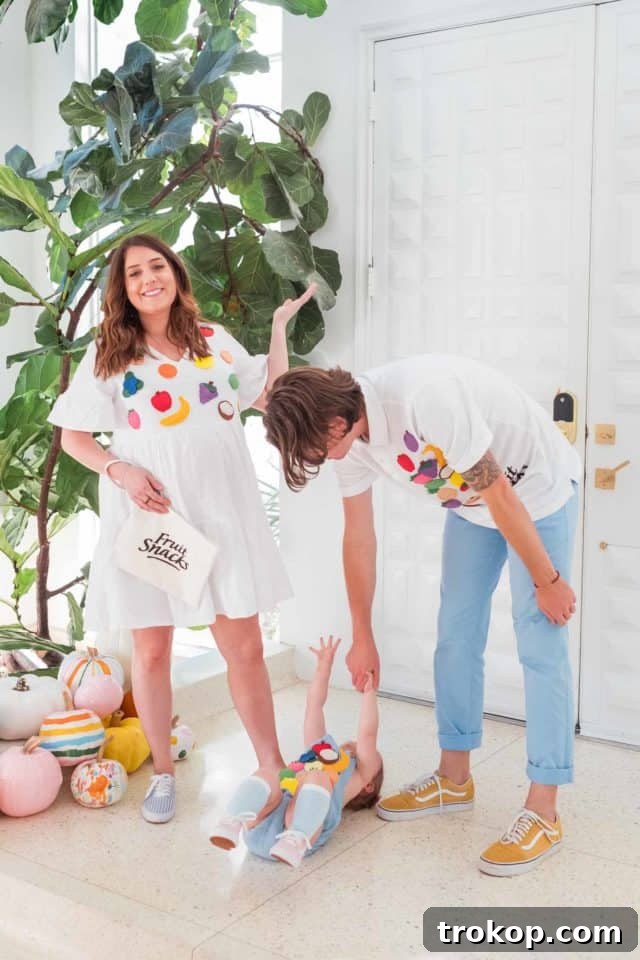

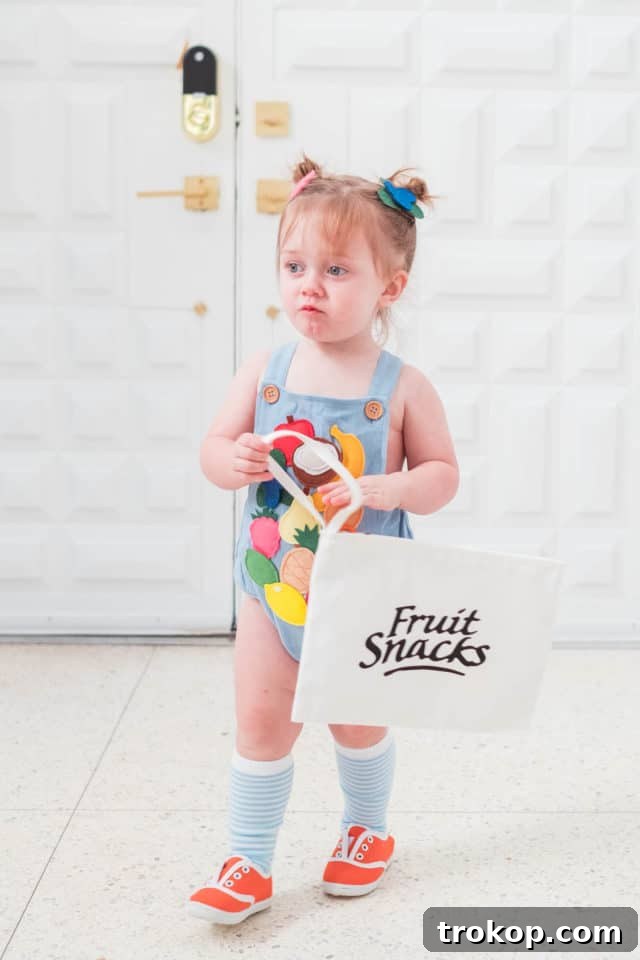
And in case you were questioning my “opinionated toddler” statement, the photos above serve as undeniable proof of Gwen when she’s simply had enough! This is precisely why selecting a costume that minimizes fuss and maximizes comfort is paramount for a peaceful Halloween experience with little ones. Our fruit snacks costume passed the ultimate toddler test, allowing her to enjoy the festivities without constant complaints or attempts to strip off uncomfortable elements.
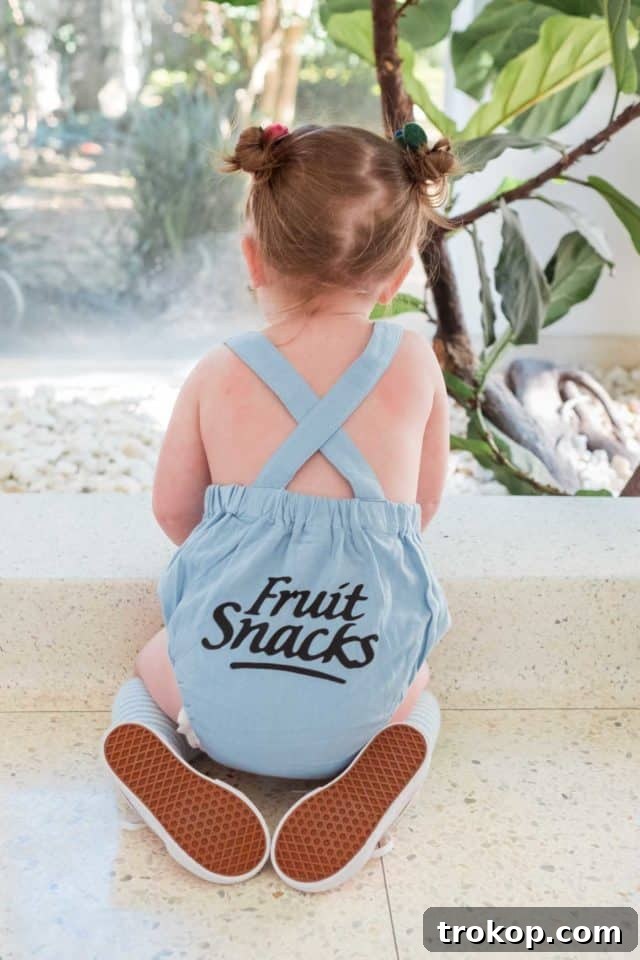
Table of Contents
The Ultimate DIY Fruit Snacks Costume Guide: A Sweet & Simple Family Idea
Crafting your own Halloween costumes can be one of the most rewarding aspects of the holiday, offering a chance for creativity, family bonding, and the joy of a truly unique ensemble. This guide provides an in-depth look at creating a delightful DIY Fruit Snacks Food Costume, perfect for families seeking comfort, charm, and a memorable look this Halloween season. Whether you’re a seasoned crafter or a beginner, these straightforward steps will help you achieve an impressive result that’s both fun to make and wear.
Why Choose a Fruit Snacks Costume? Comfort Meets Creativity
The appeal of a fruit snacks costume extends beyond its cuteness. For families, especially those with young children, practical considerations are key. Traditional costumes can often be itchy, restrictive, or easily ruined. This DIY approach allows you to build upon comfortable, everyday clothing, ensuring that everyone, from the littlest family member to the adults, can enjoy trick-or-treating or a Halloween party without discomfort. It’s a fantastic choice for:
- Last-Minute Planners: The simplicity of this costume means you can pull it together even if Halloween creeps up on you.
- Toddler-Friendly Fun: Designed with comfort in mind, it minimizes the chances of costume-induced meltdowns, as demonstrated by our own Gwen.
- Uniqueness: While fruit is a classic, the specific ‘fruit snacks’ angle makes this costume delightfully distinct and recognizable without being cliché.
- Budget-Friendly: Utilizing existing clothing and readily available craft supplies helps keep costs down compared to store-bought options.
Gathering Your Materials for the DIY Fruit Snacks Costume: What You’ll Need
The beauty of this fruit snacks costume lies in its flexibility. You can be as elaborate or as simple as you wish with your felt fruit choices. For maximum ease, I opted to purchase pre-made felt fruits from online marketplaces like Etsy. This saves a significant amount of time and effort, especially if you’re tackling this as a last-minute project or have a busy schedule. However, for those with extra time and a penchant for crafting, cutting your own felt fruit shapes is also a viable and fun option, allowing for even greater customization.
Essential Supplies:
- Felt fruit: I recommend two 30-piece sets to ensure you have plenty for multiple costumes and any accessory additions. Look for a variety of colorful fruits to mimic a classic fruit snack mix.
- Hot glue gun and glue sticks: An indispensable tool for quick and secure adhesion. Ensure you have ample glue sticks on hand.
- Iron-on fabric transfer paper: This is crucial for creating the iconic “fruit snacks” logo. Black transfer paper works best for a bold, recognizable look against lighter fabrics.
- Iron or heat press: For effectively applying the iron-on logo. A standard household iron will work perfectly.
- White clutch/pouch: This serves a dual purpose: it’s the perfect canvas for your main “fruit snacks” label and a convenient bag for collecting candy while trick-or-treating.
- Base outfits: Comfortable blue and white clothing items for each person. Think rompers, dresses, t-shirts, and pants that can be easily adorned.
Step-by-Step Guide to Making Your DIY Fruit Snacks Food Costume
Bringing this sweet vision to life is a straightforward process, broken down into manageable steps. The key is to work systematically, ensuring each element is securely in place before moving on. Here’s how we created our family’s adorable fruit snacks ensemble:
Choosing Your Base Outfits:
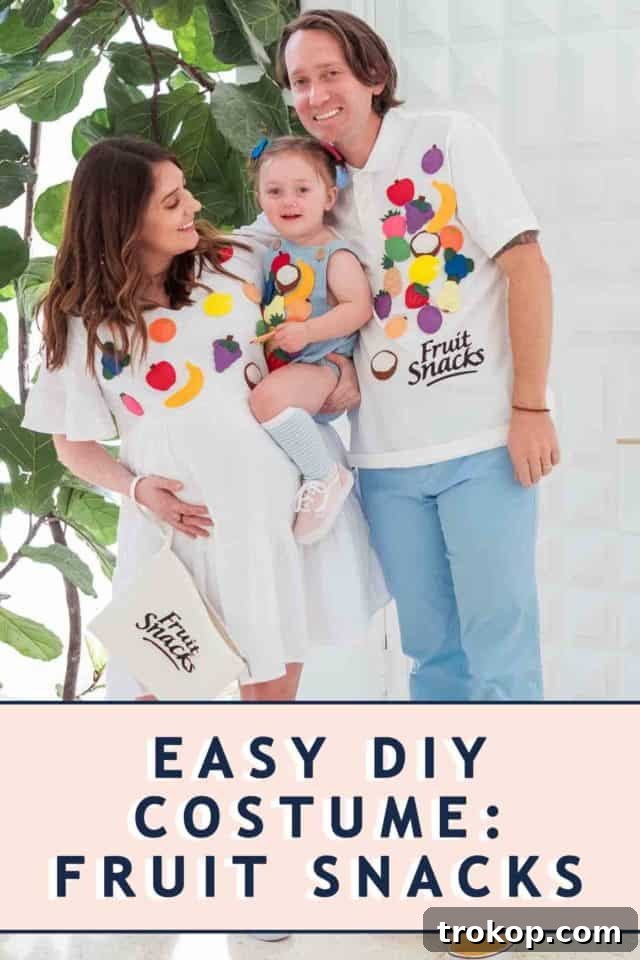
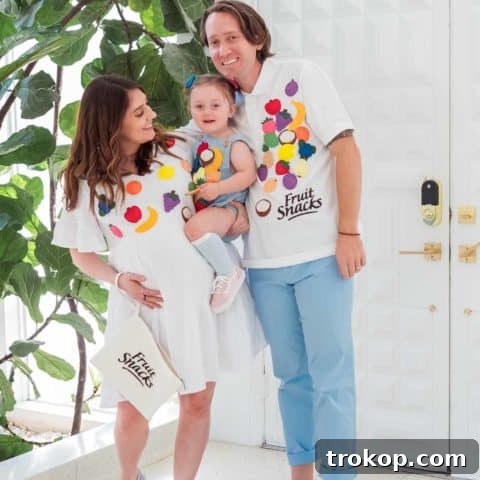
For our family, we decided on a cohesive blue and white theme to deliberately mimic the instantly recognizable color scheme of Welch’s fruit snacks. This specific choice helps convey the costume’s theme at a glance. We sourced a variety of comfortable items:
- This adorable blue baby romper for Gwen.
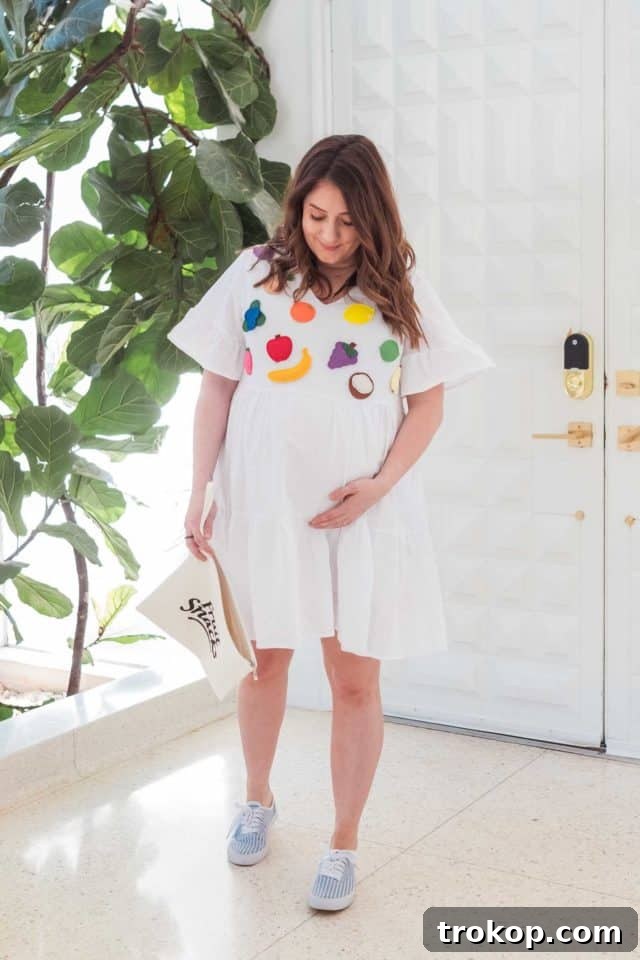
- A simple yet elegant white dress for myself.
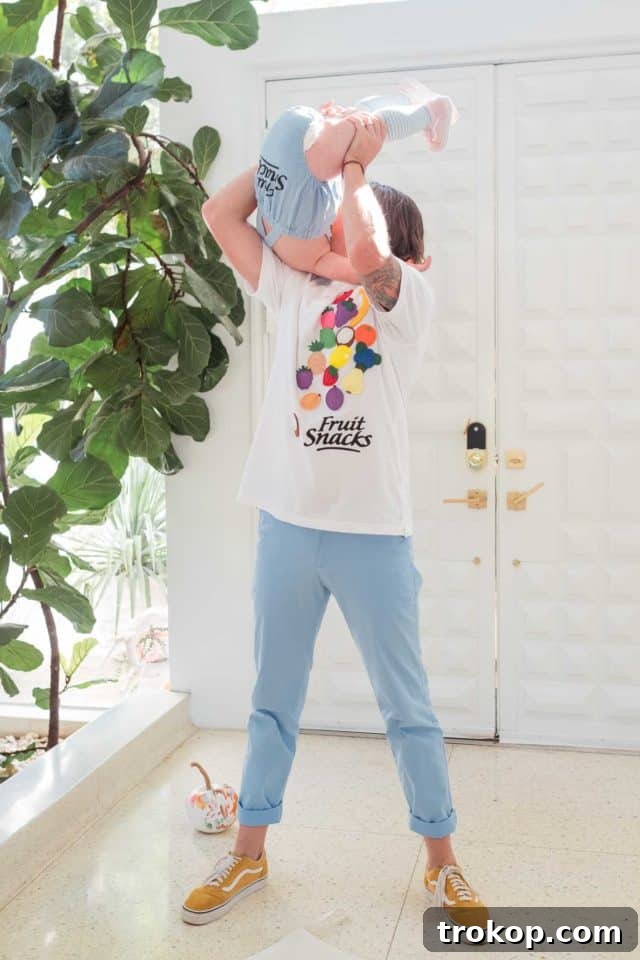
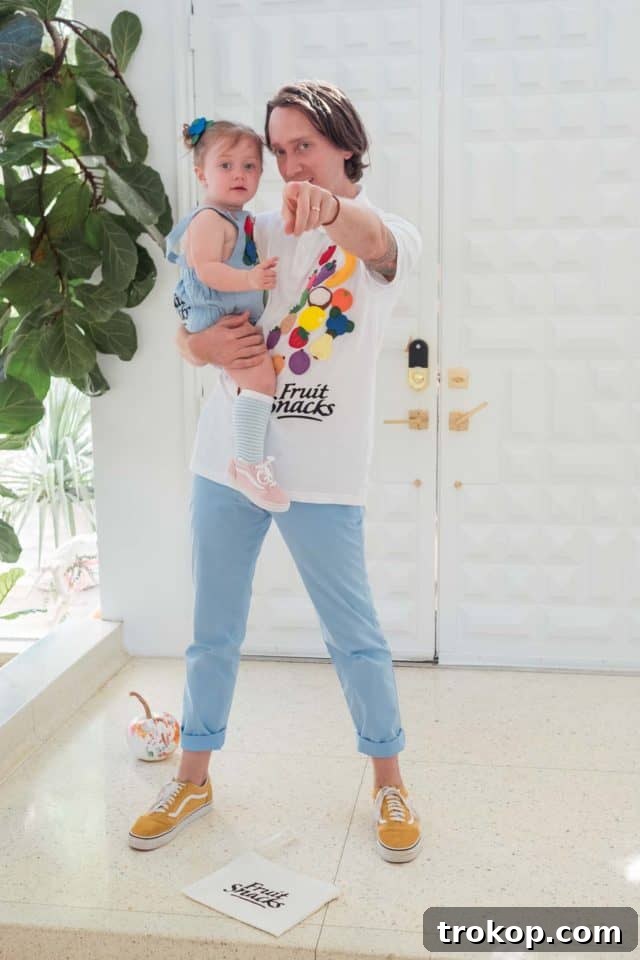
- And comfortable blue pants (paired with a white top) for my husband.
The goal is to select outfits that are not only comfortable but also provide a clean, uncluttered surface for attaching the felt fruit and logo.
Applying the Felt Fruit:
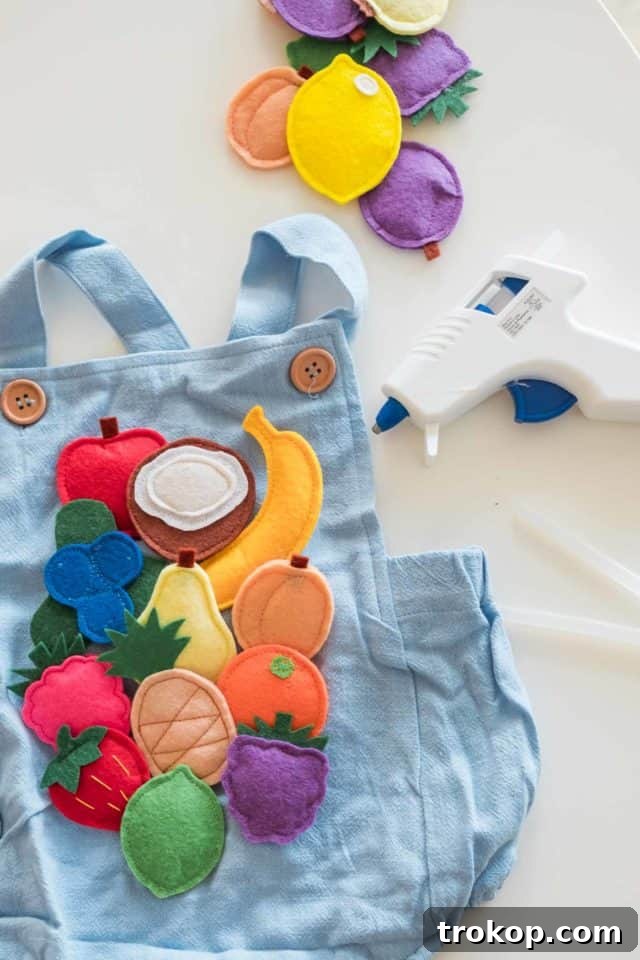
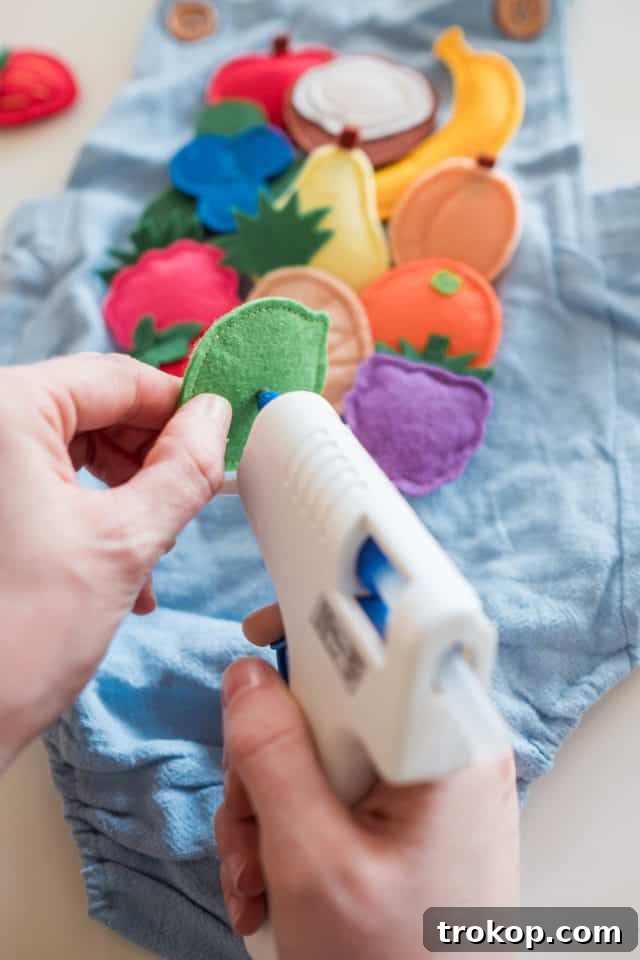
With your base outfits selected, the next step is to bring them to life with the felt fruits. First, lay each garment flat on a clean surface. Experiment with the arrangement of the felt fruits, distributing them evenly and aesthetically across the fabric. Consider varying colors and shapes to create a dynamic look. Once you’re happy with the placement, use your hot glue gun to attach each felt fruit securely, one by one. Apply a small dot of glue to the back of each fruit and press firmly onto the fabric. This method ensures a strong bond that will withstand the rigors of Halloween night.
Creating and Applying the Logo:
The “fruit snacks” logo is what ties the entire costume together, making its identity instantly clear. I used my Cricut machine to precisely cut the Welch’s-style “fruit snacks” logo from black iron-on paper, which yields very clean lines. However, if you don’t have a Cricut, don’t fret! You can easily print the logo onto regular printable iron-on transfer paper using your home printer. A crucial tip here: always remember to flip or mirror the logo image before printing. This ensures that when the iron-on design is applied, the text will be correctly oriented and readable.
For application, begin by warming the fabric surface where the logo will go for about 15 seconds. Use an iron set to its cotton setting or a heat press at 315 degrees Fahrenheit. This pre-heating prepares the fabric for optimal adhesion. Next, place the iron-on logo onto the warmed fabric and apply heat again for approximately 30-45 seconds, pressing firmly and evenly. After heating, let the transfer paper cool slightly until it’s just warm to the touch. Then, very carefully and slowly peel back the excess paper to reveal your crisp, professional-looking fruit snacks logo. Patience is key during this peeling step to avoid lifting any parts of the design.
Adding the Finishing Touches & Accessories:
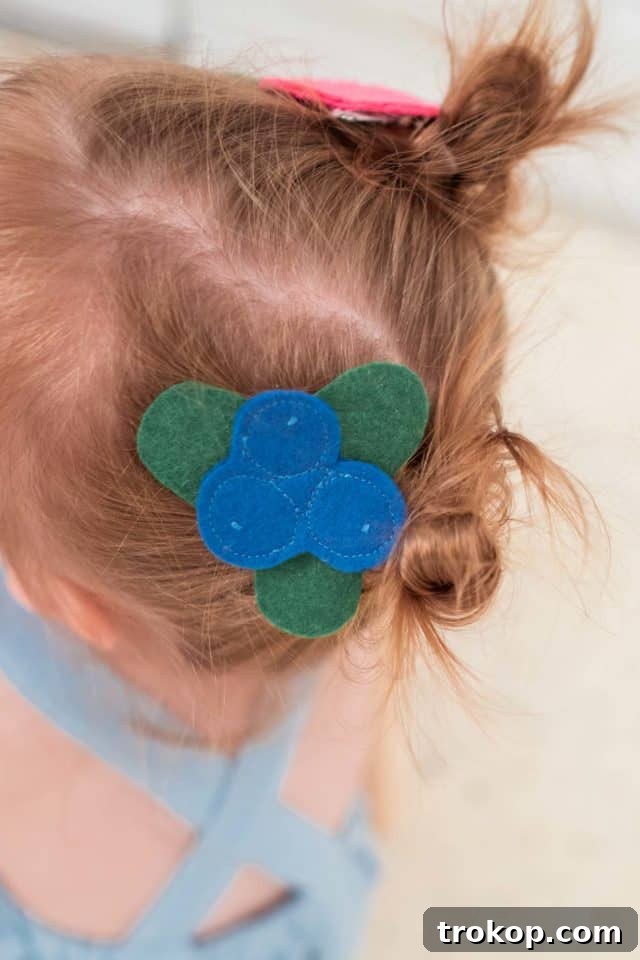
No costume is truly complete without a few thoughtful accessories! I couldn’t resist utilizing some of the leftover felt fruits to create adorable hair clips for Gwen. Simply hot glue the smaller felt fruit pieces onto metal hair clips, and voilà – a charming, coordinating accessory that ties her whole look together. You could also attach them to headbands, hats, or even small bags. This adds an extra layer of detail and fun to the ensemble, proving that even the smallest elements can make a big impact.
Personalizing Your Fruit Snacks Look: Creative Additions
While the core design is simple and effective, there’s ample room to inject your family’s unique style into your DIY Fruit Snacks Costume. Here are a few ideas to personalize your look:
- Vary the Fruits: Don’t stick to just grapes and strawberries. Incorporate bananas, apples, oranges, or any other felt fruit you can find or create.
- Color Palettes: Experiment with different base outfit colors. While blue and white evoke Welch’s, a vibrant red or green could suggest other fruit snack brands.
- Additional Text: Besides “fruit snacks,” you could add playful phrases like “100% Fun,” “Sweet Treat,” or even specific fruit names if each family member is a different fruit.
- Footwear: Simple white or colored sneakers will keep the comfort theme going. You could even glue small felt fruits to shoelaces or shoe tops.
- Candy Bag Integration: The white clutch is perfect, but a small clear backpack filled with actual fruit snacks could be a fun, interactive prop for older kids.
- Props: Consider carrying oversized, plush fruit props, or even a small basket to complete the “fruit harvest” feel.
There you have it – a fruit snack costume that’s not only easy-peasy to create but also incredibly charming and practical for a fun-filled Halloween! Its simplicity makes it a fantastic option if you find yourself needing a creative, last-minute costume idea that everyone will love.
Detailed Materials and Equipment List for Your DIY Fruit Snacks Costume
DIY Fruit Snacks Food Costume
This comprehensive guide will show you exactly how to craft an adorable and memorable homemade Fruit Snacks costume, perfect for families and last-minute Halloween fun. It’s designed for comfort and ease, ensuring a delightful experience for everyone.
Active Time: 30 mins (This refers to the hands-on crafting time once materials are gathered.)
Total Time: 30 mins (The total time for assembly is surprisingly quick, making it ideal for busy schedules.)
Course: DIY Halloween Costume, Family Craft Project
Equipment Needed
- Hot glue gun and glue sticks: Essential for quickly and securely attaching felt fruits. Ensure the glue gun is fully heated before starting for optimal results.
- Iron or heat press: For effective transfer of the iron-on logo. A standard iron is perfectly sufficient.
- (Optional) Cricut machine: If you desire a very precise, professional-looking logo cut from iron-on vinyl.
- Scissors: Useful for trimming excess fabric transfer paper or any DIY felt fruit.
- Printer: For printing your chosen fruit snack logo onto transfer paper.
Essential Materials
- Felt fruit: Plan for approximately two 30-piece sets per costume for ample variety and coverage. These can be purchased pre-made for convenience or crafted from felt sheets.
- Iron-on fabric transfer paper: Black is recommended for the “fruit snacks” logo to ensure high visibility and a classic look.
- White clutch/pouch: This acts as the primary “packaging” for the fruit snacks, perfect for showcasing the logo and holding treats.
- Base outfits in blue and white: Consider comfortable items like a blue baby romper, a white dress, or blue pants paired with white tops. The key is comfort and a clean background for your fruits.
- Optional: Metal hair clips: For creating adorable coordinating hair accessories using leftover felt fruits.
- (Optional) Fabric markers: To add small details or personalize any DIY felt fruits.
DIY Fruit Snacks Food Costume Instructions
- Select Your Base Outfits: Begin by choosing comfortable blue and white clothing items for each family member participating in the costume. We opted for a blue baby romper, a white dress, and blue pants (paired with a white shirt) to mirror the classic Welch’s fruit snack color scheme, known for its instant recognition. The overriding factor here is comfort, ensuring your little ones can move freely, sit, and play without any irritation from their attire.
- Arrange the Felt Fruits: Lay your chosen outfits flat on a clean, hard surface. Carefully arrange the felt fruits onto the fabric, experimenting with different placements until you achieve a visually appealing and balanced design. This step is crucial for visualizing the final look before permanent adhesion, allowing you to adjust for density and color distribution. Take photos of preferred layouts to refer back to.
- Hot Glue the Fruits: Once satisfied with the arrangement, use your hot glue gun to firmly attach each felt fruit to the outfits, one by one. Apply a small, precise amount of hot glue to the back of each felt piece. Press down gently but firmly for a few seconds to ensure a strong, lasting bond. Work in sections to keep the design cohesive.
- Prepare the Fruit Snacks Logo: To create the iconic “fruit snacks” logo (we mimicked the Welch’s style), you have two primary options. If you own a Cricut machine, use black iron-on paper for a precise, crisp cut of the logo. Alternatively, you can easily print your desired logo onto regular printable iron-on transfer paper using any standard printer.
- Mirror the Logo for Printing (Crucial Step): Before printing, it is absolutely essential to flip or mirror the logo image. This ensures that when the design is transferred onto the fabric, the letters will appear correctly (readable from left to right) and not reversed. Most graphic design software or printer settings will have a “mirror image” or “flip horizontal” option.
- Pre-Heat Your Fabric: Using either an iron (set to its cotton setting) or a heat press (at a temperature of 315 degrees Fahrenheit), warm the specific area of your fabric where the logo will be applied for approximately 15 seconds. This pre-heating prepares the fabric by opening its fibers, allowing for optimal adhesion of the iron-on transfer.
- Apply the Iron-On Logo: Place the prepared iron-on logo (face down, if using transfer paper that requires mirroring) onto the pre-heated fabric. Reheat the area with your iron or heat press for 30-45 seconds, applying firm, even pressure. Ensure that all parts of the logo receive adequate heat for a complete transfer.
- Peel Back the Excess Paper: Allow the transfer paper to cool slightly until it’s just warm to the touch. Then, carefully and slowly peel back the excess paper, starting from one corner. If any part of the design lifts, lay the paper back down and reapply heat for a few more seconds before attempting to peel again. This reveals your perfectly transferred fruit snacks logo.
- Accessorize (Optional): For an extra touch of charm and to utilize any leftover felt fruits, create adorable hair clips for children. Simply hot glue small felt fruit pieces onto metal hair clips. These can also be glued onto headbands or even hats to further integrate the theme.
- The Finishing Touch: Don’t forget the white clutch or pouch! This serves as a perfect prop for the main “fruit snacks” label and can double as a convenient, themed bag for collecting Halloween candy. Glue a larger, more prominent “Fruit Snacks” logo onto it.
Estimated Cost: $30 (Please note that costs can vary based on where materials are sourced, if items are on sale, or if you choose to DIY the felt fruits.)
Keywords: DIY fruit snacks food costume, easy family Halloween costume, toddler Halloween costume, homemade fruit costume, last-minute costume idea, unique Halloween costume, fruit-themed costume, comfort Halloween costume

Conclusion: Unleash Your Inner Creativity This Halloween!
And there you have it—a super simple, irresistibly cute, and remarkably comfortable DIY Fruit Snacks Food Costume that’s perfect for the whole family! This project proves that you don’t need to spend a fortune or countless hours to create a memorable Halloween look. It’s all about embracing creativity, celebrating the fun of the season, and ensuring everyone enjoys the festivities without a hitch. This costume is not just a visual treat; it’s a testament to easy, impactful DIY solutions for busy families.
We absolutely love seeing your creative endeavors! Be sure to share your fantastic DIY Fruit Snacks Costumes with us on Instagram. Tag us and use the hashtag #sugarandclothloves so we can follow along and celebrate all your amazing creations!
More Halloween Costume Inspiration for Every Member of the Family
If you’re still brimming with Halloween spirit and looking for more ideas to ignite your imagination, explore our curated collections of costumes designed for every taste and age group. From whimsical wigs to clever couple’s ensembles, we’ve got something to make every Halloween extraordinary.