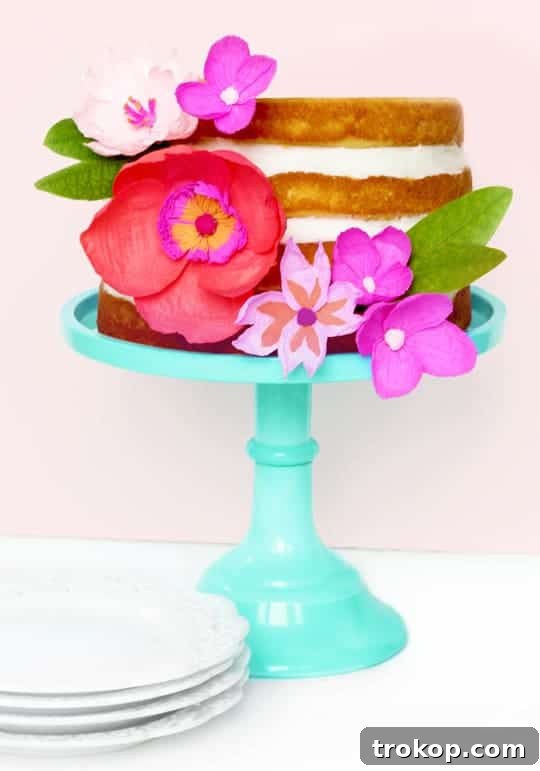
Elevate Your Celebrations: The Ultimate DIY Paper Flower Cake Topper Tutorial
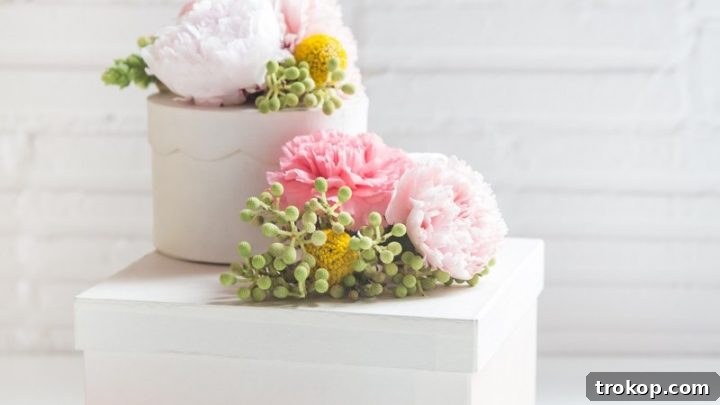
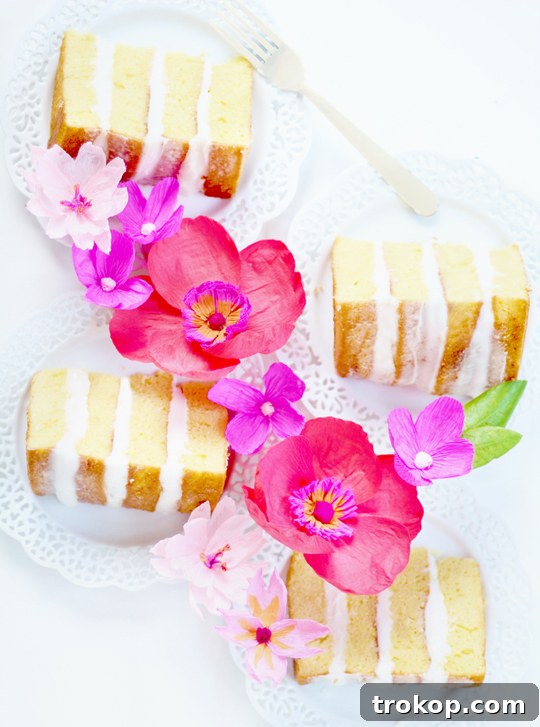
Transform your next celebration cake, whether homemade or store-bought, into an extraordinary centerpiece with this elegant and easy-to-create DIY Paper Flower Cake Topper. Perfect for birthdays, anniversaries, bridal showers, or any festive occasion, these stunning paper blooms will add a personalized touch that’s sure to impress your guests.
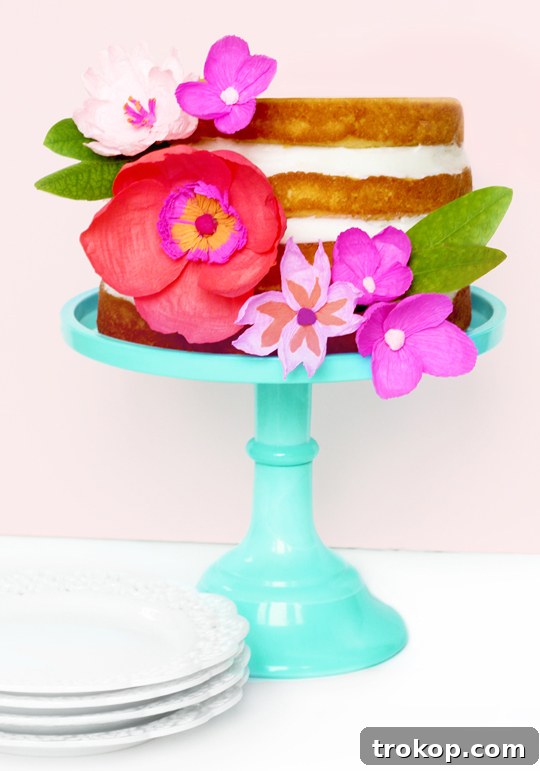
There’s absolutely no shame in presenting a delicious box cake as your own creation. In fact, it’s a clever hack for busy hosts and home bakers! However, the delicate art of intricate cake frosting can be challenging and time-consuming. As Rachael of AppetitePaper discovered after many attempts, sometimes it’s best to leave those detailed frosting designs to the professionals.
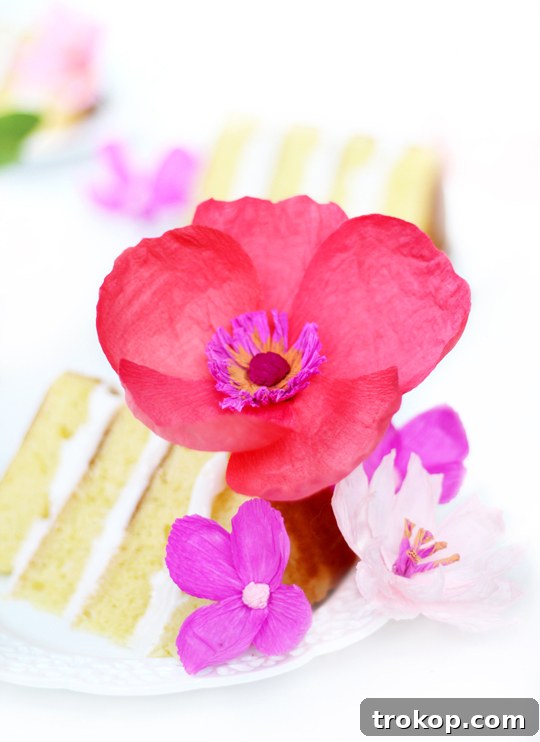
But that doesn’t mean your cake has to look ordinary. Instead, we’ll guide you through a simple yet highly effective way to elevate any cake to “party-worthy” status: crafting beautiful DIY paper flower cake toppers. These exquisite paper flowers aren’t just undeniably unique; they also promise to elicit a chorus of “oohs” and “ahhs” when dessert is served!
The beauty of paper flowers lies in their versatility, durability, and endless customization options. Unlike fresh flowers, they won’t wilt, they’re always in season, and they can be made well in advance, reducing stress on the day of your event. Plus, you can perfectly match them to your party’s color scheme or theme, creating a cohesive and stunning visual experience. Get ready to unleash your inner artisan with just a few essential materials.
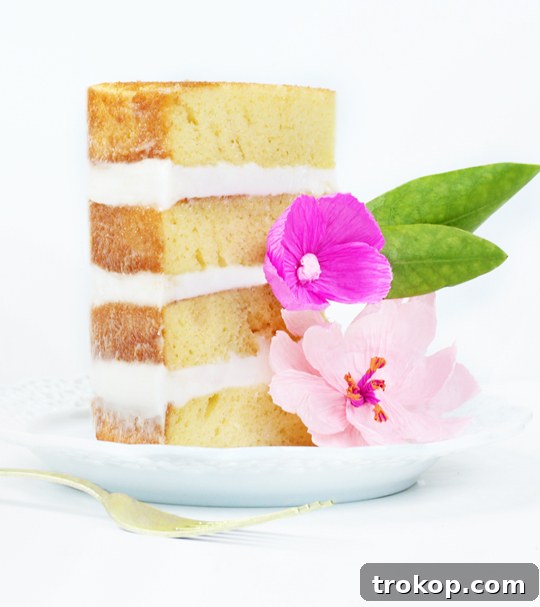
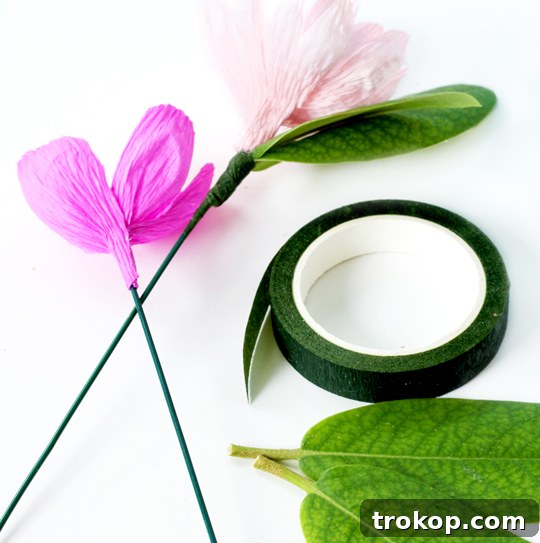
Table of Contents
Materials and Tools Needed for Stunning Paper Flower Cake Toppers
Gathering your supplies is the first exciting step to crafting these beautiful toppers. Here’s a detailed list of what you’ll need, along with some helpful notes:
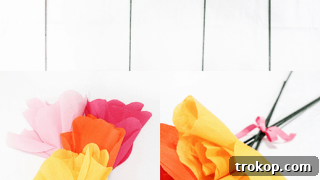
- High-Quality Crepe Paper: This is the star of your project! We recommend using medium-weight crepe paper for its excellent stretch and texture, which mimics real petals beautifully. For this tutorial, we’ve chosen a vibrant palette of bubble gum pink, coral, Marionberry (a deep berry hue), and sweet pea (a soft, elegant green). Feel free to experiment with colors that match your event’s theme or your personal preference.
- 16 Gauge Green Floral Wire: This sturdy yet flexible wire will form the stems of your flowers, allowing them to be easily inserted and positioned in your cake. The green coating helps it blend seamlessly with the floral design.
- Green Floral Tape: Measuring about 1/2″ wide, this adhesive tape is crucial for wrapping your wire stems, securing petals, and giving your finished flowers a polished, natural look. It has a slight stretch and adheres to itself, making it easy to work with.
- Hot Glue Gun and Glue Sticks: Your trusty adhesive for quickly and securely attaching petals and various flower components. Always exercise caution when using a hot glue gun to prevent burns. A low-temp gun can be a good option for beginners.
- Needle-Nose Pliers: Essential for bending, cutting, and shaping the floral wire. This tool will ensure clean cuts and precise bends, making your construction much easier.
- Peach Acrylic Paint: Used to add subtle detail and shading to your flower centers, giving them a more realistic and nuanced appearance. You can substitute this with any color that complements your chosen crepe paper.
- Free Downloadable Paper Flower Pattern Guide: Don’t guess your petal shapes! This guide provides accurate templates for each flower, ensuring consistent and beautiful results. Print it out and cut out the patterns before you start.
- Your Chosen Cake: Whether it’s a gourmet bakery creation, a simple box mix, or one of our delicious homemade recipes, your cake is the canvas! Consider our keto cheesecake, funfetti cookie cake, chai crepe cake, or unicorn strawberry cake for inspiration.
General Techniques for Crafting Paper Flowers
Before we dive into specific flower types, understanding a few basic paper flower techniques will make the process smoother and your results more professional:
- Cutting Petals: Always cut your crepe paper with the grain running vertically along the petal. This allows the paper to stretch properly.
- Stretching and Shaping: Crepe paper’s magic lies in its stretch. Gently stretch the paper from the center outwards to create a cupped, realistic petal shape. Be careful not to tear the paper.
- Wiring: Floral wire provides structural support. Ensure your glue bond is strong when attaching petals to the wire to prevent them from detaching.
- Painting Details: A little paint can go a long way in adding depth and realism to your flowers, highlighting natural variations found in real blooms.
How to Make the Delicate Bubble Gum Paper Flowers
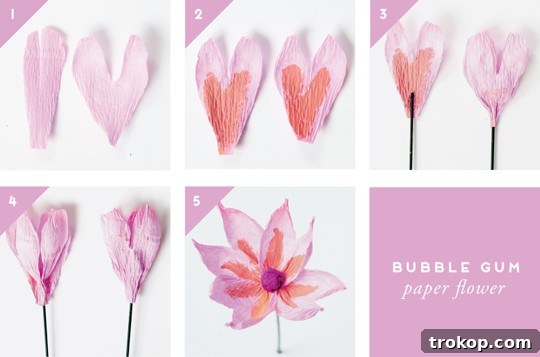
These charming bubble gum pink flowers add a soft, romantic touch to any cake. Follow these steps to create them:
Step 1: Cut and Shape Petals
Using your downloadable pattern guide, carefully cut four petals from your bubble gum pink crepe paper. With gentle finesse, stretch and smooth the paper grain from the center of each petal outwards towards its edges. This action will naturally cup the paper, forming a realistic and delicate petal shape.
Step 2: Add Painted Detail
Take your peach acrylic paint and lightly brush a small amount onto the center of each prepared petal. This subtle detail adds depth and a touch of warmth, mimicking the natural variations found in real flowers.
Step 3: Attach the First Petals to the Stem Wire
Apply a small dot of hot glue to the very bottom edge of one of your painted petals. Promptly set the tip of your 16 gauge green floral stem wire into the glue, ensuring it adheres securely. Hold until the glue sets.
Step 4: Sandwich the Wire
Immediately after securing the first petal, place a second petal directly on top of it, ensuring the painted side faces down and the wire is perfectly sandwiched between the two petals. Press firmly until the glue cools. Repeat this process with the two remaining petals on the opposite side of the wire, creating a symmetrical initial bloom.
Step 5: Form the Flower and Add Centerpiece
Gently bend the secured petals backward, away from the center of the wire. This action opens the flower and gives it a natural, blooming appearance. Next, cut one small center piece from your Marionberry crepe paper (refer to your pattern guide for the shape). Roll and press this piece firmly into a small, tight ball. Apply a dot of hot glue to the center of your formed petals and affix the Marionberry ball, completing your exquisite bubble gum paper flower.
Crafting the Vibrant Coral Paper Flowers
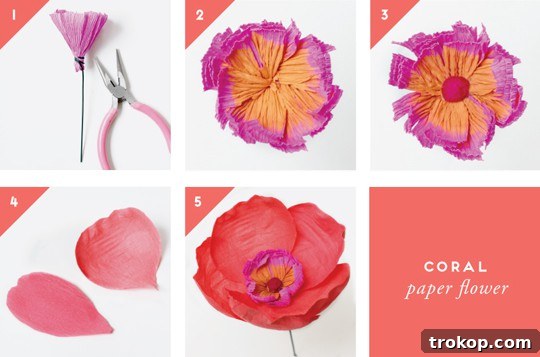
The coral paper flowers bring a pop of vibrant color and a unique texture to your arrangement. Here’s how to make them:
Step 1: Prepare the Stamen
Begin by cutting one stamen strip from your Marion Berry crepe paper, following the pattern guide. Using your scissors, carefully fringe the top edge of this stamen strip with small, evenly spaced cuts. This will create the delicate, brush-like appearance of a stamen. Roll the fringed strip tightly into itself and then wrap the base of this stamen bunch securely around your 16 gauge floral wire. Use a tiny dot of hot glue to secure the very end of the strip.
Step 2: Shape and Paint the Stamen Center
Gently open and fold back the individual fringed pieces of your stamen bunch to create a fuller, more prominent center. Once shaped, apply a touch of your peach paint to the very tips of the stamen fringes, adding a touch of realism and a subtle color contrast.
Step 3: Create the Inner Flower Center
Next, cut one small circular center piece from your coral crepe paper. Roll and press this piece into a small, compact ball. Apply hot glue to the very center of your prepared stamen, and firmly attach this coral ball, creating a distinct focal point for your flower.
Step 4: Cut and Shape Coral Petals
Cut five petals from your coral crepe paper, using the designated pattern. Just as with the bubble gum flowers, gently stretch and smooth the paper grain from the center to the edge of each petal. This critical step forms the desired cupped petal shape, giving your flower volume and grace.
Step 5: Assemble the Coral Flower
One by one, apply a small amount of hot glue to the base of each of the five coral petals. Carefully glue these petals around the stamen and inner coral center, overlapping them slightly to create a full and cohesive flower. Continue until all five petals are securely attached, forming your beautiful coral bloom.
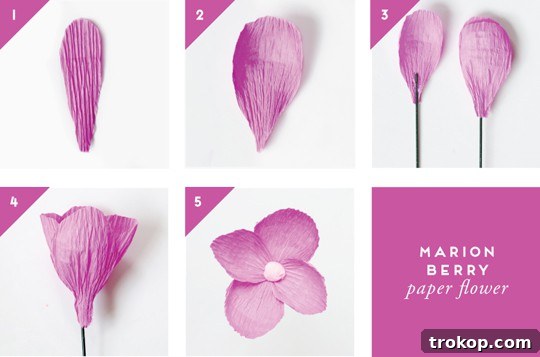
Creating the Rich Marion Berry Paper Flowers
The Marion Berry flowers provide a rich, deep hue that contrasts beautifully with lighter colors. Their creation process is similar to the bubble gum flowers but with a distinct aesthetic:
Step 1: Cut Petals
Following your pattern guide, cut four petals from your Marion Berry crepe paper. Ensure your cuts are clean for a professional finish.
Step 2: Shape the Petals
Gently stretch and smooth the paper grain from the center to the edge of each petal. This will give them a natural, soft curve, characteristic of a blooming flower.
Step 3: Secure First Petal to Wire
Apply a small bead of hot glue to the bottom of one of your Marion Berry petals. Immediately, set the tip of your green floral stem wire into this glue, pressing to ensure a firm bond. This forms the foundational support for your flower.
Step 4: Sandwich the Wire with Second Petal
Place another petal directly on top of the first, with its unpainted side facing down, effectively sandwiching the floral wire between the two petals. Repeat this precise step with the two remaining petals on the opposite side of the wire, building up the initial structure of your flower head.
Step 5: Final Shaping and Center Addition
Carefully bend your petals backward and outward from the stem, giving the flower its open, natural form. To complete this flower, cut one small center piece from your Sweet Pea crepe paper. Roll and press this piece into a small, dense ball. Apply a dot of hot glue to the heart of your Marion Berry petals and secure the Sweet Pea center, creating a striking contrast.
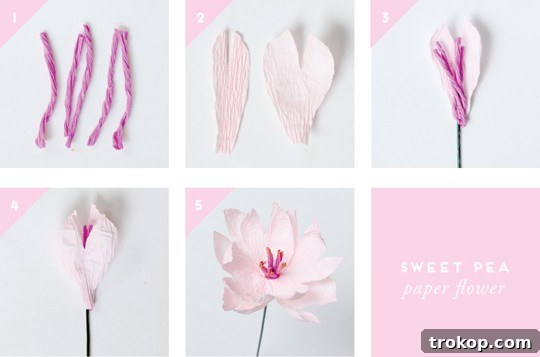
Assembling the Charming Sweet Pea Paper Flower
The Sweet Pea flower, with its unique twisted center, offers a delightful texture and visual interest. Here’s how to craft it:
Step 1: Create Twisted Centers
Cut five narrow strips, which will serve as your centers, from your Marion Berry crepe paper. Take each strip and twist it tightly from end to end, creating five small, delicate crepe paper ropes. These will form the unique focal point of your sweet pea.
Step 2: Cut Sweet Pea Petals
Using your pattern guide, carefully cut eight petals from your Sweet Pea crepe paper. Ensure they are uniform in size for a balanced flower.
Step 3: Attach First Petal with Twisted Centers
Apply a line of hot glue along the bottom edge of one of your Sweet Pea petals. Gently set the tip of your stem wire into the glue, and then carefully arrange and place the five twisted Marion Berry ropes onto the glue, ensuring they are positioned upright and clustered together to form the flower’s heart.
Step 4: Encase the Centers with a Second Petal
Place another Sweet Pea petal over the top of the twisted center ropes, sandwiching them securely between the two petals and the wire stem. Press firmly to ensure all components are well-adhered.
Step 5: Complete the Flower and Add Final Details
Continue to hot glue the remaining six petals around the growing flower, overlapping them slightly to build a full, multi-layered bloom. Work your way around the center, ensuring even distribution. For an added touch of refinement, lightly paint the very edges of your twisted center ropes with your peach paint, giving them a subtle highlight and definition.
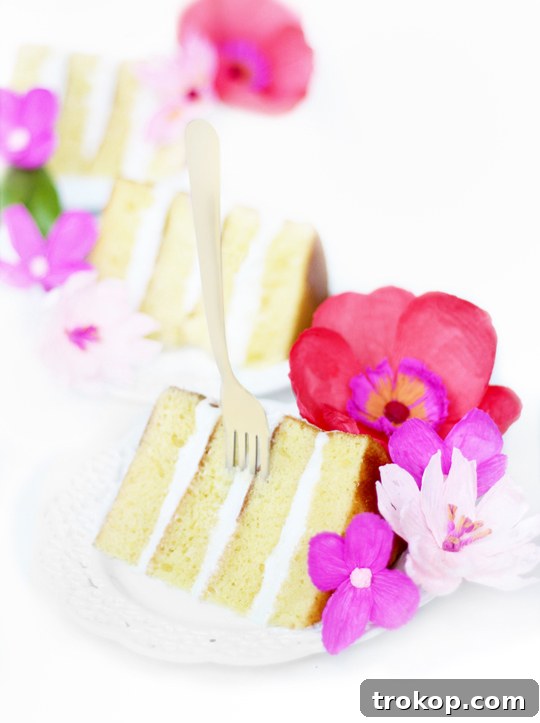
Creative Display Ideas for Your Paper Flower Cake Toppers
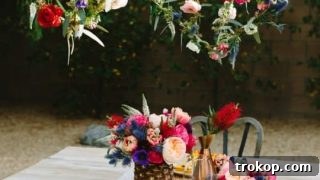
Now that your beautiful paper flowers are complete, it’s time to arrange them on your cake! Here are some ideas to make your creation truly shine:
- Complement with Fresh Greenery: Enhance the natural look of your paper blooms by incorporating fresh sprigs of eucalyptus, rosemary, or other leafy greens. You can easily attach these to your paper flower stems using floral tape for a cohesive arrangement.
- Silk Foliage for Reusability: For an everlasting topper, opt for high-quality silk foliage. This allows you to store and reuse your beautiful cake topper for future celebrations.
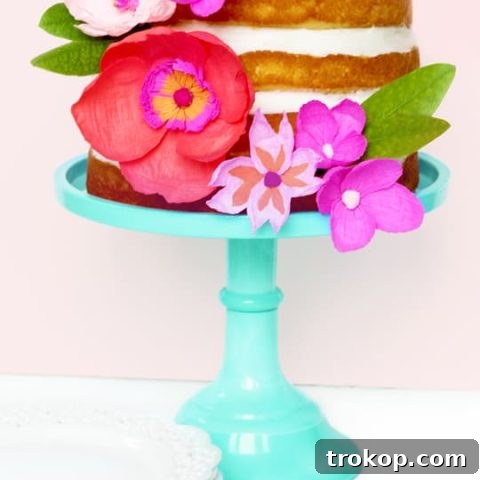
- Dynamic Arrangements: Don’t just stick them in! Play with varying heights and angles. Create a cascading effect down one side of the cake, a vibrant cluster on top, or scattered blooms around the base for a whimsical touch.
- Seasonal Themes: These paper flowers are incredibly versatile. Use deeper reds, oranges, and yellows for a stunning fall or Thanksgiving statement piece. Opt for pastels in spring, or bold primary colors for a summer bash.
- Trim Stems for Perfect Placement: To ensure your flowers sit just right on the cake, trim down your wire stems to approximately 3 inches before inserting them. This provides enough stability without being overly long.
Once arranged, your cake is officially party-ready. Enjoy the admiring glances and compliments!
Tips for Perfect Arrangement and Longevity
To ensure your paper flower cake toppers look their best and remain pristine throughout your event, consider these important tips:
- Protect from Icing Oils: Paper can absorb oils from icing, which can cause wilting or color bleeding over time. To prevent this, apply a thin coat of food-safe shellac to the back and bottom portions of your paper flowers that will come into contact with the cake. This creates a protective barrier, preserving the integrity and vibrant colors of your handcrafted blooms.
- Timing is Key: For the freshest appearance, it’s best to insert your paper flower cake toppers into the cake just before your event begins. This minimizes their exposure to the cake’s moisture and the surrounding environment, ensuring they look perfectly crisp and beautiful when guests arrive.
- Proper Storage: If you’re making your toppers in advance, store them carefully in an airtight container or box, away from direct sunlight and humidity. This will prevent dust accumulation and protect their delicate shapes until it’s time to decorate.
Discover More DIY Paper Flower Projects and Ideas
If you loved creating these cake toppers, you’ll be thrilled to explore more paper flower and DIY decorating projects. Expand your crafting skills and add a handmade touch to even more aspects of your celebrations and home decor:
- How To Make DIY Pop Culture Song Lyric Cupcake Toppers
- DIY Truffle Monster Cupcake Toppers
- DIY Animal Ear Cake Toppers
- How To Make A DIY Fresh Flower Cake Topper
DIY Paper Flower Cake Topper
Equipment
-
Hot glue gun and glue sticks
-
Needle nose pliers
Materials
- Crepe paper in assorted colors for your flowers (e.g., bubble gum pink, coral, Marionberry, sweet pea)
- 16 gauge green floral wire
- Green floral tape (1/2″ wide)
- Acrylic paint in peach or a color of your choice for detail
- Paper flower pattern (free download)
- Optional: Food-safe shellac for protection
Instructions
How to make the bubble gum paper flower:
-
Cut 4 petals from your bubble gum crepe paper using the pattern guide. Gently stretch and smooth the paper grain from the center to the edge to form a realistic, cupped petal shape.
-
Lightly paint the center of your petals with the peach acrylic paint to add depth.
-
Apply a small dot of hot glue to the bottom of one petal. Firmly set the tip of your stem wire into the glue, holding until secure.
-
Place another petal on top (painted side facing down) to sandwich the wire between the two petals. Repeat with the two remaining petals on the opposite side of the wire to form the initial bloom.
-
Gently bend your petals backward to open the flower. Cut one small center from your Marionberry crepe paper, roll it into a tight ball, and hot glue it to the center of your petals to finish the flower.
How to make the coral paper flowers:
-
Cut one stamen strip from your Marion Berry crepe paper. Fringe the top edge with scissors. Roll the fringed strip into itself and wrap the base securely with your 16 gauge floral wire, securing with glue.
-
Gently open and fold back your stamen bunch to create a fuller center. Paint the tips of the stamen with peach paint for added detail.
-
Cut one small center from your coral crepe paper. Roll it into a tight ball. Hot glue this coral ball to the center of your stamen.
-
Cut 5 petals from your coral crepe paper. Stretch and smooth the paper grain from the center to the edge to form a cupped petal shape.
-
Apply hot glue to the base of each of the 5 petals and attach them, one by one, around the stamen, overlapping slightly to create a full coral flower.
How to make the Marion Berry paper flower:
-
Cut 4 petals from your Marion Berry crepe paper, following the pattern.
-
Stretch and smooth the paper grain from the center to the edge of each petal to form a natural, curved shape.
-
Apply hot glue to the bottom of one petal. Securely set the tip of your stem wire into the glue.
-
Place another petal on top (unpainted side down) to sandwich the wire. Repeat with the two remaining petals on the opposite side of the wire to build the flower’s base.
-
Gently bend your petals backward to shape the flower. Cut one center from your Sweet Pea crepe paper, roll it into a small ball, and hot glue it to the center of your petals to complete the Marion Berry bloom.
How to make the Sweet Pea paper flower:
-
Cut 5 narrow strips (centers) from your Marion Berry crepe paper. Twist each strip tightly to create five small crepe paper ropes.
-
Cut 8 petals from your Sweet Pea crepe paper, following the pattern guide.
-
Apply hot glue along the bottom of one petal. Set the tip of your stem wire into the glue, then arrange and attach the 5 twisted center ropes upright onto the glue.
-
Place another petal over the center ropes, sandwiching them securely together with the wire.
-
Continue hot gluing the remaining petals around the flower, overlapping them to create a full bloom. For extra detail, lightly paint the edges of your center ropes with peach paint.

Rachael is the talented founder of Appetite Paper, your go-to resource for everything related to paper flowers. Discover more of her insightful tutorials and stunning designs on her blog and explore her shop for unique creations!
We absolutely love seeing your handmade projects! Don’t forget to share your finished DIY Paper Flower Cake Topper with us on Instagram using the hashtag #sugarandclothloves. For more inspiring interior design ideas, home decor tutorials, and creative projects, you can find all our resources right here on our blog!