


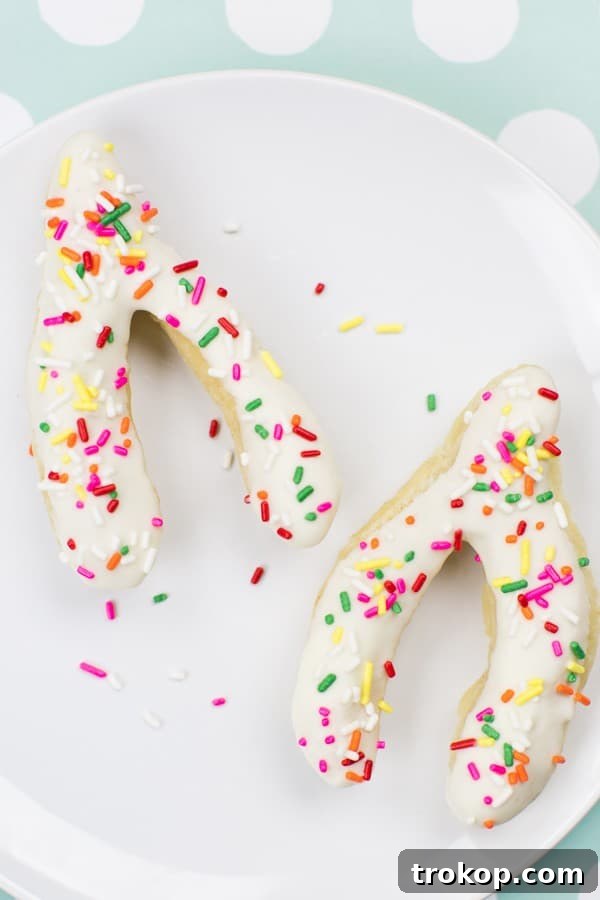
Bring Good Fortune to Your Table: The Ultimate Guide to DIY Wishbone Donuts
As the holiday season draws near, the air fills with the promise of warmth, family gatherings, and, of course, delicious treats. While traditional pies and cookies often take center stage, why not introduce a playful and symbolic dessert that’s sure to be a conversation starter? Enter the beloved wishbone donut! These charming, festive pastries are not only a delight to behold but also carry the timeless tradition of hope and good fortune, making them the perfect addition to your Thanksgiving feast or any autumnal celebration. Forget store-bought sweets; embracing the joy of homemade baking allows you to infuse your creations with personal touch and irresistible freshness.
The concept of a wishbone, traditionally broken for a wish, lends itself beautifully to the world of baking. Imagine the delight on your guests’ faces as they encounter these uniquely shaped donuts, each promising a sweet bite and a dash of whimsical charm. Crafting wishbone donuts at home is a rewarding experience that transforms a simple baking project into a festive activity for the whole family. Whether you’re an experienced baker or just starting your culinary journey, this guide will inspire you to create a batch of these enchanting donuts that are as fun to make as they are to eat.
Why Wishbone Donuts Are Your Next Holiday Baking Obsession
Beyond their adorable appearance, wishbone donuts offer a multitude of reasons to earn a spot on your holiday dessert table. Firstly, their unique shape instantly sets them apart from conventional donuts, adding a touch of novelty and creative flair. This distinctive form not only makes them visually appealing but also evokes the spirit of Thanksgiving and the tradition of making a wish, making them a perfectly themed treat for the season. Imagine a platter of these golden-brown, glazed delights, each one a miniature symbol of hope and togetherness.
Secondly, homemade donuts simply taste superior. The aroma of freshly baked dough filling your kitchen is an experience in itself, promising a soft, pillowy texture that’s hard to replicate with store-bought versions. When you make them yourself, you control the quality of ingredients, ensuring a wholesome and delicious treat for your loved ones. This personal touch elevates the entire dining experience, turning a simple dessert into a memorable highlight of any gathering. From casual brunches to elegant dinner parties, wishbone donuts bring a touch of whimsy and warmth that guests will adore.
The Symbolic Appeal: More Than Just a Treat
The wishbone holds a special place in many cultures, symbolizing good luck, hope, and the chance for a wish to come true. Integrating this symbol into a dessert adds an extra layer of meaning to your culinary creations. Serving wishbone donuts isn’t just about offering a sweet treat; it’s about sharing a piece of tradition, a gesture of goodwill, and a sprinkle of magic with your friends and family. This makes them particularly poignant for Thanksgiving, a holiday centered around gratitude and hope for the future. Each donut becomes a miniature talisman, a delicious reminder of the blessings we share.
Furthermore, these donuts offer a fantastic opportunity for creative expression. The “wishbone” shape, while specific, can be adapted and decorated in countless ways to match your personal style or holiday theme. Whether you opt for a classic sugar glaze, a rich maple frosting, or intricate decorative icing, each donut becomes a canvas. This artistic freedom makes the baking process even more engaging, allowing you to infuse your personality into every bite.
Embarking on Your DIY Donut Journey: Essentials and Tips
Creating homemade donuts might sound daunting, but with the right approach, it’s an incredibly satisfying and surprisingly straightforward process. The key to perfect wishbone donuts lies in a few fundamental steps: preparing the dough, shaping it correctly, frying or baking to perfection, and finally, decorating with flair. While the specific recipe will dictate exact measurements, understanding the general flow will set you up for success. We’re fortunate to have fantastic resources available, and you can find an excellent starting point for this specific treat, like the wishbone donut recipe over on Studio DIY, which is a wonderful guide to get you started on your baking adventure.
Gathering Your Ingredients and Tools
Before you even think about mixing, ensure you have all the necessary ingredients and equipment. For classic yeast-raised donuts, you’ll typically need:
- All-purpose flour: The foundation of your dough.
- Yeast: Active dry or instant, crucial for that fluffy texture.
- Sugar: To sweeten the dough and feed the yeast.
- Milk: Adds richness and moisture.
- Eggs: For structure and flavor.
- Butter: Provides tenderness and a lovely buttery taste.
- Salt: Balances flavors.
- Frying oil: If you’re frying (vegetable, canola, or peanut oil are common choices).
- Glaze ingredients: Powdered sugar, milk or water, vanilla extract.
Essential tools will include:
- Mixing bowls: For combining ingredients.
- Measuring cups and spoons: For accuracy.
- Whisk or electric mixer: To ensure smooth batter.
- Rolling pin: To flatten your dough evenly.
- Donut cutter or round cutters: While you might adapt for the wishbone shape, these are handy for other donut projects.
- Parchment paper: Prevents sticking and makes transfer easier.
- Deep pot or Dutch oven: If frying.
- Thermometer: A crucial tool for maintaining optimal oil temperature if frying.
- Cooling rack: For excess oil to drain and for glazes to set.
Crafting the Wishbone Shape
The unique wishbone shape is surprisingly simple to achieve once you have your dough ready. After rolling out your dough to the desired thickness, you can use a knife or a specialized cutter (if you’re lucky enough to find one) to create the distinctive “Y” shape. Some bakers opt for cutting thin strips of dough and then gently curving and pinching them together to form the wishbone. The key is to be gentle and ensure the dough pieces are well-sealed where they join to maintain their shape during cooking. Don’t worry if your first few aren’t perfect; practice makes perfect, and homemade charm is part of the appeal!
The Art of Frying (or Baking) and Glazing
Once your wishbone shapes are ready, you have a choice: deep-fry them for that classic donut experience or bake them for a lighter alternative. Frying yields a wonderfully crispy exterior and a soft, airy interior, but requires careful attention to oil temperature. Too cold, and your donuts will be greasy; too hot, and they’ll burn before cooking through. A thermometer is your best friend here, aiming for around 350-375°F (175-190°C). Baking, on the other hand, is a simpler, less messy option that still produces delicious results, especially if you have a good quality donut pan. Baked donuts tend to be denser, more cake-like, but equally satisfying.
After your donuts are cooked and cooled slightly, it’s time for the magic of glazing. A simple powdered sugar glaze, mixed with a touch of milk or water and a hint of vanilla, is a classic choice. For an autumnal twist, consider adding maple extract or a pinch of cinnamon to your glaze. Dip each donut generously, letting the excess drip off before placing them on a cooling rack. This is also where you can get creative with sprinkles, edible glitter, or even a drizzle of contrasting chocolate for an extra touch of elegance. The possibilities for customization are truly endless, allowing you to tailor your wishbone donuts to any occasion.
Serving Your Festive Wishbone Donuts
Wishbone donuts are incredibly versatile and can be enjoyed in many settings beyond the Thanksgiving table. They make a fantastic addition to a holiday brunch spread, offering a delightful alternative to everyday pastries. Imagine serving them alongside coffee or hot cocoa during a cozy fall morning. They’re also perfect for potlucks, bake sales, or as a thoughtful homemade gift for friends and neighbors. Their unique shape makes them an instant conversation starter and a truly memorable treat.
For an extra special presentation, arrange your wishbone donuts on a rustic wooden platter, perhaps adorned with a few fall leaves or miniature pumpkins. Pair them with a warm mug of spiced cider or a rich dark roast coffee. No matter how you choose to serve them, these homemade delights are sure to bring smiles and a touch of seasonal cheer to everyone who tries them.
Final Thoughts: Embrace the Joy of Creative Baking
Returning from my travels and diving back into the creative world of baking feels incredibly refreshing. The kitchen, for me, is a sanctuary where ideas come to life, and simple ingredients transform into edible art. These wishbone donuts are a perfect example of how a little creativity and effort can elevate a classic treat into something truly special and memorable for the holidays. As I tackle my overflowing inbox and endless to-do lists, the thought of whipping up another batch of these charming donuts provides a sweet escape.
I encourage you to give these delightful wishbone donuts a try. They embody the spirit of the season—hope, togetherness, and the simple joy of sharing something handmade with those you love. Whether you follow the recipe from Studio DIY or experiment with your own dough and glaze variations, the process itself is a wonderful way to connect with the holiday spirit. Stay tuned, because I have more exciting DIY projects and perhaps even a cool giveaway planned for you this week, as I fully shake off my “macaron hangover” from California and get back into full creative swing. Happy baking, and may all your wishes come true!