Transforming ordinary objects into extraordinary pieces of home decor is a delightful journey of creativity. This easy DIY project invites you to add a touch of personalized elegance to your living space by crafting a stunning patterned vase. Imagine the joy of displaying your favorite blooms in a vase that truly reflects your unique style! Whether you’re looking for a special gift, a charming centerpiece for a celebration like Valentine’s or Galentine’s Day, or simply want to refresh your home accents, this guide will walk you through creating a beautiful, custom-designed vase that’s sure to impress.
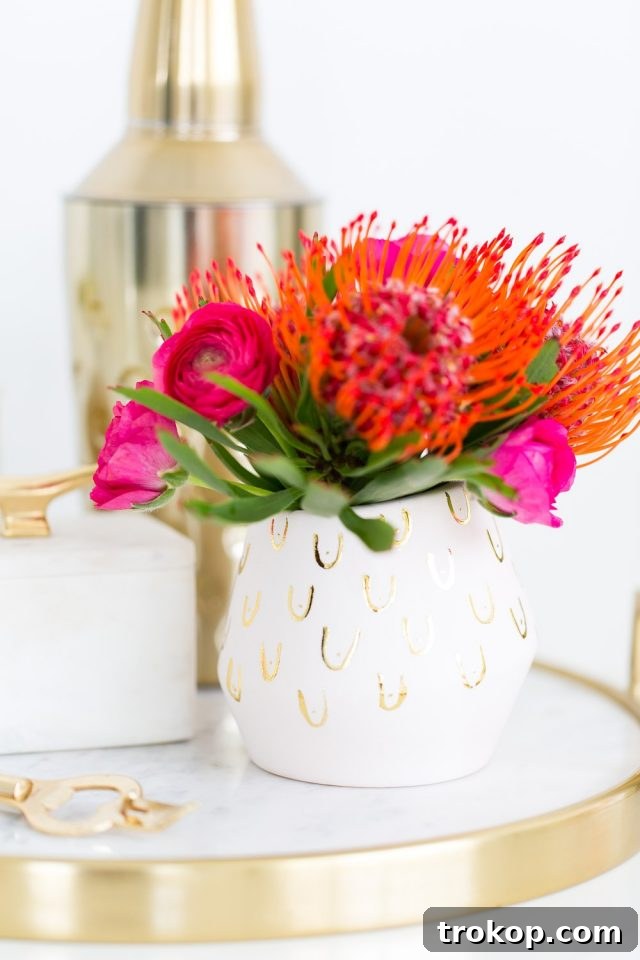
There’s something inherently charming about handmade items. They carry a story, a personal touch that mass-produced decorations simply can’t replicate. This project embraces that spirit, allowing you to infuse your personality into a functional piece of art. Forget predictable store-bought gifts; a handcrafted patterned vase filled with fresh flowers makes a thoughtful, memorable present for any occasion. Or, perhaps, it’s a special treat just for yourself, a little piece of joy you’ve created to brighten your everyday surroundings.
If you’re wondering if anyone would truly appreciate such a custom, perhaps subtly playful, piece, we say absolutely! The beauty of DIY lies in its originality. If you or a loved one receives flowers in a vase as uniquely patterned as this one, it’s a moment to cherish. We’d certainly love to see it! Share your creations with us – your artistic endeavors make our day. For those who might not have a secret admirer crafting one for them, gather your friends for a “Galentine’s” crafting session and create these delightful vases together. After all, the best gifts are often those made with love and a dash of creativity.
And speaking of Galentine’s Day, if you’re planning a full creative celebration, these DIY abstract macarons could be a fun, complementary project to add to the festive atmosphere.
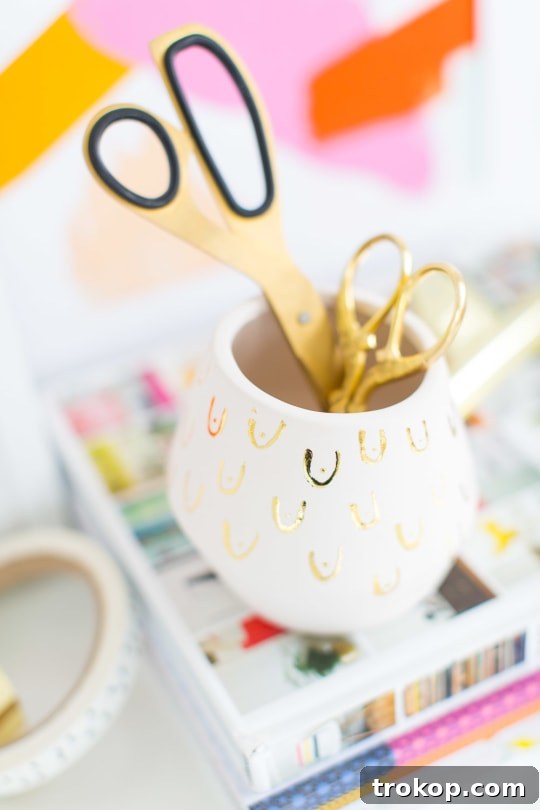
Table of Contents
Materials and Tools Needed to Make A DIY Patterned Vase
Creating your own patterned vase is a simple yet rewarding endeavor, requiring just a few key materials. Here’s a detailed look at what you’ll need to get started:
- Simply Screen Adhesive: This special adhesive is designed to work beautifully with foil, creating a strong bond that ensures your metallic patterns adhere perfectly. It’s user-friendly and crucial for achieving crisp, vibrant foil designs.
- Minc Gold Foil Paper: The star of the show! Minc foil comes in various metallic finishes and colors, but gold offers a timeless elegance. Its reflective quality will make your vase truly shine. Look for rolls or sheets, and choose a shade of gold that complements your ceramic vase.
- Paintbrush: A good quality paintbrush is essential for applying the adhesive. A fine-tipped brush allows for intricate details, while a broader flat brush can be used for larger, bolder strokes. Ensure it’s clean and free of loose bristles.
- Ceramic Vase: The canvas for your creativity! Choose a smooth, clean ceramic vase. White or a light neutral color will make the gold foil pop, but you can experiment with darker vases for a dramatic contrast. Consider the shape and size – taller, cylindrical vases offer ample space for repeating patterns, while smaller, curvier ones might inspire more abstract, organic designs.
Additional Recommended Tools:
- Rubbing Alcohol or Glass Cleaner: To ensure your vase is perfectly clean and grease-free before application, which helps the adhesive stick better.
- Paper Towels or Lint-Free Cloth: For cleaning and drying your vase.
- Protective Surface: A mat or old newspaper to protect your workspace from adhesive spills.
- Craft Knife or Scissors (Optional): For precise cutting of foil if you plan on specific shapes rather than just transferring brushed patterns.
Having these materials ready will ensure a smooth and enjoyable crafting experience, leading to a beautifully customized vase.
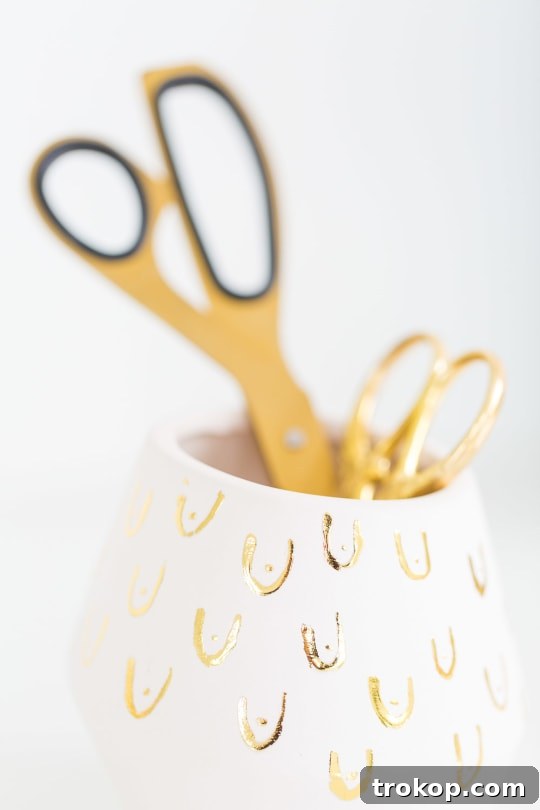
How To Make A DIY Patterned Vase
This method of decorating with gold foil adhesive is surprisingly straightforward, even for beginners. With a few careful steps, you’ll have a dazzling, personalized vase. Follow these instructions to bring your creative vision to life:
Step 1: Prepare Your Workspace and Vase
Before you begin, lay down some newspaper or a craft mat to protect your work surface. Ensure your ceramic vase is clean and dry. Wipe it down with rubbing alcohol or glass cleaner to remove any dust, oils, or fingerprints that could prevent the adhesive from sticking properly. Allow it to air dry completely.
Step 2: Practice Your Technique (Recommended)
If you’re new to working with gold foil adhesive, it’s a great idea to do a quick test run. Grab a piece of scrap paper or an inconspicuous area on the bottom of your vase. Apply a small amount of adhesive, let it dry, and then press a piece of foil over it. This will give you a feel for how much adhesive to use and how the foil transfers, helping you build confidence before working on your main design.
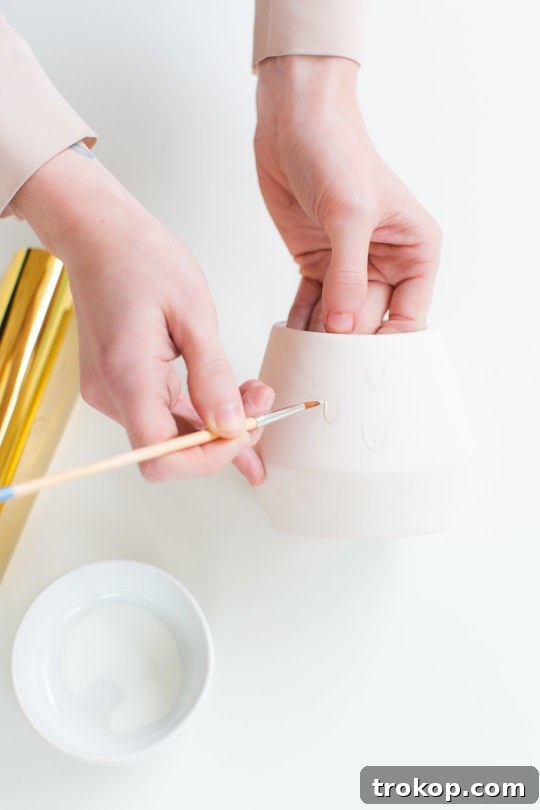
Step 3: Apply the Adhesive to Your Vase
Now, it’s time to start painting your desired patterns onto the ceramic vase. My best tip for success is to use a decent, consistent amount of glue. If you apply too little, the gold foil won’t adhere properly, resulting in a patchy or incomplete transfer. However, avoid applying it so thickly that it drips or takes excessively long to dry. Use your paintbrush to create abstract shapes, dots, lines, or any sporadic pattern that appeals to you. Think about creating a flow or rhythm with your design. Be mindful of your brush strokes, aiming for even coverage within each shape.
Step 4: Allow the Adhesive to Dry Completely
This is a crucial step! Once you’ve painted all your shapes onto the vase, set it aside and let them dry completely. The adhesive will typically become tacky or clear when dry, depending on the brand. Drying times can vary based on humidity and the thickness of your application, so it’s always best to refer to the product’s instructions. Patience here ensures a clean and successful foil transfer. Rushing this step will lead to a messy, unsatisfactory result.
Step 5: Apply the Gold Foil
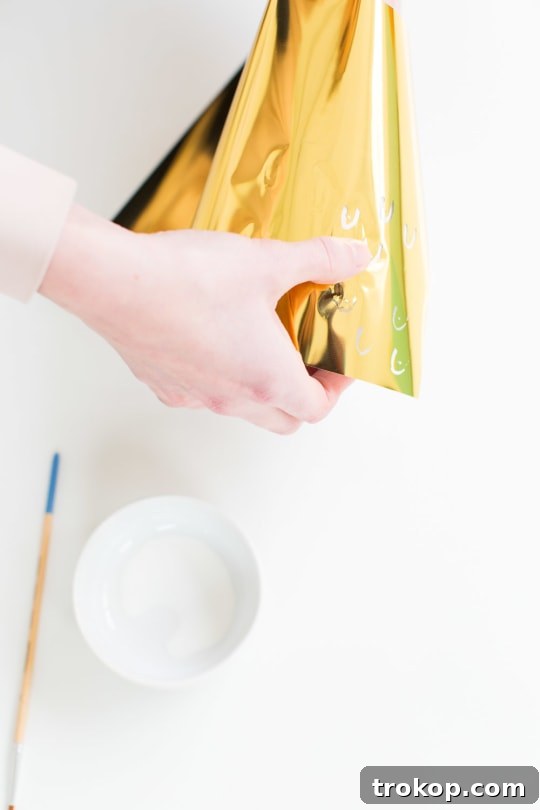
Once the adhesive is dry and tacky, carefully place a piece of Minc gold foil paper, colored side up, over a section of your dried adhesive pattern. Press the foil down onto the dried shapes firmly. Using your fingers or a soft cloth, smooth it over the top, applying gentle pressure to ensure the foil makes full contact with the adhesive. This firm pressing helps the metallic layer transfer effectively.
Step 6: Peel Away and Reveal Your Design
After pressing and smoothing, gently and slowly peel away the foil backing. You should see the beautiful gold pattern transferred onto your vase! Repeat this process until you’ve covered all of the painted adhesive elements. Be systematic to avoid missing any spots. If you notice any areas where the foil didn’t transfer perfectly, you can touch up by applying a tiny bit more adhesive, letting it dry, and then reapplying foil to that specific spot.
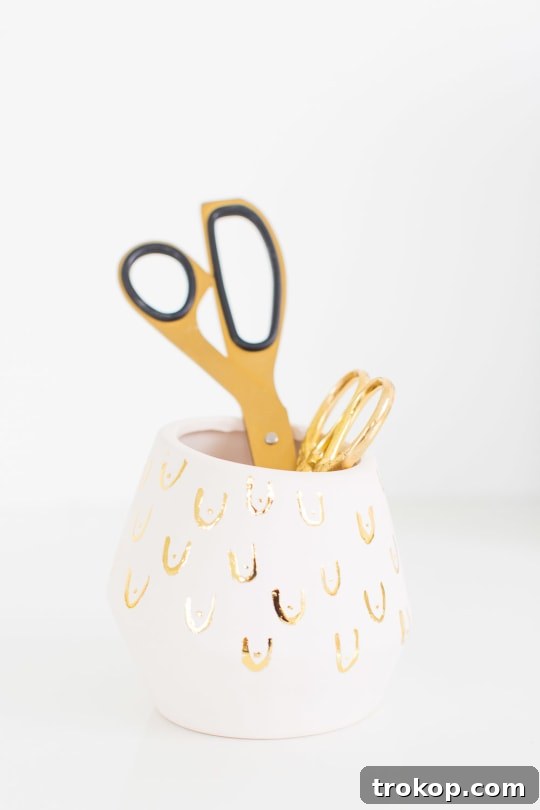
Once all your patterns are complete, step back and admire your handiwork! You’re all set with a truly unique, gold-patterned vase.
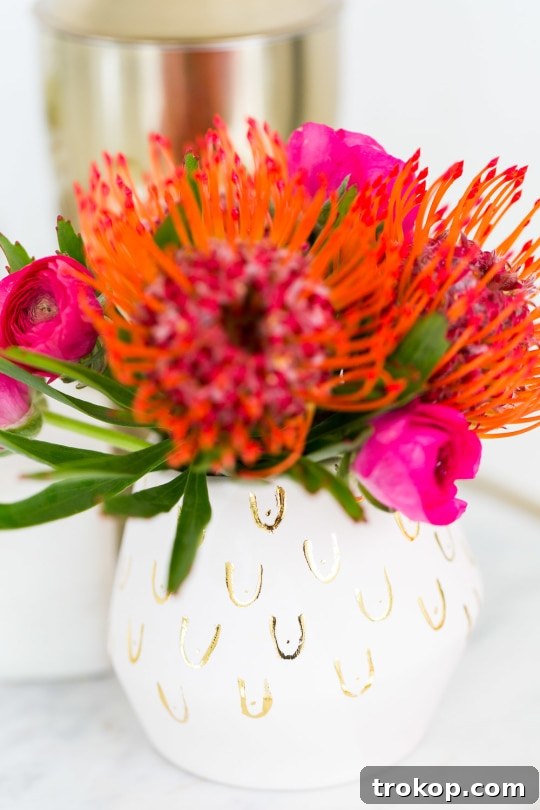
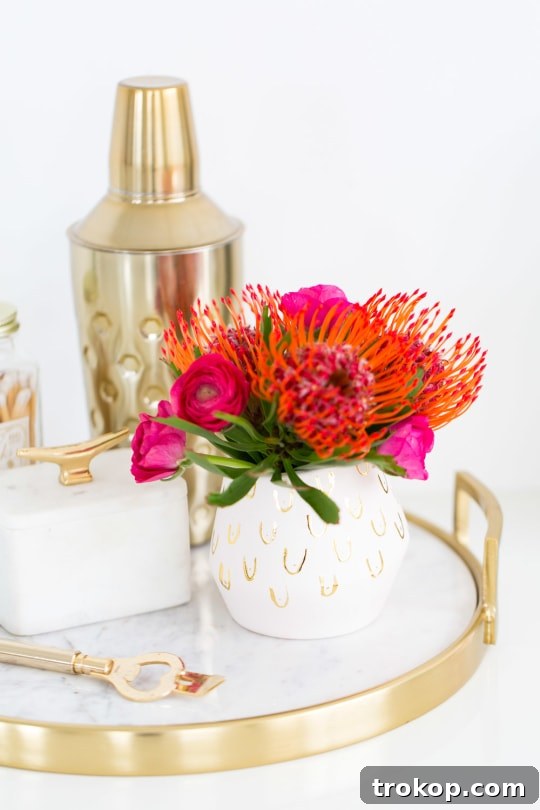
So what do you think?! It’s subtle, yet undeniably chic and adds a sophisticated pop to any room, am I right?! This technique allows for endless possibilities, from abstract and playful to elegant and minimalist patterns.
To further enhance your home decor with personalized pieces, consider making these stunning DIY Color Glazed Stacked Vases. They offer another fantastic way to introduce color and unique forms into your space.
Different Ways To Customize A Vase
Beyond the elegant gold foil technique, there’s a whole world of possibilities for customizing vases and adding personal flair to your home decor. Unleash your creativity with these diverse methods:
1. Geometric Patterns with Tape: One of the simplest yet most effective ways to create stunning patterns is by using various tapes.
- Painter’s Tape: Perfect for clean, crisp lines. Apply strips of painter’s tape to create stripes, chevrons, or intricate geometric designs. You can then paint the exposed areas with acrylic or ceramic paint. Once the paint is dry, carefully peel off the tape to reveal sharp, defined patterns.
- Washi Tape: For a less permanent or more whimsical look, washi tape comes in a myriad of colors and patterns. You can apply it directly to the vase in stripes, plaids, or even create a mosaic effect by tearing small pieces. It’s easily repositionable, making it ideal for experimenting with designs.
- Electrical Tape: Offers a glossy finish and can be used for bold, graphic black or colored patterns.
2. Intricate Designs with Stencils: Stencils allow you to replicate complex patterns or motifs with ease.
- Pre-made Stencils: Available at craft stores in countless designs, from floral to abstract. Secure the stencil to your vase with a low-tack adhesive or painter’s tape. Use a sponge, stencil brush, or even spray paint (in a well-ventilated area) to apply paint evenly over the stencil.
- DIY Stencils: For truly unique designs, create your own stencils by drawing a pattern on cardstock or vinyl and cutting it out. This allows for personalized logos, initials, or abstract shapes tailored to your taste.
3. Adding Dimension with Embellishments: Elevate your vase with sparkling or textured elements.
- Beads, Rhinestones, or Sequins: Apply these with strong craft glue in patterns, lines, or to completely cover sections of the vase for a glamorous, sparkling design. Consider using different sizes and colors to add depth.
- Ribbon, Fabric, or Yarn: Wrap sections of your vase with decorative ribbons, fabric strips, or colorful yarn. Secure with fabric glue or hot glue. This adds texture and can introduce new colors or patterns. A simple bow or a woven design can drastically change the look.
- Natural Elements: For an earthy vibe, use small pebbles, dried flowers, or even thin twigs attached with strong adhesive.
4. Artistic Expression with Paint: Paint offers the most freedom for customization.
- Acrylic or Ceramic Paints: These are versatile for hand-painted designs. Create freehand patterns, abstract splatters, or ombré effects by blending colors. Ceramic paints often require baking to cure, making the design more durable and waterproof.
- Chalk Paint: Provides a matte, rustic finish. You can distress it for a shabby-chic look.
- Marbling Techniques: Use specialized marbling paints or a simple water marbling method with nail polish to create swirling, unique patterns.
- Spray Paint: A quick way to change the base color of your vase or apply an even coat of metallic or textured paint. Always use in a well-ventilated area and apply in thin, even coats.
5. Decoupage for Collage Effects:
- Paper or Fabric: Cut out interesting images from magazines, patterned paper, or fabric scraps. Apply them to your vase using decoupage glue, then seal with multiple coats for a smooth, durable finish. This is excellent for creating a themed collage or a vintage look.
Pair any of these custom vase creations with a vibrant DIY Giant Paper Flower Bouquet for an even more impactful and personalized decorative statement.
No matter which method you choose, customizing a vase is a fantastic way to express your personal style and create truly one-of-a-kind decor pieces. It’s a wonderful project for adding character and charm to any room.
For more DIY ideas like this, you might want to consider reading the following related posts:
- DIY Edible Gold Lipstick Glasses
- Patterned DIY Candle Holder
- DIY Photo Holder: Mini Mountain Photo Holders
- Stunning DIY Clay Rose Marbled Incense Holder
DIY Patterned Vase
DIY Patterned Vase
Transform any plain vase into a stunning, personalized piece of home decor with this easy gold foil patterning technique. Perfect for gifting or adding a unique touch to your own space.
Equipment
-
Simply Screen adhesive
-
Paint brush
Materials
- Ceramic vase
- Minc gold foil paper
Instructions
-
Use a decent amount of glue when painting it on a vase, because if you use too little the gold foil won’t stick properly.
-
You can paint your shapes sporadically on the vase, then let them dry completely.
-
Now press the foil down onto the dried shapes firmly, smooth it over the top with your hands, and then peel away.
-
Repeat until you’ve covered all of the painted elements, and you’re all set!

Don’t forget to share your DIY Patterned Vase with us on Instagram using the hashtag #sugarandclothloves. We always love seeing all of your creations! Looking for more interior design inspiration? You can find all of our home decor tutorials and ideas right here!