
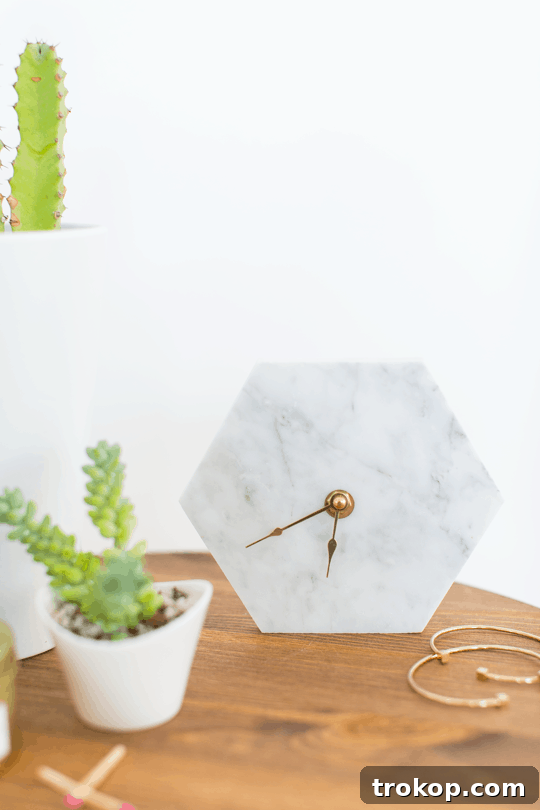
Transform your living space with a touch of DIY elegance! Discover how to craft your very own stunning marble tabletop clock, a project that blends timeless sophistication with modern design. This chic accessory isn’t just a functional timepiece; it’s a personalized statement piece that will elevate any room. Imagine a sleek marble clock gracing your shelves, desk, countertop, or even becoming a captivating centerpiece on your dinner table.
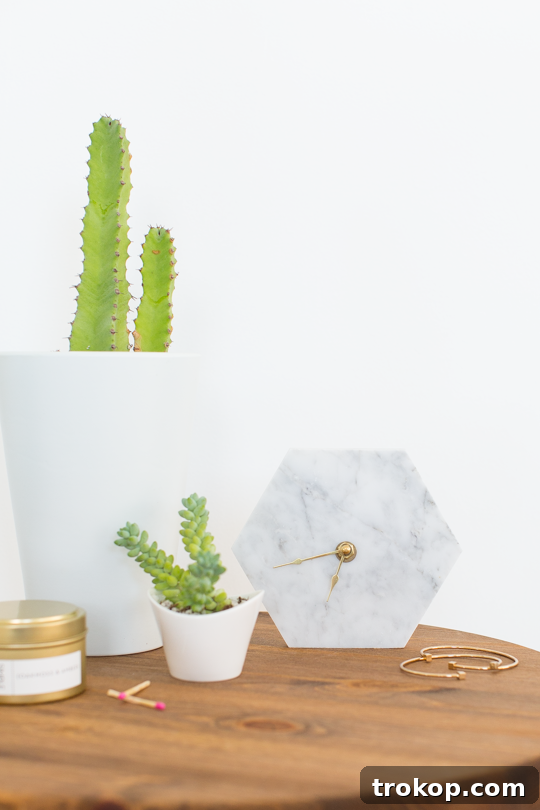
In an era where mass-produced items often lack character, creating something with your own hands brings unparalleled satisfaction and a unique charm to your home. This DIY marble clock project offers an accessible and rewarding way to infuse your decor with bespoke luxury without the hefty price tag. Marble, a material renowned for its natural beauty and durability, instantly adds a sense of refined opulence. By crafting a clock from a simple marble tile, you’re not only saving money but also ensuring that your decor truly reflects your personal style. Whether you’re a seasoned DIY enthusiast or just starting your crafting journey, this comprehensive guide will walk you through each step, making the process enjoyable and straightforward. Let’s embark on this creative adventure to design a functional work of art that captures both time and attention.
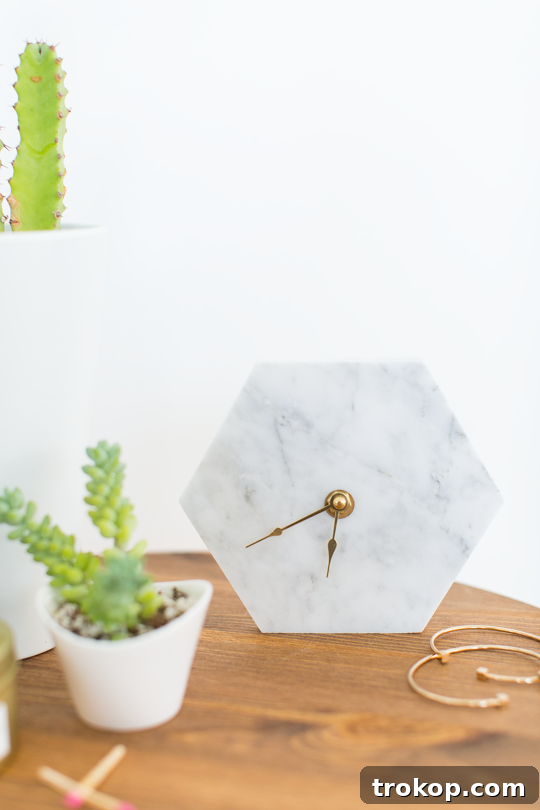
Table of Contents
Why Choose a DIY Marble Clock?
Beyond the undeniable aesthetic appeal, opting for a DIY marble tabletop clock comes with a myriad of benefits. Firstly, it’s incredibly cost-effective. High-end marble decor can be quite expensive, but by sourcing a single marble tile and a basic clock mechanism, you can achieve a luxurious look for a fraction of the price. Secondly, the joy of crafting something with your own hands is immeasurable. There’s a profound sense of accomplishment in seeing your vision come to life, and every glance at your unique clock will be a reminder of your creativity and effort.
Furthermore, a handmade clock offers unparalleled personalization. You get to choose the exact marble tile that speaks to your taste – perhaps a classic white Carrara, a dramatic black Marquina, or a subtle grey Bardiglio. The shape of the tile, whether a traditional square, a modern hexagon, or a chic round disc, also contributes to the final aesthetic. This level of customization ensures that your clock is not just another decorative item, but a truly bespoke piece that perfectly complements your existing decor and reflects your individual style. It’s an ideal project for those who appreciate both functionality and artistic expression in their home accessories.
Materials and Tools for Your Marble Clock
Before you begin, gather all your materials and tools to ensure a smooth and enjoyable crafting process. Having everything at hand will prevent interruptions and make each step more efficient.
Essential Materials:
- Marble Tile: The star of your project! Select a size and shape that resonates with your style and fits your intended display area. For a contemporary look, a hexagon tile (as featured in this tutorial) works beautifully. Consider the thickness as well; some clock mechanisms are designed for thinner materials, so a thicker tile might require some adjustment, as we’ll discuss in the instructions.
- Small Wall Clock Mechanism Movement Kit: This kit typically includes the clock mechanism, a washer, a hex nut, and the clock hands (hour, minute, and second hands). Ensure the shaft length of the mechanism is appropriate for your chosen marble tile’s thickness.
- Super Glue: A strong adhesive is crucial for securely attaching the clock mechanism, especially if your marble tile is too thick for the hex nut to fully engage from the front.
Required Tools:
- Electric Drill: A reliable drill is essential for creating the central hole in your marble tile.
- Regular Drill Bit: You’ll need this to create a small pilot groove on the marble surface. This initial indentation helps guide the specialized ceramic drill bit, preventing it from skidding and ensuring a precise starting point.
- 5/16″ Ceramic or Diamond Drill Bit: This is the most critical tool for drilling through marble. Standard drill bits will not work effectively on natural stone and may damage both the bit and the tile. Ceramic or diamond bits are designed to cut through hard materials cleanly.
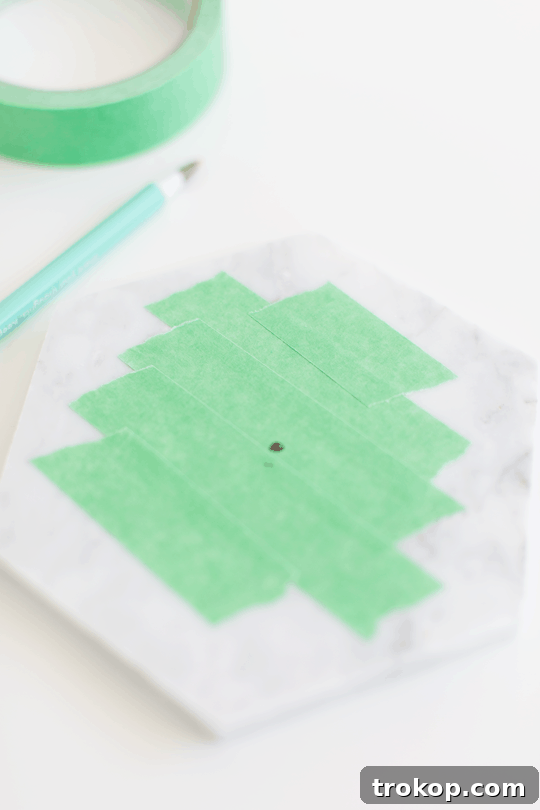
- Painter’s Tape: This versatile tape serves two important purposes: it provides extra strength to the marble surface, minimizing the risk of chipping during drilling, and it can be used to mark your precise drilling point.
- Water Squirt Bottle: Drilling through marble generates heat, which can damage your drill bit and potentially crack the marble. Regularly spritzing water on the drilling area helps to keep the bit cool and lubricated, facilitating a smoother cut.
- Paper Towel or Cloth: Useful for wiping away water, marble dust, and any excess glue, keeping your workspace clean throughout the project.
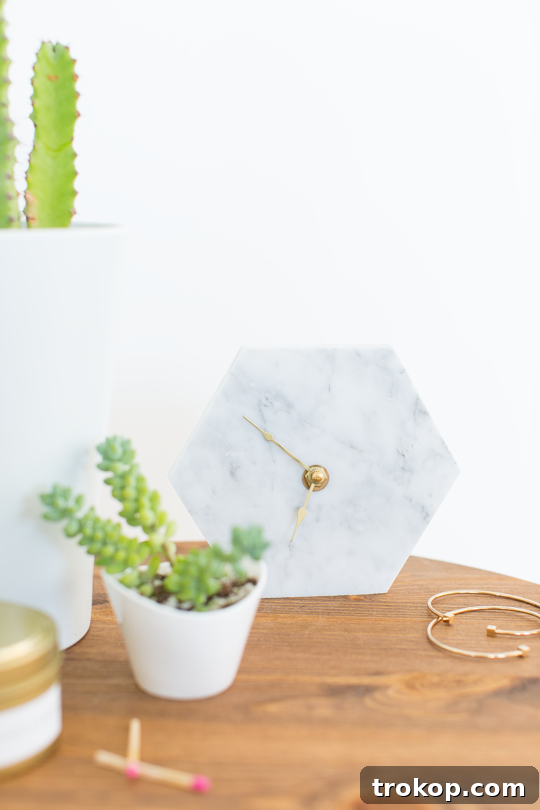
Step-by-Step Guide: How to Make Your Marble Tabletop Clock
Follow these detailed steps to create your elegant marble tabletop clock. Patience and precision are key when working with natural stone.
- Prepare for Drilling and Mark Your Center:
Before you even pick up the drill, ensure your marble tile is placed on a stable, flat surface. You might want to place a piece of scrap wood underneath to protect your workbench. Next, apply painter’s tape securely across the center of your marble tile, covering the area where you intend to drill. This tape provides crucial support, reducing the likelihood of chipping or cracking the marble as the drill bit makes contact. Using a ruler and a marker, precisely locate and mark the exact center point on the painter’s tape. This mark will be your guide for drilling.
- Create a Pilot Groove and Drill the Main Hole with Caution:
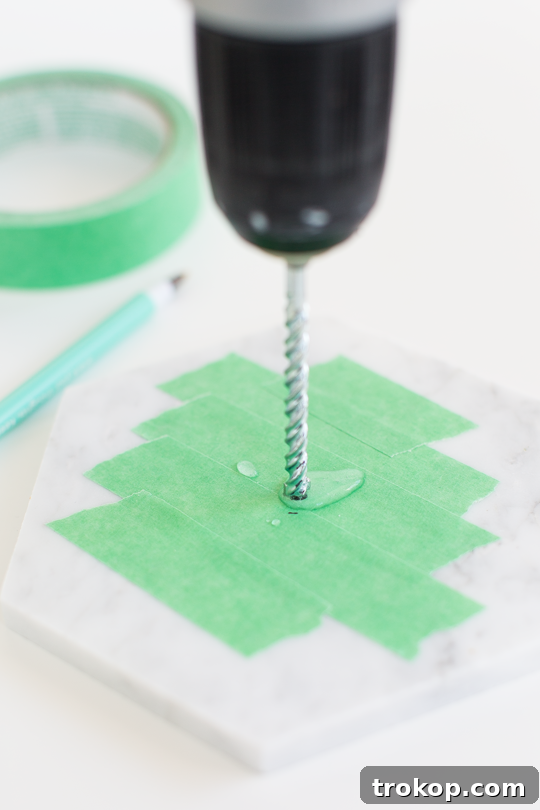
Start by attaching a regular drill bit (smaller than your ceramic bit) to your drill. Gently place the tip of the regular drill bit on your marked center point and drill just enough to create a shallow groove or indentation on the marble surface. This isn’t to drill through the tile, but rather to create a stable starting point for the ceramic bit, preventing it from wandering across the smooth marble. You should see a small amount of ceramic dust as you do this. Once you have a clear groove, switch to your 5/16″ ceramic or diamond drill bit. This specialized bit is designed to cut through hard materials like marble. Position the ceramic bit into the groove you just created. As you begin drilling, it is absolutely essential to continuously spritz water onto the drilling area using your squirt bottle. This constant flow of water serves as a lubricant and, more importantly, keeps the drill bit and the marble cool, preventing overheating which can lead to cracking or dulling the bit. Drill with steady, moderate pressure, allowing the bit to do the work. Avoid pressing too hard or too quickly. The drilling process can be a bit messy, so use a paper towel to periodically dab away the water and marble dust. Once you’ve successfully drilled all the way through the tile, remove the painter’s tape and clean the surface thoroughly.
- Secure the Clock Mechanism:
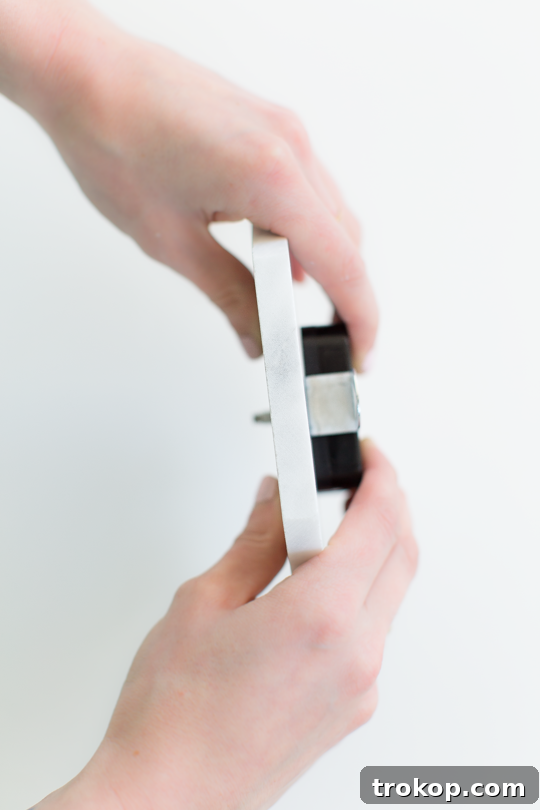
Take your clock mechanism and attempt to insert the battery compartment side through the newly drilled hole from the back of the marble tile. The threaded shaft should protrude through the front. If the fit is loose or if your marble tile is thicker than standard (meaning the hex nut won’t properly secure the mechanism from the front), you’ll need to use super glue. Apply a thin, even layer of super glue around the base of the battery mechanism on the back of the tile, being very careful to avoid getting any glue on the central hand shaft, which needs to rotate freely. Press the mechanism firmly into place, holding it steady for several minutes until the glue begins to set. Allow adequate time for the glue to fully cure as per the manufacturer’s instructions before proceeding to the next step. This step is critical for a secure and long-lasting clock.
- Add the Washer and Hex Nut:
Once the glue holding the mechanism is completely dry and secure, turn your attention to the front of the marble tile. Carefully slide the small washer onto the threaded shaft of the clock mechanism that extends through the marble. This washer helps distribute pressure and protect the marble surface. Following the washer, thread the hex nut onto the shaft. Tighten it gently but firmly. If your marble is particularly thick and the hex nut doesn’t fully engage or feel secure, you can apply a tiny dab of super glue to the underside of the hex nut before tightening it to ensure it remains fastened. Be careful not to use too much glue, which could seep into the mechanism.
- Attach the Clock Hands:
This is the final assembly step! Refer to the specific instructions provided with your clock movement kit, as the order and method for attaching hands can vary slightly. Generally, you’ll attach the hour hand first, then the minute hand, and finally the second hand. Each hand typically slides onto a different post or tier on the mechanism’s shaft. Ensure each hand is pushed down far enough to be secure but not so far that it scrapes against the hand below it or the clock face. They should move freely and not interfere with one another. Take your time to align them correctly, usually pointing to the 12 o’clock position when you first attach them, before setting the actual time.
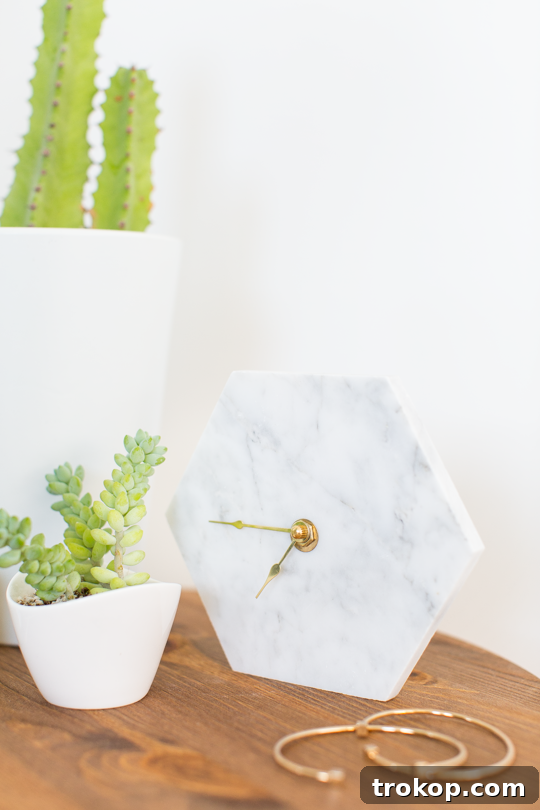
Congratulations! Your stunning marble tabletop clock is now complete. The natural heft of the marble tile means it’s sturdy enough to stand on its own, making it perfect for display. Alternatively, many clock mechanisms include a small opening on the back designed for hanging, offering another display option. You can also lean it against a wall or integrate it into a stylish stack of books for a layered decor effect. Now, insert a battery, set the time, and admire your handcrafted masterpiece!
Personalize Your Marble Clock
While the natural beauty of marble is often enough, there are numerous ways to further personalize your DIY tabletop clock. Consider adding subtle numerical markings to the marble face. You could use a fine-tip paint pen in gold, silver, or black to hand-draw numbers or simple dash marks at the 12, 3, 6, and 9 o’clock positions. For a more sophisticated look, small metallic adhesive numbers or dots can be applied. Alternatively, you might choose to leave the face entirely bare for a truly minimalist and modern aesthetic, allowing the marble’s natural veining to be the sole focal point.
The clock hands themselves offer another avenue for customization. Most kits come with standard black or metallic hands, but you can easily paint them a vibrant color to match a specific accent in your room, or use metallic spray paint for a gilded effect. Experiment with different hand styles – sleek minimalist lines, ornate vintage designs, or bold geometric shapes – to dramatically alter the clock’s character. Thinking beyond just the face, you could even add small felt pads to the bottom of the marble tile to protect your furniture surfaces and ensure the clock stands securely without slipping.
Displaying and Caring for Your New Timepiece
The versatility of your new marble clock extends to its placement. As a tabletop clock, it’s perfectly suited for a wide array of surfaces. Place it on your nightstand for a luxurious alarm clock alternative, on a bookshelf alongside your favorite reads, or on your office desk to add a touch of refined organization. In the kitchen, it can provide a stylish accent on a countertop, especially if you have other marble elements. For larger gatherings, the clock can serve as a sophisticated centerpiece, sparking conversation and admiration. Its robust marble construction also makes it a striking addition to a console table in an entryway, setting an elegant tone for your home.
Caring for your marble clock is straightforward, ensuring its beauty endures. For routine cleaning, simply wipe the marble surface with a soft, damp cloth. Avoid abrasive cleaners or harsh chemicals, which can damage the stone’s finish. If the marble develops any minor smudges or fingerprints, a gentle marble cleaner or a mixture of mild soap and water can be used, followed by a thorough drying to prevent water spots. Ensure that the clock mechanism itself remains dry and protected from moisture. With proper care, your DIY marble tabletop clock will continue to be a cherished and functional piece of decor for years to come.
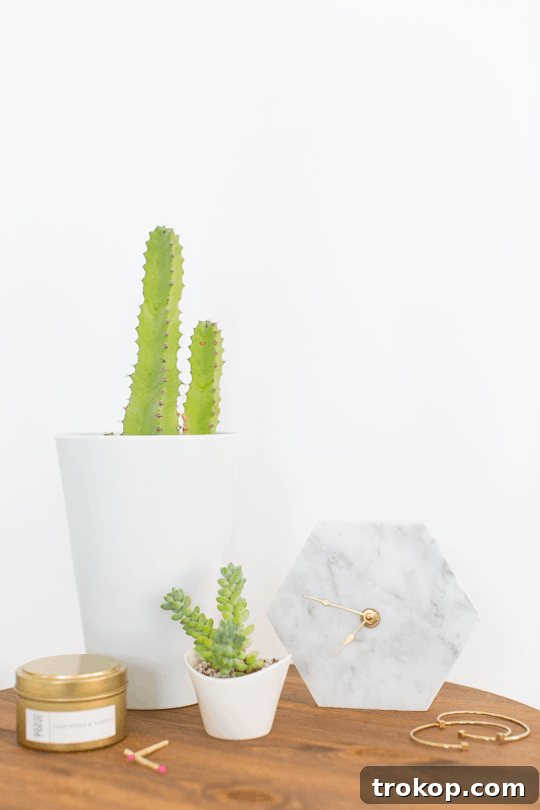
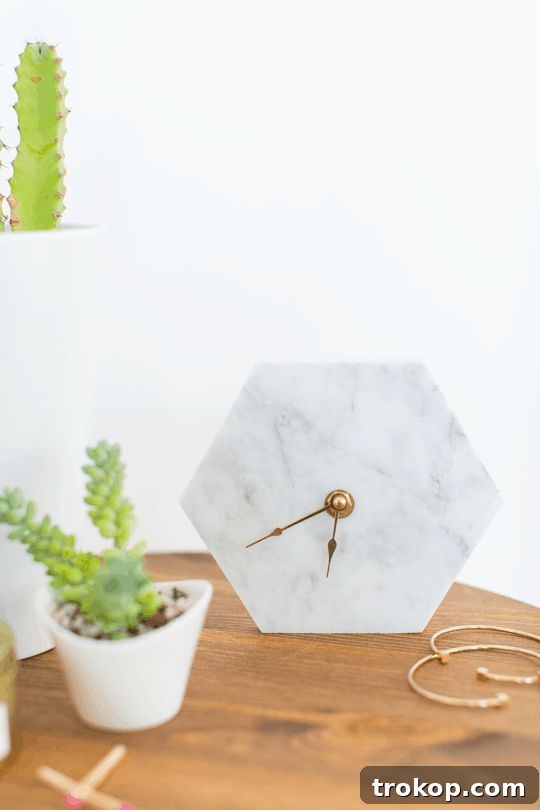
Marble DIY Tabletop Clock
Create a stunning DIY marble tabletop clock with our easy-to-follow tutorial.
Equipment
- Drill and regular drill bit
- 5/16″ ceramic drill bit
- Painter’s tape
- Super glue
- Water squirt bottle
- Paper towels
Materials
- 1 marble tile (choose your desired shape and size)
- 1 clock movement mechanism kit (with hands)
Instructions
-
Drill the hole: Start by drilling a hole at the center of your marble tile. Use painter’s tape across the surface of the tile for extra strength, which will help prevent chipping or breaking the marble during drilling.
-
Create a groove: Begin with a regular drill bit to make a small groove at the center. Drill just enough until you see ceramic dust. Then, switch to a 5/16 ceramic drill bit for the main hole. Make sure to spritz water on the area while drilling to keep the marble cool and avoid excessive friction. The drilling process may create some mess, so use a paper towel to dab away any excess water and dust. Once the hole is drilled, remove the painter’s tape and wipe the surface clean.
-
Secure the mechanism: Next, test the clock mechanism by inserting the battery part through the hole to check for a proper fit. If the clock mechanism doesn’t fit snugly, apply a thin layer of super glue around the back of the battery mechanism, avoiding the hand shaft to ensure it can still rotate freely. This is necessary because the marble is too thick for the hex nut to clip onto from the front side, so it needs to be held in place on its own. Insert the mechanism through the hole, holding it in place until the glue fully sets.
-
Add the washer and hex nut: After the mechanism is secured, slide the washer over the shaft, followed by the hex nut. You can glue the washer and hex nut in place to ensure they stay securely fastened.
-
Attach the clock hands: Follow the instructions provided with your clock kit to attach the clock hands to the mechanism. Make sure everything is properly aligned.

More Chic Clock and Decor Ideas
If you enjoyed crafting your marble tabletop clock and are looking for more ways to add stylish timepieces or refreshing decor to your home, explore these inspiring ideas:
- DIY Plate Clock: Transform ordinary decorative plates into charming wall clocks for a whimsical and unique touch.
- Mid Century DIY Wall Clock: Embrace retro elegance by creating a wall clock inspired by the iconic designs of the mid-20th century.
- 25 Large Wall Clocks for Your Living Room: Discover a curated selection of oversized wall clocks that can serve as dramatic focal points in any living space.
43 Top Amazon Wall Decor Ideas for Every Room in Your Home
Find gorgeous Amazon wall decor that makes a big impact…
Continue Reading43 Top Amazon Wall Decor Ideas for Every Room in Your Home
28 Decorative Wall Mirrors You’ll Wish You Bought Sooner
Looking for the perfect wall mirror? Explore our roundup of…
Continue Reading28 Decorative Wall Mirrors You’ll Wish You Bought Sooner
19 Unique & Easy Houseplants that We’re Loving
Looking for unique house plants? Dive into our guide to…
Continue Reading19 Unique & Easy Houseplants that We’re Loving
60 Amazon Bedroom Decor Picks to Revamp Your Room
Discover the best Amazon bedroom decor items to create a…
Continue Reading60 Amazon Bedroom Decor Picks to Revamp Your Room