
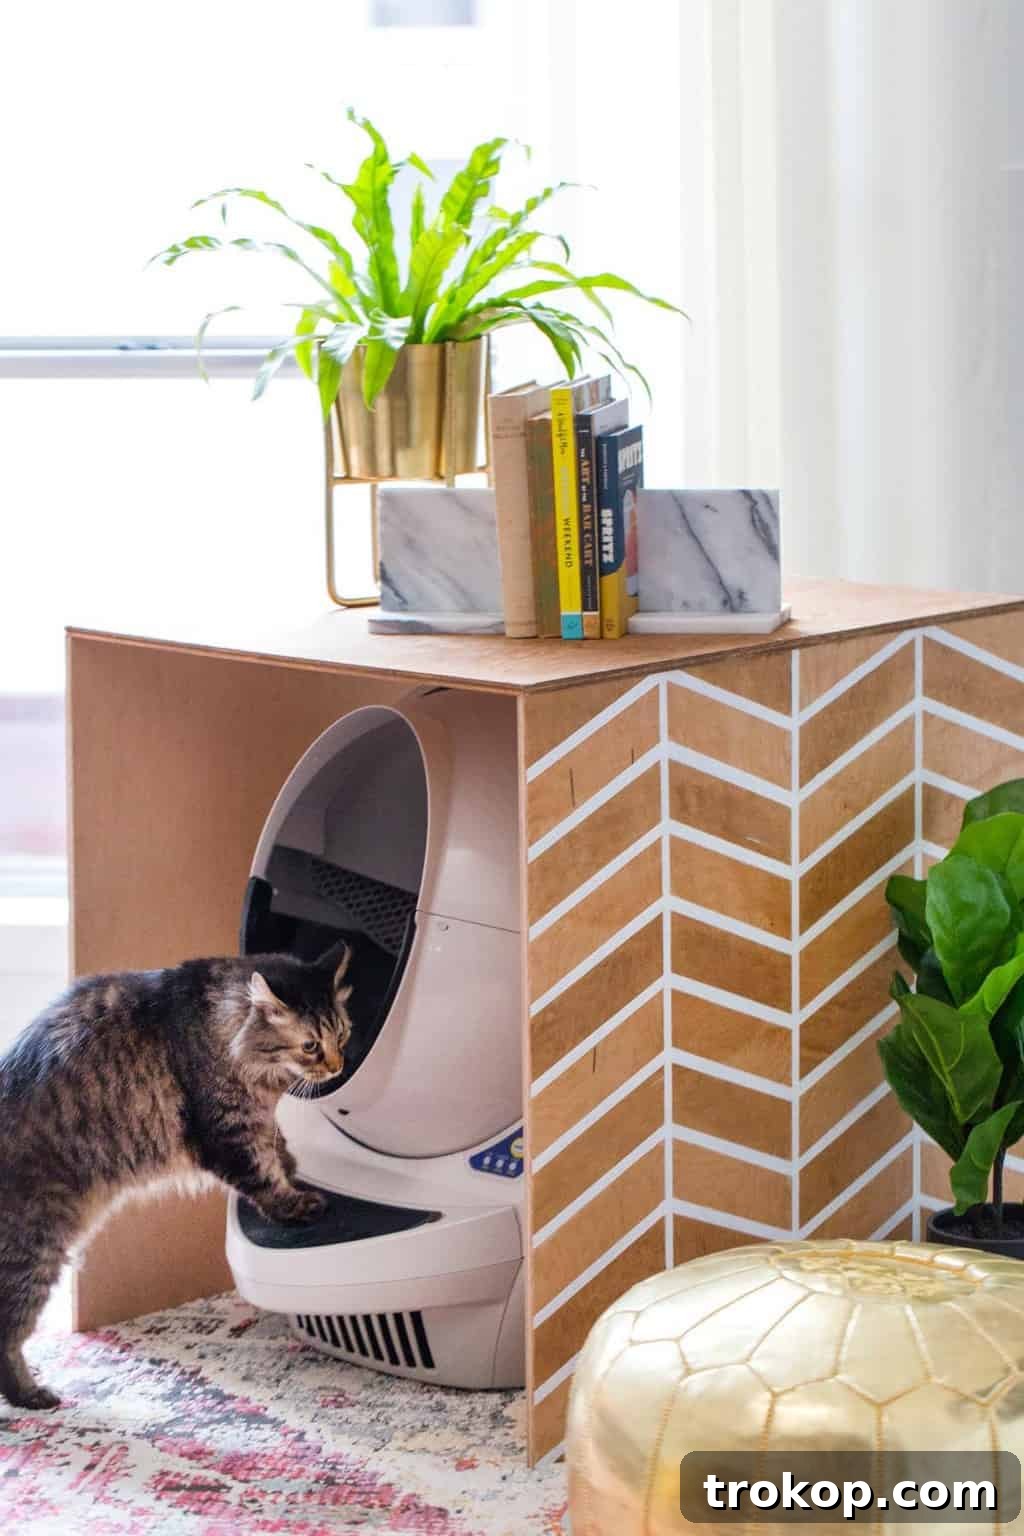
Welcome home! Nothing quite says comfort and serenity like a clean, beautifully organized living space. For pet parents, however, this serene vision often clashes with the reality of a visible litter box. But what if you could merge functionality with sophisticated design? We believe a clean home, free from unsightly pet essentials, makes for a happier household, both for humans and their beloved feline companions. That’s why we’re excited to share our step-by-step guide to crafting a stunning, **patterned DIY litter box cover** – the ultimate hidden litter box solution that brings style and peace of mind to your home.
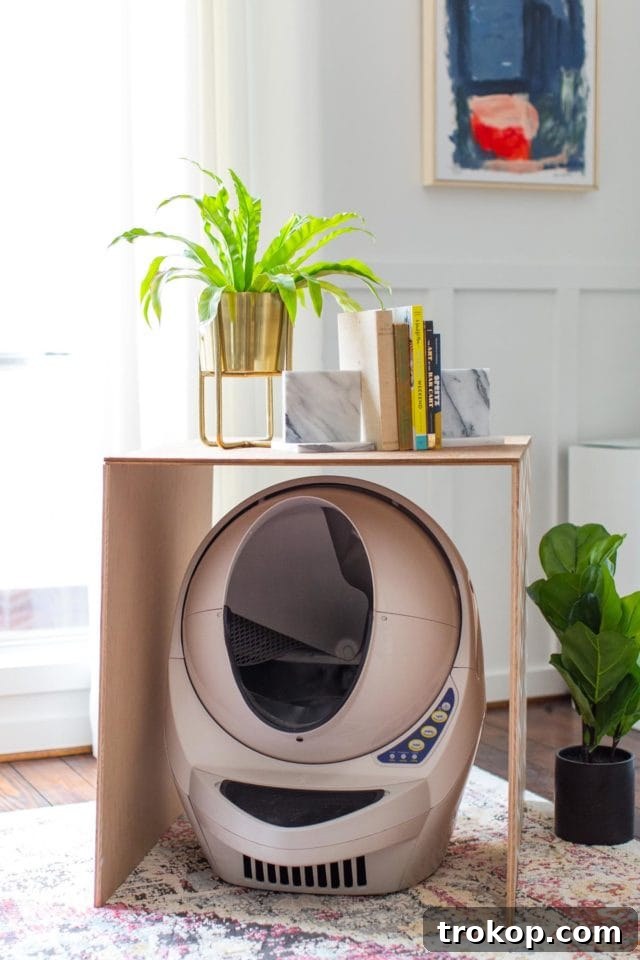
Every cat owner understands the unique challenges that come with maintaining a litter box. From persistent odors to scattered litter and the sheer visual disruption in an otherwise well-decorated room, these issues can be a constant source of frustration. We’ve certainly faced our share of litter box woes, especially with our beloved fur child, Thomas. He’s a magnificent creature, adored like a pageant king, but he possesses a rather strong opinion about the cleanliness of his facilities. If his space isn’t impeccably clean, he’s not above “protesting” outside the box – a true nightmare, particularly after investing heavily in brand-new wood floors and elegant rugs in our townhouse living room. Such tendencies can swiftly undermine all the effort put into a living space renovation.
Our quest for the perfect litter solution led us to the Litter Robot, a marvel we recently raved about on our Instagram stories. And let us tell you, it truly is AMAZING. We know the price tag might raise an eyebrow for some, and we completely empathize. However, having experienced the immense benefits, we would wholeheartedly agree that it’s worth every penny. For Thomas, a cat so particular about his pristine environment, the Litter Robot has been a game-changer. No more daily (or multiple times daily) scooping routines for us, and most importantly, no more spiteful accidents on our precious new flooring. We haven’t encountered a single “out-of-the-box” incident since integrating these incredible machines into our home (yes, we use two, strategically placed on different floors to ensure constant access and convenience). The Litter Robot has become our new best friend, providing unmatched peace of mind and significantly improving our quality of life as cat parents.
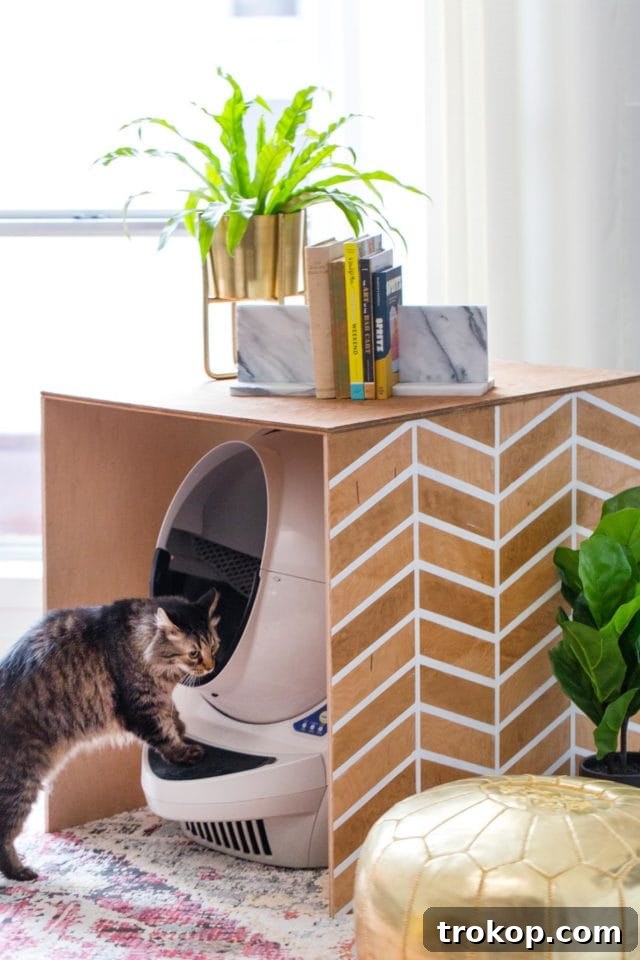
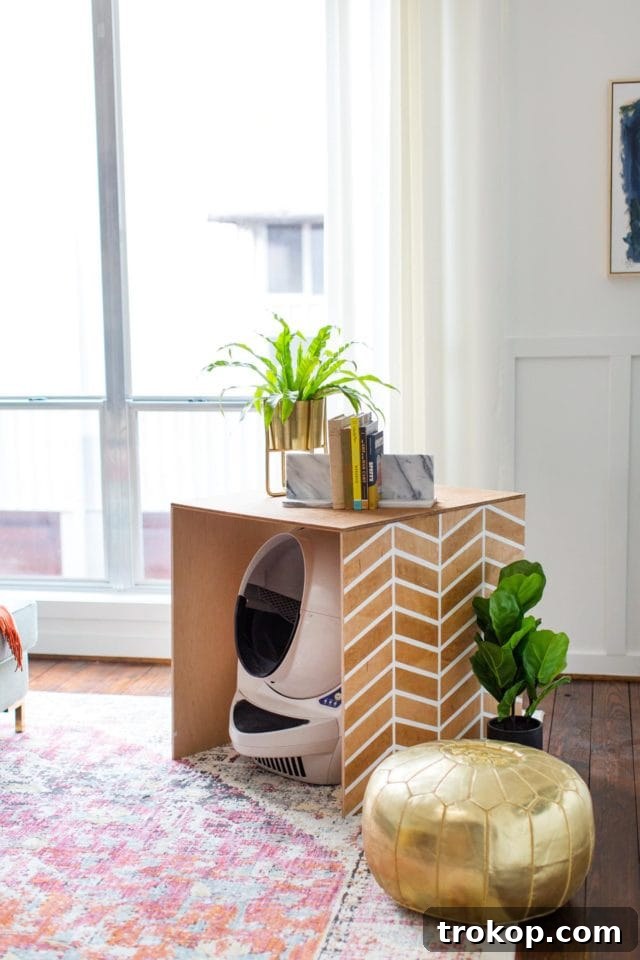
While the Litter Robot is a triumph of engineering and convenience, its modern, utilitarian design doesn’t always seamlessly blend with diverse interior aesthetics. This is where our creative spirit took over. Recognizing the need for a solution that was both highly functional and beautifully integrated into our home decor, we decided to elevate its presence. The idea was simple yet impactful: create a **patterned DIY litter box cover** that not only conceals the Litter Robot but also acts as a stylish piece of furniture, perfectly aligning with our personal design style. This project transforms a necessary pet item into an intentional design element, proving that pet care can coexist harmoniously with sophisticated home decor.
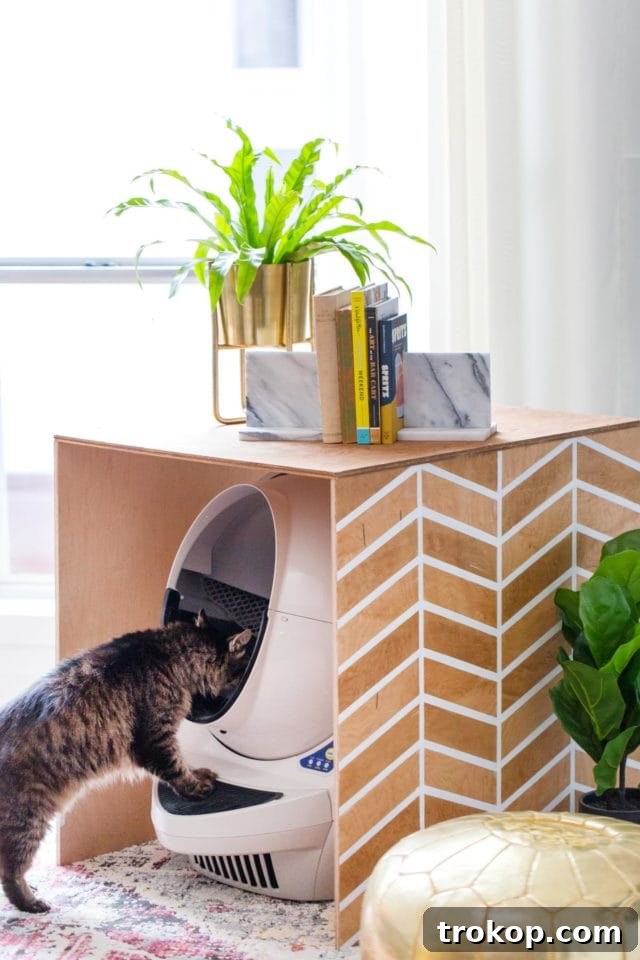
Table of Contents
Materials and Tools Needed
Embarking on this DIY project requires a few essential materials and tools, most of which are readily available at your local hardware store. The beauty of this project lies in its simplicity and the ability to customize it to your heart’s content. Here’s what you’ll need to create your very own stylish litter box enclosure:
- Plywood: You’ll need three pieces: one piece cut to 29″ x 26″ (for the top panel) and two pieces cut to 29″ x 29″ (for the side panels). Many hardware stores offer free cutting services, so be sure to take advantage of that for precise cuts. Plywood is an excellent choice for this project due to its durability and smooth surface, which takes stain and paint beautifully.
- Wood Screws: Approximately 1 1/2 inch long. These will provide a strong, stable connection between your plywood pieces. We recommend having a few extra on hand.
- 4 Metal “L” Brackets: These brackets are crucial for securely joining the side panels to the top panel, ensuring the cover is sturdy and long-lasting.
- Painter’s Tape: Essential for creating crisp, clean lines for your patterned design. Choose a high-quality tape to prevent bleeding.
- Foam Brushes: Several disposable foam brushes will be perfect for applying stain and paint, especially when working with multiple colors and needing thin, even coats.
- Wood Stain: In any two complementary colors of your choice. Selecting colors that match your existing home decor will help the litter box cover blend in seamlessly. Consider lighter tones for a modern farmhouse look or darker shades for a rich, contemporary feel.
- Fine Sandpaper: Crucial for preparing the wood surfaces. A smooth surface ensures better adhesion of stain and paint, resulting in a professional-looking finish.
- Paint: In an accent color of your choice for the lines. White is a popular choice for a clean, modern aesthetic, but feel free to experiment with bold colors to make a statement.
- Ruler: For precise measurements and drawing accurate lines for your pattern.
- Drill: A power drill will make attaching the screws and brackets quick and easy.
How to Make a Patterned DIY Litter Box Cover
Creating this custom litter box cover is a rewarding project that allows you to infuse your personal style into a practical pet solution. Follow these detailed steps to build a beautiful and functional addition to your home.
1 — Prep the Wood for a Flawless Finish: Begin by thoroughly sanding all edges and flat surfaces of each plywood piece using fine sandpaper. This step is more than just about smoothness; it removes any imperfections and opens the wood grain, allowing the stain and paint to absorb evenly and achieve a professional, streak-free finish. Dedicate extra time to this step, as a well-prepped surface is the foundation for a stunning final product. Once sanded, wipe down each piece with a clean cloth to remove any dust or debris.
2 — Stain the Top Panel with Your Chosen Hue: Take your 29″ × 26″ piece of plywood, which will serve as the top of your litter box cover. Apply your chosen solid color or wood-tone stain evenly across the entire surface. Use a foam brush or a clean rag, working in the direction of the wood grain. For a deeper, richer color, you may apply a second coat after the first has dried according to the manufacturer’s instructions. This top piece will offer a polished contrast to the patterned sides, tying the whole design together.
3 — Design and Stain the Side Panels with Alternating Colors: Now for the artistic part! Grab your two 29″ x 29″ side panels. Using a pencil and a ruler, carefully draw your desired pattern onto each panel. Geometric patterns, stripes, or even an abstract design can work wonderfully. Once your pattern is drawn, meticulously tape off the lines with painter’s tape, ensuring the edges are firmly pressed down to prevent any bleeding. Precision here is key to achieving sharp lines. With your pattern defined, use separate, dry foam brushes to lightly apply your two chosen alternating stain colors. Apply thin, even coats, being careful not to overload the brush, which can cause the stain to seep under the tape. Allow each coat to dry completely before applying the next or moving to the next color. This layered application prevents colors from mixing and maintains the integrity of your design. Always ensure the stain is fully dry before proceeding to the next step, as this is crucial for preventing smudges and ensuring vibrant, distinct patterns.
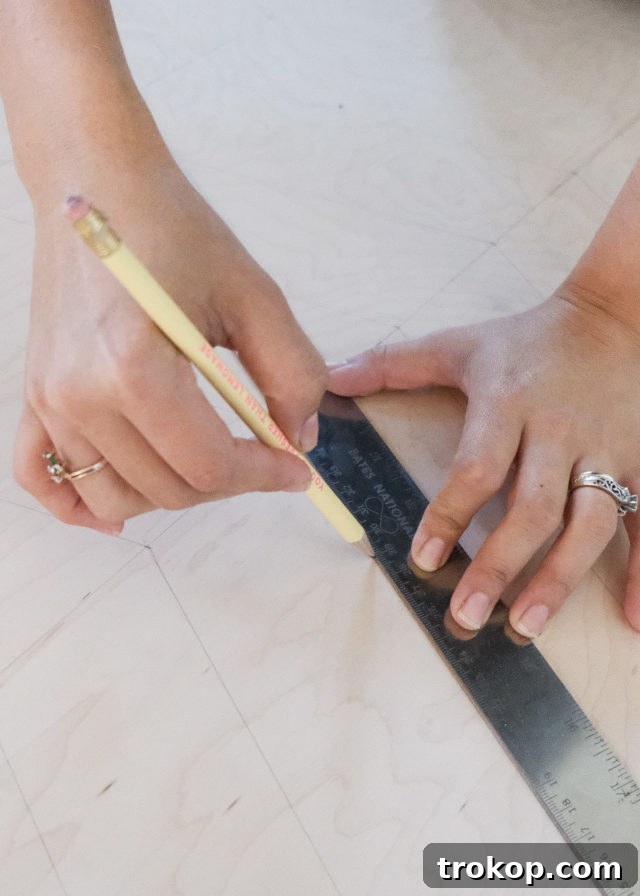
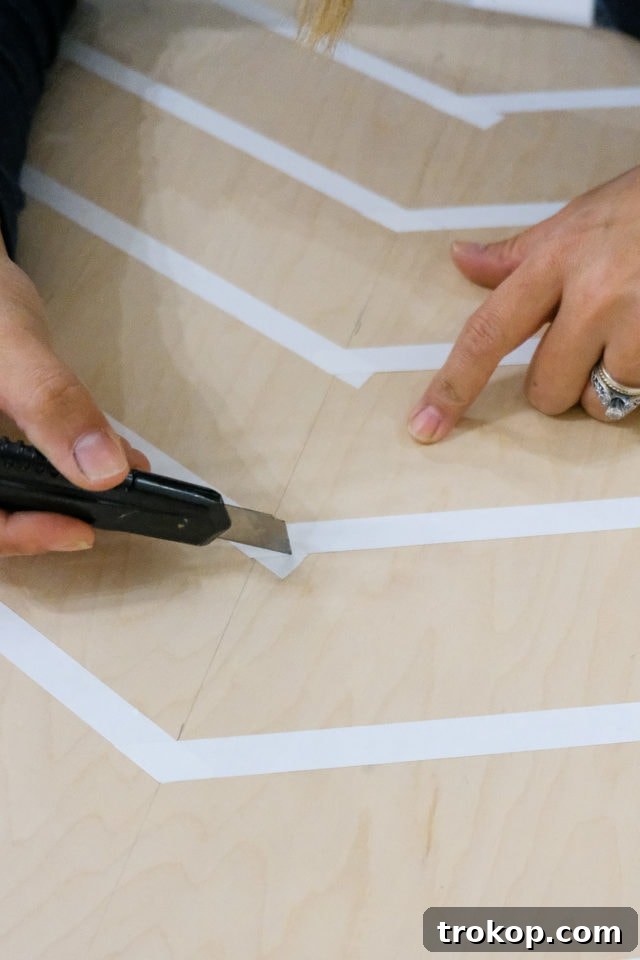
Using a dry foam brush, lightly apply alternating stain colors. Use a different brush for each color and apply thin coats to prevent bleeding. Allow to dry completely.
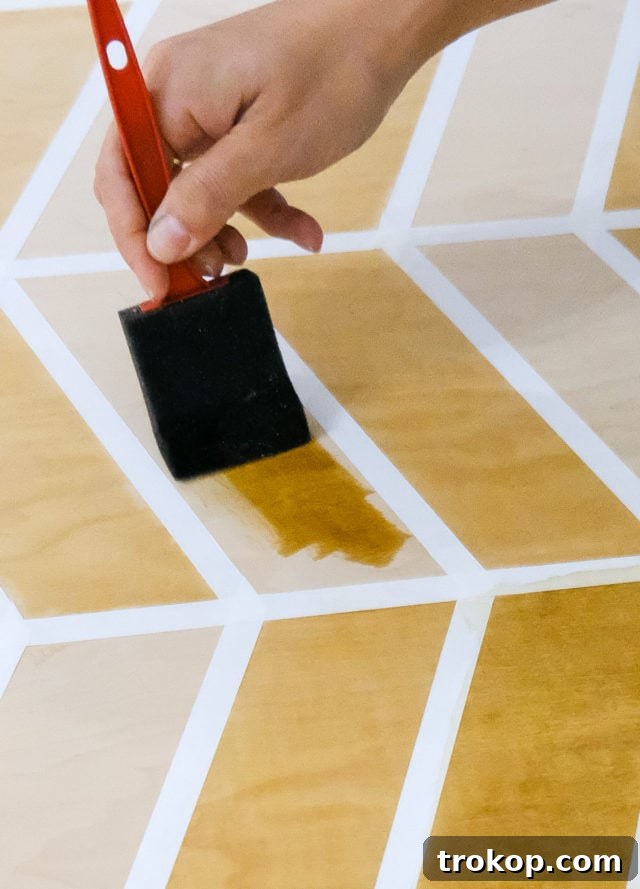
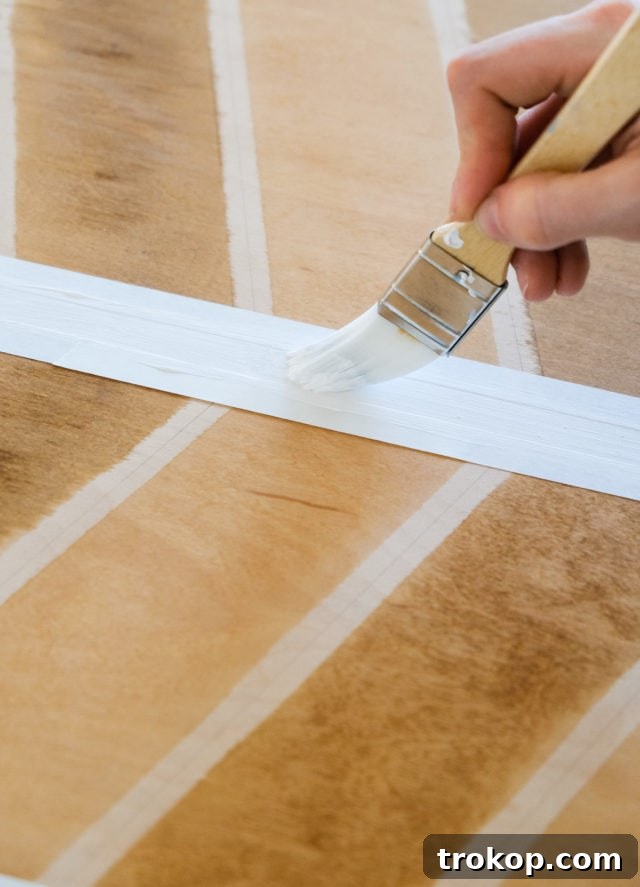
4 — Add Striking Accent Lines: Once the stained side panels are completely dry, carefully remove the initial painter’s tape. Now, retape the opposite edges of your pattern. This step is crucial for adding contrast and depth to your design. Once taped, apply your chosen accent color paint (we opted for a crisp white for a clean, modern aesthetic). Using a clean foam brush, apply multiple thin coats of paint to achieve a solid, opaque line finish. Allowing ample drying time between coats will prevent smudging and ensure your accent lines are sharp and professional. The interplay between the stained wood and the painted lines will create a dynamic visual effect, elevating the entire piece.
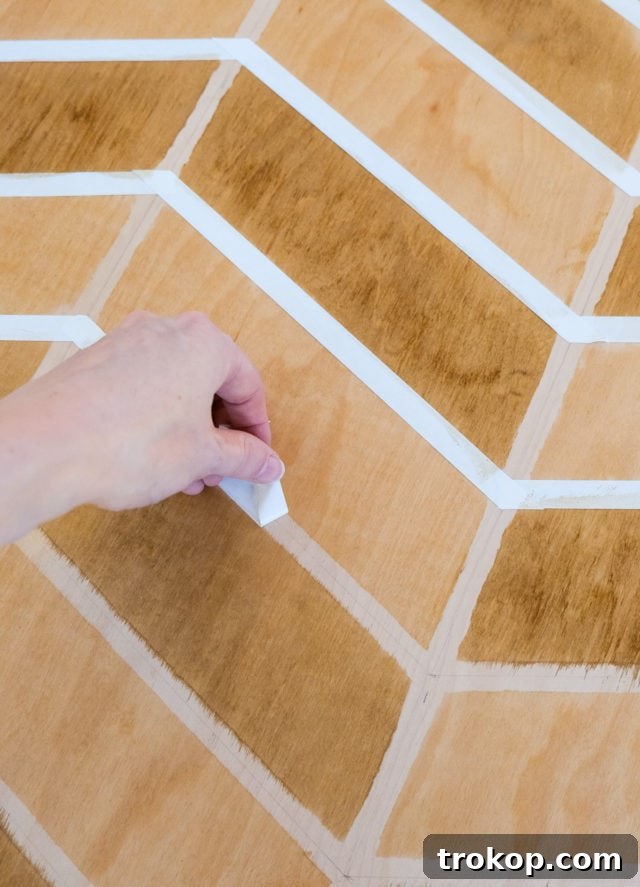
Paint your accent color (we used white for a clean, modern look). Apply multiple thin coats for a solid line finish.
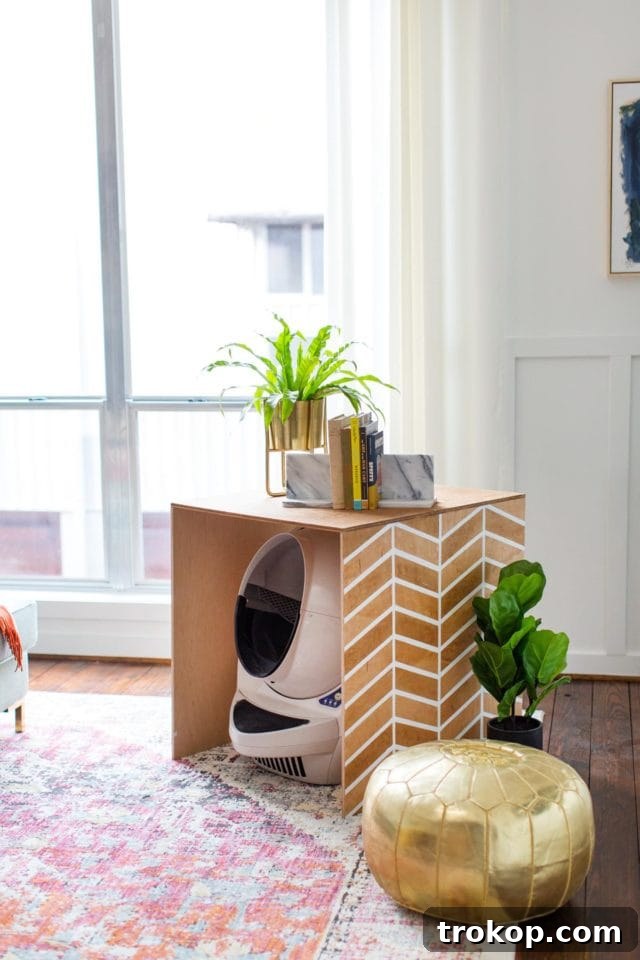
5 — Assemble Your Custom Litter Box Cover: With all your pieces stained and painted to perfection, it’s time for assembly. Using your L-brackets and wood screws, securely attach the two side panels to the top piece. Position the brackets on the inside corners of the structure. Pre-drilling small pilot holes can prevent wood splitting and make the assembly process smoother. Ensure all connections are tight and secure for a seamless, polished look that will stand the test of time. Once assembled, you’ll have a sturdy, stylish enclosure ready to house your Litter Robot, effectively hiding it while enhancing your home’s aesthetic.
Benefits of a DIY Litter Box Cover
Beyond simply hiding the litter box, a thoughtfully designed DIY cover offers a multitude of benefits for both you and your feline friend. This project transforms a necessary but often unsightly item into an integrated part of your home decor, bringing functionality and aesthetics together.
- Enhanced Aesthetics: The most immediate benefit is the visual improvement. No longer will a plastic litter box dominate your room. Instead, you’ll have a stylish piece of furniture that complements your existing decor, adding to the overall harmony and design cohesion of your space.
- Odor Containment: While not a complete seal, an enclosure can help to trap some of the litter box odors, making your living environment more pleasant. This is especially true when paired with an automatic, self-cleaning system like the Litter Robot.
- Reduced Litter Tracking: The walls of the cover act as a barrier, significantly reducing the amount of litter tracked out of the box and onto your floors. This means less sweeping and a cleaner home.
- Privacy for Your Cat: Cats often appreciate privacy when doing their business. An enclosed space provides a sense of security and a quiet retreat, which can reduce stress and encourage consistent litter box use, especially for shy or anxious cats.
- Protection for Your Litter Robot: The cover offers a layer of protection for your automatic litter box from accidental bumps or spills, extending its lifespan and keeping it in pristine condition.
- Additional Surface Space: The sturdy top panel of your DIY cover can double as a functional surface. Use it as a small side table for books, plants, or decorative items, maximizing its utility in your living space.
- Customization and Personalization: A DIY project allows for endless customization. You can choose colors, patterns, and finishes that perfectly reflect your style, making the piece uniquely yours and ensuring it fits seamlessly into your home.
Tips for a Harmonious Pet Home
Integrating pets into your home means finding solutions that work for everyone. Here are a few additional tips to ensure a harmonious environment, especially concerning litter box management:
- Strategic Placement: Even with a beautiful cover, the location of the litter box matters. Choose a quiet, accessible spot that offers your cat privacy but is also convenient for you to access for cleaning (though less frequent with a Litter Robot). Avoid high-traffic areas if possible.
- Consider Air Purifiers: For added odor control, especially in smaller spaces, a small air purifier near the litter box can work wonders in neutralizing any lingering smells.
- Use High-Quality Litter: The type of litter you use plays a significant role in odor control and tracking. Experiment with different brands and types (clumping, silica gel, natural alternatives) to find what works best for your cat and your home.
- Regular Cleaning: Even with an automatic litter box, occasional deep cleaning of the box and the cover itself is beneficial to maintain hygiene and prevent bacterial buildup.
- Provide Multiple Stations: In multi-cat households, it’s generally recommended to have one litter box per cat, plus one extra. Our experience with Thomas highlights the success of this approach; having two Litter Robots on different floors has completely eliminated his “spiteful habits.”
More Pet-Friendly Decor Ideas
Now that Thomas is keeping his habits at bay, we couldn’t be more thankful! We hope this DIY project helps you achieve a more stylish and peaceful home. Do you have any other brilliant litter box tips or pet-friendly decor ideas you swear by? We’d love to hear them! For more inspiration on creating a beautiful home that embraces your pets, check out some of our other favorite posts:
- Paw-some Gifts for Dog Owners
- The Ultimate Guide to Choosing the Perfect Pet Gifts
- DIY Cat Trinket Dish
- Inspiring Ikea Kallax Hacks for Every Room including a clever hack to add cat cubes for your feline friends.
Patterned DIY Litter Box Cover
Equipment
-
Drill
-
Ruler
-
Pencil
-
Foam brushes (multiple)
-
Fine sandpaper
-
Painter’s tape
Materials
- 1 29″ x 26″ plywood piece
- 2 29″ x 29″ plywood pieces
- 4 metal “L” brackets
- 16 wood screws (1 1/2″ long)
- 2 wood stains (in any two colors)
- Paint (any accent color of your choice for the lines)
Instructions
-
Sand all edges and flat surfaces of each plywood piece until smooth to ensure even stain and paint application.
-
Stain the 29″ × 26″ piece of plywood. This will be the top of your litter box cover. Allow to dry completely.
-
For the two 29″ x 29″ side panels, draw your desired pattern with a pencil and ruler. Tape off the lines firmly with painter’s tape to define your design. Using separate dry foam brushes, lightly apply alternating stain colors in thin coats to prevent bleeding. Allow to dry completely before proceeding.
-
Once the stained side panels are dry, remove the initial painter’s tape and retape the opposite edges to create new lines. Paint your accent color (e.g., white for a clean, modern look). Apply multiple thin coats for a solid line finish, ensuring each coat dries before the next.
-
Using your L-brackets and wood screws, attach the two side panels to the top piece. Drill the brackets on the inside corners for a seamless, polished look, ensuring stability.

43 Top Amazon Wall Decor Ideas for Every Room in Your Home
Find gorgeous Amazon wall decor that makes a big impact on your home’s aesthetic. From minimalist designs to vibrant statement pieces, discover stylish options to elevate every room.
Continue Reading43 Top Amazon Wall Decor Ideas for Every Room in Your Home
28 Decorative Wall Mirrors You’ll Wish You Bought Sooner
Looking for the perfect wall mirror? Explore our roundup of stunning decorative mirrors that add elegance, light, and a sense of spaciousness to any room in your home.
Continue Reading28 Decorative Wall Mirrors You’ll Wish You Bought Sooner
25 Large Wall Clocks for Your Living Room
Looking for the perfect extra large wall clock? Explore stylish and functional timepieces that serve as impressive focal points in your living room or any spacious area.
Continue Reading25 Large Wall Clocks for Your Living Room
19 Unique & Easy Houseplants that We’re Loving
Looking for unique houseplants to brighten your home? Dive into our guide to easy-to-care-for varieties that add a touch of nature and style to any room.
Continue Reading19 Unique & Easy Houseplants that We’re Loving