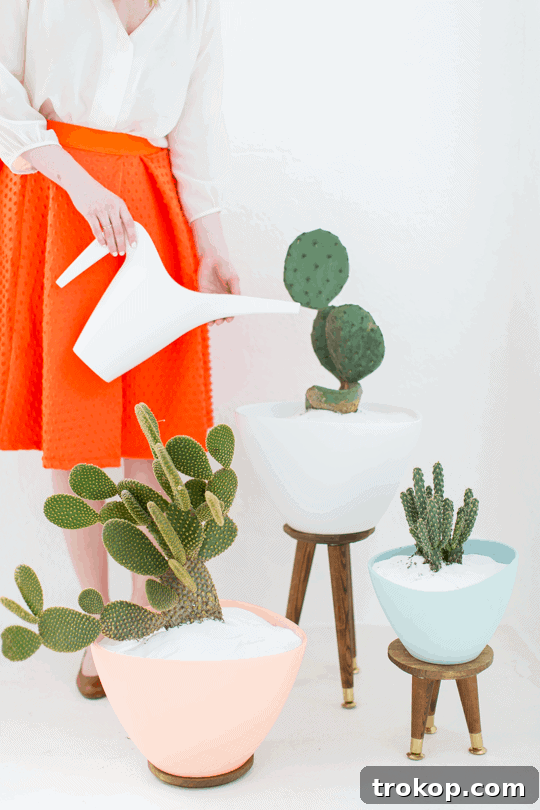
DIY Mid-Century Stand Planters: Elevate Your Indoor Garden on a Budget
Transform your living space with the timeless elegance of Mid-Century Modern design without breaking the bank. This comprehensive guide will walk you through creating your own stunning DIY Mid-Century Stand Planters. Perfect for showcasing your favorite plants, these stylish stands add a touch of sophistication to any room. Get ready to embrace spring or refresh your home decor with this easy, budget-friendly project!
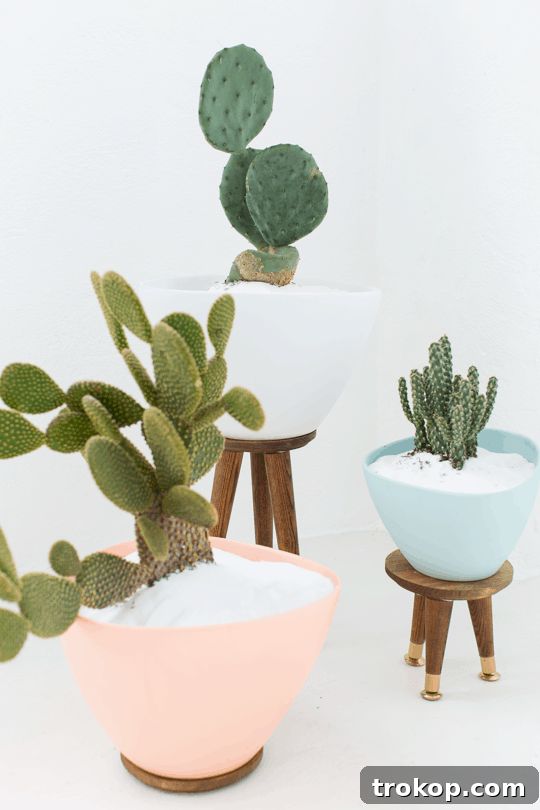
There’s something incredibly satisfying about bringing the beauty of nature indoors, and even more so when you can create a unique home for your plants with your own hands. Following the success of a fun Christmas tree cactus project, our studio became a haven for all things cacti! These prickly companions, alongside an array of lush greenery, have found their perfect home in these custom-made DIY Mid-Century Stand Planters. We’ve designed them to be not only aesthetically pleasing but also incredibly affordable, proving that “mid-century” and “budget-friendly” can indeed go hand-in-hand.
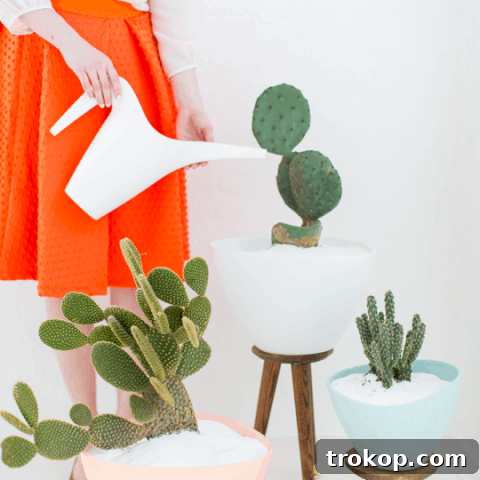
The allure of Mid-Century Modern design lies in its clean lines, organic shapes, and functional simplicity. Our DIY planters capture this iconic aesthetic, providing a chic pedestal for your beloved plants while elevating your interior design. We even stumbled upon a “drive-thru” version of this project – a quick, legless alternative that can be completed in under ten minutes. This happy accident came about when we inadvertently busted the bottom out of one of our planters and needed a swift solution. Sometimes, life’s little lemons lead to the most delicious DIY lemonade!
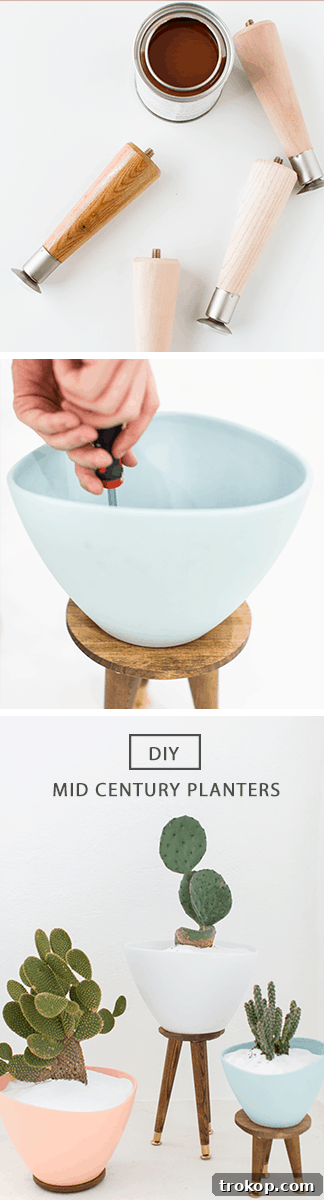
Materials Needed To Make A DIY Mid-Century Stand Planter
Gathering your materials is the first step towards creating your beautiful new plant stands. Most items are readily available at hardware stores, craft shops, or online, making this a convenient and accessible DIY project.
- Waddell Tapered Legs: Choose between 3.5-inch and 8-inch legs depending on your desired planter height. These provide the classic mid-century silhouette.
- Angle Plates: You’ll need three angle plates per stand to securely attach the legs to the base.
- Painter’s Tape: Essential for achieving crisp, clean lines when spray painting the leg tips.
- Planters: While the exact IKEA planters pictured may be sold out, many similar options are available. Look for ceramic or terracotta pots that fit your aesthetic. Consider the pot’s diameter for a stable fit on your wooden plaque.
- 6″ Wooden Plaque: One per stand, this will serve as the sturdy base to which the legs are attached and the planter rests upon.
- Wood Stain: Choose a finish like American Walnut to give your wooden components a rich, classic mid-century look. A foam brush is ideal for smooth application.
- Gold Spray Paint: For the distinctive gold “feet” of your tapered legs, adding a touch of glamour.
- Drill & Drill Bit: Necessary for attaching the angle plates and potentially securing the planter to the stand.
- Spray Paint (Optional): If you wish to customize the color of your planters to match your decor or add a pop of brightness.
- Bulldog Grip Glue or Large Screw (Optional): For permanently adhering the planter to its stand, providing extra stability, especially for taller setups or busy homes.
- White Sand (Optional): White sand adds a bright, clean top dressing to your plant’s soil, enhancing its visual appeal.
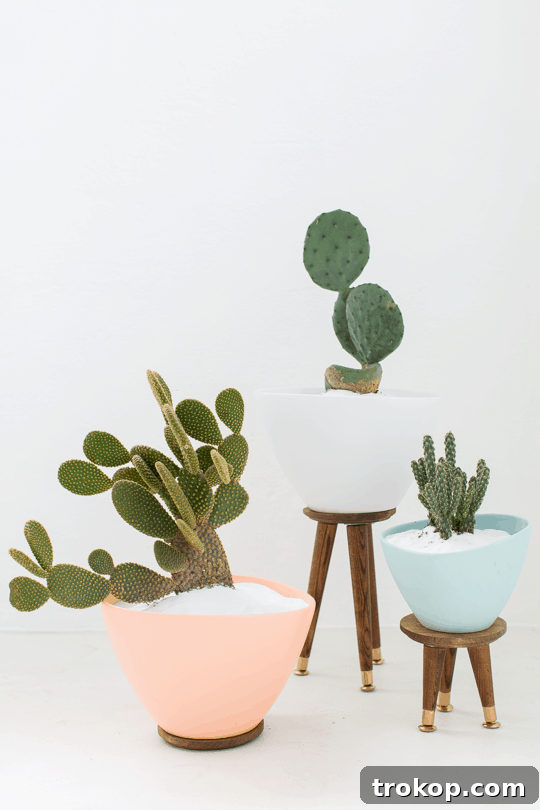
How To Make A DIY Mid-Century Stand Planter
Crafting your own mid-century stand planters is a rewarding project that requires minimal tools and skill. Follow these simple steps for a flawless finish and a chic addition to your home.
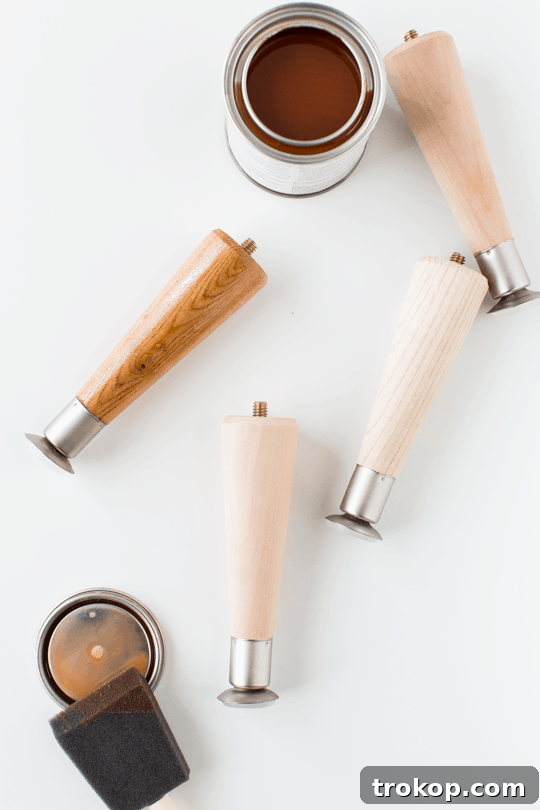
- Prepare the Wooden Components: Begin by prepping your Waddell tapered legs and the 6-inch wooden plaque. Using a foam brush, apply your chosen wood stain (we recommend American Walnut for a classic look) evenly across all surfaces of the unfinished wood. Ensure thorough coverage for a consistent finish.
- Allow to Dry Completely: Patience is key in DIY! Let the stained wood dry completely according to the stain manufacturer’s instructions. This usually takes several hours or overnight. Proper drying prevents smudging and ensures the next step adheres correctly.
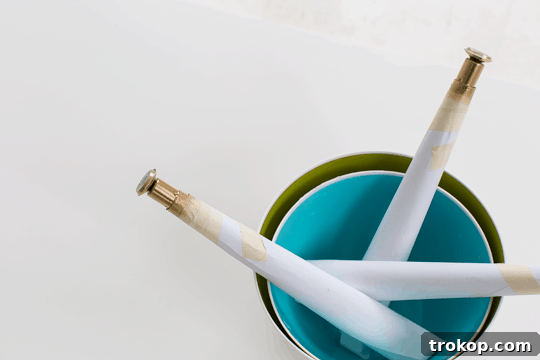
- Mask and Paint the Feet: Once the stain is dry, carefully use painter’s tape to mask off the stained wood section of each leg, leaving only the bottom 1-2 inches (the “feet”) exposed. This precision taping will give you a sharp transition. Take your gold spray paint and apply an even coat to the exposed tips. For best results and to prevent stickiness, allow the paint to dry overnight before handling. This ensures a durable, chip-resistant finish.
- Prepare the Planters (Optional): If you desire a splash of color, this is the time to customize your planters. We chose brighter hues to complement our studio’s vibrant aesthetic, but classic black or white planters would also look incredibly sleek and modern. Ensure your planters are clean and dry, then apply spray paint in light, even coats. Allow ample drying time between coats and before proceeding to the next step.
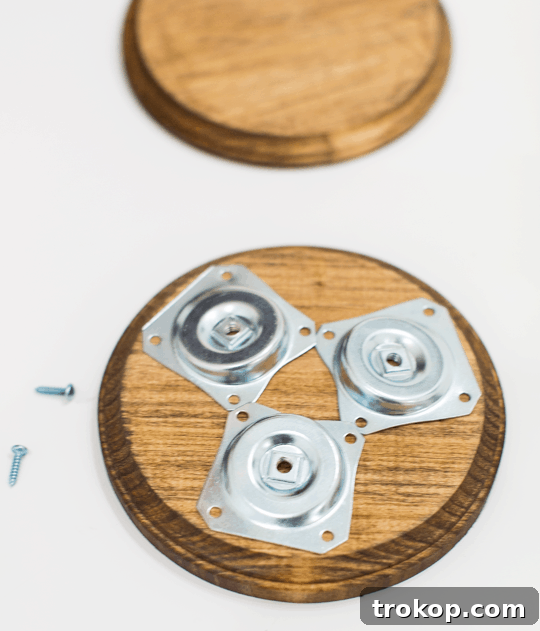
- Position the Angle Plates: Take your wooden plaque, which will serve as the base for your planter stand. Lay three angle plates in a triangular formation on the underside of the plaque, ensuring they are equidistant from each other and positioned to provide a stable, balanced foundation for the legs.
- Secure the Angle Plates: Using your drill and appropriate drill bit, carefully screw each angle plate into place on the wooden plaque. Double-check that the angled slot of each plate is facing outward, ready to receive the tapered legs. This outward orientation is crucial for the mid-century splayed leg look.
- Attach the Tapered Legs: Once the angle plates are securely fastened, twist the finished (stained and gold-tipped) tapered legs into each plate. The threaded bolts on the legs should screw snugly into the plates, creating a sturdy and stylish stand. Hand-tighten them for a firm connection.
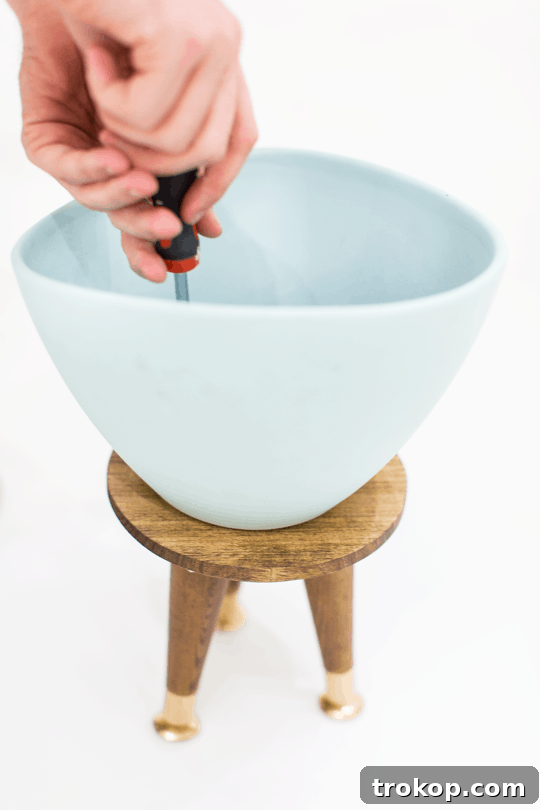
- Adhere the Planter to the Base (Optional): For added stability, especially if you have pets or children, you can choose to adhere the pot to the stand. Apply Bulldog Grip glue (designed for wood and ceramic adhesion) to the center of the wooden plaque where the planter will sit, then firmly press the planter into place.
- Alternative Planter Adhesion (Optional): Another secure option is to drill a large bolt or screw through the drip hole of the planter directly into the center of the wooden plaque. This provides a robust mechanical connection, ensuring the planter remains firmly in place.
Can You Make The Planters Without Legs?
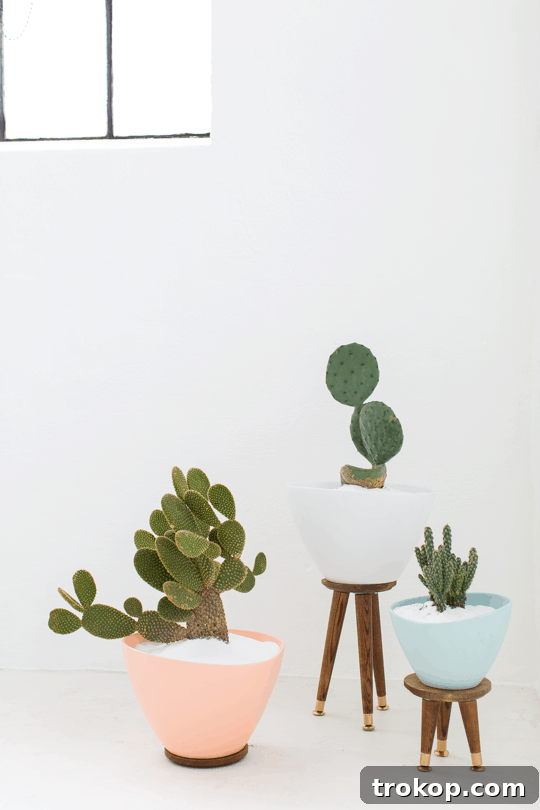
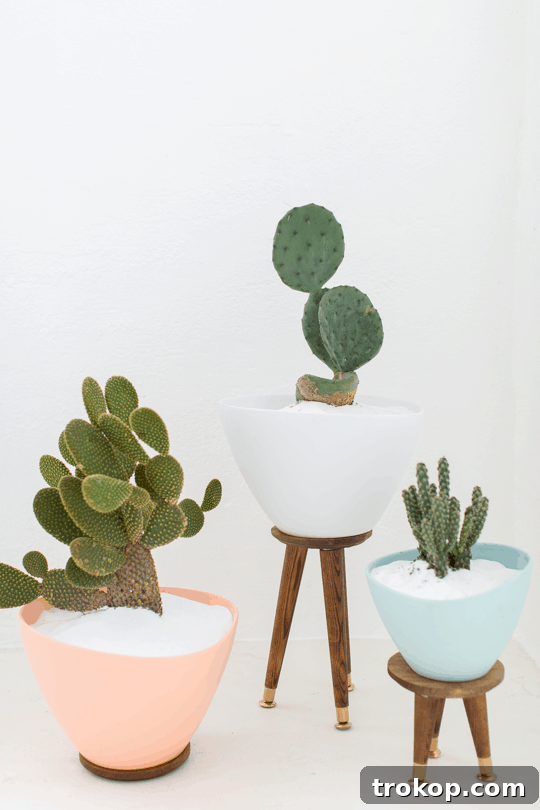
Absolutely! If you’re looking for an even quicker and simpler version of this project, or perhaps a different aesthetic, you can easily skip the legs altogether. By simply using the stained and prepared wooden plaque as a base for your planter, you create a beautiful, modern, and low-profile plant stand. This legless variation offers a grounded look that can be particularly striking on shelves, side tables, or even directly on the floor where you want the plant itself to be the primary focus. It’s a fantastic solution for those who love the mid-century vibe but prefer a more subtle or minimalist approach to their plant display. And, between us, sometimes I secretly prefer the clean, understated charm of the legless version!
How To Make Planters Look Brighter
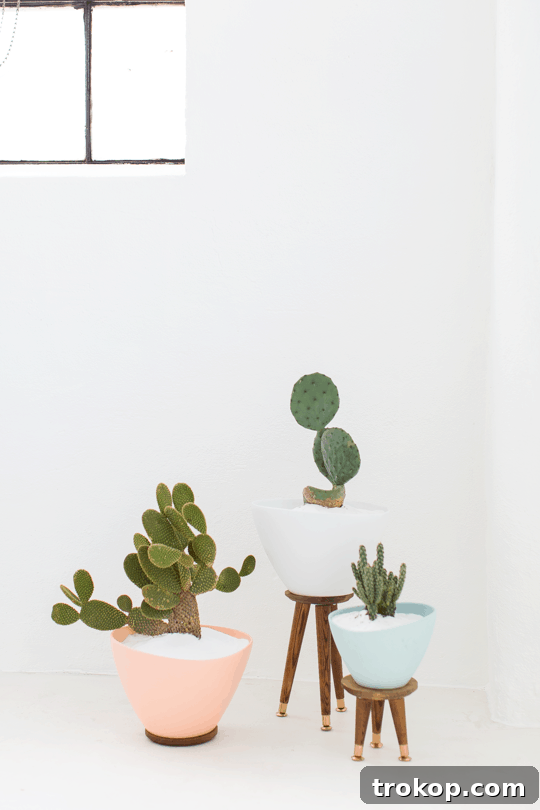
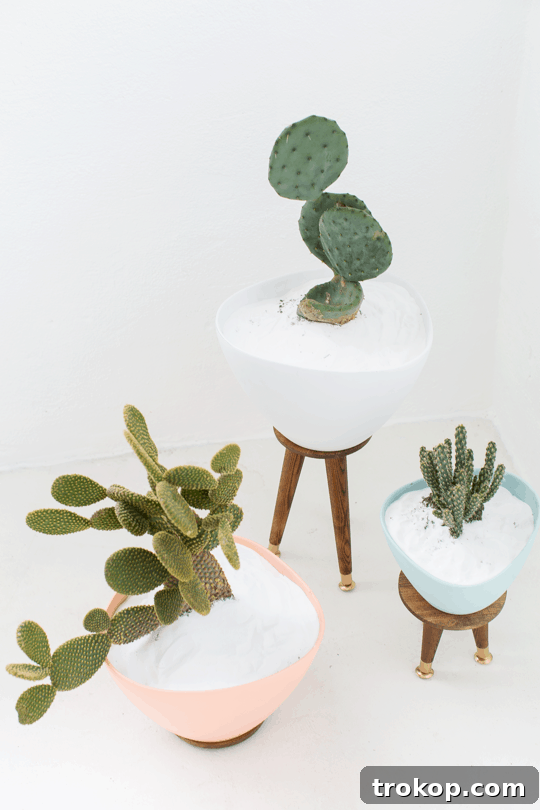
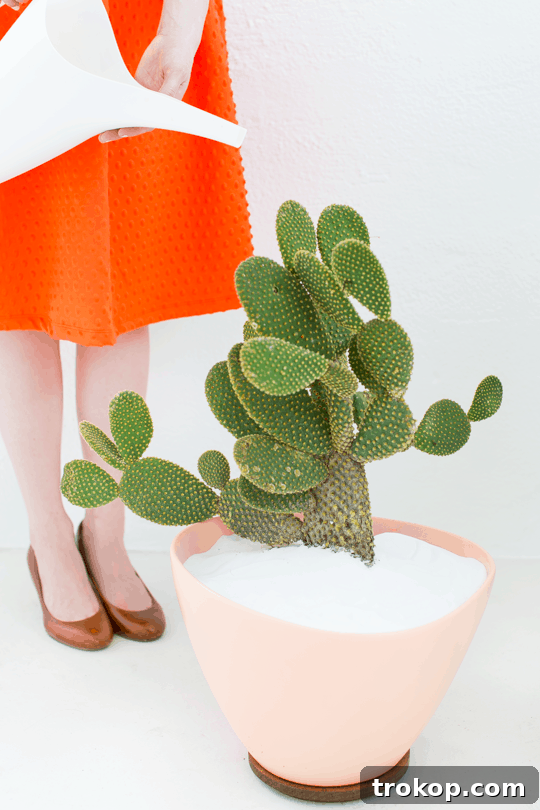
To give your DIY Mid-Century Stand Planters an extra touch of brightness and polish, consider using a decorative top dressing. We enhanced the visual appeal of our cactus soil by adding a layer of white sand. This simple addition creates a stark, clean contrast against the greenery and the pot itself, making the overall presentation pop. White sand, or other light-colored pebbles, can instantly brighten the look of your potted plants, giving them a more finished and curated appearance. You can easily find white sand at your local craft store, hardware store, or even in the aquarium section of most pet stores, offering an inexpensive way to elevate your plant display.
What Can You Plant In A Bowl Planter?
Low bowl planters, like the ones used in this DIY, offer incredible versatility for styling and can become the perfect accent or focal point in any space. Their wide, shallow nature makes them ideal for a variety of plant types. For a minimalist and contemporary look, fill them with an assortment of succulents and cacti. These drought-tolerant plants thrive in shallow containers and create stunning visual arrangements with their diverse shapes and textures. Beyond succulents, consider planting vibrant perennials that enjoy good drainage, or even creating a miniature herb garden for your kitchen. Low-growing ferns, mosses, or small flowering plants can also thrive, adding life and color to any dull corner of your home.
Can Plastic Containers Be Used As Planters?
Absolutely! Plastic containers are a fantastic and often overlooked choice for planters, especially for those who need to be mindful of their plant care routine or live in environments where lighter containers are preferable. These materials are lightweight, flexible, and remarkably durable, providing a long-lasting and resilient home for your plants in various conditions. They are less prone to breaking than ceramic pots and are excellent at retaining moisture, which can be beneficial for certain plants. When using plastic, remember to drill adequate drainage holes if none are present to prevent root rot. While some plastic containers may lack the aesthetic charm of ceramic or terracotta, many modern designs mimic these natural materials beautifully, making them a practical and budget-friendly option for any gardener.
Can I Use A Metal Bucket As A Planter?
Yes, metal buckets can make incredibly stylish and durable planters, offering a unique industrial or rustic look to your home or office. Their robust nature means they can withstand various elements, providing a strong container for your favorite flowers, herbs, or small shrubs. Repurposing metal buckets is a cost-effective and easy way to add character to your decor. However, a crucial step before planting is preparation: metal can heat up quickly in direct sunlight, potentially damaging roots, and is prone to rust. To mitigate these issues, ensure adequate drainage by drilling holes in the bottom and consider lining the interior with a barrier (like landscape fabric or a plastic pot insert) to protect roots from extreme temperatures and prevent rust from contaminating the soil. With proper preparation, a metal bucket can be transformed into a beautiful and long-lasting home for your flourishing plants.
If you love our DIY mid-century planters, explore more internal decor ideas from our archives below:
What are your thoughts? We truly believe these charming DIY Mid-Century Stand Planters are an absolute must-have for your home this spring, or any season! They offer a perfect blend of retro style and modern functionality, all achievable on a budget. Get creative, personalize them with your favorite colors, and fill them with lush greenery to bring life and style into every corner of your space. Happy crafting!
If you’re looking for more creative home decor projects, check out some of our other popular DIYs:
- DIY Rosemary Grapefruit Candle
- 20 Creative DIY Candle Holder Ideas
- 20 Great DIY Plant Stand Ideas That Show Off Your Plants
- How To Make Easy Rattan Drawers
- Cane Decor Trend: The Rattan Furniture We’re Loving
- How To Paint An Accent Wall
DIY Mid-Century Stand Planters Project Overview
DIY Mid-Century Stand Planters
A colorful and budget-friendly DIY mid-century side table alternative for plants. This project is easy to make, inexpensive, and the perfect addition to your home decor, offering a chic way to display your favorite greenery.
1 hr
1 day
1 day 1 hr
DIY
Home Decor
Equipment
- Drill & drill bit
- Bulldog Grip glue or large screw (optional)
Materials
- Waddell 3.5-inch & 8-inch tapered legs
- 3 pieces angle plates per stand
- Painter’s tape
- Planters (The Ikea ones pictured are currently sold out, but you can use these similar ones)
- 6 pieces wooden plaque per stand
- 1 wood stain (in color of your choice, we used American Walnut finish)
- Foam brush
- Gold spray paint for the feet
- Spray paint (optional for the planter color)
- White sand (optional)
Instructions
- To prep the legs and wooden plaque base, use a foam brush to stain the unfinished wood.
- Then, let dry completely.
- Next, tape off the stained wood section, leaving only the feet exposed so that you can spray paint them gold and let dry overnight.
- To prep the planters, I spray painted them in brighter hues to go along with the bright studio. Black and white would also look awesome with this tutorial.
- Lay three angled plates in a triangular shape on the bottom of the wooden plaque.
- Screw each plate into place. Make sure that the angle is facing outward from one another.
- Then, twist the finished base legs into each plate.
- If you’re adhering the pot to the base, you can use Bulldog Grip glue to adhere wood and ceramic together.
- Or you can drill a large bolt or screw through the drip hole of the planter into the center of the wooden plaque.
Keywords: diy mid century stand planters, modern plant stand, budget plant stand