
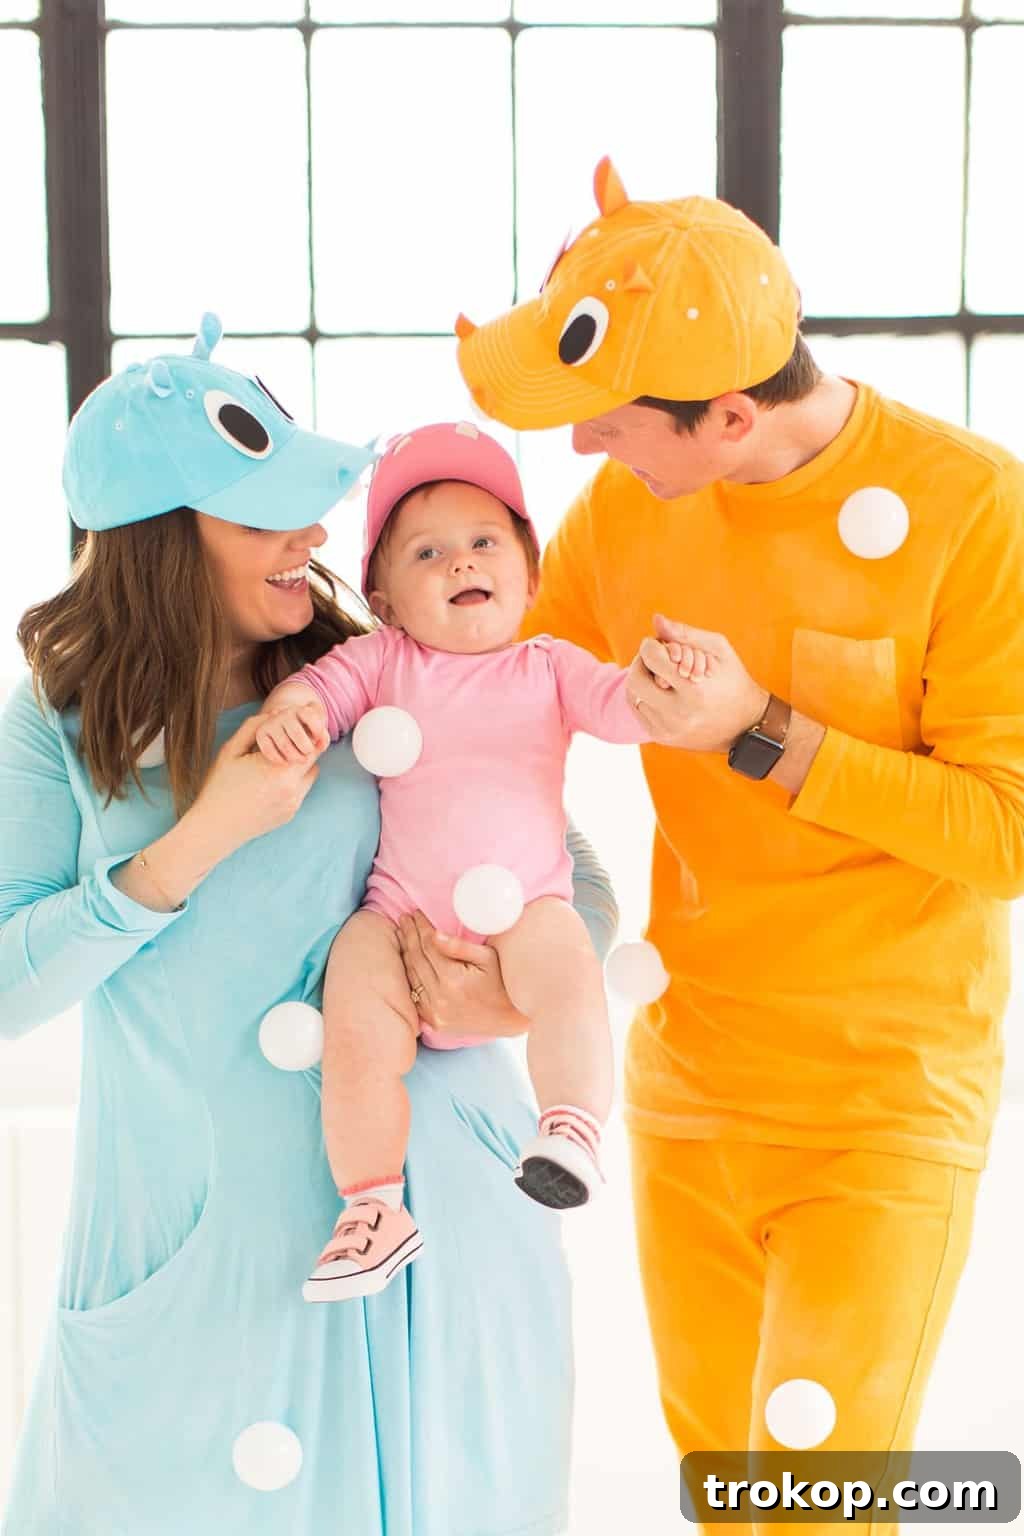
Transform your family into the most adorable board game characters this Halloween with our DIY Hungry Hungry Hippos costumes! Inspired by a beloved classic and our baby’s boundless appetite, this guide offers a unique, vibrant, and surprisingly simple way to create unforgettable memories and costumes. Get ready to embark on a fun crafting adventure that will have everyone exclaiming, “They’re so hungry!”
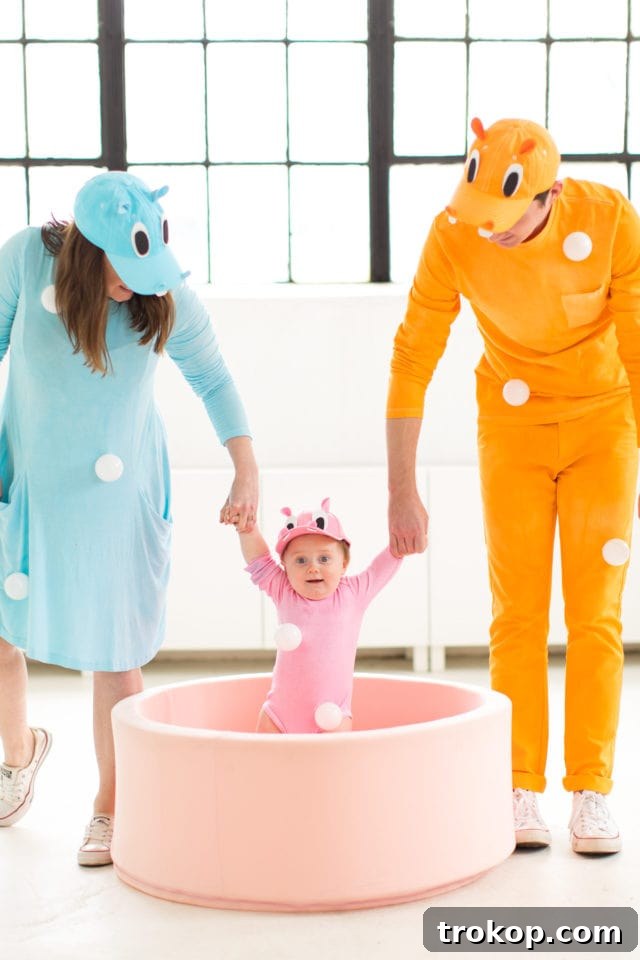
Unleashing Our Inner Hippos: The Inspiration Behind Our Family Halloween Costume
The moment we began brainstorming our first family Halloween costume, the possibilities felt endless. We wanted something creative, memorable, and reflective of our unique family dynamic. With our little Gwen, whose love for snacks knows no bounds, the idea of a “Hungry Hungry Hippos” theme quickly surfaced and immediately clicked. It wasn’t just about crafting costumes; it was about bringing a beloved childhood game to life, centered around our sweet, ever-hungry baby!
Choosing this theme offered several irresistible advantages. Firstly, the vibrant colors of the game allow for a truly eye-catching and cheerful ensemble, moving beyond typical spooky Halloween attire. The distinct hues of pink, yellow, blue, and green make for an instantly recognizable and visually appealing group. Secondly, it’s a remarkably unique concept; you won’t see many other families sporting this clever idea, ensuring your family stands out. Lastly, despite its impressive appearance, the core elements of the costume are surprisingly straightforward to create, making it an ideal DIY project for families of all crafting levels.
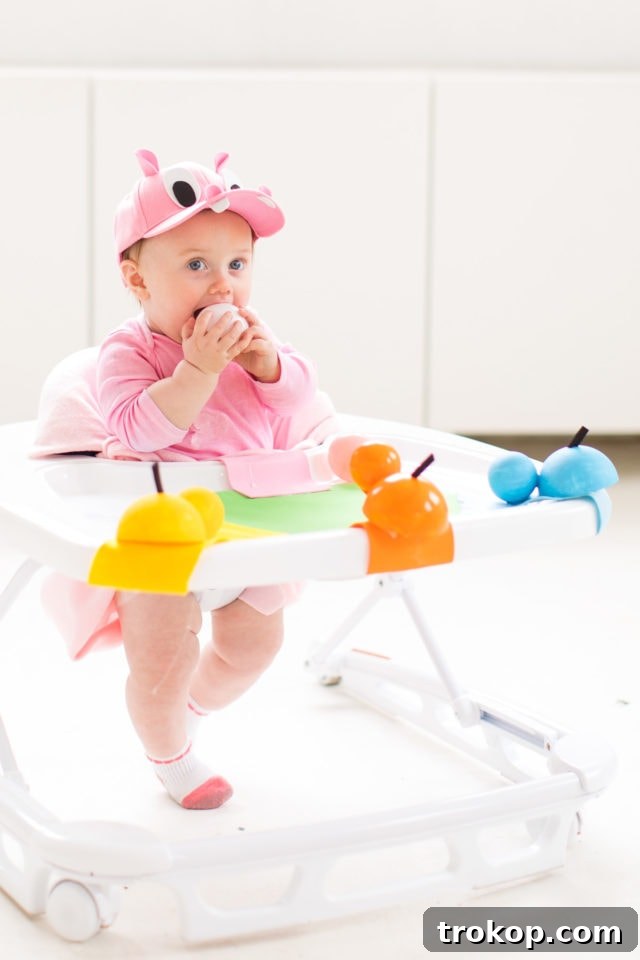
However, we couldn’t resist adding a touch of “extra” to our creation. To truly capture the essence of the Hungry Hungry Hippos board game, we decided to transform Gwen’s baby walker into a miniature game board. This ambitious addition would make her look like an actual player, complete with the game’s iconic “marbles” (white ball pit balls) scattered around. This particular detail, while challenging, was key to achieving the full immersive effect of our DIY family costume. The logistics of transporting our “circus-load” of costume pieces, diaper bags, the modified walker, and car seat to the party was a minor adventure in itself, but undoubtedly worth the effort for the reactions we received! The sight of our baby “playing” the game in her custom walker became the absolute highlight of our Halloween.
Crafting Your Own Hungry Hungry Hippos Family Costume
Whether you’re looking to go all out like we did with the baby walker transformation, or prefer a simpler approach, this DIY Hungry Hungry Hippos costume is incredibly versatile. You could easily create just the adorable hippo hats and a coordinated outfit for a charming and recognizable look in a pinch. It’s far from your average, run-of-the-mill costume; it’s a conversation starter, a nostalgic nod, and an absolute delight for anyone who grew up playing the classic board game. This costume radiates fun and invites interaction, making it perfect for family gatherings or trick-or-treating.
While inspired by the game, the basic hippo costume elements can also stand alone as a general hippo outfit, perfect if you prefer to keep the explanation minimal. Imagine a sweet baby hippo without the full game board setup – still incredibly cute and easy to assemble! This idea also lends itself wonderfully to couples costumes or a fun Halloween group costume idea, allowing friends or extended family to join in the hungry fun and create a whole herd of hippos!

Table of Contents
- Materials and Tools Needed for DIY Hungry Hungry Hippos Costumes
- Assembling Your DIY Hippo Outfits
- How to Craft Adorable Hippo Hats
- Crafting the Hippo Ears
- Designing the Hippo Eyes and Nostrils
- Transforming a Baby Walker into a Hungry Hungry Hippo Game Board
- Final Thoughts & More Halloween Costume Ideas
Materials and Tools Needed for Your DIY Hungry Hungry Hippos Family Costumes
Before diving into the creative process, let’s talk about materials. One key decision we made was to start with plain white clothing items rather than trying to source perfectly matching colored pieces. We then used fabric dye to achieve the exact vibrant hues of the Hungry Hungry Hippos game – yellow, orange, blue, and green. While this might seem like an extra step, we found it to be not only more cost-effective but also guaranteed a consistent and harmonious color palette across all our costumes. This attention to detail ensured our family looked like a cohesive, ready-to-play set of hippos straight from the game board, eliminating any “janky” color mismatches.
Of course, the choice to dye your clothes is entirely up to you. If you can find pre-colored garments that match your vision, that’s a perfectly valid and time-saving alternative! Just ensure the colors are bright and distinct to truly capture the game’s spirit. Remember, the quality of your base garments can make a difference in how well the dye adheres and how comfortable the final costume is for everyone.
Essential Materials and Tools:
- Adult hats (2): Choose a plain baseball cap or similar style for easy customization. Consider a sturdy canvas or cotton material for better dye absorption if you’re coloring them.
- Baby/Toddler hat (1): A soft, plain hat suitable for your little one. Prioritize comfort and a snug fit.
- Felt craft sheets or foam sheets: In colors matching your chosen hippo dyes (e.g., pink, yellow, blue, green). You’ll also need white and black for eyes and teeth. Foam sheets offer more rigidity and crisp edges, while felt is softer and more pliable.
- Hot glue gun and glue sticks: Your best friend for quick assembly. Ensure you have plenty of glue sticks on hand!
- Scissors: Sharp scissors are essential for clean cuts, especially with felt. An X-Acto knife is useful if working with foam sheets for precise shapes and intricate details.
- Fabric dye: In pink, golden yellow, aquamarine (blue), and a vibrant green. These are crucial if you’re dyeing your own clothing to match the classic game colors. Always read and follow the specific instructions on your chosen dye for best results.
- Women’s dress or tunic: Plain white or a base color to be dyed. Opt for comfortable, loose-fitting styles.
- Men’s shirt: Plain white or a base color. A long-sleeved tee or sweatshirt can work well.
- Men’s pants: Plain white or a base color. Joggers or comfortable trousers are ideal.
- Baby onesie or simple outfit: Plain white or a base color for your littlest hippo. Soft, natural fibers like cotton are best for baby’s sensitive skin.
- White ball pit balls: Or small white foam balls, which will represent the “marbles” the hippos eat. You’ll need a good quantity to scatter on the outfits and the walker.
- Styrofoam balls (for walker modification): Various sizes for the mini hippo bodies and heads on the walker. These can be painted.
- Craft tape (for walker): To temporarily affix elements without damaging the walker, ensuring it can be returned to its original state.
Assembling Your DIY Hippo Outfits
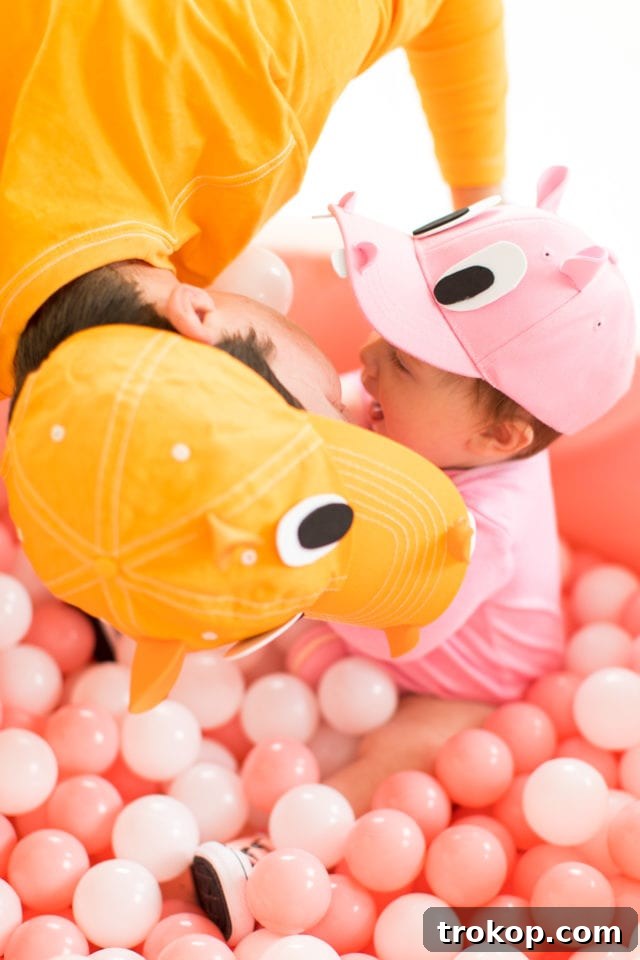
Creating the main body of your hippo costumes is perhaps the simplest part, especially if you opt for the fabric dyeing method. Each family member gets to represent one of the iconic Hungry Hungry Hippos characters – think pink, yellow, blue, and green! This choice makes for a visually appealing and instantly recognizable group costume that stands out from the crowd, evoking smiles and nostalgia wherever you go.
Step-by-Step for the Family Outfits:
- **Dyeing the Garments (if applicable):** If you chose the dyeing route, carefully follow the fabric dye manufacturer’s instructions for each garment. This typically involves preparing a dye bath, soaking the fabric, and rinsing until the water runs clear. Ensure you work in a well-ventilated area and protect your surfaces from staining. Once dyed, let the clothes dry completely according to the instructions. This step is crucial for achieving that consistent, vibrant look across all costumes. Allow ample drying time to prevent color transfer.
- **Adding the “Marbles”:** Once your dyed (or pre-colored) outfits are completely dry, it’s time to add the signature “marbles” that the hungry hippos consume. Apply small dabs of hot glue randomly across each outfit. Focus on the front and sides of the garments, distributing them unevenly to mimic the scattered look of the game. Quickly press the white ball pit balls onto the glue, holding each one in place for a few seconds to ensure a strong bond. Be mindful of areas that might rub or get sat on, securing the balls firmly to prevent them from falling off during wear. Consider the comfort of the wearer, especially for the baby’s costume, ensuring no sharp edges or uncomfortable lumps.
How to Craft Adorable Hippo Hats
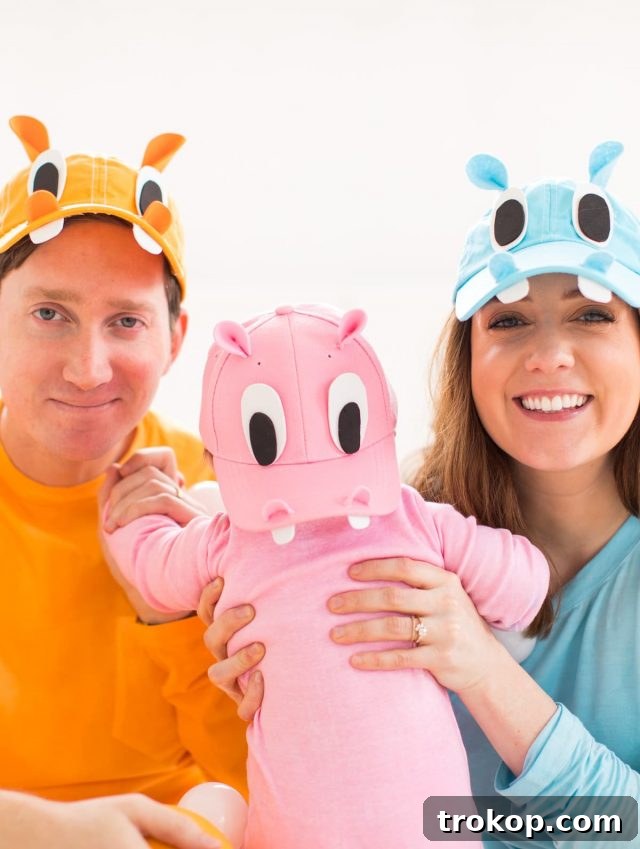
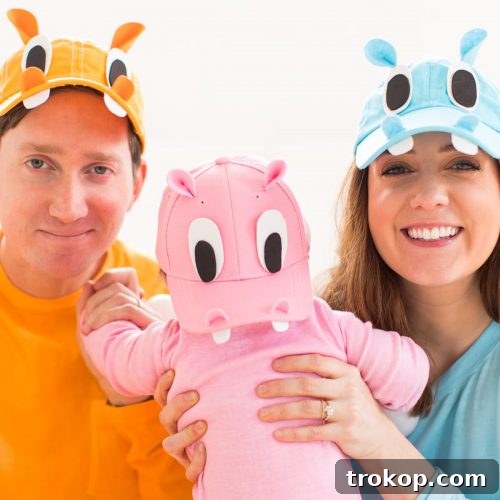
The hippo hats are what truly bring these characters to life! They add an immediate visual cue that ties the whole family costume together and makes your hippos instantly recognizable. We used a combination of felt and foam sheets for the facial features – felt for flexibility in some areas and foam for a bit more rigidity and clean edges, especially for eyes and teeth. The key is to choose materials that match the vibrant color of each family member’s chosen hippo, creating a cohesive and playful look.
Crafting the Hippo Ears:
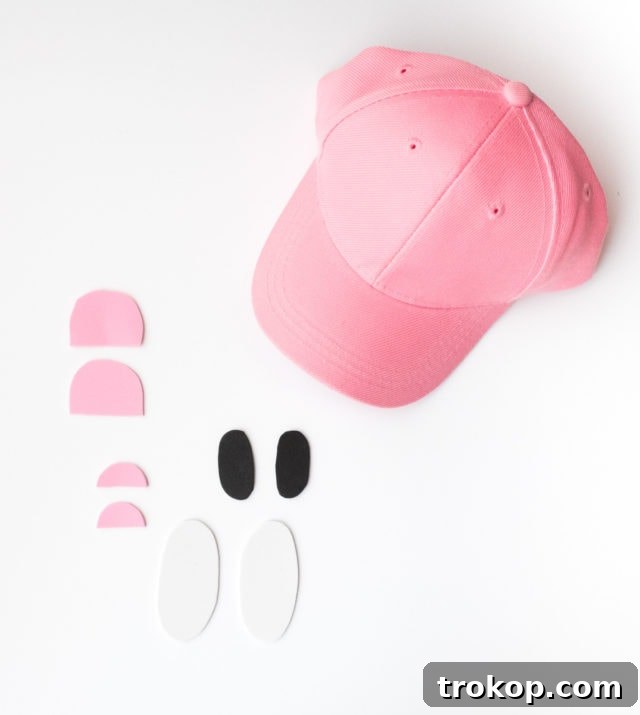
- **Cut the Shapes:** From your felt or foam sheets (matching your hippo’s color), cut out two identical ear shapes for each hat. A simple rounded-triangle or teardrop shape works best. To add more depth and realism, you might also cut smaller, inner ear pieces in a lighter contrasting color (like light pink for a blue hippo, or light yellow for an orange hippo).
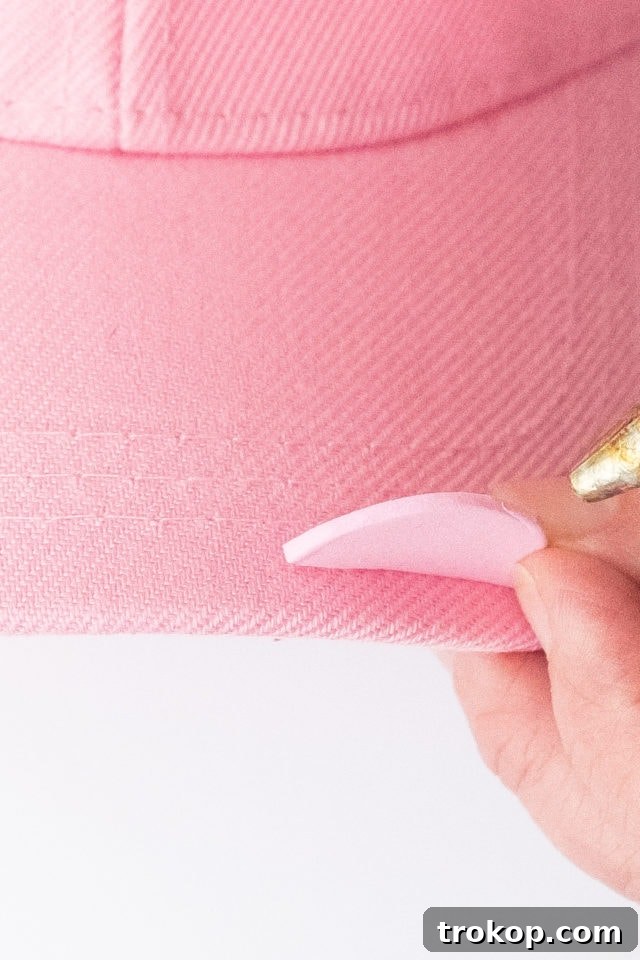
- **Add Dimension:** To give the ears that classic hippo curve and make them stand out, add a small dot of hot glue to the center of the bottom edge of each ear piece. Carefully pinch the glued edges together firmly until the glue dries. This will create a subtle fold or “cup” in the ear, making it look more three-dimensional and realistic.
- **Attach to Hat:** Once the ears have their desired dimension, carefully hot glue one ear to each side of the hat. Position them slightly forward on the crown of the hat for the most authentic hippo look, ensuring they are symmetrical. For extra durability, especially if the hats will be worn by active kids or if you anticipate a lot of movement, you can also reinforce the attachment by hand-sewing the ears on with a few strong stitches after gluing.
Designing the Hippo Eyes and Nostrils:
- **Cut Eye and Nostril Pieces:** Using white felt or foam sheets, cut out circular or oval bases for the eyes. Then, from black felt or foam, cut smaller circles for the pupils. For the nostrils, cut two small, elongated ovals from the same color material as the main hat itself, or a slightly darker shade for contrast. If you want to add a playful touch, cut jagged, triangular shapes from white felt or foam to represent friendly hippo teeth.
- **Assemble and Attach:** First, hot glue the black pupils onto the center of the white eye bases. Then, carefully hot glue the assembled eyes and the nostrils onto the front of the hat. Before making permanent attachments, experiment with different placements to find the most expressive and adorable hippo face! Positioning the nostrils slightly forward and giving them a slight curve can add to their realistic dimension. If adding teeth, glue them along the brim of the hat, below the nostrils, ensuring they are visible and secure.
By giving the ears and nostrils a bit of dimension and careful placement, your hippo hats will look incredibly charming and realistic, ensuring your family costume is a standout success and capturing the playful spirit of the game!
Transforming a Baby Walker into a Hungry Hungry Hippo Game Board
This is where the “extra” element truly shines! Turning Gwen’s baby walker into an interactive Hungry Hungry Hippos game board was the most challenging but ultimately most rewarding part of our DIY family costume. It’s a fantastic way to fully immerse your littlest hippo into the theme, making them the star player of the game and creating an unforgettable visual.
Step-by-Step for the Baby Walker Game Board:
- **Prepare the Base:** To protect your baby walker from permanent damage and ensure easy removal of the costume elements later, we highly recommend creating a temporary base. Cut out large shapes from felt or foam craft sheets that generally fit the surface of your walker’s tray. Secure these base pieces firmly with strong craft tape, avoiding direct gluing to the walker itself. These taped-down pieces will serve as the “ponds” where the mini hippos sit and the balls gather. We opted to place our hippos around the outer edge of the walker tabletop, leaving the center clear for Gwen to enjoy her space.
- **Form the Hippo Bodies:** Obtain several styrofoam balls of appropriate size. Cut these styrofoam balls in half to create the rounded, stable bodies of the mini hippos. You’ll need one half for each “player” hippo you plan to feature on the walker (typically three or four, matching your family’s hippo colors). These halves will provide the three-dimensional base for your mini hippos.
- **Assemble and Paint the Mini Hippos:** Carefully glue the styrofoam halves onto the prepared felt/foam base on the walker tray. Next, glue whole, smaller styrofoam balls or spare white ball pit balls on top of the halves to form the heads of the mini hippos. Position them to look like they are reaching out, mouths open, ready to “eat.” Once assembled, paint these mini hippos in the same vibrant colors as your family’s main costumes (yellow, orange, blue, green) to create a cohesive look. Allow paint to dry completely.
- **Add Game Details:** Cut small black rectangles or squares from felt or foam sheets to create the iconic “handles” that players use to make their hippos chomp in the original board game. Hot glue these behind each mini hippo’s head, adding another layer of authenticity to your game board. You can also use markers to add simple eyes or mouth details to the mini hippos.
- **Safety First: Securing the “Marbles”:** This step is paramount for your child’s safety. When placing the white “marbles” (ball pit balls) on the walker, ensure they are securely fastened in a way that absolutely prevents your baby from easily grabbing and ingesting them. Hot glue is an effective method for this. The illusion of loose balls is achieved by carefully arranging and gluing them just out of immediate reach of the baby, or by only placing a few where they can be observed but not accessed. Never leave loose small objects where a baby could potentially choke on them. Prioritize your child’s safety above all else, regularly checking that all glued elements remain secure.
The walker transformation requires a bit more patience and precision, but the visual impact is incredible. It truly completes the family’s Hungry Hungry Hippos ensemble, creating a dynamic and playful scene that will undoubtedly garner smiles, compliments, and endless photo opportunities.
Final Thoughts & More Halloween Costume Ideas
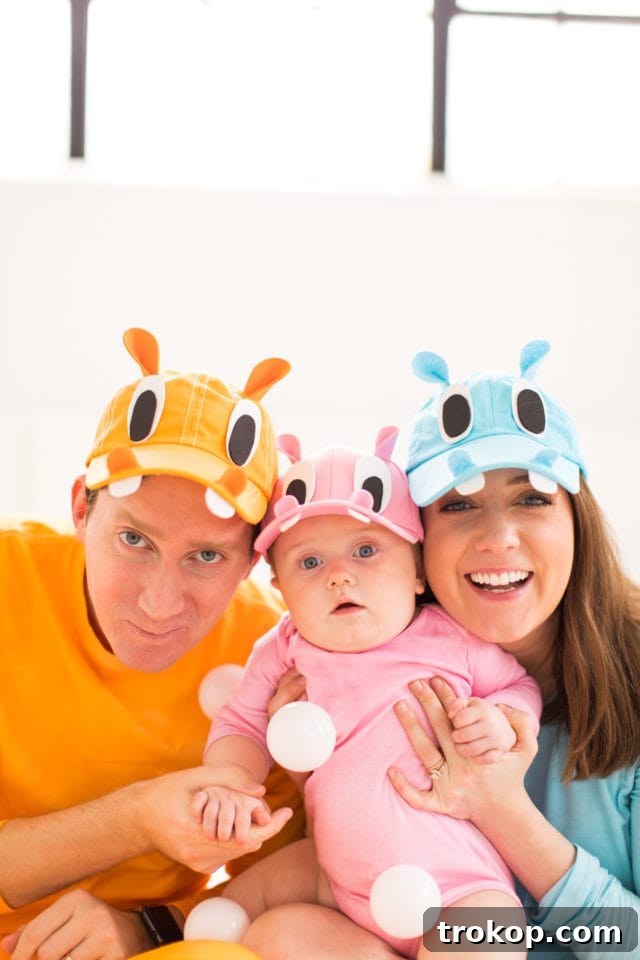
So, what do you think of our Hungry Hungry Hippos family costume? We truly believe Gwen made the cutest hungry hippo anyone has ever seen! The joy and laughter we shared, from the initial crafting process to proudly showing off our creations at the Halloween party, made all the effort worthwhile. Even our UberXL driver couldn’t help but crack a smile and share a laugh seeing us juggle our “abstract hippo forms” – a true testament to the costume’s delightful impact and ability to bring joy to others!
Halloween is a magical time for creativity, imagination, and unforgettable family fun. We hope our Hungry Hungry Hippos adventure inspires you to think big and create your own unique and unforgettable costumes. Don’t be afraid to think outside the box, personalize your chosen theme, and involve the whole family in the making process. The most cherished costumes are often those that reflect your family’s unique personality, shared interests, and the collaborative effort put into them.
What are your plans for Halloween this year? We’d love to hear your creative ideas! Share your thoughts and costume inspirations in the comments below, and don’t forget to explore more of our Halloween costume ideas for even more inspiration to make your next Halloween truly spectacular:
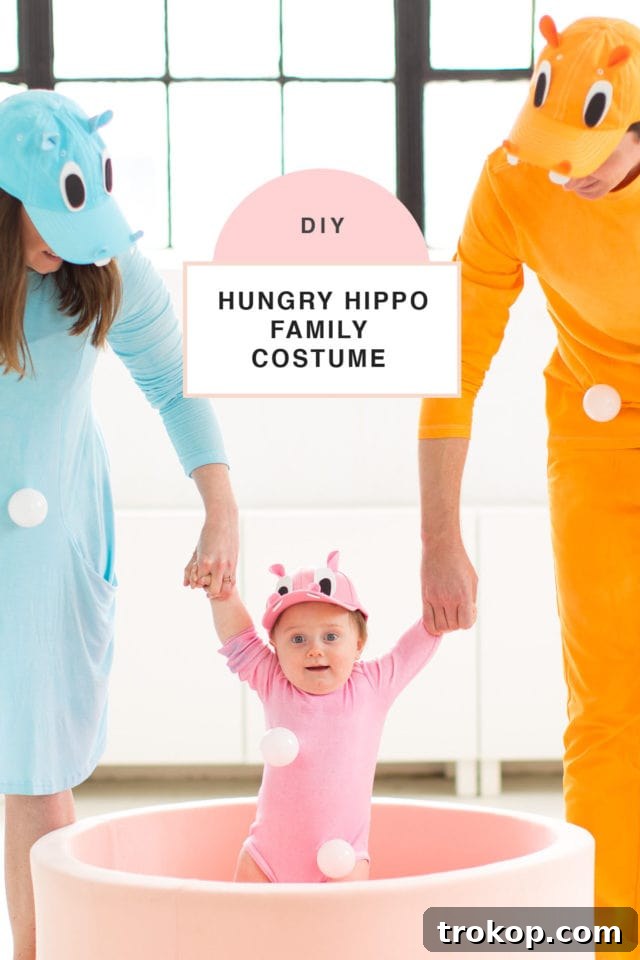
DIY Hungry Hungry Hippos Costume
You can make this super cute family costume idea from a favorite board game, the Hungry Hippos! This unique family Halloween costume is perfect for creating memorable moments and standing out.
Total Time: 1 hour 30 mins
Course: DIY
Category: Halloween
Equipment
- Scissors
- Hot glue gun and glue sticks
- X-Acto knife (optional, for foam sheets)
Materials
- 2 adult hats (plain base)
- 1 baby, toddler, or kids hat (plain base)
- Fabric dye in your chosen colors (e.g., pink, golden yellow, aquamarine, green)
- Foam or felt crafting sheets (matching hippo colors, plus white and black for details)
- White ball pit balls or foam balls
- Plain white clothing items for each family member (e.g., dress, shirt, pants, baby onesie)
- Styrofoam balls (for walker hippos)
- Craft tape (for securing elements to the walker)
Instructions
For the Family Outfits:
- Dye each garment to the vibrant colors of your choice according to the fabric dye manufacturer’s instructions. Ensure proper ventilation and let dry completely.
- Once garments are fully dry, apply small dabs of hot glue randomly across each outfit. Securely press the white ball pit balls onto the glue, holding for a few seconds until fixed.
For the Hippo Hats:
- From felt or foam sheets, cut out two ear shapes, two small ovals for nostrils, and white and black circles for eyes (white base, black pupils) for each hat. Optional: cut jagged white triangles for teeth.
- To create dimension for the ears: Add a small dot of hot glue to the center of the bottom edge of each ear piece. Pinch the corners closed and together until the glue is dry.
- Hot glue one dimensional ear to each side of the hat, positioning them slightly forward. Assemble the eyes (pupils on white base) and hot glue them, along with the nostrils and optional teeth, onto the front of the hats.
For the Baby Walker Game Board:
- To protect the walker, tape cutouts of felt or foam craft sheets onto the walker tray. This serves as a removable base for your game board elements.
- Cut styrofoam balls in half to form the bodies of the mini hippos. Glue these halves onto the prepared base on the walker.
- Glue whole styrofoam balls or ball pit balls onto the halves to form the heads of the mini hippos. Paint them in your chosen hippo colors and let dry.
- Cut black rectangles from felt or foam to create the “handles” found on the Hungry Hungry Hippo board game. Glue these behind each mini hippo’s head.
- Securely hot glue any additional white ball pit balls to the walker’s surface, ensuring they are well out of your baby’s immediate reach to prevent choking hazards.
Cost: ~$125
Keywords: diy hungry hungry hippos costume, family halloween costume, unique baby costume, board game costume, easy group costume

More Halloween Costume Ideas to Inspire You
Explore a vast collection of creative and easy-to-make DIY Halloween costumes perfect for your little ones, ensuring they have a blast trick-or-treating.
Continue Reading
Find inspiration for charming and effortless Halloween costumes designed for duos, from funny to romantic, for a perfectly matched look.
Continue Reading
Discover straightforward and creative Halloween costume options tailored for guys, ensuring style without complexity, perfect for any party.
Continue Reading
Browse through 40 top Halloween costume ideas, from classic to contemporary, for a truly memorable celebration for everyone in the family.
Continue Reading
Find adorable and imaginative costume pairings for couples and their beloved canine companions, perfect for a pet-friendly Halloween.
Continue Reading
Unleash your creativity with fun DIY wig and lash combinations to elevate any Halloween costume, adding flair and personality to your look.
Continue Reading