
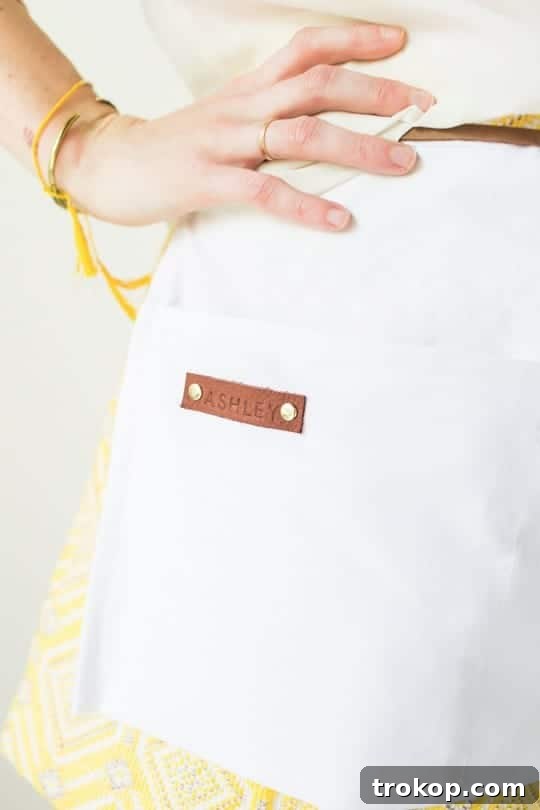
Craft the Perfect Gift: DIY No-Sew Aprons for Every Enthusiast — Discover how to create stunning, personalized no-sew aprons that make ideal handmade thank you gifts or thoughtful Christmas presents for the florists, gardeners, artists, or DIY lovers in your life. This easy-to-follow guide will walk you through every step, ensuring a beautiful and functional result without needing a single stitch.
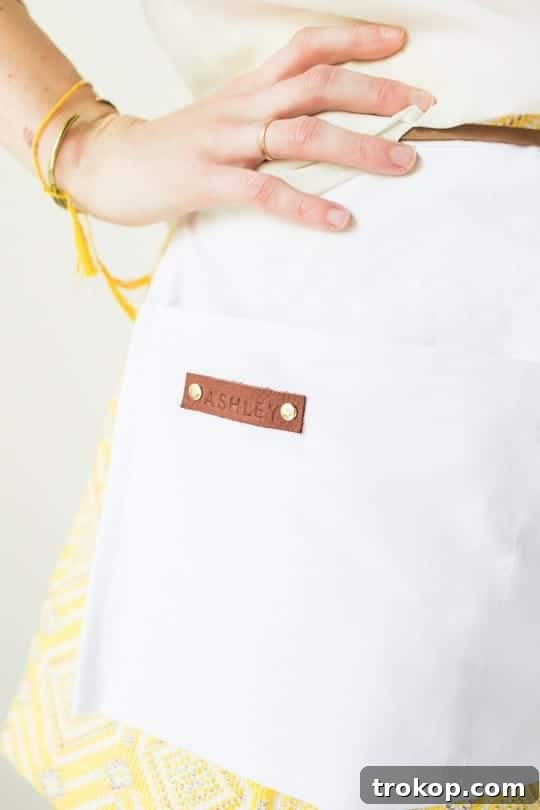
There’s immense satisfaction in crafting something with your own hands, especially when it’s a gift designed to be both beautiful and practical. These DIY No-Sew Aprons emerged from a desire to create a memorable and functional thank-you gift for our floral workshop attendees. After hours of creative collaboration and sharing, we wanted to send everyone home with a token that celebrated their passion for all things floral and handmade.
Not only did these aprons serve as a thoughtful memento, but we also cleverly incorporated them into our event’s decor. Each carefully folded no-sew apron doubled as a charming place card, guiding guests to their seats. Tucked inside, attendees found essential workshop supplies like shears, making them instantly useful and adding a delightful surprise upon arrival. The personalized touch of these aprons instantly elevated the workshop experience, leaving a lasting impression.
The process, while requiring a bit of dedication and extra hands (a huge shout-out to Nancy and Aelish for helping us complete all twenty aprons on time!), was incredibly rewarding. Seeing the finished collection of these charming aprons was a testament to the power of simple crafting techniques combined with a clear vision. Their stylish appeal and undeniable utility quickly made them a favorite among our team and our guests.
I genuinely believe these DIY No-Sew Aprons are the quintessential handmade gift. They are perfect for florists who need a place for their snips, gardeners who appreciate easy access to tools, artists who want to keep their clothes clean, or any DIY enthusiast (like myself!) who loves a functional accessory for their projects. Let’s be honest, my green thumb isn’t quite as developed as some, but I certainly appreciate a handy apron to keep my creative tools organized.
Who wouldn’t adore a gift that not only looks fantastic but also offers a practical solution for organizing tools and protecting clothing? These aprons are more than just a piece of fabric; they are a canvas for creativity and a testament to thoughtful giving. Their simplicity in design belies their versatility and charm, making them a standout present for any occasion.
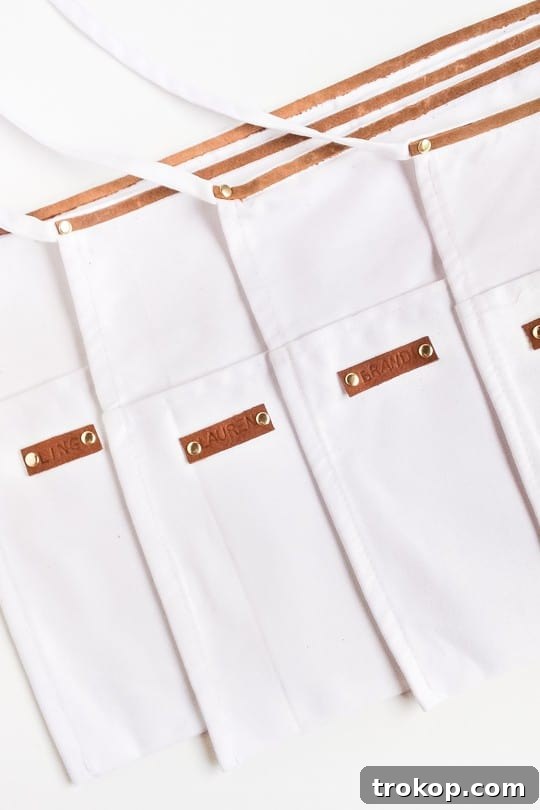
Materials And Tools Needed To Make A DIY No-Sew Apron
Embarking on a no-sew project means carefully selecting the right materials and tools to ensure durability and a polished finish. Here’s everything you’ll need to create your very own stylish and functional apron:
- Short Waist Apron: Opt for a sturdy canvas or denim apron that provides a good base. The neutral color and robust fabric will perfectly complement the leather accents, giving it a professional and minimalist look. Consider the apron’s pockets – ample storage is key for a truly functional gift!
- Leather Rotary Punch: This tool is essential for creating clean, precise holes in both the apron fabric and the leather lace. While punching through multiple layers, especially leather, can require some strength, don’t be discouraged! With a firm grip and a bit of leverage, you’ll achieve perfect holes. Jared, for instance, had no trouble at all.
- Contact Adhesive or Spray Adhesive: For a lasting bond, a strong adhesive is crucial. Contact cement provides a superior, permanent hold, while spray adhesive offers an easy, even application. Ensure you choose one suitable for fabric and leather. Applying it to both surfaces ensures the strongest adhesion.
- Brass X-Small Rivets with Setter and Anvil: These small but mighty fasteners are what hold the leather accents securely in place without any sewing. The brass adds a touch of rustic elegance. For convenience, you can often purchase them as a complete kit, which usually includes the necessary tools for setting them.
- Leather Letter Stamp Kit: This is where personalization comes in! A quality stamping kit allows you to add names, initials, or small messages to your leather accents, making each apron truly unique. Experiment with different fonts and sizes to find your favorite look.
- 1/8 Inch Leather Lace: This material will form the decorative and functional straps on your apron. Choose a color that complements your apron fabric and brass rivets. Real leather offers a premium feel and excellent durability, ensuring your apron stands the test of time.
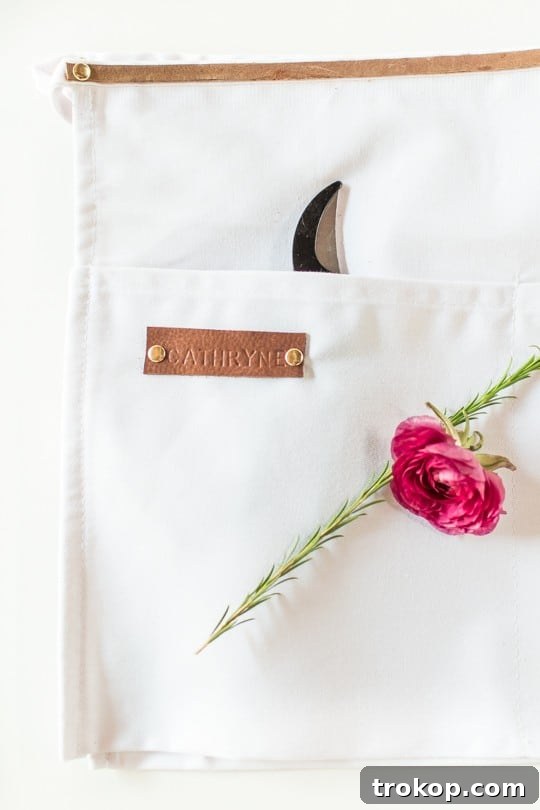
How To Make A DIY No-Sew Apron
Creating these no-sew aprons is a straightforward process, even for beginners. The key is precise measurement and careful application. Follow these steps to assemble your beautiful and durable apron:
Step 1: Preparing the Apron Base
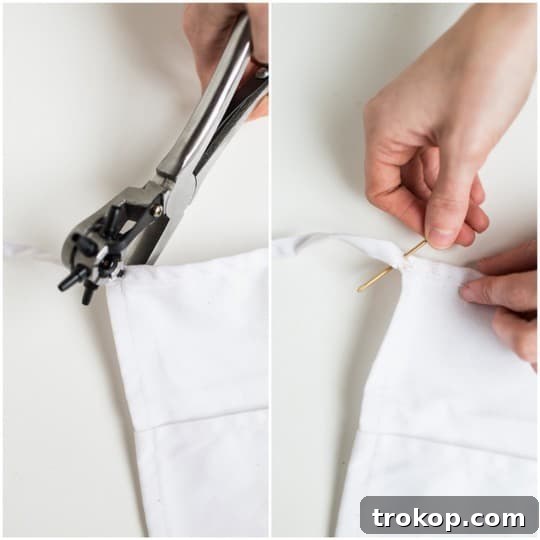
Begin by laying your short waist apron flat on a clean, stable work surface. Using your leather rotary punch, make a small, neat hole in each of the top corners of the apron. Ensure these holes are exactly the same size as your chosen rivets for a snug fit. Accuracy here is important for the overall aesthetic and structural integrity. If you find the fabric thick or resistant, you can first pierce a pilot hole with a thick needle or a sharp awl to guide the punch and make the process smoother.
Step 2: Cutting and Punching the Leather Lace
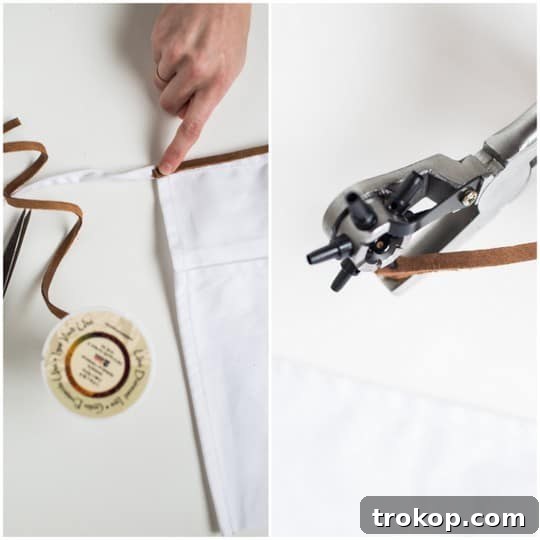
Next, unroll your leather lace and cut a strip that will comfortably span the entire top length of the apron. To ensure you have enough material for adjustments and a clean finish, we highly recommend leaving approximately half an inch of extra length on each side. This provides a margin of error and allows for a more secure attachment. Once cut, take one end of this pre-measured leather strip and use your rotary punch to create a hole in it, mirroring the size of the holes you made in the apron.
Step 3: Attaching the First Rivet
Align the punched hole in the leather lace with one of the holes in the apron’s top corner. Carefully insert one of your brass rivets through both the apron fabric and the leather hole. If you’re new to working with rivets, don’t worry! Most rivet kits come with detailed instructions. For a visual guide, you can also find many helpful how-to tutorials online that demonstrate the setting process. Once the rivet is in place, use the setter and anvil to secure it firmly, ensuring a strong and lasting bond.
Step 4: Marking and Punching the Second Hole
With one end of the leather lace securely riveted, gently lay the lace flat along the entire top edge of the apron, stretching it smoothly to the other side. This is where you previously punched the second hole in the apron fabric. Carefully mark the exact spot on the leather lace where the second apron hole aligns. Once you’ve made your mark, remove the leather lace and use your rotary punch again to create a perfectly matched hole at that marked spot. This ensures the leather strap lies flush and evenly across the apron.
Step 5: Applying Adhesive for a Secure Bond
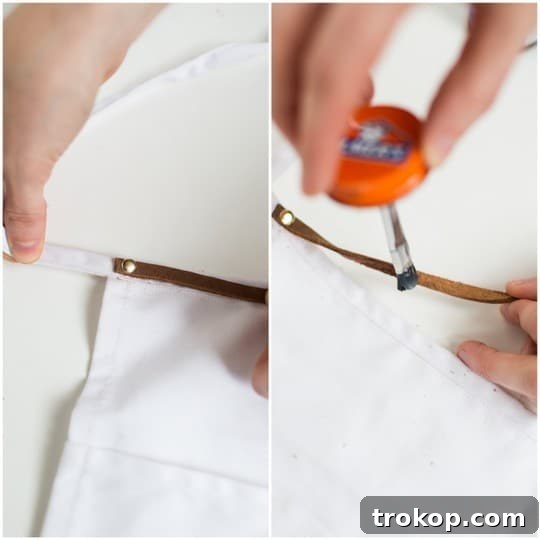
Before you insert the final rivet on the second side of the apron, it’s time to apply your chosen adhesive. For the strongest and most reliable bond, liberally apply the contact or spray adhesive to both the underside of the leather lace and the corresponding top rim of the apron where the leather will be adhered. A common mistake is to apply glue to only one surface, which often results in a weaker hold. Allow the glue to become tacky according to the product’s instructions – this usually takes a few minutes. Once tacky, carefully press the leather lace onto the apron’s edge, smoothing it down firmly along its entire length. This dual application technique ensures the leather stays perfectly in place and resists peeling over time.
Step 6: Final Rivet and Setting
With the adhesive holding the leather lace in position, you can now insert the final rivet. Push a rivet through the remaining aligned holes in both the apron and the leather lace. Use your rivet setter and anvil to securely fasten it, creating a durable and neat finish. Once both rivets are set and the leather is firmly glued, allow the entire apron to set undisturbed. Give the adhesive ample time to dry completely and cure – typically several hours, or even overnight, depending on the type of glue used. This final curing process is crucial for the apron’s longevity and structural integrity.
DIY No-Sew Apron Customization | How To Create Personalized Name Tags
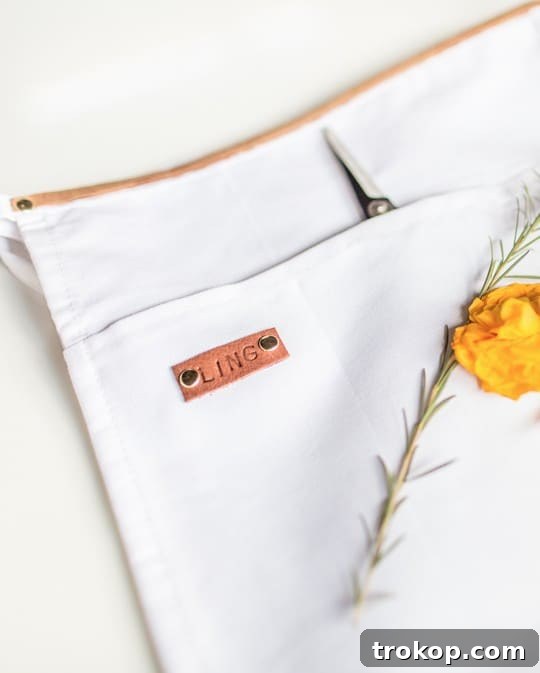
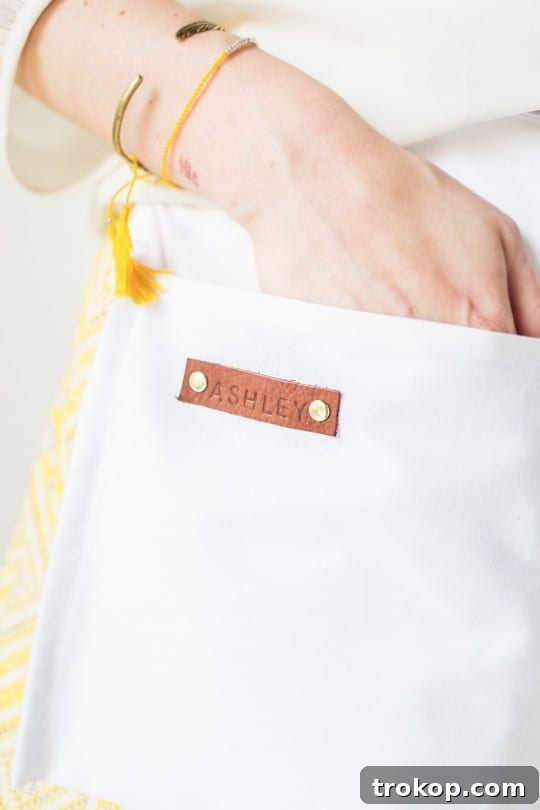
Adding personalized name tags truly transforms these simple aprons into treasured keepsakes. The process for creating these custom leather tags is very similar to attaching the main leather strap, but with a few key distinctions for ease and optimal results.
For the name tags, you’ll utilize the same reliable steps: cut small strips of leather lace, apply adhesive, and secure them with rivets through the apron fabric. However, for these smaller pieces, you might find it even easier to use the rotary punch to go through both the leather tag and the apron fabric simultaneously. This technique simplifies alignment and saves a step. Before you make your final cut on the leather for the name tag, be sure to stamp your desired name or message using your leather alphabet kit. Stamping first ensures you know the exact length needed for the tag, allowing for perfect spacing and a balanced look. Refer to the instructions included with your alphabet kit for specific tips on achieving crisp, clear leather stamps. Once all the tags are attached and the adhesive is completely dry, your custom aprons are ready to be packaged and gifted to your favorite ladies (or gentlemen)! This personal touch elevates the apron from a simple tool to a cherished, bespoke item.
For A More Patterned Look & Design Variations
While we absolutely adore the clean, minimalist aesthetic of these aprons with their understated white fabric and elegant leather accents, the beauty of DIY lies in endless customization. If you’re aiming for a more vibrant, bold, or visually engaging look, there are countless ways to infuse personality into your DIY No-Sew Aprons.
Consider swapping the petite white aprons for longer, full-bib styles made from patterned fabrics. Think classic pinstripes for a sophisticated chef, whimsical floral prints for a gardening enthusiast, or even a robust, dark canvas for a utilitarian artist’s apron. Denim aprons offer a timeless, durable choice, while linen provides a lighter, more breathable option for warmer climates. You could also experiment with different colors of leather lace – perhaps a contrasting tan or even a deep red to really make the details pop. Adding fabric paint, iron-on patches, or embroidered motifs before assembling can further enhance the personalized touch. The possibilities are truly boundless, allowing you to tailor each apron perfectly to its recipient’s taste and intended use.
We’re excited to share more of these aprons in action later this week when we post a full recap of our recent flower workshop. You’ll get to see how beautifully they integrated into the event and how much our attendees loved them. So, make sure to stay tuned for more inspiration and creative ideas!