
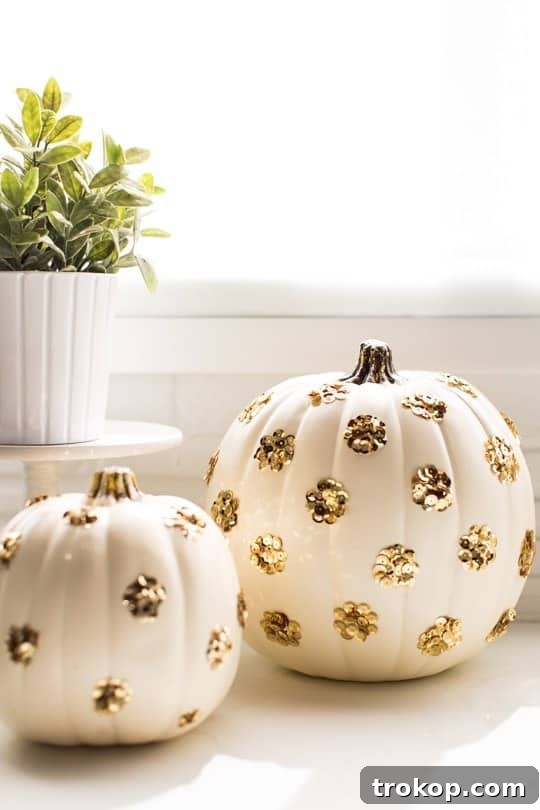
Transform your autumn aesthetic with our detailed guide to crafting an elegant Sequin Polka Dot DIY Pumpkin. This creative no-carve project offers a chic alternative for dazzling Halloween, sophisticated Thanksgiving centerpieces, or any festive fall decor. Forget the mess of carving and embrace the sparkle of sequins as you turn ordinary faux pumpkins into extraordinary works of art.
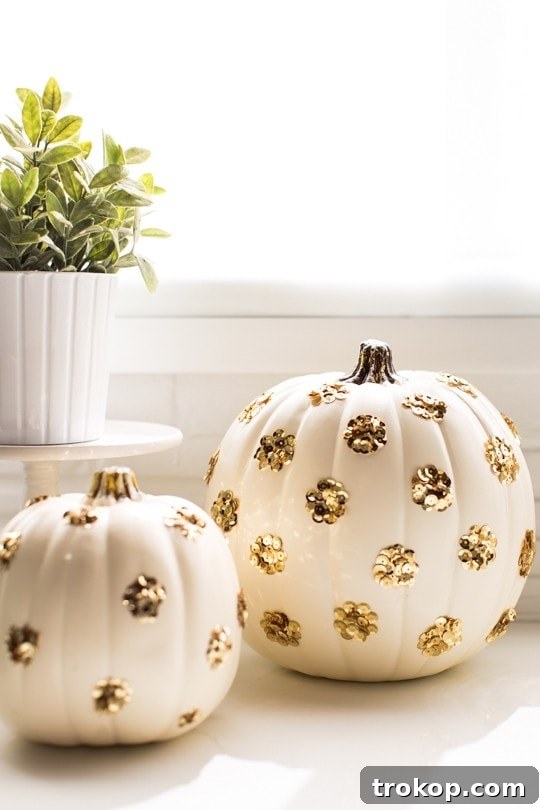
Are you ready to infuse your home with a touch of glitz and glamour this fall season? Our fun and easy Sequin Polka Dot DIY Pumpkin project is designed to elevate your seasonal decor, transforming a simple craft pumpkin into a captivating centerpiece or an eye-catching accent that truly shines. It’s the perfect choice for those who desire a chic, modern Halloween decor approach, moving away from the traditional spooky vibe towards sophisticated sparkle. Imagine an array of these sparkling pumpkins adorning your entryway, mantel, or even small versions gracing your Thanksgiving table, adding a unique and personalized touch to your holiday celebrations.
With just a handful of affordable supplies and a sprinkle of creativity, you can embark on a delightful DIY journey to create a festive masterpiece. This project is not only simple but incredibly rewarding, promising a dazzling result that is sure to impress all your guests and bring a unique flair to your autumn arrangements. Get ready to add unparalleled shimmer and style to your pumpkin patch with our comprehensive, step-by-step guide!
Why Choose Sequin Polka Dot Pumpkins?
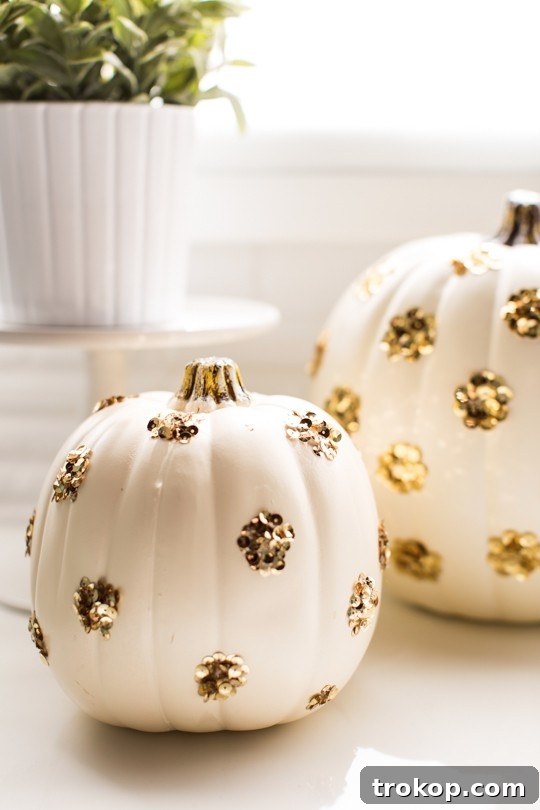
In a world of traditional fall decor, sequin polka dot pumpkins offer a refreshing and glamorous twist. They stand out as a sophisticated alternative to carved pumpkins, providing a multitude of benefits that make them an ideal choice for your autumnal styling. Firstly, the “no-carve” aspect cannot be overstated. This means no messy pulp, no sharp tools, and a significantly safer activity, especially if crafting with children. Furthermore, carved pumpkins, while classic, have a short shelf life. Faux pumpkins adorned with sequins can be stored and reused year after year, making them a sustainable and cost-effective decor solution that brings consistent joy.
The elegance of sequins elevates the humble pumpkin into a true statement piece. Whether you’re aiming for a luxurious Halloween party vibe or a glittering Thanksgiving tablescape, these pumpkins deliver. Their reflective surfaces catch the light beautifully, adding dynamic visual interest to any setting. This project also allows for immense personalization. With a rainbow of sequin colors and various pumpkin sizes, you can tailor your creations to perfectly match your existing decor or explore new color palettes. It’s not just a craft; it’s an opportunity to infuse your personal style into the heart of your seasonal home.
Gather Your Supplies: What You’ll Need
Before you dive into the dazzling world of sequin pumpkins, ensure you have all your materials ready. The beauty of this DIY project lies in its simplicity, requiring only a few key items that are easily accessible at most craft stores or online retailers. Gather your components, and let the transformation begin!
- White pumpkin: The foundation of your sparkling creation.
- Loose sequins: The key to all that glitz.
- Tacky glue: Your trusty adhesive.
The Perfect Pumpkin Base
For this project, we highly recommend using faux craft pumpkins. They are incredibly versatile, available in various sizes and colors, and best of all, they allow you to reuse your glamorous creations season after season. White faux pumpkins provide a pristine canvas that makes metallic or colorful sequins truly pop. You can find these at craft stores, dollar stores, or online. Consider different sizes to create a dynamic display, from mini pumpkins for subtle accents to larger ones for prominent centerpieces.
If you prefer the charm of the real thing, you absolutely can use fresh pumpkins! Just make sure to clean them thoroughly and allow them to dry completely. For best results, give your real pumpkin a base coat of paint in your chosen color – black or a vibrant orange, for instance, can offer a striking contrast to gold or iridescent sequins. Remember, real pumpkins are perishable, so plan to enjoy your creation for a shorter period.
Sparkling Sequins
Our project features elegant 6mm gold sequins, which provide a classic and sophisticated look. However, the world of sequins is vast and wonderful! Feel free to experiment with different sizes—larger sequins create a bolder, more abstract polka dot, while smaller ones allow for finer detail. Explore a spectrum of colors: silver, rose gold, iridescent, matte black, or even a mix of vibrant hues can drastically alter the final aesthetic. Consider sequins with a cup shape for extra dimension or flat ones for a sleeker finish. The quantity needed will depend on the size of your pumpkin and the density of your polka dot pattern, but it’s always wise to have a little extra on hand.
The Essential Adhesive
A good quality tacky glue is paramount for this project. It offers a strong, clear bond and dries with enough tackiness to hold the sequins firmly in place without them sliding around. Brands like Aleene’s Tacky Glue are excellent choices due to their reliability. Any strong craft adhesive will work, but avoid fast-drying super glues, as they can make precise sequin placement difficult. A small bottle with a fine tip or a toothpick can be helpful for applying the glue in perfectly circular dots. Ensure your glue dries clear to maintain the sparkling integrity of your design.
Step-by-Step Guide: Crafting Your Sequin Polka Dot Masterpiece
Now that you have all your materials, let’s bring your vision to life! This process is straightforward and enjoyable, ensuring a beautiful result with minimal effort.
Step 1: Prepare Your Workstation
Before you begin, set up a clean, well-lit workspace. Cover your table with newspaper or a craft mat to protect it from glue spills. Have your pumpkin, sequins, glue, and any optional tools like tweezers or toothpicks within easy reach. Ensuring everything is organized will make the crafting process much smoother and more enjoyable.
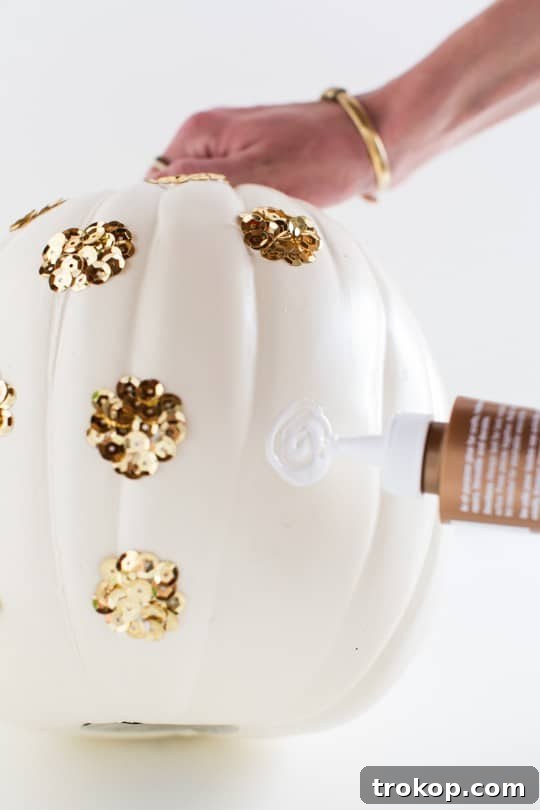
Step 2: Applying the Adhesive Dots
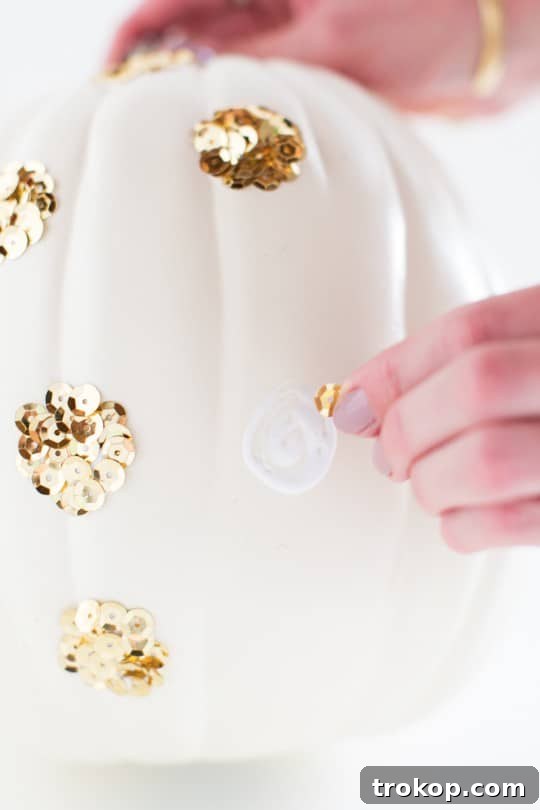
Using your tacky glue, apply a small circular dot to the surface of your pumpkin. The size of this dot will determine the size of your sequin polka dot. Aim for consistency if you want uniform dots, or vary the size for a more playful, organic look. Work in small sections to prevent the glue from drying out prematurely. A steady hand and a gentle squeeze of the glue bottle will help create neat, round dots. Don’t press too hard, as this can cause excess glue to spread.
Step 3: Placing the Shimmering Sequins
Once the glue dot becomes slightly tacky (usually a minute or two, depending on the glue and environment), begin pressing your loose sequins into the glue. Carefully place each sequin, ensuring it adheres firmly to the adhesive. For a full, shimmering effect, you may need to slightly overlap the edges of the sequins as you fill each circular glue dot. Use tweezers for precise placement, especially if you’re working with smaller sequins or intricate patterns. Gently press down on each sequin to ensure good contact with the glue.
Step 4: Designing Your Polka Dot Pattern
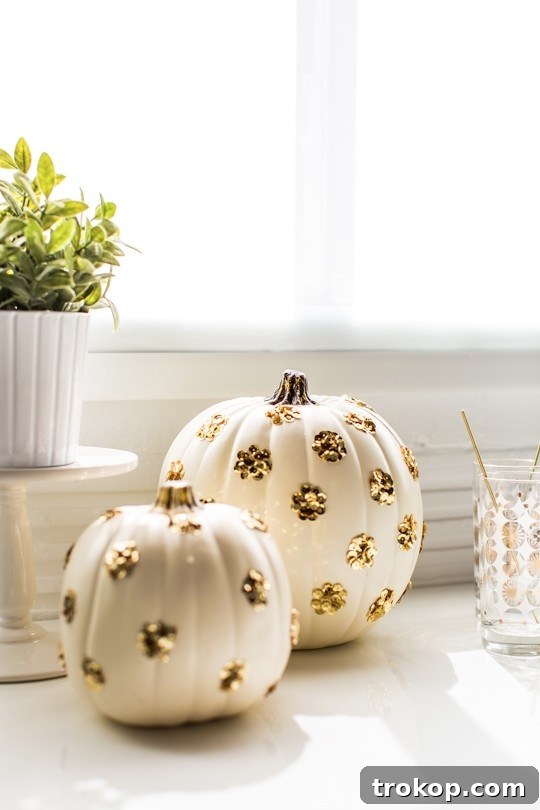
The beauty of this DIY lies in its adaptability. Continue adding sequin circles around the pumpkin until you are delighted with your design. You can opt for a classic, evenly spaced polka dot pattern, create clusters of sequins for a more abstract feel, or even design stripes or swirls. Don’t be afraid to experiment with the arrangement and density of your sequins. This is where your creativity truly shines, allowing you to craft a pumpkin that is uniquely yours.
Step 5: The Drying Process
Once all your sequins are in place and your design is complete, it’s crucial to allow the pumpkin to dry completely. Place it in a safe, undisturbed area, preferably at room temperature, for several hours or even overnight. The drying time will depend on the type of glue used and the thickness of the application. Avoid handling or displaying your sequin pumpkin until the glue is fully cured and all sequins are securely bonded. This patience will ensure the longevity and pristine appearance of your sparkling decor.
Pro Tips for a Flawless Finish and Lasting Sparkle
Achieving a professional-looking sequin pumpkin is easier with a few insider tips. These suggestions will help you overcome common crafting challenges and ensure your decor remains stunning for seasons to come.
Work Smart, Not Hard: Section by Section
One of the most critical tips for this project is to work in small sections. Applying glue to the entire pumpkin at once will cause it to dry before you have a chance to add all your sequins. Instead, apply glue for one or two polka dots at a time, place the sequins, then move to the next section. This technique ensures that your glue remains tacky enough for optimal adhesion, preventing frustration and ensuring a smooth application process.
Enhance Durability with a Clear Sealant
To give your sequin pumpkin extra durability and protect its sparkle for long-term storage and display, consider sealing it with a clear spray sealer. A light, even coat of a clear acrylic craft sealer will help secure the sequins, prevent them from falling off, and protect the glue from dust and minor wear. Choose a matte or gloss finish depending on your preference. Always test the sealer on an inconspicuous area first to ensure it doesn’t affect the sequins or glue.
Unleash Your Creativity: Pattern Ideas
While polka dots are charming, don’t limit yourself! Think beyond random placement to create a truly designer look. Experiment with various patterns:
- Stripes: Create vertical or horizontal lines of sequins.
- Swirls: Apply glue in a swirling motion and fill with sequins for an elegant effect.
- Clustered Dots: Group sequins closely together in varying sizes for a more organic, textured look.
- Ombré: Use sequins of different shades of the same color, transitioning from light to dark.
- Geometric Shapes: Outline diamonds, squares, or even abstract patterns with sequins.
- Monograms: Personalize your pumpkin by spelling out an initial in sequins.
These variations can make your sequin pumpkins unique focal points in your fall decor.
Stunning Display Ideas for Your Sequin Pumpkins
Once your sparkling creations are complete, it’s time to showcase them! These versatile pumpkins are perfect for numerous festive settings:
- Festive Centerpieces: Arrange them in the middle of your dining table, perhaps with candles and autumn foliage, for a stunning focal point.
- Mantel Decor: Line them along your fireplace mantel, mixing different sizes and colors for visual interest.
- Entryway Welcome: Place them on your console table to greet guests with a touch of glam.
- Staircase Adornment: Create an elegant display by placing them on alternating steps of your staircase.
- Shelf Styling: Integrate them into existing shelf decor, adding sparkle and texture.
- Empty Fireplace Idea: Fill an unused fireplace with a collection of sequin pumpkins and fairy lights for a magical glow.
- Outdoor (Covered) Displays: Use them on a covered porch or patio to extend your glam decor outdoors.
Combine them with natural elements like acorns, pinecones, or branches for a balanced look that merges natural beauty with dazzling artifice.
More Inspiring Fall & Holiday Decor Projects
If you’ve enjoyed crafting your sequin polka dot pumpkin, you’ll love these other easy and creative ideas to enhance your autumn and holiday decor. Dive into more DIY fun and personalize every corner of your home for the festive season!
- 33 Easy DIY Pumpkin Painting Ideas: Discover creative ways to decorate your pumpkins with paint, offering endless possibilities for color and design.
- DIY Pumpkin Place Card Holders: Add a charming and personalized touch to your Thanksgiving table with these simple place card holders.
- 23 Easy DIY Turkey Decor Ideas: Get inspired with festive turkey-themed crafts perfect for Thanksgiving celebrations.
- 42 Best DIY Thanksgiving Table Decorations: Explore a wide array of ideas to set a beautiful and inviting Thanksgiving table.
DIY Sequin Pumpkin Craft Details
Equipment
- Tacky glue (or any strong craft adhesive)
Materials
- 1 craft pumpkin (faux or real, prepped)
- Loose sequins (e.g., 6mm gold sequins)
Instructions
- Apply glue to the pumpkin in small, circular shapes, creating the desired polka dot pattern.
- Wait until the glue becomes tacky (a minute or two), then carefully press individual sequins into the glue until the circle is filled. Use tweezers for precision if needed.
- Continue adding sequin polka dots all around the pumpkin, working in small sections to prevent the glue from drying.
- Let the finished sequin pumpkin dry completely for several hours or overnight before handling or displaying.
Prep Time: 20 mins
Total Time: 30 mins
Course: DIY
Category: Pumpkin
Cost: $12 (approx.)
Keywords: diy sequin pumpkin, glam fall decor, no-carve pumpkin
50 Best Halloween Food Ideas for a Spooky Party
Continue Reading
46 Delicious Thanksgiving Dessert Ideas to Sweeten Your Holiday
Continue Reading
33 Easy DIY Pumpkin Painting Ideas
Continue Reading
Pumpkin Pie Pop Tarts Recipe
Continue Reading