
Reimagine your holiday decor traditions this year with a vibrant and personalized touch. This simple yet stunning DIY Color Block Ornament Garland offers a unique way to elevate your home’s festive atmosphere, moving beyond the ordinary to create something truly special.
DIY Color Block Ornament Garland: A Comprehensive Guide to Stunning Holiday Decor
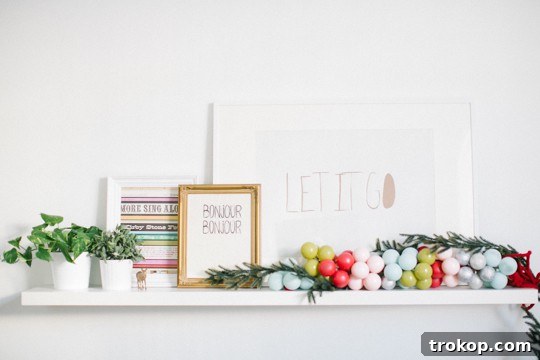
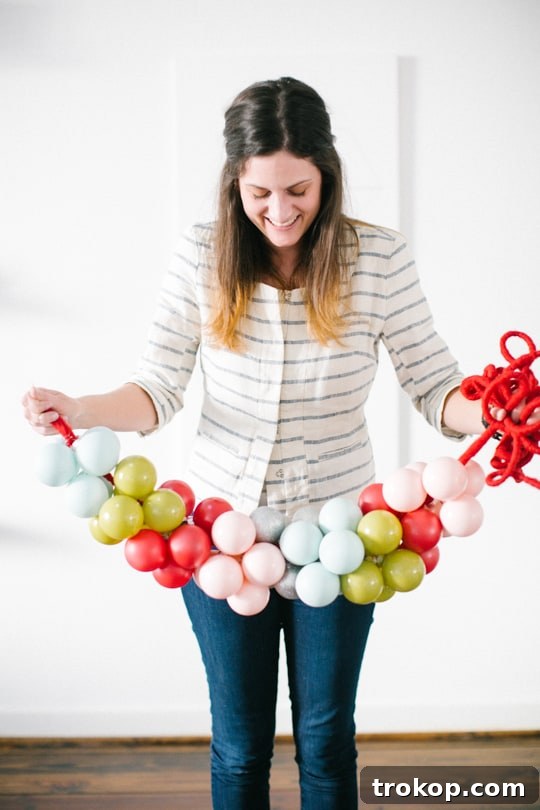
Infuse your holiday season with a burst of color and a touch of handmade charm by crafting your very own DIY Ornament Garland. This project is not only incredibly easy to assemble but also promises to be a dazzling focal point wherever it’s displayed. Whether you envision it gracefully draping over your fireplace mantel, spiraling up a grand staircase, or adding a cheerful accent to your holiday party setup, this customizable garland offers endless possibilities. The true beauty lies in its versatility: you can tailor it to perfectly complement your existing holiday color scheme, from classic reds and greens to elegant metallics, chic pastels, or, as we demonstrate, a striking color block design.
Why Choose a DIY Ornament Garland This Holiday Season?
Creating your own ornament garland transcends mere decoration; it’s an opportunity to inject personality and warmth into your home. Beyond the satisfaction of a unique, handcrafted piece, there are numerous benefits:
- Personalized Touch: Unlike mass-produced decor, a DIY garland reflects your individual style and creativity. Choose colors, sizes, and textures that resonate with your personal aesthetic.
- Budget-Friendly: With a smart selection of ornaments and materials, crafting your own garland can be significantly more affordable than purchasing a high-end pre-made version. This allows you to achieve a luxurious look without the hefty price tag.
- Family-Friendly Activity: This project is perfect for involving loved ones. Gather your family or friends for a fun crafting session, creating not just a beautiful garland but also cherished holiday memories. We even had the pleasure of assembling ours during a memorable crafting party with Martha Stewart Living!
- Stress-Free Customization: You’re in complete control of the length, fullness, and color pattern, ensuring the garland fits perfectly into any space or theme you have in mind.
All it takes are a few basic supplies and a spark of creativity to transform ordinary ornaments into an extraordinary, sparkling statement piece. A word of caution, however: to achieve a truly full and lush garland, you will need a substantial number of ornaments. So, make sure to stock up beforehand! The great news is that any leftover bulbs won’t go to waste; they can easily be repurposed into charming monogrammed gift tags or other small festive accents, ensuring every piece contributes to your holiday cheer.
Ready to embark on this delightful crafting journey? Follow our comprehensive step-by-step guide below to craft your stunning ornament garland in no time.
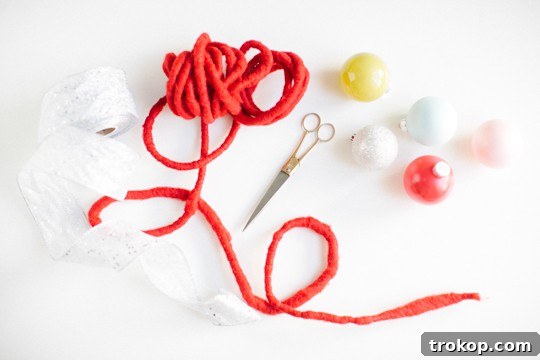
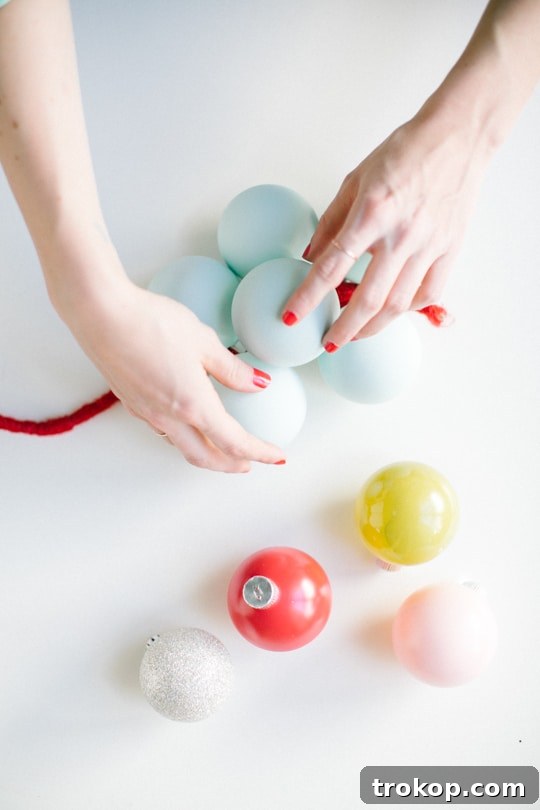
Table of Contents
Materials and Tools Needed to Make Your DIY Ornament Garland
Gathering your supplies is the first exciting step in bringing your vision to life. Here’s what you’ll need:
- Ornaments: The star of your garland! We recommend opting for plastic or shatterproof ornaments to prevent accidental breakage, especially if your garland will be in a high-traffic area or if little hands might be helping. Our original ornaments were from Martha Stewart’s Holiday Frost Collection. Don’t hesitate to paint plain bulbs if you’re looking for specific colors that aren’t readily available, as we did for some unique shades.
- Ornament Hooks: These small but mighty tools are essential for attaching your ornaments securely.
- Garland Base (Wired Ribbon or Rope): Choose a sturdy base that complements your desired aesthetic:
- Wired Ribbon: Ideal for a more sophisticated, structured look. The wire helps hold its shape when draped.
- Felted Wool Rope: Offers a playful, rustic, or cozy feel, perfect for a whimsical or Scandinavian-inspired theme.
- Cotton Cord Rope: Provides a natural, minimalist, or farmhouse aesthetic.
When we hosted our crafting party, we offered guests both the sophisticated wired ribbon and the playful felted wool rope options, allowing for diverse styles.
- Scissors: For cutting your ribbon or rope to the desired length.
How to Make a DIY Ornament Garland: Step-by-Step Instructions
Follow these simple steps to construct your beautiful color block ornament garland:
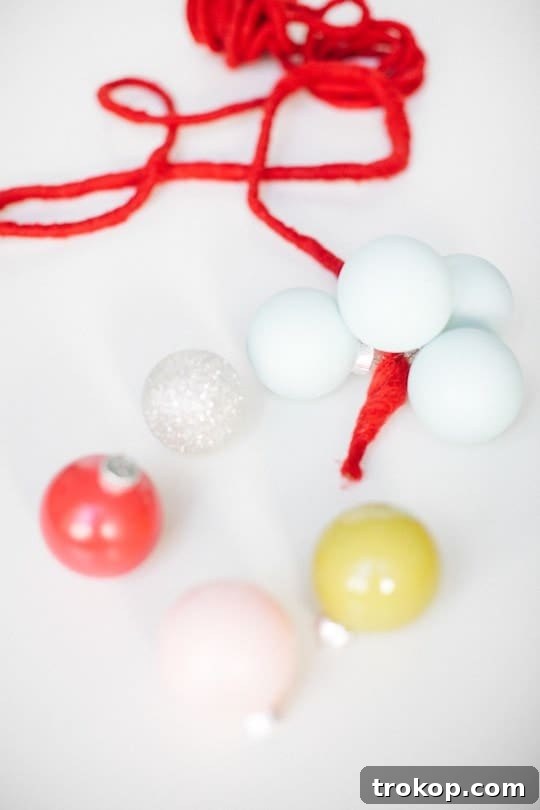
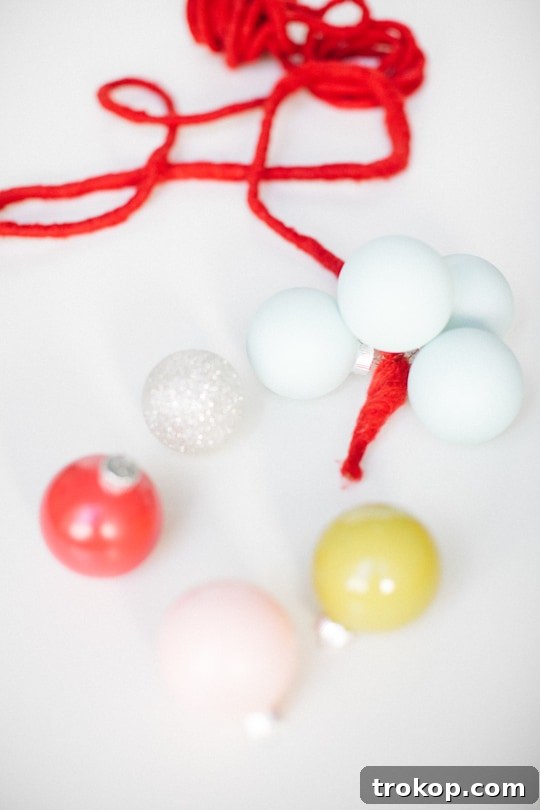
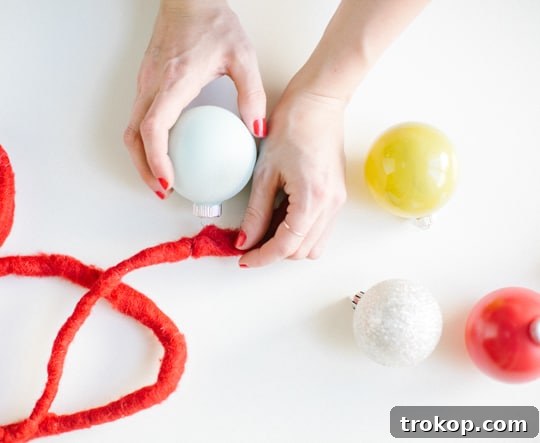
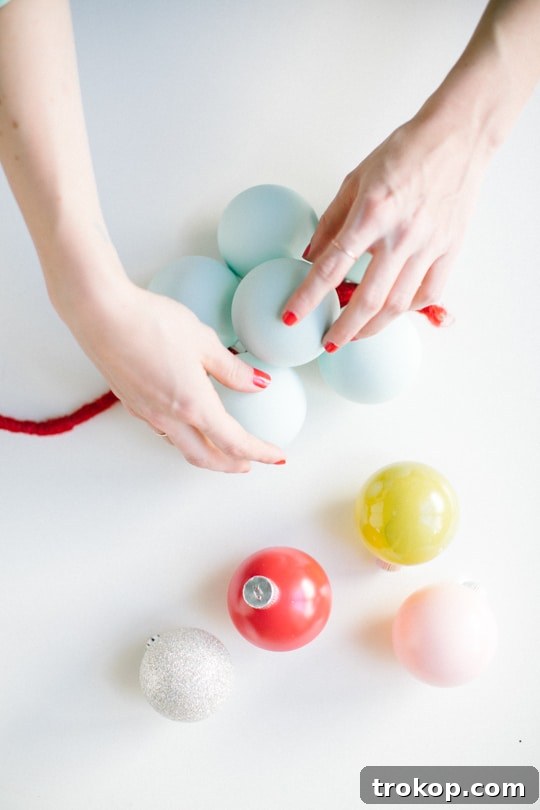
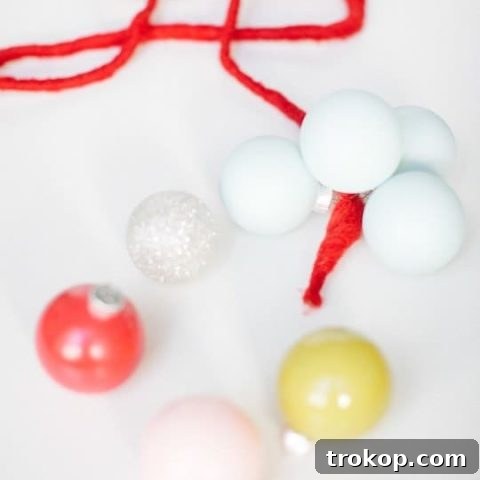
- Group Your Ornaments: Begin by taking three ornaments and grouping them together onto a single ornament hook. This method is incredibly efficient and helps create a full, consistent look for your garland. For a true “color block” effect, ensure these three ornaments are of the same color or a harmonious blend within your chosen color palette for that section.
- Attach to the Garland Base: Once your ornaments are securely grouped on the hook, twist the ornament hook firmly around your chosen ribbon or rope. Make sure it’s snug enough to prevent movement but not so tight that it damages the garland base.
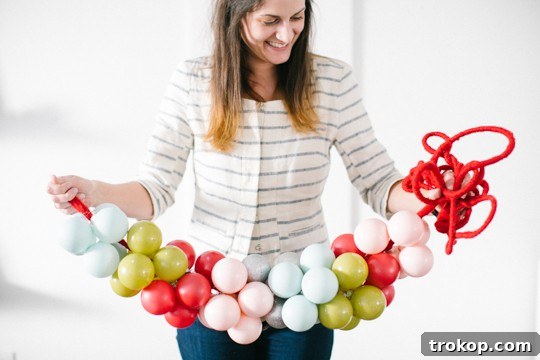
- Repeat and Build Your Pattern: Continue this grouping and attachment process. If you’re aiming for a color block design, create sections of ornaments in specific colors. For our garland, we utilized six ornaments per color group (which means two ornament hooks, each holding three ornaments, per color block). Feel free to adjust this number based on your desired fullness and the length of each color section. Keep adding groups until your garland reaches your desired length and density.
- Secure the Ends: Once all your ornaments are attached and you’ve achieved the perfect length, carefully clip the ribbon or rope. Then, tie a strong, secure knot at each end of the garland. This knot is crucial for preventing the ornaments from sliding off and for maintaining the integrity of your design. You can also create small loops at the ends for easier hanging.
- Display Your Masterpiece: With your garland complete, it’s time to find its perfect home! Drape it elegantly across your mantel, weave it through the banister of your stairway, adorn a doorway, or even incorporate it into your Christmas tree decorations. Step back and admire your festive, handcrafted decor that adds a unique sparkle to your home!
Project Notes and Expert Tips for Your DIY Ornament Garland
To ensure your garland-making process is as smooth and successful as possible, consider these helpful tips:
- Measure Before You Start: Avoid running out of materials or having a garland that’s too short or long. Before you begin assembly, carefully measure the exact space where you intend to hang your garland. This planning ensures you’ll achieve the perfect fit and look.
- Add Accents for Extra Flair: Elevate your garland’s visual appeal by incorporating additional festive elements. Tuck in sprigs of fresh or artificial greenery, intertwine delicate fairy lights for a magical glow, or attach small bows between ornament groups for an extra touch of charm.
- Anchor the Ends Securely: For peace of mind and to protect your walls or furniture, use reliable anchoring methods. Command hooks are excellent for temporary decorations as they won’t damage surfaces. Alternatively, small nails or discreet clips can provide a sturdy hold for heavier garlands.
- Keep it Lightweight and Balanced: While a full garland is desirable, be mindful of the overall weight. Overloading your garland with too many heavy ornaments can cause it to sag unattractively or become difficult to hang safely. Distribute ornaments evenly for a balanced look.
- Experiment with Patterns: Don’t be afraid to play with your design! For a polished and intentional look, alternate colors, sizes, or finishes in a repeating pattern. If you prefer a more whimsical and dynamic vibe, opt for a random arrangement of ornaments.
- Prep Ahead for Efficiency: To streamline the assembly process, sort your ornaments by color, size, and type before you begin. Having everything organized will make the crafting much smoother and more enjoyable.
- Test the Hanging Spot During Creation: If possible, periodically drape your developing garland in its intended location. This allows you to check the length, fullness, and overall appearance, making any necessary adjustments to the ornament spacing or color distribution as you go.
- Consider Themes Beyond Color Block: While color blocking is fantastic, think about other themes! A monochromatic garland (all silver, all gold), a rustic garland with natural elements, or a whimsical garland with playful shapes can also be stunning.
- Storage for Next Year: To prevent tangling and damage, store your garland carefully. You can wrap it loosely around a cardboard tube or gently coil it into a storage box, ideally with tissue paper separating sections or delicate ornaments.

More Easy Christmas DIYs and Gift Guides
Looking for even more simple ways to add handmade charm and thoughtfulness to your holiday season? These easy Christmas DIYs are perfect for crafting beautiful decorations, thoughtful gifts, and festive home accents without any stress. Plus, explore our curated gift guides to find the perfect presents for everyone on your list!
- 1 Minute Santa Drink Stirrers: Quick and Festive
- 33 Mason Jar Christmas Gifts: Creative and Heartfelt
- Mini DIY Wooden Christmas Tree: Charming Tabletop Decor
- DIY Gold Wreath & Gold Garland: Elegant Holiday Accents
DIY Block Ornament Garland: Quick Reference
Create a beautiful color block ornament garland for your holiday decorating! This project is so easy, it’s perfect for anyone.
30 mins
30 mins
DIY
Holidays
Equipment
-
Scissors
Materials
- Ornaments
- Ornament hooks
- Wired ribbon, felted wool rope or cotton cord rope
Instructions
-
Start by grouping three ornaments together using an ornament hook. This quick and easy method keeps things simple and speeds up the process.
-
Twist the ornament hook securely around your ribbon or rope to attach the grouped ornaments.
-
Repeat the process, grouping ornaments by color or design if desired. For this garland, we used 6 ornaments per color group, but you can adjust the number to fit your style. Continue adding groups until your garland reaches your desired length.
-
Once all the ornaments are attached, clip the ribbon or rope and tie a secure knot at each end to keep everything in place.

You Might Also Like:
47 Affordable Gifts Under $10 for Everyone
Shop budget-friendly gifts under $10 that look way more expensive.…
Continue Reading47 Affordable Gifts Under $10 for Everyone
Gingerbread Muffin Recipe with Lemon Glaze
Add a touch of spice to your breakfast or snack…
Continue ReadingGingerbread Muffin Recipe with Lemon Glaze
Funfetti Reindeer Cookies Recipe
Get into the festive spirit with our Funfetti Reindeer Cookies,…
Continue ReadingFunfetti Reindeer Cookies Recipe
25 Easy Christmas Cocktail Recipes to Try for the Holidays
Deck the halls with these delicious Christmas cocktail recipes! From…
Continue Reading25 Easy Christmas Cocktail Recipes to Try for the Holidays