
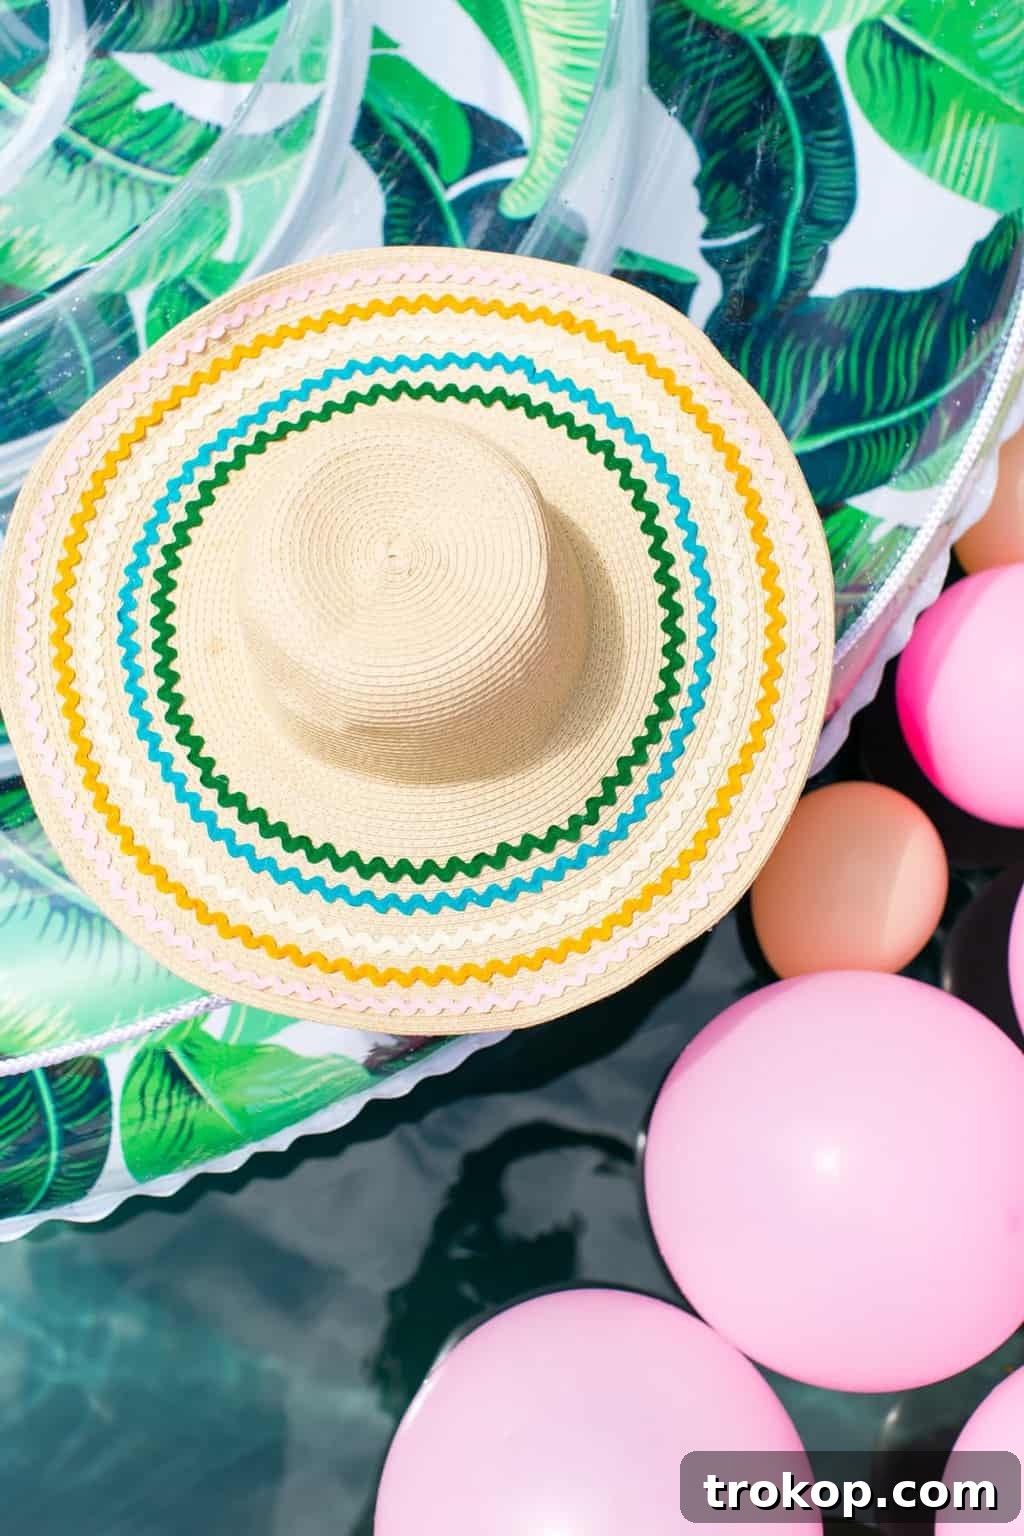
Nothing embodies poolside glamour and summer readiness quite like a custom Ric Rac DIY Sun Hat! Imagine crafting your very own chic accessory in just 10 minutes flat, without needing a single stitch. This ultimate guide will walk you through transforming a simple straw hat into a vibrant, personalized statement piece that’s perfect for sunny days, beach getaways, and stylish outdoor adventures.
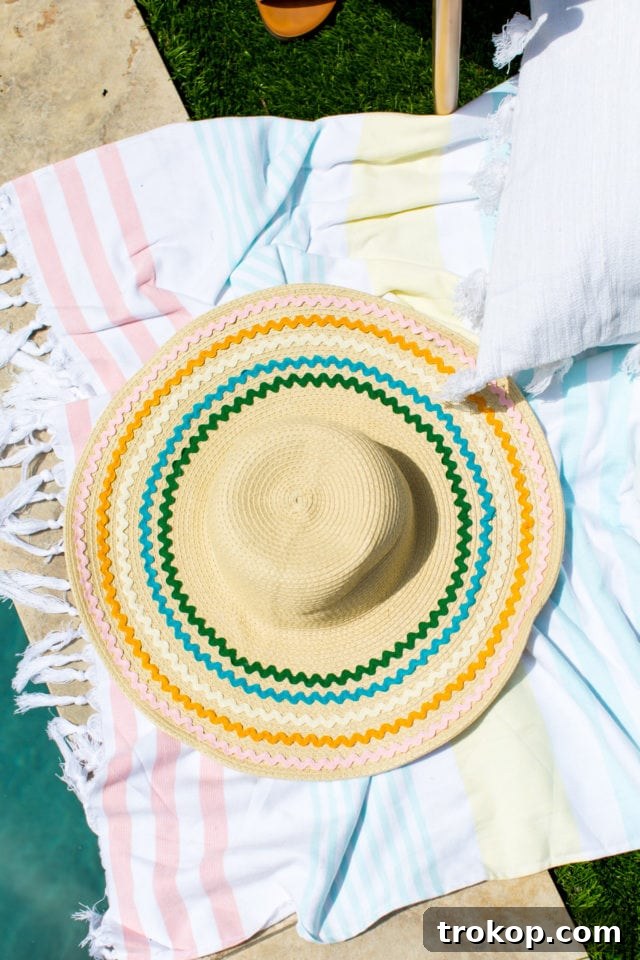
The allure of summer is undeniable: bright sunshine, gentle warm breezes, and the promise of endless outdoor fun. What better way to embrace this season than with a floppy hat that not only shields you from the sun but also screams unique summer style? This Ric Rac DIY Sun Hat hack tutorial is your passport to elevating your poolside look, adding a playful touch to your everyday outfits, or creating the perfect companion for your next vacation.
The absolute best part? No sewing is required, making this project incredibly accessible for everyone, regardless of crafting experience. In a mere 10 minutes, you can take a plain straw hat – or any hat base you fancy – and imbue it with a burst of color and personality using cheerful ric rac ribbon. This project perfectly complements other summer DIYs, like a DIY pom pom tassel circle pool bag, creating a cohesive and stylish ensemble.
Whether you consider yourself a seasoned crafter with a knack for quick projects or a complete beginner looking for an easy entry into the world of DIY, this project is tailor-made for you. It offers a swift and satisfying way to inject a pop of individuality into your summer wardrobe. So, gather your materials, put on your favorite summer playlist, and prepare to create a sun hat that’s as wonderfully unique as you are!

Table of Contents
Materials and Tools Needed for Your DIY Ric Rac Sun Hat
Embarking on this simple yet impactful DIY project requires just a handful of readily available items. The beauty of this craft lies in its minimal material list and the high impact of the final result. Here’s everything you’ll need to create your personalized ric rac summer hat:
- Plain Straw Hat: This is your canvas! A classic wide-brimmed straw hat works perfectly, but don’t limit yourself. Consider a fedora, a Panama hat, or even a bucket hat for a different vibe. The key is a clean, smooth surface for your ric rac to adhere to. We’ve previously used this versatile straw hat base to craft a unique retro DIY floral hat and a playful polka dot DIY floppy hat, showcasing its adaptability. Look for one with a relatively flat surface on the brim for easier application.
- Ric Rac Ribbon Trim in Assorted Colors: This wavy, zig-zag trim is the star of the show. Choose a variety of colors and widths that reflect your personal style and the summer aesthetic you’re aiming for. Our project features 7mm width ric rac, which provides a lovely visual texture without being too bulky. You can mix bright, contrasting colors for a bold statement or opt for softer, monochromatic shades for a more subtle elegance. The more colors you choose, the more vibrant and unique your hat will become.
- Hot Glue Gun and Glue Sticks: Your trusty tool for a secure and speedy attachment. A good quality hot glue gun heats up quickly and provides a strong bond. Ensure you have plenty of glue sticks on hand, as you’ll be applying glue along the length of your ric rac. Small, thin glue sticks are often easier to control for intricate work.
- Fabric Scissors: Sharp scissors are essential for clean, precise cuts of your ric rac ribbon. While regular scissors might work, fabric scissors will prevent fraying and ensure a crisp edge.
Step-by-Step: Crafting Your Ric Rac Sun Hat
Ready to transform your plain hat into a summer masterpiece? Follow these straightforward steps to create your Ric Rac DIY Sun Hat with ease and speed. Remember, precision and patience (even in a 10-minute project!) will lead to the best results.
- Prepare Your Ric Rac Strips: Begin by measuring the circumference of the part of your hat where you intend to apply the first strip of ric rac. It’s always a good idea to cut your ric rac trim a little longer than the exact measurement. This extra length provides a small margin for error and makes it much easier to handle and position with the hot glue gun without running short. If you’re planning multiple layers or specific patterns, cut all the necessary lengths before you start gluing. This pre-planning ensures a smooth workflow.
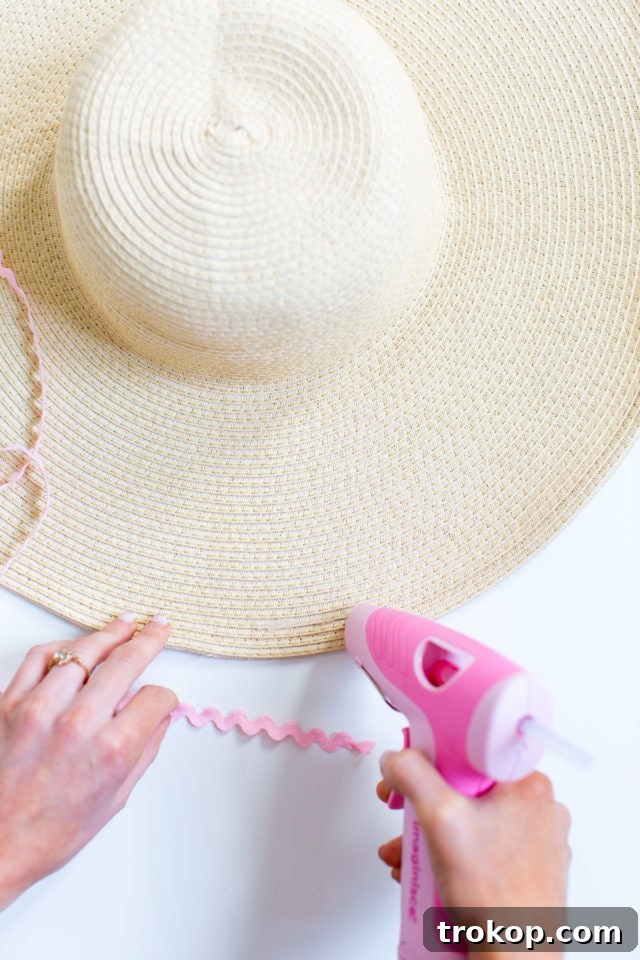
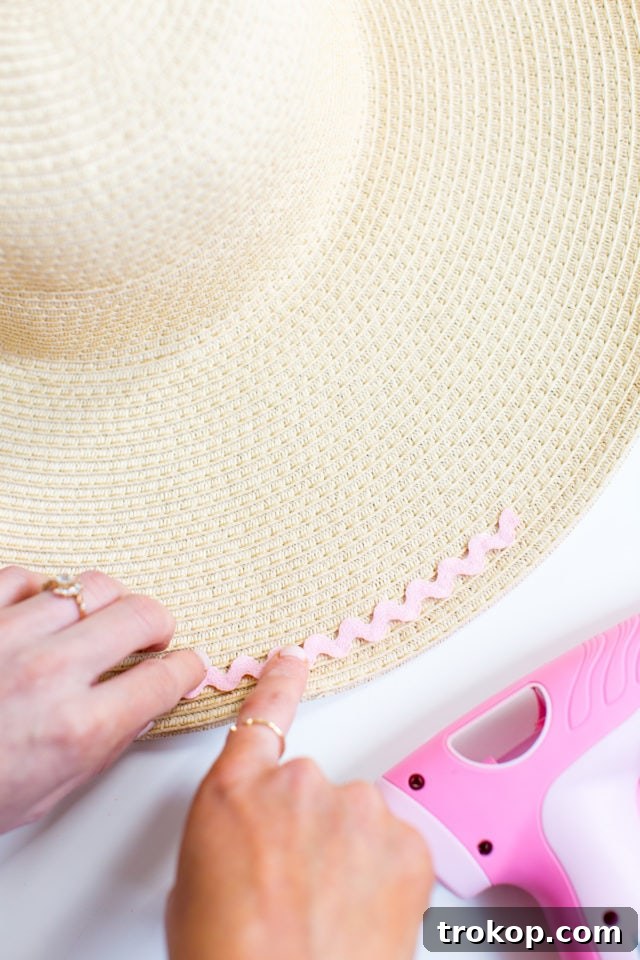
- Activate Your Hot Glue Gun and Begin Gluing: Plug in your hot glue gun and allow it a minute or two to fully heat up. Once the glue is ready, carefully apply a small, thin bead of glue to the underside of your first ric rac strip. Start by securing one end of the ric rac to the desired starting point on your hat base. We found it effective to begin on the outer edge of the hat’s brim, following its natural curve. Work in short sections, applying glue to about 3-4 inches of ric rac at a time, then firmly pressing it onto the hat. This sectional approach gives you better control over placement and prevents the glue from drying too quickly before you’ve had a chance to position the trim. Apply steady, even pressure for a few seconds to ensure a strong bond.
- Repeat and Layer for a Dazzling Effect: Continue this process, working your way around the hat for the first strip of ric rac. Once the first strip is securely in place, carefully trim any excess length, ensuring a neat finish where the ends meet. Now, repeat the entire process for each subsequent color of ric rac, layering them above or below the previous strip, or creating parallel lines. You can experiment with different patterns: tight, parallel lines for a dense, colorful effect, or spaced-out lines for a more minimalist look. Don’t be afraid to mix widths for added texture. Once all your ric rac strips are applied and the glue has cooled, your vibrant new Ric Rac DIY Sun Hat is complete and ready to wear!
Essential Tips and Tricks for Your DIY Hat Project
While this Ric Rac DIY Sun Hat is incredibly simple, a few expert tips can help you achieve a flawless finish and ensure your hat stands up to all your summer adventures. Consider these pointers for an even more successful crafting experience:
- Enhance Adhesion for Longevity: For an extra secure hold, especially if you plan to use heavier embellishments or if your hat will face a lot of wear and tear, consider using a combination of hot glue and a strong fabric glue. Apply the hot glue first for immediate tack, then go over the edges with a thin bead of fabric glue. Fabric glue often provides a more flexible and durable bond over time. Allow ample drying time for any fabric glue used.
- Correcting Mistakes with Ease: Don’t stress if you accidentally misplace a piece of ric rac or apply too much glue. Hot glue is surprisingly forgiving! Simply let the glue cool completely and harden. Once solid, you can gently peel it off the hat. Any stubborn residue can usually be removed with a bit of rubbing alcohol or a specialized glue remover, but always test on an inconspicuous area first.
- Embrace Creative Variations: This project is a fantastic starting point for endless customization. Instead of just a simple trim around the brim, think about creating a layered effect with multiple colors and widths of ric rac. You could form geometric patterns, spirals on the crown, or even use a single, bold strip for a minimalist yet striking look. Incorporate other elements like small pom-poms, tassels, or fabric flowers to really make it your own.
- Maintain Your Hat’s Pristine Look: To keep your Ric Rac DIY Sun Hat looking its best, avoid prolonged exposure to heavy rain or extreme heat, which could weaken the glue bond. If it gets dusty, gently brush it with a soft cloth. For spot cleaning, use a damp cloth with mild soap, being careful not to soak the glued areas. Store it in a cool, dry place when not in use to maintain its shape and vibrant colors.
- Consider Different Hat Bases: While a straw hat is classic, think about other materials. A plain canvas or denim hat could also serve as an excellent base for ric rac, offering a different texture and aesthetic. This opens up possibilities for year-round wear, not just summer!
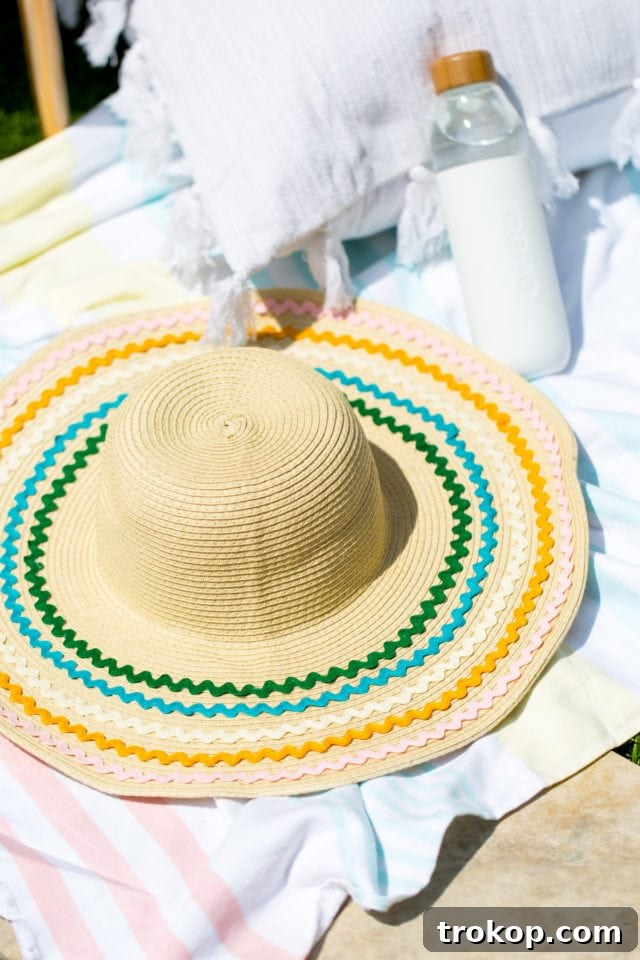
Styling Your New Ric Rac Hat for Every Occasion
Now that you’ve crafted your beautiful Ric Rac DIY Sun Hat, it’s time to show it off! This versatile accessory can complement a wide range of summer outfits, transitioning seamlessly from beach days to garden parties. Here are a few ideas to inspire your summer styling:
- Beach Day Bliss: Pair your vibrant ric rac hat with your favorite swimsuit, a breezy cover-up, and oversized sunglasses. It’s the quintessential beach accessory, offering both sun protection and undeniable style. Don’t forget your DIY pom pom tassel circle pool bag to complete the look.
- Casual Chic for Everyday: For a relaxed daytime look, team your hat with a simple white linen dress, a denim skirt and graphic tee, or a pair of tailored shorts and a crisp button-down. The ric rac adds a playful pop of color to even the most understated outfits.
- Garden Party Glam: Elevate your garden party attire by pairing your hat with a floral maxi dress or a pretty sundress. The colorful ric rac can pick up accent colors in your dress, creating a harmonious and sophisticated ensemble.
- Festival Fun: Make a statement at your next outdoor festival! Combine your ric rac hat with a flowy bohemian top, high-waisted shorts, and comfortable sandals or boots. It’s practical for sun protection and adds a unique, crafty touch to your festival wear.
- Vacation Ready: Whether you’re exploring a new city or lounging by the resort pool, your DIY hat is the perfect travel companion. It folds relatively easily into a suitcase (check for brim rigidity) and instantly adds a vacation vibe to any outfit.
Beyond the Hat: More Fun Summer Finds and DIY Inspiration
Creating this easy hat hack is just the beginning of your summer crafting and style journey! If you’re planning to spend your summer days lounging by the water, you’ll definitely want a chic patterned DIY swimsuit cover-up to go perfectly with your fabulous new straw hat. To get you fully summer-ready, dive into some of our other favorite fun finds, delicious recipes, and inspiring DIY projects below:
- Retro DIY Beach Umbrella: Add a touch of vintage flair to your beach setup with this charming project.
- Best Pool Floats for the Summer: Discover the most stylish and comfortable floats to make a splash.
- Bahama Mama Cocktail: Mix up a refreshing tropical drink to sip under your new sun hat.
- DIY Pool Noodle Garland: Brighten up your poolside decor with this colorful and easy garland.
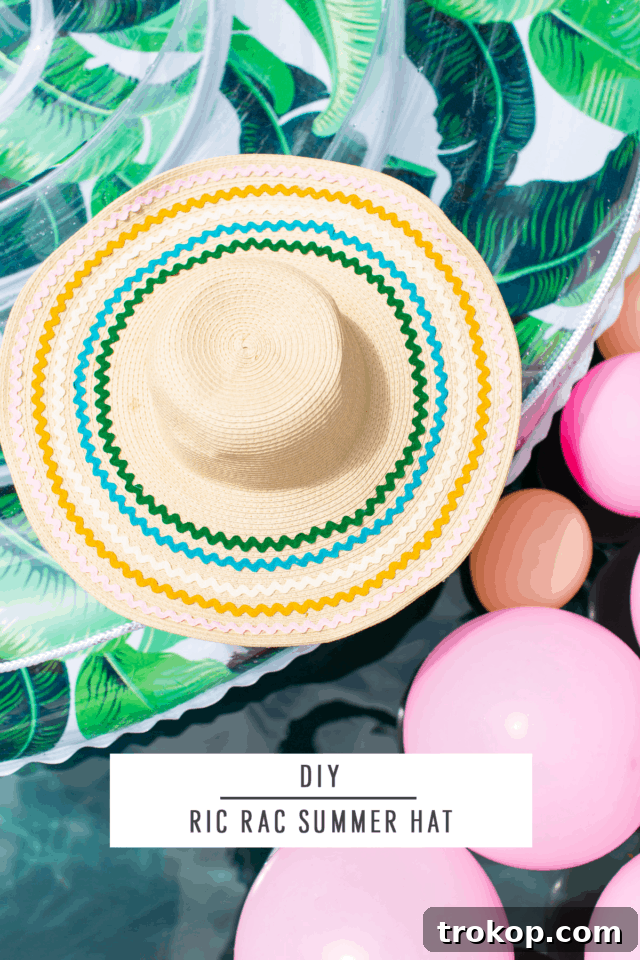
Ric Rac DIY Sun Hat: Project Overview
Add some vibrant flair to your summer style with this incredibly easy and quick Ric Rac DIY Sun Hat hack. Perfect for beach days, poolside lounging, or simply adding a unique touch to your warm-weather wardrobe.
10 mins
10 mins
DIY
Hats
Equipment
- Hot glue gun and glue sticks
- Scissors
Materials
- 1 plain straw hat
- 5 ric rac ribbon trim in any color and width of choice
Instructions
- Measure and cut your ric rac trim to the desired lengths. Consider going a little longer for easier handling with the hot glue.
- Heat up your hot glue gun. Apply a small amount of glue to the underside of the Ric Rac and carefully press it firmly onto your hat base. Work in sections for better control and to avoid the glue drying too quickly. We started on the outer edge and followed the lines of the straw hat.
- Repeat the same process all the way around for each color, ensuring a neat and even application.
$30 (approximate, depending on hat and ric rac choices)
diy sun hat, ric rac hat, summer hat, no-sew hat, custom hat, easy craft

A special thank you to On Point Custom Homes for generously allowing us to utilize one of their stunning pools for this delightful photoshoot! We absolutely adore seeing your creative flair come to life. Be sure to share your very own Ric Rac DIY Summer Hat creations with us on Instagram using the hashtag #sugarandclothloves. We can’t wait to see your unique designs!
Discover More Summer Style
25 Best Clear Stadium Bags for Concerts, Sports & Events
Stay stylish and compliant with the best clear stadium bags for all your event needs. From concerts to sports games, find the perfect bag to carry your essentials securely and fashionably.
Continue Reading25 Best Clear Stadium Bags for Concerts, Sports & Events
31 Best Beach Bags for Your Summer Essentials
From spacious tote bags to chic straw bags, discover our top picks to keep you organized and stylish on all your summer beach trips.
Continue Reading31 Best Beach Bags for Your Summer Essentials
Our 41 Favorite Amazon Women’s Swimsuits
Get ready to hit the beach or pool in ultimate style with our curated selection of 41 favorite women’s swimsuits from Amazon, offering options for every body type and aesthetic.
Continue ReadingOur 41 Favorite Amazon Women’s Swimsuits
Leather Hexagon DIY Vanity Tray
Keep your essentials organized and add a touch of modern elegance to your space with this easy-to-make Leather Hexagon DIY Vanity Tray.
Continue ReadingLeather Hexagon DIY Vanity Tray