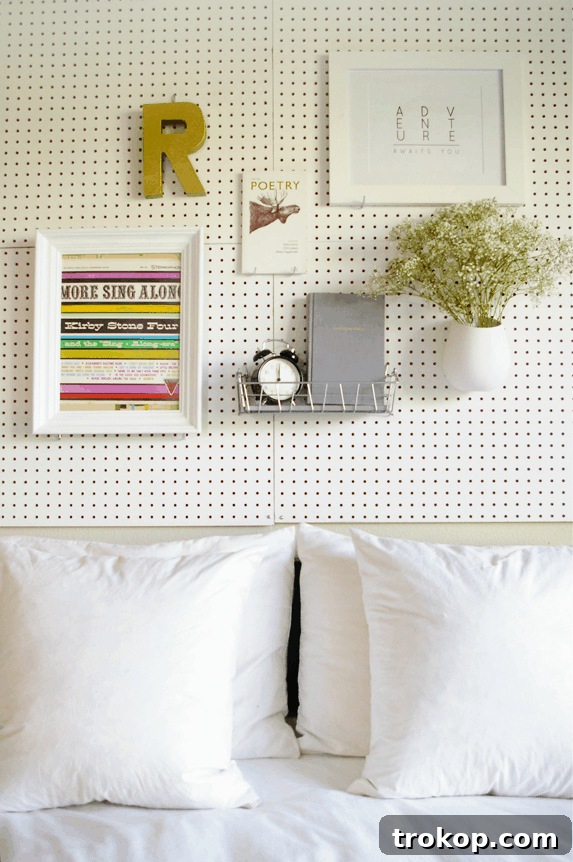
Transform Your Bedroom with a Versatile DIY Pegboard Headboard! This ingenious project is perfect for anyone seeking a stylish, functional, and easily customizable headboard solution without a long-term commitment. Say goodbye to plain walls and hello to an organized, personalized sleeping space!
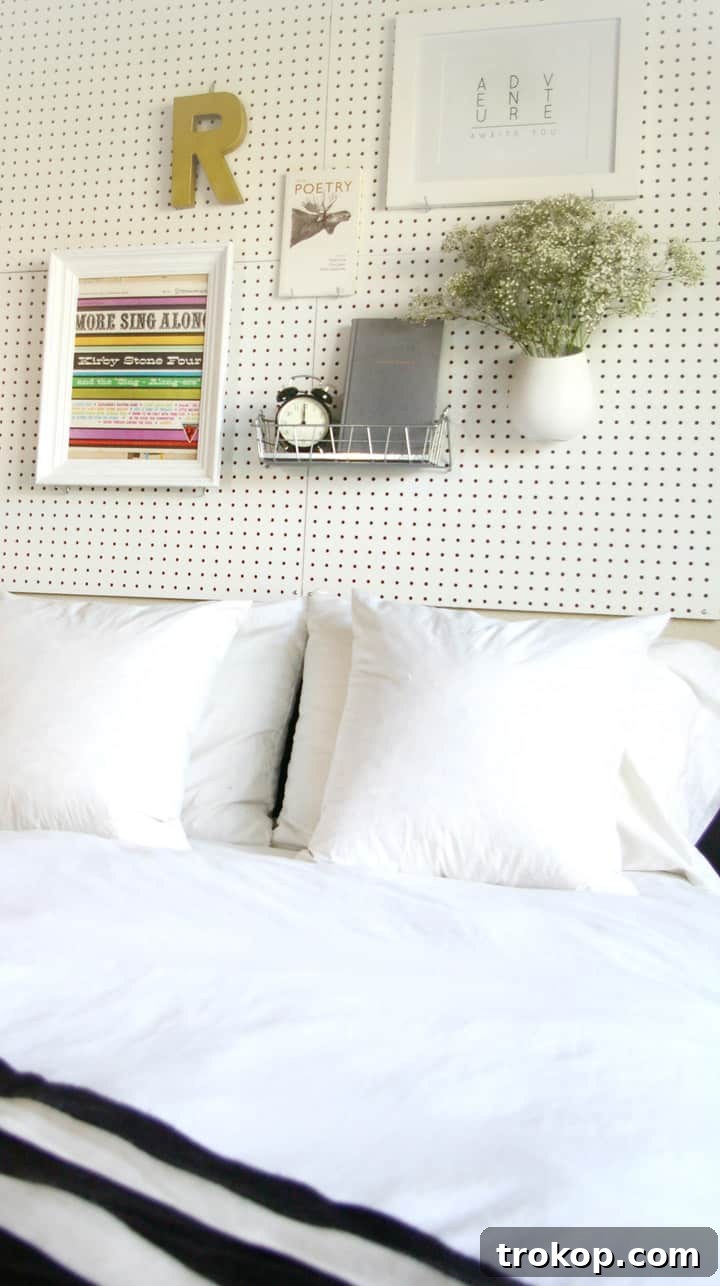
Have you ever found yourself endlessly scrolling through headboard designs, falling in love with one style only to question it days later? The struggle to commit to the “perfect” headboard is real, especially when your decor tastes evolve faster than design trends! Many of us crave a bedroom centerpiece that is both beautiful and practical, offering more than just aesthetic appeal. We need something that adapts to our changing needs and decor whims, providing valuable functionality without sacrificing style.
After countless hours admiring various headboard ideas, a realization dawned: the ideal solution wasn’t about finding a singular, unchangeable design, but rather creating one that embraced flexibility. This led to the discovery of the pegboard headboard – a brilliant, adaptable, and budget-friendly DIY project that perfectly caters to creative spirits and those who appreciate a dynamic living space. It’s the ultimate answer for anyone who loves to redecorate or needs smart storage solutions right where they sleep.
Also read: DIY Paper Wall Art
Prepare to sleep soundly, knowing your search for the perfect headboard is over. This DIY Pegboard Headboard is here to empower your design journey, offering unparalleled customization and organizational potential. It’s designed for those who value both form and function, providing a canvas for personal expression that can be updated as often as you like.
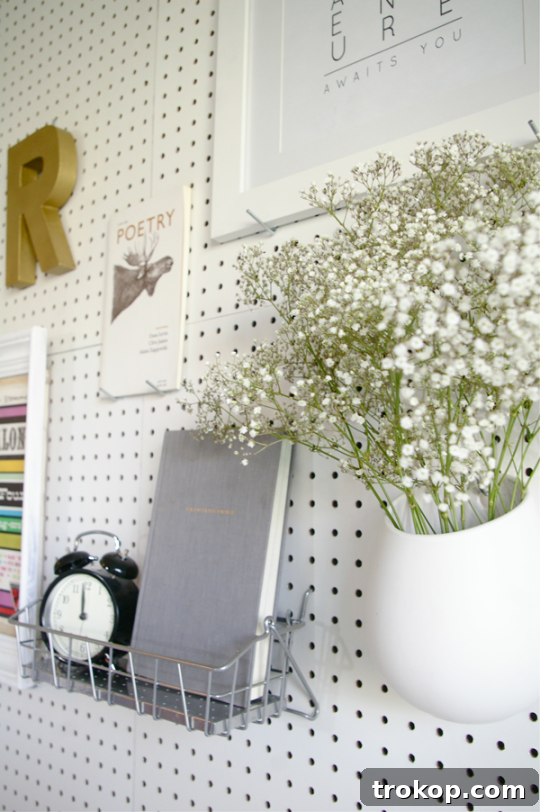
Table of Contents
Why Choose a Pegboard Headboard?
A pegboard headboard isn’t just another DIY project; it’s a game-changer for bedroom design and organization. Here’s why this versatile solution is gaining immense popularity:
- Unmatched Customization: Unlike traditional headboards, a pegboard offers an empty canvas. You can paint it any color, arrange accessories in infinite configurations, and change its look on a whim. This means your headboard can evolve with your style, room decor, or even the seasons.
- Superior Organization: Small bedrooms often lack adequate storage. A pegboard headboard instantly transforms a blank wall into a vertical organization hub. Hang shelves for books, hooks for jewelry or headphones, small bins for essentials, or even a charging station for your devices. Everything you need can be within arm’s reach but neatly tucked away.
- Space-Saving Design: For compact rooms, bulky headboards can feel overwhelming. Pegboard headboards are slim and mount flush against the wall, maximizing floor space. They offer storage without adding visual clutter, making your room feel larger and more open.
- Cost-Effective: Compared to buying a designer headboard or custom shelving, a pegboard headboard is incredibly affordable. The materials are readily available at hardware stores, making it a budget-friendly project that delivers high-end functionality and style.
- Renter-Friendly: Many rental agreements prohibit permanent alterations. A pegboard headboard, when installed correctly with drywall anchors, can be removed without significant damage, making it an excellent temporary yet impactful decor solution for renters.
- Personalized Aesthetic: Showcase your personality! Display cherished photos, small art pieces, plants, or decorative items. It becomes a dynamic gallery reflecting your interests and adding a unique touch to your private sanctuary.
Essential Materials and Tools for Your DIY Pegboard Headboard
Gathering the right materials and tools is the first step to a successful DIY project. For this pegboard headboard, you’ll find everything you need is accessible and straightforward to use. Let’s break down the essentials:
Pegboard — The star of our project! While you can certainly purchase pegboard online, you’ll often find more competitive prices and a wider selection at your local hardware or craft store. Stores like Home Depot or Lowes often offer cutting services, allowing you to get your pegboard precisely sized to your desired dimensions – whether it’s a single large piece or multiple smaller squares for easier transport and installation, as we used for our project. Pegboard comes in various materials (wood, fiberboard, metal) and an array of colors. We opted for a classic white to keep the bedroom bright and airy, but don’t hesitate to explore vibrant hues or natural finishes to match your room’s aesthetic. The beauty of pegboard is its incredible affordability and adaptability, making it a favorite for many DIY projects, including our DIY Pegboard Wall Art, a festive DIY Pegboard Christmas Tree, and even a practical She Shed It Tool Organizer.
Drywall Screws — These are crucial for securely anchoring your pegboard to the wall. Ensure you choose screws appropriate for your wall type (e.g., drywall anchors if not screwing into studs). The length should be sufficient to pass through the pegboard, spacer, and into the wall securely.
Clear Spacers — These small but mighty components are vital for ensuring your pegboard functions correctly. Spacers create a gap between the pegboard and the wall, allowing pegboard hooks and accessories to be inserted easily. Without this space, the hooks would press against the wall and be unusable. We recommend using 1 in. x 3/8 in. O.D. x 0.171 in. nylon spacers for optimal clearance and durability. Clear spacers are aesthetically pleasing as they blend seamlessly with any pegboard color.
Pegboard Hangers/Accessories Kit — This is where the fun begins! A wide variety of pegboard hangers, hooks, shelves, and small bins are available. These accessories are what allow you to customize the functionality of your headboard, transforming it into a personalized storage and display unit. Consider what you want to store or display near your bed – books, reading glasses, a water bottle, jewelry, small plants, or decorative items – and select your hangers accordingly. Starter kits often provide a good assortment.
General Mounting Tools — To ensure a smooth installation, you’ll need a few common household tools. These typically include:
- Drill: For pre-drilling pilot holes and driving screws.
- Measuring Tape: For accurate measurements of your wall and pegboard placement.
- Pencil: For marking screw locations.
- Level: Essential for ensuring your pegboard is mounted perfectly straight.
- Stud Finder: If you plan to screw directly into wall studs for maximum stability (highly recommended).
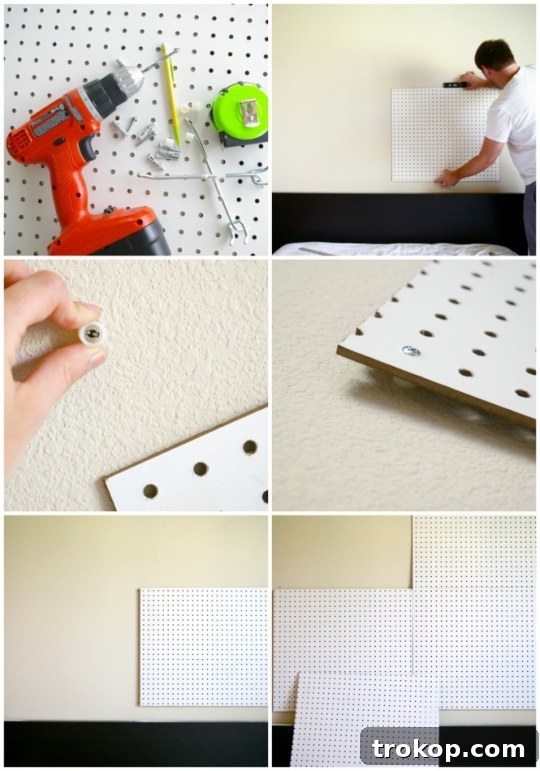
Step-by-Step Guide: How to Craft Your Pegboard Headboard
Creating your functional pegboard headboard is a rewarding project that takes minimal time and effort. Follow these simple steps to transform your bedroom. For this particular project, we used four separate pegboard squares due to transportation limitations. If you can, using one large piece of pegboard might simplify the process even further.
1 – Plan Your Layout and Measurements: Begin by envisioning how you want your headboard to look. Consider the width of your bed (twin, full, queen, king) and how high you want the pegboard to extend above it. Use your measuring tape and a pencil to mark the desired dimensions on your wall. If you’re using multiple pegboard pieces, lay them out on the floor first to visualize the overall arrangement and ensure they fit together seamlessly. Mark where the corners of each pegboard section will meet the wall, and identify the ideal spots for your mounting screws, aiming for wall studs if possible for added security.
2 – Anchor Drywall Screws and Place Spacers: Once your marks are in place, it’s time to secure the first pegboard section. Using your drill, create pilot holes at your marked screw locations. These holes should go through the wall and be appropriately sized for your drywall screws and anchors (if not hitting a stud). Before inserting the screws, position the clear spacers between the wall and the pegboard. These spacers are crucial as they create the necessary gap for pegboard hooks to function properly. Drive the drywall screws through the pegboard, through the spacers, and securely into the wall until the pegboard is firmly in place but not overtightened, which could damage the board. Use a level to ensure the first board is perfectly straight.
3 – Assemble Remaining Sections (If Applicable): If you are working with multiple pegboard pieces, repeat step 2 for each subsequent board. Carefully align each new board with the previously mounted one, ensuring the pattern of the pegboard holes lines up. Continue to use spacers for each screw point. Take your time to make sure all boards are level and evenly spaced if there are any gaps between them. This meticulous approach will result in a professional, cohesive look for your headboard. Remember, using a single large piece of pegboard would circumvent this step, but working with smaller sections is totally feasible with careful alignment.
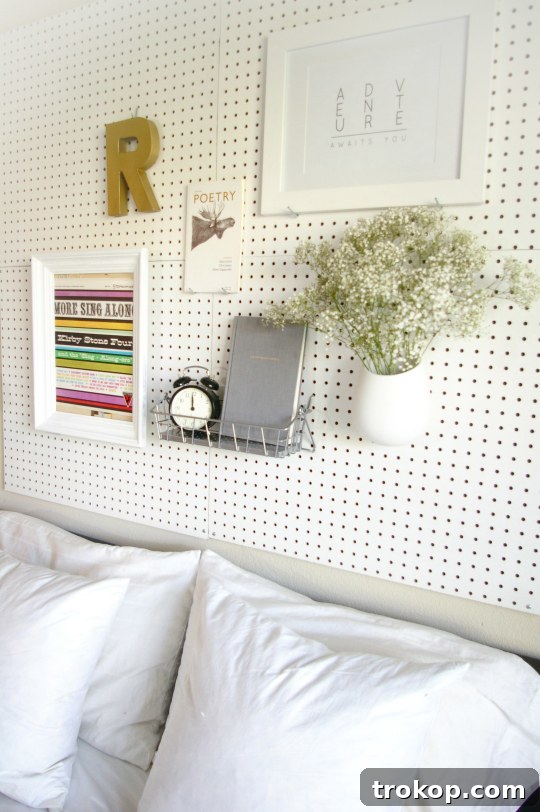
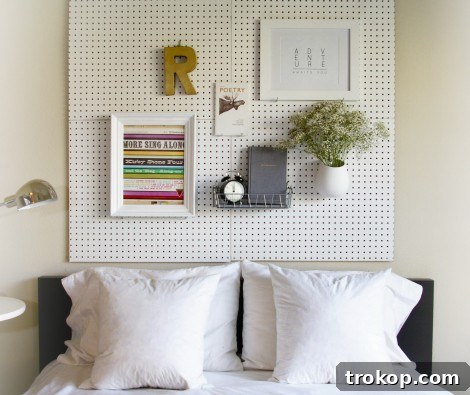
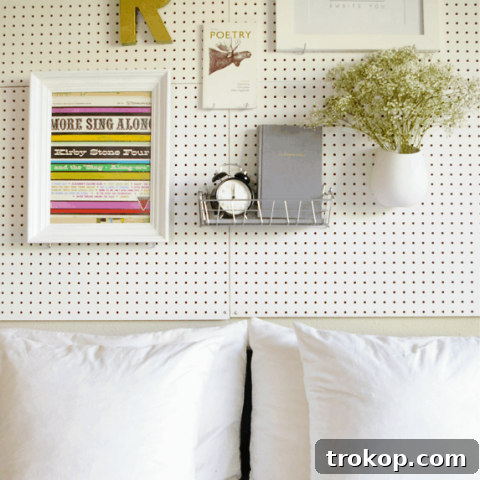
4 – Personalize and Organize with Pegboard Accessories: Now for the most exciting part – decorating and organizing! With your pegboard headboard securely mounted, unleash your creativity using a variety of pegboard accessory hangers. Add small shelves to hold your alarm clock, a succulent plant, or your favorite book. Install hooks for headphones, a hat, or a string of fairy lights to create ambiance. Small cups or bins can keep pens, hair ties, or charging cables tidy. The beauty of pegboard is its dynamic nature; you can rearrange these accessories whenever you wish, constantly refreshing your bedroom’s look and functionality.


Unleash Your Creativity: Customizing Your Pegboard Headboard
The true magic of a pegboard headboard lies in its infinite potential for customization. Beyond just hanging a few hooks, you can truly make this headboard a reflection of your unique style and needs.
- Color and Finish: Don’t limit yourself to plain white or brown. Paint your pegboard to match your bedroom’s existing color scheme, or choose a bold accent color to make it pop. You can use spray paint for an even finish or roll-on paint for a textured look. Consider painting only a portion of the board, or even creating a geometric pattern for an artistic touch. Staining a wooden pegboard can add a warm, natural feel, complementing a bohemian or rustic aesthetic.
-
Accessory Versatility: The world of pegboard accessories is vast!
- Shelves: Install small wooden or metal shelves to hold books, a small alarm clock, a charging phone, or decorative miniatures.
- Hooks: Utilize various types of hooks for everything from headphones and scarves to necklaces and light jackets. S-hooks are great for versatility, while specialized hooks can hold tools or art supplies.
- Bins and Cups: Attach small bins or cups to store pens, lip balm, remotes, or other bedside essentials, keeping clutter off your nightstand.
- Lighting: Drape fairy lights around the perimeter or weave them through some of the holes for a soft, ambient glow. Small battery-operated puck lights can also be mounted on shelves for targeted illumination.
- Thematic Decor: Adapt your pegboard to any theme. For a minimalist look, keep accessories sparse and choose a neutral color palette. For a vibrant, eclectic space, fill it with colorful artwork, quirky collectibles, and a mix of textures. It can be an industrial-chic display with metal accessories, or a cozy, rustic haven with wooden elements and potted plants.
- Smart Functionality: Think beyond basic storage. Create a small charging station by incorporating a hidden power strip behind the board (ensure proper safety and ventilation) with cables neatly routed through the holes. Add a small mirror for quick checks, or even mount a tablet holder for hands-free viewing in bed. For students or avid readers, it can serve as a mini-library, keeping current reads and notebooks organized.
The beauty is that every element on your pegboard headboard can be changed or rearranged in minutes, giving you endless possibilities to refresh your bedroom decor without undertaking a whole new project.
More Easy Bedroom DIYs To Inspire Your Space
If you’ve enjoyed creating your pegboard headboard and are looking for more ways to personalize your sleeping quarters, these easy bedroom DIY projects are sure to spark your imagination and add even more charm to your home.
- DIY Midcentury Daybed: Create a stylish and functional daybed, perfect for a guest room or a cozy reading nook, bringing a touch of vintage elegance to your space.
- Color Dipped DIY Clothes Hangers: Add a pop of color and personality to your closet or open wardrobe with these simple yet chic dipped hangers, making laundry day a little brighter.
- Beautiful DIY Tassels For Your Door Handle: Elevate your interior doors with handcrafted tassels, offering a subtle decorative accent and a touch of bohemian flair.
- Modern DIY Dream Catcher: Craft a contemporary dream catcher that doubles as a unique piece of wall art, adding a serene and artistic element to your bedroom decor.
DIY Pegboard Headboard Project Summary
DIY Pegboard Headboard
30 minutes
30 minutes
DIY
Home Decor
Equipment
-
General mounting tools (drill, measuring tape, level, stud finder)
-
Drywall screws
Materials
- Pegboard (sized to your preference, potentially multiple pieces)
- Clear spacers (e.g., 1 in. x 3/8 in. O.D. x 0.171 in. nylon spacers)
- Pegboard hangers and accessories (hooks, shelves, bins)
Instructions
-
1. Plan Your Layout and Measurements: Get a general idea of the layout you want for your pegboard, considering your bed size and desired height. Measure and mark the precise locations on your wall where the pegboard will be installed and where mounting screws will go.
-
2. Secure the First Pegboard Section: Using your drill, create pilot holes in the wall at your marked points. Anchor drywall screws to the wall, then place clear spacers between the wall and the pegboard. Screw the first section of pegboard firmly in place, ensuring it is level.
-
3. Assemble Remaining Sections (If Applicable): If you are working with multiple pegboard pieces (as we did for transport), continue by aligning and securing the remaining boards. Repeat the process of anchoring screws and placing spacers, making sure each piece is level and joins seamlessly with the others. This step is only necessary if you’re not using a single, large pegboard sheet.
-
4. Personalize and Organize: The fun part! Use various pegboard accessory hangers, hooks, shelves, and bins to decorate and organize your new headboard. Arrange items like books, lights, photos, and small decorative pieces to create a personalized and functional display.
$70
DIY pegboard headboard, functional headboard, bedroom organization, customizable decor

Transform Your Sleeping Space: More Bedroom Decor Makeovers
Ready to give your entire bedroom a fresh new look? Explore these inspiring before-and-after transformations and clever DIY projects to create the bedroom of your dreams.