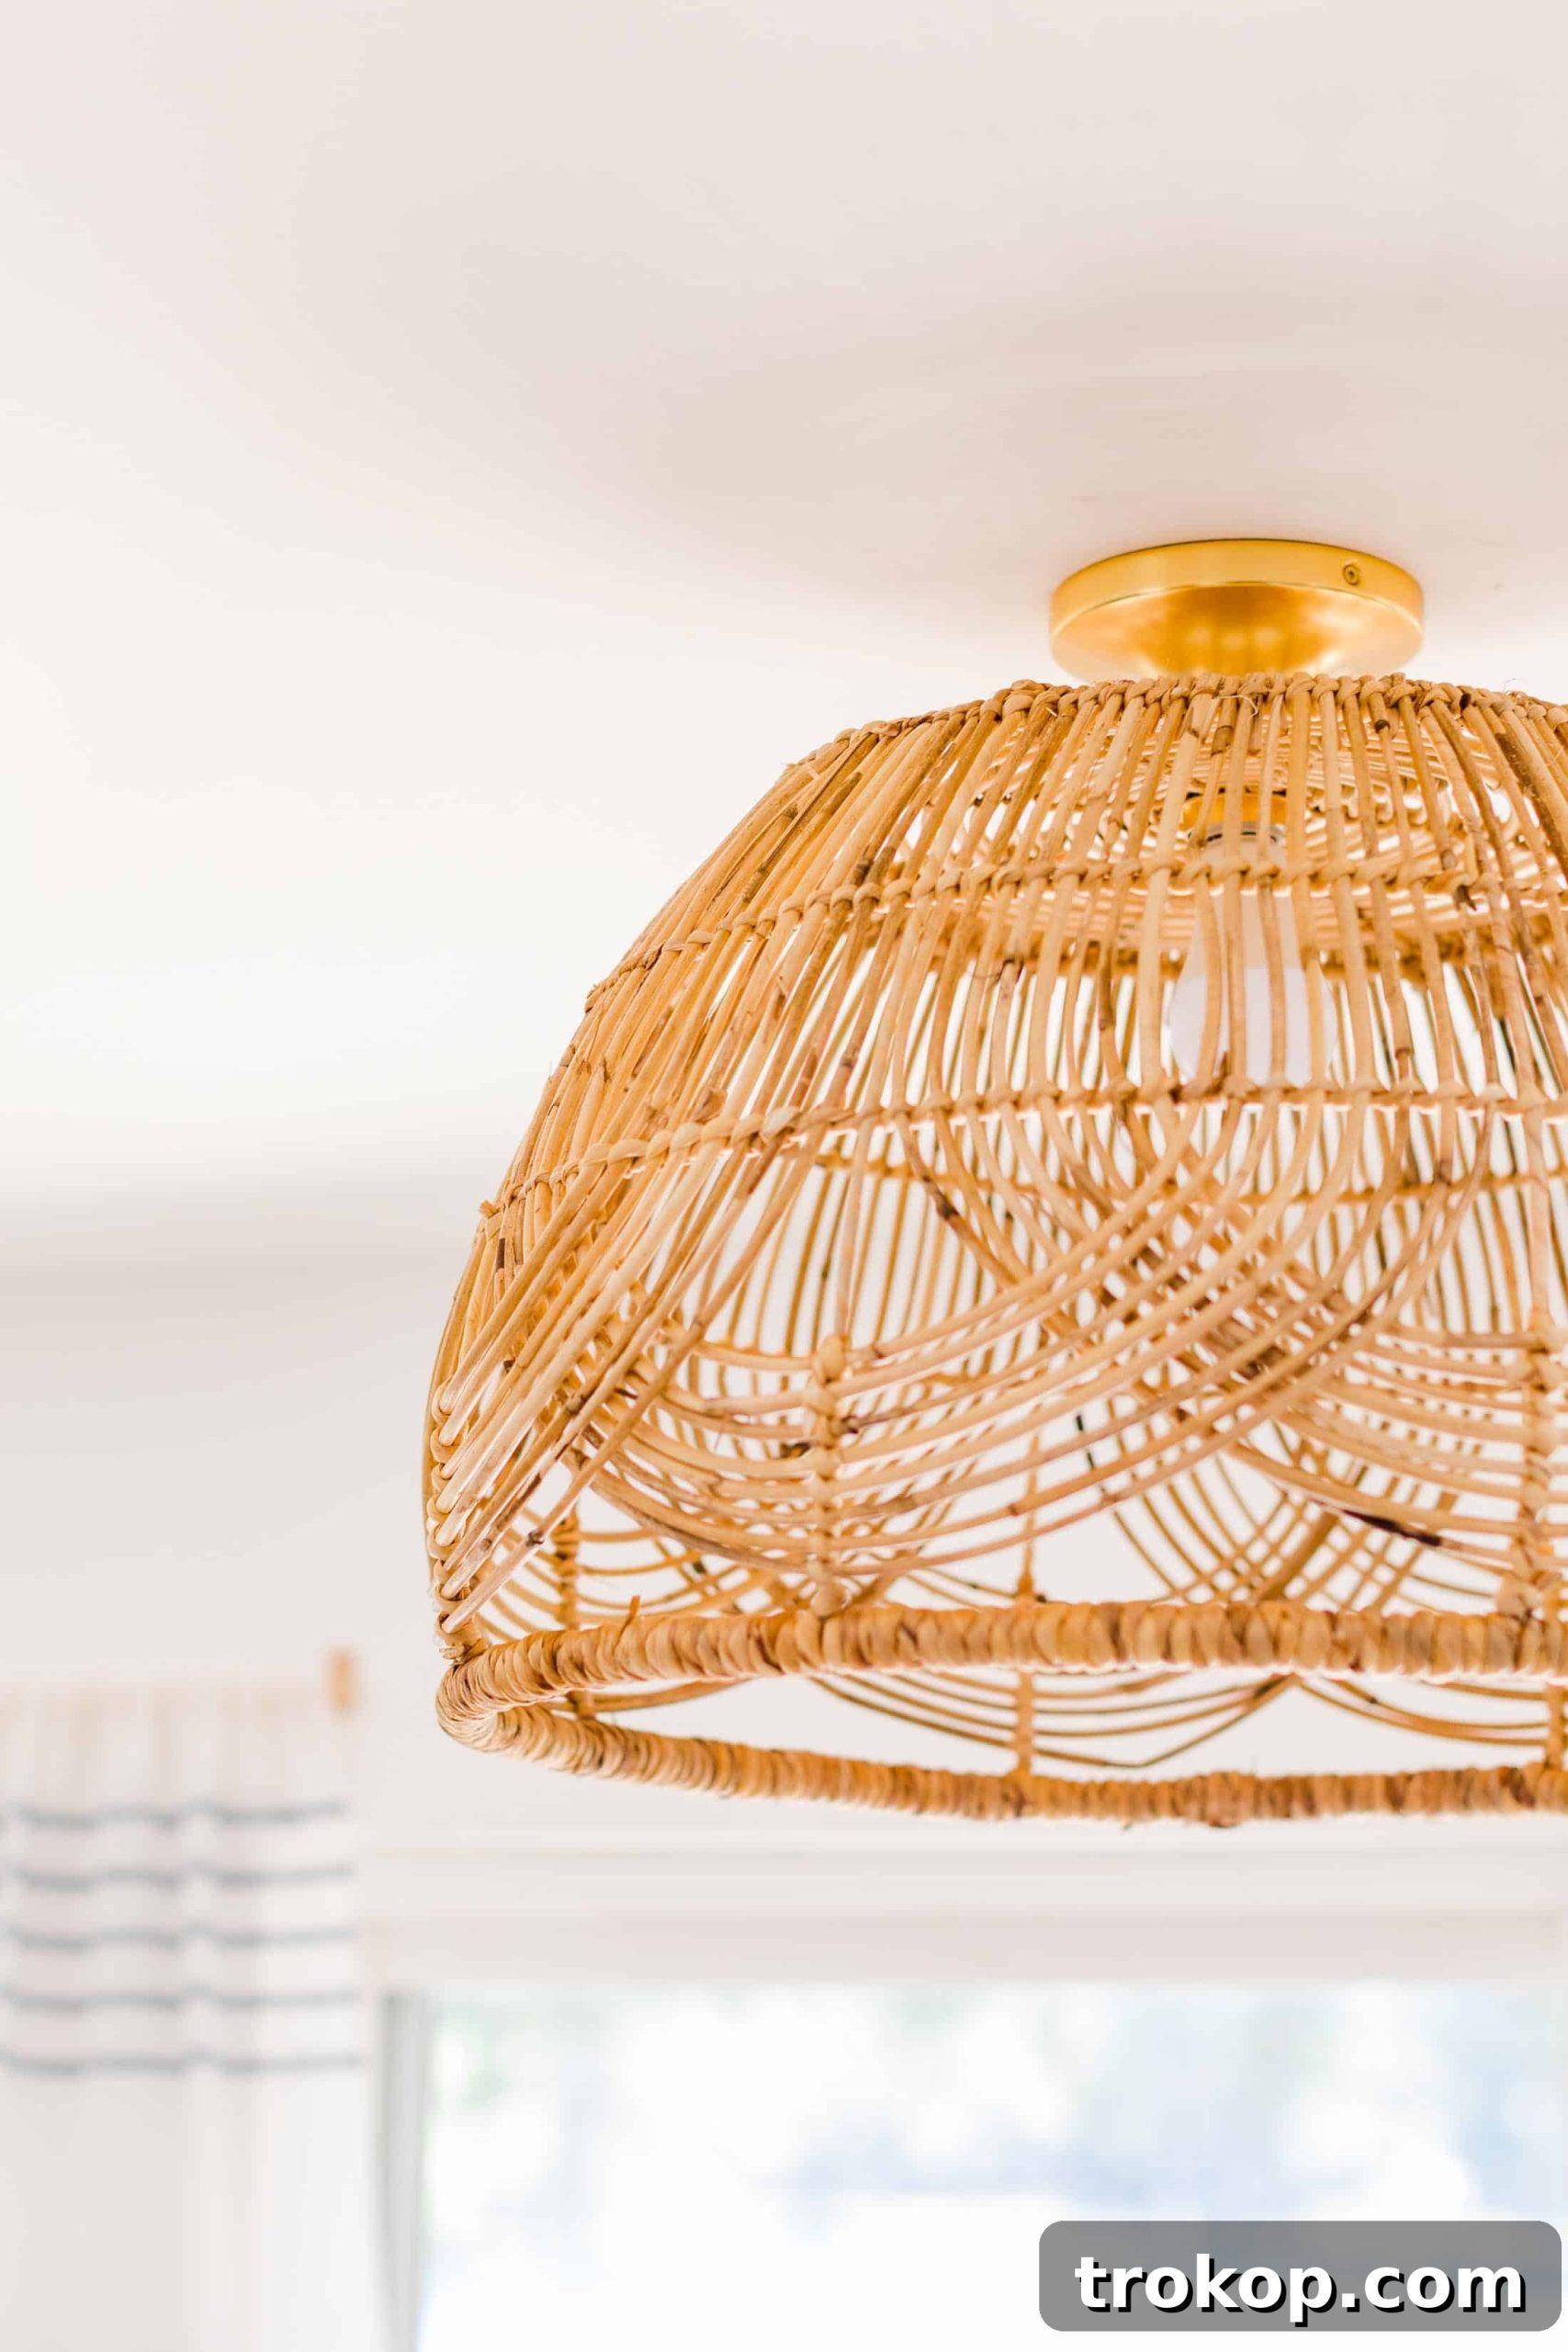
Discover how to create a breathtaking DIY basket pendant light with this comprehensive, step-by-step tutorial. This ingenious project is ideal for those seeking budget-friendly home decor solutions, effortlessly infusing character and warmth into any living space.
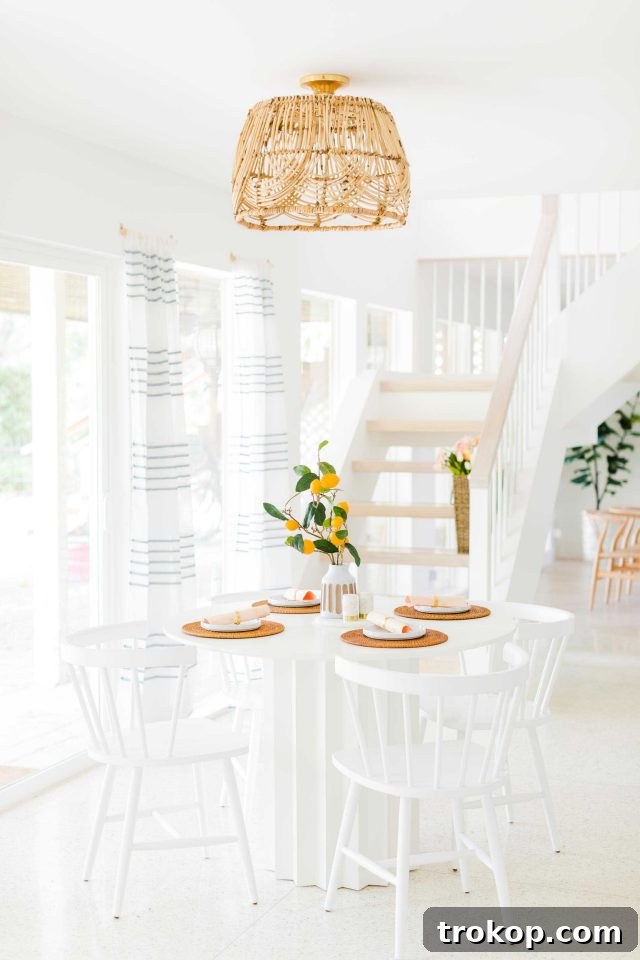
Are you searching for a straightforward yet impactful DIY project to elevate your home? Look no further! We’re thrilled to share our guide on crafting a beautiful basket light fixture that promises both simplicity and style. This project is a fantastic way to personalize your interior design without breaking the bank, offering a unique focal point that guests will undoubtedly admire.
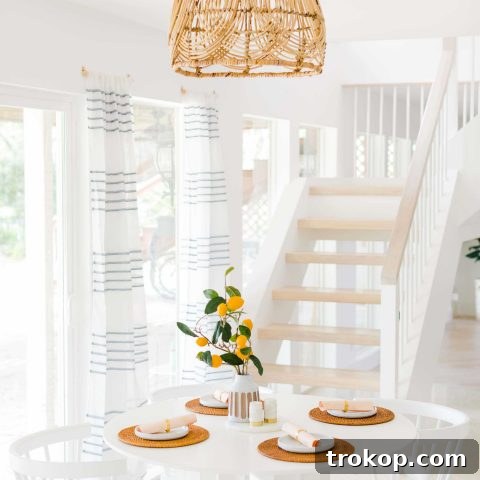
Welcome back to our breakfast nook, nestled within our new home! We’ve been slowly but surely transforming this space, making it truly feel like our own. While we still have a delightful journey ahead, incorporating a DIY Basket Pendant Light is one of those small, significant steps that makes a house a home. We’ve been living here for about two months now, navigating the balance between an abundance of unpacked boxes and creating thoughtfully styled corners that offer a glimpse of the finished vision. Our breakfast area, in particular, is a work in progress, as we consider its seamless integration with adjacent spaces like the family room and our recently renovated kitchen. Therefore, this isn’t a grand before-and-after reveal of the entire space just yet.
However, the transformation in this specific area is already remarkable, a drastic improvement from its initial appearance in the original listing photos. For today, our focus is squarely on empowering you to replicate this chic woven basket pendant light. With just a standard basket from your favorite home goods store and a few essential tools, you can achieve this high-end look yourself.
As you’ll observe, the specific design we’re featuring isn’t a traditional low-hanging pendant light. However, the beauty of this DIY concept lies in its adaptability. You can effortlessly adjust the length to create a longer, more dramatic pendant if your space allows, simply by extending the cord of your chosen light kit. This flexibility ensures your DIY creation perfectly suits your ceiling height and aesthetic preferences.
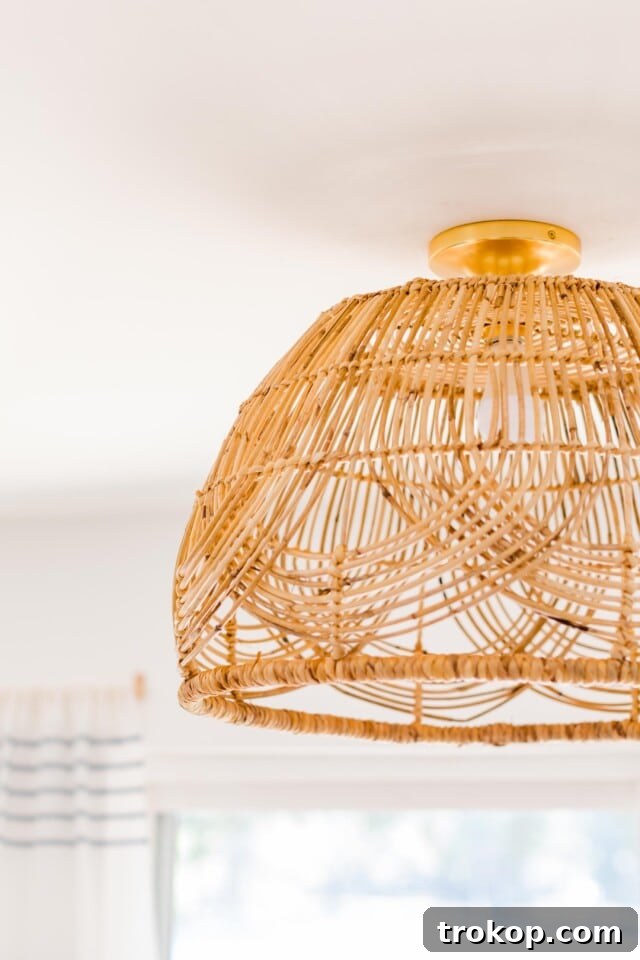
Given that our ceilings in this room are approximately eight feet high, I deliberately chose a design that wouldn’t visually shorten the room by hanging too low. Instead, I opted for what essentially became a semi-flush DIY pendant light. This design choice is also an excellent solution if you’re looking to refresh an existing light fixture. It’s incredibly simple to swap out an old, outdated fixture for this charming hanging basket light, providing an instant upgrade to your decor.
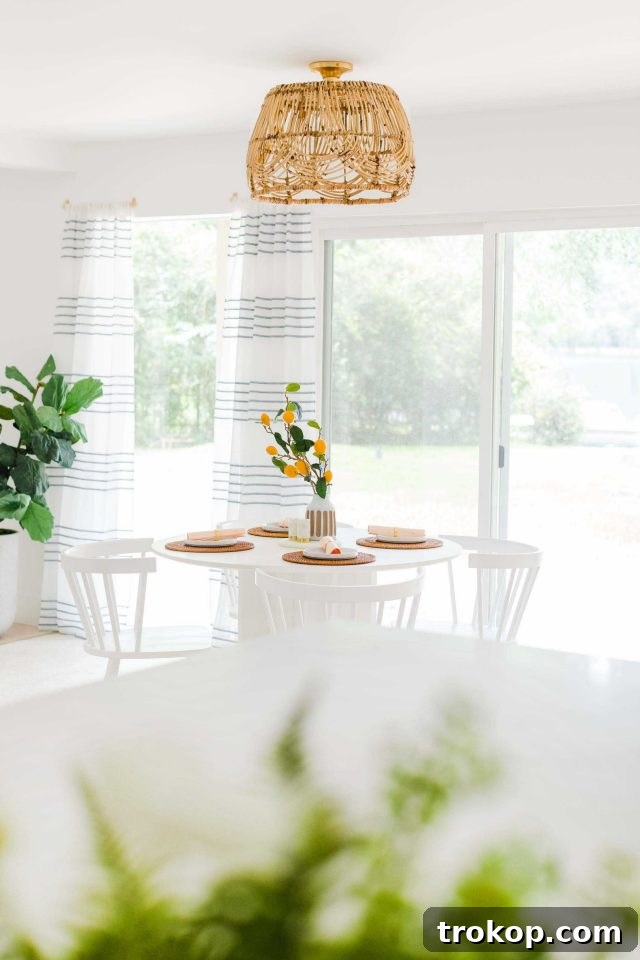
Table of Contents
Breakfast Room Decor & Styling
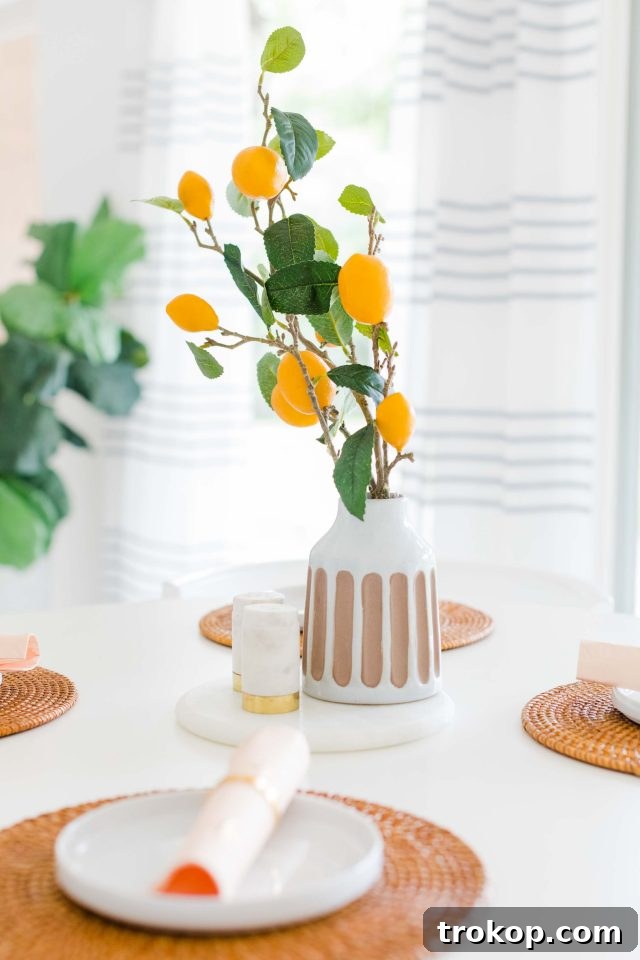
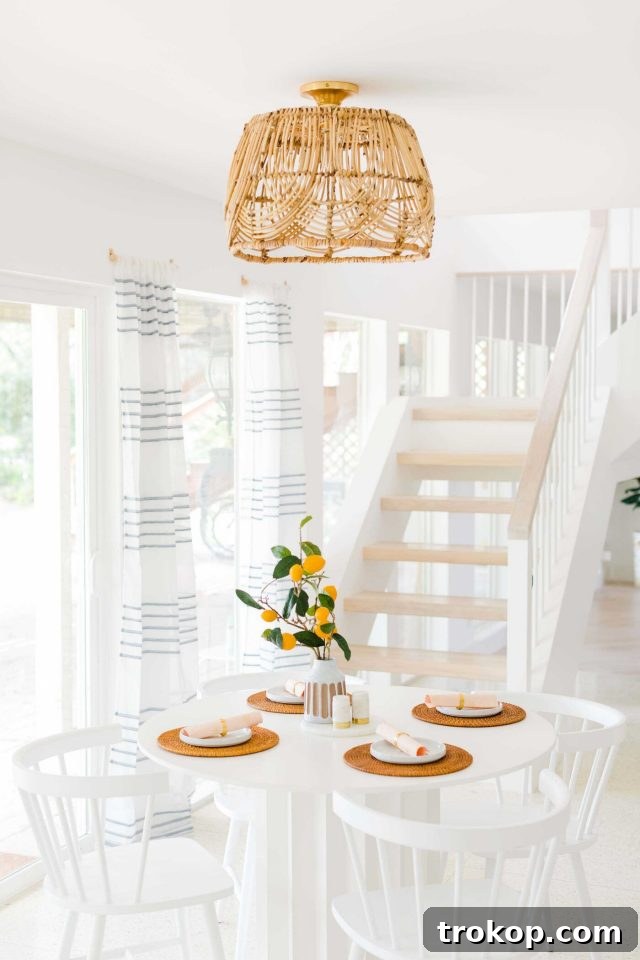
Because the light fixture itself has a relatively compact profile, I chose to complement it with a faux lemon plant stem as a centerpiece on our dining table (which, by the way, is currently enjoying a limited 20% off discount!). This simple addition beautifully adds vertical interest and a touch of vibrancy, lending a modern, clean feel while maintaining a timeless classic appeal. The bright yellow of the lemons provides a cheerful contrast to the neutral tones of the basket and the room.
To further unify the aesthetic, I subtly echoed the woven texture of the basket light fixture by incorporating woven placemats into our table settings. This intentional repetition of texture creates a cohesive and inviting dining experience. I specifically sought a pop of color that remained neutral in tone, as both the table and chairs are crisp white. The natural warmth of the woven elements and the soft yellow of the lemons achieve this balance perfectly.
The quest for the ideal curtains proved to be quite an endeavor, involving a long search to find just the right ones. However, I eventually discovered a selection at At Home that perfectly captured the aesthetic I was aiming for, completing the breakfast nook’s transformation.
Why Choose a DIY Basket Pendant Light?
Opting for a DIY basket pendant light offers a multitude of benefits that extend beyond mere aesthetics. Firstly, it’s incredibly cost-effective. High-end lighting fixtures can be surprisingly expensive, but by repurposing a stylish basket and a standard light kit, you can achieve a designer look for a fraction of the price. This project allows you to allocate your home decor budget to other areas, making chic living more accessible.
Secondly, it provides unparalleled opportunities for personalization. When you create your own light fixture, you have complete control over the basket’s style, size, and material, ensuring it perfectly complements your existing decor. This is your chance to infuse your unique personality and taste into your living space, creating a piece that truly reflects you. No more settling for mass-produced options that don’t quite fit your vision!
Moreover, embracing DIY projects like this promotes sustainability and resourcefulness. Instead of buying new, you’re giving new life to an item that might otherwise sit unused or be discarded. This eco-conscious approach not only reduces waste but also fosters a sense of accomplishment and pride in your handmade creations. It’s a tangible way to contribute to a greener lifestyle while enhancing your home’s appeal.
Finally, the process itself can be incredibly rewarding. There’s a distinct satisfaction that comes from transforming simple materials into something beautiful and functional. It’s an easy project that builds confidence and encourages further creative exploration in your home decor journey.
Designing Your Space with Natural Elements
A DIY basket pendant light is remarkably versatile and can enhance a variety of interior styles. Its natural texture and organic form make it a perfect fit for bohemian, farmhouse, coastal, and even modern minimalist aesthetics. The warmth of the woven material instantly adds an inviting, cozy feel to any room.
While we showcased it in our breakfast nook, imagine the impact of this fixture in other areas of your home:
- Kitchen Island: Hang a pair or trio of these lights over a kitchen island for a cohesive and stylish task lighting solution. The natural texture provides a wonderful contrast to sleek countertops and appliances.
- Bedroom: Replace traditional bedside lamps with smaller basket pendants hanging on either side of the bed. This frees up nightstand space and creates a soft, ambient glow perfect for relaxation.
- Living Room: A larger basket pendant can serve as a stunning central light fixture, particularly in rooms with high ceilings. It draws the eye upward, adding architectural interest and a touch of organic elegance.
- Nursery or Kids’ Room: The playful yet sophisticated nature of a basket light makes it an ideal addition to a child’s space. It’s soft glow creates a calming atmosphere, and its natural materials are a welcome alternative to plastic.
- Entryway or Hallway: Create a welcoming first impression by hanging a basket pendant in your foyer. Its unique design will instantly capture attention and set the tone for the rest of your home.
The key is to consider the scale of your room and the basket’s size. A larger room might benefit from a more substantial basket or multiple smaller ones, while a compact space could be overwhelmed by anything too grand. The natural materials beautifully diffuse light, creating a soft, warm ambiance that is perfect for any time of day.
Selecting the Perfect Basket
The choice of your basket is paramount to the success and overall aesthetic of your DIY pendant light. I initially acquired my basket from At Home, envisioning it as a storage solution for living room blankets. However, a friend, Shannon, inspired me with the idea of repurposing similar items into hanging light fixtures, much like our hanging floral baskets, and I immediately fell in love with the concept.
When scouting for your ideal basket, there are a few key considerations:
- Material: Woven materials like rattan, wicker, seagrass, and bamboo are excellent choices. They offer a natural, organic look and allow light to filter through beautifully, creating interesting patterns on your walls and ceiling.
- Shape and Size: Consider the proportions of your room and where the light will hang. A wider, shallower basket might work well in a breakfast nook, while a taller, narrower one could be striking in a hallway. Dome-shaped, bell-shaped, or even more abstract designs can all be adapted.
- Weave Pattern: The tightness or looseness of the weave will affect how much light is diffused and the kind of shadows it casts. A looser weave will allow more light to escape, creating a brighter ambient light, while a tighter weave offers a more focused glow.
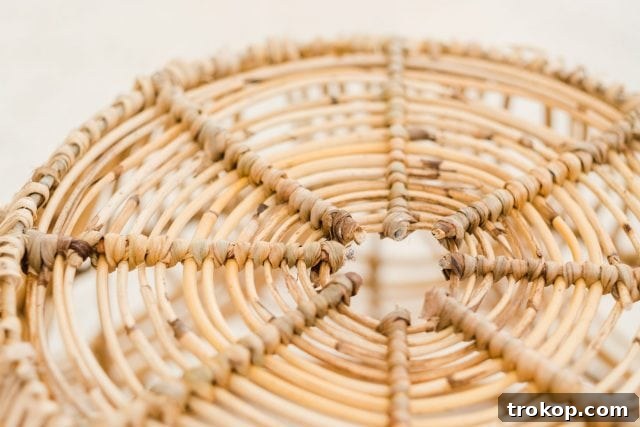
- Bottom Structure: A basket with a clearly defined, sturdy center at the bottom is highly advantageous for this DIY project. It provides a natural target for cutting the hole for the light socket and often offers a more stable base for the fixture. While you can certainly adapt baskets without this feature, having one makes the process significantly simpler and more precise.
- Handles or No Handles: I personally preferred using a basket without handles for a cleaner, more streamlined look. However, baskets with handles can also be creatively integrated into your design, or the handles can be easily removed with heavy-duty cutters if desired. For example, you could easily adapt this rattan basket as a fantastic DIY Ikea Hack version, even if it has handles.
Take your time choosing; the right basket will truly make your DIY pendant light a statement piece.
Materials Needed to Make A DIY Pendant Light
Gathering your materials before you begin will ensure a smooth and efficient crafting process. Here’s what you’ll need to bring this stunning project to life:
- Woven Basket of Your Choice: As discussed, select a basket that complements your aesthetic. We utilized one from At Home Stores, but this Ikea option is quite similar, and this set offers a spot-on alternative for diverse needs.
- Semi-Flush Mount Light Kit: This will be the functional core of your pendant. You can find options in classic black or sleek silver here, or if you prefer a touch of elegance, a gorgeous gold version can be found here. These kits are perfect whether you’re installing a new fixture or repurposing an old one.
- Heavy-Duty Cutting Pliers: Essential for creating a clean and precise opening in the basket without damaging the weave.
- Aesthetic Light Bulb: Consider an Edison-style LED bulb or a round, clear bulb to enhance the light’s appearance, as it will be visible through the basket.
- Safety Equipment: Always have safety glasses and electrical tape on hand when working with wiring.
How to Make a Basket Pendant Light Fixture | How to Wire a Basket Pendant Light
This section guides you through the process of assembling your unique basket light. We’ll utilize the base of a semi-flush mount light fixture, which typically includes various components and often comes with a standard shade. My linked suggestions in the materials list above provide several excellent choices. The key is that you will only be using the mounting and electrical components, not the shade that comes with it.
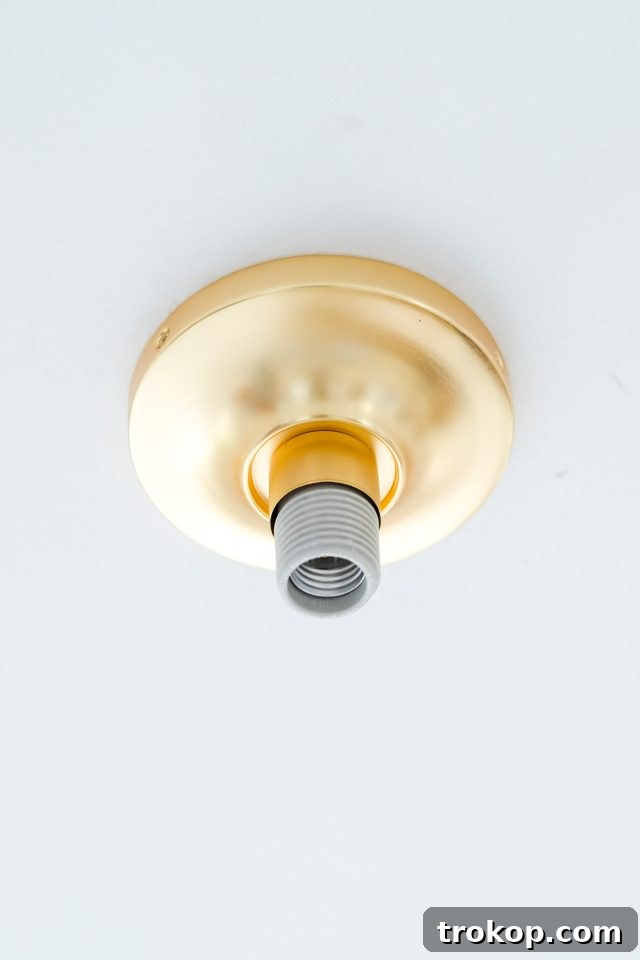
The accompanying photo illustrates what the semi-flush mount light fixture looks like when installed on the ceiling, prior to attaching the basket. If you’re using one of the kits I recommended, you will essentially install all components *except* for the original shade it comes with. This prepares the fixture to receive your custom basket shade.
Before You Begin: Safety First
Working with electrical wiring can be intimidating, but with proper precautions, it’s a manageable DIY. Always ensure the power to the light fixture’s circuit is turned OFF at your home’s main electrical panel before beginning any wiring work. If you’re uncomfortable or inexperienced with electrical installations, it is highly recommended to consult a qualified electrician or utilize services like Task Rabbit for a quick and safe installation. They can handle the electrical wiring portion of the project, allowing you to focus on the creative basket attachment.
Preparing Your Basket
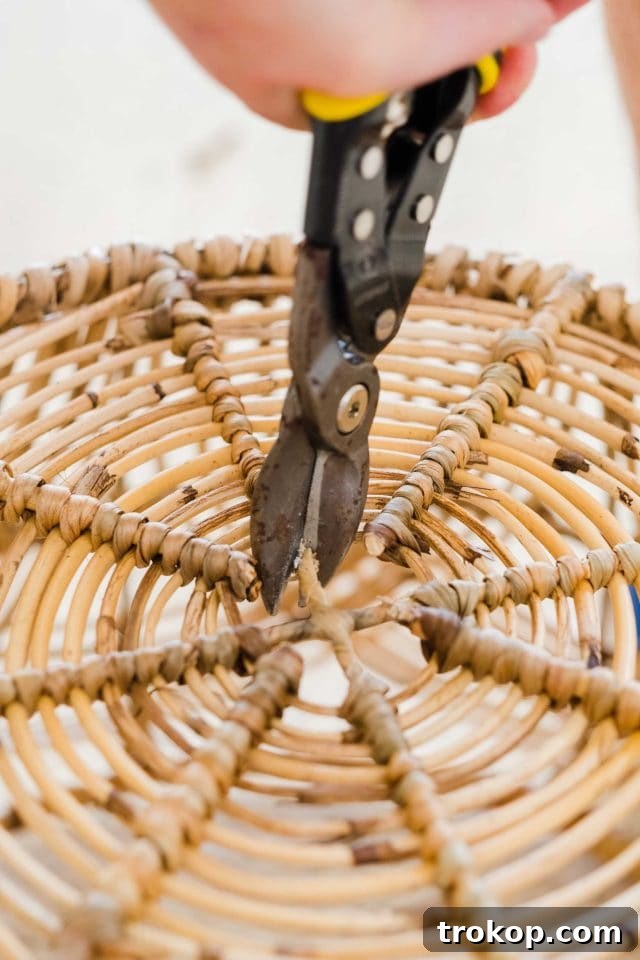
- Create the Opening: Once the electrical wiring for your light fixture is safely completed and installed on the ceiling (or by a professional), it’s time to prepare your basket. Using your heavy-duty cutting pliers, carefully create a hole in the absolute center of the basket’s bottom.
- Size it Right: The crucial step here is to ensure the hole is just wide enough to smoothly slip over the light bulb socket of your fixture. However, and this is important, you want the diameter of this hole to be slightly smaller—a hair smaller—than your shade ring. A shade ring is a threaded ring that screws onto the light socket to hold a shade in place; you can see what a typical shade ring looks like here. This slight size difference is what will allow the shade ring to securely hold the basket in place.
Installing the Light Fixture
As mentioned, ensure your semi-flush mount light kit is properly wired and installed onto the ceiling, following the manufacturer’s instructions. Remember to only install the base and electrical components, omitting the original shade. Double-check that the power is still off at the breaker box before proceeding with the basket attachment.
Attaching the Basket
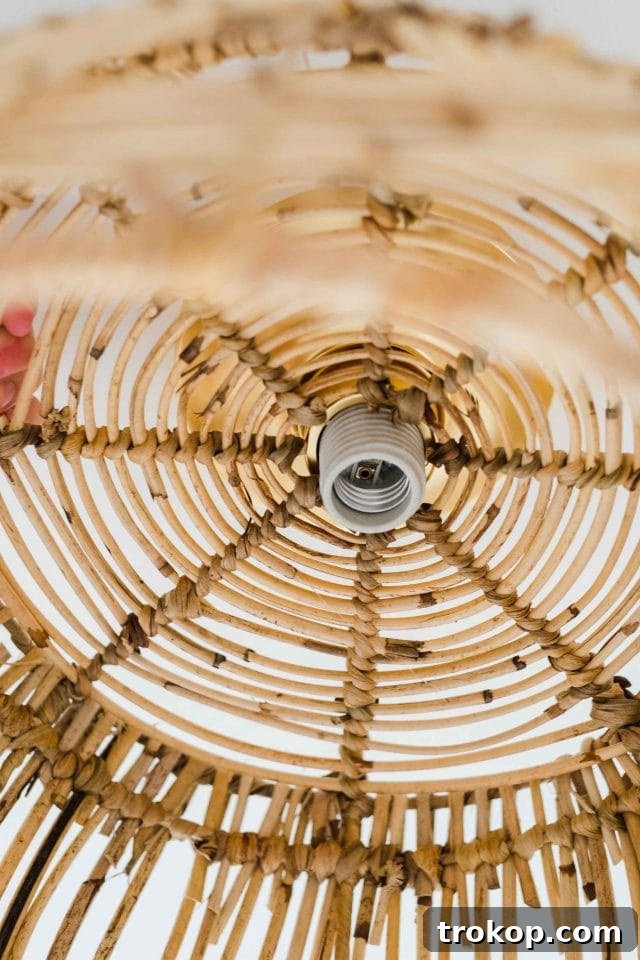
- Secure the Basket: Once your precisely cut hole is ready, carefully slip the basket over the light bulb socket. Guide it upwards until it snugly reaches the base of the mounted light fixture. At this point, retrieve your shade ring and screw it firmly onto the socket, ensuring it presses against the basket to hold it securely in place.
- Understanding the Mechanism: The ingenious part of this design is that the mounted light fixture itself bears the weight of the basket. The basket is effectively sandwiched and held firm between the shade ring (screwed onto the socket) and the top portion of the bulb socket where it meets the fixture’s base.
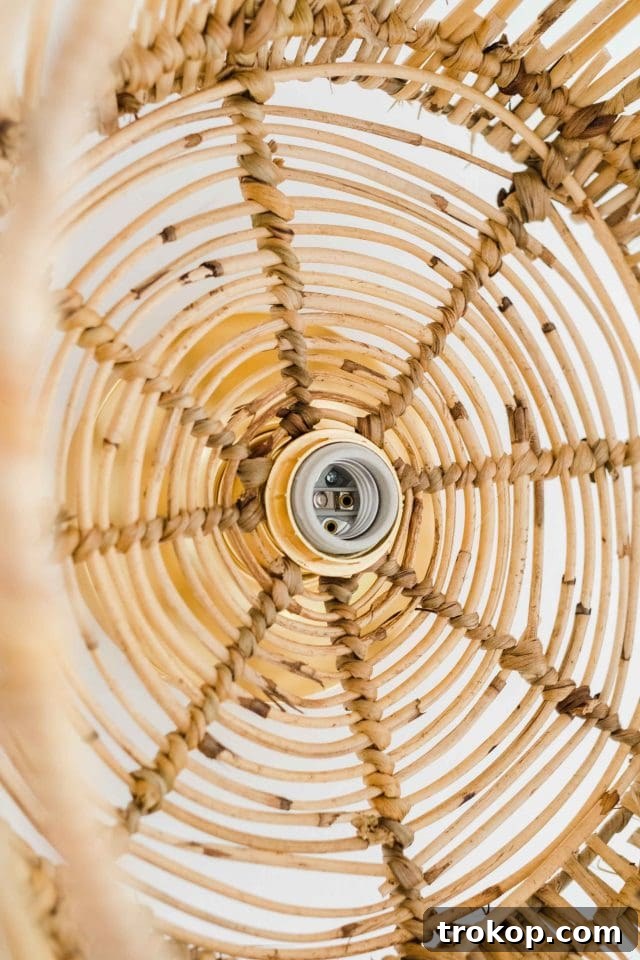
The photo above clearly illustrates how the basket is now securely fastened, providing a stable and attractive new shade for your light fixture.
The Final Touch: Bulb Selection
- Insert the Bulb: With your basket firmly in place, the final step is to insert your chosen light bulb. We recommend a cute round bulb or an Edison-style LED bulb, as its aesthetic will be visible through the basket weave. Turn the power back on at the breaker box, and you are all set to enjoy your brand-new, custom DIY basket pendant light!
What are your thoughts on this transformation? I absolutely adore how it turned out! The natural texture adds such unique character, and it’s especially captivating at night when the light glows warmly through the intricate design, casting beautiful patterns across the room. It’s truly a functional piece of art.
More DIY Home Decor Projects
If you’re as inspired as we are by the concept of repurposing everyday items into stunning DIY home decor, then you’re in for a treat! Here are a few more creative projects that demonstrate how you can transform ordinary objects into extraordinary pieces for your home:
- Repurpose a Serving Board as a DIY Marble Table: Learn how to turn a simple serving board into an elegant marble and gold accent table, adding a touch of luxury to any corner.
- Making DIY Trivets and Serving Boards Out of Marble Tiles: Discover the ease of crafting stylish and functional marble trivets and serving boards using inexpensive marble tiles, perfect for entertaining or daily use.
- A DIY Side Table Out of a Cake Pan: Uncover the surprising potential of a humble cake pan as you transform it into a chic mid-century inspired side table, a true testament to creative upcycling.
These projects are just a starting point for unleashing your creativity and making your home uniquely yours. Now, let’s get back to our basket light. Below, you’ll find a full printable tutorial for how to make a DIY basket pendant light in your house, ensuring you have all the details at your fingertips.
DIY Basket Pendant Light
If you’re on the hunt for an easy DIY pendant light to make, this guide shares how to create a stunning basket light fixture that’s incredibly simple and adds undeniable charm!
Equipment
- Heavy-duty cutting pliers
Materials
- 1 woven basket I used this one from At Home Stores, but this one is similar and this set is spot on!
- 1 semi-flush mount light kit Here it is in black or silver or here in gold
- Aesthetic light bulb (e.g., round or Edison style)
Instructions
-
Prepare the Wiring: First, ensure the wiring for your chosen light fixture is complete and the fixture base is securely installed on your ceiling. Always turn off power at the main breaker before beginning any electrical work. If you are uncomfortable with electrical wiring, please consult a professional.
Cut the Basket Hole: Using heavy-duty cutting pliers, carefully create a hole in the absolute center of the basket’s bottom. This hole should be just wide enough to slip over the light bulb socket. Crucially, it must be slightly smaller in diameter than your fixture’s shade ring. A shade ring looks like this.
-
Attach the Basket: Once the hole is perfectly cut, carefully slip the basket over the light bulb socket until it rests against the base of the mounted light fixture. Then, screw the shade ring onto the socket, tightening it firmly to securely hold the basket in place. The basket’s weight will be supported between the shade ring and the top of the bulb socket.
-
Add the Bulb: With your basket now securely fashioned as the shade, all that remains is to insert your decorative light bulb. Turn the power back on, and admire your beautifully crafted DIY basket pendant light!