
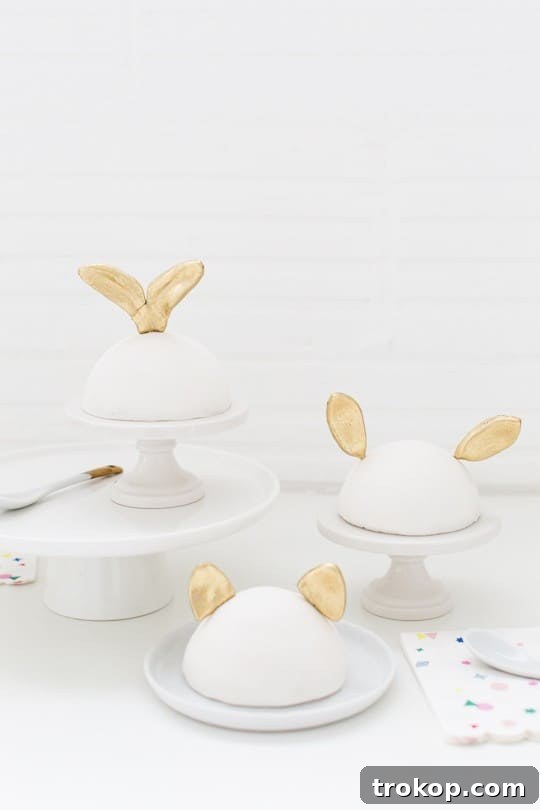
Transform your ordinary cakes into extraordinary centerpieces with enchanting fondant animal ear cake toppers! This comprehensive DIY tutorial provides easy, step-by-step instructions to create adorable, custom decorations perfect for any animal-themed party, birthday celebration, or baby shower. Unleash your creativity and add a whimsical touch that will make your dessert truly memorable.
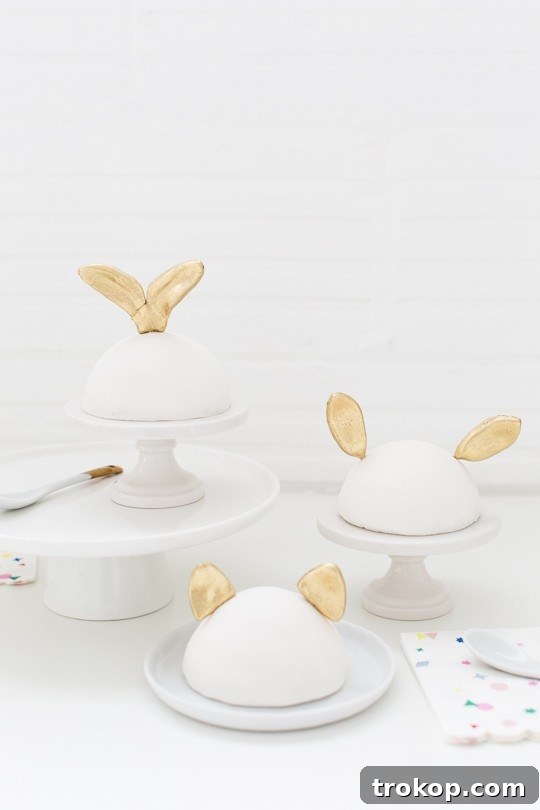
There’s something truly special about a homemade touch, especially when it comes to celebrations. Whether you’re planning a lively birthday bash, a charming baby shower, or simply want to bring a smile to someone’s face, these DIY fondant animal ear cake toppers offer a unique blend of creativity and sweetness. They inject personality and fun into any dessert, making your cake the star of the show. Imagine a cake adorned with playful bunny ears for an Easter gathering, or a regal set of cat ears for a feline-loving friend’s special day – the possibilities are as endless as your imagination.
For me, the inspiration for these adorable creations stemmed from my beloved fur baby, Thomas. He came into my life during my college years, a tiny kitten I rescued from a busy four-lane road, small enough to fit in the palm of my hand. Bottle-feeding him and watching him grow created an unbreakable bond, much to my dad’s initial dismay about a pet in our rental house. Now, almost seven years later, Thomas continues to bring joy, and his upcoming birthday was the perfect excuse to craft something extra special. Spoiled rotten, he insists on only the finest wet food and even boasts his own fancy DIY litter box cover and DIY pet pillow. My adoration for him naturally led to throwing him a memorable seventh birthday party, where these DIY animal ear cake toppers made their delightful debut!
With just a few basic tools and easy-to-handle fondant, you can effortlessly sculpt charming animal ears that will stand tall and proud on any cake. This step-by-step tutorial will empower you to create a variety of ears, from perky cat ears to whimsical bunny shapes, elegant deer ears, and beyond. It’s an accessible and delightful way to elevate a simple cake into a stunning, imaginative DIY cake topper masterpiece. Get ready to impress your guests and add that personal, handmade touch that makes every celebration extraordinary.
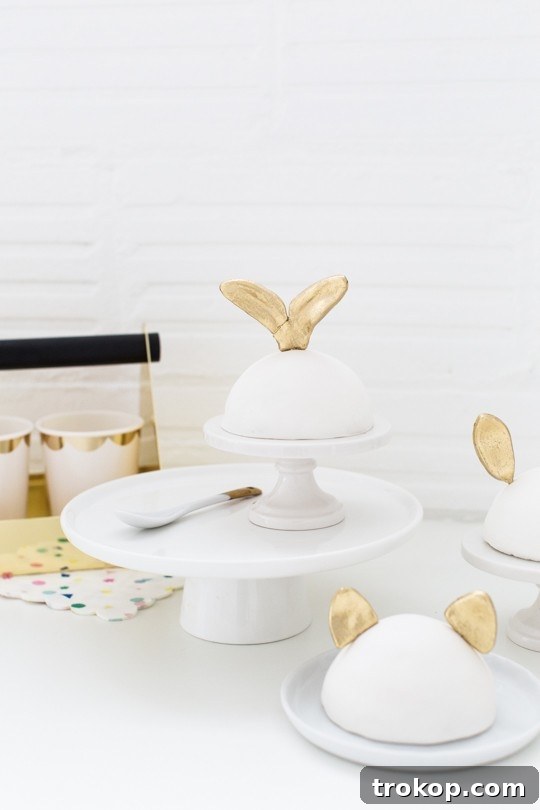
Materials and Tools Needed for DIY Animal Ears Cake Toppers
Crafting these adorable fondant animal ears requires a few essential items. Quality materials ensure your toppers are not only beautiful but also sturdy and safe for consumption.
- Fondant or gum paste: The primary material for molding your shapes. Fondant offers a softer texture, while gum paste dries harder and faster, ideal for more delicate or upright structures. Choose white or light-colored fondant for easy painting and customization.
- Toothpicks or mini wooden dowels: These are crucial for inserting the ears securely into your cake. Ensure they are food-safe and long enough to provide stability.
- Mini leaf cookie cutter: Perfect for shaping bunny and deer ears with natural curves.
- Cat cookie cutter: To create perfectly shaped cat ears. A simple triangle cutter can also work.
- Edible gold dust: An optional but highly recommended touch for adding shimmer and elegance to your finished ears. Other edible dusts or gel food colors can also be used.
- Clear lemon or almond extract: This acts as a solvent for edible dusts, creating a smooth, paintable consistency. It evaporates quickly, leaving behind vibrant, smudge-free color.
- Food-dedicated paint brush: Use a clean, fine-tipped brush exclusively for food decorations to ensure hygiene and precise application.
- Rolling pin: For evenly flattening your fondant to the desired thickness.
- Non-stick mat or parchment paper: To prevent fondant from sticking to your work surface.
How to Make Bunny Ears
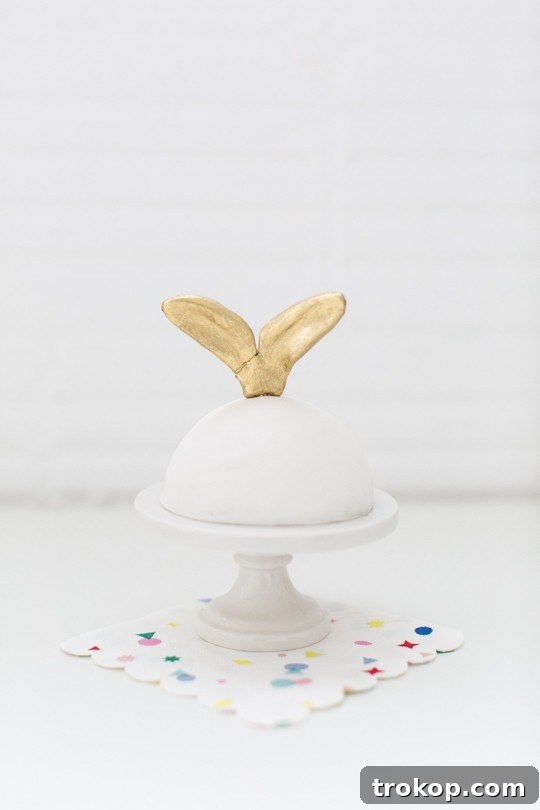
Creating adorable bunny ears is straightforward and adds a playful touch to any cake, especially for Easter or springtime celebrations. Here’s how to craft them:
- Roll out your chosen fondant (preferably white or a pastel color) to an even thickness of about 1/2-inch. This ensures the ears have enough substance to hold their shape.
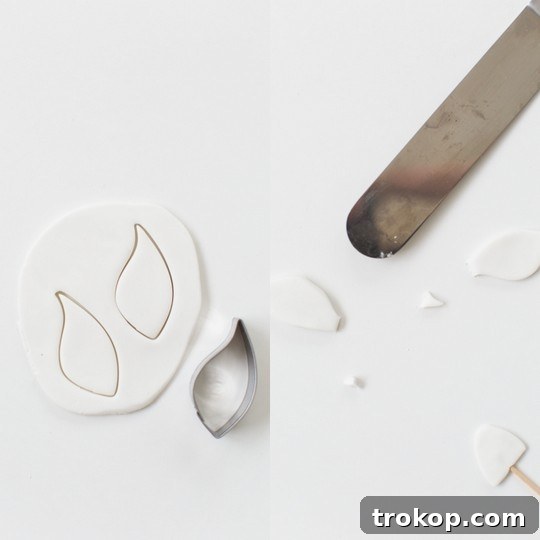
- Using a mini leaf-shaped cookie cutter, carefully cut out two distinct ear shapes. If you desire a more elongated bunny ear, you can gently stretch the fondant shapes before they dry.
- To create a stable base for your bunny ears, roll a small ball of fondant, roughly 1 inch in diameter. This ball will connect the two ears and provide a point of insertion into the cake.
- Gently press the bottom of each leaf-shaped ear onto the fondant ball. Use your fingers to seamlessly blend the seams where the ears meet the ball, creating a smooth, unified look.
- Finally, insert a toothpick or mini wooden dowel into the bottom of the fondant ball. This toothpick will serve as the anchor to secure your bunny ears firmly into the cake, ensuring they stand upright throughout your event.
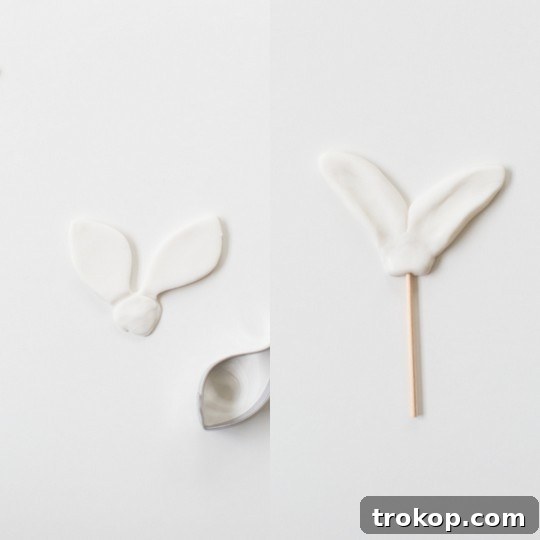
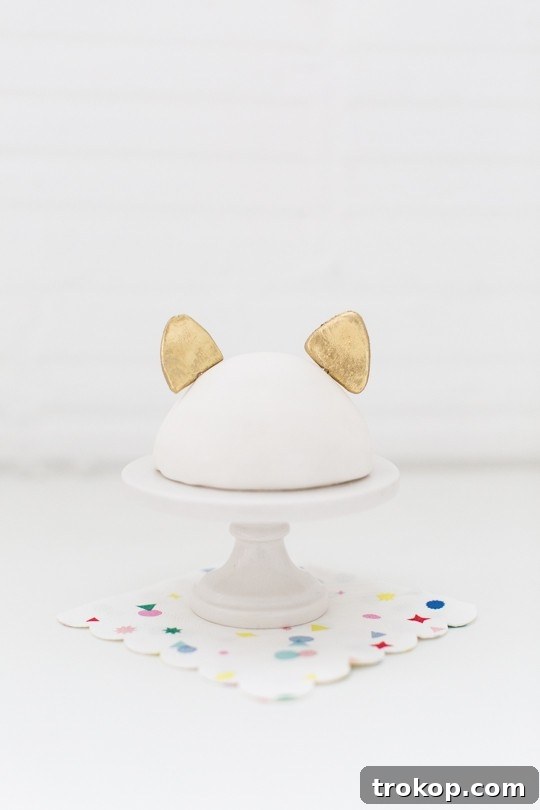
How to Make Cat Ears
For a purr-fectly charming cake, cat ears are a must! These sharp, elegant ears can be created with ease:
- Roll out your chosen fondant (white or a darker color for a more realistic look) to an approximate thickness of 1/2-inch. Consistency is key for uniform ears.
- Utilize the pointed edge of a cat silhouette cookie cutter to stamp out two small, triangular ear shapes. If a specific cat cutter isn’t available, a leaf cutter can be adapted, or you can simply use a sharp knife to hand-cut small triangles, then gently round the bases. For added detail, you can use a smaller triangle cutter or carefully cut a smaller, contrasting color triangle for the inner ear.
- Take a toothpick and carefully insert it into the base of each fondant triangle. Position the toothpick so that a good portion extends from the bottom, which will be used to secure the ears onto your cake, ensuring they stand up with feline grace.
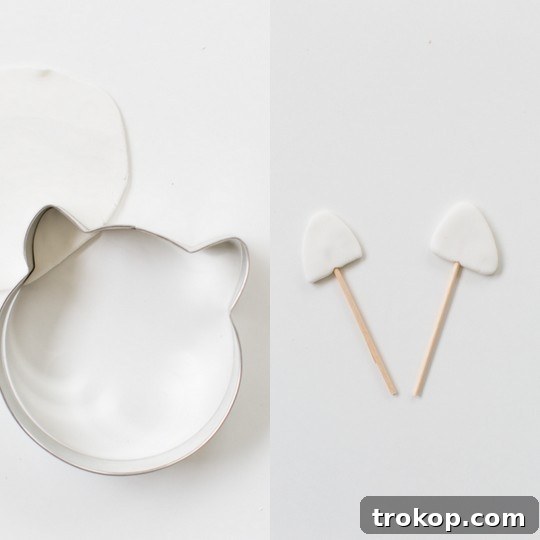
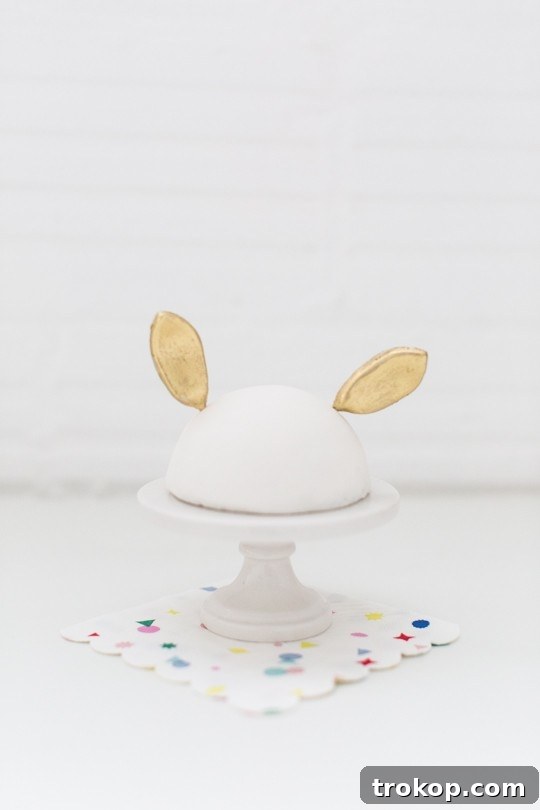
How to Make Deer Ears
Deer ears bring an elegant and woodland-inspired charm to any cake. Follow these steps to craft beautiful deer ears:
- Begin by rolling out white or light brown fondant to a consistent thickness of about 1/2-inch. This thickness provides a good base for shaping.
- Use a leaf-shaped cutter to cut out the initial base for each ear. The natural curve of the leaf shape is ideal for replicating the gentle contour of a deer ear.
- Once cut, gently smooth and round the edges of each fondant shape with your fingers. Then, make a clean, straight cut across the very bottom of each shape. This creates a flat edge that will sit nicely against the cake. For added realism, you can gently pinch the tip of the ear to create a more pointed look.
- Insert a toothpick or mini dowel into the flat bottom edge of each ear. Ensure it’s inserted firmly but carefully to avoid distorting the shape, as this will be how you secure them to your cake.
Turning Your Ears into Animal Cake Toppers
Once you’ve crafted your desired animal ear shapes, the final steps involve drying, decorating, and assembling them onto your cake. Proper drying is essential for sturdy and long-lasting toppers.
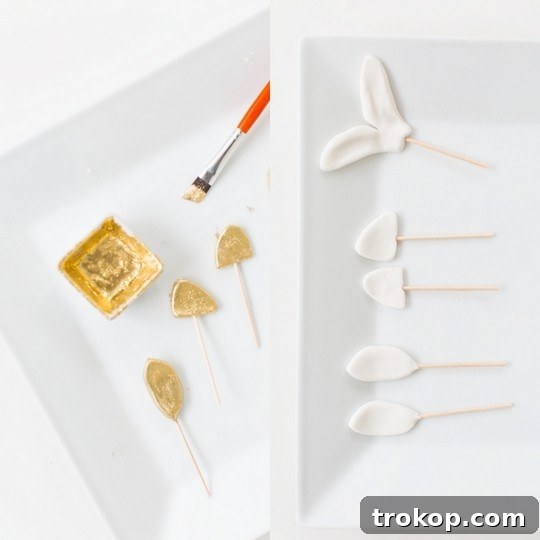
- Now that your fondant shapes are complete, it’s crucial to allow them to dry and harden completely. Place the fondant ears on a clean, dry surface, ideally a curved plate or a piece of crumpled foil, for at least 24 to 48 hours. This curved drying method adds extra dimension and a more realistic, natural look to the ears. Ensure they are fully firm before proceeding to the next step.
- After the ears have thoroughly hardened, it’s time to add decorative flair. Mix a small amount of edible gold dust with a few drops of clear lemon or almond extract to create a smooth, paintable consistency. Using a food-dedicated paintbrush, carefully apply the gold paint onto each ear, covering all desired areas for a touch of sparkle. Allow this paint to dry completely, which usually takes about 15-30 minutes, before handling.
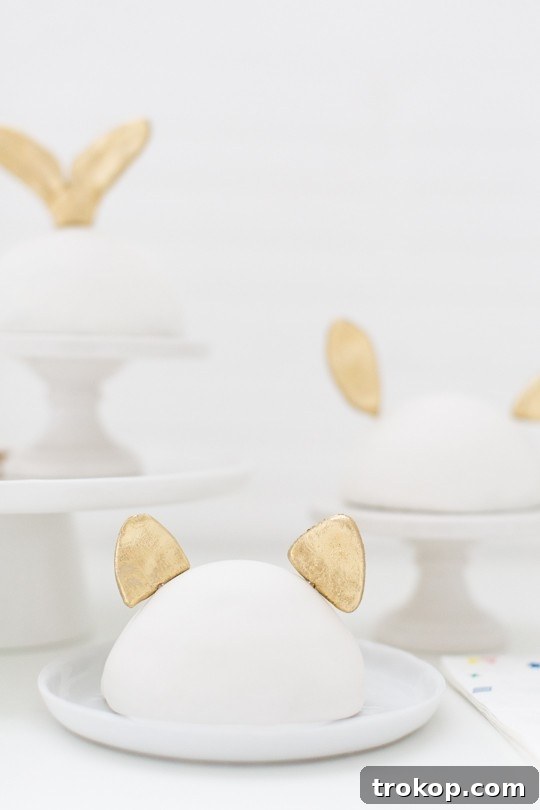
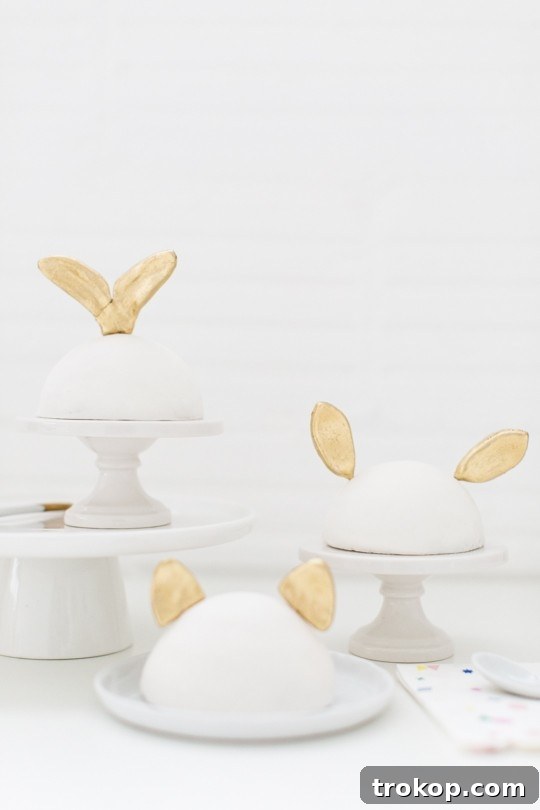
- With the painted ears fully dry and hardened, your animal cake toppers are ready for their grand debut! Carefully insert the exposed toothpicks or mini dowels into your cakes. For best results, place them into mini fondant-covered cakes or a larger, beautifully frosted cake. Arrange them to create your desired animal character, and watch your dessert come alive, ready to impress at any party!
Animal Cake Toppers Tutorial and Tips
Achieving professional-looking fondant cake toppers is easier with a few expert tips and tricks. These suggestions will help you overcome common challenges and enhance the durability and appearance of your creations:
- Use Tylose Powder for Fondant Strength: If you’re working with fondant and want your ears to dry faster and become significantly sturdier, knead in a small amount of Tylose powder (also known as CMC powder). This transforms fondant into a gum paste-like consistency, preventing drooping and cracking.
- Work on a Non-Stick Surface: Always roll out your fondant or gum paste on a silicone mat or a surface lightly dusted with cornstarch or powdered sugar. This prevents sticking, tearing, and preserves the smooth finish of your shapes.
- Prevent Cracks with Shortening: If your fondant begins to feel dry, stiff, or develops cracks while you’re shaping it, gently knead in a tiny amount of vegetable shortening (like Crisco). This will restore its pliability and make it easier to work with without affecting its taste.
- Let Toothpicks Dry in Place: Once you’ve inserted the toothpicks into your fondant shapes, allow the entire piece to dry with the toothpicks already in position. Attempting to insert them into hardened fondant later can cause the ears to break or crack.
- Create Texture for Realism: To add an extra layer of detail and realism, use the back of a small knife, a specialized sculpting tool, or even a clean toothpick to gently imprint subtle texture lines or veins on the ears. This can mimic fur or cartilage for a more lifelike appearance.
- Experiment with Shape for Dimension: For ears that have a natural curve or movement, don’t let them dry flat. Instead, place them on crumpled aluminum foil, an egg carton, or over a curved object (like a rolling pin) while they harden. This encourages natural curvature, adding dynamic dimension to your toppers.
- Plan Ahead for Drying Time: Fondant and gum paste need ample time to dry and harden thoroughly. It’s always best to make your ears at least one to two days in advance of your event. This ensures they are fully firm and won’t sag or break when placed on the cake.
- Store Properly: Once dried and decorated, store your fondant toppers in an airtight container at room temperature, away from direct sunlight or humidity. Do not refrigerate, as condensation can cause them to soften or melt.
More DIY Cake Topper Ideas
These charming animal ear toppers are incredibly versatile, perfect for themed animal parties, Disney celebrations, adorning vanilla cupcakes, or even as delightful bunny ears for Easter treats. If you’re inspired to explore more creative cake decoration projects, dive into our archive for additional DIY cake topper ideas:
- Balloon Garland Cake Topper: A festive and customizable decoration.
- Paper Flower Cake Topper: Elegant and intricate floral designs.
- Fringed Love Cake Topper: A whimsical and romantic statement piece.
- Ghost Peeps Dessert Toppers: Spooky and fun for Halloween.
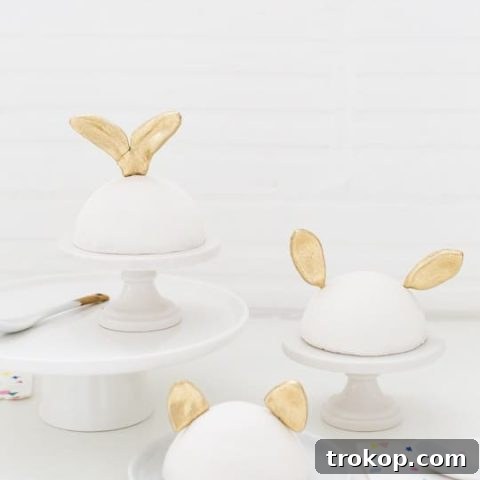
DIY Fondant Animal Ear Cake Toppers
Make these adorable animal ears for your next party, celebration or special occasion! They add a charming, personalized touch to any cake.
- Active Time
- 20 mins
- Dry Time
- 1 day
- Total Time
- 1 day 20 mins
- Course
- DIY
- Category
- Cake Topper
Equipment
- Mini leaf cookie cutter
- Cat cookie cutter
- Rolling pin
- Food safe paintbrush
- Toothpicks or mini wooden dowels
Materials
- Fondant or gum paste (for molding the shapes)
- Edible gold luster dust
- Clear lemon or almond extract
Instructions
To make bunny ears:
- Roll out white fondant to about 1/2-inch thickness. Use a leaf-shaped cookie cutter to cut out two ear shapes for the bunny ears.
- Roll a small ball of fondant to serve as the base to attach both ears.
- Press the bottom of each ear shape onto the fondant ball, blending the seams gently with your fingers to ensure a smooth connection. Insert a toothpick into the bottom of the fondant ball to secure the ears in place on the cake.
To make the cat ears:
- Roll out white fondant to about 1/2-inch thickness. Use the pointed edge of a cat silhouette cookie cutter to cut out two small triangle shapes for the ears. If you don’t have a cat-shaped cutter, use a leaf cutter or simply shape small triangles by hand.
- Insert a toothpick into the bottom of each triangle to help secure the ears when placing them on the cake.
To make the deer ears:
- Roll out white fondant to about 1/2-inch thickness. Use a leaf-shaped cutter to cut out the base.
- Gently smooth and round the edges of each shape with your fingers, then make a straight cut across the bottom to create a flat edge.
- Insert a toothpick into the bottom of each shape to secure them for placing on the cake.
For all toppers:
- Now that your shapes have been created, allow the fondant ears to dry for at least 24 hours so they harden and keep their shape. For extra dimension, place them on a curved plate while drying.
- Once the ears have fully hardened, mix a small amount of edible gold dust with clear extract and paint it onto each ear for a touch of sparkle. Let the paint dry completely.
- Insert the ears into mini fondant-covered cakes, and your cake toppers are ready to shine at the party!
$30
diy animal cake toppers, fondant animal ears, custom cake decorations, party cake ideas

We absolutely love seeing your creative endeavors! Don’t forget to share your amazing DIY Animal Ear Toppers with us on Instagram using the hashtag #sugarandclothloves. We can’t wait to see all the wonderful ways you’ve brought your cakes to life!
Baileys Tiramisu Crepe Cake Recipe
Infused with Baileys and using crepes as a twist on a classic tiramisu, this cake offers a delightful blend of flavors and textures, perfect for any occasion.
Continue ReadingBaileys Tiramisu Crepe Cake Recipe
40 Delicious Easter Desserts to Sweeten Your Celebration
Get inspired by these festive and easy-to-make Easter desserts that will add a perfect touch of sweetness to your holiday gathering.
Continue Reading40 Delicious Easter Desserts to Sweeten Your Celebration
34 Decadent Desserts for Valentine’s Day
Sweeten up your celebration with these irresistible desserts for Valentine’s Day, ranging from rich chocolates to fruity delights.
Continue Reading34 Decadent Desserts for Valentine’s Day
Gingerbread Muffin Recipe with Lemon Glaze
Add a touch of spice to your breakfast or snack with this delightful gingerbread muffin recipe, perfectly complemented by a bright lemon glaze.
Continue ReadingGingerbread Muffin Recipe with Lemon Glaze