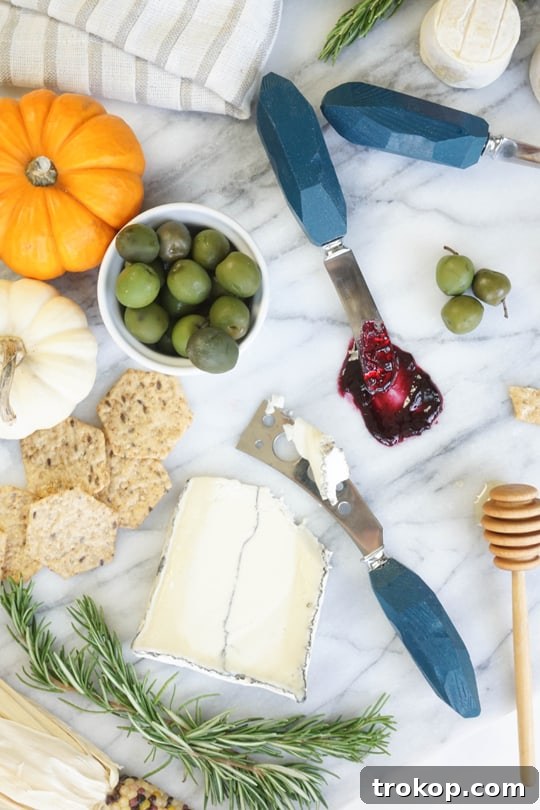
Transform your charcuterie boards and impress your guests with a personal touch! This comprehensive guide will show you how to craft exquisite DIY cheese knives, perfect for elevating your home entertaining or creating thoughtful, handmade gifts. Learn to design and assemble custom handles that reflect your unique style.
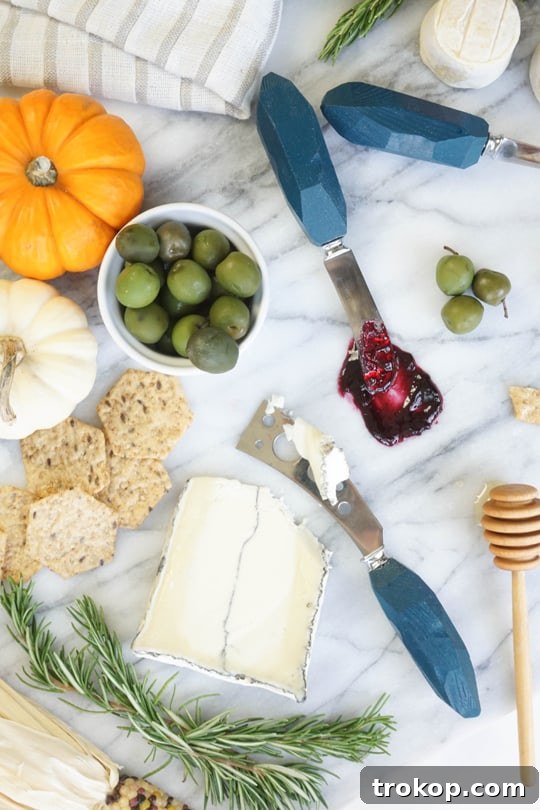
Craft Your Own Unique DIY Cheese Knives: A Guide to Personalized Charcuterie Accessories
In the world of home entertaining and thoughtful gifting, it’s often the small, personalized details that leave the biggest impression. This is precisely why a set of custom-made DIY cheese knives stands out as a truly perfect project. Whether you’re assembling an elegant charcuterie spread for a festive gathering or searching for a unique holiday present, these handcrafted tools add a touch of sophistication and warmth that store-bought items simply cannot match.
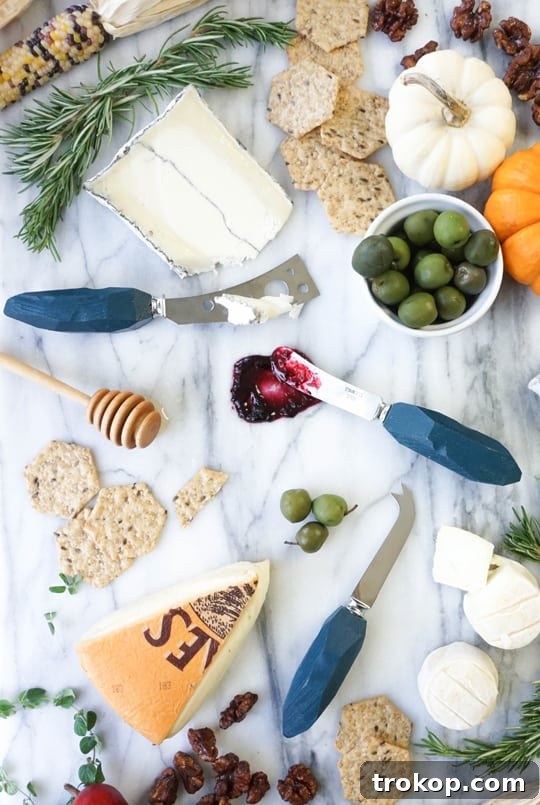
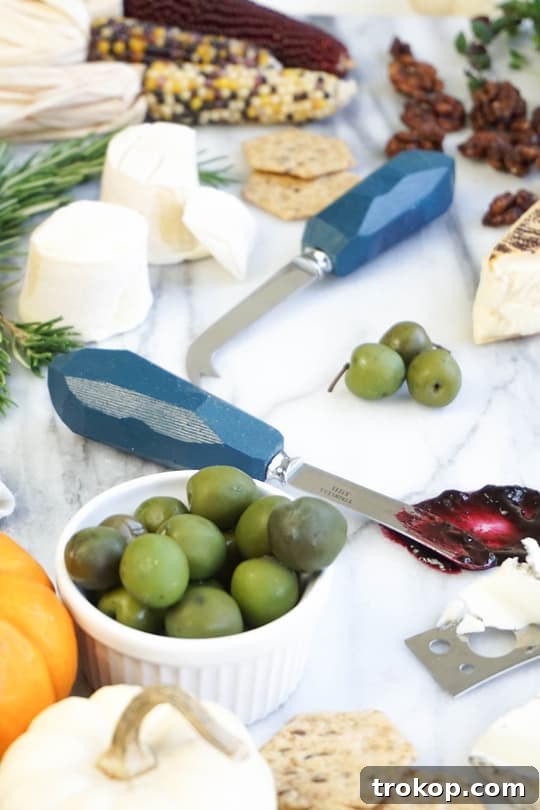
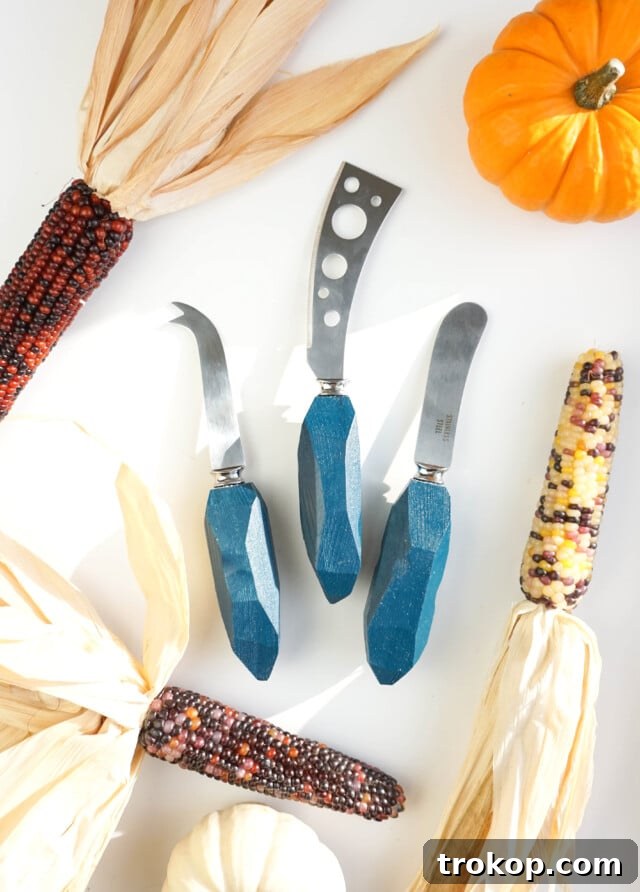
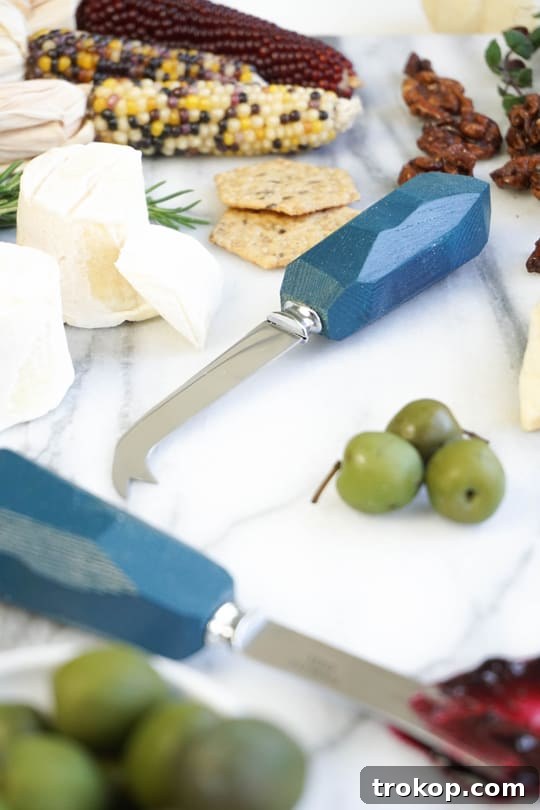
With the holiday season fast approaching, the opportunity to gather friends and family around a beautifully arranged cheese plate becomes even more appealing. As an avid host and creator, I, Erin, recently embarked on making a fresh set of DIY cheese knives to perfectly complement any spread. Drawing inspiration from the captivating allure of faceted crystals and geometric gems, these handles were designed to bring a striking, modern aesthetic to your table. Their versatile design makes them ideal for various occasions, from a cozy Thanksgiving dinner to a sparkling Christmas party, and indeed, any celebratory get-together throughout the year.
Are you ready to dive into a creative project that combines practicality with artistic expression? This detailed tutorial will walk you through every step of the process. From precisely cutting and shaping wooden blocks into elegant handles to applying vibrant paints and assembling the final pieces, you’ll discover how rewarding it is to craft something both beautiful and incredibly functional. Let’s gather our supplies and begin creating a stunning set of personalized cheese knives that will be cherished for years to come.
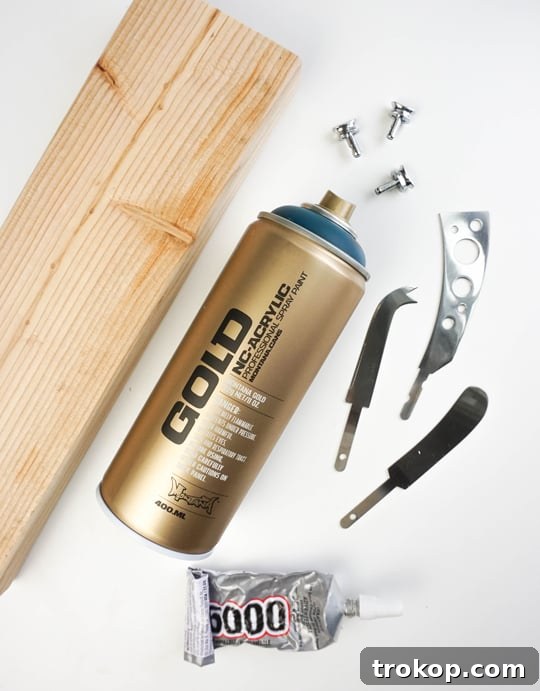
Table of Contents
Why Crafting Custom Cheese Knives is a Must
In a world saturated with mass-produced goods, the act of creating something by hand offers immense satisfaction and a unique connection. DIY cheese knives are more than just serving utensils; they are conversation starters, reflections of your personal style, and thoughtful tokens of appreciation. Imagine presenting a charcuterie board adorned with knives whose handles you’ve designed and crafted yourself – it instantly elevates the entire experience, showing care and attention to detail. For gift-giving, a personalized set of cheese knives speaks volumes, perfect for housewarmings, weddings, or holiday celebrations. It’s a gift that combines utility with artistic flair, sure to be treasured by any recipient. This project allows for endless creativity, enabling you to match the handles to your existing decor or experiment with new color palettes and textures.
Project At A Glance
- Active Time: Approximately 2 hours
- Dry Time: Approximately 2 hours (between paint coats and sealant)
- Total Project Time: Roughly 4 hours
- Estimated Cost: Around $40 (can vary based on materials chosen)
- Keywords: DIY cheese knives, custom charcuterie tools, handmade gifts, personalized entertaining
Essential Materials and Tools for Your DIY Cheese Knife Project
Before you begin shaping and painting, ensure you have all the necessary components and equipment. Quality materials and the right tools will not only make the crafting process smoother but also ensure a durable and professional-looking finished product. Safety is also paramount, so always be prepared with appropriate protective gear.
Materials List
- Cheese knife blanks with bolsters: These are the metal blades and the part that separates the blade from the handle. You’ll want at least three for a standard set. Look for sets or individual knife blanks on platforms like Etsy, Walmart, Amazon, or specialty wood and metal craft stores. Ensure they are designed for handle attachment.
- Small 2×4 pine board: This will be the foundation for your custom handles. Pine is an excellent choice for beginners due to its workability, but for a more premium and polished aesthetic, you might consider experimenting with hardwoods like walnut or maple. The dimensions of the board should yield handles roughly 3.5 to 4 inches long.
- Spray paint in the color of your choice: This is where your creativity shines! We opted for Montana Gold Acrylic Spray Paint in Petrol for its vibrant finish, but feel free to select a shade that complements your personal style or home decor.
- High gloss clear polyurethane spray: Essential for sealing and protecting your painted handles. This adds durability, prevents chipping, and provides a beautiful, lustrous finish that mimics glass or crystal.
- Industrial strength adhesive (optional but recommended): Brands like E6000 work well. If your drilled holes are slightly too wide for a snug fit, a strong adhesive will ensure the knife blades remain firmly attached to their new handles.
Required Tools
- Mitre saw or hand saw: Used for accurately cutting your wood board into the initial handle blanks. A miter saw offers precision and ease for angular cuts, while a hand saw is a more accessible alternative.
- Belt sander: Crucial for smoothing rough edges, refining the facets, and achieving the desired crystal-like shape. It makes quick work of shaping and ensures a comfortable grip.
- Electric drill: Fitted with a 7/32″ drill bit. This is used to create the precise, snug holes required to secure the metal knife blanks within the wooden handles.
- Safety glasses and gloves: Always wear appropriate personal protective equipment when working with power tools, cutting wood, or applying spray paints.
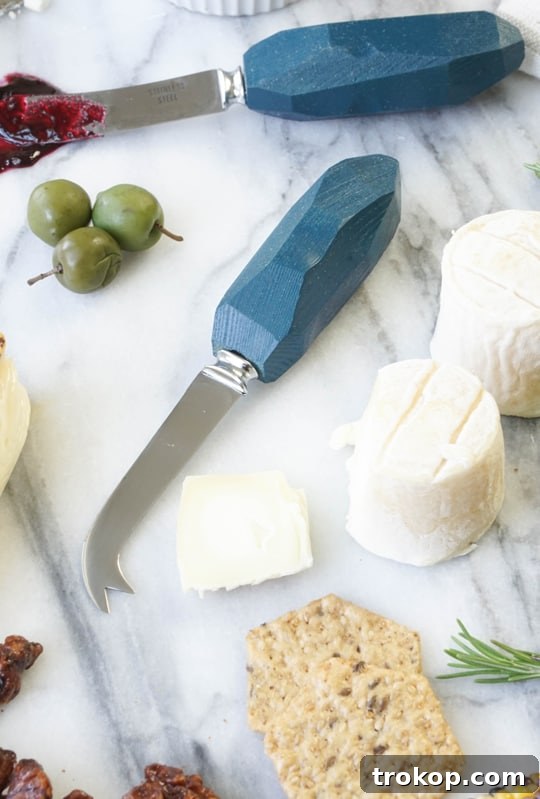
Step-by-Step Guide: How to Make Your Own Cheese Knives
Creating your own custom cheese knives is a rewarding process that combines a bit of woodworking with a splash of artistic flair. Follow these detailed steps to bring your vision to life, ensuring both beauty and functionality in your finished pieces.
- Prepare Your Wood Blanks: Begin by cutting the 2×4 pine board into two equal 4-inch sections. This provides enough material for multiple handles. Next, take each of these 4-inch sections and carefully cut them vertically down the center. This will result in four pieces, each measuring approximately 1×4 inches. For a standard set of three cheese knives, you’ll only require three of these pieces, so set aside the fourth piece for another project or discard it.
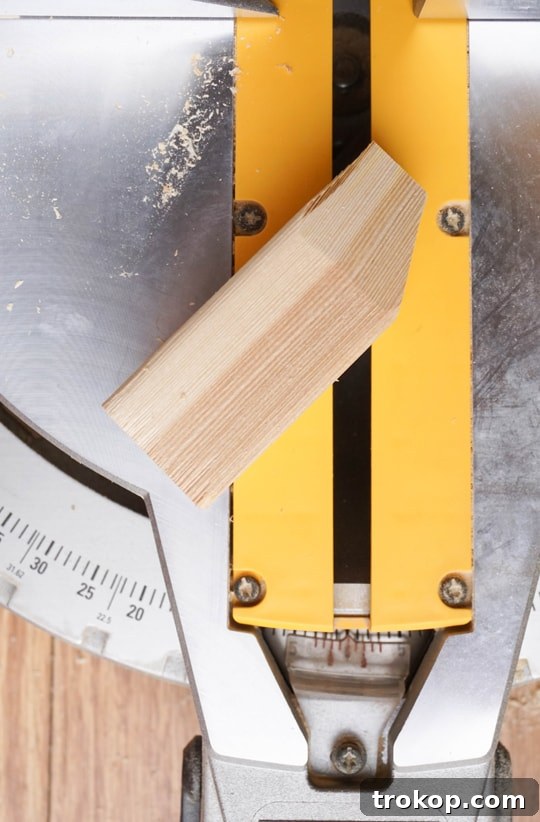
- Master the Art of Facet Cutting: With your wood pieces ready, it’s time to create the striking, crystal-like facets that define the design. Using either a miter saw or a hand saw, meticulously cut various angles into each wood piece. The goal is to achieve an angular, gem-inspired shape. Experiment with different depths and angles to create a truly unique look for each handle. Remember, perfect symmetry is not the aim; slight irregularities enhance the organic, crystalline aesthetic.
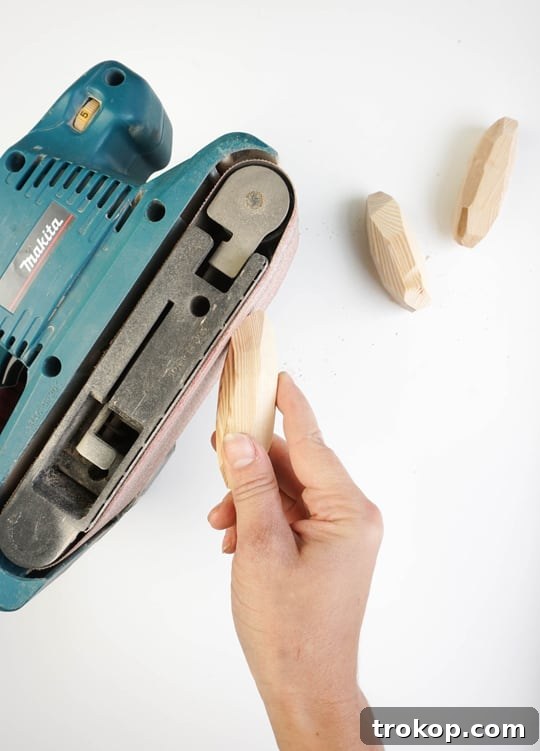
- Sanding for Smoothness and Shape: Once the facets are cut, move to the belt sander to smooth any rough edges and refine the angular planes. To do this, gently press the corners and edges of each wood block into the moving belt of the sander. Hold it steadily in place until a flat, smooth plane forms. Continue rotating the wood and sanding different sections until you achieve a refined, faceted shape and a smooth-to-the-touch finish. After sanding, each wood piece should be approximately 3.5 inches long, ready for the next steps. Repeat this shaping and sanding process for the remaining two wood blocks, ensuring you have three beautifully formed “wood crystals.”
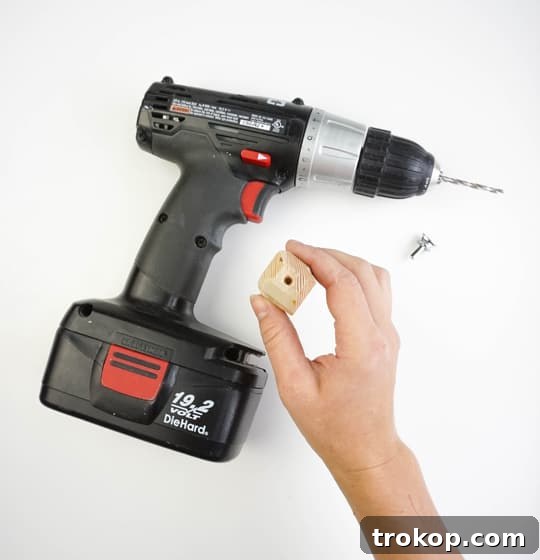
- Precision Drilling for Knife Insertion: Now it’s time to prepare the handles for the metal knife blanks. Using an electric drill fitted with a 7/32-inch drill bit, carefully drill a hole at one end of each wooden piece. The key here is to create a hole that is snug enough to securely house the tang (the unfinished end) of the metal cheese tool. A tight fit is crucial for stability, but make sure not to drill too deep, leaving enough wood for a secure attachment. Test the fit of the knife blank before proceeding.
- The Creative Step: Painting Your Handles: With the shaping and drilling complete, it’s time for the fun part – painting! In a well-ventilated area, apply two light, even coats of your chosen spray paint to each wooden handle. Ensure full coverage and allow each coat to dry completely before applying the next. This prevents drips, ensures a smooth finish, and allows the vibrant color to truly pop. Patience during the drying phase is essential for a professional result.
- Sealing for Durability and Shine: Once the paint is thoroughly dry and cured, it’s crucial to seal your handles for protection and a beautiful finish. Apply a high-gloss clear polyurethane spray over each painted wooden piece. This protective layer will guard against wear and tear, moisture, and maintain the vibrant color for longer. Allow the polyurethane to dry completely, following the manufacturer’s instructions, which may take several hours. Once dry, your handles will have a durable, shiny, and almost glass-like appearance.
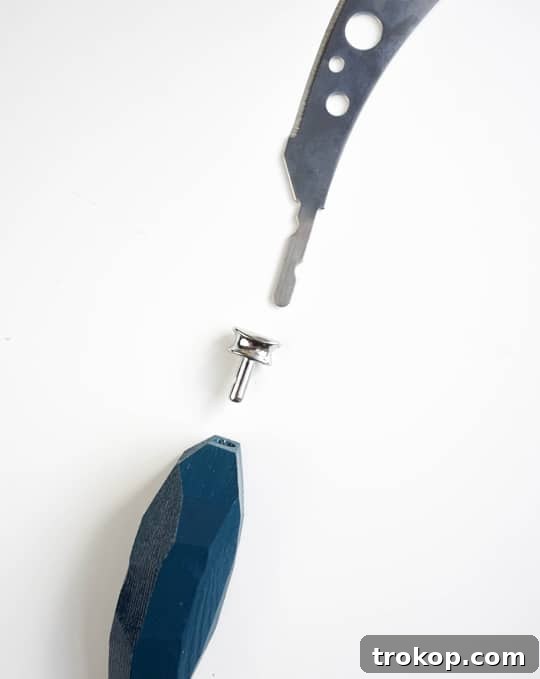
- Assemble Your Custom Cheese Knives: With your handles perfectly prepared, it’s time for the final assembly! First, slide the bolster (the metal ring that separates the blade from the handle) onto the unfinished end of each metal cheese knife. The bolster should rest against the blade.
- Secure the Handles: Next, insert the unfinished tang end of the knife, with the bolster in place, into the drilled hole of the corresponding wood crystal handle. Push it in firmly until the bolster rests flush against the handle. If you find the fit to be slightly loose, apply a small amount of industrial-strength adhesive inside the drilled hole before reinserting the knife. This will create a super secure bond. If using adhesive, allow it to dry and cure for a few hours, or as recommended by the product instructions, before handling your new cheese knives.
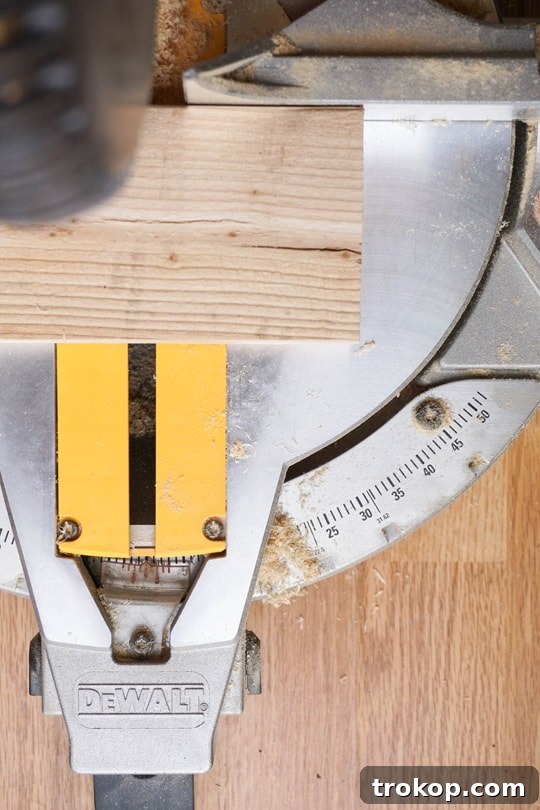
Safety Tip: When using saws, always wear safety glasses and maintain a firm grip on the wood. Take your time, make slow and controlled cuts, and ensure your fingers are clear of the blade’s path to prevent injury.
Pro Tips and Creative Notes for Your DIY Project
To ensure your DIY cheese knives turn out perfectly and to make your crafting experience even more enjoyable, consider these valuable tips and creative insights:
- Embrace Imperfection in Facets: Don’t strive for absolute symmetry when cutting your facets. The beauty of a crystal-like design often lies in its natural, slightly irregular angles. These unique cuts add character and make each knife truly one-of-a-kind, enhancing its handmade charm.
- Always Test Before Painting: Before you commit to painting, perform a dry run. Insert the cheese tool’s tang into the drilled hole of the wood handle. This ensures a snug fit. If the fit is too loose, you might need to apply adhesive during final assembly. If it’s too tight, a little more sanding or a slightly larger drill bit (proceed with caution) might be necessary.
- Mastering Spray Paint Application: For a flawless, professional finish, always apply spray paint in light, even coats. Holding the can approximately 8-10 inches away from the wood and moving it in a steady, sweeping motion will prevent unsightly drips and uneven coverage. Multiple thin coats are always better than one thick coat.
- Patience is Key for Drying Time: Rushing the drying process between coats of paint and especially after applying the polyurethane sealant can lead to smudges, tackiness, or a less durable finish. Always allow ample drying time as specified by the product manufacturers. A fully cured finish will be much more robust and aesthetically pleasing.
- Prioritize Safety Precautions: Your safety is paramount. When sanding wood, always work in a well-ventilated area or wear a mask to avoid inhaling fine dust particles. Similarly, when using spray paints and polyurethane, ensure good ventilation to prevent inhaling fumes. Safety glasses are a must when operating any power tools.
- Perfect for Gifting: Beyond personal use, these DIY cheese knives make an exceptional gift. Elevate your present by pairing the custom knife set with a beautiful charcuterie board, a selection of gourmet cheeses, artisanal crackers, or a bottle of fine wine. They are ideal for holidays, housewarming gifts, or thoughtful hostess gifts, offering a personal touch that shows how much you care.
- Choosing the Right Wood: While pine is beginner-friendly, don’t hesitate to explore other wood types. Maple offers a fine grain and light color, perfect for staining. Walnut provides a rich, dark tone that looks sophisticated even unpainted. Consider the desired final look and your comfort level with different wood densities.
- Maintaining Your Knives: To ensure your beautiful DIY cheese knives last, gently hand wash the metal blades after use. Avoid submerging the wooden handles in water for extended periods, as this can damage the wood and paint finish. A quick wipe with a damp cloth should suffice for cleaning the handles.
Elevate Your Entertaining: Customization Ideas
The beauty of DIY lies in endless customization. Here are some ideas to make your cheese knives even more unique:
- Paint Techniques: Instead of a single solid color, try an ombre effect by blending two colors, or use painter’s tape to create geometric patterns, stripes, or color-blocked designs. You could also experiment with metallic spray paints for a glamorous finish.
- Wood Stains: If you prefer to showcase the natural beauty of the wood, skip the spray paint and opt for a wood stain. This allows the grain to show through while adding color. Follow with a clear, food-safe sealant.
- Adding Embellishments: For an extra touch of sparkle, consider applying small, flat-backed crystals or rhinestones to some facets of the handles using a strong craft adhesive. You could also try stenciling small designs or monograms.
- Different Wood Types: As mentioned, experimenting with hardwoods like oak, cherry, or mahogany can give your knives a completely different look and feel, offering varying grains and natural colors.
- Matching Sets: Create a cohesive collection by making multiple sets with varying handle designs but similar color palettes. This allows for a dynamic display while maintaining a unified theme.
FAQ About DIY Cheese Knives
- Q: Are these cheese knives food-safe?
- A: The metal blades are typically food-safe. For the handles, ensure that any sealant you use (like polyurethane) is fully cured before use. While the handles won’t directly touch food for long, fully cured polyurethane forms a safe, inert layer. Always hand wash the blades and avoid prolonged contact between food and handles.
- Q: Can I use different types of wood for the handles?
- A: Absolutely! Pine is recommended for beginners due to its softness and ease of cutting/sanding. However, you can use hardwoods like maple, walnut, or cherry for more durable and luxurious handles. Keep in mind that harder woods will require more effort and possibly different tools for shaping.
- Q: How do I clean my DIY cheese knives?
- A: Hand wash the metal blades with mild soap and water. Avoid submerging the wooden handles for extended periods. Wipe the handles clean with a damp cloth and dry immediately. Dishwashers are generally too harsh for custom wooden handles and can damage the paint and sealant.
- Q: What if the knife blank doesn’t fit snugly into the drilled hole?
- A: If the hole is slightly too large, industrial-strength adhesive is your best friend. Apply a generous amount inside the hole before inserting the knife tang and allow it to cure fully. If the hole is too small, you can carefully re-drill with a slightly larger bit or widen it with a rotary tool.
More Handmade Ideas for Your Kitchen and Home
The completed set of DIY cheese knives will undoubtedly make a sophisticated addition to any cheese plate. If you’re heading to a friend’s for Thanksgiving or a holiday party, why not extend your creativity? These knives make a fantastic hostess gift when paired with a super cute DIY slate cheese board or colorful mini cheese boards. If you’re the host, consider adding some cheeky and fun printable cheese markers to your spread. For more inspiring handmade items to elevate your kitchen and home, explore these popular projects from our archives:
- 21 DIY Cake Stand Ideas You Can Make
- Retro DIY Lazy Susan
- DIY Frozen Wine Chiller
- Cabana Stripe DIY Apron
DIY Ikea Play Kitchen Hacks to Make it One-of-a-Kind
Take your child’s pretend play to the next level with…
Continue ReadingDIY Ikea Play Kitchen Hacks to Make it One-of-a-Kind
19 Wet Bar Ideas for a Stylish & Functional Home Design
From sleek and modern to cozy and classic, discover the…
Continue Reading19 Wet Bar Ideas for a Stylish & Functional Home Design
Best Amazon Kitchen Gadgets You Didn’t Know You Needed
Upgrade your kitchen and explore the best Amazon kitchen gadgets.…
Continue ReadingBest Amazon Kitchen Gadgets You Didn’t Know You Needed
Seersucker DIY Tea Towels
Dry your dishes and wipe your hands in style with…
Continue ReadingSeersucker DIY Tea Towels