
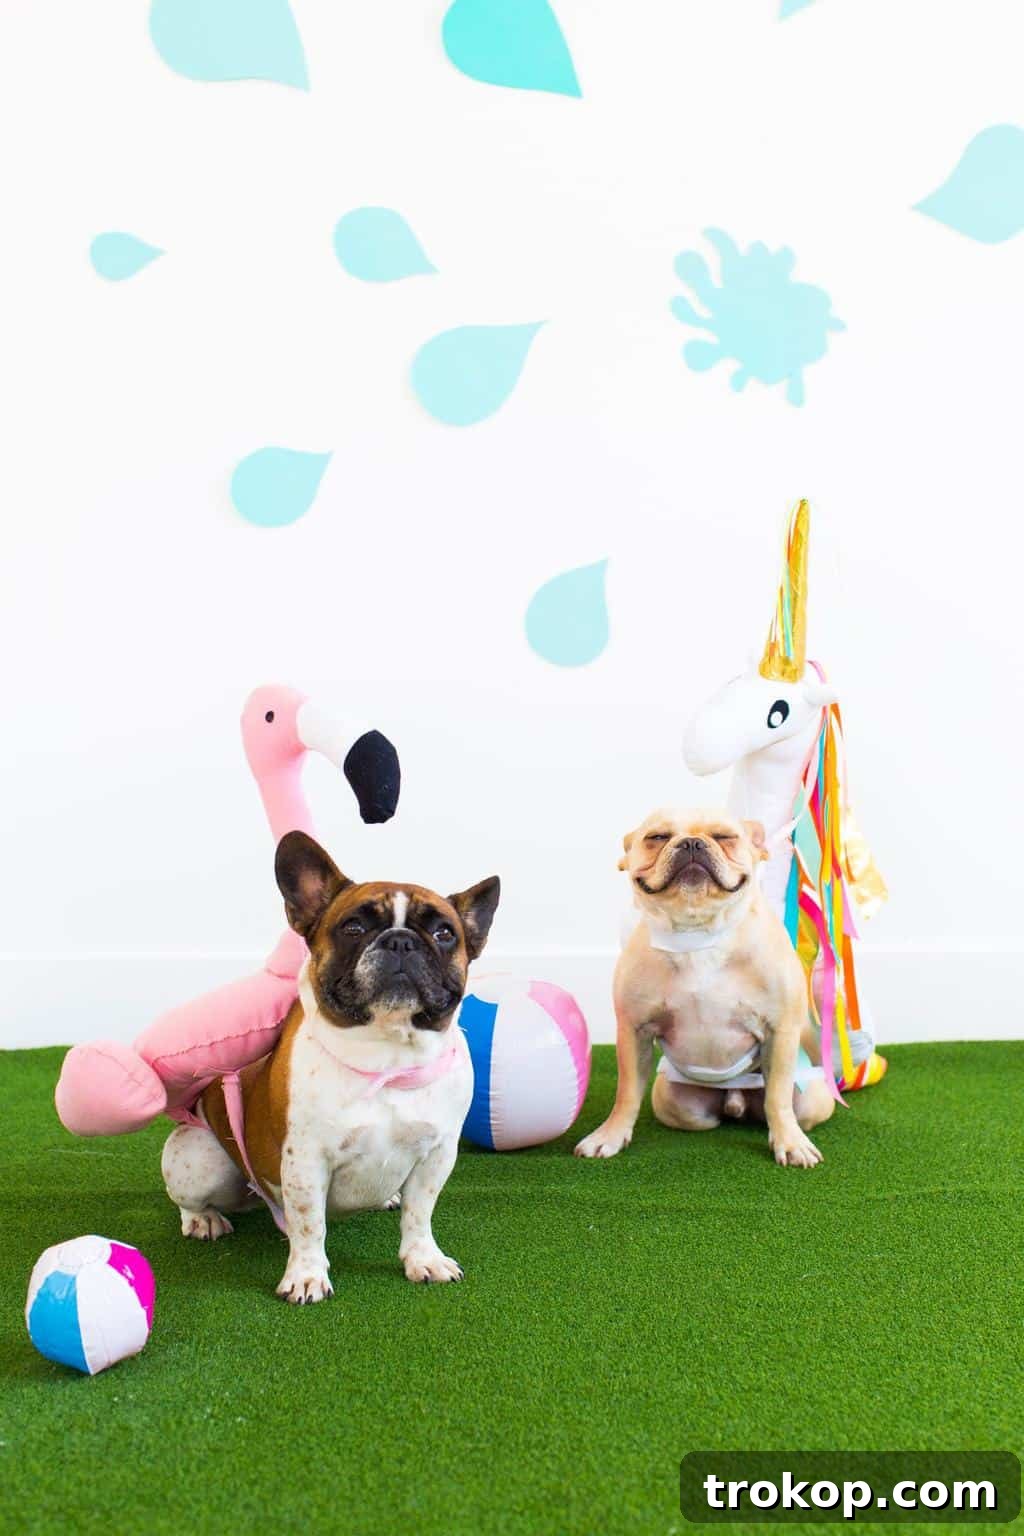
DIY Pool Float Costumes For Pups — Sharing the ultimate get-up for your pets on Halloween: DIY Pool Float Costume for the pups! See the hilarity and how to now…
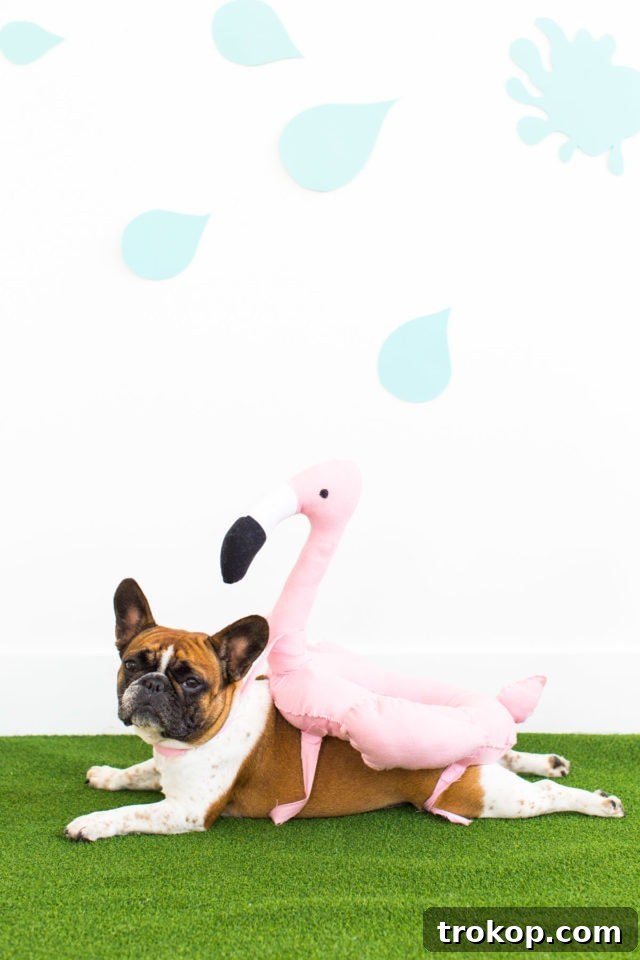
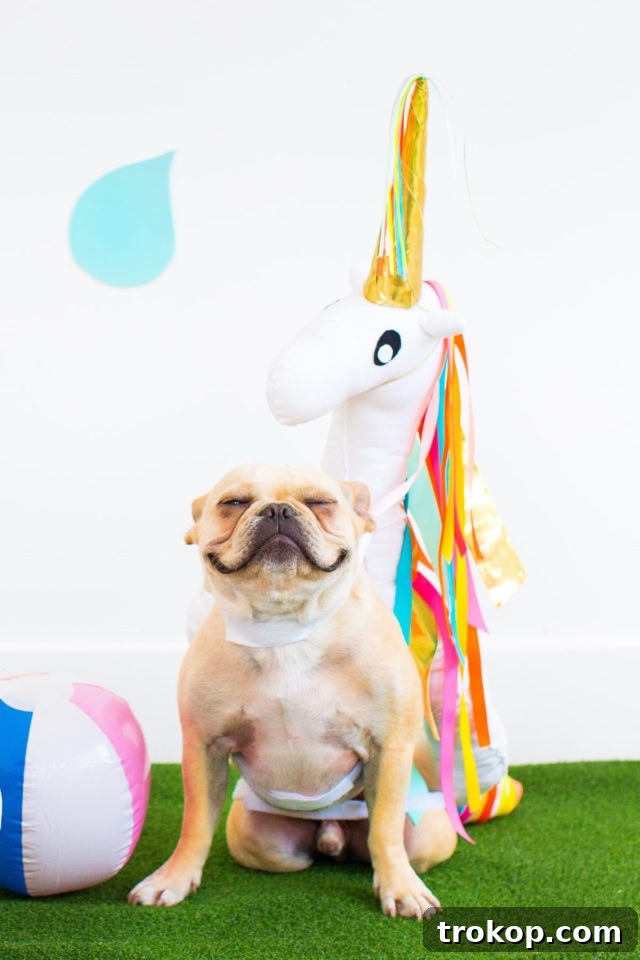
Meet Our Adorable Canine Models: Finn and Fritz!
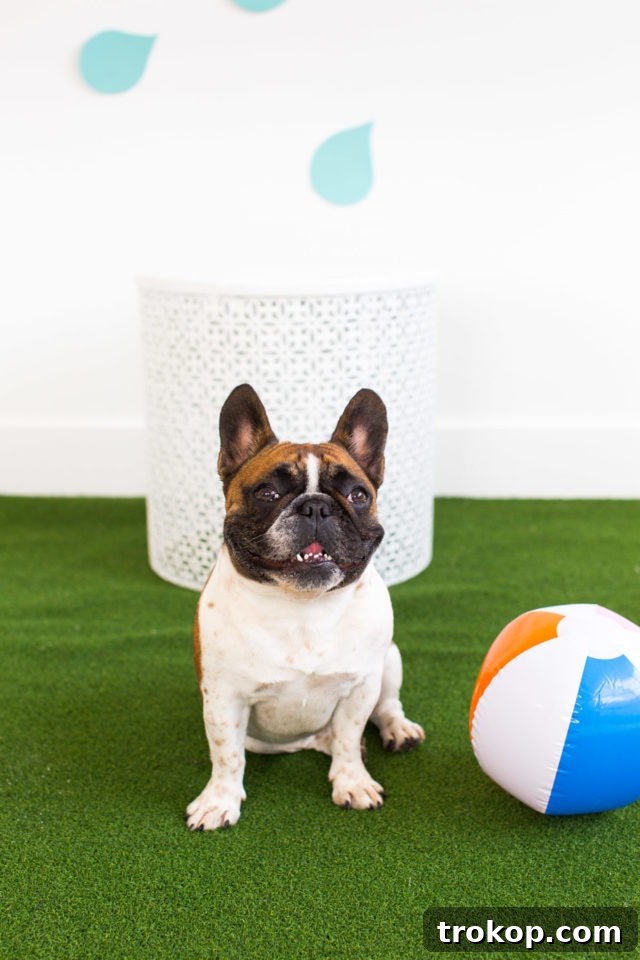
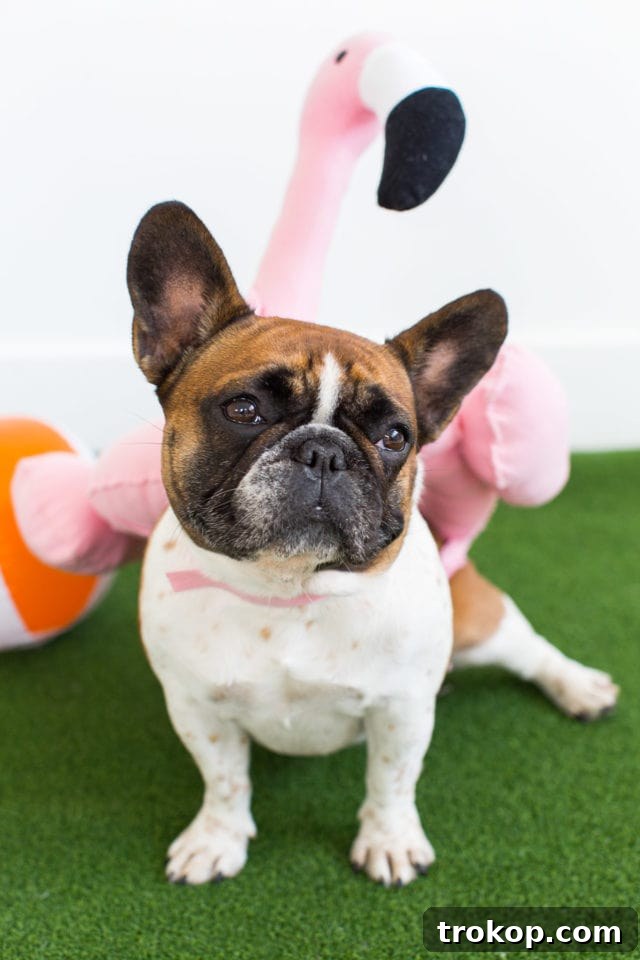
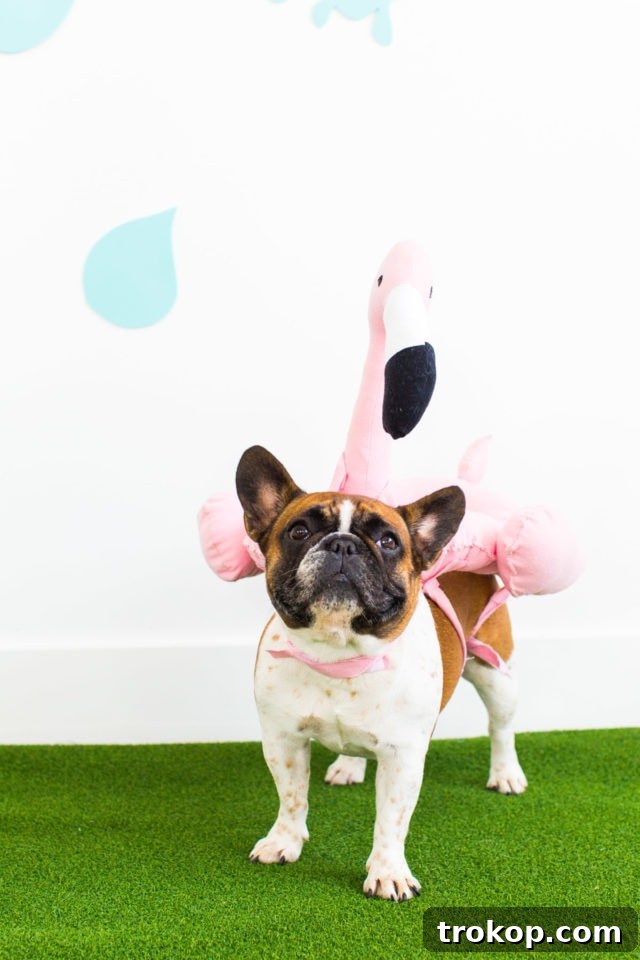
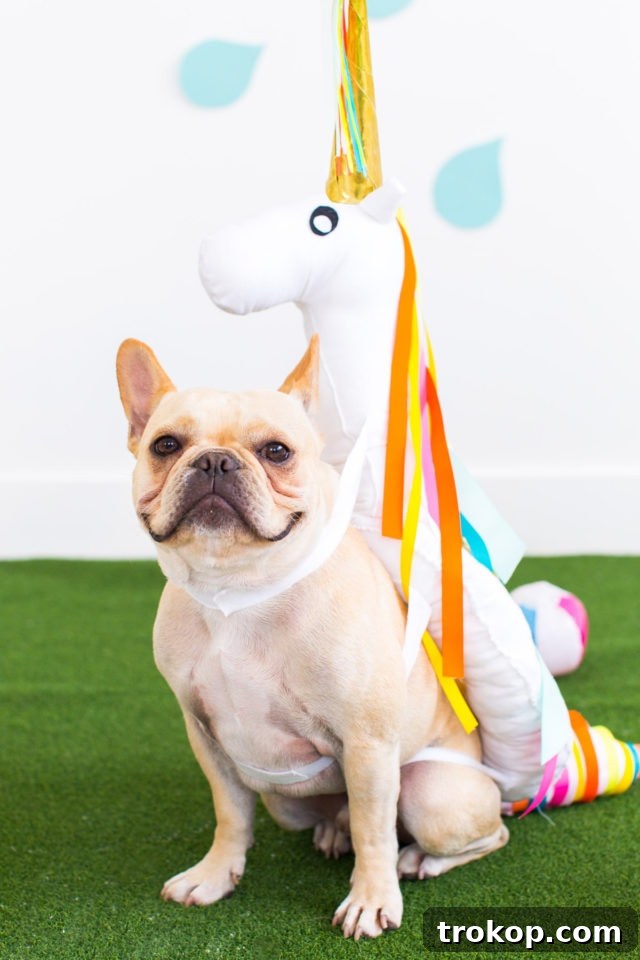
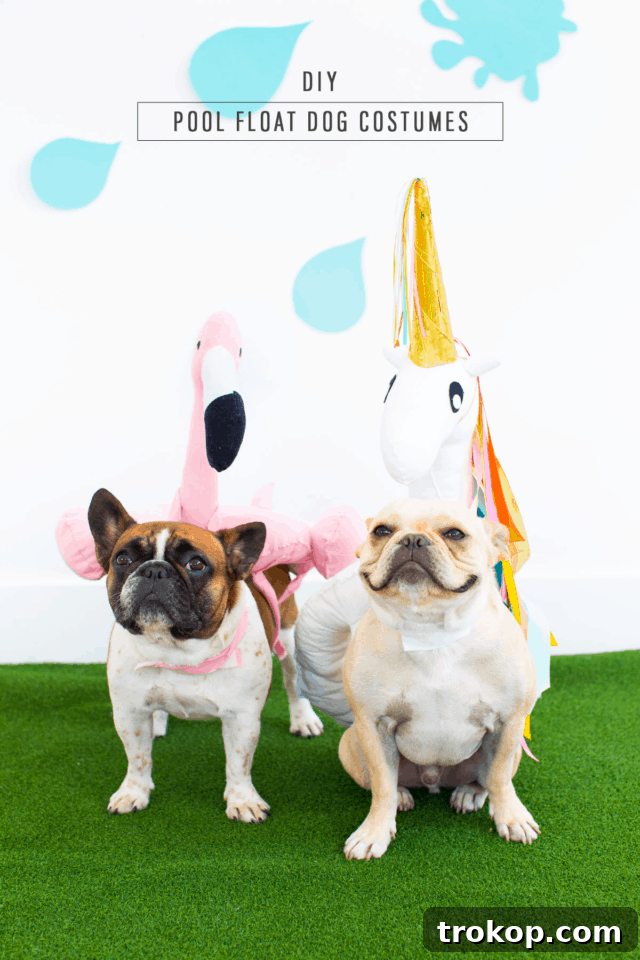
Allow us to introduce you to Finn and Fritz, our newest and most delightful studio models! While they aren’t exactly studio regulars, we certainly wish they were. These two bundles of joy were the perfect paw-some personalities to strut their stuff in our unique DIY Pool Float Costumes!
We extend our heartfelt thanks to our friend Kate, who graciously allowed us to borrow an array of beautiful things, including her wonderful fur kids. Watching Finn and Fritz parade around with unicorn manes flowing and flamingo necks bobbing brought more laughter and fun than we’ve experienced during twenty photoshoots combined. It was truly a priceless experience!
In hindsight, a tiny part of us wishes we had added a third member to our whimsical troop, perhaps sporting a miniature bikini. Just imagine the full Palm Springs pool party vibe! While that wasn’t to be, you live and learn, and the sheer joy these costumes brought made every stitch completely worth it. Can you just picture the entire family, humans and pets, dressed in full Palm Springs gear now? It’s a dream!
Now, let’s get into the nitty-gritty of how to create these spectacular dog Halloween costumes. More importantly, we’ll share some valuable lessons on what *not* to do, ensuring you can make a big splash with your own DIY pet creations!
Why Choose DIY Pool Float Costumes for Your Dog?
In a sea of generic pet costumes, a DIY pool float outfit stands out as a beacon of originality and undeniable cuteness. This theme evokes carefree summer days, playful relaxation, and a touch of whimsical fantasy that perfectly suits the joyous spirit of our canine companions. Whether you’re preparing for Halloween, a themed birthday party, a pet parade, or simply a fun photoshoot, these costumes are guaranteed to make your dog the star of the show.
Crafting these outfits allows you to express your creativity, customize the design to your pet’s personality, and ensure a comfortable fit. It’s a delightful project that results in memorable moments and adorable photos that you’ll cherish for years to come. Plus, the sheer joy and laughter these costumes bring are an added bonus!
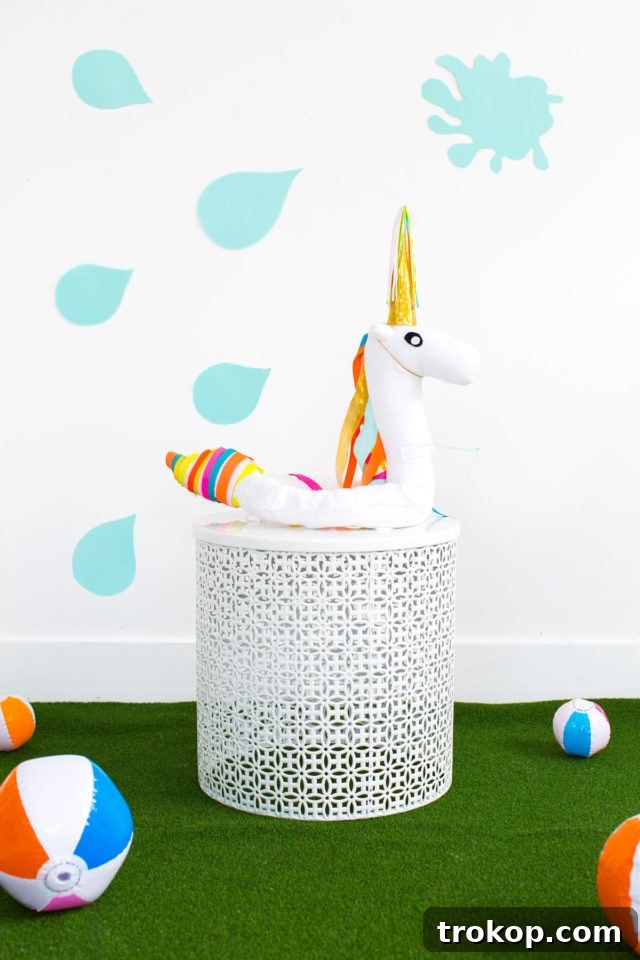
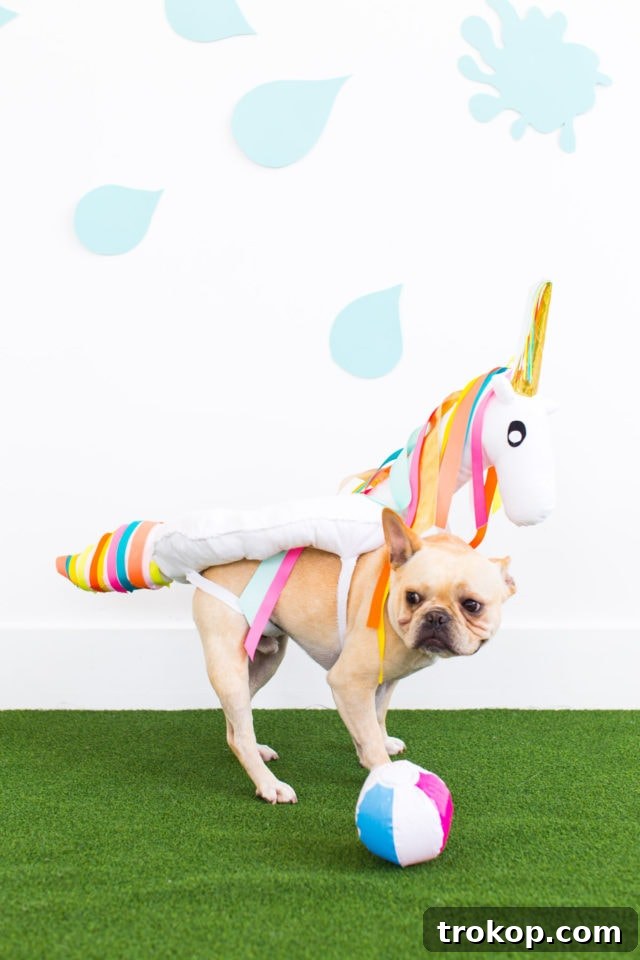
Table of Contents
Essential Tips for Crafting the Perfect Pet Costume
Before you dive into sewing, here are some crucial lessons we learned the hard way. Heeding these tips will make your DIY pet costume project smoother and ensure a more comfortable and practical outfit for your furry friend:
- Sturdy Attachment Method: While Velcro straps might seem like a quick solution, we highly recommend skipping them for the main body of the float. Instead, sew the float body directly onto a fitted doggy t-shirt (pink for the flamingo, white for the unicorn). This provides significantly better stability and prevents the costume from shifting, tilting, or falling off, especially when your pup is enthusiastically moving around.
- Mind the Head Height: This was our biggest learning curve! We initially made the animal heads a bit too tall, causing them to constantly fall over or droop the moment our pups picked up speed or turned too quickly. For optimal balance and visibility, the costume heads should ideally be only about an inch or two taller than your dog’s actual head. This ensures they stand upright and look perfect without impeding your dog’s comfort.
- Prioritize Pet Comfort & Safety: Always ensure that the costume does not restrict your dog’s natural movement, breathing, or vision. Choose lightweight, breathable fabrics. Avoid small, easily detachable parts that could pose a choking hazard if ingested. Ensure all materials are non-toxic.
- Accurate Measurements Are Key: Before cutting any fabric, take precise measurements of your dog’s back length, width, and neck circumference. A well-fitting costume is a comfortable costume.
- Consider Your Dog’s Temperament: Some dogs love dressing up, while others tolerate it for a short period. Only put your dog in a costume if they are comfortable and happy. Never force them.
Keep these valuable pointers in mind, and you’ll be well on your way to creating a fantastic and comfortable DIY pool float costume!
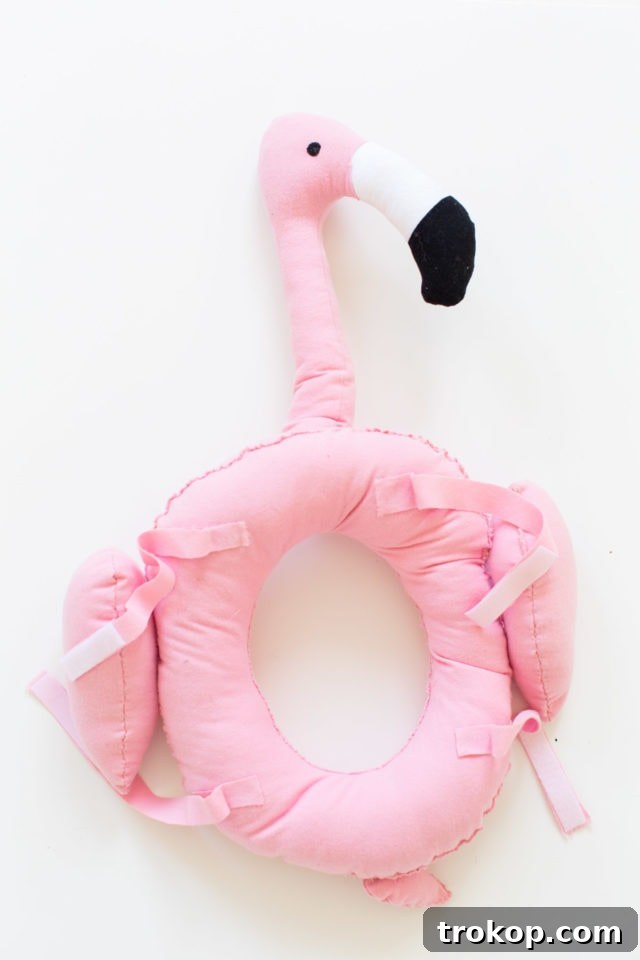
Flamingo Head Costume: Materials
To craft the elegantly curved neck and charming head of your flamingo float, gather the following supplies:
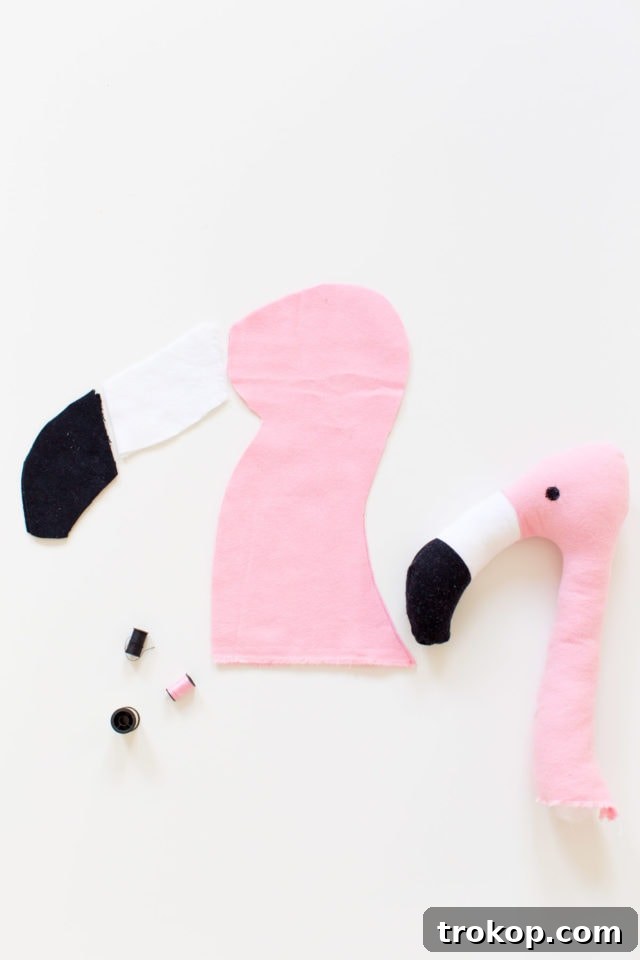
- Pink Fabric: You’ll need two substantial pieces of pink fabric, cut into the shape of a flamingo’s head and neck. A soft but sturdy fabric that holds its shape well is ideal.
- White Fabric: Two parallelogram-shaped pieces of white fabric for the upper part of the flamingo’s distinctive beak.
- Black Fabric: Two smaller pieces of black fabric, shaped like the bottom half of a flamingo’s beak, for contrast and detail.
- Flex Foam: Essential for giving the flamingo head structure and ensuring it stands proudly upright.
- Stuffing: Polyester fiberfill or similar soft stuffing to give the head a fuller, rounded shape.
- Black Thread: For delicately sewing the flamingo’s expressive eyes.
- White Thread: For constructing the beak components and general sewing.
- Matching Pink Thread: For seamless stitching of the pink fabric sections of the head and neck.
How To Make The Flamingo Head: Step-by-Step Guide
Follow these detailed instructions to bring your adorable flamingo head to life:
- Prepare Beak Sections: Lay out your black and white fabric pieces with their ‘wrong’ sides (the inside of the fabric) facing up. This is essential for concealing seams.
- Sew Beak Halves: Take one white parallelogram and one black beak bottom piece. Align their corresponding edges and sew along about a ½-inch seam allowance. This creates one half of the flamingo’s beak. Repeat this process for the other white and black fabric pieces to form the second beak half.
- Assemble the Beak: Keeping the fabric inside out, align the two newly sewn beak halves together. You will now sew these two halves to create the overall beak shape. Start sewing from about one inch inward from the unattached white edge, sew around the tip of the beak, and stop one inch before the other white end. This leaves crucial openings at the base of the beak for easy attachment to the head.
- Attach Beak to Head Pieces: Now, take your two main pink flamingo head and neck pieces (also inside out). Line up the remaining open edges of your white beak sections with the corresponding edges of the pink head pieces. Pin them in place and stitch along about a ½-inch seam allowance. Repeat for both sides of the head.
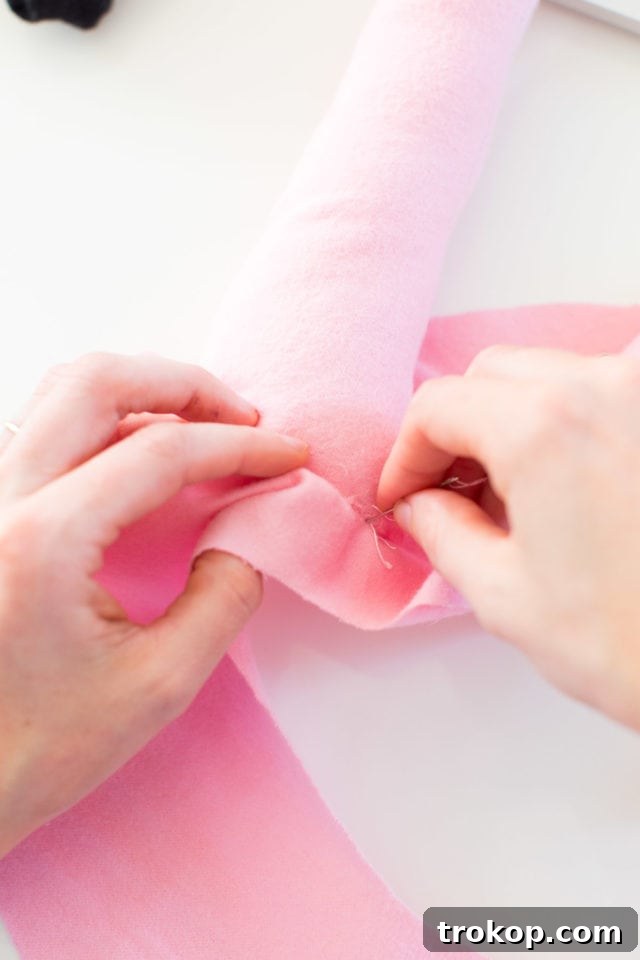
- Sew the Head and Neck: Carefully sew the remaining outer edges of the two pink flamingo head pieces together, forming the head and neck structure. It’s important to leave the very bottom of the neck open, as this will be used for stuffing and eventually attaching the head to the float body.
- Turn and Stuff: Gently turn the entire flamingo head right-side out. Begin to firmly stuff the head and neck with flex foam. This provides essential structural support, allowing the neck to stand upright. Once the flex foam is in place, add polyester fiberfill to fill out the remaining space, giving the head a soft, rounded, and complete shape. Ensure it’s firm but not overly rigid.
- Embroider Eyes: Using your black thread, carefully embroider or sew on two small, expressive eyes on either side of the flamingo’s head. Simple dots or small half-moon shapes work wonderfully to capture a charming expression.
Congratulations! You now have a beautifully crafted flamingo head, ready to add character to your pup’s pool float costume.
Flamingo Float Body Costume: Materials
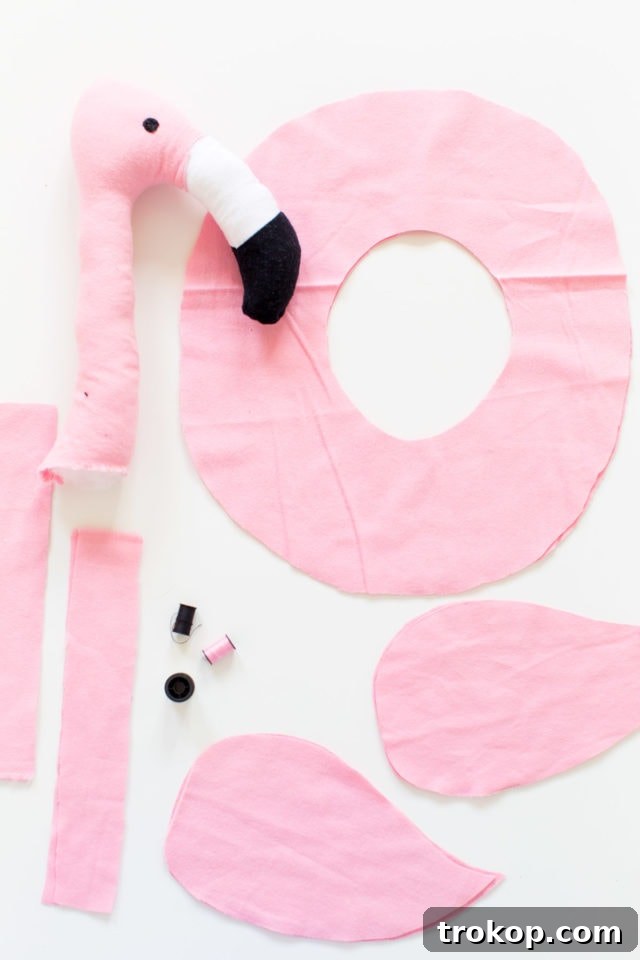
The float body is what truly transforms your pup into a poolside delight. Here’s a list of materials required to construct the main float, tail, and wings:
- Pink Fabric:
- Two large oval pieces that will form the main float body. The size will be tailored to your dog’s measurements.
- Two teardrop-shaped pieces of pink fabric for the flamingo’s cute, stubby tail.
- Four larger teardrop-like pieces of pink fabric for the wings, giving the impression of a buoyant float.
- Six 11-inch long pink rectangle pieces (approximately 1-2 inches wide) for the securing straps.
- Stuffing: A generous amount of polyester fiberfill for stuffing the float body, tail, and wings to give them volume and shape.
- Adhesive Velcro: Three sets of 2-inch adhesive Velcro pieces. While useful for straps, remember our recommendation to sew the main float body onto a doggy t-shirt for superior stability.
- Pink Thread: To ensure all stitching blends seamlessly with your pink fabric.
How To Make The Flamingo Float Body: Step-by-Step Guide
Let’s construct the main flamingo float body, creating that delightful “floating” illusion for your furry friend:
- Measure and Cut Oval Pieces:
- First, carefully mark the width of your dog’s back onto one of your large pink fabric pieces.
- Next, measure and mark a point approximately 5 inches outwards from each side of your dog’s back width measurement. This will define the generous outer edge of your float.
- Then, mark the total length of your dog’s back.
- Connect these marks to sketch an elongated oval shape. This oval should comfortably encompass your dog’s back while extending sufficiently outwards to create the float effect.
- Cut out two identical oval pieces from your pink fabric using this pattern. These two ovals will form the top and bottom sections of your float.
- Create the Inner Circle Opening:
- Take one of your cut fabric ovals and lay it flat. From the approximate center of this oval, sketch a circle with a diameter of about 6 inches. This inner circle will serve as the opening where your dog’s back will sit, allowing the costume to cradle them comfortably.
- Carefully cut out this middle circle from both oval pieces. You now have your main float pieces, each with a central opening.
- Attach the Flamingo Head: Take one of your prepared oval pieces (either the top or bottom, it doesn’t matter yet) and sew the completed flamingo head (from the previous section) onto one of the shorter ends of the oval. Ensure it’s securely attached and positioned to face forward when worn.
- Construct and Attach the Tail:
- Take your two teardrop-shaped tail pieces. Place them ‘wrong’ sides together and sew along most of their edges, leaving a 3-inch opening.
- Lightly stuff the tail with polyester fiberfill to give it a gentle volume without making it too stiff.
- Finish sewing the remaining edges to securely close the opening.
- Sew this stuffed tail onto the opposite short end of the same pink oval piece where you attached the head.
- Prepare and Attach the Wings:
- Take two of your larger teardrop-like wing pieces. Place them ‘wrong’ sides together and sew them, leaving a small opening for stuffing.
- Lightly stuff the wing with fiberfill, then close the opening by sewing. Repeat this exact process for the other two wing pieces to create a second identical wing.
- Join the Float Halves: Align your two main oval float pieces (the ones with the inner circle cut out). Sew along the entire edge of the inner circle, effectively connecting the top and bottom float pieces around what will be the dog’s back opening. This creates the central harness-like structure.
- Sew Outer Edges and Stuff the Float:
- Starting at the end opposite the flamingo head, begin sewing the outer edges of the two oval pieces together.
- Crucially, leave an opening of about 6 inches from where you started stitching. This opening is vital for stuffing the float.
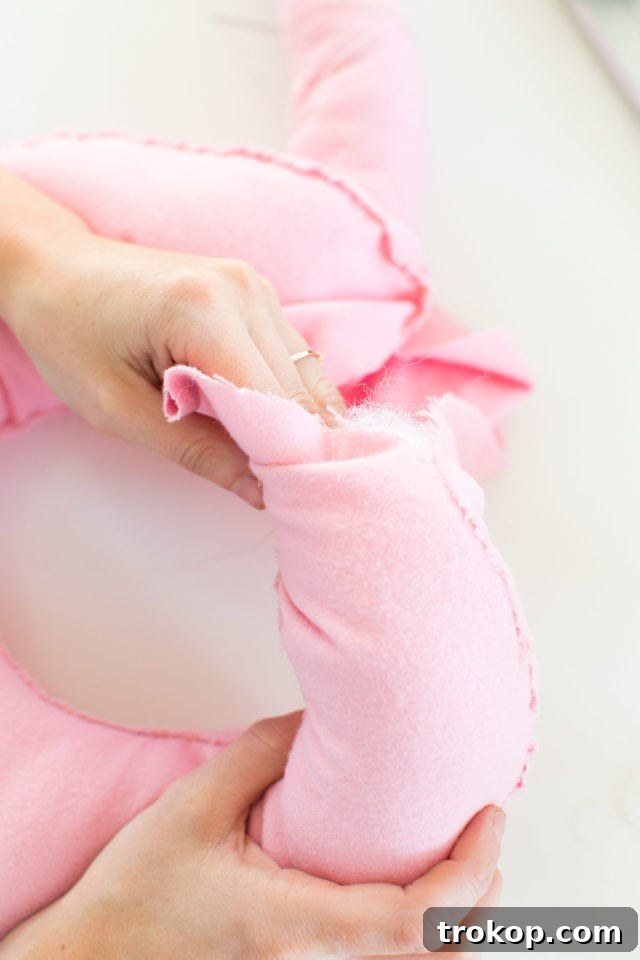
- Now, generously stuff the float! Pack the outer sides heavily to achieve that characteristic plump, buoyant pool float appearance. However, for the sections that will sit directly on your dog’s back (towards the oval ends), stuff them more lightly. This thoughtful stuffing technique allows the float to sit comfortably without being too rigid or bulky on your fur baby.
- Once the float is adequately stuffed and shaped, finish sewing the remaining edges to securely close the opening.
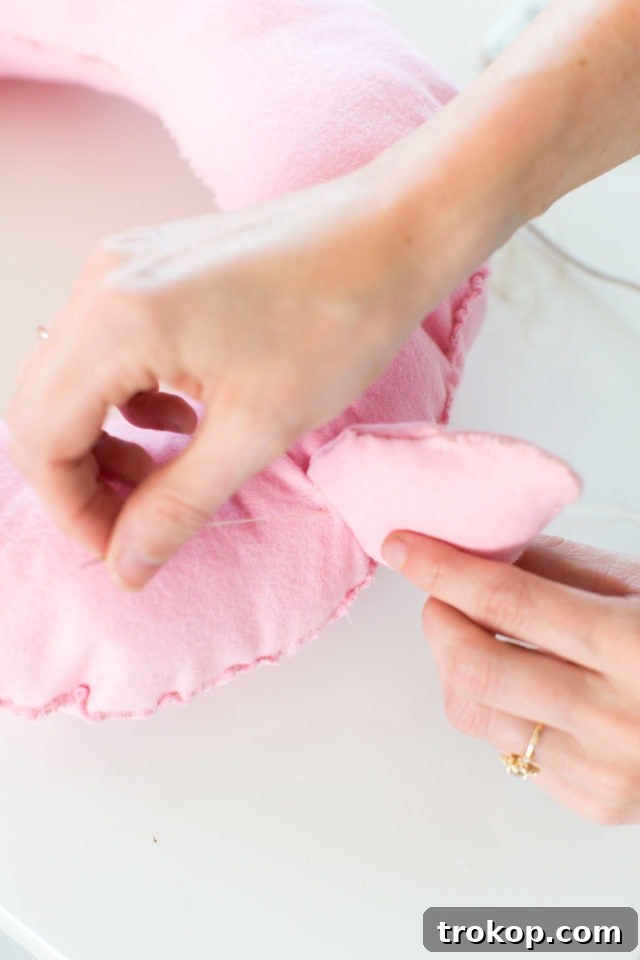
- Attach the Wings to the Float Body: Sew one stuffed wing onto each side of the float body, positioning them roughly in the middle for a balanced and visually appealing look.
- Add Straps for Security (Optional):
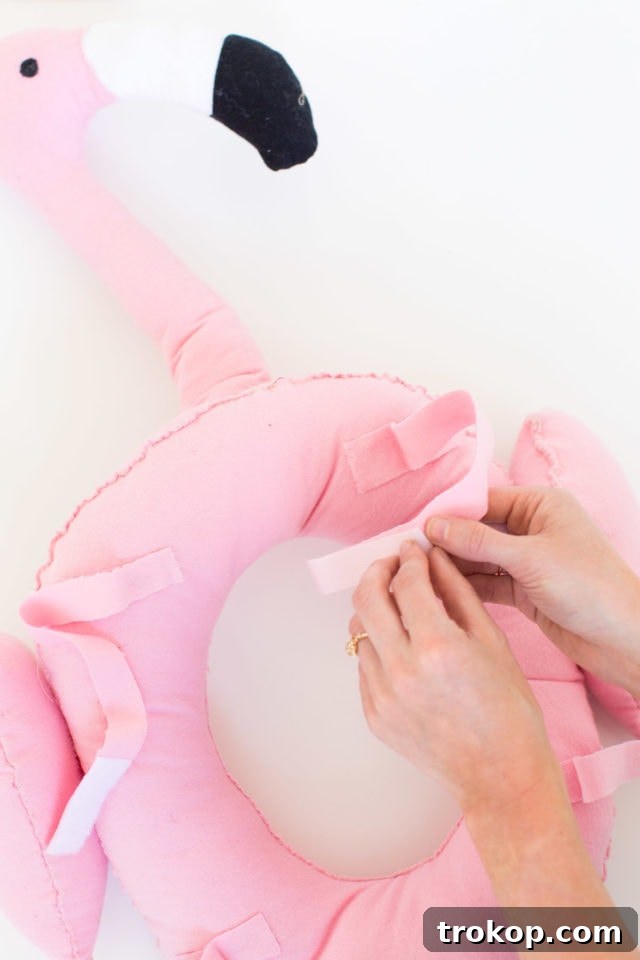
- Take four of your 11-inch pink rectangle pieces. Attach one half of a 2-inch adhesive Velcro set to one end of each of these four rectangles.
- Sew the opposite ends of two rectangles onto opposite sides of the bottom of the flamingo float, near the head end. Repeat this for the other two rectangles, attaching them near the tail end of the float. These will form adjustable straps that go under your dog’s belly.
- For the final two pink rectangle pieces, attach one half of a 2-inch Velcro set to one end of each. Sew the opposite ends of these two pieces onto the sides of the bottom of the flamingo’s neck. These straps can help stabilize the head if it’s not directly integrated with a t-shirt.
Remember the golden rule: for optimal stability and your dog’s comfort, we highly recommend sewing the entire float body directly onto a fitted doggy t-shirt. The Velcro straps can then be used for minor adjustments or to help secure the head if it’s not fully integrated into the shirt.
Unicorn Head for Your Pet: Materials
Infuse a touch of magic into your pet’s ensemble with a whimsical unicorn headpiece. Here’s what you’ll need for this enchanting creation:
- White Fabric:
- Two pieces shaped like a unicorn’s head, ensuring they are sized appropriately for your dog’s head for a comfortable fit.
- Four small triangle pieces of white fabric for the unicorn’s ears.
- Flex Foam: Crucial for providing structure to the head and ensuring it stands up majestically.
- Stuffing: Polyester fiberfill for adding volume and a soft, plush feel to the head and ears.
- Colorful Ribbons: A vibrant assortment of different colored ribbons to create the unicorn’s flowing, magical mane. Choose bright, playful hues that complement each other.
- White Thread: For seamless construction of the white fabric head and ears.
- Black Thread: For delicately sewing the unicorn’s expressive eyes.
- Thin Cardboard Party Hat: This will serve as the perfect base for creating the iconic unicorn horn. A small, pointed party hat works best.
- Gold Ribbon: To elegantly wrap around the cardboard party hat, transforming it into a shimmering, fantastical horn.
- Fabric Glue (Optional): Useful for securing ribbons or minor embellishments if extra hold is desired.
Steps To Make The Unicorn Head Costume
Let’s weave some magic and create that enchanting unicorn head for your furry friend:
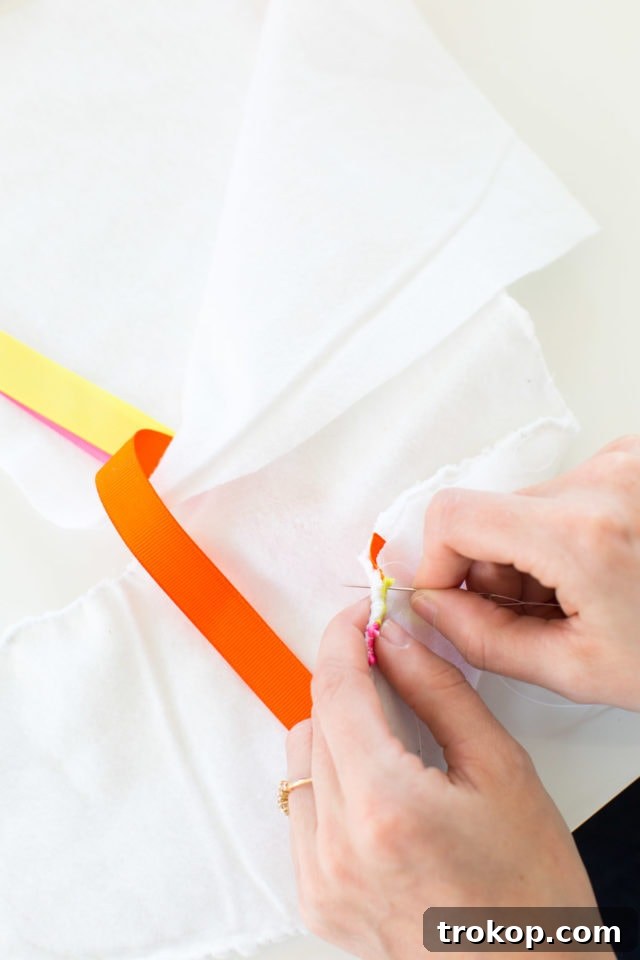
- Prepare the Mane: Begin by cutting various lengths of your colorful ribbons. Lay them flat in a uniform layer between the two white unicorn head pieces. Ensure the ends of the ribbons align neatly with what will be the ‘back’ or neck edge of the unicorn head. This placement will create the flowing mane.
- Sew the Mane in Place: Carefully sew along the edges where the ribbons are placed, securely attaching them to one of the white head pieces. This establishes the beautiful, multi-colored mane.
- Assemble the Head: Place the two white unicorn head pieces (with the mane now secured on one side) wrong-sides together. Pin them in place and sew around the entire perimeter of the head. Remember to leave the bottom of the neck open; this opening is essential for turning the head right-side out and for stuffing.
- Turn and Stuff the Head: Gently flip the unicorn head right-side out through the opening at the neck. Begin stuffing it firmly with flex foam to provide robust structural support, ensuring the head stands tall and proud. Then, add polyester stuffing to fill out the remaining space, giving it a soft, rounded, and complete form.
- Create the Ears: Take two of your white fabric triangles to form one ear. Place them ‘wrong’ sides together and sew along two edges, leaving the bottom edge open. Stuff lightly with polyester fiberfill to give it shape, then repeat the process for the second ear.
- Attach the Ears: Sew the stuffed ears securely onto the top of the unicorn head, positioning them symmetrically and upright for that classic unicorn look.
- Embroider Eyes: Using your black thread, carefully embroider or sew on small, expressive eyes onto the unicorn’s face. Simple stitches can create a charming and gentle gaze.
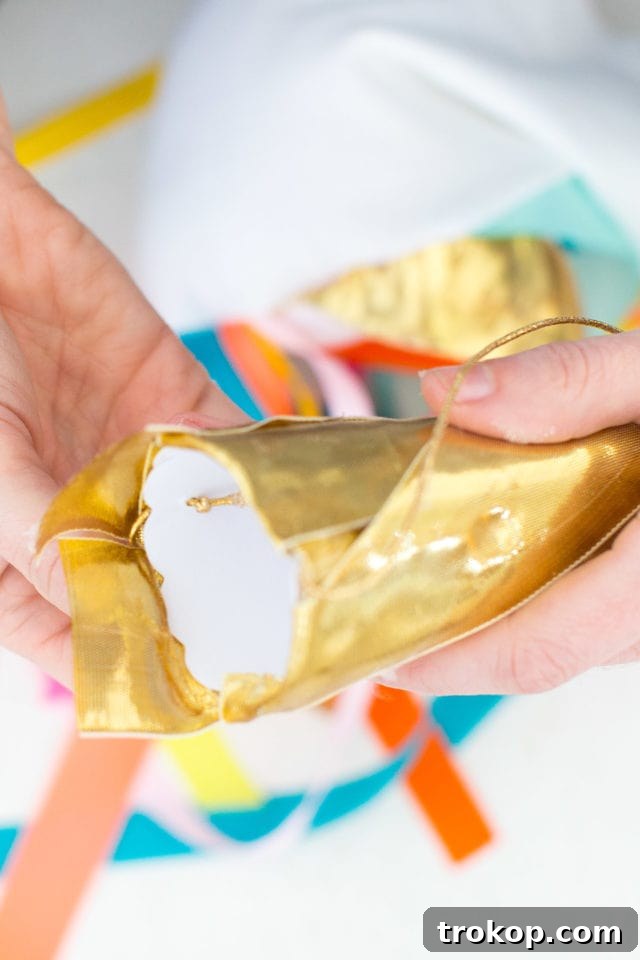
- Craft the Unicorn Horn: Take your thin cardboard party hat and wrap it entirely and smoothly with gold ribbon. You can use a small dab of fabric glue at the beginning and end of the ribbon to secure it in place. This transforms a simple hat into a dazzling, shimmering horn.
- Attach the Horn: Position the finished gold horn firmly onto the top-center of the unicorn head. Secure it in place with a few strong stitches through the base of the horn and into the stuffed head, or use a reliable fabric adhesive for a permanent bond.
Your magnificent unicorn head is now complete and ready to bring a touch of fantasy and wonder to your pup’s appearance!
Materials Needed To Make A Unicorn Float Body For Your Pet
To perfectly complement the magical unicorn head, you’ll need a matching float body. The materials are very similar to those used for the flamingo float, with a special emphasis on white fabrics and enchanting ribbon embellishments:
- White Fabric:
- Two large oval pieces that will form the main float body, sized appropriately for your dog.
- Two teardrop-shaped pieces of white fabric for the unicorn’s tail.
- Six 11-inch long white rectangle pieces (approximately 1-2 inches wide) for the securing straps.
- Stuffing: Plenty of polyester fiberfill for generously stuffing the float body and tail, providing volume and shape.
- Colorful Ribbon: A selection of different colored ribbons, specifically chosen for wrapping the unicorn’s tail. These ribbons will give the tail a playful, magical, and distinctive look.
- White Thread: For seamless stitching of all white fabric components, ensuring a clean and consistent appearance.
- Adhesive Velcro: Three sets of 2-inch adhesive Velcro pieces for securing the float. As advised, sewing the float directly onto a white doggy t-shirt is highly recommended for superior results and comfort.
How To Make A Unicorn Float Body: Step-by-Step Guide
Creating the unicorn float body is a very similar process to the flamingo float, with a distinct, magical twist for the tail. Follow these steps:
- Follow Flamingo Float Body Instructions (Steps 1-8): Please refer to the detailed instructions provided in the “How To Make The Flamingo Float Body” section (Steps 1 through 8). These steps are identical for the unicorn float body and cover:
- Measuring and precisely cutting the two large oval pieces for the float body, tailored to your dog’s specific dimensions.
- Creating and carefully cutting out the 6-inch diameter inner circle opening in both oval pieces, which forms the dog’s back opening.
- Attaching the completed unicorn head (from the previous section) onto one of the shorter ends of an oval piece.
- Constructing the two teardrop-shaped pieces for the unicorn’s tail by sewing them together, but **it is crucial NOT to stuff or fully close the tail at this stage.**
- Aligning and sewing the two main oval float pieces together around the inner circle opening to form the central structure.
- Sewing the outer edges of the float, remembering to leave a 6-inch opening.
- Generously stuffing the float, ensuring heavy packing on the sides for buoyancy and lighter stuffing at the oval ends for comfort on your dog’s back.
- Finally, finishing sewing the outer edges of the float securely after stuffing.
- The Unicorn Tail Transformation: This is where your unicorn’s magic truly begins! Before attaching the tail to the float body:
- Take your partially constructed unicorn tail (the two teardrop pieces sewn together with an opening).
- Artistically wrap the entire tail with your chosen different colored ribbons. You can crisscross them, create stripes, or weave them for a truly unique and whimsical effect. Secure the ribbon ends with a few discreet stitches or a dab of fabric glue to prevent unraveling.
- Now, lightly stuff the beautifully ribbon-wrapped tail with polyester fiberfill to give it volume and shape. Once stuffed, finish sewing the remaining edges to securely close the tail.
- Attach the Unicorn Tail: Sew the beautifully ribbon-wrapped unicorn tail onto the opposite short end of the float body from where the unicorn head is attached. Ensure it is securely fastened.
- Add Straps for Security (Optional): Follow Step 9 from the “How To Make The Flamingo Float Body” instructions for attaching the white rectangle straps with Velcro. Remember, for the best stability and comfort, integrating the float body directly onto a white doggy t-shirt provides a much superior fit for your adorable unicorn pup!
With these steps, your dog will be ready to enchant everyone as an adorable, magical pool float unicorn!
The End Result: Pure Pet-fection!
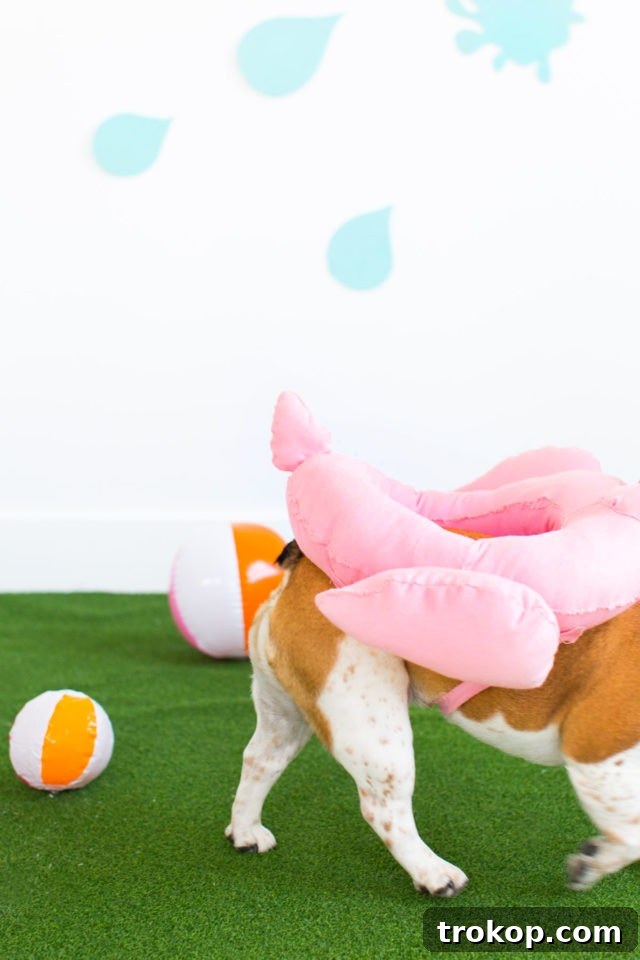
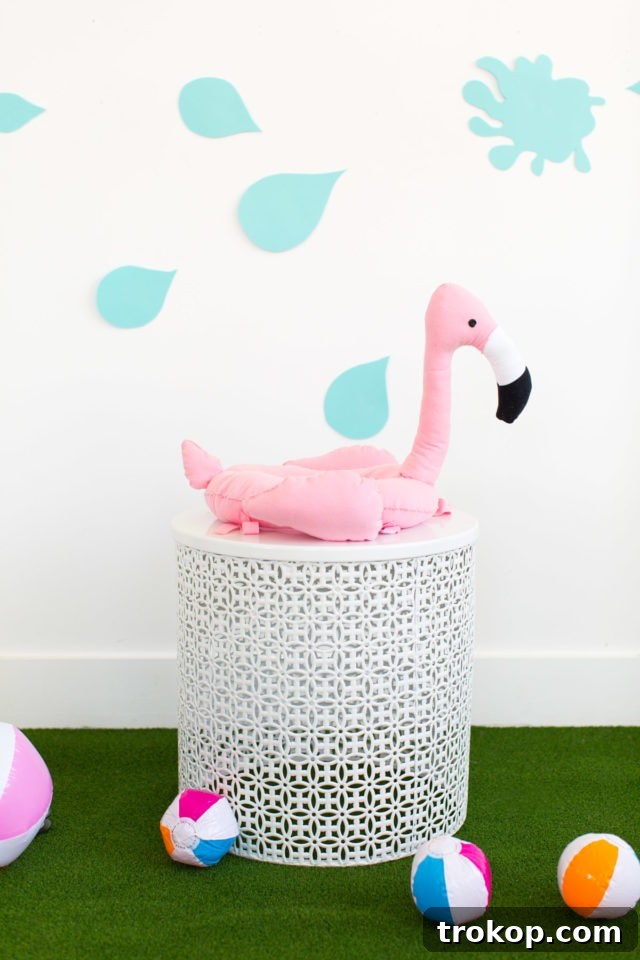
Despite a few initial fitting lessons learned the hard way (those unexpectedly tall heads!), we genuinely think these DIY dog costumes turned out absolutely darling! Perhaps we’re a little biased, and they aren’t even our own fur babies, but can you honestly blame us? Just look at those adorable, smiling faces!
Crafting these unique pool float costumes for Finn and Fritz was an adventure filled with laughter, a dash of challenge, and immense creative satisfaction. The pure joy of seeing them prance around, embodying the whimsical spirit of a vibrant flamingo and a magical unicorn, made every single stitch and moment of effort entirely worthwhile. These handmade creations brought so much happiness, and we’re certain they will for you too.
Unleash Your Creativity: Share Your Pet Costume Creations!
We sincerely hope this comprehensive and detailed guide inspires you to unleash your inner crafter and create something truly special and memorable for your beloved pet. Whether you’re aiming for the ultimate Halloween pet costume, preparing for a fun-filled costume party, or simply want to capture some adorable and unique photos, these DIY pool float costumes are guaranteed to be a sensational hit.
Don’t hesitate to experiment with different fabric colors, add your own personal touches, and incorporate unique embellishments to make the costume truly one-of-a-kind. Most importantly, always prioritize your pet’s comfort and happiness in their new outfit. A comfortable pet is a happy model!
We would absolutely love to see your furry friends rocking their fabulous DIY creations! Share your photos, crafting stories, and any tips you discover along the way with us. Let’s celebrate the boundless creativity, endless joy, and heartwarming companionship that pet costuming brings to our lives together!