
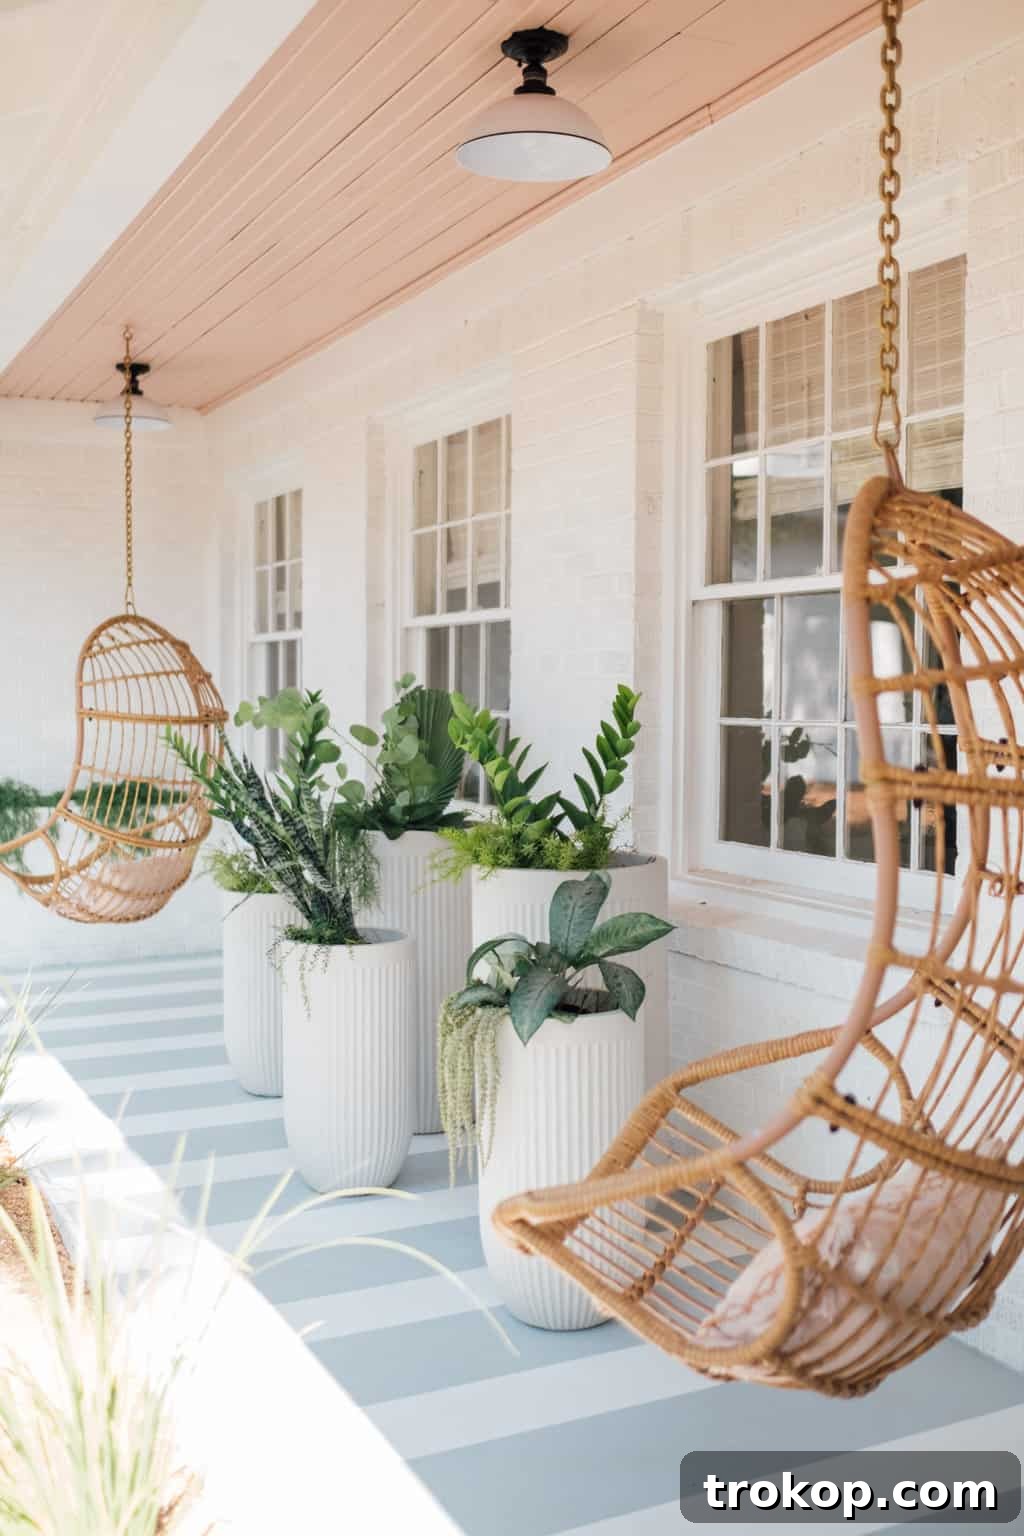
Looking to give your home’s exterior a significant refresh without breaking the bank? Painting your porch is an incredibly impactful and affordable way to instantly boost your property’s curb appeal. A well-maintained and stylish porch can transform the entire look and feel of your home, creating a welcoming first impression that speaks volumes about the care you put into your living space. This comprehensive guide will walk you through every step of the process, ensuring a stunning and long-lasting finish.
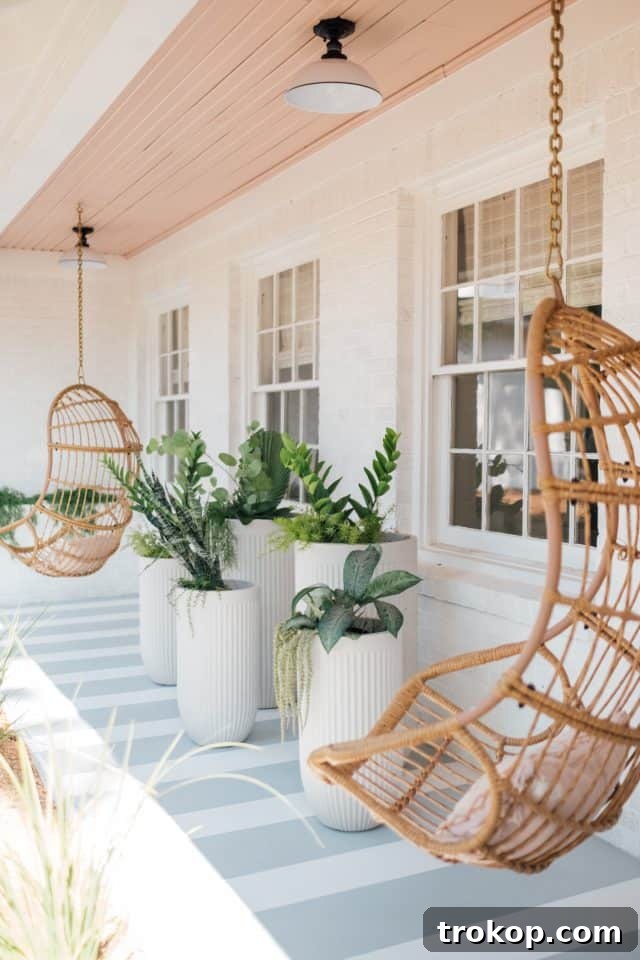
Transform Your Home’s Exterior: The Ultimate Guide to Painting Your Porch
Your front porch is more than just an entry point; it’s the gateway to your home, often the very first element noticed by guests, passersby, or potential homebuyers. We all understand the importance of first impressions, which is why neglecting your porch is a missed opportunity to showcase your home’s character and charm. A fresh, expertly applied coat of paint can elevate your porch from overlooked to outstanding, drawing admiration and hinting at the beautiful interiors beyond.
Whether you have a sturdy concrete porch or a classic wooden porch, every outdoor surface benefits from a bit of tender loving care over time. Environmental factors, foot traffic, and general wear can dull its appearance, making it look tired and uninviting. Painting your porch offers an immediate, dramatic, and surprisingly affordable transformation. With just a day or two of focused effort and the right paint, you can achieve a truly stunning makeover.
Why a Fresh Porch Paint Job is a Game-Changer for Your Home
- Boosting Curb Appeal and First Impressions: A vibrant, clean porch instantly enhances your home’s exterior aesthetic, making it more attractive and inviting. This is crucial for both personal enjoyment and maximizing property value.
- Protecting Your Investment: Quality porch paint acts as a protective barrier against harsh weather, UV rays, moisture, and daily wear and tear, extending the life of your porch materials, whether wood or concrete.
- Cost-Effective Home Improvement: Compared to extensive renovations, painting offers one of the most budget-friendly ways to achieve a significant visual upgrade, providing excellent return on investment in terms of aesthetic impact.
- Personalizing Your Outdoor Space: Paint allows you to infuse your personality into your home’s exterior, choosing colors and designs that reflect your style and create a cohesive look with your existing architecture and landscaping.
We’ve witnessed the incredible power of paint in various projects, from creating a geometric accent wall in our guest bedroom to revitalizing our in-law’s brick home with limewash paint. Now, it’s time to tackle the porch. So, grab your brushes and let’s dive into our detailed, budget-friendly tutorial on how to paint a porch, revealing all the secrets to a professional-looking finish.

Essential Materials & Tools for Your Porch Painting Project
Having the right equipment and high-quality materials on hand before you begin will make your porch painting project smoother and more efficient. Here’s a detailed list of what you’ll need:
- Pressure Washer: Essential for deep cleaning and removing stubborn dirt, grime, and loose paint. If you don’t own one, consider renting or using a stiff bristle brush with a strong cleaning solution for smaller areas.
- Exterior Porch Paint: Choose a paint specifically formulated for porches and floors. These paints are engineered for durability, high traffic, and weather resistance. Our project used Behr Porch and Floor Paint in ‘Polar Bear White’ for the base and ‘Heirloom Silver’ for the stripes, both in a satin finish for a subtle sheen and easy cleaning.
- Paint Brushes: A high-quality angled brush (2-inch or 2.5-inch) is crucial for “cutting in” around edges, corners, and areas a roller can’t reach.
- Paint Rollers: A standard-sized roller (9-inch) with a medium-nap cover is ideal for large, flat surfaces. A mini roller (4-inch or 6-inch) is perfect for smaller areas and intricate designs like stripes.
- Scotch® Rough Surface Painter’s Tape (2060): This specialized tape is designed for challenging, textured surfaces like concrete, brick, stucco, and rough wood, ensuring sharp, clean paint lines where standard tape might fail.
- ScotchBlue™ Original Painter’s Tape (2090): Ideal for smooth surfaces such as PVC trim, painted wood, or vinyl, providing excellent adhesion and clean removal.
- Straight Edge and Ruler: Absolutely essential for precise measurements when laying out geometric patterns or stripes, ensuring your design is perfectly aligned.
- Pencil: For making light, erasable marks during the design layout phase.
- Optional: Concrete Etching Solution: Recommended for new or smooth concrete surfaces. It creates a porous texture that helps paint adhere better, improving durability.
- Optional: Paint Sealant/Topcoat: An additional clear sealant can provide an extra layer of protection, particularly in high-traffic areas or climates with extreme weather.
- Safety Gear: Don’t forget safety glasses, work gloves, and a dust mask (especially if sanding or using etching solutions).
- Drop Cloths/Plastic Sheeting: To protect surrounding areas, delicate plants, or items that cannot be moved.
- Outdoor Cleaning Agent/Degreaser: For tackling stubborn stains, oil, or mildew before pressure washing.
- Paint Scraper and Sandpaper: For removing old, peeling paint and smoothing surfaces. Various grits (e.g., 80-grit for rough spots, 120-grit for general smoothing) will be useful.
- Stirring Sticks and Paint Tray Liners: For easy paint preparation and cleanup.
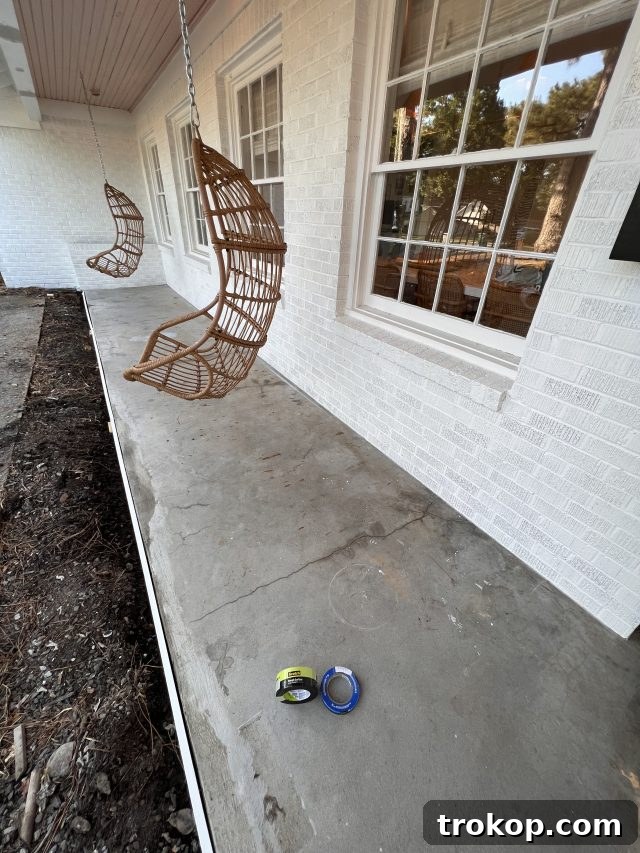
Thorough Porch Preparation: The Key to Lasting Results
Preparation is arguably the most crucial step in any painting project, especially outdoors. The longevity and flawless appearance of your painted porch depend almost entirely on how well you prepare the surface. Skipping or rushing this stage can lead to premature peeling, chipping, and an overall subpar finish. Invest your time here, and you’ll be rewarded with a beautiful, durable result.
- Clear the Area: Begin by removing all furniture, potted plants, decorations, and anything else from your porch surface. If there are any delicate plants or immovable items nearby, protect them thoroughly with drop cloths or specialized masking film like 3M™ Hand-Masker™ Advanced Masking Film.
- Inspect and Repair: Carefully inspect your porch for any cracks, holes, loose boards, or other damage. For concrete porches, fill cracks with a suitable concrete patching compound. For wood porches, replace any rotten or severely damaged boards, drive in loose nails, and fill smaller holes or imperfections with exterior wood filler. Allow all repairs to cure completely according to manufacturer instructions.
- Initial Cleaning: Sweep away any loose debris, leaves, or dirt. For a more thorough initial clean, you can mop or hose down the surface with a stiff brush and an all-purpose outdoor cleaner to loosen embedded grime.
- Deep Cleaning with a Pressure Washer: This step cannot be emphasized enough. A pressure washer is your best friend here, dramatically speeding up the cleaning process and achieving a level of clean that hand scrubbing simply cannot match. Systematically spray the entire porch surface, ensuring you remove all dirt, mildew, mold, algae, and loose paint flakes. If your porch has existing paint that is peeling, use a paint scraper in conjunction with the pressure washer to remove as much old, loose paint as possible. For heavily soiled areas or mildew, use a specific outdoor cleaning agent formulated for the type of surface (concrete cleaner or deck wash).
- Etching (for Concrete): If you have a bare concrete porch, especially new or very smooth concrete, applying a concrete etching solution (as per product instructions) is highly recommended. This solution creates a slightly rougher, more porous surface, significantly improving paint adhesion. Always wear appropriate safety gear (gloves, eye protection, mask) when working with etching solutions.
- Rinsing and Drying: After cleaning and/or etching, rinse the entire porch thoroughly with clean water to remove all cleaning solution residues, loose particles, and etching chemicals. Allow the porch to dry completely. This typically takes a minimum of 24 hours, depending on humidity and temperature. Any trapped moisture under the paint will inevitably lead to bubbling and peeling down the line. The harder part is now over, and your porch is ready for its transformation!
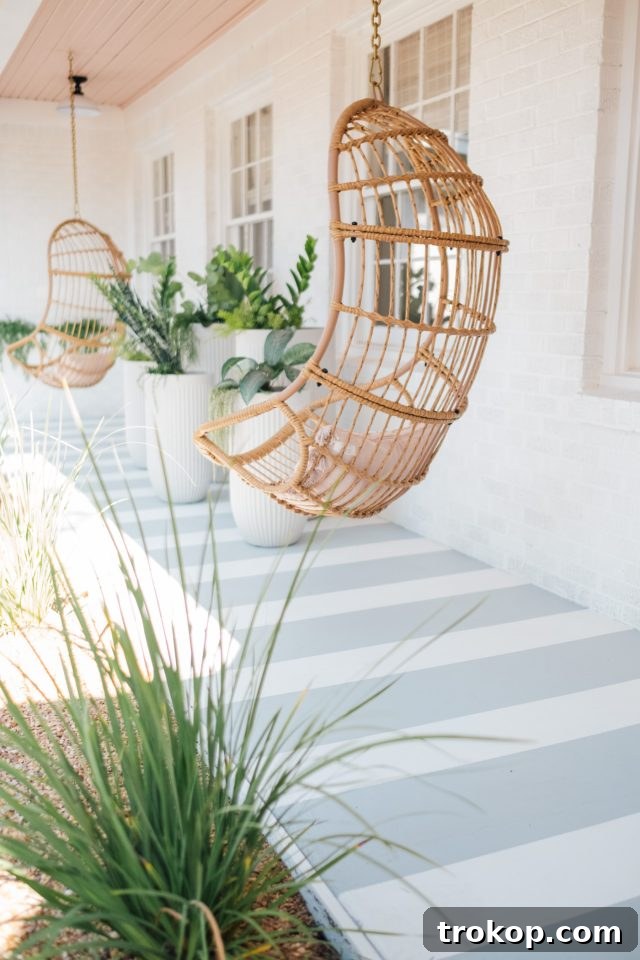
Step-by-Step: How to Expertly Paint Your Porch
Once your porch is immaculately clean and completely dry, you’re ready to bring your vision to life. Follow these steps carefully for a smooth application and a professional finish.
Step 1: Deep Clean the Surface
As previously detailed, begin your painting day with a final check that the porch surface is perfectly clean, free of any new residue, dirt, and debris. If you’ve prepped thoroughly, this should just be a quick sweep or rinse. Ensure it’s completely dry before proceeding.
Step 2: Prepare the Porch Surface
If your porch surface has previously been painted or sealed and you couldn’t remove all of it, a light sanding will help feather the edges of old paint and create a better surface for new paint to adhere. For concrete, if you didn’t etch it in the prep phase, and it feels slick, consider a mild etching solution now. This step creates a crucial “tooth” for the new paint, ensuring a strong bond and preventing early chipping or peeling.
Step 3: Mask Off Areas for Clean Lines
This is where precision pays off. Select the appropriate painter’s tape for your specific surfaces:
- For textured surfaces like our brick walls, the Scotch® Rough Surface Painter’s Tape (2060) is specifically engineered for excellent adhesion and clean removal on concrete, brick, stucco, and rough wood. Carefully apply this tape along the base of your house where the porch meets the wall.
- For smooth surfaces, such as our wood base or PVC trim around the concrete, the ScotchBlue™ Original Painter’s Tape (2090) offers precise lines and residue-free removal. Apply this tape to any smooth areas you want to protect from paint splatter or to create distinct borders.
Press down firmly along the entire edge of the tape, especially on textured surfaces, to “burnish” it and prevent paint bleed. For extra assurance on very rough surfaces, you can run a thin bead of clear caulk along the tape’s edge before painting, smoothing it with your finger to seal any gaps.
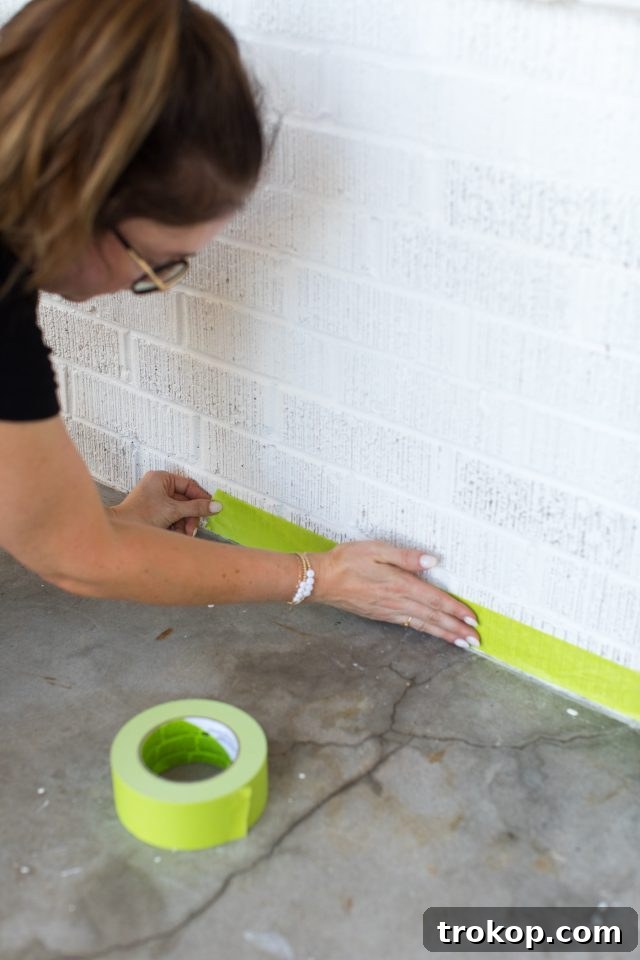
Careful application of painter’s tape ensures crisp, professional-looking edges. Don’t rush this stage, as poorly applied tape can undo all your hard work.
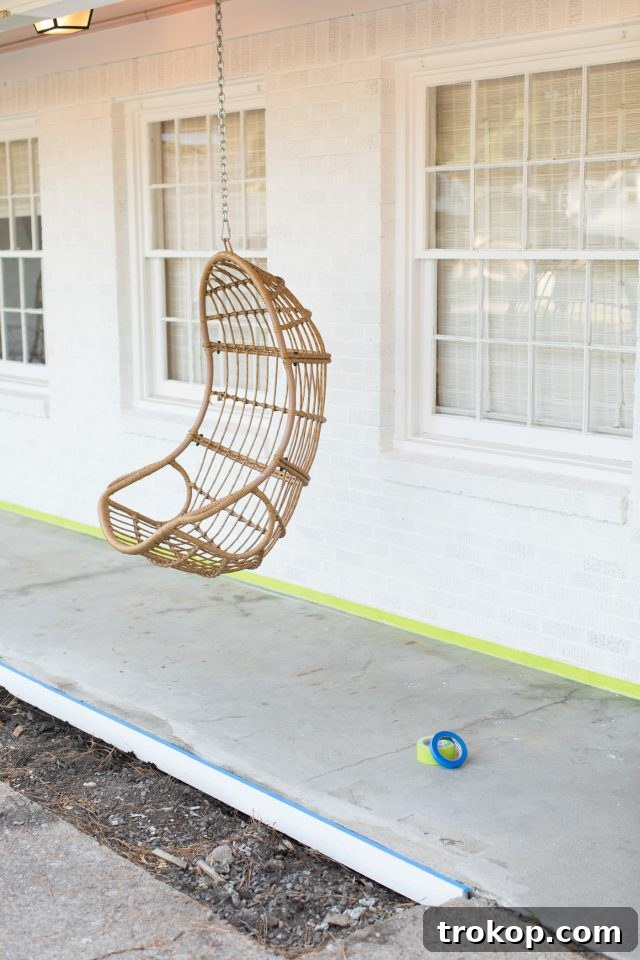
Step 4: Apply Primer and/or Base Coat
Now, it’s time to apply the first color coat, which will serve as your base. We opted for Behr Porch and Floor Paint in a satin finish, which cleverly combines paint and primer in one. While porch paints are inherently durable, we strongly recommend using a dedicated primer or an all-in-one paint-and-primer product. A primer creates a uniform surface, blocks stains, and significantly enhances paint adhesion, leading to a smoother application and a much stronger, longer-lasting finish.
Apply the base coat evenly using a roller for the main areas and a brush for cutting in edges. Avoid applying too thickly, as this can lead to uneven drying and cracking. Allow this base coat to dry for a full 24 hours (or as recommended by the paint manufacturer) before moving on to any design work. Proper drying time is critical, especially before applying tape for designs, to prevent the tape from pulling off fresh paint.
Step 5: Create Your Custom Design
If you’re adding a design like stripes, a checkerboard pattern, or stencils, precision is key. For stripes, we measured and marked 10-inch intervals from one edge of our porch using a ruler and pencil. It’s helpful to make small, light marks at several points along the intended line to ensure accuracy. Then, carefully apply your chosen painter’s tape.
When applying the tape for your design, always place the tape on the *same side* of your marked lines to maintain consistent stripe widths. For instance, if you mark a 10-inch line, place the tape on the outer edge of that mark for all stripes. This ensures each painted stripe will be exactly 10 inches wide once the tape is removed. Press the tape down firmly along its entire length to prevent any paint from bleeding underneath.
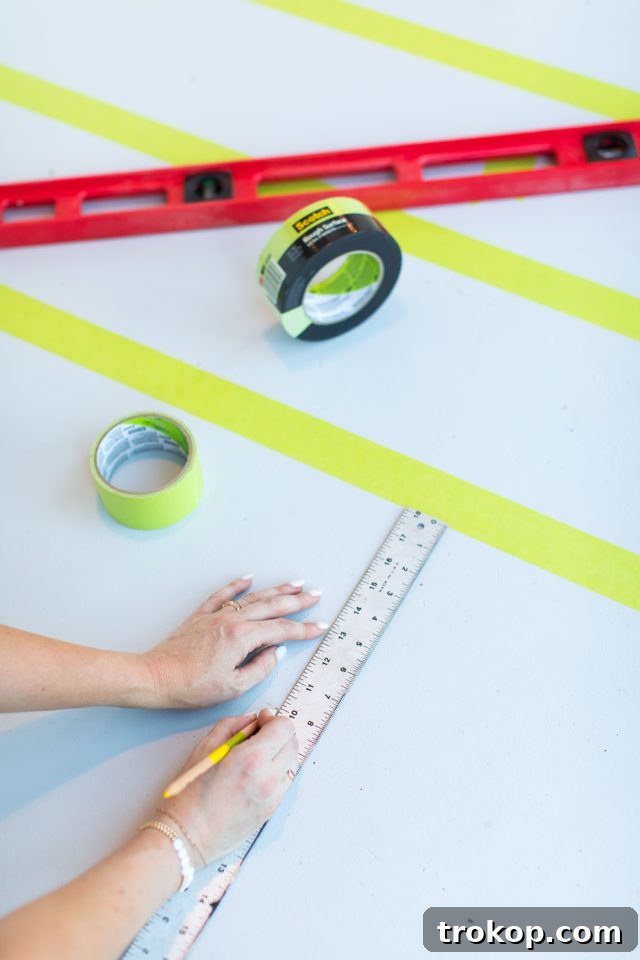
Double-check all your measurements and tape placement. Small errors here can become very noticeable in the final product. A straight edge can help you apply the tape perfectly straight.
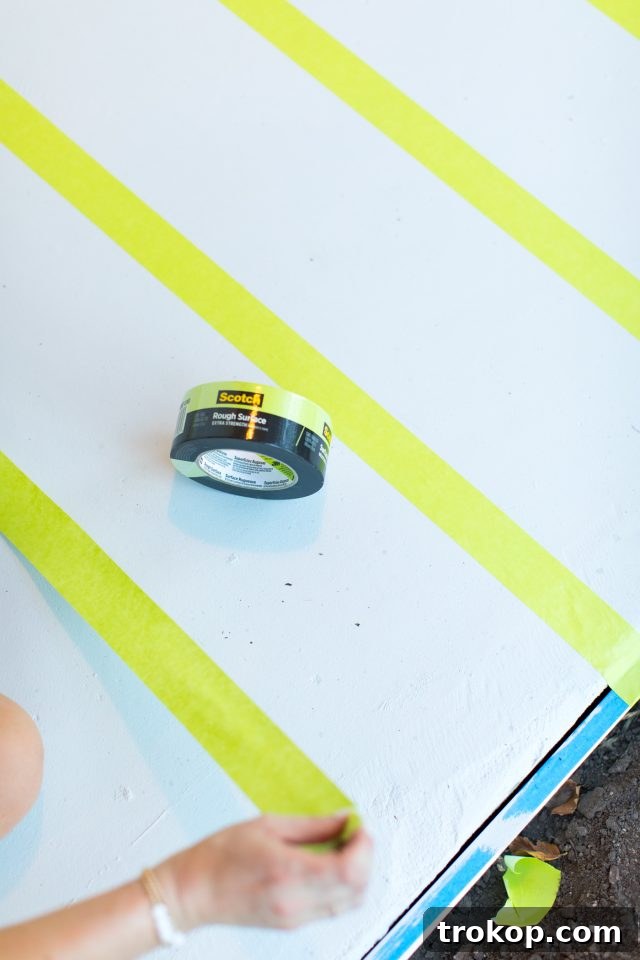
Step 6: Apply Your Topcoat(s)
With your design taped off, it’s time to apply your accent color or topcoat. Using a mini roller, carefully paint within the taped-off stripes or design areas. Apply two thin, even coats of paint. Two thin coats will always provide better adhesion, durability, and a smoother finish than one thick coat, which can be prone to cracking or peeling.
Allow the first coat of paint to dry completely to the touch before applying the second. This prevents lifting or smudging and ensures uniform color. Always follow the manufacturer’s recommendations for drying times between coats, as this can vary by product and environmental conditions.
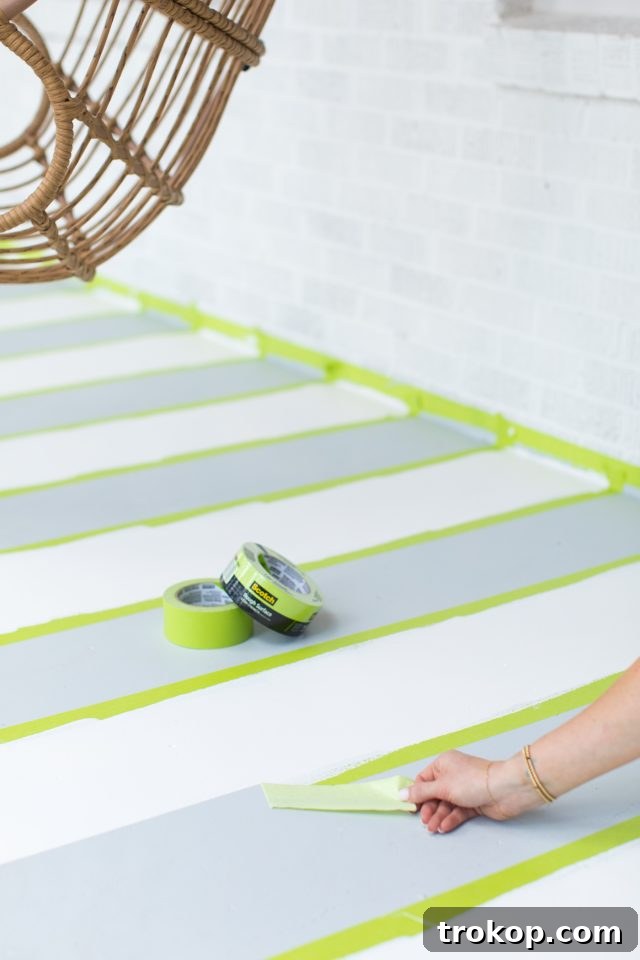
Step 7: The Grand Reveal – Removing the Tape
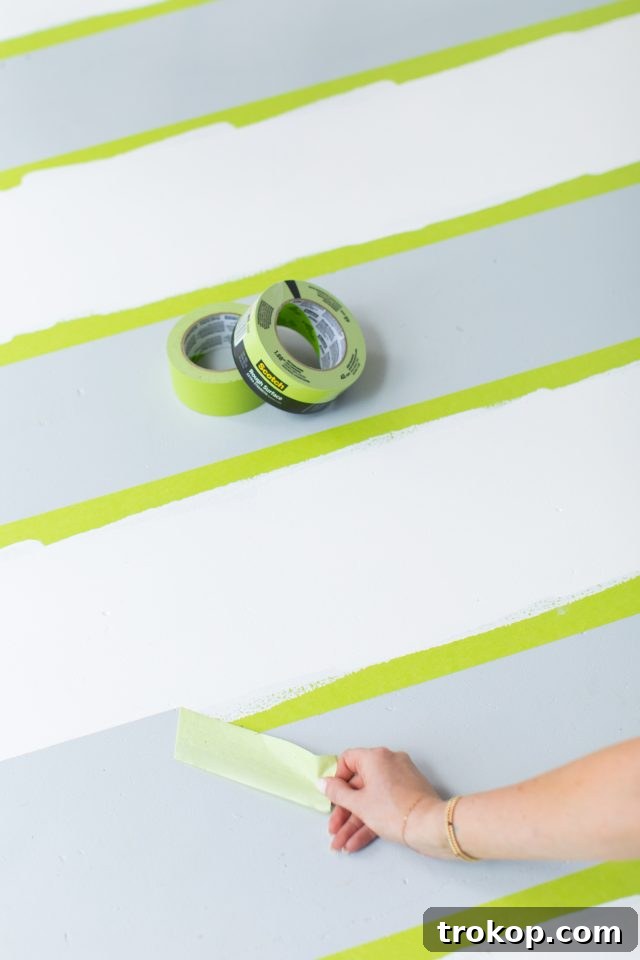
Timing is crucial when removing painter’s tape for the cleanest lines. Ideally, you should remove the tape while the paint is still slightly wet or tacky (within an hour or two of the final coat), or after it has fully cured (24-48 hours). Removing it when the paint is partially dry (but not fully cured) risks pulling up paint along with the tape. Once your stripes or design areas have fully dried to the touch, gently and slowly remove all the tape. Pull the tape back at a 45-degree angle, away from the freshly painted line. This angle helps to break the paint film cleanly and prevents tearing or jagged edges.
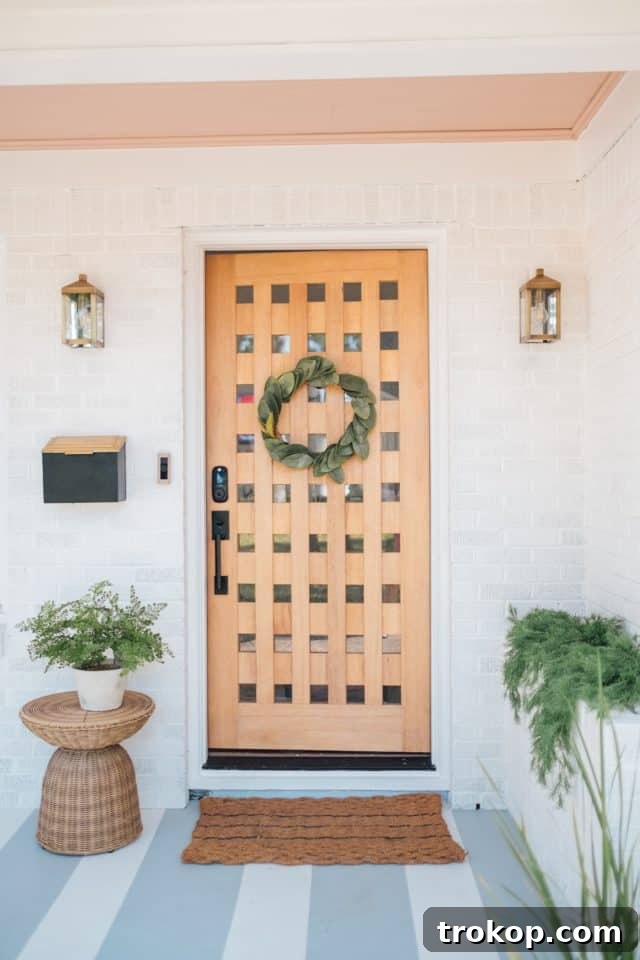
If you notice any small areas of bleed-through or imperfections, carefully use a small artist’s brush and your base color to touch them up. Once the tape is removed and any touch-ups are dry, your beautifully painted porch is ready for its grand reveal! Now you’re all set to decorate and enjoy your refreshed outdoor space.
Painting a Wood Porch: Specific Considerations
Yes, the general technique for painting a porch can absolutely be applied to wood surfaces! However, wood porches have unique characteristics that require special attention:
- Thorough Cleaning: Just like concrete, pressure washing is key. Pay extra attention to cleaning in between the wooden boards, where dirt, leaves, and mildew can easily accumulate and hide. A stiff brush may be needed for stubborn grime in crevices.
- Dealing with Old Paint: If your wood porch has existing paint that is peeling, you must thoroughly scrape off all loose and flaking paint. Any old, unstable paint left behind will cause your new paint to fail prematurely.
- Sanding is Crucial: Unlike concrete which benefits from etching, wooden porches almost always require sanding. If the wood is bare and rough, sand it smooth. If there’s old, intact paint, a light sanding will de-gloss the surface, creating a better profile for new paint adhesion. Use a medium-grit sandpaper (e.g., 80 or 100 grit) for initial sanding, followed by a finer grit (120 or 150) for smoothness.
- Wood Repairs: Inspect for any rotten wood, splinters, or loose fasteners. Replace rotten sections with new pressure-treated wood. Fill any nail holes or small cracks with an exterior-grade wood filler, sanding smooth once dry.
- Wood-Specific Primers: For bare wood, especially older wood or species prone to tannin bleed (like cedar or redwood), an oil-based primer or a stain-blocking acrylic latex primer is highly recommended. This prevents wood tannins from discoloring your topcoat.
- Ventilation and Drying: Wood can absorb more moisture than concrete. Ensure the wood is bone dry before priming and painting. Good ventilation is also essential for proper curing of wood-specific paints and stains.
Choosing the Right Paint for Your Porch
Selecting the correct paint is paramount for a durable and aesthetically pleasing porch. Not just any exterior paint will do; you need products specifically designed for floors and porches due to the unique demands of foot traffic and environmental exposure.
- Porch and Floor Specific Paint: Always opt for paint clearly labeled for “porches,” “floors,” or “deck & porch.” These paints are formulated with harder resins and higher resistance to abrasion, fading, and moisture than standard exterior house paint.
- Types of Porch Paint:
- Acrylic Latex: Most common and user-friendly. Offers excellent adhesion, flexibility (resists cracking), and easy water cleanup. Many come with built-in primers and are highly resistant to fading and mildew.
- Oil-Based Alkyd: Known for superior hardness and durability, especially on wood. Provides a very smooth finish but requires mineral spirits for cleanup and takes longer to dry. Can become brittle over time.
- Epoxy-Based: Often used for concrete garages or industrial floors, offering exceptional durability and chemical resistance. Typically a two-part system, more complex to apply, but incredibly tough.
- Key Features to Look For:
- Anti-Slip Additives: Some porch paints include or can have additives mixed in to create a slightly textured, anti-slip surface, enhancing safety, especially in wet conditions.
- UV Resistance: Prevents color fading from sun exposure.
- Mildew Resistance: Essential for damp climates, inhibits mold and mildew growth.
- Primer Included: Many modern porch paints are “self-priming” or “paint and primer in one,” simplifying the process.
- Finish Options:
- Satin/Semi-Gloss: Our choice, offers a slight sheen, is easier to clean, and provides good durability.
- Matte/Flat: Offers a non-reflective look, but can be harder to clean and may show scuffs more easily.
- Color Selection: Choose colors that complement your home’s existing exterior walls, trim, and roof. Lighter colors can make a small porch feel larger and reflect heat, keeping the surface cooler. Darker colors can absorb heat and add dramatic contrast. Consider how the color will look in different lighting conditions throughout the day.
Mastering Painter’s Tape for Professional Edges
Achieving crisp, professional paint lines is often the hallmark of a successful DIY project. Painter’s tape is your secret weapon, but knowing how to use it correctly makes all the difference.
- Ensure Complete Dryness: As emphasized, the surface must be completely dry before applying tape. Moisture will prevent proper adhesion.
- Burnish the Edges: After applying the tape, use a plastic putty knife, an old credit card, or even your thumbnail to firmly press along the entire edge of the tape that meets the surface you intend to paint. This “burnishes” the tape, creating a tight seal and preventing paint from bleeding underneath.
- Apply in Short Sections: For long, straight lines, apply the tape in manageable sections, pressing down as you go to avoid bubbles or wrinkles. Overlap sections slightly for continuous protection.
- Remove at the Right Time: The general rule of thumb is to remove the tape when the paint is either still wet (immediately after the final coat) or completely dry and cured (usually 24-48 hours later). Removing it when the paint is just “tacky” risks pulling up chunks of paint. Always pull the tape back slowly at a 45-degree angle, away from the freshly painted line, to achieve the cleanest break.
- Pre-Seal on Textured Surfaces: For highly textured surfaces (like rough concrete or brick) where bleed-through is a concern, apply a very thin coat of your base color paint over the edge of the tape before painting your accent color. This essentially “seals” the tape edge with the existing color, and any bleed-through will be the same color as the base, creating a perfectly clean line for your topcoat.
- Different Tapes for Different Tasks: Remember to use the correct tape for the surface (rough surface tape for textured areas, blue original tape for smooth areas). Also, consider different widths; wider tape can be helpful for protecting large areas, while narrower tape is great for fine lines.
- For more creative design inspiration, explore various handmade wall painting ideas. Many of these techniques, which cleverly utilize painter’s tape to create unique designs, can be adapted and applied beautifully to your porch, stair risers, or other outdoor surfaces.
Porch Paint Maintenance for Enduring Beauty
Once your porch is beautifully painted, a little ongoing maintenance will ensure its vibrant look lasts for years. While porch paint is designed for durability, regular care can significantly extend its lifespan and keep your exterior looking fresh.
- Regular Cleaning: Sweep your porch regularly to remove leaves, dirt, and debris that can trap moisture and scratch the paint surface. Periodically wash it with a mild soap and water solution, using a soft brush or mop. Avoid abrasive cleaners or harsh scrubbing that could damage the paint.
- Address Spills Promptly: Clean up any spills (e.g., drinks, oil, chemicals) immediately to prevent staining or damage to the paint finish.
- Inspect Annually: Once a year, preferably in spring, inspect your painted porch for any signs of wear and tear, such as chips, cracks, or fading. Addressing these minor issues early can prevent them from becoming larger, more costly problems.
- Touch-Ups: Keep a small amount of your porch paint for touch-ups. Small chips or scuffs can be easily repaired with a fine brush, blending seamlessly with the existing finish.
- Re-Seal (Optional): If you chose to apply a paint sealant, check its condition. Depending on the product and traffic, you might consider reapplying a clear sealant every few years for added protection and shine.
- Protect from Furniture: Use felt pads or rubber caps under the legs of porch furniture to prevent scratches and gouges in the painted surface.
- Winter Care: In colder climates, keep your porch clear of snow and ice using a plastic shovel to avoid scraping the paint. Avoid using rock salt or harsh de-icers, as these can damage paint and concrete alike.
By following these simple maintenance tips, your freshly painted porch will continue to be a source of pride and a welcoming feature of your home for many seasons to come.
Porch Painting Project Summary
For a quick reference and to help plan your project, here’s an overview of the key details for painting your porch:
Project Overview
- Prep Time: Approximately 1 day (allows for thorough cleaning, repairs, and full drying of the porch surface).
- Active Painting Time: Around 6 hours (this includes applying primer/base coat and two topcoats with drying time between).
- Dry Time: 1 day (for paint to fully cure and be ready for tape removal or light foot traffic).
- Total Project Time: Roughly 2 days and 6 hours (this can vary based on porch size, design complexity, and local climate conditions).
- Estimated Cost: ~$100 (project costs are dependent on your porch size, the specific design, the condition of your current porch, and the quality/brand of paint chosen. Our porch measured 20 ft x 7 ft.)
Equipment & Materials Checklist
Ensure you have these items on hand before you start:
- Equipment: Pressure washer, straight edge and ruler, pencil, paint brushes (angled and standard), paint rollers (mini and standard), safety glasses, work gloves, dust mask, paint scraper, sandpaper/sander.
- Materials: Exterior porch paint (base color), exterior porch paint (accent color, if designing stripes/patterns), Scotch® Rough Surface Painter’s Tape (2060), ScotchBlue™ Original Painter’s Tape (2090), concrete etching solution (optional), paint sealant (optional), outdoor cleaning agent, drop cloths/plastic sheeting, wood filler/concrete patch (as needed).
More Inspiring Outdoor Makeovers
If you’re looking for more easy DIYs and painting projects to enhance your home, be sure to check out some of our other renovation guides:
- Our Before and After Front Door Makeover
- Creative Stair Riser Ideas to Elevate Your Home
- Why You Should Use Limewash Paint on Brick for a Timeless Look
- Transforming Your Outdoor Space: Tiled Backyard Patio Before and After

28 Decorative Wall Mirrors You’ll Wish You Bought Sooner
Looking for the perfect wall mirror? Explore our roundup of stylish options that will instantly elevate any room in your home, from the bathroom to the living room.
Continue Reading28 Decorative Wall Mirrors You’ll Wish You Bought Sooner
37 Best Beach Toys for Vacation Fun
Discover the best beach toys for kids, toddlers, and families to ensure endless fun and entertainment on your next vacation or day trip to the shore.
Continue Reading37 Best Beach Toys for Vacation Fun
Your Guide to Hosting the Perfect Outdoor Movie Night
From DIY projectors to cozy seating arrangements, explore the best tips and ideas for hosting an unforgettable outdoor movie night for friends and family.
Continue ReadingYour Guide to Hosting the Perfect Outdoor Movie Night
33 Easy DIY Pumpkin Painting Ideas
Create festive and unique decorations with these pumpkin painting ideas, perfect for Halloween, Thanksgiving, or simply adding autumnal charm to your home decor.
Continue Reading33 Easy DIY Pumpkin Painting Ideas