
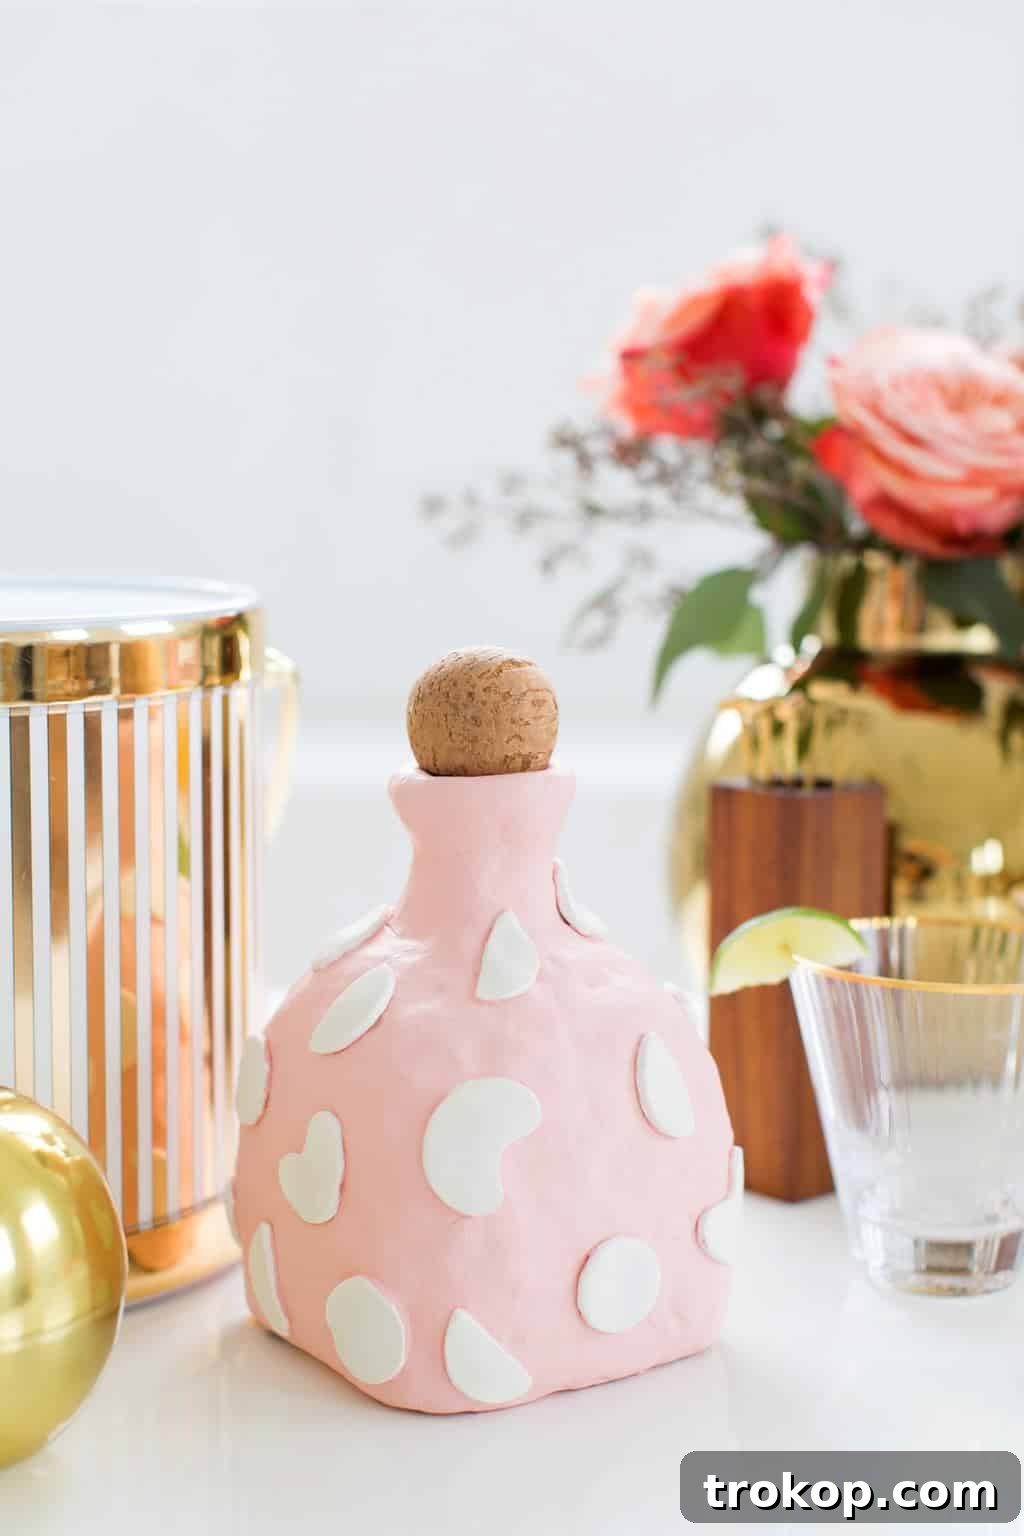
Transform Your Bar Cart with a Custom DIY Clay Decanter
Imagine a beautifully crafted decanter gracing your bar cart, a unique statement piece that reflects your personal style. What if you could create such an item yourself, not from scratch, but by upcycling something you already have? This guide will show you how to transform an ordinary glass bottle into an extraordinary DIY clay decanter, adding a touch of handmade elegance to your home decor or gifting it as a personalized treasure.
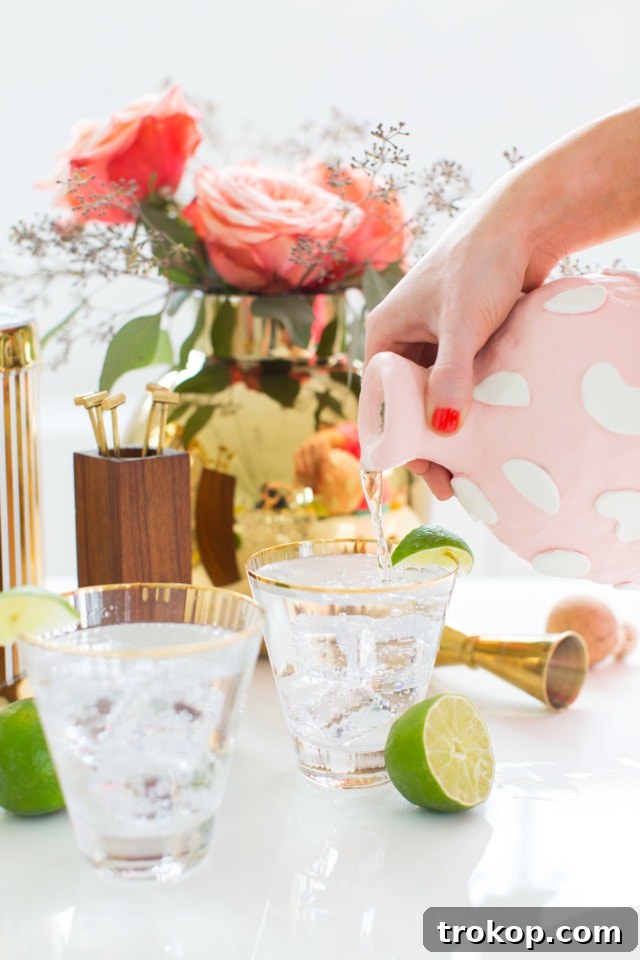
For those of us who approached school art projects with utmost seriousness and a burning desire for originality, this project is a dream come true. It’s a chance to unleash your inner artist and craft something truly special. While the original inspiration for this DIY came from Patrón’s “Art of Patrón” Bottle Art Competition, the spirit of creative competition and the joy of making something beautiful remain at its core. It’s a fantastic way to infuse a healthy dose of creativity into your weekend DIY plans, culminating in a functional piece of art.
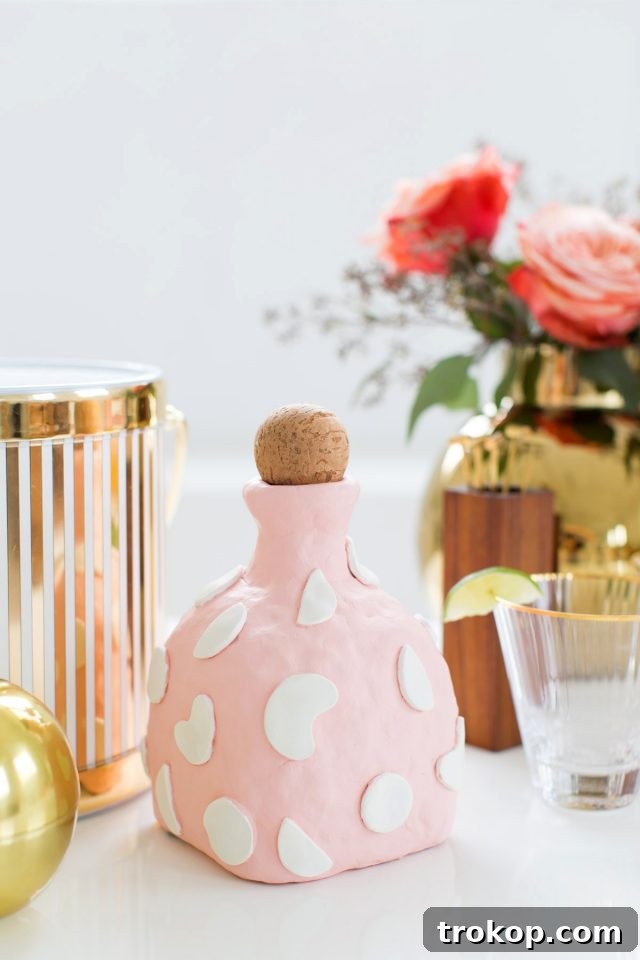
Beyond the artistic challenge, there’s immense satisfaction in upcycling. Instead of discarding an empty bottle, you give it a new life, transforming it into a stylish and functional item. Preparing your bar cart with a pretty new decanter, especially one that began its journey as a bottle you enjoyed, adds a layer of personal history and charm that store-bought items simply can’t match. This project is not just about making a decanter; it’s about sustainable crafting, personalized decor, and the sheer pleasure of creation.
My own journey with air-dry clay has had its share of trials and errors. It took several attempts to achieve a result I was truly happy with, particularly when it came to preventing the clay from cracking as it dried. Air dry clay can be a fickle medium, but with the right techniques and a bit of patience, you can achieve stunning results. That’s why I’m sharing my tried-and-tested tips to save you time and frustration, ensuring your DIY clay decanter project is a smooth and enjoyable experience from start to finish. Let’s dive into the process and create something truly unique for your home.
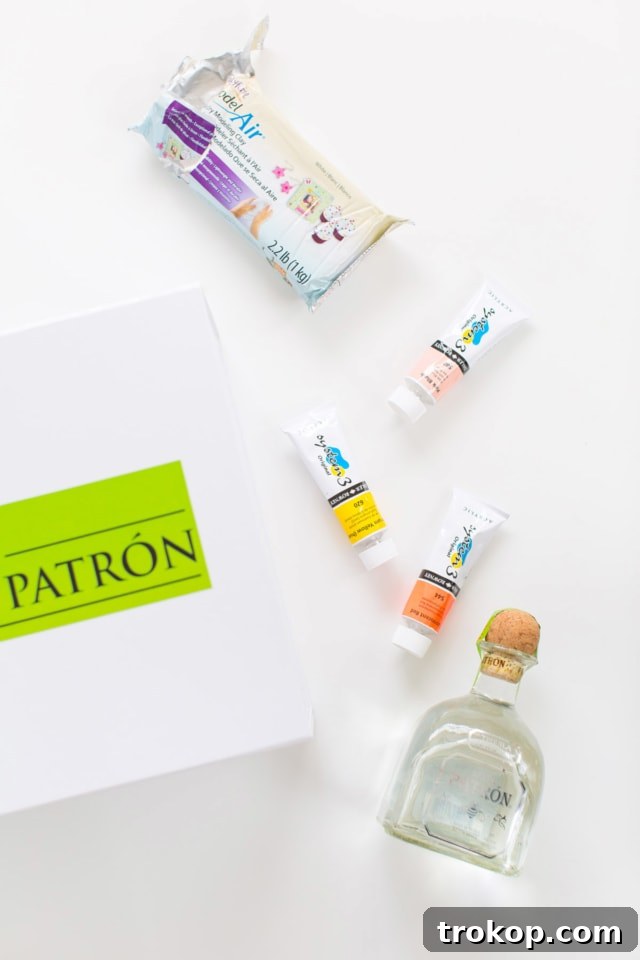
Table of Contents
Materials and Tools Needed To Make A DIY Clay Decanter
Gathering all your materials before you begin is crucial for a seamless crafting experience. For this project, you’ll need a few essential items, most of which are readily available at craft stores or even around your home. The key is quality air dry clay and the right sealant to ensure your decanter is both beautiful and functional.
- Air dry clay: This is the star of our project. Choose a high-quality clay that is easy to work with and known for its minimal cracking during drying. White clay is versatile as it can be painted any color.
- Foam brush: Essential for smoothing the clay surface and applying sealant. A soft foam brush will help achieve an even, streak-free finish.
- Cup of water: Used to moisten the clay for smoothing and blending, making it more pliable and preventing it from drying out too quickly while you work.
- Clean glass liquor bottle: An empty Patrón bottle works perfectly due to its unique shape, but any clean, empty glass bottle with an interesting silhouette can be repurposed. Ensure it’s thoroughly washed and dry.
- Gloss shellac: This is a vital food-safe sealant that will protect your clay decanter and make it suitable for holding liquids. Ensure you choose a variety that clearly states it is food-safe.
- Wax paper: Provides a non-stick surface to work on, preventing the clay from adhering to your table and making cleanup much easier.
- Petite four cutters (Optional for shapes): These small cutters can be used to create decorative shapes and patterns to add unique embellishments to your decanter. Cookie cutters or even freehand sculpting tools can also work.
- Acrylic paints of your choice (Optional): If you plan to add color to your decanter, acrylic paints are ideal as they adhere well to dried clay and offer a wide range of vibrant hues.
Having these items ready will allow you to focus on the creative process without interruptions. Each material plays a specific role in achieving a professional-looking and durable DIY clay decanter.
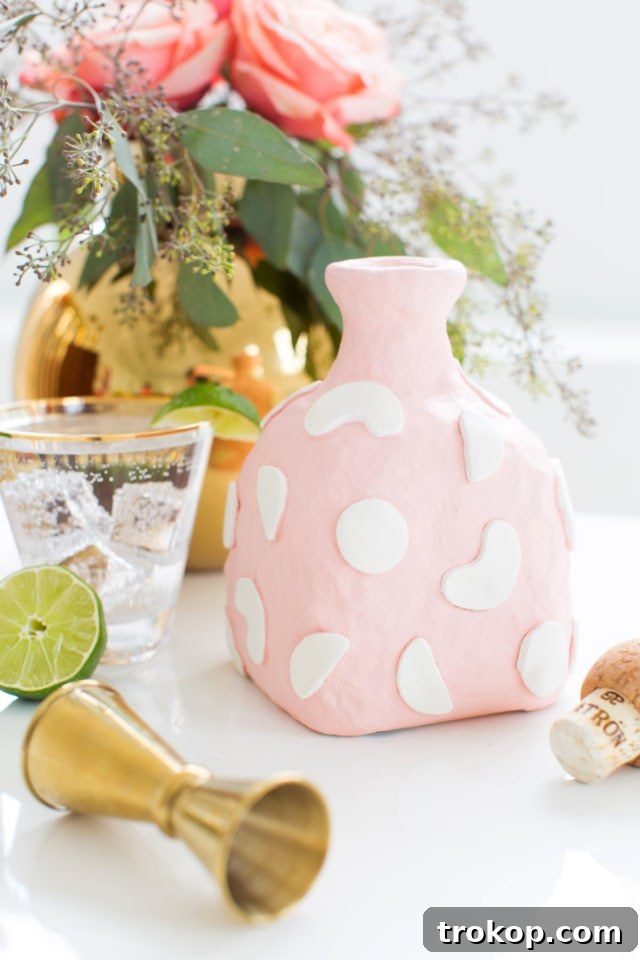
How to Make a DIY Clay Decanter
Creating your custom clay decanter is a rewarding process that combines simple techniques with artistic flair. Follow these steps carefully to achieve a beautiful and long-lasting piece.
Step 1: Applying the Clay to the Bottle— Starting with your thoroughly cleaned and dry glass bottle, begin applying thick layers of air-dry clay in manageable sections. Press the clay down firmly onto the glass, using your fingers to blend each section seamlessly into the next. The goal is to create an even, consistent layer around the entire bottle. It’s often easiest to work from the bottom up, leaving the very top of the bottle – the neck and opening – until last. This provides a stable area to grip as you manipulate and smooth the clay on the main body of the decanter. Take your time with this step, ensuring a strong bond between the clay and the glass, which will prevent future cracking or detachment.
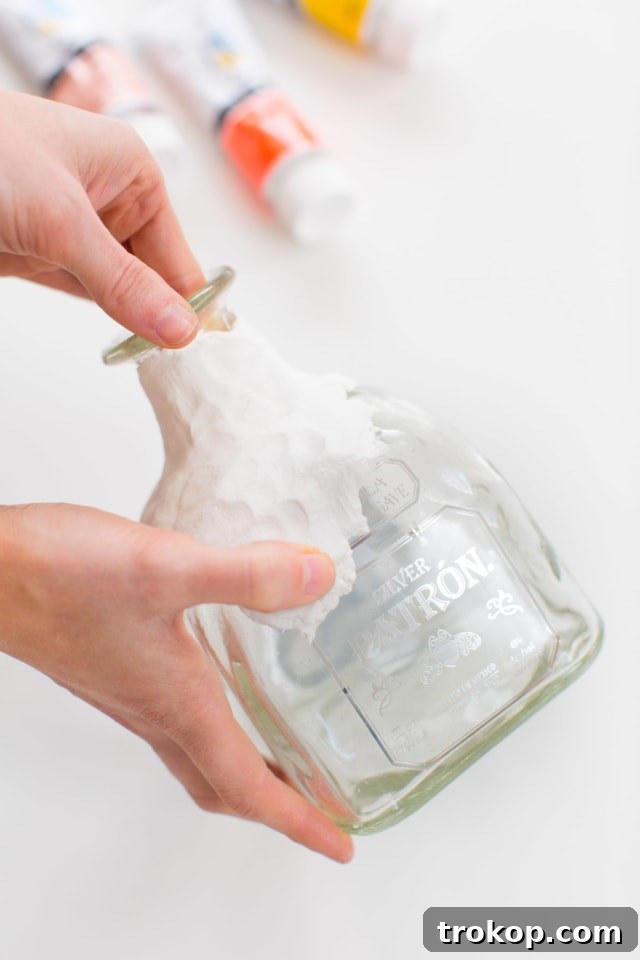
While an unfinished, slightly textured clay surface offers a wonderfully rustic and organic aesthetic, you might prefer a sleeker look. To achieve a smoother finish, dip your foam brush intermittently into your cup of water, ensuring it’s damp but not dripping wet. Gently brush the moistened clay surface, then use your fingers to smooth out any imperfections, seams, or uneven textures. This technique helps to “polish” the clay and can make it look more refined. When applying the clay, make sure to extend it down to the very edge of the glass bottom. However, avoid covering the actual base of the bottle to ensure your finished decanter sits flat and stably on any surface.
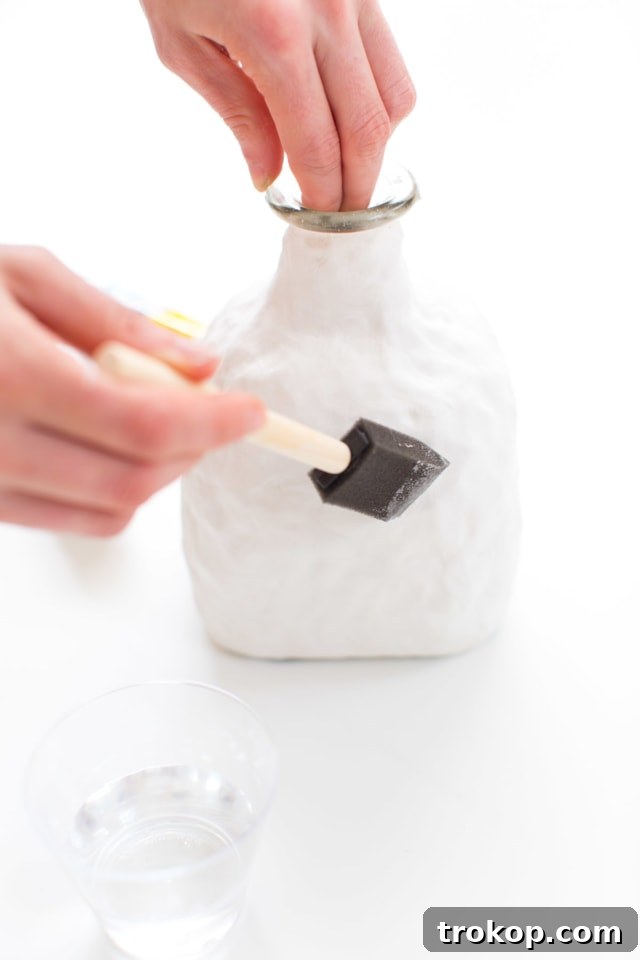
Step 2: Finishing the Top Lip and Adding Embellishments — Once the main body of the bottle is covered to your satisfaction, turn your attention to the top lip. Carefully apply and shape the clay around the opening, creating a clean and defined edge. This is a critical area for both aesthetics and functionality. Ensure the clay doesn’t obstruct the opening of the bottle or interfere with any potential stopper you might use. Smooth this area thoroughly, as it will be a prominent feature of your finished decanter.
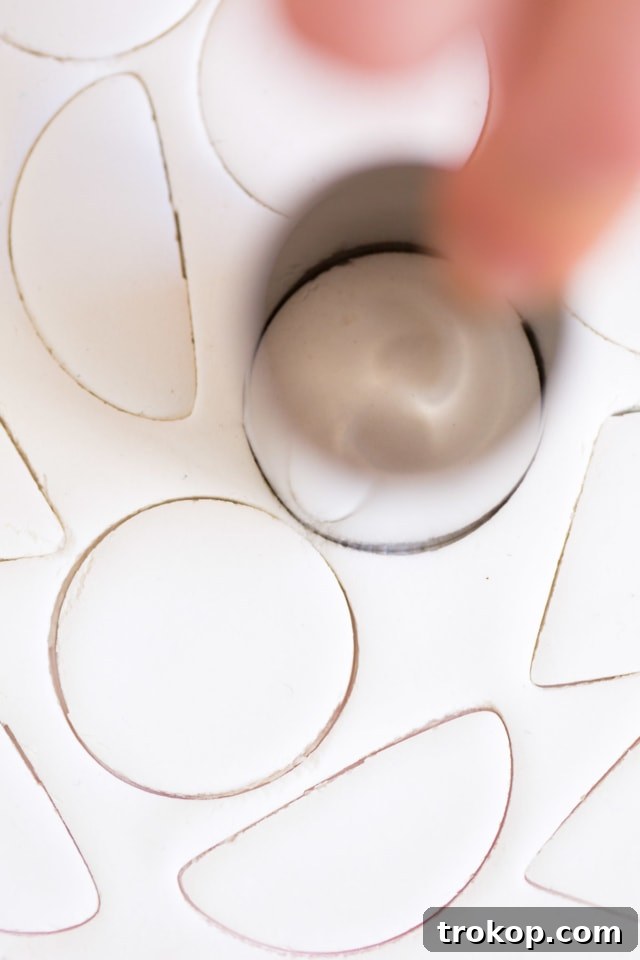
To infuse your decanter with a little extra flair and personality, consider adding decorative elements. I used petite four cutters to create small, intricate shapes, which were then gently pressed onto the main clay surface. Before attaching, lightly moisten the back of the cutouts with water to help them adhere securely. You can create geometric patterns, floral motifs, or abstract designs. Alternatively, you can hand-sculpt small details, engrave patterns into the wet clay with a stylus, or even press natural textures like leaves or lace into the surface for an organic look. This step is where your creativity truly shines, transforming a simple clay layer into a work of art.
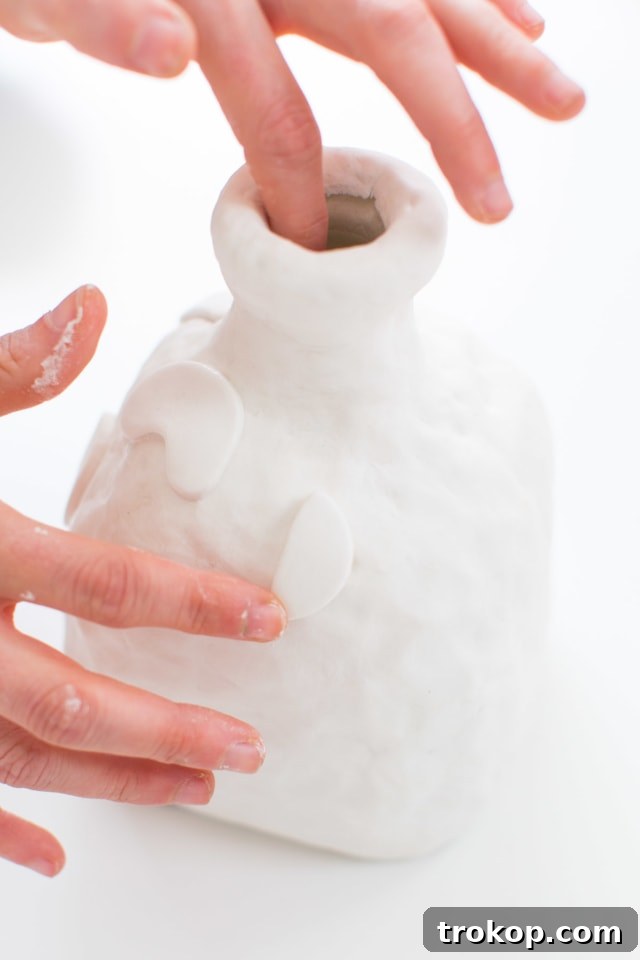
Step 3: The Crucial Drying Process — Patience is paramount during the drying phase, which is often the most critical step for air-dry clay projects. Allow your clay-covered bottle to dry for a minimum of 24 hours, but ideally much longer, ensuring it dries very slowly and evenly. The most common pitfall with air-dry clay is rapid drying, which leads to unsightly cracks. To prevent this, consider wrapping your finished piece loosely in plastic wrap or placing it in a slightly humid environment (like a bathroom, not directly exposed to moisture, but where the air isn’t bone dry). This creates a microclimate that allows the moisture to evaporate at a snail’s pace, minimizing stress on the clay and reducing the likelihood of cracking. Depending on the thickness of your clay layers and the humidity of your environment, this slow drying process might take several extra days, even up to a week. Resist the urge to rush it with heat sources, as this almost guarantees cracks. A truly dry piece will feel light, hard, and cool to the touch, with no visible damp spots.
Step 4: Painting and Adding Color (Optional) — Once the clay is completely and thoroughly dry, reaching its maximum hardness, you have the option to add color. Acrylic paints are excellent for this purpose, offering good coverage and a wide array of colors. You can choose to paint the entire decanter a single solid color for a bold statement, use multiple colors to highlight different sections, or simply add subtle accents to your decorative shapes. Experiment with different painting techniques like dry brushing for a distressed look, or sponge painting for a textured effect. If you prefer a more natural, minimalist look, you can skip the paint entirely and let the raw beauty of the clay shine through. Always ensure your painted surfaces are completely dry before moving to the next step.
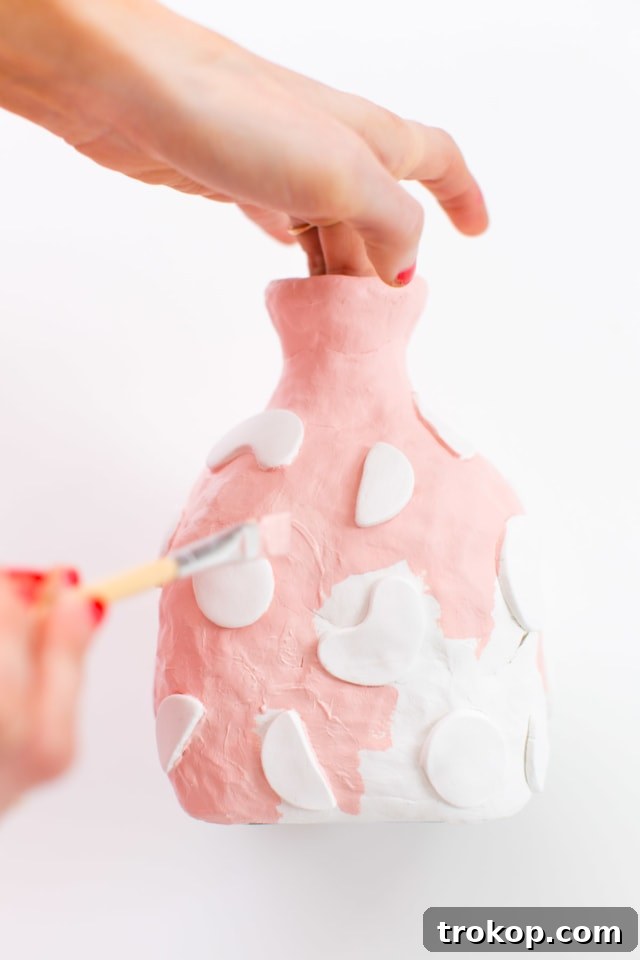
Step 5: Sealing Your Decanter for Food Safety and Durability — The final and most crucial step is to seal your decanter. Spray the entire exterior of the bottle with a generous, even coat of gloss shellac. Shellac is a natural resin that provides a durable, food-safe finish, making your decanter suitable for holding beverages. It’s imperative that you absolutely DO NOT spray any shellac inside the bottle. To protect the interior, firmly stuff a ball of paper napkins, paper towels, or even a piece of plastic wrap into the bottle’s opening before you begin spraying. Apply several thin, even coats of shellac, allowing each coat to dry according to the manufacturer’s instructions before applying the next. This multi-coat approach ensures maximum protection and a beautiful, lasting shine. Once fully dry and cured, your custom-made, food-safe decanter is ready to be filled with your favorite spirits or non-alcoholic beverages, becoming the perfect centerpiece for your next gathering!
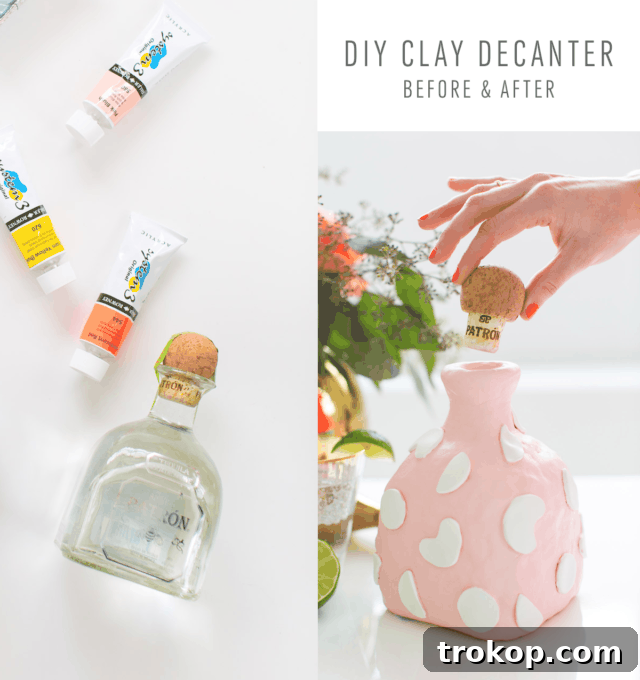
With your personalized decanter complete, you can now proudly display it on your bar cart, dining table, or use it as a unique decorative accent. It’s an ideal way to present your party favorites, be it whiskey, infused water, or a vibrant cocktail mix. Each time you use it, you’ll be reminded of your creative accomplishment.
What do you think of this DIY project? We absolutely love seeing your handmade creations! Be sure to share your finished decanters with us online, and don’t forget to tag us so we can admire your artistry and follow along with your creative journey.
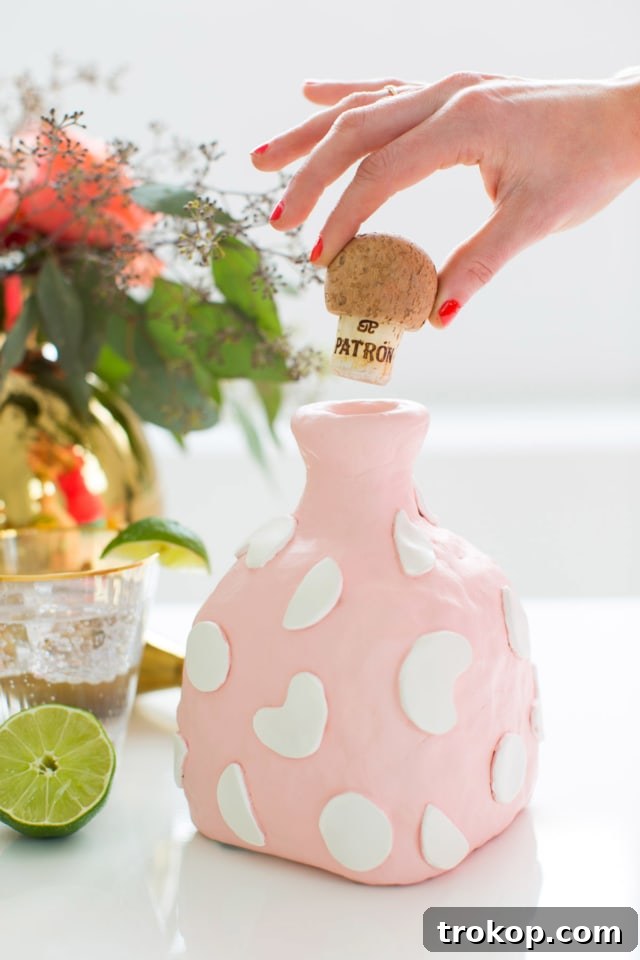
Creative Design Tips for Your Clay Decanter
Beyond the basic steps, there are countless ways to customize your DIY clay decanter and truly make it your own. Here are some ideas to spark your imagination:
- Texture Play: Before the clay dries, experiment with various tools to create unique textures. A fork, a comb, or even natural items like leaves can impress interesting patterns onto the soft clay. For a smoother, polished look, use a damp sponge or your fingertips.
- Color Schemes: If you choose to paint, consider your existing home decor. Will a bold, contrasting color make a statement, or will subtle pastels blend harmoniously? Ombre effects, geometric patterns, or abstract designs can also add visual interest. Metallic paints can give a luxurious touch.
- Functional Embellishments: Think beyond purely decorative shapes. You could sculpt a small handle, create a textured band for better grip, or even embed small, decorative pebbles or glass beads into the wet clay for added sparkle.
- Personalization: Monograms, dates, or small messages can be carved into the clay before drying, making the decanter a truly personal item or a thoughtful gift.
- Theme Integration: If your bar cart or room has a specific theme (e.g., bohemian, minimalist, industrial), tailor your decanter’s design to match. Use earthy tones and organic textures for a bohemian vibe, or clean lines and a monochromatic palette for a modern aesthetic.
Troubleshooting Common Air Dry Clay Issues
Working with air dry clay can sometimes present challenges. Here are some common problems and how to address them:
- Cracking: The most frequent issue is cracking, almost always caused by too-rapid drying. As discussed, slow drying is key. If minor cracks appear, you can often fill them with a small amount of fresh clay mixed with a tiny bit of water to form a paste, then smooth it over and allow it to dry very slowly again.
- Uneven Surface: If your clay surface is bumpy or uneven after drying, you can gently sand it with fine-grit sandpaper. Be careful not to sand through to the glass. Dust off thoroughly before painting or sealing.
- Clay Not Sticking: Ensure your glass bottle is perfectly clean and dry. Any residue can prevent the clay from adhering properly. Applying firm pressure and working in small, blended sections also helps create a strong bond. Lightly scoring the glass (if safe to do so) or the back of the clay can also improve adhesion for larger pieces.
- Mold Growth: If the clay remains damp for too long in a humid, enclosed environment, mold can form. Ensure adequate (but slow) airflow during drying. If mold appears, gently scrape it off and ensure the piece dries out completely in a well-ventilated area.
- Breakage: Air dry clay, once dry, can be somewhat brittle. Handle your decanter with care. The shellac sealant will add a layer of protection, but it won’t make it indestructible.
More Easy DIY Clay Projects
If you enjoyed crafting this decanter, you’ll love exploring other creative possibilities with air dry clay. It’s a versatile medium perfect for a variety of home decor and accessory projects. Here are a few more inspiring ideas to keep your crafting momentum going:
- DIY Clay Letter Keychain: Create personalized keychains with custom letter designs.
- Stunning DIY Clay Rose Marbled Incense Holder: Craft beautiful and functional incense holders with elegant marbled patterns.
- Speckled DIY Clay Keychain: Design unique speckled keychains for a modern, artistic touch.
- How To Make Easy Clay Sculptures For Decor: Discover simple techniques to create charming decorative sculptures for any room.
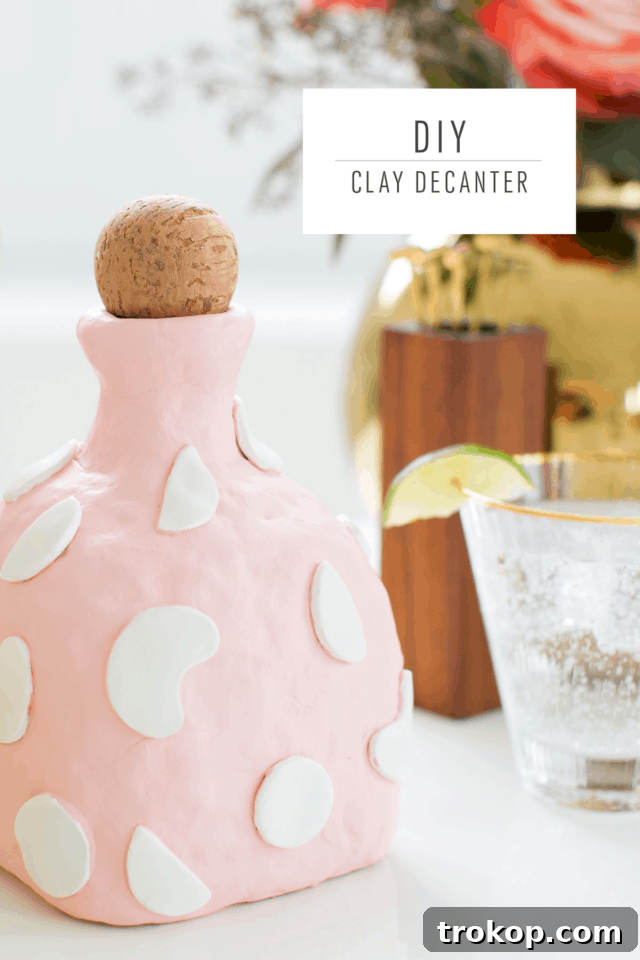
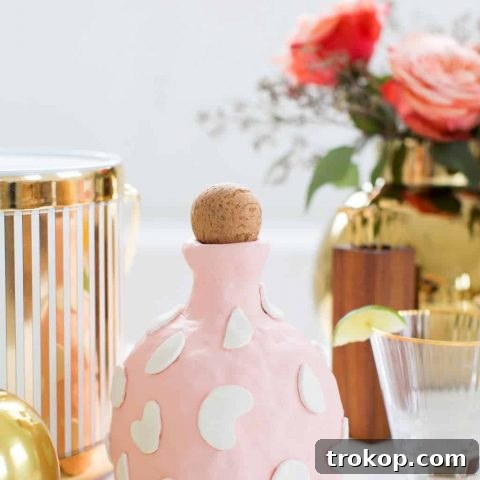
DIY Clay Decanter Project Overview
Print This Guide
Learn how to make this fun and unique DIY decanter! It’s a great project for beginners and a fantastic way to upcycle old bottles. You can personalize it with any color or design you like, creating a custom piece for your bar cart or as a thoughtful gift.
45 mins
1+ day
1+ day 45 mins
DIY
Bar Cart Decor
Equipment
- Foam brush
- Petite four cutters (optional for shapes)
Materials
- Air dry clay
- 1 cup water
- 1 liquor glass bottle (empty and clean)
- Gloss shellac (food-safe)
- Wax paper
- Acrylic paint (optional, in color(s) of your choice)
- Paper napkins (for bottle opening protection)
Instructions
- Starting with your empty glass bottle, apply thick layers of air dry clay in sections, pressing down firmly to blend them together. Leave the top of the bottle for last to maintain a grip. For a smoother finish, use a wet foam brush to moisten and smooth the clay with your fingers. Ensure the clay goes down to the edge of the glass bottom but does not cover the base for an even surface.
- Once the majority of the bottle is covered, finish the top lip, ensuring a clean edge around the opening. To add extra embellishment, cut out shapes using petite four cutters (or hand-sculpt) and gently press them onto the bottle, moistening their backs slightly for better adhesion.
- Let the clay dry for at least 24 hours, or several days, making sure it dries slowly to prevent cracks. To aid slow drying, loosely wrap the finished piece in plastic wrap, allowing moisture to evaporate gradually over an extended period.
- When the clay is completely set and hardened, you can use acrylic paints to cover some or all of the pieces, adding color and detail to your design. Allow paint to dry fully.
- Spray the entire exterior of the bottle with a coat of food-safe gloss shellac. Crucially, do NOT spray inside the bottle. To prevent this, stuff a ball of paper napkins or paper towels into the top opening before spraying. Apply multiple thin, even coats for durability, allowing each to dry.
$30
diy clay decanter, upcycle liquor bottle, handmade barware

Our Most Popular DIY’s!
DIY Pom Pom Wall Hang
Add a playful and cozy touch to your walls with this fun and easy pom pom wall hanging project.
Continue Reading
DIY Marble Table Top with Gold Accents
Elevate your home decor with a luxurious marble and gold accent table, a sophisticated DIY project.
Continue Reading
Ikea Bed Hack: DIY Wooden Headboard With Stikwood
Transform your Ikea bed with a beautiful and unique wooden headboard using Stikwood panels.
Continue Reading
DIY Ikea hack dresser and prepping for guests
Customize an Ikea dresser and prepare your home for guests with these clever DIY tips.
Continue Reading
DIY Ikea Hack Floating Credenza
Create a contemporary floating credenza using simple Ikea hacks for an elevated storage solution.
Continue Reading
How to Make a DIY Knot Pillow
Learn the simple steps to create a stylish and trendy knot pillow that adds character to any space.
Continue Reading