
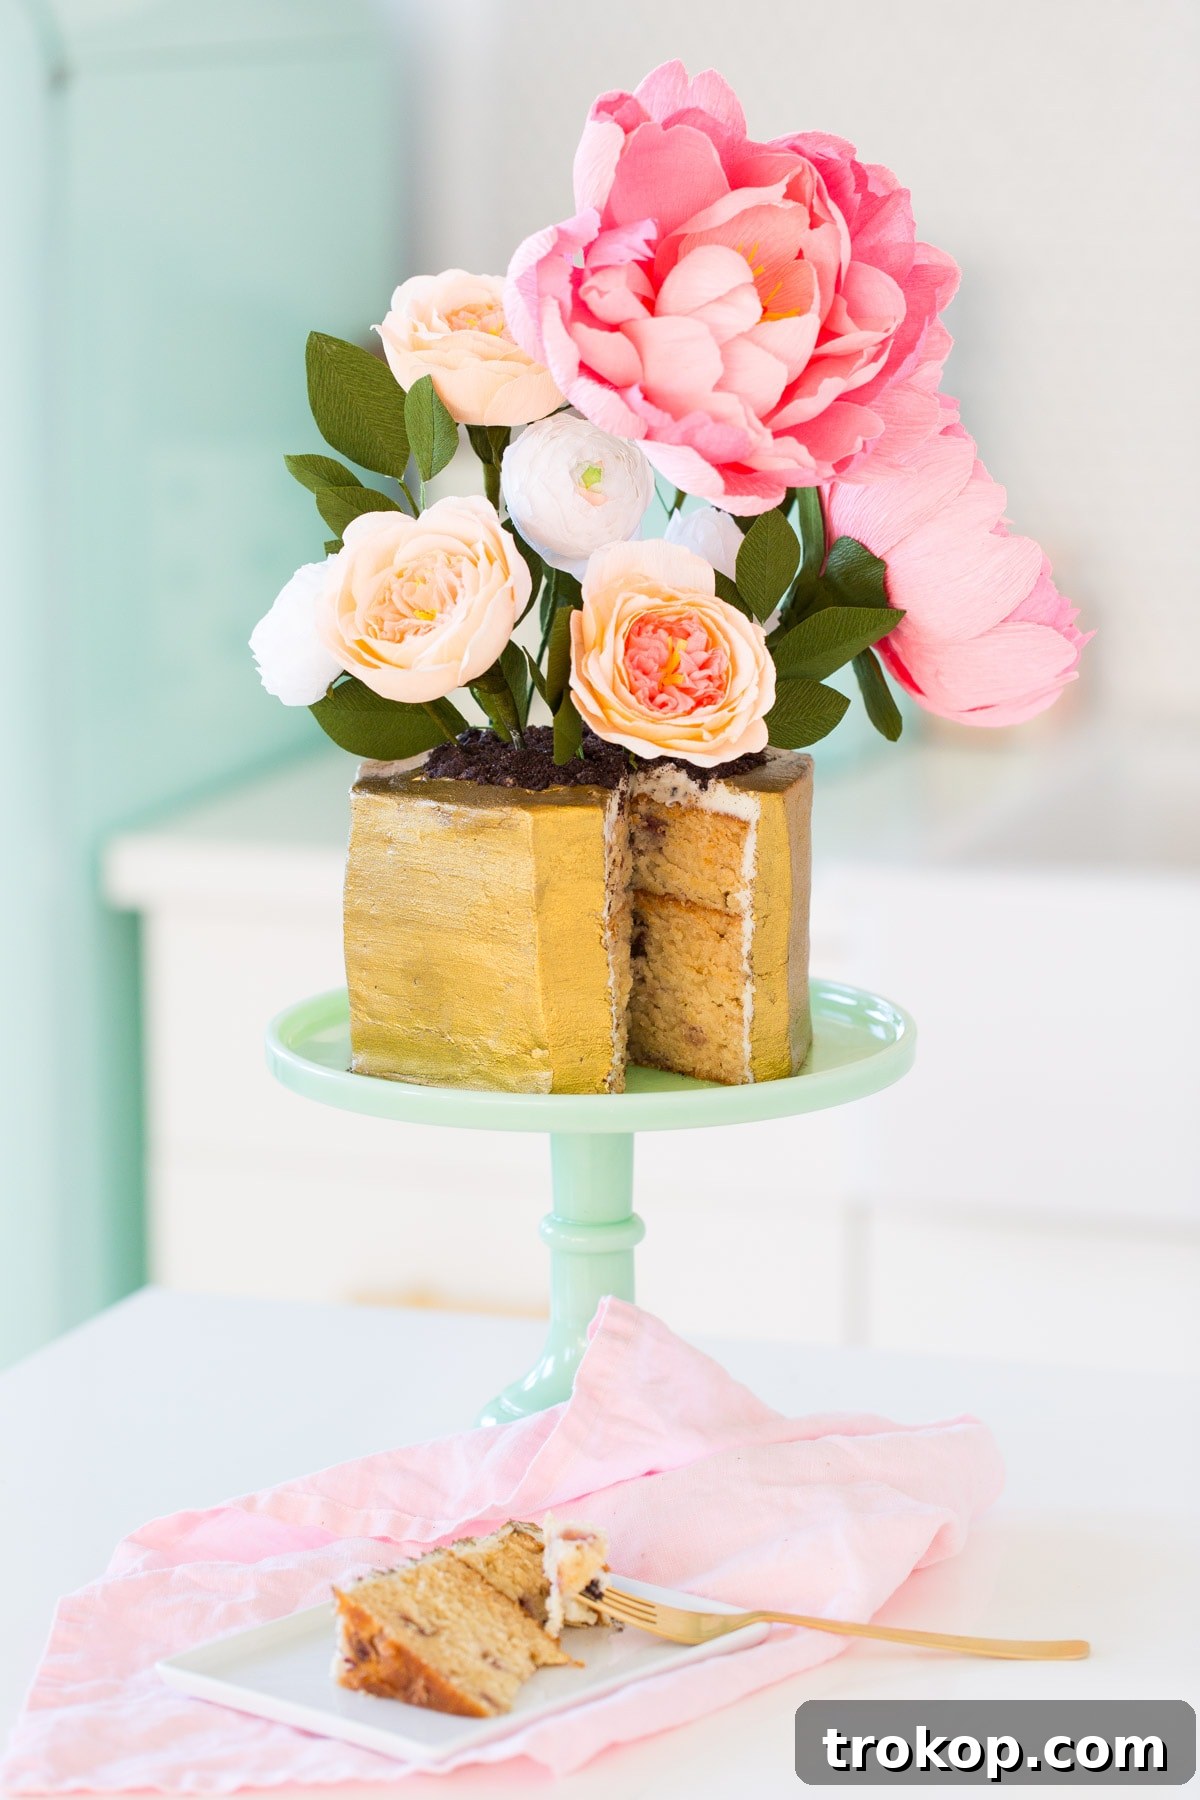
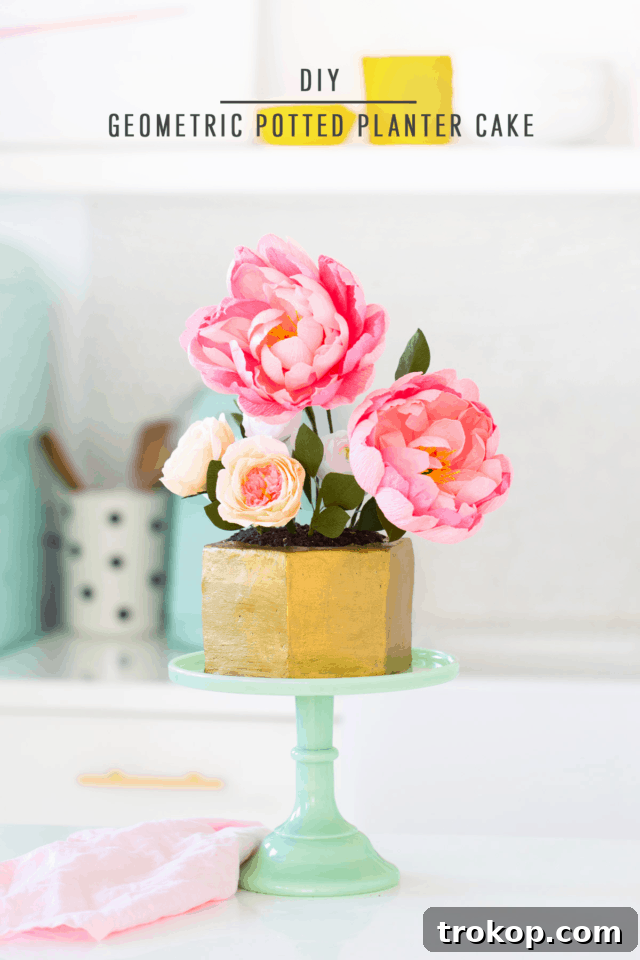
Transform your ordinary celebrations into extraordinary memories with a truly unique dessert: the edible flower pot cake! This isn’t just any cake; it’s a stunning floral centerpiece that also happens to be a delicious, multi-layered confection. Imagine the delight on your guests’ faces as they discover that the beautiful “flower pot” and its “soil” are entirely edible, offering a whimsical twist on traditional desserts. Perfect for spring gatherings, garden parties, birthdays, or simply a desire to indulge in something extraordinary, this modern flower pot cake tutorial will guide you through creating a show-stopping dessert that’s as impressive to look at as it is to eat.
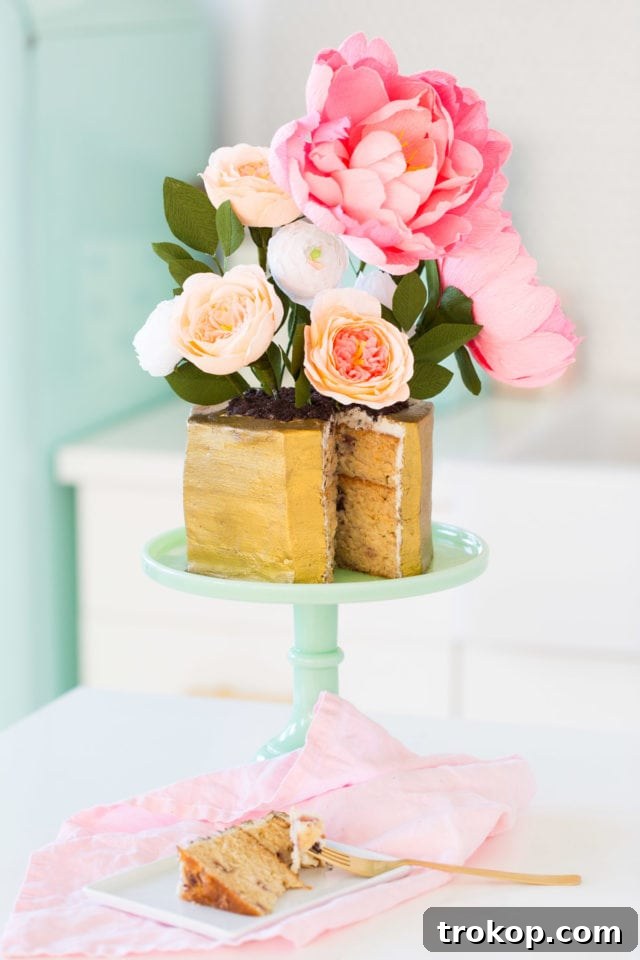
While the idea of a “dirt cake” has been around for some time, often seen in playful dirt cups with gummy worms, this flower pot cake elevates the concept with a touch of sophistication and modern design. We’ve embraced a clever shortcut by using store-bought cake rounds, making this ambitious-looking dessert surprisingly accessible for home bakers of all skill levels. Whether you’re a seasoned cake decorator or just starting out, our easy-to-follow steps will help you craft a dessert that will undoubtedly be the talk of the party.
Get ready to impress everyone with this delightful and delectable creation, proving that sometimes, the best art is truly edible!
Table of Contents
Ingredients and Tools Needed
Creating this stunning flower pot cake requires a blend of delicious ingredients and a few essential tools. Don’t worry, most items are readily available, and we’ve included options for both baking from scratch and convenient shortcuts to suit your schedule and skill level. Gathering everything before you begin will ensure a smooth and enjoyable decorating process.
- Cakes of your choice: The foundation of your edible pot! You’ll need three round cake layers to achieve the necessary height for carving. While a classic strawberry cake or a vibrant raspberry cake offers a delightful flavor contrast, a rich chocolate cake is a popular choice for its uncanny resemblance to “dirt.” To save time without sacrificing quality, consider purchasing three pre-made cake rounds from your local bakery or grocery store, or use a high-quality cake mix for an easy bake. Ensure your cakes are completely cooled before you begin assembly and decorating to prevent melting frosting and structural issues.
- Icing of your choice: This forms the “pot” exterior and binds your cake layers. A smooth and stable frosting is key. Our preference is a vanilla buttercream, especially an Italian meringue buttercream, for its silky texture and delicious taste. While fondant offers a perfectly crisp, sculpted look and holds its shape exceptionally well, many find its taste less appealing. For those prioritizing flavor, a sturdy cream cheese frosting or classic American buttercream can also work beautifully, just ensure it’s firm enough to hold its shape after carving and chilling.
- Crepe paper flowers: These are the vibrant “blooms” that bring your cake to life. We sourced ours from Etsy, where you can find an array of beautifully crafted options. Amazon also offers many premade crepe flowers or DIY kits for those who enjoy a crafting challenge. Alternatively, unleash your creativity and construct your own at home, following tutorials like our paper flower cake topper or DIY giant flower bouquet. We specifically chose crepe paper flowers over real flowers for two key reasons: a) they hold up incredibly well, allowing you to prepare your cake in advance without worrying about wilting, and b) with food-safe stems (ensure they are), they are a hygienic and safe choice for cake decoration.
- Edible gold dust: This magical ingredient adds a touch of glamour and sophistication to your edible flower pot. Mixed with a small amount of extract, it transforms into a shimmering “paint” that gives your cake a high-end, artistic finish. Keep edible gold dust in your pantry, as just a sprinkle can elevate almost any dessert, from pumpkin cream puffs to elegant chocolates.
- Almond extract: Essential for mixing with the edible gold dust to create a paintable consistency. Ensure you use 100% pure almond extract for the best flavor and application, or an imitation flavored one will also work.
- Crushed chocolate wafer cookies: These are the secret to creating realistic “soil” for your flower pot. Brands like Thinsters or Oreo cookies work perfectly. You can easily crumble them by hand for a chunkier texture or use a food processor or blender for a finer, more uniform “dirt.” The darker the cookie, the more authentic your soil will appear!
- Knife: A sharp, long serrated knife is crucial for cleanly carving your cake into the desired pot shape. A small paring knife can be useful for finer detail work.
- Food-dedicated paint brush: A clean, new paintbrush, reserved solely for food use, is necessary for applying the edible gold dust mixture evenly and artfully onto your cake.
- Cake board or serving platter: A sturdy base is essential for assembling, decorating, and presenting your cake.
- Offset spatula or palate knife: For smooth application of frosting between layers and around the carved cake.
How to Make a Flower Pot Cake
Embark on this creative baking journey to craft an edible masterpiece. Each step is designed to be straightforward, ensuring you achieve a professional-looking result with ease.
Step-by-Step Instructions
1 — Stack and Frost the Cake Layers: Begin by placing your first cake round on your chosen cake board or serving platter. Generously apply a layer of your preferred frosting over the top. Carefully place the second cake round on top, ensuring it’s centered, and repeat the frosting process. Finally, add the third cake round. Aim for even layers of frosting to create a stable base for carving. This layering forms the core structure of your flower pot.
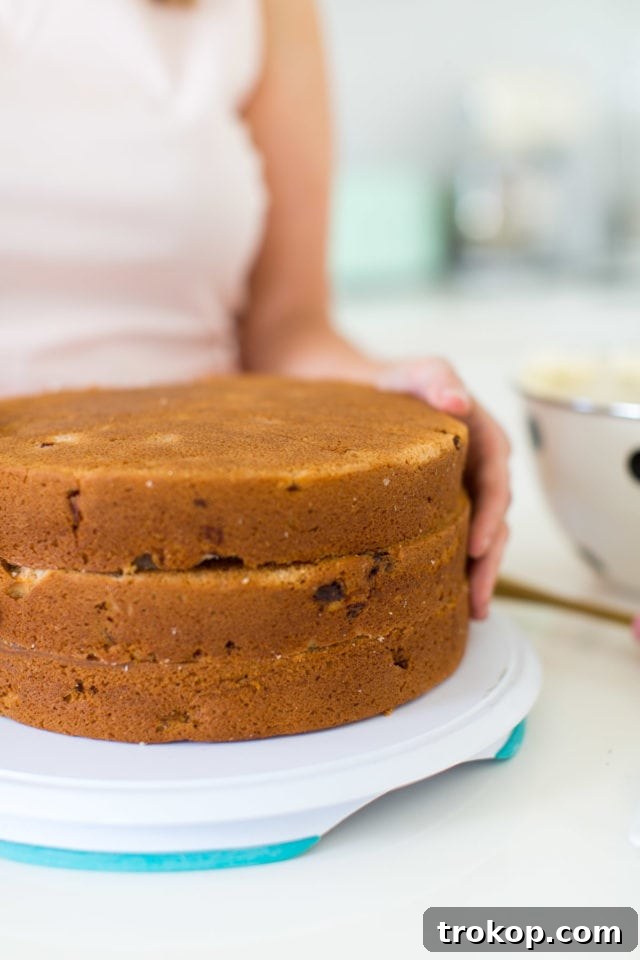
2 — Carve Your Edible Pot Shape: Now for the artistic part – shaping your cake! We opted for a modern hexagon-shaped “planter.” To achieve this, use a sharp knife to gently score a hexagon outline on the top cake layer. This initial mark serves as a guide. Then, slowly and carefully, begin cutting away the cake from the outer edges, following your marked shape down through the subsequent layers. Take your time, making small cuts and rotating the cake as needed, until you achieve your desired flower pot silhouette. Remember, slight imperfections add to the handmade charm!
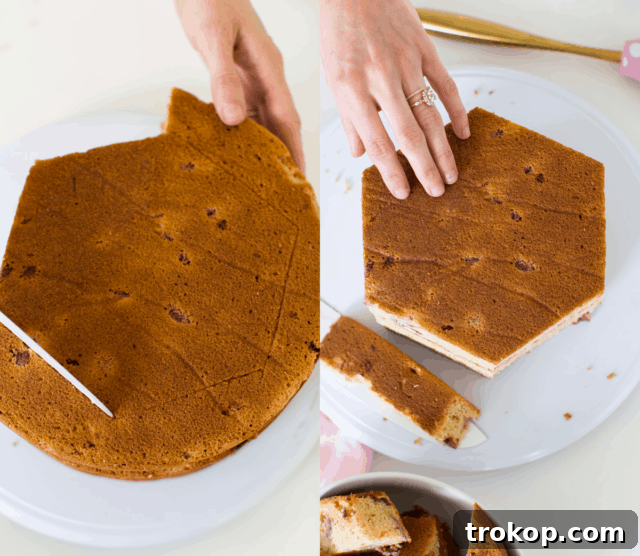
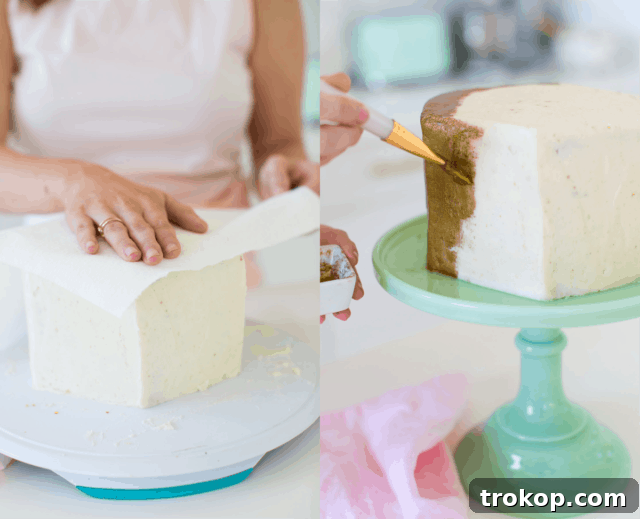
3 — Apply Crumb Coat and Chill: Once carved, apply a thin, even layer of your chosen icing over the entire cake, including the carved sides and top. This is known as a “crumb coat,” and its purpose is to trap any loose crumbs, ensuring a smooth, flawless finish for your final frosting layer. Chill the cake in the refrigerator for 20-30 minutes, or until the crumb coat is firm to the touch. This step is crucial for stability and a clean final look. For an extra smooth finish on your final layer of icing, once applied, gently rub non-imprinted paper towels over the surface using the warmth of your hands. This technique helps to buff out any small imperfections and create a polished surface.
4 — Paint with Edible Gold: In a small bowl, mix a small amount of edible gold dust with a few drops of almond extract. Start with a tiny amount of extract and add more gradually until you achieve a paint-like consistency – not too thick, not too watery. Using your food-dedicated paintbrush, carefully paint the entire exterior of your carved flower pot with the gold mixture. Apply in smooth, even strokes for a uniform, glamorous shimmer. Allow the gold paint to dry completely before proceeding, which usually takes about 10-15 minutes.
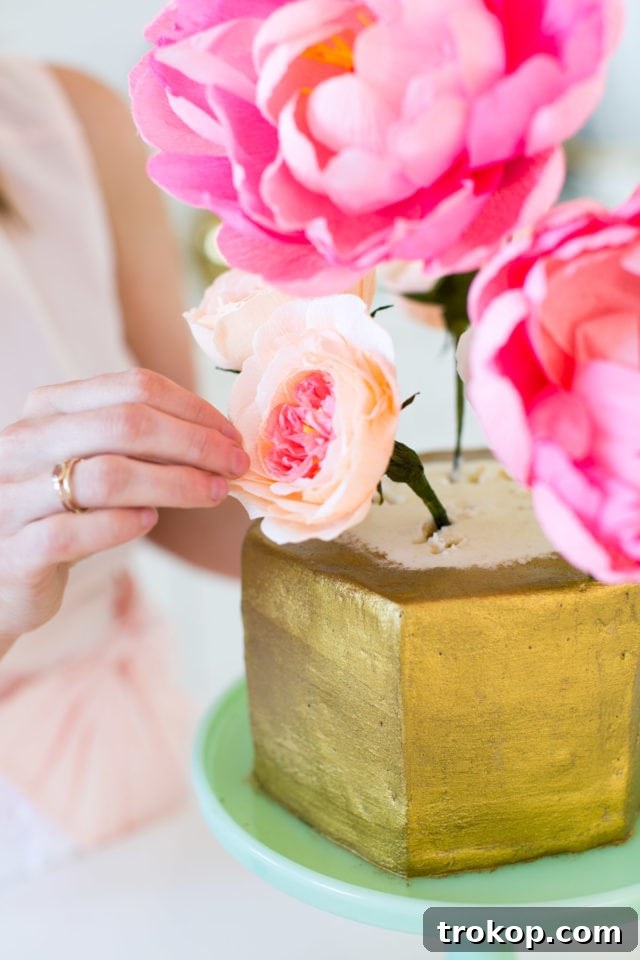
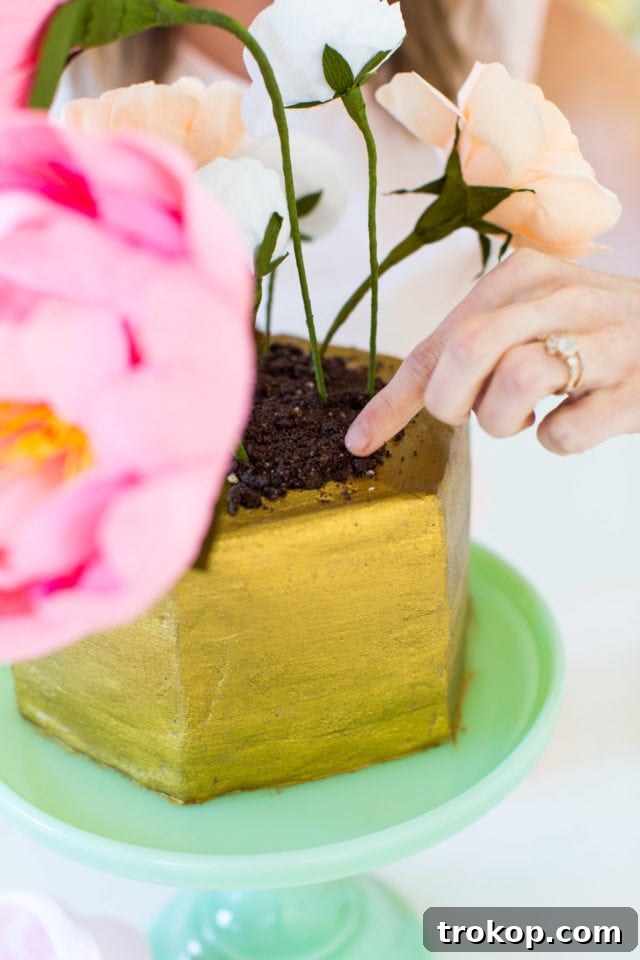
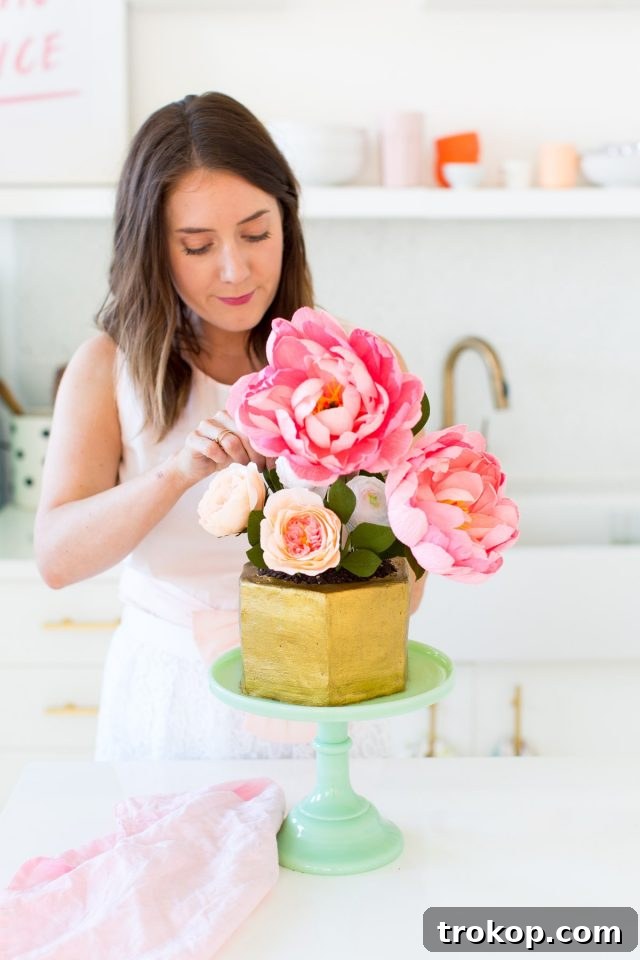
5 — Arrange Your Crepe Paper Flowers: Now for the blossoming effect! Carefully insert the floral wire or stems of each crepe paper flower into the top of the cake, arranging them to mimic a vibrant bouquet overflowing from the flower pot. Experiment with varying heights, colors, and angles to create a natural and abundant display. If using various flower sizes, place larger flowers in the center and smaller ones around the edges for a balanced look. Ensure the wires are clean and food-safe, or wrap them in floral tape for extra precaution.
6 — Create the “Soil” Effect: To complete the illusion, generously sprinkle your crushed chocolate wafer cookies over the top surface of the cake, around the base of your flowers. Spread them evenly, creating a realistic soil texture that wonderfully contrasts with the vibrant blooms and shimmering pot. Don’t be shy; a thick layer of “soil” truly enhances the flower pot aesthetic and adds another delicious textual element to your cake.
Tips for a Perfect Flower Pot Cake
Achieving a show-stopping flower pot cake is all about attention to detail and a few clever tricks. These tips will help you elevate your creation and ensure it’s both beautiful and delicious.
- Cool Cakes Completely: If you’re baking your cakes from scratch, ensure they are completely cooled to room temperature before stacking and decorating. Warm cakes will melt your frosting, leading to a messy and unstable structure. For best results, consider baking your cakes the day before and chilling them overnight.
- The Crumb Coat is Your Friend: While mentioned in the instructions, reiterating the importance of a crumb coat cannot be overstated. It’s the secret to a smooth, flawless outer layer of frosting. Apply a thin layer, chill thoroughly for at least 30 minutes (or longer), then proceed with your final, thicker layer of frosting. This technique locks in crumbs and provides a stable canvas.
- Experiment with Flower Varieties: Don’t limit yourself to one type of crepe paper flower! Experiment with different shapes, sizes, and colors to create a truly vibrant and personalized bouquet. Consider adding some crepe paper greenery, as we did, for a fuller, more natural look that mimics actual foliage spilling from the pot.
- Subtle Gold Touches: For an extra touch of elegance, lightly dust the very edges or tips of some of your crepe paper petals with edible gold dust. This adds a subtle shimmer that catches the light and ties the flowers into the glam aesthetic of the pot.
- Cookie Crumb Consistency: The texture of your “soil” can significantly impact the overall look. For a smoother, more refined soil texture, crush your chocolate wafer cookies very finely using a food processor. If you prefer a more rustic, “chunky” garden soil feel, hand-crumble the cookies and leave some larger pieces for added visual interest and crunch.
- Chill for Stability: After completing the final frosting and gold painting, a brief chill in the refrigerator can help the cake set, making it easier to handle and ensuring the decorative elements stay in place, especially if transporting it.
- Presentation Matters: Present your magnificent flower pot cake on a beautiful cake stand or a decorative platter to truly highlight its artistry. This elevates the entire display and makes it an even more impressive centerpiece.
More Spring and Dessert Recipes to Try
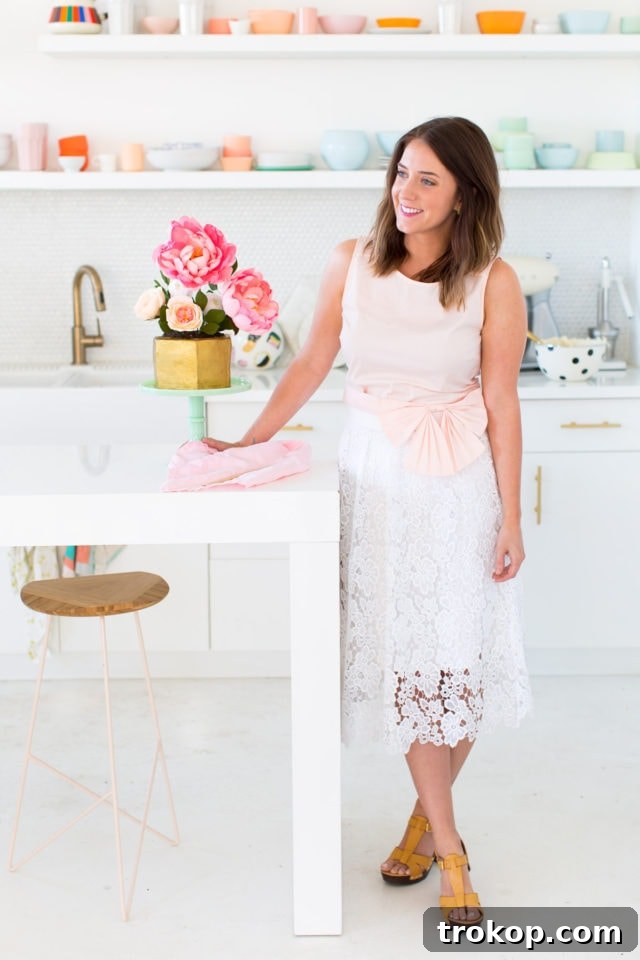
Once your flower pot cake is complete, you’ll be amazed at how convincingly it mimics a real potted plant! Unless you’re standing close enough to inhale the delightful aroma of sugar and chocolate, your guests might never guess it’s a cake. And don’t forget to display your masterpiece on one of these adorable DIY cake stands for an even more personalized touch!
Beyond this unique creation, explore some of our other favorite dessert and brunch recipes perfect for springtime celebrations, Easter, or any occasion that calls for something sweet and special:
- Spiked Easter Peeps: A grown-up twist on a classic Easter candy, these spiked peeps are a fun and festive treat.
- Strawberry Crepes with Chocolate Sauce: Delicate crepes filled with fresh strawberries and almond, drizzled with rich chocolate sauce – an elegant brunch or dessert option.
- Sriracha Bacon Egg Muffins: For a savory contrast to all the sweets, these breakfast muffins are packed with flavor and perfect for a festive brunch spread.
- Easter Egg Shots: Add a playful, adult-only touch to your Easter festivities with these colorful and delicious shots served in hollowed-out eggshells.
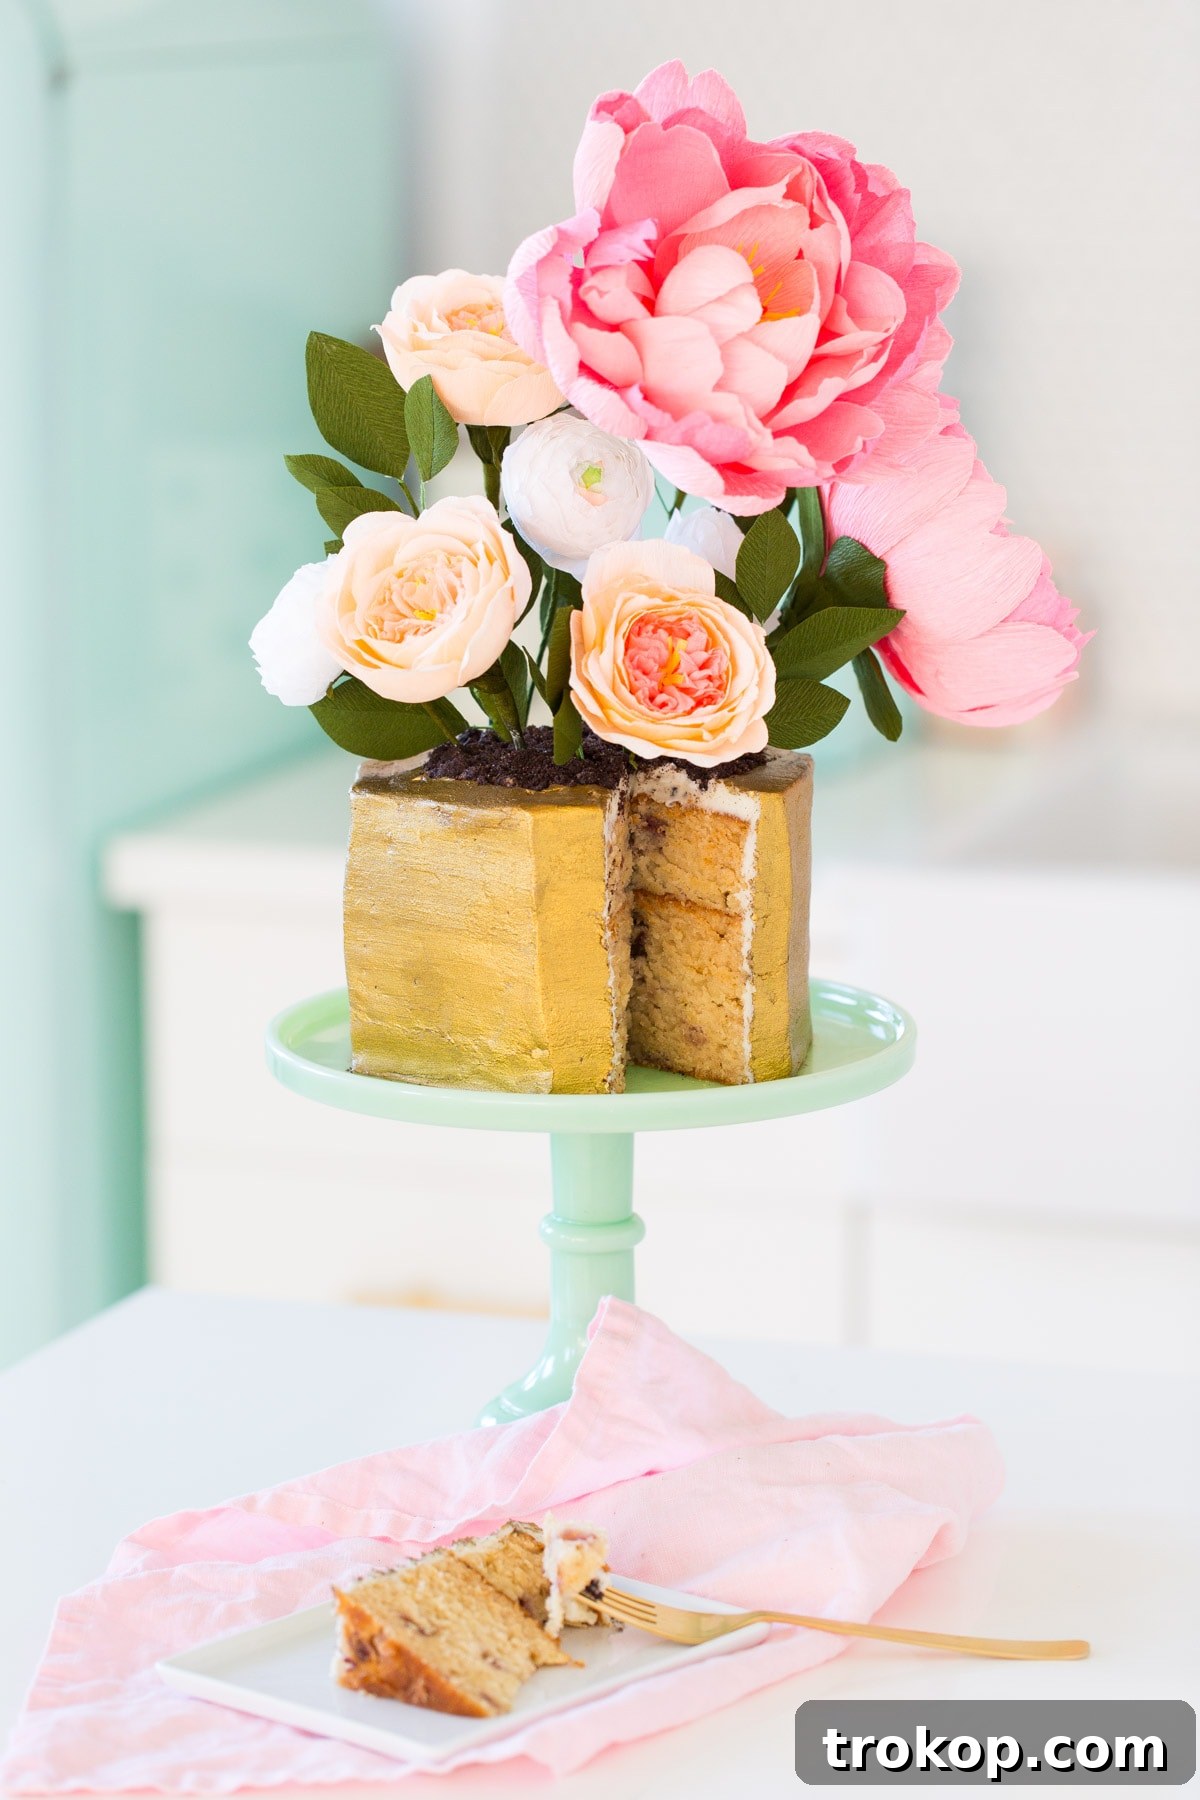
Flower Pot Cake
Equipment
- Food-safe paintbrush
- Knife (serrated recommended)
- Crepe paper flowers (with food-safe stems/wires)
- Cake board or serving platter
- Offset spatula (optional, for smoothing)
Materials
- 3 round cake layers (store-bought or homemade)
- 2 cups icing (vanilla buttercream or chosen frosting)
- 1 cup edible gold luster dust
- 1 tbsp almond extract (or as needed for paint consistency)
- 1 cup chocolate wafer cookies, crushed (e.g., Oreos, Thinsters)
- Crepe paper flowers (assorted sizes and colors)
Instructions
- Stack the cake rounds on your chosen platter, applying an even layer of frosting between each layer to secure them.
- Carefully carve the stacked cake into your desired flower pot shape. For a modern look, mark a hexagon on the top layer with a knife and gradually cut through all layers to create the pot’s form.
- Apply a thin crumb coat of icing over the entire carved cake to seal in any loose crumbs. Chill in the refrigerator for 20-30 minutes until firm. Once chilled, apply a final, thicker, and smooth layer of icing. For a perfectly smooth finish, gently rub the icing with non-imprinted paper towels using the heat from your hands.
- Mix the edible gold dust with a small amount of almond extract in a bowl until it forms a paintable consistency. Using a food-dedicated paintbrush, carefully paint the entire exterior of the cake (your “flower pot”) with the gold mixture for a glamorous shimmer. Allow to dry completely.
- Insert the food-safe floral wires or stems of your crepe paper flowers into the top of the cake, arranging them to create a beautiful, overflowing bouquet effect. Vary the heights and positions for a natural look.
- Generously sprinkle the crushed chocolate cookies over the top surface of the cake, around the base of the flowers, to create a realistic “soil” texture.

We absolutely love seeing your creative endeavors! Don’t forget to share your edible flower pot cake masterpiece with us on Instagram using the hashtag #sugarandclothloves. We’re always inspired by your unique creations and how you bring our tutorials to life. For more quick, delicious, and visually stunning recipes and DIYs, you can find them all right here on our site!
40 Delicious Easter Desserts to Sweeten Your Celebration
Get inspired by these festive and easy-to-make Easter desserts that will delight everyone at your holiday table, from classic carrot cakes to fun, colorful treats.
Continue Reading40 Delicious Easter Desserts to Sweeten Your Celebration
28 Thoughtful Baptism Gift Ideas
When it comes to gifts for a baptism, you want something meaningful and lasting. Discover 28 thoughtful and beautiful gift ideas to celebrate this significant milestone.
Continue Reading28 Thoughtful Baptism Gift Ideas
24 Carrot Cocktail Recipe
Our 24 Carrot Cocktail combines the sweetness of fresh carrots with a spirited kick, making it a unique and refreshing drink perfect for spring brunches or evening gatherings.
Continue Reading24 Carrot Cocktail Recipe
24 Best Fruit Platter Ideas & Tips
Make a fruit platter that’s as beautiful as it is delicious for any occasion. Here are some of the best fruit platter ideas and tips for stunning presentation and selection.
Continue Reading24 Best Fruit Platter Ideas & Tips