
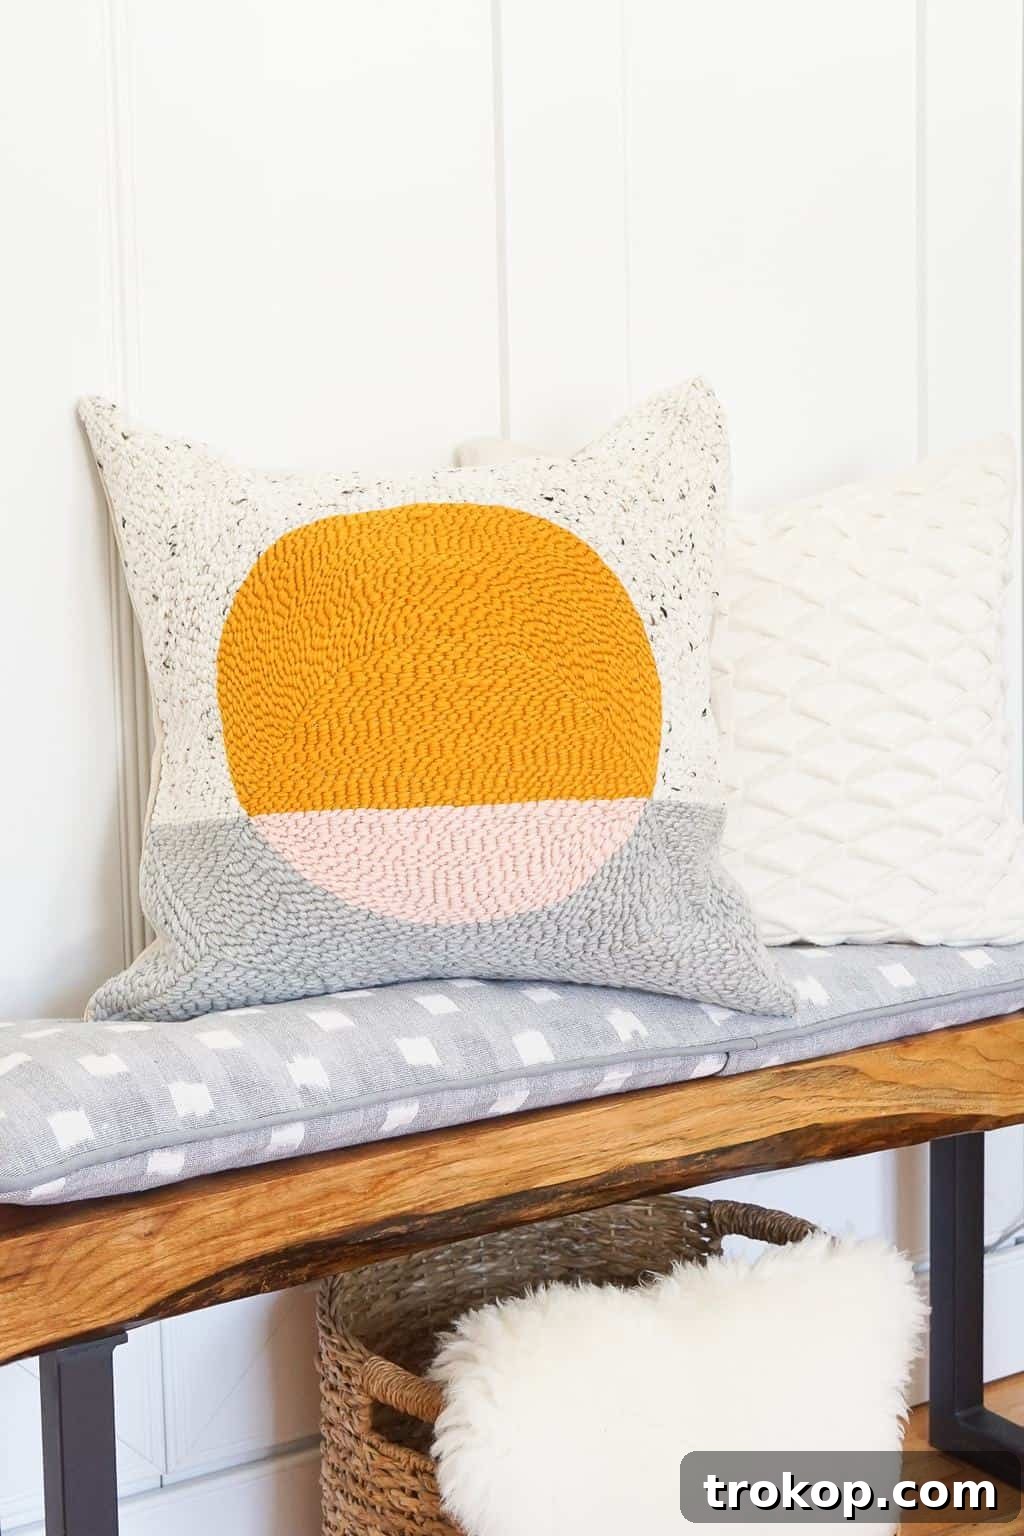
DIY Rug Hook Pillow: Create Custom Cozy Home Decor
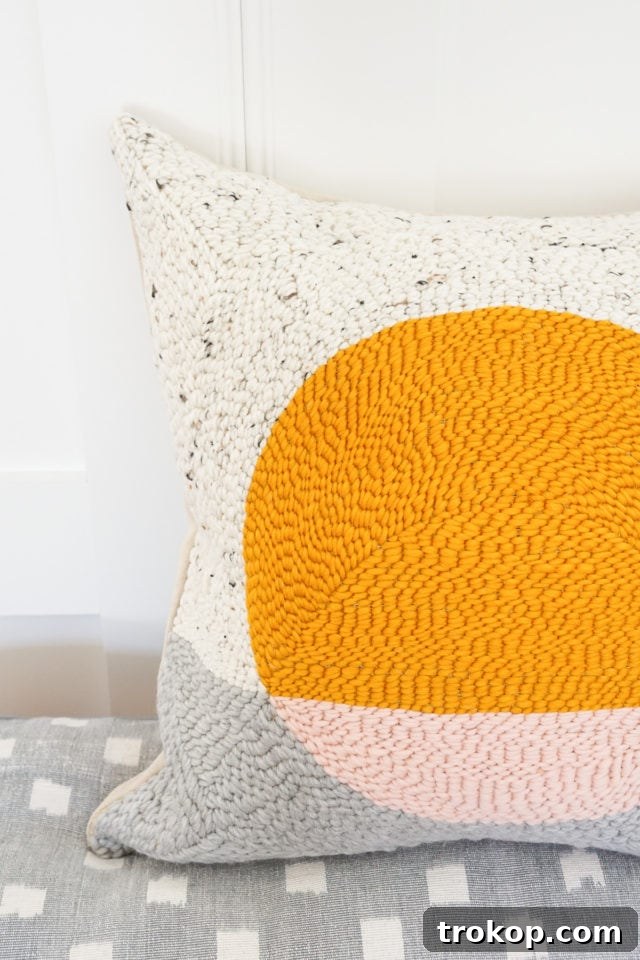
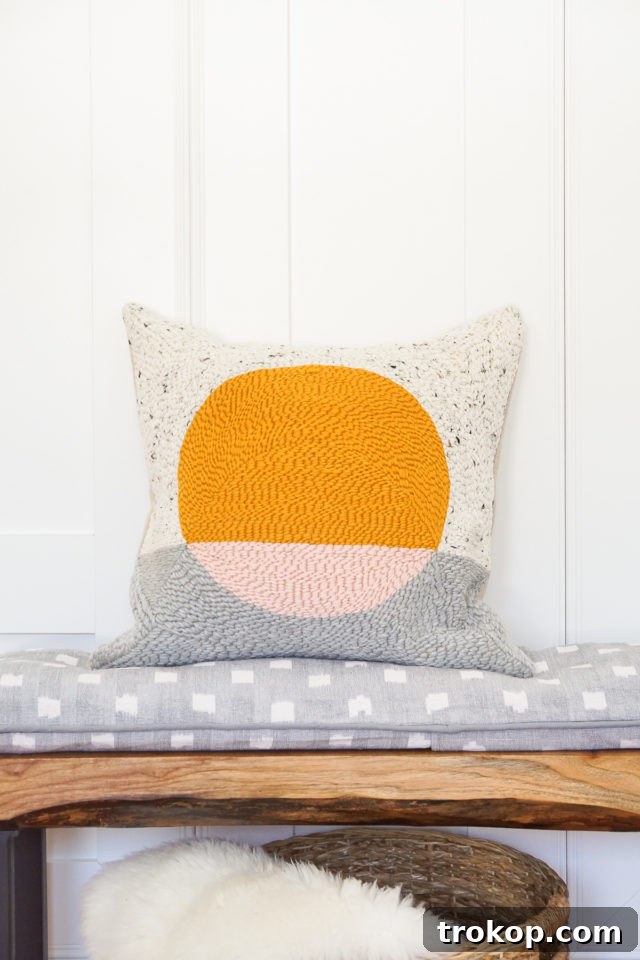
Transform your living space with a unique, handmade touch! This comprehensive step-by-step tutorial will guide you through creating a beautiful and wonderfully cozy rug hooked pillow. Perfect for adding custom charm and tactile texture to your home, this DIY project is simpler than you might imagine and offers a deeply satisfying crafting experience, reminiscent of traditional rag rug making but with a modern, approachable twist.
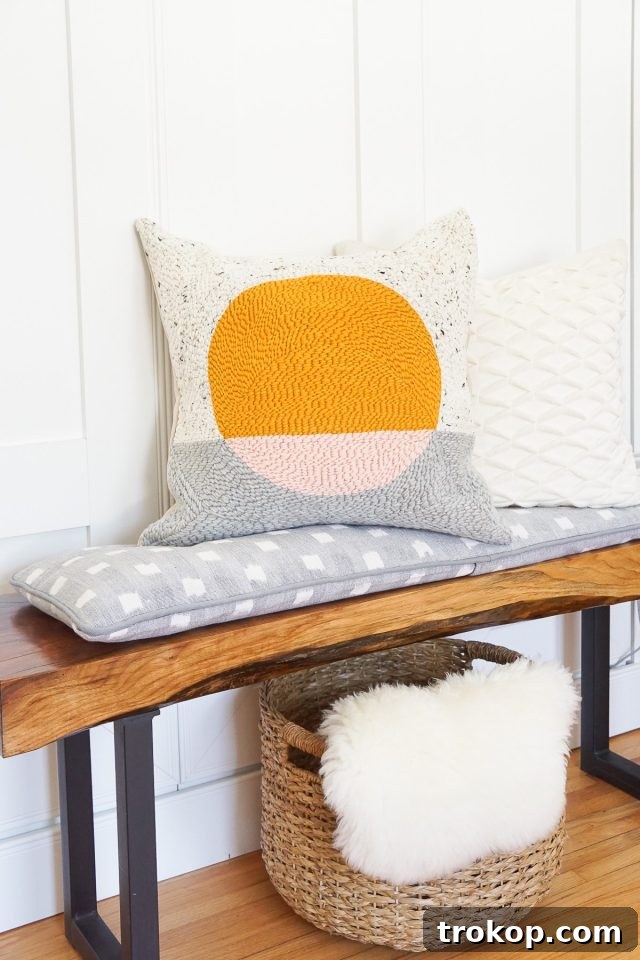
Embrace the Art of Rug Hooking for Personalized Home Accents
From time to time, a DIY technique emerges that completely captivates the crafting world, offering both simplicity and stunning results. Rug hooking is precisely that – our newest obsession! If you’ve been searching for a creative outlet that delivers satisfying outcomes without a steep learning curve, you’re about to uncover your next favorite hobby. This particular rug hooking pillow project isn’t just about making an item; it’s an opportunity to infuse your unique personal style directly into your home decor, utilizing straightforward supplies and a surprisingly forgiving method.
What makes rug hooking so incredibly appealing, especially for those new to textile arts? Unlike the often-intricate and sometimes frustrating processes of knitting or crocheting, which can demand precise tension and complex stitch patterns, rug hooking stands out as remarkably fast and incredibly adaptable. You can genuinely create a beautiful, finished piece like this DIY pillow in a single day – a significant accomplishment for anyone, particularly for busy individuals or new parents!
The inherent beauty of this craft lies in its simplicity and flexibility: should you make a mistake, a gentle tug on the yarn easily unravels your stitches, allowing for quick corrections without any fuss. This makes rug hooking an ideal craft for both absolute beginners and those who appreciate a more relaxed, imperfection-friendly approach to their creative endeavors. Say goodbye to the pressure of perfection and hello to the joy of creation with this creative DIY pillow idea.
What is Rug Hooking?
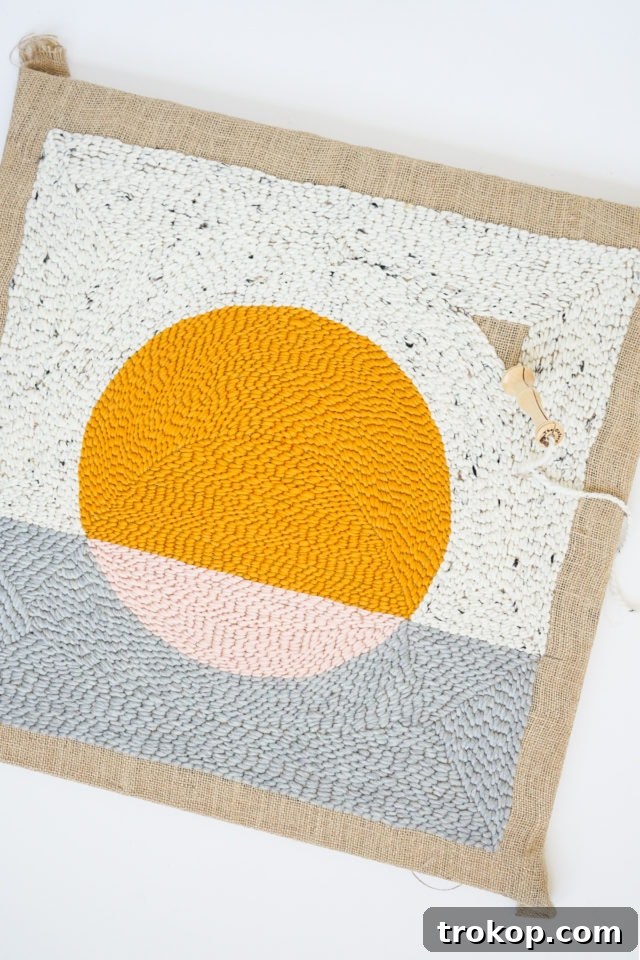
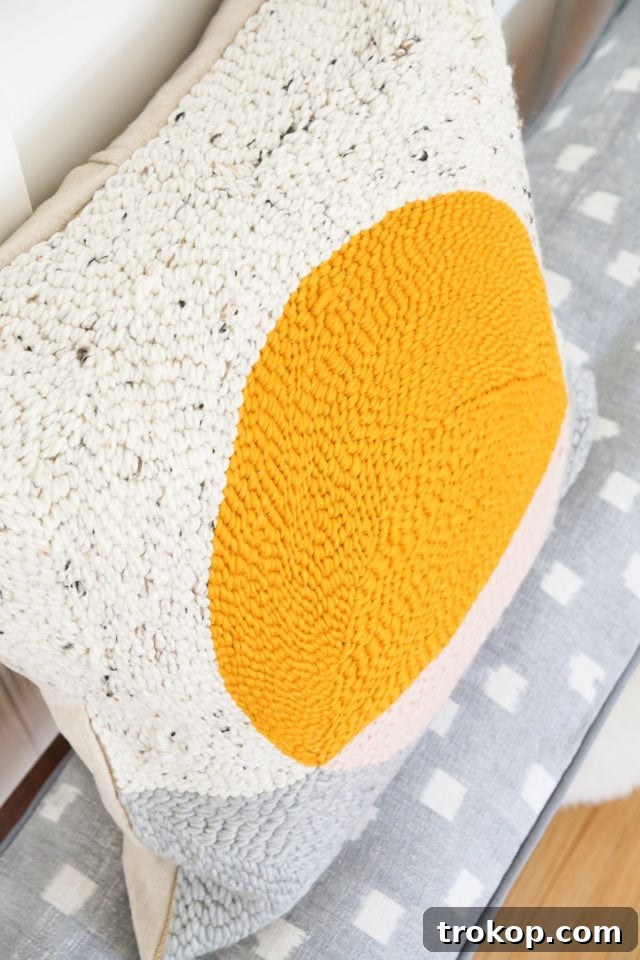
Rug hooking is a traditional craft that involves pulling loops of yarn or fabric strips through a woven fabric base, typically burlap, linen, or monk’s cloth, to create a textured, three-dimensional surface. While it’s an art form with a long history, you can essentially think of it as a primitive yet highly effective method for crafting items such as durable wool rugs, rustic jute rugs, and even intricate wall hangings. The process involves using a specialized tool, often a punch needle or a latch hook, to systematically draw loops of fiber through the sturdy backing fabric.
It’s important to distinguish rug hooking from the closely related latch hook method. With latch hooking, you are actively knotting wool yarn or fabric strands as you go, securing each piece individually. In contrast, traditional rug hooking, as demonstrated in this tutorial, relies on the density and tension of numerous unknotted loops to hold the design in place. For this project, we’re putting a modern twist on this time-honored technique to create a beautiful and unique pillow, making it an easy and satisfying weekend craft project.
The Rich History and Modern Evolution of Rug Hooking
The craft of rug hooking boasts a fascinating history, originating in coastal North America during the early 19th century. Born out of necessity and resourcefulness, it was primarily practiced by women in fishing and farming communities who sought to create warm, durable floor coverings from discarded materials. Scraps of old clothing, fabric remnants, and even worn ship sails were cut into strips and “hooked” through burlap sacking or linen backings, giving new life to otherwise unusable textiles.
What began as a practical skill quickly evolved into a cherished folk art, particularly in New England and Atlantic Canada. Crafters began to experiment with colors and patterns, creating elaborate designs that depicted everyday life, nature scenes, or intricate geometric motifs. These handmade rugs became not just functional items but also expressions of creativity and community heritage, often passed down through generations.
In modern times, rug hooking has experienced a significant resurgence. While still honoring its humble origins and traditional techniques, contemporary artists and hobbyists are pushing the boundaries of the craft. Today, rug hooking embraces a wider array of materials, from fine wool roving to various synthetic yarns, and is used to create diverse projects beyond floor rugs. Items like decorative pillows, wall art, fashion accessories, and even sculptural pieces demonstrate the enduring versatility and timeless appeal of this beautiful textile art form. It’s a craft that perfectly bridges the gap between historical tradition and modern aesthetic.
Why Choose Rug Hooking for Your Next DIY Project?
Beyond its aesthetic appeal, rug hooking offers several compelling reasons to become your next creative passion. Firstly, it’s remarkably beginner-friendly. Unlike many other textile crafts that demand precise tension, complex stitch patterns, or advanced motor skills, rug hooking is incredibly forgiving. Mistakes are easily corrected with a simple tug, making the learning curve gentle and enjoyable. This low barrier to entry means you can achieve beautiful results even if you’ve never picked up a craft tool before.
Secondly, the process itself can be profoundly meditative and stress-reducing. The rhythmic, repetitive motion of pulling loops through fabric allows for a focused, calming experience, making it a perfect antidote to a busy and often overwhelming day. Many crafters find the act of rug hooking to be therapeutic, providing a quiet space for reflection and creative flow.
Furthermore, rug hooking allows for immense personalization. You have complete freedom to choose any color palette, design any pattern, and even incorporate various yarn types to achieve different textures and visual effects. This means your finished rug hooked pillow won’t just be an item of decor; it will be a true reflection of your unique style and creativity. It’s also a fantastic way to create high-quality, durable home accents that look far more expensive than their DIY cost, giving your space a unique, curated feel that mass-produced items simply can’t replicate. The versatility of the craft also means you can create not just pillows, but also small rugs, wall hangings, trivets, and more, opening up a world of handmade possibilities for your home.
Essential Rug Hooking Supplies: A Detailed Guide
To embark on your rug hooking journey and create this beautiful pillow, you’ll need a few essential supplies. While many convenient rug hooking kits are available that bundle all the necessary items, sourcing individual components allows for greater customization and control over your project, especially when tailoring it to your specific home decor. Below is a detailed list of what you’ll need, along with insights into why certain choices are recommended, particularly for beginners. Keep in mind, if you prefer to skip the sewing part, you are welcome to buy a premade burlap pillowcase to use on the stretcher frame for the hooking portion of this tutorial!
- 3-Ply Yarn or Medium Weight Wool Roving: You’ll need yarn or wool roving that is about 1-inch wide. The type of fiber you choose significantly impacts the final look and feel of your pillow. Wool roving provides a wonderfully plush and traditional texture, while 3-ply yarn offers a slightly firmer, more defined loop. Consider the color palette of your home decor to select yarns that will complement your existing aesthetic.
- Burlap: For your ground cloth, we highly recommend using 100% jute burlap. Its tightly woven structure provides excellent stability and minimizes stretching during the hooking process. This characteristic is particularly beneficial for beginners, as it helps maintain consistent loop height and prevents the fabric from warping, ensuring a neat and professional finish.
- 1/2 Yard of Pillow Back Fabric: For the back of your pillow, approximately ½ yard of fabric is needed. Linen is an excellent choice due to its durability, natural texture, and elegant drape, which beautifully complements the rustic feel of the hooked burlap. Other medium-weight fabrics like cotton duck, canvas, or even a sturdy upholstery fabric would also work well, depending on your desired finish.
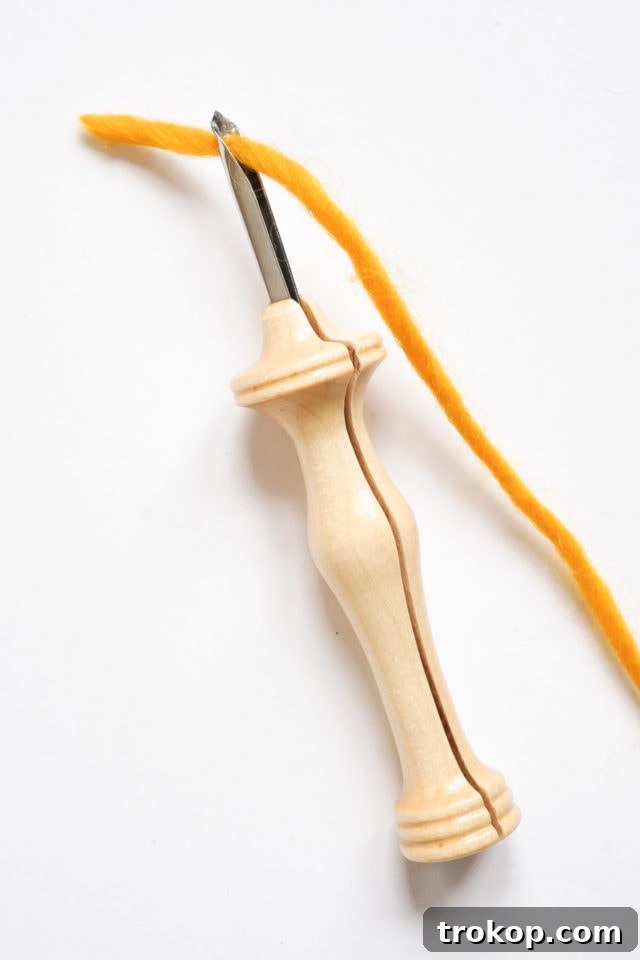
- #10R Oxford Punch Needle: This is a key tool for rug hooking. The #10R Oxford punch needle is a widely respected and recommended tool in the rug hooking community. Its ergonomic wooden handle makes it comfortable for extended periods of use, and the “R” indicates it creates a “regular” height loop, which is ideal for most projects, including pillows. Understanding how to properly thread this specific needle is crucial for a smooth punching experience.
- 24-inch Wood Stretcher Frame: A sturdy frame is essential to keep your burlap taut while you work. We repurposed an art store canvas frame by simply removing the canvas, but you can also purchase stretcher bars and assemble them. The goal is to have a drum-tight surface, as proper tension prevents your fabric from distorting and helps create uniform loops.
- Scissors: A sharp pair of scissors is indispensable for cleanly trimming your yarn, cutting burlap, and preparing your pillow back fabric.
- Staple Gun: A reliable staple gun is necessary for securely attaching your burlap to the wood stretcher frame. Ensure you have plenty of staples on hand.
- Marker: A permanent marker is used to draw your design onto the burlap. Don’t worry about the marker showing through; the dense hooked loops will entirely cover your drawn lines, making it perfect for layout.
- Flat Head Screwdriver or Pliers: These tools are useful for safely removing the staples from your frame once your rug hooking is complete.
- Sewing Machine: While hand-sewing is an option, a sewing machine will significantly speed up and professionalize the process of assembling your pillow cover.
- Sewing Pins: Essential for holding fabric layers together securely while you sew.
- Zipper Foot (Optional): If your sewing machine has one, a zipper foot can be very helpful. It allows you to sew very close to the thick, rug hooked edge of your pillow front, resulting in a cleaner and more professional finish.
- Iron: An iron is crucial for pressing seams and creating crisp, professional folds on your pillow backing fabric.
- Feather Pillow Form: The final component to give your handmade cover its plush, inviting shape. Choose a size that perfectly fits your finished hooked panel, typically 20×20 or 22×22 inches for a 21-inch square design.
How to Rug Hook: Step-by-Step Instructions for Beginners
Creating your rug hooked pillow is a wonderfully rewarding process that combines artistic expression with a satisfying tactile craft. Follow these detailed steps to bring your cozy vision to life, ensuring a smooth and enjoyable experience even if you’re a complete beginner.
- Prepare Your Burlap and Frame: Begin by cutting a 30-inch square piece of burlap. This generous size ensures you have ample fabric to work with, allowing for tensioning and trimming. Center the burlap over your 24-inch wood stretcher frame. Starting from the middle of each side, carefully stretch the burlap and secure it to the back of the frame using a staple gun. Work your way outwards towards the corners, continuously pulling the burlap as taut as possible before stapling. The goal is to achieve a drum-tight surface, like a canvas on a stretcher; this extreme tension is absolutely crucial for producing even, consistent loops with your punch needle. Without a taut surface, your loops may be uneven, or the fabric may sag and warp, making the hooking process much more challenging.
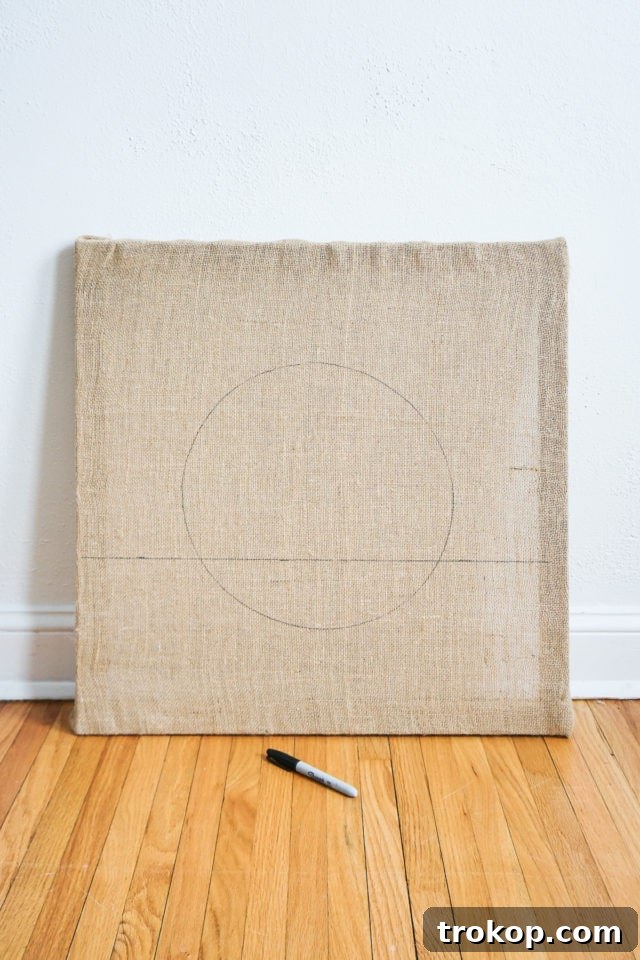
- Transfer Your Design: With your burlap securely stretched and taut, it’s time to transfer your chosen design. Use a permanent marker to draw your pattern directly onto the burlap. Don’t worry about making a perfect drawing or any visible marker lines; they will be completely covered by the hooked yarn in the final piece. Simple geometric shapes like stripes, abstract swirls, or even block initials are excellent starting points for beginners. For more complex designs, you can print a template, position it under the burlap (if it’s thin enough), and trace it, or use a light box.
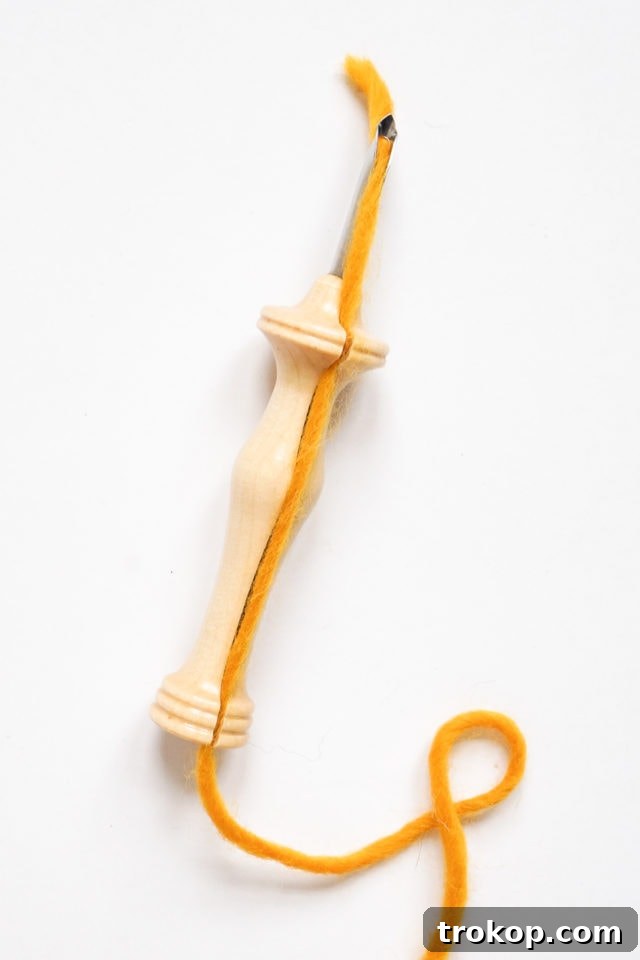
- Thread Your Punch Needle: Correctly threading your punch needle is essential for smooth and consistent operation. Start by inserting your chosen yarn (or strips of wool roving) through the small hole at the very tip of the metal needle. Then, guide the yarn string along the open channel on the wood handle of the punch needle. Work the yarn back and forth gently, ensuring it settles snugly into this channel. It’s crucial that the yarn flows freely without any snags or excessive tension from the yarn ball; any resistance will affect your loop consistency. Once threaded correctly, you’re ready to punch!
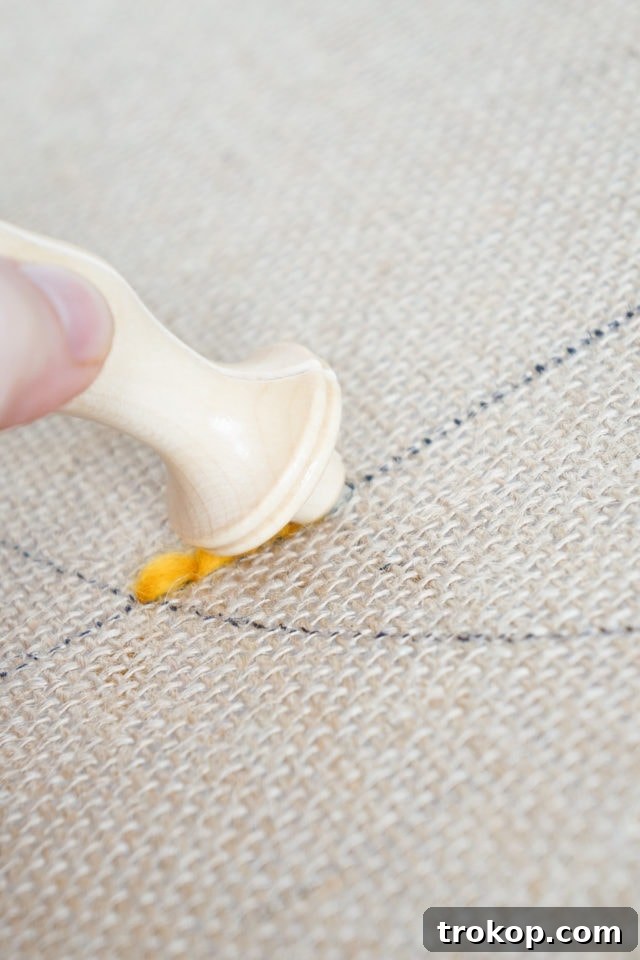
- Master the Initial Punching Technique: Hold your punch needle firmly but comfortably, ensuring the wooden channel on the handle faces the direction you intend to stitch. This orientation is crucial for forming consistent loops. Insert the metal part of the needle fully into the burlap, pushing until the handle meets the fabric. On the underside of the fabric (the side facing away from you), gently hold onto the tail end of the yarn as you make your first few punches. This ensures the yarn catches and securely creates the initial loops, preventing them from pulling back through.
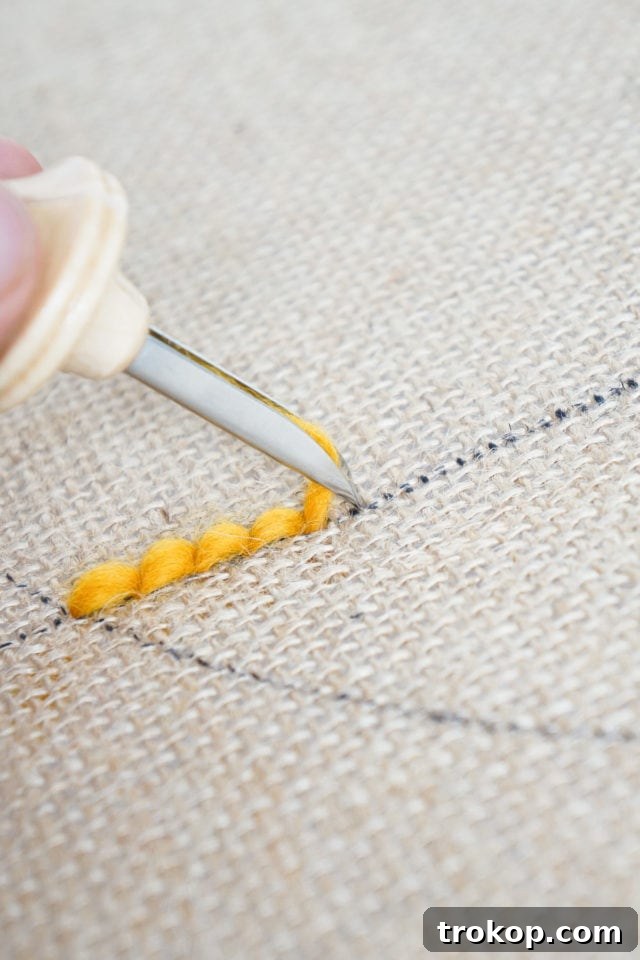
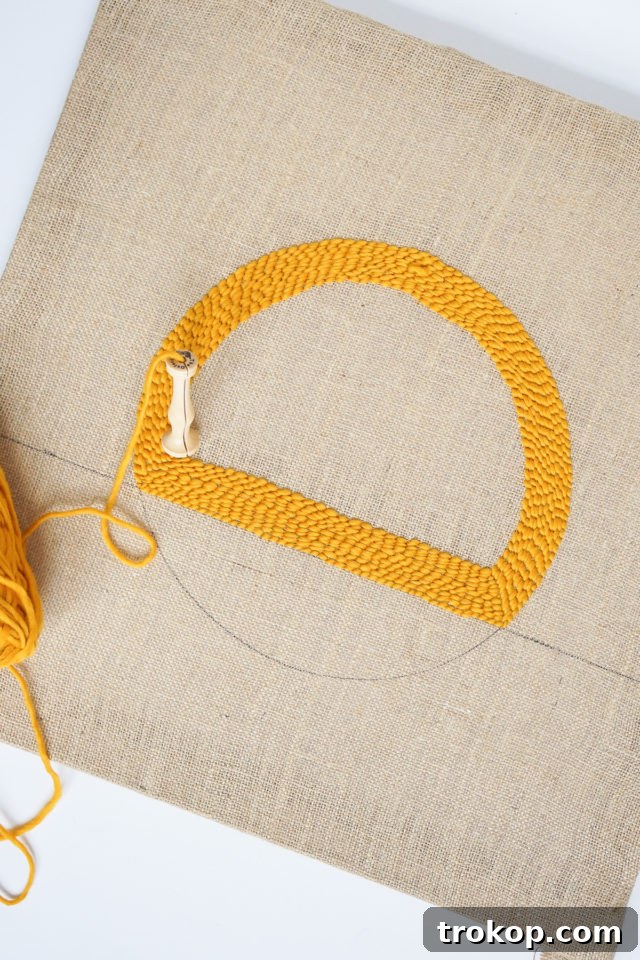
- Forming Consistent Stitches and Filling Shapes: After the initial insertion, slowly pull your needle straight up out of the burlap just enough so that the tip skims the surface of the fabric. It is crucial NOT to lift the needle completely out of the fabric, as this will undo your previous stitch. Maintain constant, gentle contact with the fabric surface. Then, re-insert the needle back into the fabric approximately 1/8 to 1/4 inch away from your last stitch. This consistent spacing is vital for creating uniform loops and a dense, even texture. Aim for about 4-5 stitches per inch for a plush, full result. Continue this motion, punching along the outline of your first design shape. Once the outline is complete, begin filling in the shape with parallel lines of stitches, working from the outside in or in rows, until the entire area is covered.
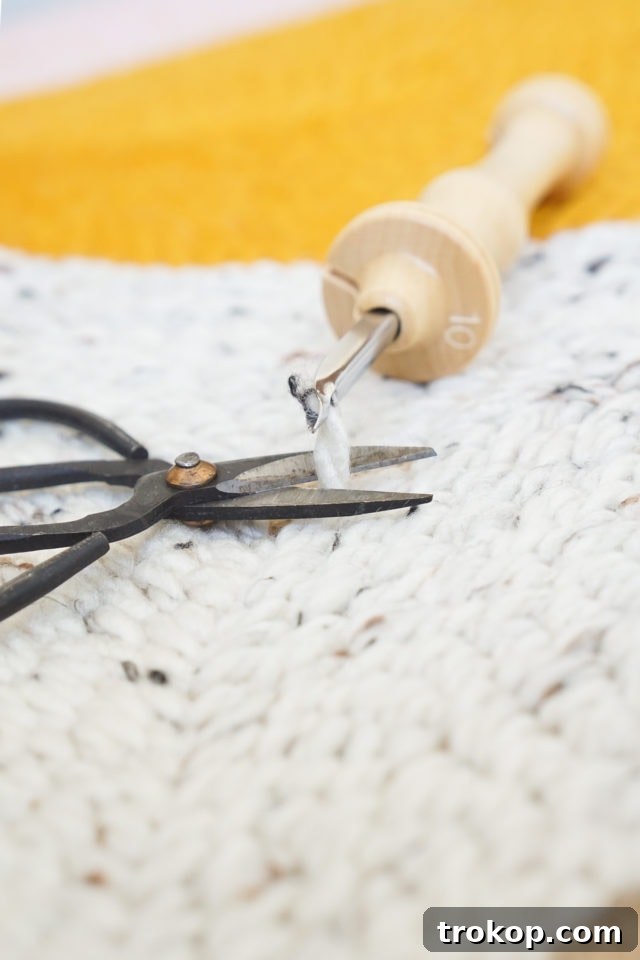
- Changing Yarn Colors: When you’re ready to switch to a new yarn color, or when you finish a specific section of your design, pull your punch needle out of the fabric just barely until the needle’s tip grazes the face of the fabric, similar to the motion between stitches. Then, use your scissors to trim the yarn tail as close to the fabric as possible on the ‘back’ side (the flat stitched side). This method ensures clean color transitions without bulky knots or visible ends on the finished side. Re-thread your needle with the new color and continue punching your design.
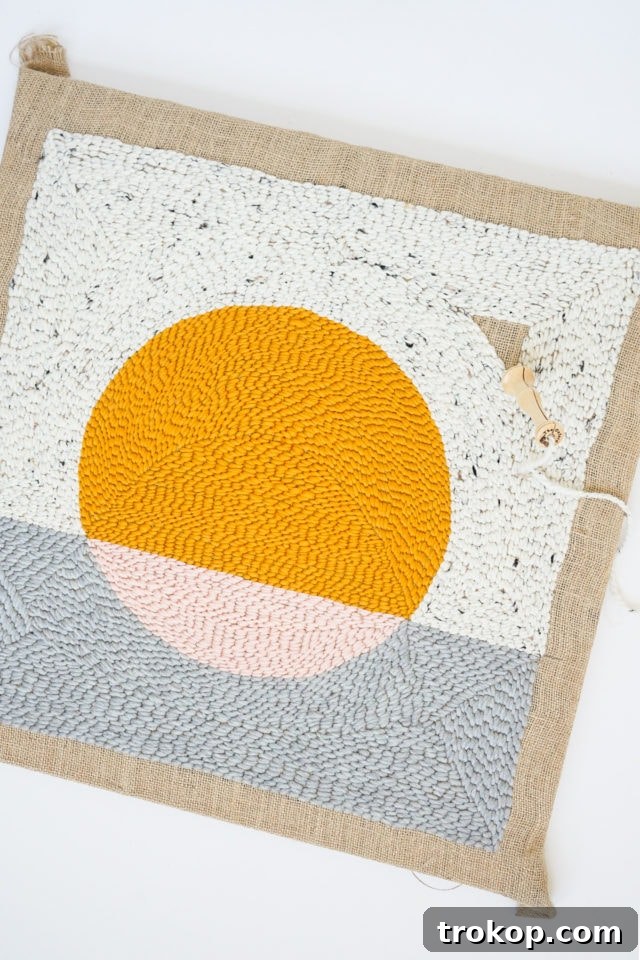
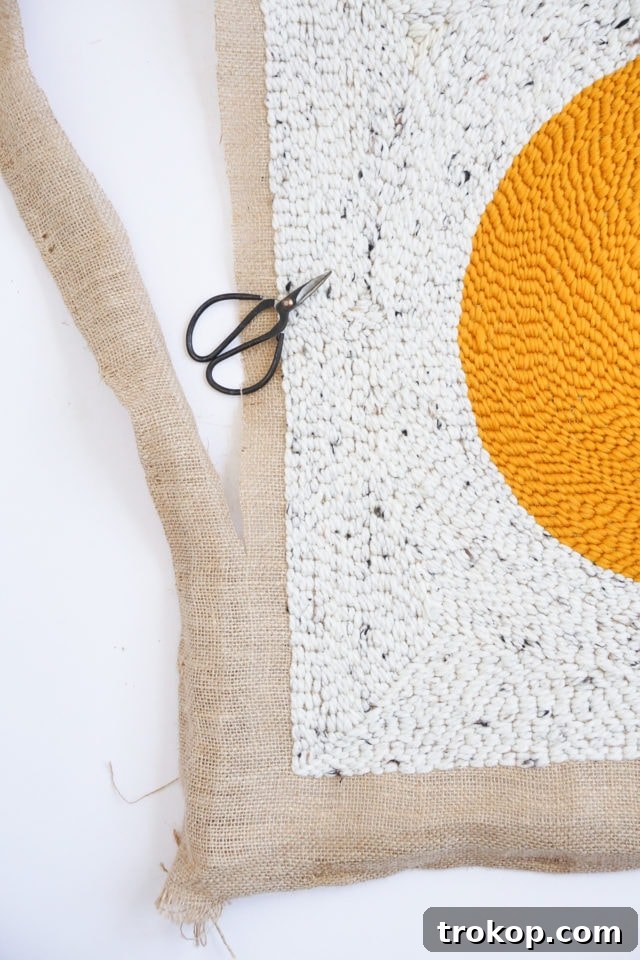
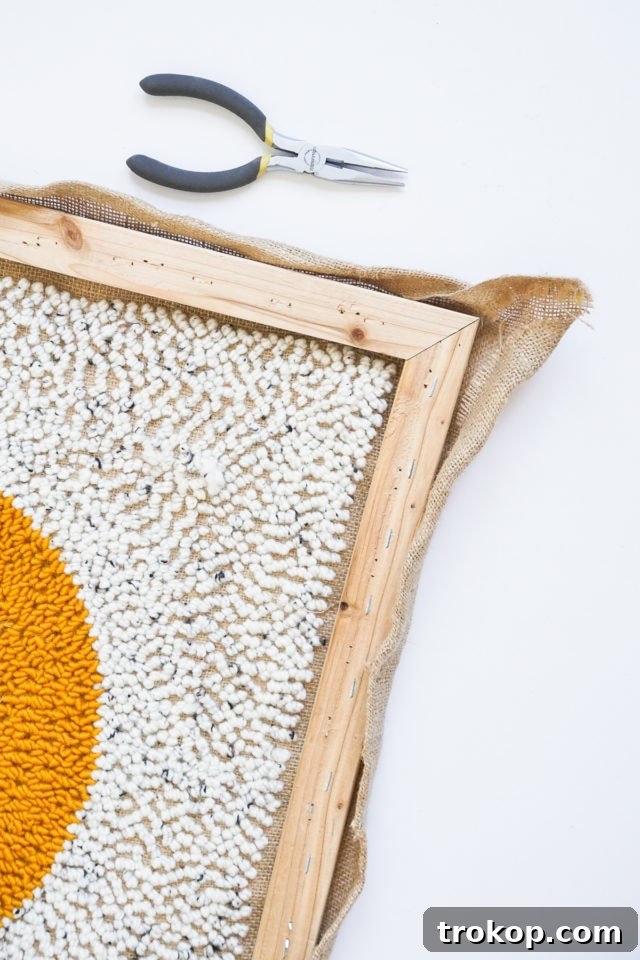
- Remove from Frame: Once your entire pillow face is filled with beautiful rug hooked stitches and your design is complete, it’s time to carefully remove it from the stretcher frame. Use a flathead screwdriver or a pair of pliers to carefully pry out all the staples securing the burlap to the wood. As the burlap comes off the frame, you’ll notice it condenses slightly and relaxes. This natural compression helps to securely set the stitches in place, adding to the durability and stability of your design. You now have your finished rug hooked panel.
Design and Customization Tips for Your Unique Pillow
The true beauty of rug hooking lies in its endless possibilities for personalization and creative expression. Don’t feel limited to simple squares or basic patterns; your pillow can be a unique work of art. Here are some tips to help you design a truly one-of-a-kind pillow:
- Find Inspiration Everywhere: Look for design ideas in your surroundings. Nature, geometric patterns, abstract art, existing home decor, or even textile prints you admire can spark creativity. Pinterest and Instagram are fantastic resources for visual inspiration, allowing you to explore countless rug hooking designs and color schemes.
- Thoughtful Color Palette Selection: Experiment with color. A monochromatic scheme (variations of a single color) can create a sophisticated and understated look, while a vibrant mix of complementary or contrasting colors can create a bold, energetic statement. Consider your existing home decor to choose colors that will seamlessly integrate with your space, or opt for a pop of color to make your pillow a focal point.
- Play with Texture: Different types of yarn and hooking techniques will produce varying textures. Wool roving creates a wonderfully soft, plush, and traditional feel, while thinner yarns can offer more definition and intricate detail. Don’t hesitate to combine different yarn weights, fiber types, or even incorporate strips of fabric scraps for a unique, multi-dimensional rag rug effect.
- Start Simple, Grow Complex: For beginners, simple geometric shapes (such as stripes, chevrons, circles, or color blocks) or abstract freeform designs are easier to execute and still look incredibly stylish. As you gain confidence and familiarity with the punch needle, you can gradually move on to more intricate patterns, floral motifs, landscapes, or even personalized text and monograms.
- Sketch and Refine Your Design: Before committing your design to the burlap, sketch your ideas on paper. This allows you to refine layouts, experiment with color placement, and make adjustments without wasting materials. You can also color in your sketches to visualize the final result.
Finishing Your Rug Hooked Pillow Cover
Now that your rug hooked design is complete, it’s time to transform it into a functional and beautiful pillow. We’ll create an envelope closure back, which is a popular choice for its clean look and ease of removing the pillow insert for cleaning or changing.
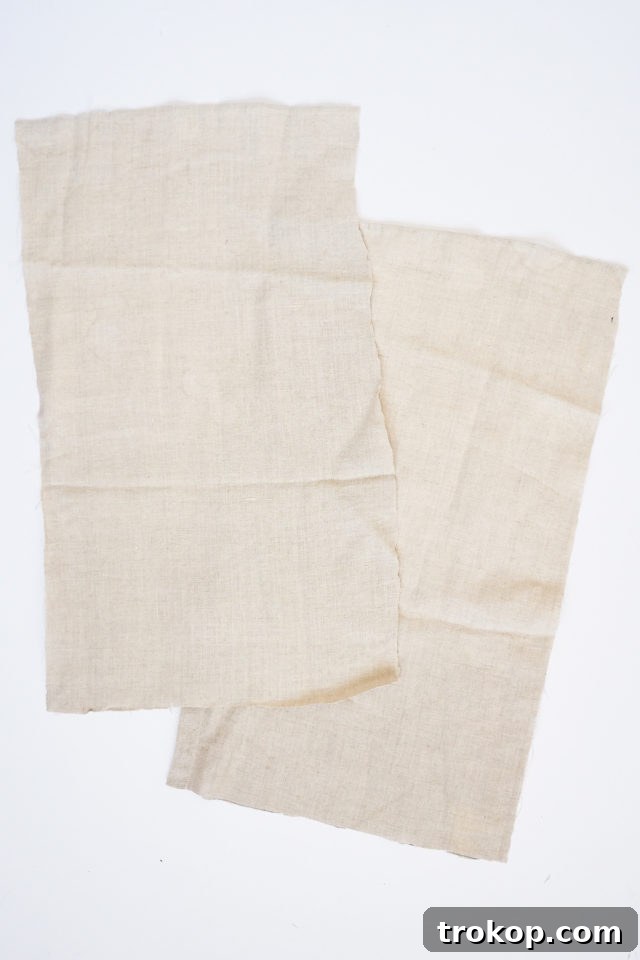
- Prepare Pillow Back Fabric: For a rug hooked pillow face that measures roughly 21 inches square, you’ll need two pieces of backing fabric (such as linen or sturdy cotton) measuring approximately 14 inches by 22 inches each. These dimensions are crucial: the extra length ensures adequate overlap for the envelope closure, and the extra width accounts for a ½-inch seam allowance around all edges. This overlap guarantees a secure and neat closure for your pillow insert.
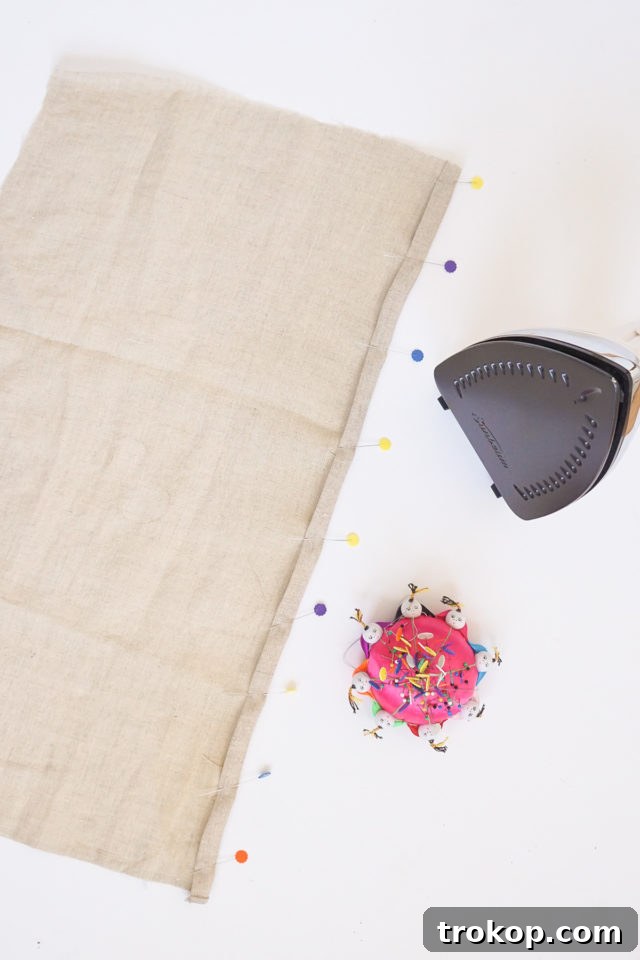
- Hem the Back Pieces: Take one of your pillow back pieces. Along one of the long (22-inch) edges, fold the fabric over by ½ inch towards the wrong side and press firmly with a hot iron to create a crisp crease. Then, fold that same edge over again by another ½ inch, press, and secure the double-folded hem with sewing pins. This creates a neat, durable, and fray-proof finished edge. Repeat this exact process for one long edge of the second backing piece. You will now have two backing pieces, each with one hemmed long edge, which will form the opening of your envelope closure.
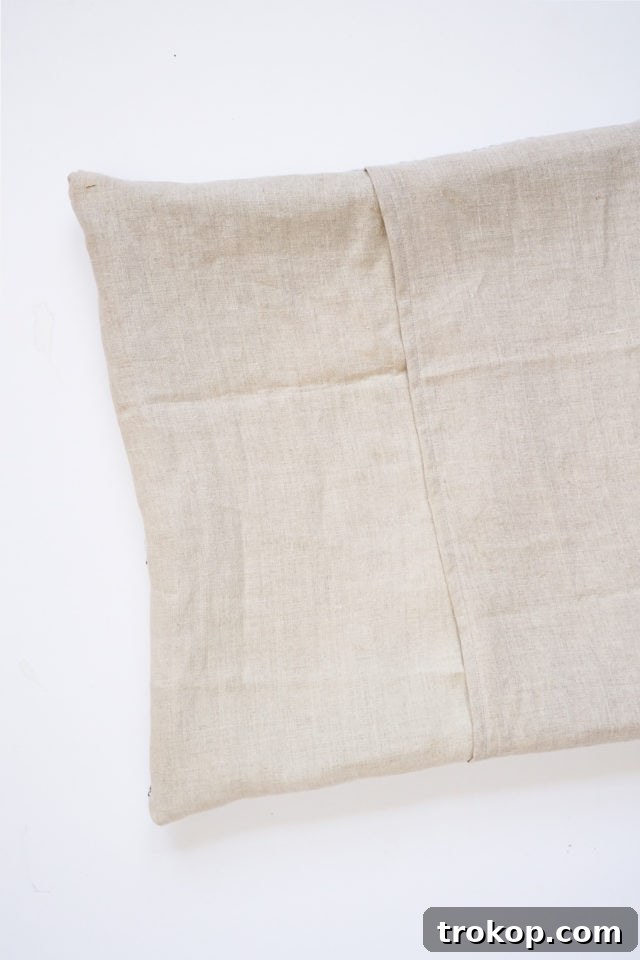
- Assemble the Pillow Layers: Lay your finished rug hooked design face up on a clean, flat surface. Next, take your two prepared backing pieces and lay them face down on top of the rug hooked panel. Position them so their hemmed edges overlap by a few inches in the center, forming the envelope opening. Ensure that all raw edges of the backing pieces align perfectly with the raw edges of the rug hooked panel all around the perimeter. Pin all four layers together securely around the entire outer edge, placing pins perpendicular to the raw edges to hold them firmly.
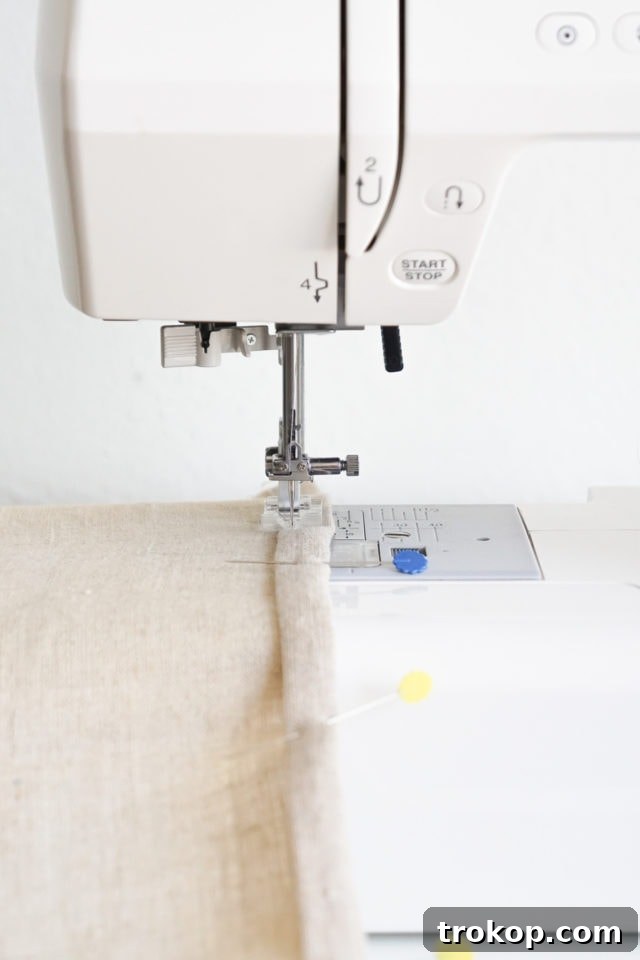
- Sew the Pillow Cover: If you have one, switch your sewing machine’s standard presser foot for a zipper foot and move your needle all the way to the left. While optional, this specialized foot is incredibly helpful as it allows you to sew very close to the thick, rug hooked edge, resulting in a cleaner and more professional finish without distorting the loops. Carefully sew all four edges of the assembled pillow layers together. You won’t be able to visually see the exact edge of the rug hooked design due to the layers, but you’ll be able to feel it. Use the thickness of the hooked layer as your guide, maintaining a consistent ½-inch seam allowance. Remember to backstitch at the beginning and end of your seam for added durability.
- Final Stuffing and Enjoyment: Once all four sides are sewn, carefully trim the corners of your pillow cover to reduce bulk, being extremely careful not to cut through any of your stitches. Turn your pillow cover right side out, gently pushing out the corners with a blunt tool (like a chopstick) for a crisp, well-defined shape. Now, simply stuff your new pillow cover with your chosen feather pillow form, and stand back to admire your beautiful, unique, and entirely handmade rug hooked creation!
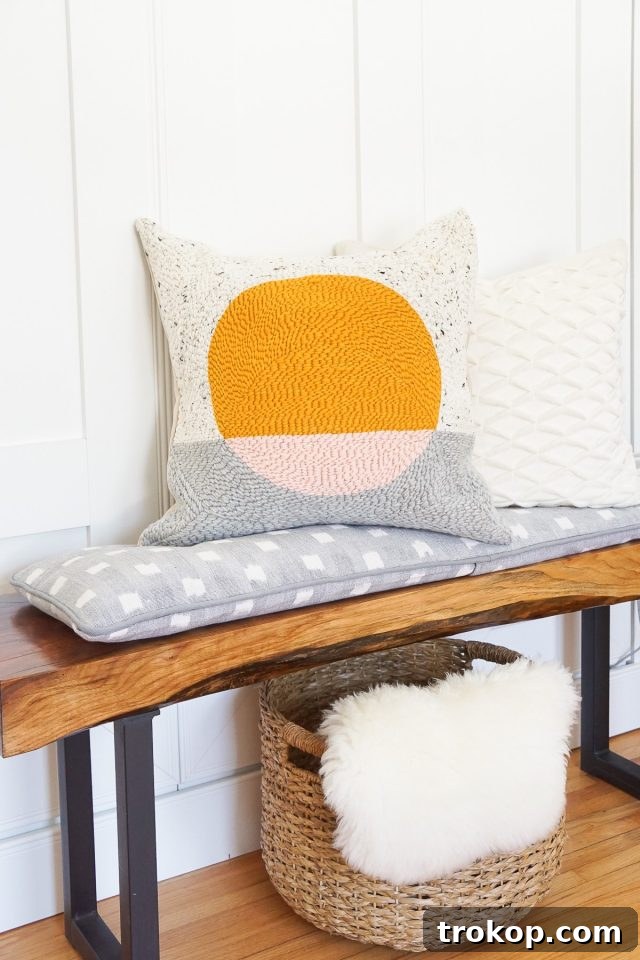
Care and Maintenance for Your Handmade Pillow
To ensure your beautiful rug hooked pillow remains a cherished part of your home decor for many years to come, proper care and maintenance are essential. Regular attention will help preserve its vibrant colors, plush texture, and overall integrity.
- Spot Cleaning for Spills: For minor spills or stains, gently spot clean the affected area immediately. Use a mild soap (such as wool wash or a gentle detergent) diluted in cold water. Apply the solution with a clean, soft cloth or sponge, blotting gently rather than rubbing, which can distort the delicate loops. Rinse thoroughly by dabbing with a clean, damp cloth, and then allow the pillow to air dry completely. Avoid saturating the fabric.
- Regular Dusting and Vacuuming: Periodically remove dust and loose debris that can settle within the yarn loops. You can gently shake the pillow outdoors, or use a vacuum cleaner with a low suction setting and a brush attachment. Carefully glide the brush over the surface, taking care not to pull on the loops.
- Avoid Machine Washing and Drying: Due to the delicate nature of the hooked loops, the potential for shrinkage, and possible damage to the burlap backing fabric, machine washing is generally not recommended. The agitation of a washing machine can unravel stitches or distort the pillow’s shape. Similarly, tumble drying can cause significant shrinkage and damage.
- Professional Cleaning: If a deeper clean is absolutely necessary, especially for stubborn stains or overall grime, it is best to consult with a professional dry cleaner who has experience with textile arts and delicate fabrics. Inform them that the item is a rug hooked piece to ensure appropriate cleaning methods are used.
- Protect from Direct Sunlight: Prolonged exposure to direct sunlight can cause the colors of your yarn to fade over time, diminishing the pillow’s vibrancy. Position your rug hooked pillow in an area where it receives indirect light, or rotate it regularly to ensure even exposure and minimize fading.
- Fluff Regularly: To maintain its plumpness and original shape, fluff your pillow regularly. This helps redistribute the filling and keeps the pillow looking fresh and inviting.
More Inspiring DIY Pillow Tutorials to Spark Your Creativity
Congratulations on completing your stunning rug hooked pillow! If you’re now truly “hooked” on the joy of creating personalized home accents, you’ll be delighted to explore more of our DIY pillow tutorials. Each project offers a unique technique and style to add flair, comfort, and a touch of handmade charm to your living space. Dive into our archives and discover your next favorite craft project:
- Knot Pillow: A contemporary and sculptural design that adds unique interest.
- Tassel Pillow: Fun, whimsical, and perfect for adding a playful touch to any room.
- Structured Pleat Lumbar Pillow: Achieve elegance and sophistication through tailored pleats.
- Fringe Pillow: Embrace a boho-chic vibe and soft textures with this easy project.
- Gold Ombre Pillowcase: Add a touch of glam and luxury with this easy, no-sew technique.
- No-Sew Flamingo Lumbar Pillow: A quick and charming project that requires absolutely no sewing skills.
- Shibori Throw Pillow: Explore beautiful indigo dyeing techniques for a unique patterned pillow.
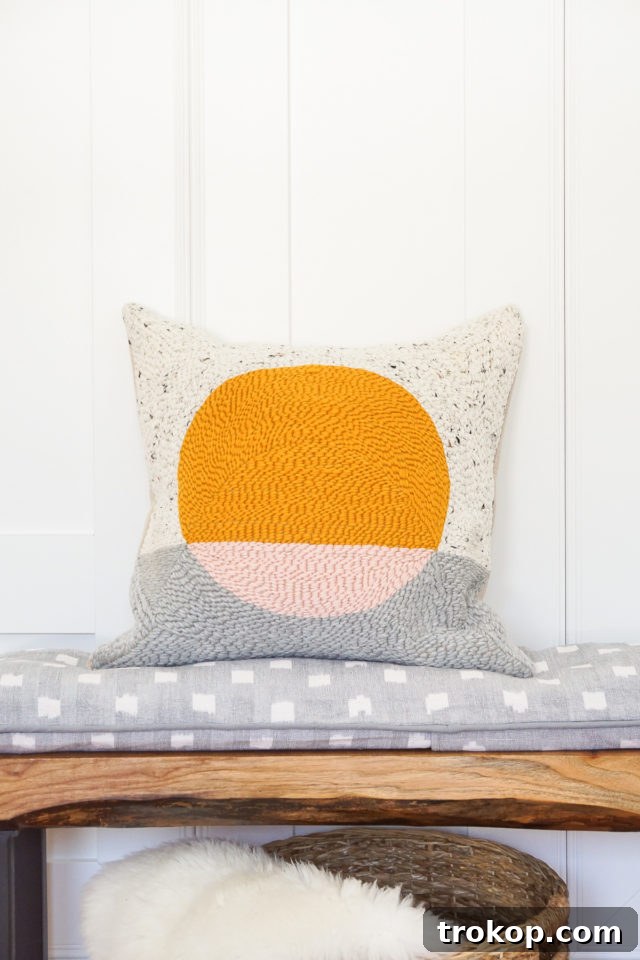
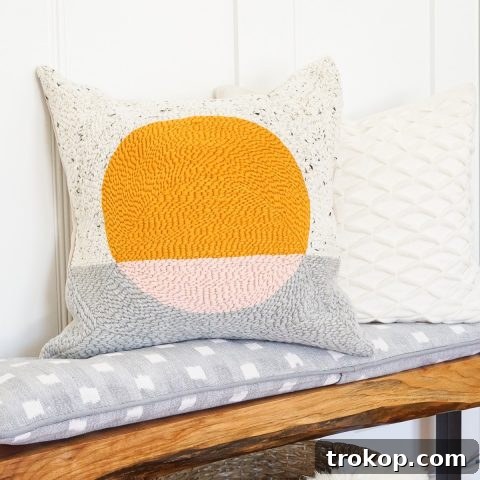
DIY Rug Hooking Pillow: Project Overview
Print Project Instructions
Learn a simple rug hooking technique to recreate this easy pillow cover DIY and add a custom touch to your home decor.
Equipment Needed
- Sewing machine (optional if using a pre-made burlap cover)
- Scissors
- Marker
- Iron
- Staple gun and staples
- Flat Head Screw Driver or Pliers (for removing staples from burlap)
Materials Required
For Rug Hooking
- 1 #10R Oxford Punch Needle
- 1 24” wood stretcher frame (an art store canvas frame with the canvas removed works)
- 3 ply yarn or medium weight wool roving about an inch wide
- 1 burlap pillow cover (optional, if you’re not making your own backing)
For Pillow Assembly
- 1 pc burlap (for ground cloth, ideal for beginners due to minimal stretch)
- 1 zipper foot (optional, for sewing closer to the edge)
- ½ yd pillow back fabric (linen recommended for durability)
- 1 feather pillow form (matching the size of your hooked panel)
Detailed Instructions
- Cut a 30” square piece of burlap. Stretch it around your wood frame and secure it to the back of the frame with a staple gun, pulling it as tight as possible for a taut fabric surface.
- Draw your design onto the burlap with a marker. The marker won’t be visible in the final piece, so don’t worry about minor imperfections.
- Thread your punch needle by inserting your yarn or wool strips through the hole at the tip of the needle, then along the channel on the wood handle until it settles.
- Hold your punch needle so the wood channel faces the stitching direction. Insert the metal part of the needle into the burlap, holding the yarn tail on the underside to ensure it catches.
- Pull your needle up just enough to skim the fabric surface, then re-insert it 1/8” – ¼” away to create a stitch. Aim for 4-5 stitches per inch.
- Continue punching the outline of your first shape. Once complete, start on the second outline, filling in the entire shape with parallel lines of stitches.
- To switch yarn colors, pull your needle out until it grazes the fabric face. Use scissors to trim the yarn as close to the fabric as possible on the back side.
- Once the entire pillow face is rug hooked, remove the burlap from the frame by pulling out the staples with a flathead screwdriver or pliers. The burlap will condense, securing the stitches.
- Turn your design into a pillow by adding an envelope pillow back closure. For a 21” square hooked face, cut two pieces of linen backing fabric 14” x 22” to allow for overlap and seam allowances.
- Fold the long edge of one back piece over ½” and press, then fold again, press, and pin. Repeat for the second back piece.
- Place your rug hook design face up, then lay the two back pieces face down on top, overlapping a few inches in the center. Pin all layers together at the edges.
- (Optional but recommended) Switch to a zipper foot on your sewing machine and move the needle left. Sew the pillow layers together, using the thick rug hooked layer as a guide, feeling its edge if you can’t see it.
- Turn your pillow right side out and stuff with a cushion insert to complete your handmade creation.
Estimated Cost: $45
Keywords: rug hook pillow, rug hooking, DIY pillow, punch needle craft, handmade home decor

Looking for More Decor Inspiration?
60 Amazon Bedroom Decor Picks to Revamp Your Room
Discover the best Amazon bedroom decor items to create a stunning personal retreat and transform your sleeping space into an oasis of style and comfort…
Continue Reading