
One Room Challenge Week 2: Unveiling Our Master Bathroom Oasis Design Plan
As the clock ticks down on the One Room Challenge (ORC), we find ourselves at a critical juncture: a mere five weeks away from the final reveal, and our master bathroom renovation has yet to truly begin. It might seem unconventional, but for our Week 2 update, we’re diving deep into our meticulously crafted master bath design plan. This allows us to mentally fast-forward through the construction phase and share the exciting vision we have for this crucial space.
Navigating the Challenges: From Hurricane Harvey to Home Renovations
Our renovation journey has been anything but smooth, marked by significant hurdles. The devastating impact of Hurricane Harvey on Texas created unprecedented challenges, particularly in securing contractors for smaller home projects. The sheer scale of destruction meant countless families lost everything, prioritizing the urgent rebuilding of entire homes over aesthetic remodels. Competing for skilled labor in such a landscape proved nearly impossible, putting our bathroom dreams on hold as the community focused on essential recovery efforts.
Beyond the widespread disaster, we’ve encountered additional, personal construction woes – a saga many of you may already be familiar with if you follow our Instagram stories. These ongoing setbacks have fueled a very real fear that our master bathroom might not be completed within the demanding ORC timeline. Yet, despite these anxieties, we choose to focus on the beauty and potential of what’s to come, particularly the luxurious gold accents and marble finishes that define our vision.
To truly appreciate the transformation ahead, it’s worth revisiting the starting point. Here are the “before” photos of our master suite, offering a stark contrast to the elegant sanctuary we plan to create.
Our Vision: A Master Bathroom Infused with Modern Luxury and Timeless Elegance
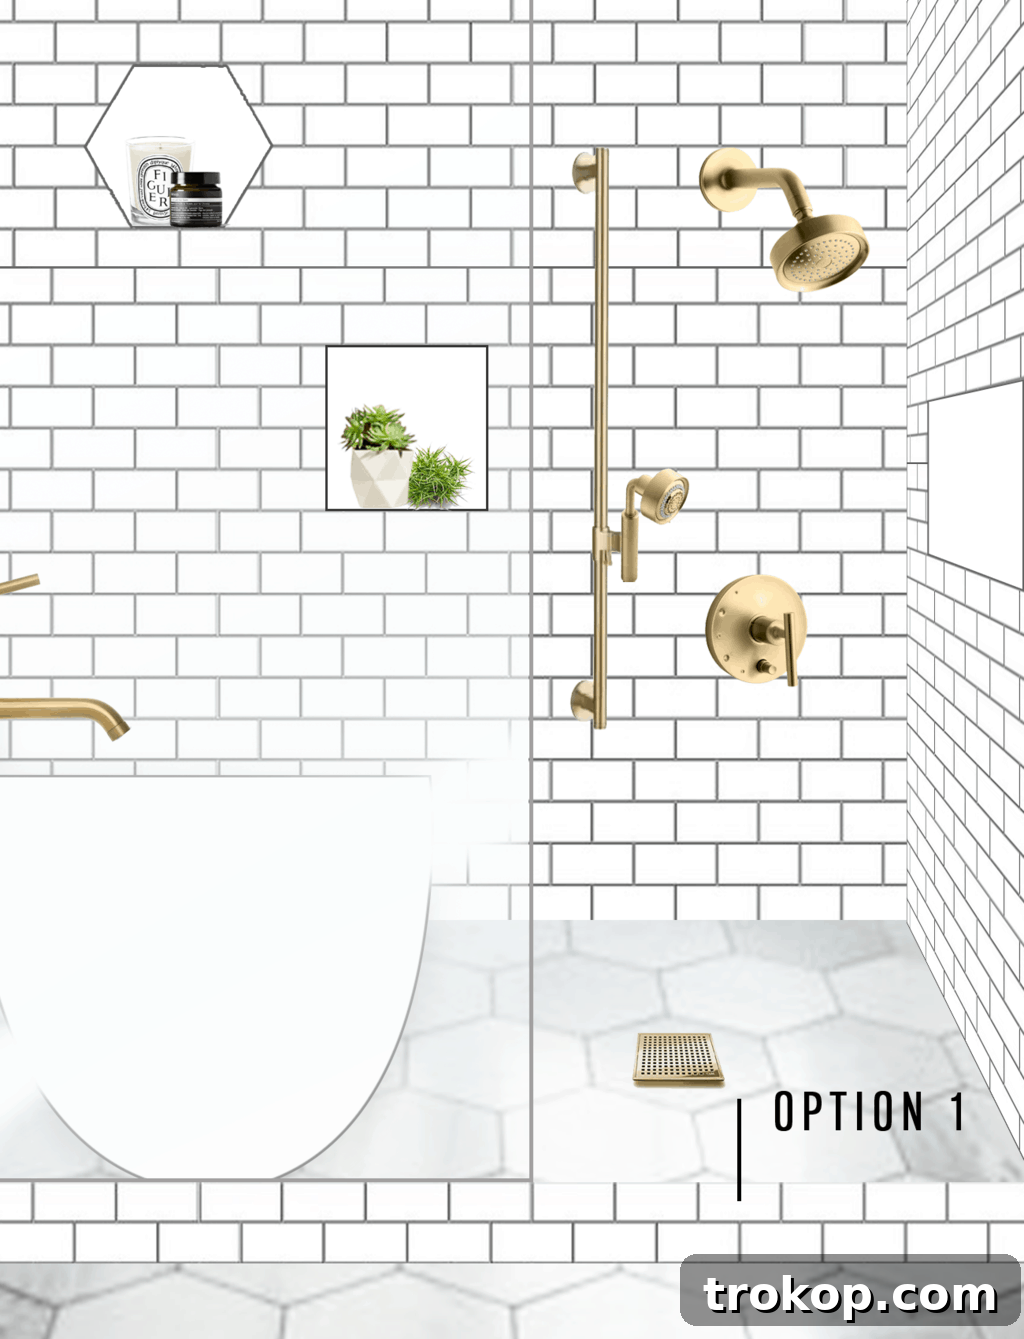
This image represents the core visual plan for our new master bathroom, a space designed to embody modern luxury and timeless elegance. While the intricate styling details are still being finalized, this rendering provides a comprehensive overview of the aesthetic we’re aiming for. A significant change that will immediately enhance the bathroom’s grandeur is the replacement of the existing, small pocket door with magnificent True Craft double doors from Metrie, adorned with exquisite gold Emtek hardware. This shift will not only improve accessibility but also create a more dramatic and inviting entry into what will become our personal spa-like retreat.
Strategic Layout Enhancements for Optimal Flow and Style
Our renovation will involve a comprehensive gutting of the current bathroom. The new fixtures and fittings will largely maintain their existing placements, optimizing efficiency and minimizing structural complications. However, two key layout modifications are set to dramatically transform the space. Firstly, the awkward dividing wall separating the toilet area from the walk-in shower—a feature previously highlighted in our Week 1 post—will be replaced by a sleek, transparent glass wall. This change will create an open, expansive feel, allowing light to flow freely and visually enlarging the shower space. Secondly, the dated built-in tub will be removed to make way for a contemporary, elegant freestanding bathtub, instantly elevating the bathroom’s aesthetic to a luxurious, spa-inspired haven.
The Vanity: A Statement of Sophistication and Functionality
The existing “custom” vanity, regrettably constructed from the most budget-friendly materials imaginable, is due for a significant upgrade. We’ve selected this stunning 72-inch double vanity from Overstock. Its pre-installed Carrera white marble top and integrated sinks are a tremendous advantage, saving us considerable time and effort during installation. I am particularly excited to see how the new gold wall-mount faucets and matching cabinet pulls from The Mine will complement the luxurious marble, adding a touch of sophisticated glamour to the vanity area.
Tiling Choices: Marble Hexagons and Classic Subway Tiles
The entire existing tile scheme will be completely removed, paving the way for a refreshed, elegant foundation. For the flooring, we’ve chosen large marble hexagon tiles, which will introduce a beautiful geometric pattern and a sophisticated, luxurious feel underfoot. The walls will be adorned with classic white subway tiles, offering a clean, timeless backdrop that complements the marble exquisitely. These choices promise a bright, inviting atmosphere that balances modern trends with enduring style.
The Great Grout Debate: Light Gray vs. White
Now, we face a crucial design decision that significantly impacts the final aesthetic: the grout color for our newly selected tiles. Our current debate centers on whether to opt for light gray grout throughout the entire bathroom, or to use white grout for the marble hexagon floor tiles and light gray grout for the white subway wall tiles. The choice of grout can dramatically alter the perception of a tiled surface. White grout on white subway tile creates a seamless, monolithic look, making the wall appear as one continuous surface. Conversely, a light gray grout would highlight the individual subway tile pattern, adding subtle texture and definition. For the marble hexagons, white grout would allow the natural veining of the marble to take center stage, while a light gray could emphasize the hexagon shape more distinctly. We believe a consistent light gray could unify the different tile styles, creating a cohesive, understated elegance. However, using white on the floor and gray on the walls could provide a gentle contrast, linking the two surfaces without being overtly matchy. We’d love your input on this intricate detail!
Exploring Creative Built-In Tiled Shelves: Functionality Meets Flair
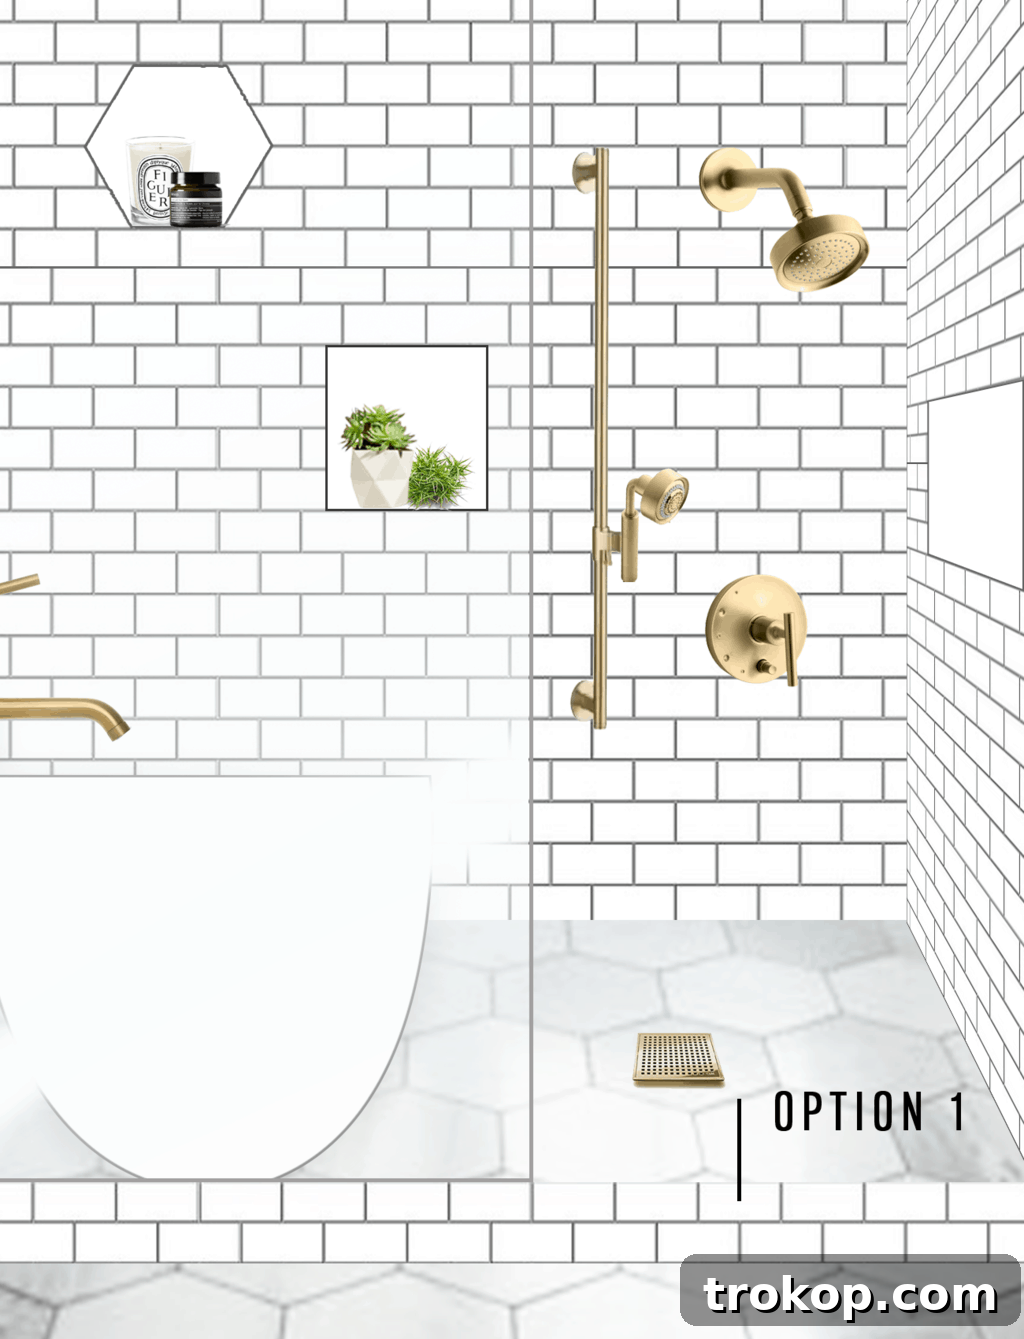
Another exciting design element we’re considering is the incorporation of unique built-in tiled shelves within the shower. These would feature distinct hexagon and square shapes, tiled with white grout to ensure they pop against the subway tile backdrop. Visually, I find these shelves incredibly appealing and believe they would add a custom, high-end touch to the shower area, offering both practical storage and an interesting architectural detail. However, a part of me is apprehensive about their real-world execution and whether they might be perceived as too avant-garde by potential future buyers. These are the kinds of “adult questions” that constantly arise during a renovation – balancing personal preference with long-term investment. Your thoughts on this design risk would be invaluable!
The Modern Shower Barrier: White Subway vs. Marble Subway
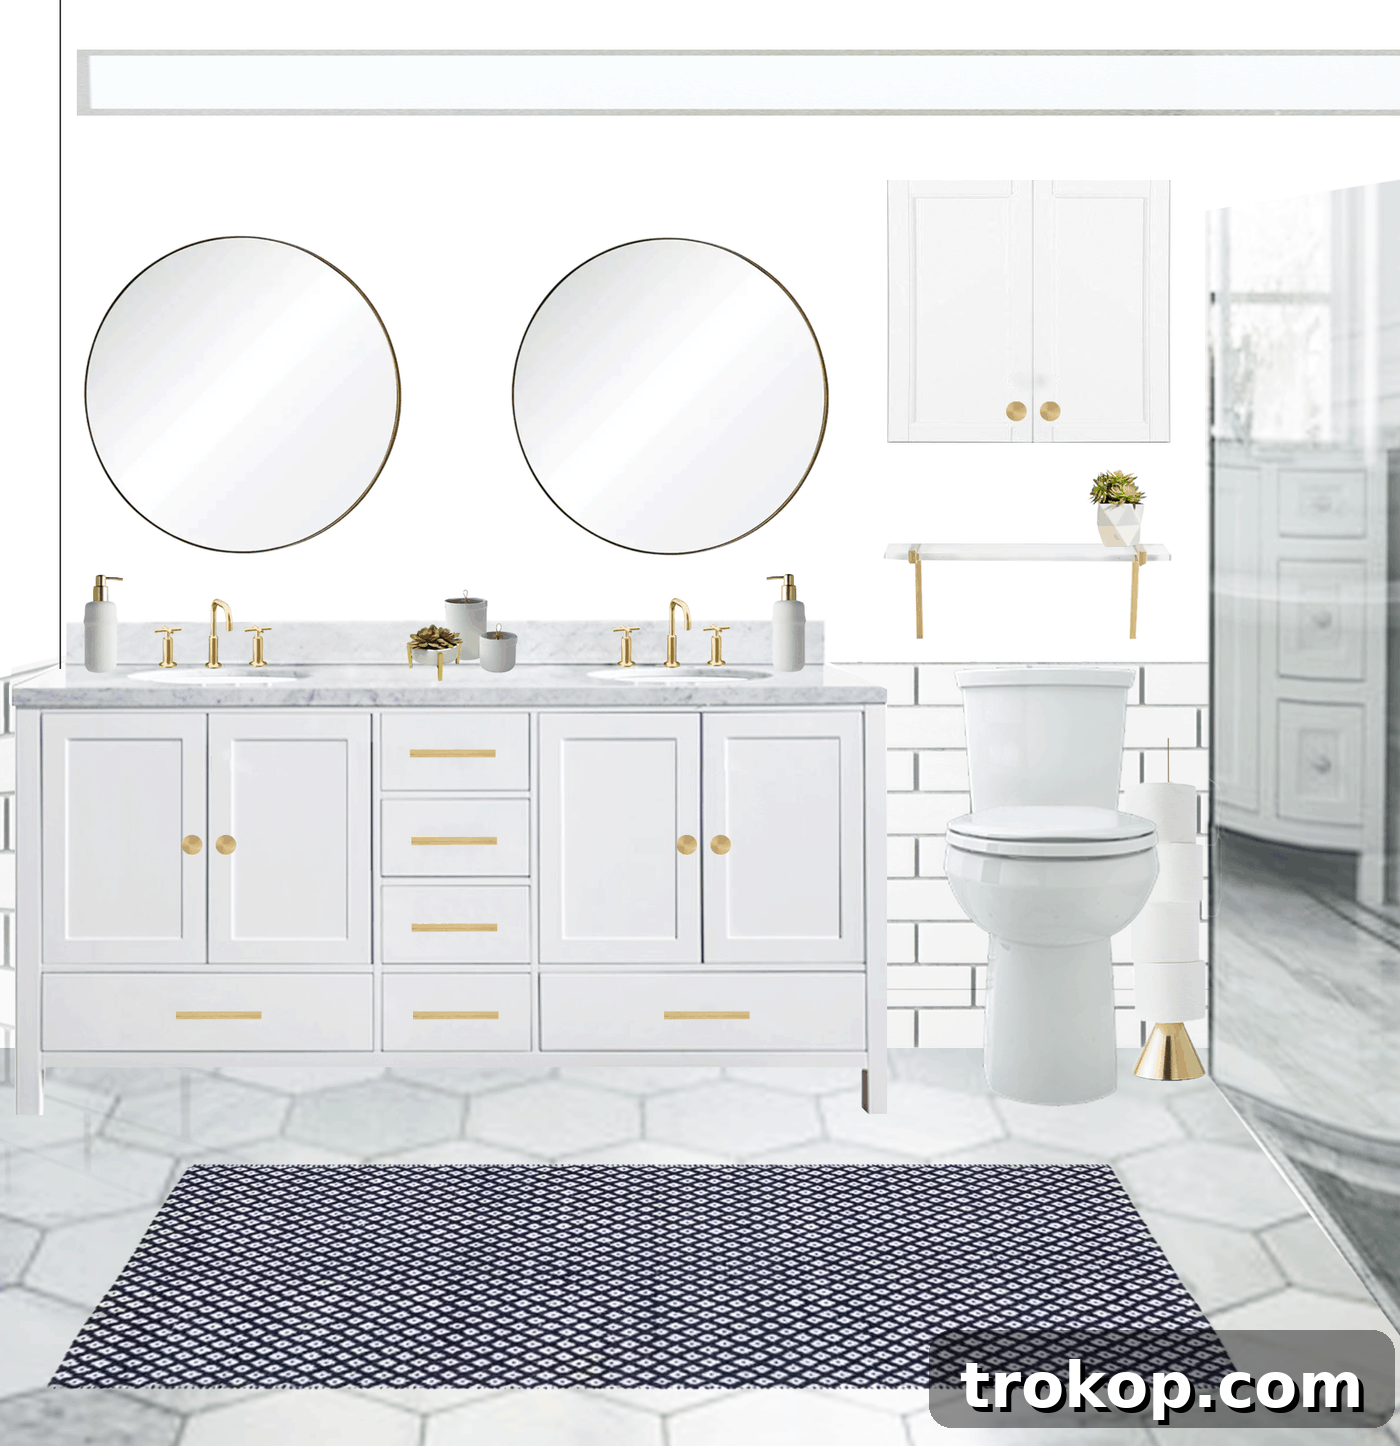
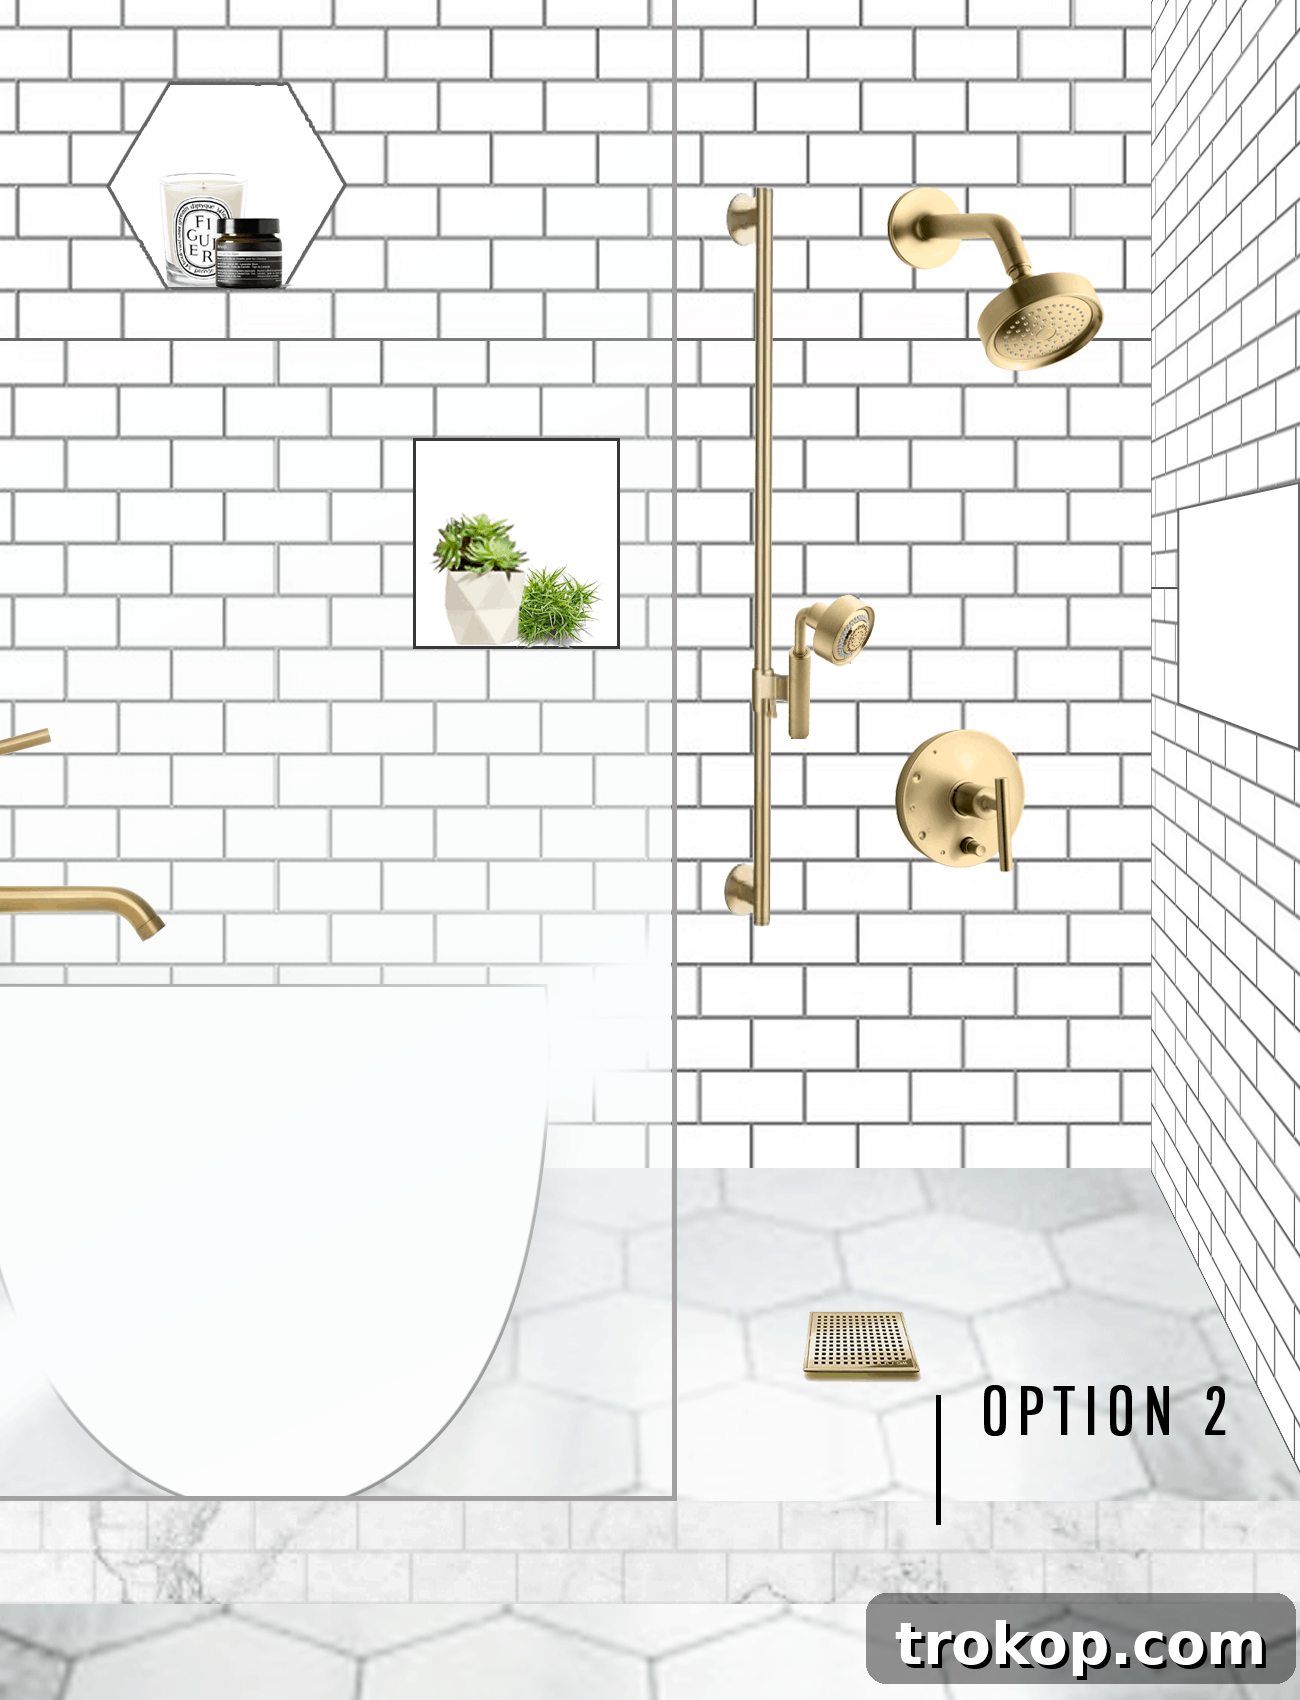
Our commitment to a sleek, “overly modern” shower design means we’re opting for a glass wall on one side and an open, doorless entry on the other. This contemporary choice necessitates a tiled barrier to effectively contain water spray and maintain a dry bathroom floor. The critical decision here lies in the choice of tile for this barrier, which runs along the base of the open shower entrance (as depicted by the subway tile line in the design renders). We’re weighing two distinct options:
- Option 1: White Subway Tile (as seen above). This approach would extend the existing white subway tile from the shower walls down into the barrier, creating a cohesive and minimalist look. It offers a clean, understated transition, blending seamlessly with the surrounding wall tiles.
- Option 2: Marble Subway Tile (as seen below). This option proposes using marble subway tiles for the barrier, which would directly complement and blend with the marble hexagon floor tiles. This choice would create a more luxurious and integrated look with the floor, emphasizing the natural beauty of the marble as it transitions from the horizontal to the vertical plane.
I find myself leaning towards Option 2 for the shower barrier as it creates a more sophisticated and integrated aesthetic with the floor. However, my husband favors Option 1 for its clean simplicity. We are truly at an impasse and would greatly appreciate your help in deciding! And a quick note, please excuse my design rendering skills if our freestanding tub appears somewhat like an oversized sink in these visuals – I’m doing my best!
Curated Selections: Bringing Our Vision to Life
To give you a clearer picture of the components we’ve meticulously chosen, all the bath products selected for this space are linked below. We’ve been incredibly impressed with the quality and selection available, especially from Overstock – proving that beautiful design doesn’t always have to break the bank. Feel free to click through to explore each item; if you have any questions about specific resources or our sourcing process, please don’t hesitate to ask!
Looking Ahead: Next Steps in Our One Room Challenge
Next week, we’ll be sharing further updates on our design plan and, hopefully, more progress on the renovation itself. Thankfully, we’ve already made significant headway in the adjoining master bedroom, which provides some much-needed momentum. Stay tuned for more details on our ORC journey, and if you missed the beginning, be sure to check out our Week 1 ORC announcement here.
Master Bathroom Room Sources:
Here’s a detailed list of the products we’ve chosen to create our dream master bathroom, blending luxury with practicality:
- Gold bathroom wall-mount faucets from The Mine
- Gold cabinet pulls from The Mine
- Gold faucet drains from The Mine
- Freestanding white bathtub from The Mine
- Gold shower valve from The Mine
- Hexagon marble bath tiles from Overstock
- White subway tile from Overstock
- Gold handheld shower from Overstock
- Gold shower slidebar from Overstock
- Round gold mirrors for vanity from Overstock
- Slidebar trim in gold from Overstock
- Acrylic and gold wall shelf from Overstock
- Framed ocean print from Overstock
- Navy blue runner from Overstock
- Marble and white double vanity from Overstock
- Gold bathroom doorknob from Emtek
- True Craft interior doors from Metrie
Follow Along with Other One Room Challenge Participants:
Don’t forget to explore the incredible transformations underway with the other talented ORC participants. There’s a wealth of inspiration to be found!
Boxwood Avenue | Coco & Jack | Design Manifest | IBB for DWD | The House That Lars Built | Little Green Notebook | The Makerista | Making it Lovely | Old Brand New | Old Home Love | The Painted House | Megan Pflug Designs | Pink Pagoda | Erica Reitman | Sacramento Street | Simply Grove | Jill Sorensen | Vintage Rug Shop | Waiting on Martha
Media Partner House Beautiful | Trademark by ORC