
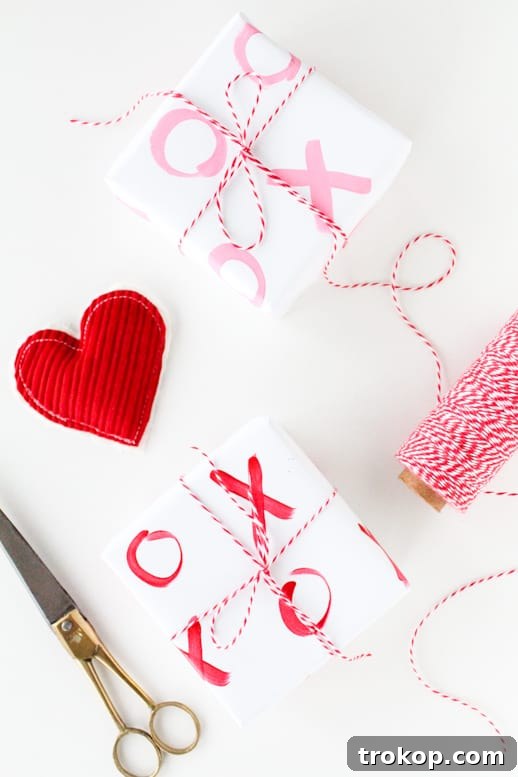
DIY XOXO Gift Wrap — The Ultimate Guide to Thoughtful and Personalized Gift Presentation
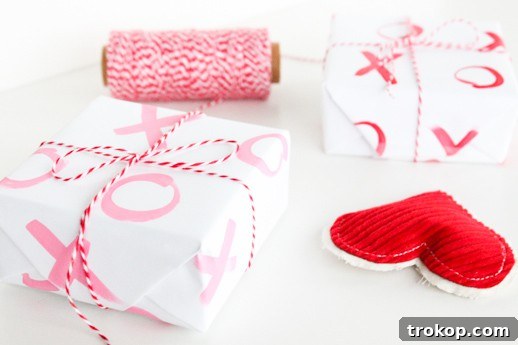
There’s an undeniable magic in giving a gift that’s been wrapped with care and creativity. It elevates the present itself, turning a simple item into a memorable experience even before it’s opened. This guide dives into creating your very own DIY XOXO Gift Wrap – a quick, easy, and incredibly charming handmade idea perfect for adding that special touch to Valentine’s Day, anniversaries, birthdays, or any occasion where a little extra love is due.
Beyond its romantic connotations, the “XOXO” motif universally symbolizes hugs and kisses, making it a versatile and heartfelt design. This project isn’t just about wrapping; it’s about infusing your gifts with personality and showing your loved ones just how much you care through a truly unique presentation.
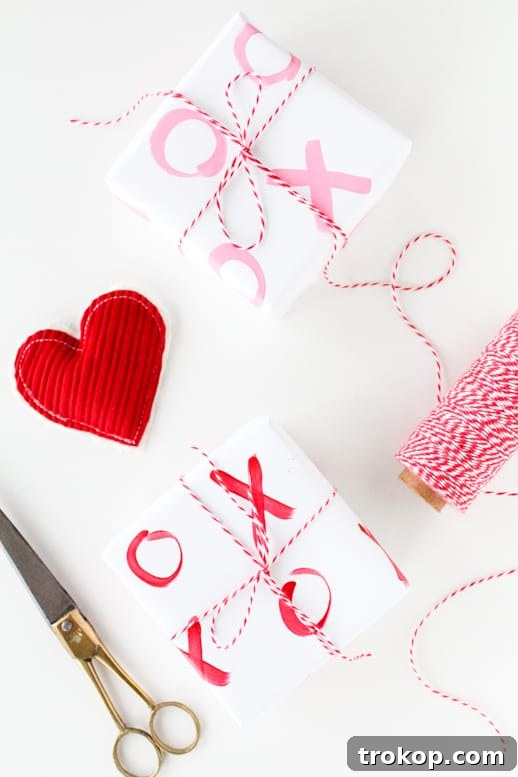
In a world increasingly dominated by mass-produced items, the appeal of a handmade touch stands out. Crafting your own gift wrap is not only a fantastic way to express your affection but also offers a creative outlet that can be incredibly satisfying. Forget generic store-bought paper; with just a few simple supplies and a little imagination, you can transform ordinary packaging into a piece of art that truly speaks volumes.
Whether you’re looking to impress a special someone, celebrate a friend, or simply enjoy a relaxing crafting session, this DIY XOXO gift wrap tutorial is designed for everyone. It’s a project that embraces simplicity, allowing you to create stunning results without needing advanced artistic skills. Let’s embark on this creative journey to make your next gift unforgettable.
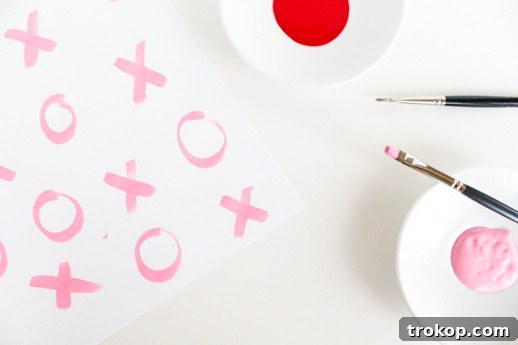
Table of Contents
Why Choose DIY Gift Wrap? The Power of a Personal Touch
In an age where convenience often overshadows personalization, DIY gift wrap offers a refreshing return to thoughtful craftsmanship. Opting for homemade wrapping paper goes beyond mere aesthetics; it imbues your gift with a deeper layer of meaning and sentiment. Here’s why embracing DIY gift wrap, especially a charming XOXO design, is such a rewarding endeavor:
- Uniqueness and Individuality: Unlike store-bought options, your handmade wrap will be truly one-of-a-kind. No two sheets will be identical, making your gift stand out and feel incredibly special. It reflects the effort and thought you’ve invested, creating a memorable unboxing experience.
- Expressing Personal Style: DIY projects allow you to inject your own aesthetic into the final product. You can choose colors, patterns, and embellishments that resonate with your personal style or perfectly match the recipient’s taste, creating a cohesive and heartfelt presentation.
- Cost-Effectiveness: While specialized craft supplies can add up, simple DIY gift wrap often utilizes inexpensive or even recycled materials. Plain paper, a few paints, and basic embellishments can go a long way, saving you money compared to high-end designer wrapping paper.
- Eco-Friendliness: This is a fantastic opportunity to be more environmentally conscious. By using recycled paper (like old maps, newspaper, or brown kraft paper) or repurposing plain paper, you contribute to reducing waste. Water-based paints are also a more eco-friendly choice.
- Creative Outlet and Stress Relief: Engaging in a simple, repetitive craft like painting patterns can be incredibly meditative and therapeutic. It’s a wonderful way to unwind, express creativity, and take a break from daily stresses. The satisfaction of seeing your design come to life is immensely gratifying.
- Adds Value to the Gift: A beautifully wrapped gift instantly feels more luxurious and thoughtfully chosen. The presentation sets the tone, hinting at the care that went into selecting the present itself. It transforms an ordinary item into a cherished treasure.
By choosing to craft your own XOXO gift wrap, you’re not just packaging a present; you’re creating an extension of your affection, a little piece of art that makes the act of giving and receiving all the more joyous.
Materials Needed To Make DIY XOXO Gift Wrap
One of the best aspects of this DIY project is its simplicity, requiring only a handful of readily available materials. You likely have most of these items lying around your home already! Here’s what you’ll need to gather:
- Paper for Wrapping:
- White Card Stock/Computer Paper: Ideal for smaller gifts, these provide a crisp, clean canvas for your XOXO design. Standard printer paper works perfectly and is widely accessible.
- Kraft Paper/Butcher Paper: For larger gifts or a more rustic, earthy aesthetic, rolls of kraft paper are an excellent choice. They are sturdy, inexpensive, and their natural brown tone offers a lovely contrast to colorful paints. Look for these at craft stores, stationery shops, or even online.
- Drawing Paper: If you need something sturdier than computer paper but prefer a lighter color than kraft, large sheets of drawing paper from an art supply store are a great option.
- Newsprint: An eco-friendly and very affordable option, newsprint provides a unique texture and can be painted over for an interesting background.
- DecoArt Paints (or similar acrylic/craft paints):
- Acrylic craft paints are perfect for this project due to their quick drying time, vibrant colors, and good coverage. You can choose any colors that suit your taste or the occasion.
- For a classic Valentine’s look: Red, pink, and white are traditional choices.
- For a modern twist: Metallics (gold, silver, rose gold), pastels, or even bold, contrasting colors can create stunning effects.
- Quantity: A few small bottles will be more than enough for several sheets of wrap.
- You’ll want a few small to medium-sized brushes with relatively firm bristles for clear, crisp lines.
- Flat brushes (1/4 to 1/2 inch): Excellent for creating the straight lines of the ‘X’ and defining the curves of the ‘O’.
- Round brushes (small to medium): Also good for the ‘O’ and for filling in colors if desired.
- You don’t need expensive art brushes; basic craft brushes work wonderfully.
With these simple materials, you’re all set to transform plain paper into a heartfelt, custom-designed gift wrap!
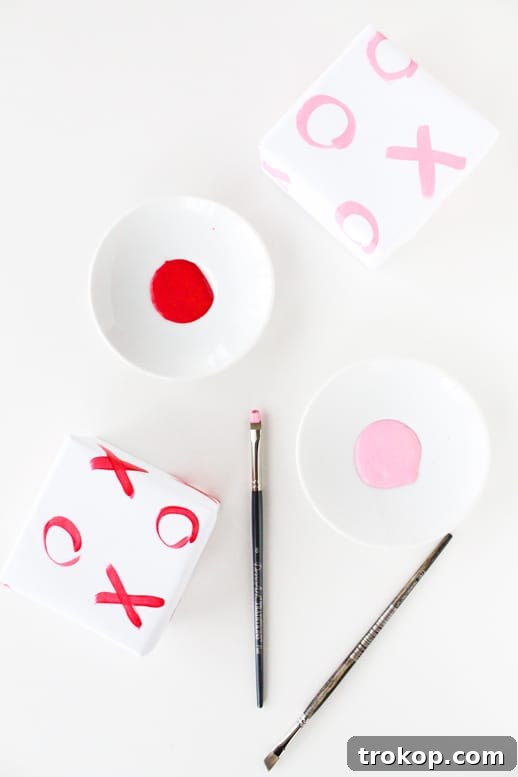
How To Make DIY XOXO Gift Wrap: A Step-by-Step Guide
This might be the simplest yet most effective wrapping paper you’ll ever create. Follow these straightforward steps to craft your personalized XOXO design:
Step 1: Prepare Your Workspace and Paper
First, lay down some old newspapers or a protective sheet to cover your work surface. This will guard against any paint spills. Unroll your chosen paper (computer paper, kraft paper, etc.) and smooth it out. If you’re using individual sheets, arrange them as needed. Ensure the paper is clean and free of creases for the best results.
Step 2: Set Up Your Paints
Squeeze a small amount of your chosen DecoArt paints onto your palette. Start with one or two colors. Remember, a little paint goes a long way, and you can always add more if needed. Have your water container and paper towels ready for cleaning brushes.
Step 3: Begin Painting the ‘X’s
Dip your paintbrush into the first color. Dab off any excess paint to prevent drips. To create an ‘X’, draw two intersecting diagonal lines. You can make them uniform or vary their size and angle for a more organic, hand-drawn look. Experiment with pressure to create thicker or thinner lines. Aim for a relatively consistent flow to keep your design cohesive.
Step 4: Add the ‘O’s
After painting a few ‘X’s, switch to a fresh brush (or rinse and dry your current one thoroughly) and dip it into your next color, or continue with the same color. To create an ‘O’, draw a simple circle. Again, you can make them perfectly round or slightly irregular. The charm of handmade wrap often lies in these subtle imperfections.
Step 5: Create a Repeating Pattern
Continue painting ‘X’s and ‘O’s all over your paper, aiming for a scattered, repeating pattern. You can alternate colors, vary the size of your letters, or even overlap them slightly for a layered effect. Don’t overthink it too much; the goal is a joyful, spontaneous design. Ensure there’s enough space between each “XOXO” pairing or individual letter so they don’t blend into an unidentifiable blob.
Step 6: Let It Dry Completely
Once you’ve finished painting your design, allow the paper to dry flat and undisturbed. Acrylic paints dry relatively quickly, usually within 15-30 minutes, but thicker applications might take longer. Ensure the paint is completely dry to the touch before handling or wrapping to prevent smudging. You can gently lift a corner to check.
Step 7: Wrap Your Gift
Once the paper is completely dry, it’s time to wrap your gift! Measure and cut the paper to fit your box or item like you would with any store-bought wrapping paper. Use tape to secure the edges.
Step 8: Embellish with Twine or Ribbon
Finally, tie your wrapped box with your chosen twine or ribbon. A simple bow or a decorative knot can add a polished finish. You can also add a handmade gift tag, sprig of greenery, or a small ornament for extra flair.
Pro Tip for Larger Gifts: If you need to wrap something a bit bigger than what computer paper allows, simply buy larger sheets of drawing paper or a roll of kraft paper from your local craft store. The process remains the same, just on a grander scale!
Creative Variations & Customization Tips for Your XOXO Wrap
While the basic XOXO design is charming on its own, there are countless ways to customize and enhance your DIY gift wrap to suit any occasion, recipient, or personal style. Unleash your creativity with these ideas:
Exploring Color Palettes
- Monochromatic Magic: Use varying shades of a single color (e.g., light pink, medium pink, dark pink) on white or kraft paper for a sophisticated and subtle effect.
- High Contrast: Opt for bold, contrasting colors like black and white, or navy and gold, for a striking modern look.
- Seasonal Hues: Adapt your colors to the season. Think pastels for spring, brights for summer, warm oranges and browns for autumn, and icy blues or metallics for winter holidays.
- Recipient’s Favorites: Choose colors you know the recipient loves, making the wrap even more personal.
Varying the Design Elements
- Size and Scale: Experiment with different sizes of X’s and O’s. You can have a mix of large, bold letters and tiny, delicate ones for added visual interest.
- Spacing: Play with the density of your pattern. A tightly packed design creates a busy, festive feel, while more sparse placement offers an elegant, minimalist touch.
- Brush Strokes: Don’t be afraid to experiment with your brushwork. You can create clean, crisp lines or embrace a looser, more painterly style with visible brushstrokes for an artistic flair.
- Layering Colors: Once the first layer of X’s and O’s is dry, add a second layer using a different color, slightly offset, to create a shadowed or layered effect.
Adding Embellishments (After Drying)
- Glitter Glam: While the paint is still wet, sprinkle fine glitter over some of your X’s and O’s for a sparkly finish. Alternatively, use glitter glue pens to add shimmering outlines once the paint is dry.
- Stamping Instead of Painting: If you prefer more uniform letters or want to involve younger crafters, use small X and O shaped stamps with an ink pad or paint.
- Texture with Puffy Paint: For a raised, tactile effect, use puffy paint pens to create your X’s and O’s.
- Mixed Media: Combine painting with other elements. Glue small sequins, beads, or even tiny dried flowers onto some of the O’s for a unique texture.
Beyond the XOXO Pattern
While “XOXO” is the star, the technique of hand-painting patterns can be applied to countless other designs:
- Polka Dots: Simple, classic, and always cheerful. Use the end of a paintbrush or a circular sponge for perfect dots.
- Stripes: Use painter’s tape to create crisp stripes, or freehand them for a more relaxed look.
- Hearts: Perfect for Valentine’s Day or expressing love.
- Stars or Celestial Motifs: Great for birthdays or anyone who loves the night sky.
- Simple Geometric Shapes: Triangles, squares, or squiggles can create modern abstract patterns.
- Personalized Initials: Instead of XOXO, paint the recipient’s initials or a short, meaningful word.
The key is to enjoy the process and let your imagination lead the way. Each custom-wrapped gift will carry a piece of your creativity and thoughtfulness, making it truly unforgettable.
Achieving the Perfect Presentation: Beyond the Wrap
The beauty of a gift isn’t solely in what’s inside, nor just in the paper that encases it. The overall presentation plays a crucial role in creating anticipation and excitement. Once your stunning DIY XOXO gift wrap is dry and your present is expertly folded and taped, elevate the entire package with thoughtful finishing touches.
The Art of Ribbon and Twine
- Classic Ribbons: Satin, grosgrain, or velvet ribbons in complementary colors can add a touch of elegance. A simple bow tied neatly on top or a criss-cross pattern around the package can make a significant difference.
- Rustic Twine: Natural jute or cotton twine offers a charming, rustic appeal that pairs beautifully with kraft paper. Experiment with multiple strands or adding a small, unexpected charm to the knot.
- Layering Textures: Combine a thin metallic ribbon with a wider fabric ribbon, or pair twine with a sheer organza ribbon for an interesting tactile experience.
Thoughtful Gift Tags
- Handwritten Tags: A handwritten note or message on a simple cardstock tag adds an incredibly personal touch. You can even hand-paint a small XOXO design on the tag to match the wrap.
- Die-Cut Shapes: Use a craft punch to create tags in interesting shapes like hearts, stars, or geometric forms.
- Natural Elements: Attach a small sprig of fresh rosemary, lavender, eucalyptus, or a tiny pinecone to the ribbon for a fragrant and visually appealing accent.
- Wax Seals: For an extra touch of sophistication and vintage charm, use a wax seal stamp over the ribbon or on a plain tag.
Beyond the Bow
- Small Ornaments or Charms: For holiday gifts, tie a small ornament or a decorative charm onto the ribbon. The recipient can then keep it as a keepsake.
- Dried Flowers: A few delicate dried flowers or a mini floral bouquet can transform a simple package into a work of art, especially fitting for spring or romantic gifts.
- Personalized Toppers: Consider custom-made toppers like mini pompoms, fabric flowers, or small printed photos relevant to the recipient.
- Bells or Whistles: For a playful touch, add tiny jingle bells or small confetti pouches.
Remember, the goal is to create a harmonious and appealing package that reflects the care and affection you hold for the recipient. These small details are often what make a gift truly memorable and show the effort you’ve invested in celebrating them.
More Inspiring Gift Wrap Ideas
If you’ve enjoyed crafting your XOXO gift wrap and are looking to explore further into the world of creative gift presentation, there’s a wealth of inspiration to discover. Transforming a gift into a work of art is a delightful process, and sometimes all it takes is a clever idea and a few simple materials. Here are some of our favorite DIY gift wrap projects from our archives to spark your imagination and help you make every gift extra special:
- Lip Patterned Gift Wrap: Perfect for a playful and romantic touch, this design is simple to create and adds a vibrant pop to any present. Think bold reds and pinks for a fun, flirty vibe.
- Fabric Wrapped Bouquet For Gifting: Move beyond paper and explore the elegance of fabric. This method adds a luxurious texture and can often be reused by the recipient, making it an eco-friendly and stylish choice for floral gifts.
- Faux Flower Gift Topper Stickers: Elevate plain wrapping paper with beautiful, easy-to-attach faux flower toppers. These stickers provide a three-dimensional element and can instantly transform a simple package into something exquisitely decorative.
- Fresh Flower Gift Box: For an unforgettable presentation, integrate fresh flowers directly into your gift box design. This natural embellishment offers fragrance, beauty, and a truly organic touch that is perfect for special occasions.
- Wood Veneer Confetti & Gift Tag Flags: Add a unique, rustic, and sophisticated touch with wood veneer elements. This project offers a different texture and an unexpected material to create memorable confetti and stylish gift tags.
Each of these ideas offers a unique way to personalize your gifts, showcasing your creativity and thoughtfulness. Experiment with different materials, textures, and techniques to find what truly resonates with your style and the recipient’s taste. The joy of giving is significantly enhanced when the presentation itself is a gift of art and effort.
Conclusion: Wrap Your Love with Creativity
Creating your own DIY XOXO gift wrap is more than just a craft; it’s an act of love, thoughtfulness, and personal expression. In a world saturated with generic options, a handmade touch truly stands out, transforming a simple present into a cherished memory. From selecting your paper and paints to carefully crafting each X and O, every step in this process infuses your gift with a unique story and a piece of your heart.
We hope this guide has inspired you to pick up a paintbrush and embark on your own creative journey. Whether it’s for Valentine’s Day, a birthday, an anniversary, or just because, the XOXO gift wrap is a versatile and endearing way to say “I care.” Remember, the beauty lies not in perfection, but in the effort and affection poured into every handmade detail. So go ahead, gather your materials, let your creativity flow, and wrap your next gift with all the hugs and kisses it deserves. Happy crafting!