
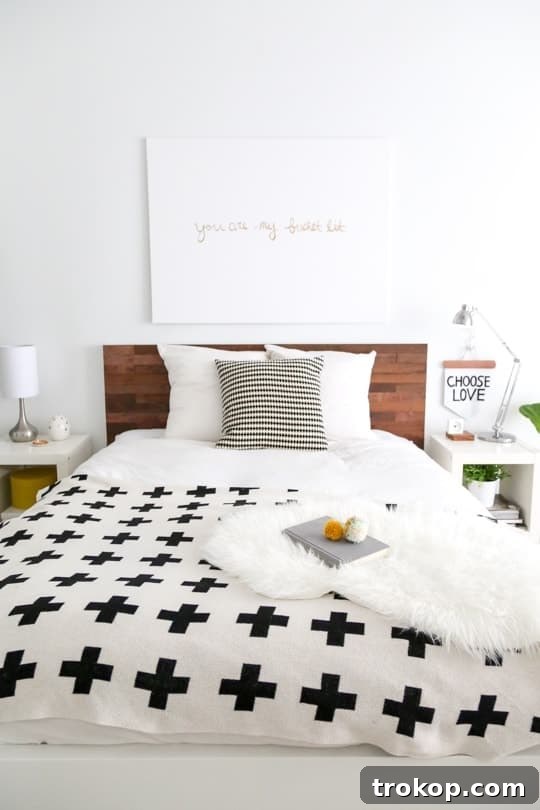
Transform your bedroom into a personalized sanctuary with this brilliant DIY headboard idea! Discover how a simple IKEA furniture piece, combined with the innovative ease of Stikwood panels, can create a stunning, custom focal point without breaking the bank or requiring extensive woodworking skills.
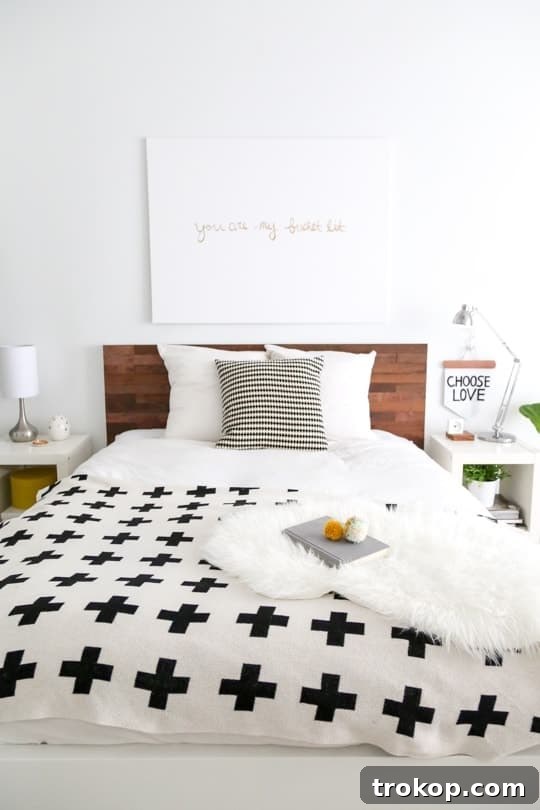
Are you yearning for a bedroom that truly reflects your style and personality, but feel limited by generic furniture options and steep prices? The good news is, you don’t need a huge budget or professional help to infuse character into your sleeping space. This guide introduces a remarkably simple yet impactful project: a DIY wooden headboard made from an IKEA bed frame and self-adhesive reclaimed wood panels.
IKEA has long been a go-to source for affordable and versatile furniture, and its pieces are renowned for their “hackability.” We love a good IKEA hack, and this DIY wooden headboard, featuring innovative adhesive wood, stands out as one of our favorites. It requires no messy drywall screws or complex carpentry, making it an ideal weekend project for anyone looking to upgrade their bedroom aesthetics with a touch of rustic elegance.
With just a few essential materials and a spark of creativity, you can transform an ordinary bed into a polished, unique centerpiece. Imagine waking up to the warmth and texture of real wood, adding a cozy, inviting atmosphere to your room. This project offers a fantastic opportunity to express your individuality and elevate your home decor effortlessly.
So, let’s embark on this exciting DIY journey. We’ll guide you through every step to create a one-of-a-kind headboard that will not only impress everyone who sees it but also provide you with immense satisfaction from a job well done. Get ready to personalize your bed frame and redefine your bedroom’s charm!
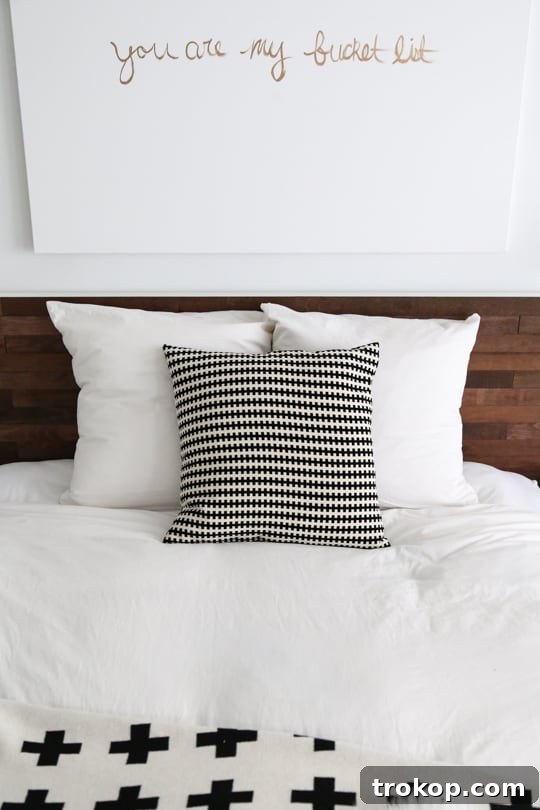
What is Stikwood? How Much Does It Cost?
Allow us to introduce you to the transformative power of Stikwood. This innovative product offers genuine reclaimed wood panels, pre-finished and equipped with an adhesive backing. Essentially, it provides the authentic, rustic charm of real wood without the need for complex woodworking skills, making it an ideal solution for DIY enthusiasts seeking a polished look with minimal effort.
Stikwood panels are crafted from real, reclaimed weathered wood, sustainably harvested right here in the US. This commitment to quality and environmental responsibility means it’s a premium product. While it might be pricier than standard MDF boards, typically ranging from $9-$15 per square foot, you are investing in a durable, authentic wood headboard at a fraction of the cost of custom-built furniture. The ease of installation and the genuine material make it an excellent value for a high-impact home improvement project.
Our creative minds are constantly buzzing with new applications for this ingenious material. Beyond headboards, Stikwood is incredibly versatile. We’ve previously used it to create a stunning DIY reclaimed wood accent wall in another bedroom, instantly adding depth and character. It even proved perfect for crafting a charming DIY folding table. Its peel-and-stick nature opens up a world of possibilities for adding warmth, texture, and a unique story to almost any surface in your home.
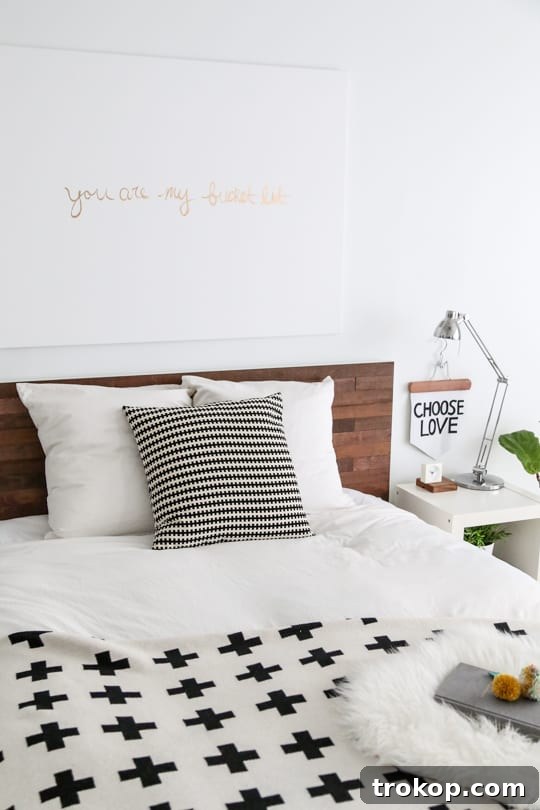
Materials and Tools Needed for Your DIY Wooden Headboard
Gathering your materials and tools is the first step towards creating your stunning new headboard. While this project is designed for ease, having the right supplies ensures a smooth and enjoyable process. Here’s everything you’ll need:
- IKEA Malm Bed Frame: This popular IKEA bed frame provides an excellent, sturdy base for our headboard hack. Its flat, clean surface is ideal for applying Stikwood panels. If you have a different bed frame with a solid, non-fabric headboard, it may also work beautifully.
- Stikwood Reclaimed Peel & Stick Wood Planks: We opted for just over 10 square feet of the Reclaimed Barrel Oak planks for our IKEA Malm queen bed. This quantity allowed for plenty of coverage and even some leftover pieces for future creative projects. Remember to measure the width and height of your specific headboard to ensure you order an adequate amount of Stikwood for complete coverage.
- Rotary Saw: Essential for precise trimming of the wood panels to fit your headboard dimensions perfectly. Its compact size and ease of use make it ideal for working with Stikwood’s thin profile.
- Measuring Tape: Accuracy is key in any DIY project. A reliable measuring tape will help you get precise measurements for your Stikwood panels.
- Clear Matte Polyurethane Finish or Spray Sealant: Since this headboard will be indoors, an interior-grade sealant is sufficient. This step protects the wood, enhances its durability, and prevents color transfer onto your pillows.
- Fine Sandpaper (Optional): For achieving an ultra-smooth finish and removing any slight imperfections or rough edges on the reclaimed wood. This ensures maximum comfort and prevents snags.
- Black Permanent Marker (Optional): A clever trick for adding visual depth and dimension between panels, especially if you prefer a look that isn’t perfectly flush.
How to Create Your Stikwood IKEA Headboard Hack
Ready to transform your bed? Follow these easy steps to craft a beautiful and unique wooden headboard using Stikwood panels and your IKEA bed frame. Precision and careful application are key to a flawless finish.
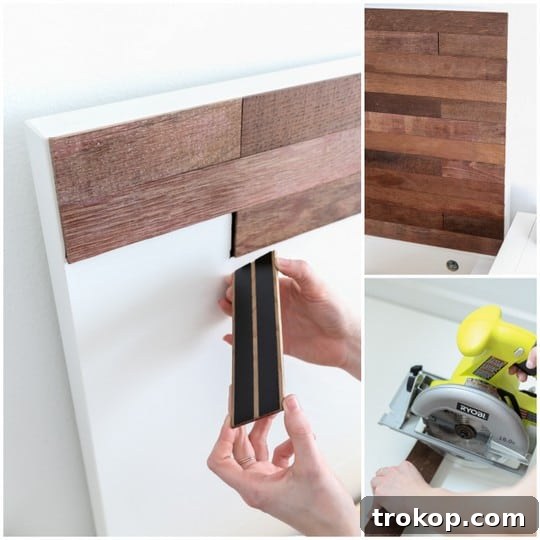
- **Measure and Mark Your Stikwood Panels:** Begin by measuring the exact width of your headboard. The dimensions of Stikwood panels can vary slightly depending on the finish you choose, so always measure individual pieces if necessary. If you’re using the IKEA Malm queen bed with Reclaimed Barrel Oak panels, like us, each row of panels should measure approximately 66 1/8 inches across. Use a pen to clearly mark your cutting lines on the back of each wood panel. For our design, we used two full-length Stikwood pieces per row and then cut a smaller piece, about 4 1/4 inches wide, to complete the row. This variation in piece size adds visual interest and a more authentic reclaimed look.
- **Trim the Panels to Size:** With your measurements marked, use your rotary saw to carefully trim the Stikwood panels to match the headboard’s width. Working with Stikwood is remarkably easy because of its lightweight and thin nature, making precise cuts achievable even for beginners. Always prioritize safety when using power tools.
- **Apply Stikwood Panels to the Headboard:** This is where the magic happens! Peel off the protective backing from a Stikwood panel. Position the panel carefully on the face of the headboard, starting from one edge and working your way across. Press down firmly along the entire length of the panel to ensure strong adhesion. For our design, we alternated the placement of the smaller cut piece in each row to create a dynamic, varied pattern. Because Stikwood is made from real reclaimed wood, not all pieces will fit perfectly flush together. To ensure the best alignment, we highly recommend dry-fitting each row before peeling off the adhesive backing. This allows you to arrange the pieces, adjust as needed, and ensure a cohesive look before committing to placement.
- **Optional: Smooth the Surface with Sandpaper:** For an extra touch of refinement and comfort, lightly sand any rough edges or areas on the wood panels using fine sandpaper. This optional step ensures that your pillows won’t snag on the surface and provides a wonderfully smooth finish that enhances the tactile appeal of the headboard.
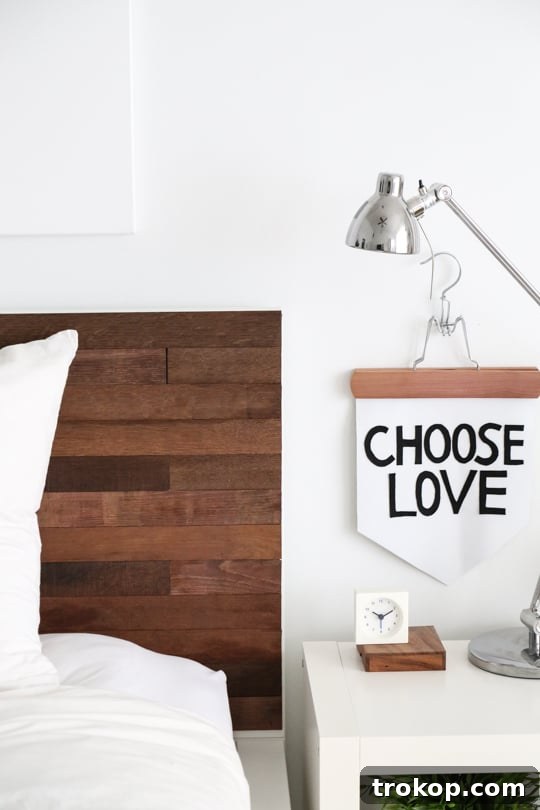
- **Optional: Enhance Dimension with a Permanent Marker:** If you desire a headboard with more visual depth and character, rather than a perfectly seamless look, grab your black permanent marker. Use the marker to draw a thin line along the edges where two panels meet, especially if there’s a small, intentional gap. This trick, visible in many of our tutorial photos, creates the illusion of deeper grooves and accentuates the individual planks, giving your headboard a more robust, dimensional appearance.
- **Seal the Headboard with Polyurethane Finish:** Once all the Stikwood panels are securely in place and you’ve completed any optional steps, it’s time to protect your masterpiece. Apply the clear matte polyurethane wood finish to the entire surface of the headboard. You can either spray it on for an even coat or paint it with a brush. Allow the finish to dry completely according to the product instructions. This crucial step not only protects the wood from wear and tear but also prevents any potential color from the reclaimed wood rubbing off onto your bedding or pillows, ensuring your beautiful new headboard remains pristine for years to come.
And there you have it! A beautifully customized, rustic, and stylish DIY wood headboard, ready to elevate your bedroom aesthetic.
Will This Tutorial Work for Any Bed Frame?
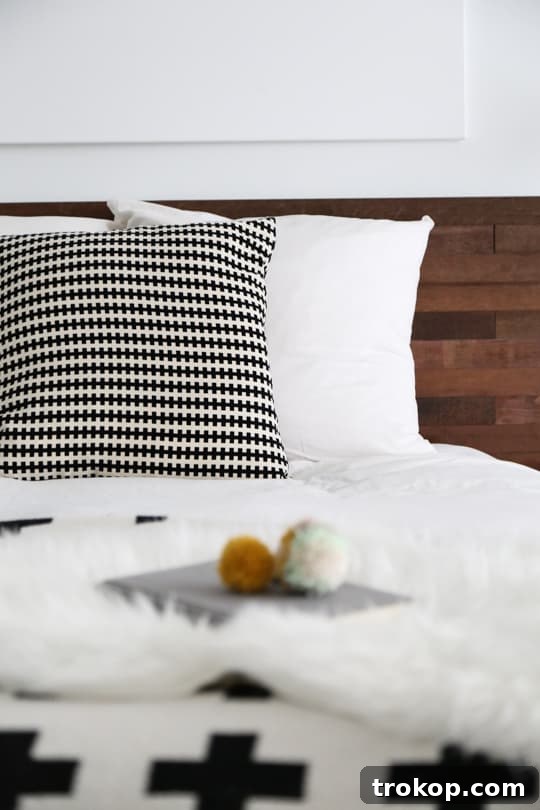
Absolutely! While our specific example features an IKEA Malm bed, the beauty of this headboard hack lies in its adaptability. This method can successfully transform any bed frame that already includes a solid, non-fabric headboard. The Stikwood panels adhere effectively to most smooth, flat surfaces, making it a versatile upgrade for various existing bed designs. Always ensure the surface is clean and dry before application for optimal adhesion.
What if your bed doesn’t have a headboard at all? No problem! You can still achieve this stunning look by creating a freestanding wooden headboard. Simply mount the Stikwood panels directly onto a wall behind your bed. This approach allows you to customize the height and width to your exact preference, creating a dramatic accent wall that doubles as a unique headboard, completely independent of your bed frame.
Do I Need Additional Nails or Adhesive Glue?
One of the most appealing aspects of this IKEA bed hack is its simplicity and self-contained nature. You do not need any additional nails or separate adhesive glue. The genius of Stikwood lies in its high-quality, pre-applied adhesive backing. This industrial-grade adhesive is engineered for long-lasting performance, with a bond that is designed to hold securely for over 10 years when applied correctly.
Furthermore, there’s no need for time-consuming surface preparation like pre-sanding. As long as your existing headboard surface is clean, dry, and relatively smooth, the Stikwood panels will adhere firmly and reliably. This eliminates extra steps, reduces mess, and significantly speeds up the project, allowing you to enjoy your new headboard sooner.
More Easy IKEA Hacks to Inspire You
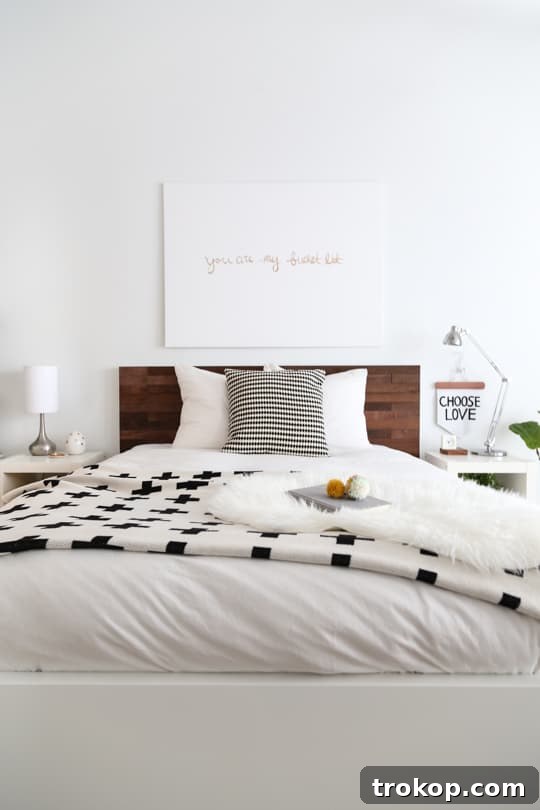
Initially, we thought we might miss our all-white bed frame, but the addition of this stunning wooden headboard completely transformed our bedroom. It instantly infused the room with a much cozier and inviting atmosphere, especially when paired with our plush white shag rug and favorite cozy blanket. The warmth and texture of the reclaimed wood are truly transformative, making the space feel more personal and luxurious.
If you’ve enjoyed this project and are eager for more creative ways to personalize your home with affordable IKEA pieces, you’re in luck! We love finding clever solutions to elevate everyday furniture. Explore our other favorite home decor DIY projects below for more inspiration and easy-to-follow guides:
- DIY Vanity IKEA Hack
- DIY Rattan Drawers
- DIY Floating Credenza
- DIY IKEA Daybed

DIY Wooden Headboard with Stikwood: Project Guide
We’re livening up your bedroom, one reclaimed headboard at a time with this simple DIY transformation. This project delivers a high-impact style upgrade with minimal effort, perfect for adding a touch of rustic charm to your personal space.
Total Time: 1 hr 30 mins
Course: DIY | Category: Bedroom
Equipment
- Rotary saw
- Measuring tape
- Black permanent marker (optional)
- Fine sandpaper (optional)
Materials
- 1 box Stikwood (we used Reclaimed Barrel Oak)
- 1 IKEA Malm bed frame (or any bed frame of your choice with a solid headboard)
- 1 clear matte polyurethane finish (spray or paint)
Instructions
- Measure the individual Stikwood panels to match the width of your headboard. Stikwood panel dimensions can vary by finish. For an IKEA Malm queen bed with Reclaimed Barrel Oak, aim for rows that are 66 1/8 inches across. Mark these measurements on the back of the wood panels. For a varied look, we used two full-length pieces and one 4 1/4-inch piece per row.
- Using a rotary saw, carefully trim the marked panels to fit the headboard’s width. Stikwood planks are thin and lightweight, making them easy to cut.
- Peel the adhesive backing off each Stikwood panel. Carefully and firmly press the wood panels onto the face of the headboard. Alternate the placement of the smaller pieces to create a dynamic pattern. It’s easiest to start from one edge and work your way across. Since Stikwood is made from real reclaimed wood, not all pieces will fit identically; test each row’s arrangement before peeling the adhesive to ensure proper alignment.
- Optional: For a perfectly smooth finish, lightly sand any rough areas on the wood. This prevents pillows from snagging on the surface.
- Optional: To achieve a more dimensional look where pieces don’t fit perfectly flush, use a black permanent marker to color in a small line between two pieces. Then, leave a slight gap, as demonstrated in our large tutorial photo.
- Once the entire headboard is covered, apply the polyurethane wood finish (spray or paint) to the entire surface. Allow it to dry completely. This step seals the wood, protects it, and prevents the color from transferring onto your pillows.
Notes
- The estimated cost for Stikwood is based on a full box. You will likely not use the entire box for this specific DIY project (we used roughly half).
Cost: $150 + bed frame
Keywords: diy wooden headboard, ikea headboard hack, stikwood headboard, reclaimed wood

43 Top Amazon Wall Decor Ideas for Every Room in Your Home
Find gorgeous Amazon wall decor that makes a big impact…
Continue Reading43 Top Amazon Wall Decor Ideas for Every Room in Your Home
28 Decorative Wall Mirrors You’ll Wish You Bought Sooner
Looking for the perfect wall mirror? Explore our roundup of…
Continue Reading28 Decorative Wall Mirrors You’ll Wish You Bought Sooner
19 Unique & Easy Houseplants that We’re Loving
Looking for unique house plants? Dive into our guide to…
Continue Reading19 Unique & Easy Houseplants that We’re Loving
60 Amazon Bedroom Decor Picks to Revamp Your Room
Discover the best Amazon bedroom decor items to create a…
Continue Reading60 Amazon Bedroom Decor Picks to Revamp Your Room