
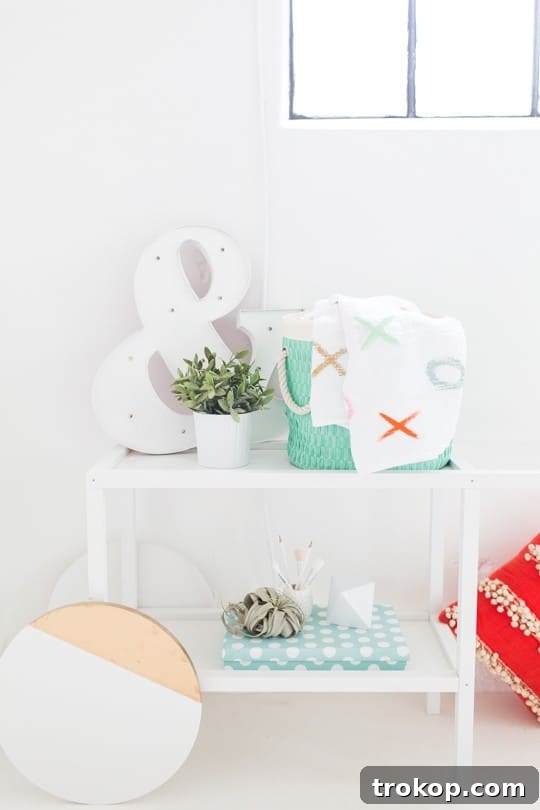
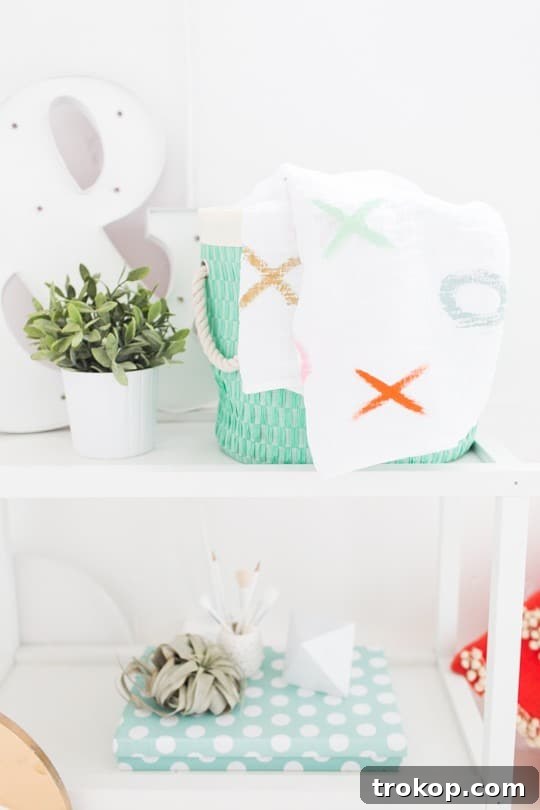
Craft Your Own Hugs & Kisses: The Ultimate DIY XOXO Throw Blanket Guide
Photos by Jared Smith
There’s something uniquely special about a handmade item, especially when it’s crafted with love and care. In the realm of home decor, a cozy throw blanket instantly adds warmth, texture, and personality to any space. But what if you could create a throw blanket that not only offers comfort but also conveys a heartfelt message? Enter the DIY XOXO throw blanket – a charming and surprisingly simple project that allows you to infuse your personal touch into a functional piece of art.
Whether you’re looking to enhance your living room aesthetic, find the perfect personalized gift for a loved one, or simply indulge in a rewarding craft project, making an XOXO blanket is an excellent choice. It’s a project that speaks volumes, symbolizing hugs and kisses, warmth, and affection. This guide will walk you through the journey of creating your very own, offering inspiration and practical tips to ensure your blanket is as beautiful as it is meaningful.
Why Choose a DIY XOXO Throw Blanket?
The appeal of a DIY XOXO throw blanket extends far beyond its visual charm. It embodies a multitude of benefits that make it a superior choice over store-bought alternatives:
- Personalized Touch: You get to choose the colors, fabrics, and exact design, ensuring it perfectly matches the recipient’s style or your home’s decor. This level of customization is unparalleled.
- Meaningful Gifting: A handmade gift carries an inherent value that a purchased item often lacks. The XOXO motif makes it an ideal present for anniversaries, birthdays, Valentine’s Day, baby showers, or just to show someone you care. It’s a tangible representation of your affection.
- Cost-Effective: Crafting a blanket yourself can often be more budget-friendly than buying a high-quality throw, especially if you take advantage of fabric sales.
- Therapeutic Crafting: Engaging in DIY projects can be incredibly relaxing and satisfying. The process of creating something beautiful with your own hands offers a wonderful sense of accomplishment and stress relief.
- Unique Home Accent: Stand out from the crowd with a truly unique piece of home decor. Your XOXO blanket will be a conversation starter and a testament to your creativity.
Understanding the XOXO Symbolism
The “XOXO” motif is universally recognized as a symbol of “hugs and kisses.” It’s a simple yet powerful way to express affection and warmth. Incorporating this into a blanket elevates it from a mere functional item to a comforting embrace. This symbolism makes the XOXO blanket particularly versatile for various occasions:
- Romantic Gestures: Perfect for partners, expressing continuous affection.
- Family Comfort: A lovely way to show love to children, parents, or siblings.
- New Arrivals: An adorable and practical gift for welcoming a new baby, such as the inspiration found in Chelsea’s DIY XOXO throw blanket project, demonstrating the enduring charm of such a thoughtful gesture for a new little one.
- Friendship Tokens: A heartfelt present for close friends.
The beauty of the XOXO design lies in its timeless appeal and its ability to transcend specific holidays, making it a beloved addition to any home year-round.
Materials You’ll Need for Your DIY XOXO Blanket
While specific materials can vary based on your chosen method (sew or no-sew), here’s a general list to get you started on a popular and accessible version, like a fleece XOXO blanket:
- Fabric:
- Main Blanket Fabric: Approximately 1.5 to 2 yards of soft, cozy fabric like fleece, minky, flannel, or sherpa. Choose a solid color or a subtle pattern that will allow your XOXO design to pop.
- XOXO Design Fabric: About 0.5 to 1 yard of a contrasting fabric for the “X” and “O” letters. Felt, fleece, or minky in a complementary or contrasting color work wonderfully.
- Cutting Tools: Sharp fabric scissors or a rotary cutter with a cutting mat.
- Measuring Tools: A long ruler or yardstick and a fabric measuring tape.
- Marking Tools: Fabric marker or tailor’s chalk.
- Adhesive/Attachment (No-Sew Option): Fabric glue suitable for your chosen fabric types, or fusible web for iron-on appliqué.
- Sewing Supplies (Sew Option): Sewing machine, coordinating thread, pins, and hand-sewing needle (for touch-ups).
- Optional: Stencils for “X” and “O” letters, or printer and paper to create your own templates.
Step-by-Step Guide to Crafting Your XOXO Throw Blanket
Let’s dive into the creative process. This guide provides a versatile approach, allowing for either a no-sew or a simple-sew method for attaching your XOXO design.
Phase 1: Fabric Preparation
- Wash and Dry Fabric: Pre-wash and dry all your fabrics according to their care instructions. This helps prevent future shrinking and ensures your finished blanket remains its intended size.
- Cut Main Blanket Fabric: Lay your main blanket fabric flat and smooth it out. Trim the edges to ensure they are straight and even. A standard throw blanket size can range from 50×60 inches to 60×70 inches, but feel free to adjust to your desired dimensions.
- Prepare Edges (No-Sew Fringe Option): If you’re making a no-sew fleece blanket with a fringe, cut 1-inch wide by 4-5 inch long strips along all four edges of the main blanket fabric, creating fringes. You will later tie these fringes together.
Phase 2: Creating the XOXO Design
- Design Your Letters:
- Templates: Print out large “X” and “O” letters from your computer (choose a bold, simple font) or purchase stencils. Ensure they are proportional to your blanket size. A good starting point is letters that are 8-12 inches tall.
- Trace onto Fabric: Lay your contrasting XOXO design fabric flat. Using your fabric marker or chalk, carefully trace your “X” and “O” templates onto the fabric. Decide on the number of Xs and Os you want for your blanket, usually alternating “X O X O” across the blanket.
- Cut Out Letters: Precisely cut out all your traced “X” and “O” letters. Take your time to ensure clean edges, as this will significantly impact the final look of your design.
- Arrange Letters on Blanket: Lay your main blanket fabric flat again. Arrange your cut-out “X” and “O” letters onto the blanket surface. Experiment with spacing and placement until you are happy with the layout. A common arrangement is to center them horizontally and distribute them evenly vertically.
Phase 3: Attaching the XOXO Design
Now, it’s time to permanently affix your design. Choose the method that best suits your skills and desired finish:
- No-Sew Method (Fabric Glue or Fusible Web):
- Fabric Glue: Apply a thin, even layer of fabric glue to the back of each “X” and “O” letter. Carefully press each letter onto its designated spot on the main blanket fabric. Smooth out any wrinkles or bubbles. Allow ample time for the glue to dry completely, following the manufacturer’s instructions, typically 24-72 hours.
- Fusible Web: If using fusible web (like HeatnBond), trace your letters onto the paper side of the fusible web, iron it onto the back of your XOXO fabric, cut out the letters, peel off the backing, and then iron them onto your main blanket fabric. This creates a secure bond without sewing.
- Sew Method (Appliqué):
- Pin Letters: Carefully pin each “X” and “O” letter in place on the main blanket fabric.
- Machine Stitch: Using your sewing machine and a matching or contrasting thread, stitch around the perimeter of each letter. You can use a straight stitch for a clean look, or a zigzag stitch for a decorative and more secure appliqué finish. Go slowly and carefully, especially around curves.
- Hand Stitch (Optional): For extra durability or if you prefer the look, you can hand-stitch around the edges of the letters using a small blanket stitch or whipstitch.
Phase 4: Finishing the Blanket Edges
- No-Sew Fringe: If you created fringe strips in Phase 1, take two corresponding top and bottom fringes and tie them together with a double knot. Repeat this process around the entire perimeter of the blanket. This creates a charming, rustic edge.
- Sewn Hem: If you prefer a more refined edge, fold the raw edges of your main blanket fabric over by about 1/2 inch, press, then fold over again by another 1 inch to create a double-fold hem. Pin in place and machine stitch around the entire perimeter of the blanket.
- Binding (Optional): For an even more polished look, you can add a fabric binding around all four edges of the blanket. This is a more advanced technique but results in a very professional finish.
Tips for a Perfect XOXO Throw Blanket
- Fabric Choice is Key: Always choose soft, comfortable fabrics for a throw blanket. Consider the climate – lighter fabrics like flannel for warmer areas, heavier fleece or sherpa for colder regions.
- Measure Twice, Cut Once: This old adage holds true, especially for your “X” and “O” letters. Precision makes a difference.
- Pre-test Adhesives: If using fabric glue, test a small amount on scrap pieces of your chosen fabrics to ensure good adhesion and no discoloration.
- Personalize Further: Add a small, embroidered tag with a special date, names, or a short message.
- Care Instructions: Always include care instructions for your finished blanket. Generally, gentle machine wash on cold and tumble dry low is recommended for most fleece or cotton blankets.
Styling Your XOXO Blanket in Your Home
Once complete, your XOXO blanket isn’t just a craft project; it’s a statement piece. Here’s how to style it:
- Living Room Focal Point: Drape it over the arm of a sofa or the back of an armchair. The XOXO design will instantly draw the eye and add a playful yet sophisticated touch.
- Bedroom Comfort: Fold it neatly at the foot of your bed or across a decorative pillow for an extra layer of warmth and visual appeal.
- Nursery Charm: An XOXO blanket is a perfect addition to a nursery, providing a soft spot for cuddles and a loving message.
- Outdoor Oasis: Bring it out on cooler evenings for patio or porch lounging, adding a touch of personalized comfort to your outdoor spaces.
The Joy of Giving and Receiving a Handmade Gift
In a world saturated with mass-produced goods, a handmade gift stands out. It’s an investment of time, creativity, and love. When you gift an XOXO throw blanket, you’re not just giving a cozy item; you’re giving a piece of yourself, a warm embrace, and a lasting reminder of your affection. The recipient will cherish the thought and effort behind such a unique and personal present.
So, gather your materials, unleash your creativity, and embark on the delightful journey of creating your very own DIY XOXO throw blanket. The result will be a beautiful, cozy, and heartfelt creation that brings smiles and comfort for years to come. Happy crafting!