
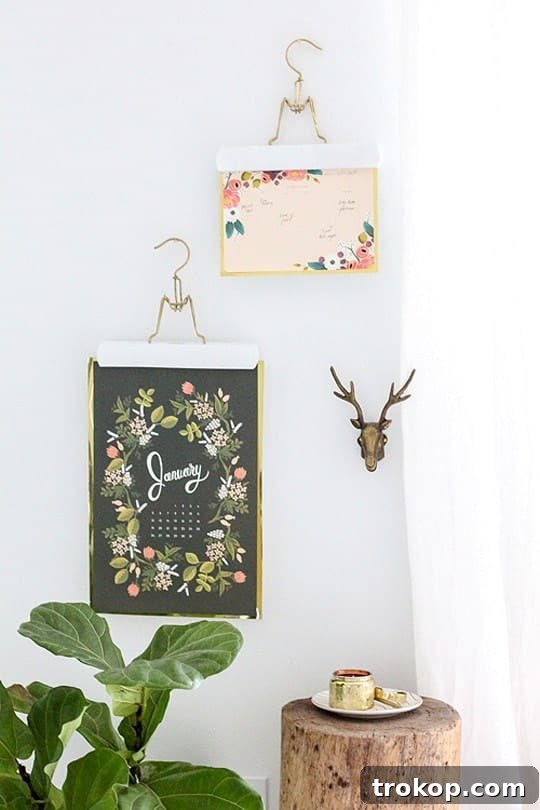
DIY Metallic Calendar Hangs: An Anthropologie-Inspired Home Decor Transformation
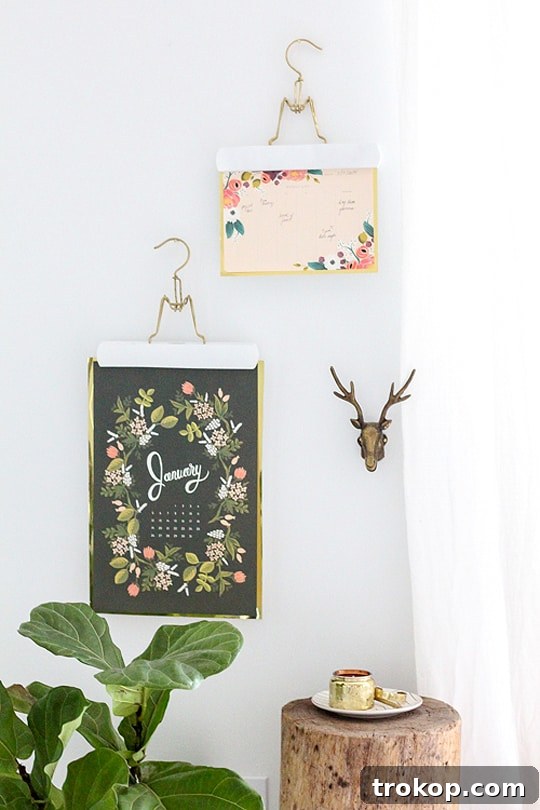
There are certain moments in life when an opportunity arises that leaves you feeling utterly thrilled, buzzing with excitement and a flutter of butterflies. For me, one such moment was the incredible chance to create a unique DIY project for none other than Anthropologie, a brand I’ve admired and adored for as long as I can remember. Their unique aesthetic, blend of vintage charm and modern sophistication, has always captivated my imagination, making this collaboration a dream come true.
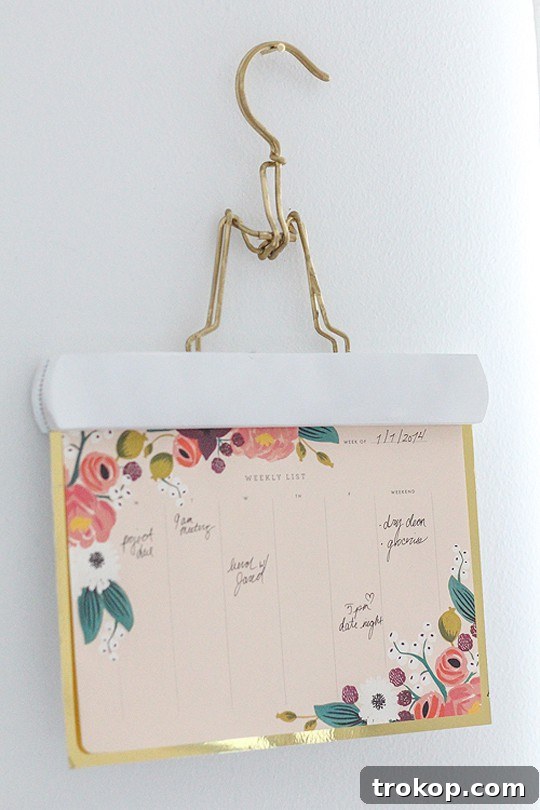
This post delves into the inspiration, the joy of creation, and the magic behind crafting your very own DIY Metallic Calendar Hangs. It’s a project that brings a touch of Anthropologie’s signature style into your home, allowing you to personalize your space with a functional piece of art that sparkles. While you can find the comprehensive, step-by-step tutorial and all the insider tips on how I brought these metallic calendar hangs to life directly on their blog, consider this your ultimate guide to understanding the beauty and simplicity of this enchanting DIY.
The Allure of Metallic Decor: Inspired by Anthropologie’s Unique Aesthetic
Anthropologie has a knack for infusing spaces with personality and warmth, often through unexpected textures, intricate patterns, and captivating metallic accents. Their displays and product selections frequently feature shimmering elements that catch the light and add an instant touch of glamour and sophistication. It’s this very aesthetic that served as the primary muse for our DIY metallic calendar hangs. The idea was to capture that distinctive Anthropologie charm – a blend of handcrafted appeal with a chic, polished finish – and make it accessible for anyone to recreate.
Metallic finishes, whether gold, silver, copper, or rose gold, have a timeless appeal in interior design. They reflect light, add depth, and can instantly elevate a room from ordinary to extraordinary. Beyond their visual appeal, metallics offer incredible versatility. They can complement a minimalist design, add a touch of luxury to a bohemian setting, or bring a contemporary edge to traditional decor. For this project, we harnessed the power of metallics to transform simple calendar pages into dazzling wall art, blending functionality with high-end style.
Why Embrace DIY? The Joy of Personalized Home Decor
In a world of mass-produced items, the act of DIY offers a refreshing antidote. Creating something with your own hands brings a unique sense of satisfaction and allows for unparalleled personalization. When you choose to embark on a DIY home decor project, you’re not just making an item; you’re infusing it with your personality, your vision, and a piece of your story. This metallic calendar hang project is a prime example of how a simple craft can yield stunning results, adding character and warmth to your living space.
Beyond the personal gratification, DIY projects often prove to be incredibly budget-friendly. Achieving an Anthropologie-inspired look can sometimes come with a hefty price tag, but with a bit of creativity and a few accessible materials, you can replicate that coveted style without breaking the bank. This project demonstrates how inexpensive items can be transformed into bespoke pieces that look far more expensive than they actually are, proving that stylish home decor doesn’t have to be unattainable.
Crafting Your Own Sparkle: DIY Metallic Calendar Hangs Explained
The concept behind these metallic calendar hangs is delightfully simple yet incredibly impactful. We take the often-overlooked pages of a calendar – perhaps last year’s beautiful botanical calendar or one with stunning typographic designs – and give them a glamorous new life. Instead of discarding them, we transform them into a rotating display of art, each month offering a fresh visual feast. The metallic elements tie everything together, adding that touch of chic sophistication that we adore.
Essential Materials for Your Metallic Wall Art Project
While the full, detailed list is on Anthropologie’s blog, here’s a general idea of what you might need to gather for your DIY metallic calendar hangs:
- Calendar Pages: Choose pages with designs you love. Monthly art calendars, botanical prints, or even personal photos printed on sturdy paper can work wonderfully.
- Metallic Spray Paint: Gold, copper, rose gold, or silver – select your favorite shade to achieve the desired metallic finish. Ensure it’s suitable for the materials you’re using.
- Wooden Dowels or Thin Rods: These will serve as the top and bottom supports for your hangings, giving them structure and a polished look.
- Twine or Decorative Cord: For suspending your wall hangings. Choose a color and material that complements your metallic theme.
- Small Clips or Magnets: To attach the calendar pages to the dowels. Binder clips, bulldog clips, or strong decorative magnets can be used.
- Strong Adhesive: Craft glue or a hot glue gun to secure components.
- Craft Knife or Scissors: For precise cutting if needed.
- Measuring Tape or Ruler: For accuracy in sizing.
- Protective Drop Cloth or Cardboard: Essential for spray painting to protect your work surface.
Step-by-Step Guide to Creating Your Masterpiece
Once you’ve gathered your supplies, the magic truly begins. The process is straightforward, making it an ideal project for beginners and seasoned DIYers alike. Here’s a generalized outline of the steps:
- Preparation is Key: Begin by carefully selecting the calendar pages you wish to use. Trim any unnecessary edges to achieve a clean look. If using wooden dowels, ensure they are cut to the appropriate length, slightly wider than your calendar pages.
- The Metallic Transformation: Lay your wooden dowels (and any clips or small elements you wish to metallize) on a protected surface in a well-ventilated area. Apply several light, even coats of your chosen metallic spray paint, allowing each coat to dry thoroughly according to the manufacturer’s instructions. This creates that beautiful, lustrous finish.
- Assembling the Hanger Structure: Once the painted components are completely dry, it’s time to assemble. Attach the painted dowels to the top and bottom edges of your chosen calendar page. Depending on your design, you might use strong adhesive to secure the paper around the dowels, or use metallic clips that have also been spray-painted for a cohesive look.
- Adding the Hanging Mechanism: Cut a length of decorative twine or cord to your desired hanging length. Securely tie or glue each end of the cord to the top dowel, ensuring the knot is sturdy and discreet. This loop will be used to hang your metallic art on the wall.
- The Finishing Touches: Step back and admire your creation! Ensure everything is securely fastened. You might want to add small weights to the bottom dowel to ensure the calendar page hangs perfectly flat, especially if using lighter paper.
Tips for Personalizing Your Metallic Wall Decor
While the metallic calendar hang offers a specific aesthetic, there’s ample room for personalization to truly make it your own. Consider these ideas to infuse your unique style:
- Color Variations: Don’t limit yourself to traditional gold or silver. Experiment with rose gold for a softer, romantic vibe, or even a bold metallic blue or green for a modern, unexpected twist.
- Mixed Materials: Instead of plain wooden dowels, explore copper pipes or acrylic rods for a different texture and shine.
- Beyond Calendars: This hanging technique isn’t just for calendars. Use beautiful art prints, pressed botanicals, fabric swatches, or even framed quotes to create a similar stunning effect.
- Layering and Grouping: Create a gallery wall by making several metallic hangs of varying sizes and hanging them together. This adds visual interest and a grander statement.
- Embellishments: Consider adding small tassels, beads, or charms to the bottom dowel or along the hanging cord for an extra touch of flair.
Integrating Your New Decor into Your Home
Your newly crafted DIY metallic calendar hang can find a home in almost any room. In a home office, it provides a chic way to keep track of dates while adding inspirational art. In a living room, it can serve as a focal point, drawing the eye with its shimmering details. Consider hanging it in an entryway to welcome guests with style, or in a bedroom to add a touch of tranquil elegance. Its versatile design means it can complement various decor styles, from Scandinavian minimalist to bohemian chic, or even industrial modern, depending on your chosen metallic finish and calendar art.
More Than Just a Calendar: A Statement Piece
These metallic wall hangs transcend their initial purpose as mere calendar holders. They become sculptural art pieces that bring light, texture, and a sense of curated style to your home. Each month, as you rotate the calendar page, you’re essentially refreshing your wall art, keeping your decor dynamic and engaging. It’s a sustainable approach to decorating, giving new life to beautiful imagery that might otherwise be discarded.
As I reflect on the incredible experience of collaborating with Anthropologie, I’m reminded that creativity truly knows no bounds. This project was not just about making something beautiful; it was about connecting with a brand I admire and sharing a piece of that inspiration with others. The feeling of seeing your creation come to life, especially when it resonates with the aesthetic of a beloved store, is truly unmatched.
I hope this deep dive into the DIY Metallic Calendar Hangs has inspired you to pick up some metallic spray paint and start crafting. It’s an accessible project that promises significant visual impact and personal satisfaction. Do yourself a favor and get the complete tutorial, with all the specific details and insider tips, directly from the Anthropologie blog. You won’t regret embarking on this sparkling journey!
In the meantime, as I fly to the east coast today for some exciting new projects, trying to stay warm amidst this arctic-style weather (what a contrast to shimmering metallics!), remember to stay safe and get ready for more fun content coming your way this week. Happy crafting!