
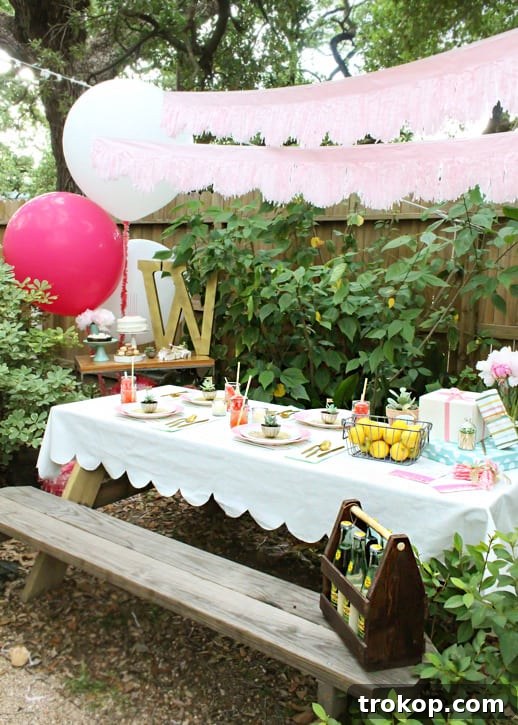
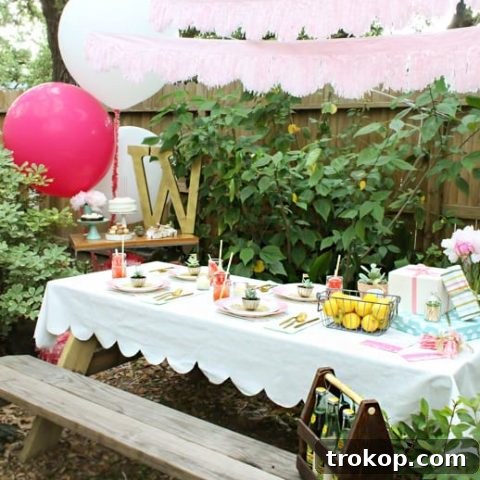
Transform your dining area or event space with a touch of timeless elegance! Learning how to make your own **DIY Scalloped Tablecloth** is surprisingly simple and requires no sewing skills at all. All you need are a pair of sharp scissors, an old canvas drop cloth (or any suitable fabric panel), and a spark of creativity. This project is a wonderfully charming and affordable way to instantly elevate your table setting, adding a bespoke flair that will impress your guests and bring unique character to your home decor. Say goodbye to plain, uninspired table covers and hello to custom, handcrafted beauty!
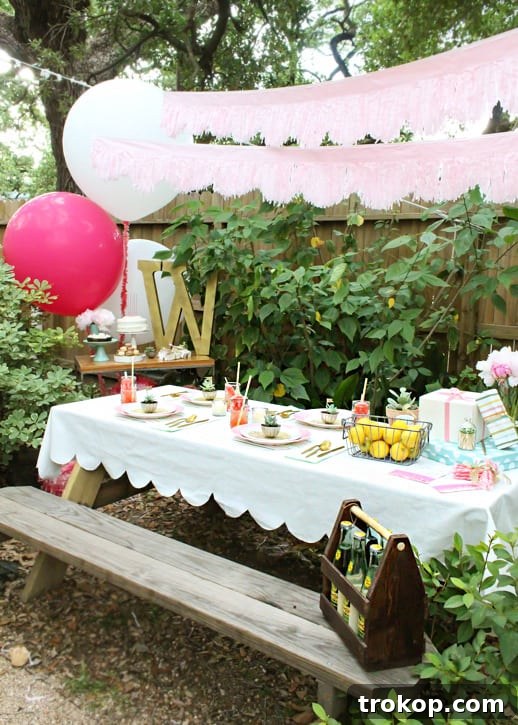
Scalloped designs have a captivating way of adding softness, sophistication, and a hint of playful whimsy to any item, from fashion to home furnishings. If you’ve been admiring the resurgence of this delightful wavy pattern in interior design, you’re in luck! This comprehensive guide will walk you through creating a stunning scalloped tablecloth that’s perfect for infusing a touch of refinement into any occasion. Whether you’re planning a grand dinner party, hosting a casual brunch, or simply want to refresh your everyday dining experience, this beginner-friendly project is a must-try. The absolute best part? It’s incredibly quick, taking approximately 20-30 minutes from start to finish, making it an ideal choice for last-minute decorating or for those who prefer quick gratification in their DIY endeavors.
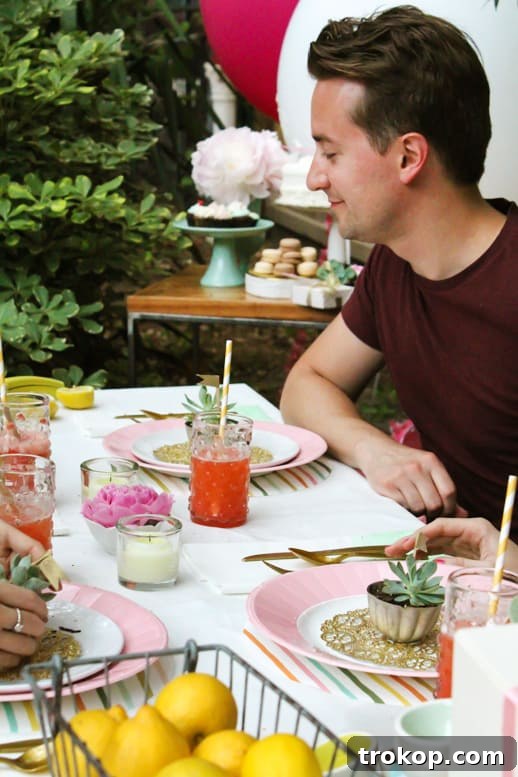
Table of Contents
Why A Scalloped Tablecloth Is Your Next DIY Project
The allure of a scalloped tablecloth lies in its unparalleled ability to blend classic charm with a playful, yet refined, modern aesthetic. Unlike traditional straight-edged tablecloths, the soft, undulating curves of a scalloped edge introduce a unique visual interest that immediately captures attention. This design choice instantly transforms a plain table into a captivating focal point, adding texture, dimension, and a sense of handcrafted luxury to any room. Scallops often evoke a feeling of nostalgia, reminiscent of vintage textiles, antique lace, and timeless interior design, yet they remain incredibly relevant and sought-after in contemporary decor trends. They are perfectly suited for creating a warm, inviting atmosphere, making your space feel more personal and demonstrating an impressive attention to detail that truly elevates your hosting style.
The Many Benefits Of This No-Sew DIY
Embarking on this particular DIY scalloped tablecloth project offers a plethora of practical and creative advantages:
- Absolutely No Sewing Required: This is, without a doubt, one of the most appealing features of this project! If you’ve ever felt intimidated by sewing machines, lacked the necessary equipment, or simply prefer projects that don’t involve needle and thread, this DIY is tailor-made for you. All the transformative magic happens with just a pair of scissors and a little careful tracing.
- Incredibly Quick to Complete: Time is often a precious commodity, and this project respects that! You can realistically complete your beautiful custom tablecloth in under 20 to 30 minutes, making it an excellent option for those who need a swift decor update or are preparing for an event at the eleventh hour.
- Remarkably Budget-Friendly: Utilizing an inexpensive canvas drop cloth, readily available at most hardware or home improvement stores, or repurposing an old curtain panel keeps the material costs to an absolute minimum. This allows you to achieve a high-end, designer look without stretching your budget.
- Fully Customizable Design: This project offers immense creative freedom. You have complete control over selecting your fabric, choosing the perfect bowl size to define your ideal scallop shape, and determining the overall dimensions to perfectly match your specific table and desired aesthetic. You can even dye the fabric for a vibrant pop of color or keep it in its natural state for a minimalist or farmhouse-chic vibe.
- Perfectly Beginner-Friendly: The steps outlined in this tutorial are straightforward, intuitive, and require absolutely no prior DIY experience. It’s an ideal entry-level crafting project for anyone looking to try their hand at creating personalized home decor.
- An Eco-Conscious Choice: By repurposing an old drop cloth, a forgotten curtain, or other scrap fabrics, you’re giving new life to materials that might otherwise end up in a landfill. This sustainable approach allows you to create something beautiful while being mindful of environmental impact.
Materials And Tools Needed For Your DIY Scalloped Tablecloth
Gathering your supplies is the exciting first step towards crafting your stunning new tablecloth. Fortunately, the list is short and simple:
- Canvas Drop Cloth or Curtain Panel: This will serve as the primary fabric for your tablecloth. A canvas drop cloth is an excellent choice due to its durability, affordability, and natural texture. It holds its shape well and offers a rustic yet sophisticated look. Alternatively, an old curtain panel, a large piece of linen, or even a sturdy cotton sheet can work, offering a wider range of colors, patterns, and textures to match your interior design scheme. Ensure your chosen fabric is large enough to cover your table with your desired amount of overhang on all sides.
- Sharp Fabric Scissors: A high-quality pair of sharp fabric scissors is crucial for this project. They will allow you to make clean, precise cuts, which are essential for smooth, professional-looking scallops. Dull scissors can lead to frayed edges, uneven cuts, and a frustrating crafting experience.
- Pencil or Fabric Marker: You’ll need this to trace your scallop pattern onto the fabric. A regular pencil works perfectly on lighter-colored fabrics. For darker materials, consider using a chalk pencil, an air-erasable fabric marker, or a silver gel pen, as these will provide better visibility of your tracing lines.
- Bowl or Any Circular Object: This item will act as your template for creating the perfect scallop curves. The diameter of the bowl you choose will directly determine the size and prominence of your scallops. A smaller bowl will yield tighter, more frequent scallops, offering a delicate touch, while a larger bowl will create broader, softer, and more dramatic curves. Experiment with different sizes to find the aesthetic you prefer.
- Painter’s Tape or Masking Tape (optional but highly recommended): This can be incredibly useful for securing your fabric to your work surface. Taping down the edges prevents the fabric from shifting or bunching up while you are tracing and cutting, ensuring greater accuracy and ease.
- Measuring Tape (optional, but beneficial): While not strictly necessary for the scallop cutting itself, a measuring tape is invaluable for accurately determining the initial dimensions of your tablecloth and ensuring the desired overhang for your specific table size.
Step-By-Step Guide To Making Your Scalloped Tablecloth
Follow these simple and precise steps to create your elegant and custom scalloped tablecloth quickly and efficiently:
-
Step 1: Prepare and Trim Your Fabric to Size. Begin by laying your chosen drop cloth or fabric panel completely flat on a large, clean, and smooth work surface. Ensure there are no wrinkles or creases that could affect your measurements or cuts. Measure your dining table’s length and width. Next, decide on your desired overhang – that is, how much fabric you want to hang down each side of the table. A typical overhang can range from 6 to 12 inches, depending on your preference and the formality of your setting. Add twice your desired overhang to both the length and width of your table (e.g., if your table is 60×30 inches and you want a 10-inch overhang, your initial fabric should be at least 80×50 inches). Trim your fabric to these approximate dimensions, adding a slight extra margin (about 1-2 inches on each side) to allow for any minor adjustments or imperfections when cutting the scallops. This pre-trimming ensures you start with a manageable and appropriately sized piece of fabric.
-
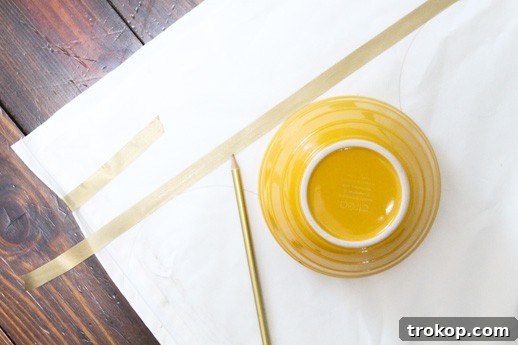
Step 2: Position Your Bowl for the First Scallop. Now it’s time to create your signature scalloped edge. Take your selected bowl and place it upside down on one corner of your fabric. Carefully position the bowl so that exactly half of its rim extends beyond the raw edge of the fabric. This exposed semi-circle will form the shape of your first scallop. Imagine a straight line connecting the two points where the bowl’s edge meets the fabric’s edge; this line should ideally run parallel to the fabric’s original raw edge. Precision here is key to ensuring uniform scallops around the entire tablecloth.
-
Step 3: Trace and Repeat the Scallop Pattern. Using your pencil or fabric marker, carefully trace the outer curve of the bowl’s rim onto the fabric. Once the first half-scallop is traced, lift the bowl and move it along the same edge of the fabric. Align the edge of the bowl perfectly with the end point of your previously traced scallop curve. This seamless alignment ensures a continuous, flowing scalloped pattern. Continue tracing, creating a full row of half-scallops along the entire length of that side of the fabric. Repeat this meticulous process for all four sides of your tablecloth. For enhanced stability and to prevent any fabric movement during tracing, you may wish to use painter’s tape or masking tape to secure the corners and edges of your fabric to your work surface.
Optional Pro Tip for Perfect Symmetry and Efficiency: To achieve a perfectly symmetrical scalloped pattern and significantly speed up the tracing process, you can fold your fabric in half lengthwise, then fold it in half widthwise. This clever technique means you only need to trace along two adjacent raw edges (the folded corner). When you carefully unfold the fabric after tracing, your scallops will be perfectly mirrored and consistent on all four sides.
-
Step 4: Carefully Cut Along Your Traced Lines. With your sharp fabric scissors, begin to carefully cut along the traced lines you’ve created. Take your time with each curve, aiming for smooth, uninterrupted cuts to achieve the cleanest possible finish for your scallops. Avoid snipping or making jagged cuts, as these will be very noticeable in the final product. If you utilized the folding technique from Step 3, ensure your scissors are sharp enough to cut through all layers of fabric evenly. After all sides are cut, gently unfold your fabric to reveal your beautifully crafted, no-sew DIY scalloped tablecloth.
Congratulations! In just a few easy and enjoyable steps, you’ve transformed a simple piece of fabric into a custom, elegant scalloped tablecloth that adds instant charm and sophistication to any setting. Now it’s ready to grace your table!

Tips For Achieving Perfect Scallops And Customizing Your Design
While the basic process is straightforward, a few additional tips can help you achieve truly professional-looking results and even customize your design further to suit your unique style:
- Experiment with Bowl Sizes: Don’t settle for the first bowl you find. Test different sizes on a scrap piece of your fabric to discover which scallop depth and width you find most aesthetically pleasing for your tablecloth.
- Utilize the Right Marking Tool: For optimal visibility, especially on darker fabrics, a chalk pencil or an air-erasable fabric marker will work far better than a standard graphite pencil, which might be hard to see.
- Practice Makes Perfect: Before making the final cuts on your tablecloth, take a moment to practice cutting the curved lines on a small scrap piece of the same fabric. This helps you get a feel for cutting smooth, continuous curves.
- Consider Preventing Fraying: While canvas drop cloths are relatively robust and resist heavy fraying, some fabric types might be more prone to it. For a truly neat and durable edge without sewing, you can apply a thin line of liquid fabric glue (such as Fray Check) along the freshly cut edges. Alternatively, for a slightly thicker and more defined edge, you could iron on a fusible hem tape *before* cutting, though this adds a step and moves slightly away from the pure “no-sew” definition.
- Add Creative Embellishments: Unleash your inner artist! Consider stenciling a complementary pattern onto the tablecloth’s surface, applying fabric paint along the scalloped edges for a pop of color, or even gluing on a delicate ribbon or decorative trim to enhance the detail and elegance.
- Explore Different Fabric Types: While a canvas drop cloth is excellent for a rustic, casual, or farmhouse-inspired look, don’t limit yourself. A beautiful linen, a heavier cotton twill, or even an outdoor-friendly fabric can provide a more refined aesthetic for formal events or specialized uses.
Caring For Your Handmade Scalloped Tablecloth
To ensure your beautiful new scalloped tablecloth remains a cherished part of your home decor for years to come, here are some essential care tips:
- Washing Instructions: Most canvas drop cloths and many fabric panels are machine washable. Always check the care instructions for your specific fabric type. Generally, machine wash your tablecloth in cold water on a gentle cycle to preserve its shape and prevent excessive fraying.
- Drying: Tumble dry on a low heat setting or, ideally, air dry by laying it flat or hanging it to prevent shrinking and maintain the integrity of the scalloped edges.
- Ironing: If your tablecloth develops wrinkles from washing or storage, you can iron it on a medium-high setting. Ironing can also help to subtly flatten and define any slight irregularities in the cut scallops, giving it a crisper appearance.
- Spot Cleaning: For minor spills or stains, address them immediately. Blot the affected area with a clean cloth, warm water, and a mild detergent solution. Avoid harsh rubbing, which can spread the stain or damage the fabric.
- Proper Storage: When not in use, fold or gently roll your tablecloth neatly. This prevents the formation of deep creases, especially along the delicate scalloped edges, keeping it ready for your next gathering.
Versatile Styling Ideas For Your New Tablecloth
This easy-to-create and remarkably affordable scalloped tablecloth is the perfect way to infuse a little vintage charm and handmade personality into a myriad of settings:
- Elevate Everyday Dining: Transform your daily meals from ordinary to extraordinary. An elegant tablecloth creates a more inviting and special atmosphere, encouraging longer, more enjoyable family dinners and conversations.
- Chic Special Occasions: It’s an impeccable choice for a wide array of celebratory events. Think enchanting birthday parties, charming tea parties, elegant baby showers, sophisticated bridal brunches, or any indoor gathering where you wish to add a unique, personalized, and memorable touch.
- Outdoor Entertaining Made Stylish: The sturdy nature of a canvas drop cloth makes it an ideal companion for outdoor events. It’s perfect for casual picnics, lively garden parties, festive barbecues, or any al fresco dining experience. Its weight also provides the added benefit of helping it stay securely in place during a gentle breeze.
- Festive Holiday Decor: Easily customize your tablecloth to match any holiday theme by selecting a festive-colored fabric or adding seasonal embellishments. Imagine a rich red scalloped tablecloth adorned with pine cones for Christmas, a cheerful pastel one for Easter, or an autumnal orange for Thanksgiving!
- Stylish Craft Table Cover: Protect your work surfaces in style! This tablecloth can double as a chic and durable cover for your craft or hobby table, adding inspiration to your creative space while keeping it clean.
With this simple, no-sew tutorial, you can make your own stunning DIY Scalloped Tablecloth in under 30 minutes, unequivocally proving that beautiful, custom decor doesn’t have to be complicated, expensive, or require advanced skills. So, why not gather your materials and give this satisfying project a try? You may be genuinely surprised at how fulfilling it is to create something both beautiful and highly functional with your own two hands, adding a deeply personal and heartfelt touch that truly makes your house feel like a cherished home.
More Inspiring DIY Projects You’ll Love
If you thoroughly enjoyed the creativity and simplicity of this quick and easy project, we invite you to explore more innovative ways to personalize your living spaces and elevate your events. Dive into our curated collection of other engaging DIYs:
- How to Make a DIY Animal Memo Holder Gift for Your Loved Ones
- DIY Fabric Wrapped Bouquets for Gifting
- How To Make Cute DIY Footed Serving Bowls
- DIY Plate Clock
DIY Scalloped Tablecloth Project Overview
DIY Scalloped Tablecloth
Add a touch of elegance and handcrafted charm to your next gathering with this incredibly easy-to-follow, no-sew DIY scalloped tablecloth tutorial.
Active Time: 20 mins
Total Time: 20 mins
Course: DIY Project
Category: Home Decor, Entertaining Decor
Equipment Needed
- Scissors
- Pencil or Fabric Marker
- Bowl (for tracing scallops)
- Tape (optional, for securing fabric)
- Measuring Tape (optional)
Materials Required
- Canvas drop cloth or large fabric curtain panel (sufficient size for your table)
Simple Instructions
- Trim your chosen fabric (drop cloth or curtain panel) to the desired size, ensuring it’s slightly larger than your table with the intended overhang.
- Place a bowl upside down on the fabric’s edge, aligning half of its rim beyond the fabric to create the first scallop shape.
- Trace this half-circle with a pencil or fabric marker. Move the bowl, aligning it with the end of the previous trace, and continue tracing along all four sides of the fabric. For symmetry, you can fold the fabric in half lengthwise and then widthwise before tracing.
- Carefully cut along all traced lines using sharp scissors to reveal your elegant scalloped edges. Unfold the fabric (if folded) to see your finished tablecloth.
Estimated Cost: $10 – $25 (depending on fabric source)
Keywords: diy scalloped tablecloth, no-sew tablecloth, easy table decor, homemade table linen

Share Your Creativity And Find More Inspiration
We absolutely adore seeing your creative projects come to life and how you transform your spaces! Don’t forget to share your newly crafted DIY scalloped tablecloth with our vibrant community on Instagram. Be sure to use the hashtag #sugarandclothloves so we can easily discover and perhaps even feature your unique creations! We find immense joy in showcasing how you incorporate handmade charm and personal touches into your home and celebrations.
Are you seeking further inspiration for interior design, delightful hosting ideas, or more engaging DIY crafts? Our blog is a treasure trove brimming with innovative home decor tutorials, practical entertaining tips, and a wide array of other DIY projects meticulously designed to spark your creativity and help you craft spaces that are both beautiful and profoundly personal. We continuously strive to provide accessible and inspiring content for every skill level. Dive into our extensive collection of ideas and start planning your next stunning home transformation or memorable event today!
More Decor and Recipe Ideas for the Perfect Host
Continue Reading
Continue Reading
Continue Reading
Continue Reading
Continue Reading
Continue Reading