
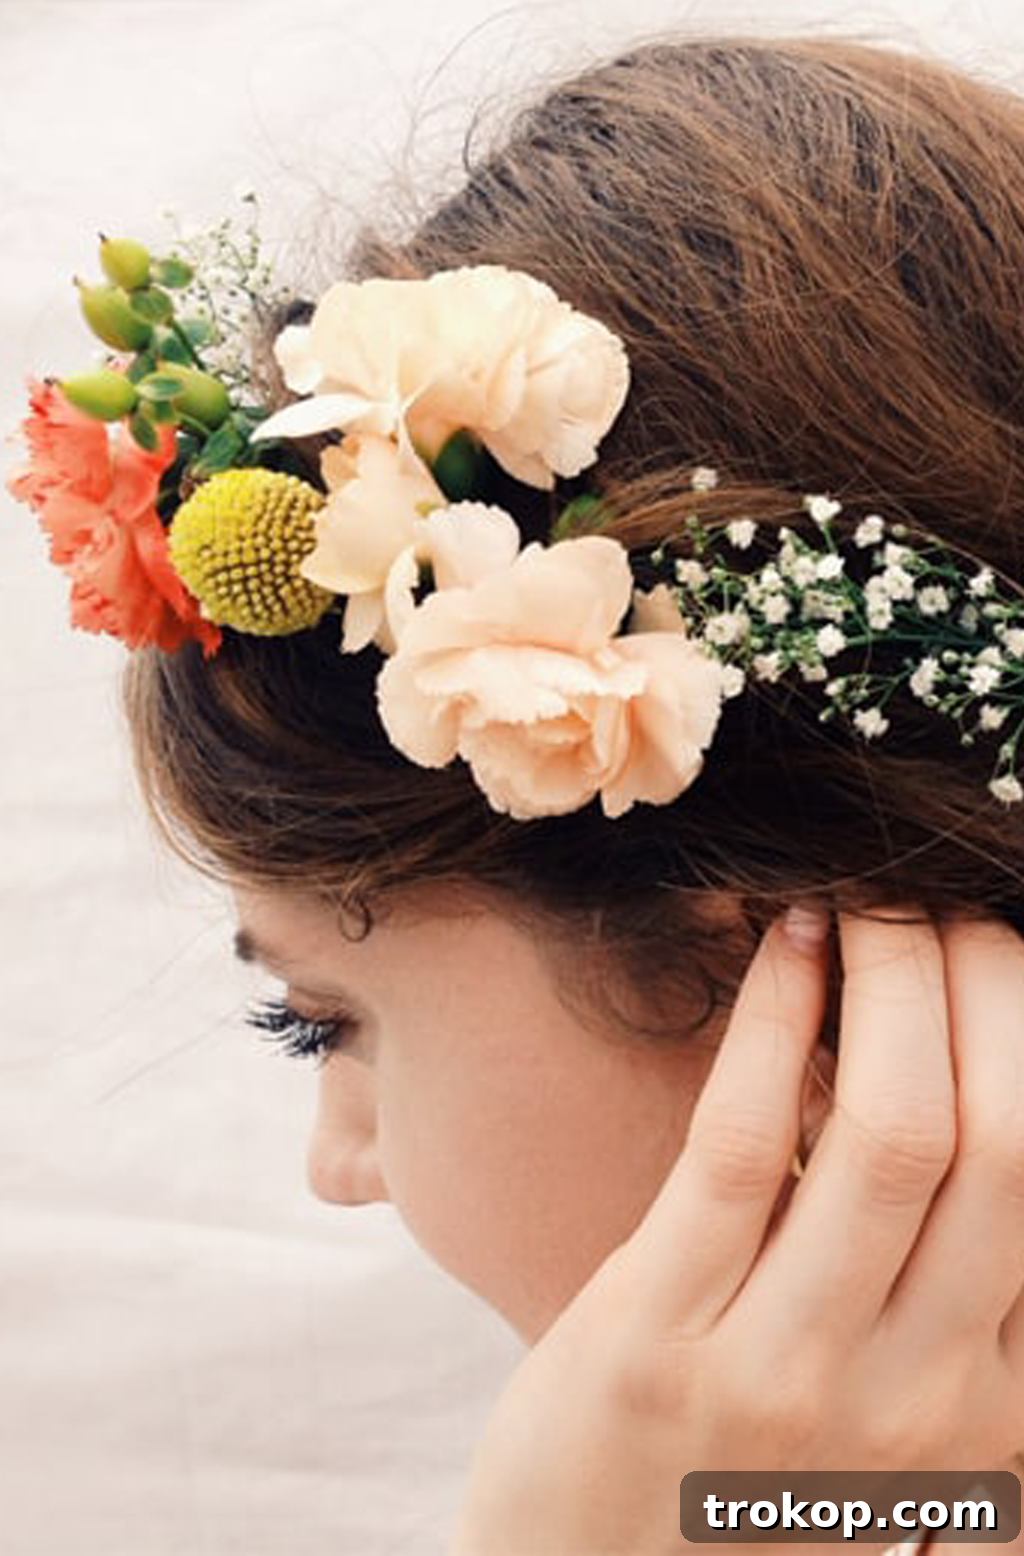
Craft Your Own Stunning DIY Floral Headpiece: An Effortless Guide
Unleash your creativity and design a beautiful flower crown for any special occasion or a touch of everyday magic.
There’s something truly enchanting about a beautifully crafted floral headpiece. It evokes a sense of whimsical charm, natural elegance, and festive spirit, making it the perfect accessory for a myriad of events. From bohemian weddings and vibrant music festivals to elegant garden parties and picturesque photo shoots, a custom-made flower crown adds an unforgettable personal touch.
The best part? Creating your own **DIY floral headpiece** is far simpler than you might imagine. You don’t need years of floral design experience or even a particularly “green thumb” to achieve stunning results. This comprehensive guide is designed to empower anyone to craft a gorgeous, personalized flower crown with ease. We’ll walk you through every step, ensuring your creation is not only beautiful but also durable.
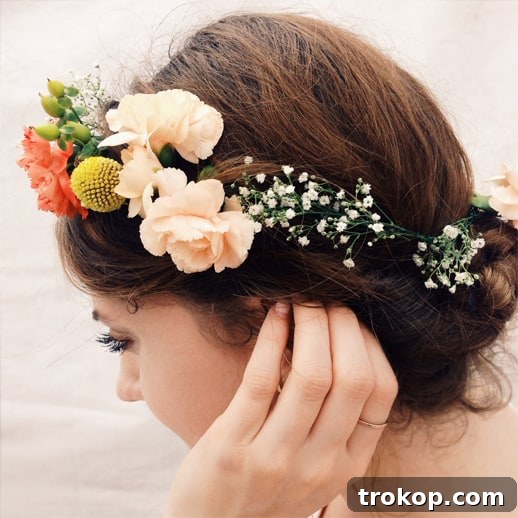
Our inspiration for this tutorial comes from the simple yet elegant designs we taught at events like Texas Antiques Week in Round Top. This method proves that professional-looking results are within reach for hobbyists and beginners alike. We’ll focus on practical techniques and accessible materials, ensuring a smooth and enjoyable crafting experience.
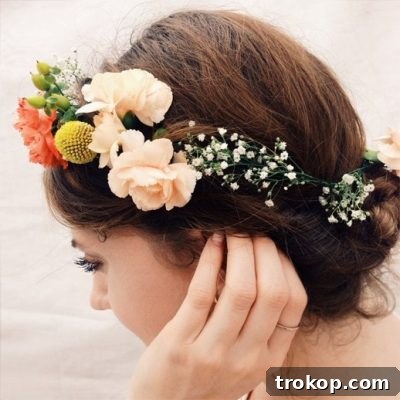
Whether you envision a delicate halo of blossoms for a romantic bridal look or a lush, vibrant crown for a fun-filled day, this guide covers all you need to know. These versatile floral headpieces are perfect for enhancing a simple, effortless hairstyle for a casual outing, or as a sophisticated accent atop an elegant braided updo for a more formal occasion. Let’s gather our supplies and begin creating your blooming masterpiece!
The Allure of a DIY Floral Headpiece: Why Make Your Own?
Choosing to craft your own floral headpiece offers a wealth of benefits that go beyond simply acquiring a beautiful accessory. It’s an experience that combines creativity, personal expression, and often, significant savings.
Firstly, **unparalleled personalization** is at your fingertips. Unlike store-bought options, a DIY floral headpiece allows you to meticulously select every single bloom, leaf, and berry. This means you can perfectly match your headpiece to your event’s color scheme, your outfit’s specific shade, or simply your unique aesthetic vision. The result is a truly bespoke piece that reflects your individuality and creative flair.
Secondly, it’s often a much more **budget-friendly** option. While pre-made flower crowns from florists can be quite expensive, especially for high-quality fresh flowers, sourcing your own blooms and supplies directly can significantly cut costs. This is particularly advantageous for weddings, proms, or events where you might need multiple headpieces, allowing you to allocate your budget to other essential details without sacrificing beauty.
Finally, there’s immense **satisfaction and joy** in the creative process itself. Crafting a floral headpiece can be a calming and meditative activity, a wonderful escape into the world of natural beauty. The sense of accomplishment when you wear or present a piece you’ve made with your own hands is truly priceless. It adds a heartfelt, handcrafted touch that store-bought items simply cannot replicate.
Choosing the Perfect Blooms for Your Flower Crown
The longevity and overall aesthetic of your floral headpiece largely hinge on your choice of flowers. While your personal taste is paramount, considering certain factors will ensure your crown remains vibrant and beautiful throughout your event.
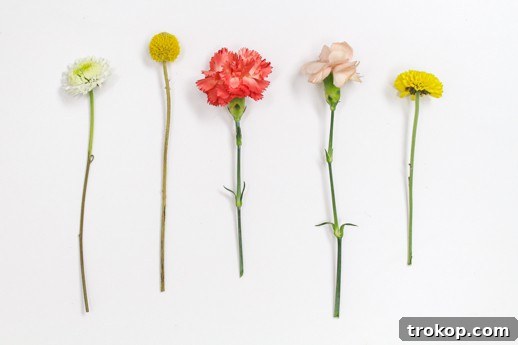
- Durability and Resilience: For headpieces that need to last several hours, especially in warmer conditions, select hardy blooms. Excellent choices known for their staying power out of water include carnations, chrysanthemums, succulents, baby’s breath, billy buttons (craspedia), spray roses, and certain varieties of berries and solidago. Avoid overly delicate flowers like hydrangeas, gardenias, or sweet peas unless you plan for very short wear or have methods for constant rehydration.
- Variety in Size and Texture: A captivating flower crown features a mix of sizes and textures. Incorporate larger focal flowers such as standard roses, gerbera daisies, or protea to create impact. Complement these with medium-sized blooms like spray roses or ranunculus, and fill in gaps with smaller filler flowers such as baby’s breath, waxflower, cosmos, or delicate wildflowers. Lush foliage like eucalyptus, ferns, ivy, or ruscus adds depth, contrast, and fullness.
- Harmonious Color Palette: Plan your color scheme to complement your attire and the event’s theme. You can opt for a sophisticated monochromatic look, a vibrant and playful mix of contrasting colors, or soft, romantic pastels. Remember to include natural greens and sometimes even subtle browns or silvers from foliage for a balanced and organic feel.
- Subtle Scents: While a fragrant flower crown can be delightful, be mindful of overly strong scents, especially if you or others have sensitivities. A subtle, pleasant aroma is ideal, ensuring comfort throughout the day.
- Fresh vs. Artificial Flowers: This tutorial primarily focuses on fresh flowers for their natural beauty and fragrance. However, artificial or silk flowers are a fantastic alternative for practice, for those with allergies, or when you need a headpiece that will last indefinitely and can be reused. The techniques outlined here are easily adaptable for both fresh and artificial blooms.
Essential Materials and Tools for Crafting Your Floral Headpiece
Having all your supplies ready before you begin is key to a smooth and enjoyable crafting session. Here’s a detailed list of what you’ll need to create your exquisite flower crown:
- A Selection of Fresh Flowers and Foliage: As discussed above, choose a thoughtful mix of focal points, fillers, and greens. The quantity will depend on how full and dense you wish your headpiece to be.
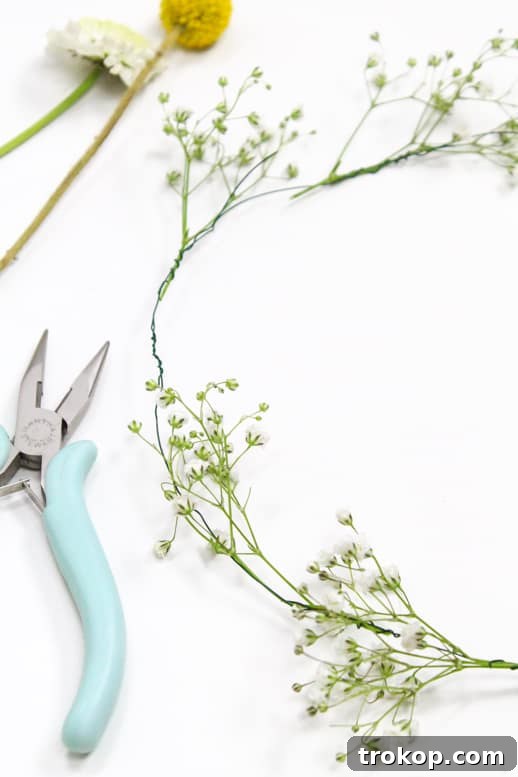
- Floral Wire: This is the structural backbone of your headpiece. Opt for a durable yet flexible gauge, typically 20 to 24 gauge. Green floral wire is ideal as it blends seamlessly with natural stems. You’ll need a length sufficient for the main base loop, plus additional shorter pieces for individual flower attachments.
- Wire Cutters: An absolute essential for clean, precise cuts of your floral wire. A good pair prevents hand strain and ensures professional-looking finishes.
- Needle Nose Pliers: These are invaluable for bending, shaping, and securely twisting wire ends. Critically, they help you tuck in any sharp wire protrusions, ensuring your headpiece is comfortable and safe to wear.
- Wire Twig or Floral Tape (Optional): A decorative wire twig (often brown or green, with a natural, vine-like appearance) can be wrapped around your finished base. This is excellent for aesthetic purposes, adding a rustic touch, or concealing any visible floral wire, especially if you have lighter hair. Floral tape, which is slightly adhesive and stretchy, can also be used to cover wires and provide extra stem stability, though our primary method uses wire for security.
- Sharp Scissors or Floral Shears: For neatly trimming flower and foliage stems to the appropriate length.
- Spray Bottle with Water (Optional): Keeping a fine mist of water handy can help keep your fresh flowers hydrated and vibrant throughout the assembly process.
Step-by-Step Guide: Creating Your DIY Floral Headpiece
With all your materials at hand, let’s embark on the delightful journey of crafting your personalized floral headpiece. Remember, this is a creative process—feel free to adapt and experiment as you go!
Step 1: Form the Sturdy Base Wire Loop
The foundation of your flower crown is a robust wire loop, which will determine the fit and shape of your entire design.
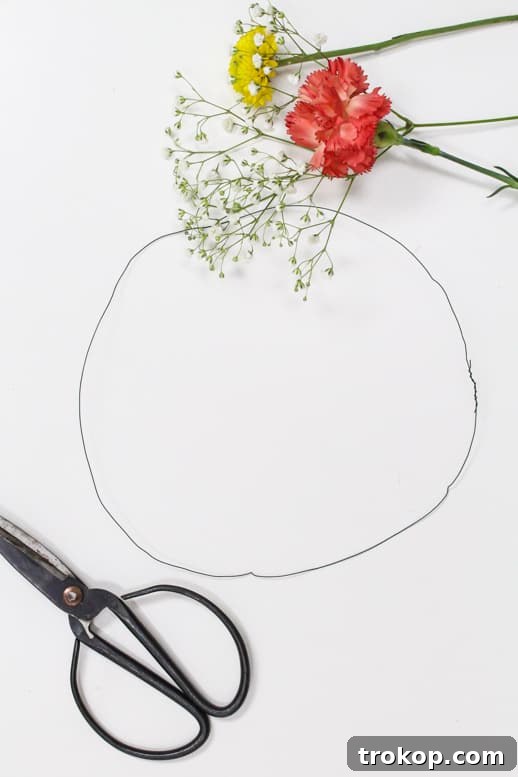
- Measure Your Head: Unroll a generous length of floral wire. Measure it against your head where you envision the headpiece resting. It’s crucial to make the initial wire length a bit longer than your head’s actual circumference – typically around 22-24 inches is a good starting point for an adult, but always measure to be sure.
- Create the Loop: Bend the wire into a circular or oval shape. Overlap the two ends by approximately 2 to 3 inches. Tightly twist these overlapping ends together several times to create a strong, secure join. Use your needle-nose pliers to ensure a firm, unyielding twist.
- Crucial Sizing Tip: Always make your base loop slightly larger than you initially think you’ll need. As you attach flowers and foliage, the crown will gain bulk and its inner circumference will naturally decrease. A common mistake is creating a base that’s too small, leading to a headpiece that feels uncomfortably tight once adorned. It’s much easier to slightly tighten a large crown than to expand a small one after the flowers are on.
- Consider the Style: Think about how you want to wear your crown. Do you prefer a full circle crown that encircles your entire head, a delicate half-crown that adorns just the front or side, or a stylish diagonal placement? Adjust the initial size and shape of your base loop to match your desired aesthetic.
Step 2: Layer in Filler Flowers and Foliage
This step builds the volume and background texture of your headpiece, providing a lush canvas for your main blooms.
- Prepare Stems: Trim the stems of your chosen filler flowers (like baby’s breath, waxflower, or small wildflowers) and foliage (eucalyptus, fern sprigs) to a manageable length, about 1.5 to 2 inches. Remove any lower leaves that might become submerged or interfere with wrapping.
- Initial Attachment: Take a small cluster of filler flowers or a sprig of foliage. Cut a 1.5-inch piece of floral wire. Position the cluster against your base loop. Wrap one end of the small floral wire around the middle of the cluster’s stem, and the other end around the base loop, twisting tightly to secure it.
- Building the Base: Continue attaching these small clusters, working in a consistent direction around your base loop. Overlap each new cluster slightly over the stem of the previous one. This creates a continuous, natural look and ingeniously conceals the floral wire connections beneath the greenery.
- Safety Check: After each attachment, use your needle-nose pliers to gently but firmly press down any sharp wire ends against the base loop. This prevents them from poking out, which is vital for comfort.
- Pro Tip for Fullness: Begin with a layer of foliage first. This creates a wonderful green base that adds depth and makes the entire crown appear fuller, providing a beautiful backdrop for the flowers you’ll add next.
Step 3: Secure Your Stunning Main Blooms
Once your base is lush with filler, it’s time to introduce your magnificent focal flowers—the stars of your **DIY floral headpiece**.
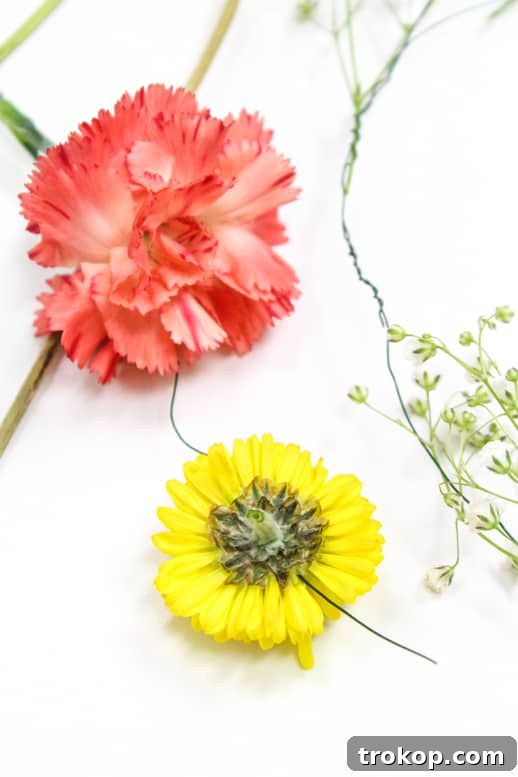
- Trim Blooms: Prepare your larger flowers (roses, daisies, ranunculus) by trimming their stems to a shorter length, typically around 1 to 1.5 inches. This ensures they sit snugly against the base.
- Wire the Bloom: Take a piece of floral wire, about 3 to 4 inches long. Carefully thread this wire through the back of the flower’s base, near the calyx (the green leafy part directly beneath the petals). Aim to pass the wire through the sturdiest part of the stem, avoiding damage to the delicate petals.
- Position and Secure: Bring both ends of the threaded wire down along the flower’s stem. Place the bloom onto your base loop at your desired position. Twist each side of the wire tightly around the base loop, securing the flower firmly in place. Ensure the bloom is oriented in the direction you want it to face.
- Repeat and Arrange: Continue this process for all your main blooms. Strategically space them out evenly for a balanced look, or cluster them together for a more dramatic, impactful effect. Step back frequently to assess your arrangement and make adjustments.
- Final Wire Safety: After attaching each large flower, double-check for any wire ends that might be sticking out. Use your needle-nose pliers to meticulously push and tuck these ends against the base loop. This step is non-negotiable for comfort, preventing any painful pokes or snagging in your hair.
Step 4: The Finishing Touches for a Lush Look
With your main elements secured, the final stage involves refining your **DIY floral headpiece** by filling in any gaps and adding aesthetic enhancements.
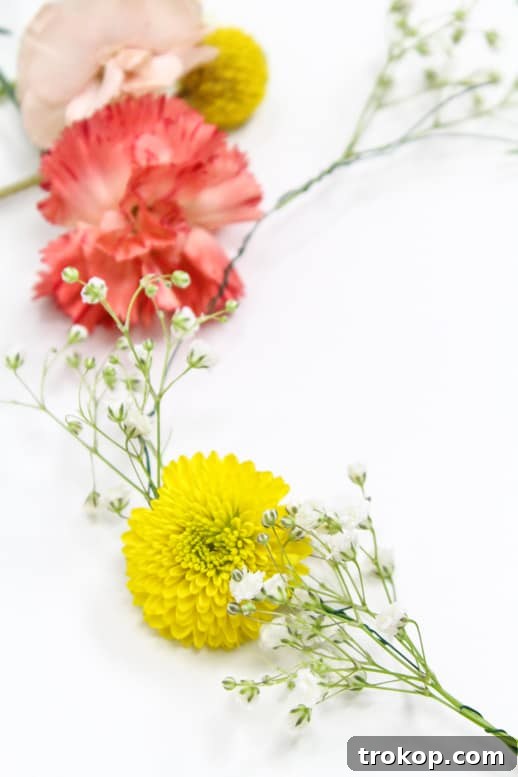
- Fill in Gaps: Continue adding smaller blooms, supplementary filler flowers, and extra sprigs of foliage to any remaining empty spaces. The objective is to achieve a dense, seamless, and lush appearance. Rotate your headpiece as you work to ensure it looks beautiful and well-covered from all angles.
- Assess and Balance: Periodically pause and hold your headpiece up to assess its overall balance and symmetry (unless an intentional asymmetry is your goal). Add more flowers where needed to achieve your desired level of fullness and distribution. Don’t be afraid to gently shift or adjust existing flowers to perfect the composition.
- Optional Aesthetic Enhancement: If you have lighter hair and are concerned about the floral wire being visible, or if you simply prefer a more organic, rustic aesthetic, consider wrapping a decorative wire twig (which often resembles a thin vine) or floral tape around the entire base. This technique effectively conceals the underlying wire structure and adds an extra layer of texture and style.
- Final Comfort Check: Before declaring your headpiece complete, perform one last, thorough inspection for any sharp or protruding wire ends. Use your needle-nose pliers to firmly push and tuck them away. This critical step ensures maximum comfort and prevents any damage to your hair or skin during wear.
Prolonging the Beauty: Tips for a Long-Lasting Flower Crown
One of the most frequently asked questions about fresh flower crowns revolves around their longevity. While fresh flowers are inherently delicate, with the right selection and care, your stunning creation can remain vibrant for hours, even days!
- Strategic Flower Selection: As highlighted earlier, choose flowers known for their endurance out of water. Carnations, chrysanthemums, succulents, baby’s breath, billy buttons, and certain types of roses tend to hold up exceptionally well. Varieties like orchids can also last surprisingly long.
- Pre-Hydration Protocol: Ensure your flowers are optimally hydrated before you even begin crafting. Upon receiving or purchasing flowers, re-cut their stems at an angle under water and place them in cool water with floral food for at least 2-4 hours, or ideally, overnight. This “conditions” them to better withstand being out of water.
- Timing is Everything: For peak freshness and vibrancy, it is always best to assemble your **DIY floral headpiece** on the very same day you plan to wear it. The closer to the event, the better.
- The Art of Refrigeration: If you must create your headpiece a day in advance, careful storage is crucial. After assembly, lightly mist your entire crown with water. Then, gently place it inside an airtight container (like a plastic storage box) or carefully slide it into a large plastic bag. Store this in the crisper drawer of your refrigerator. The cool, humid environment will help significantly slow down the wilting process, potentially keeping your crown fresh for up to a week. Avoid placing it near fruits that release ethylene gas, as this can accelerate ripening and wilting.
- Event Day Care: On the day of the event, keep your crown in the coolest, most shaded area possible until the moment you put it on. Direct sunlight, high heat, and dry conditions are the primary enemies of fresh flowers. A final light misting just before wearing can give it an extra boost.
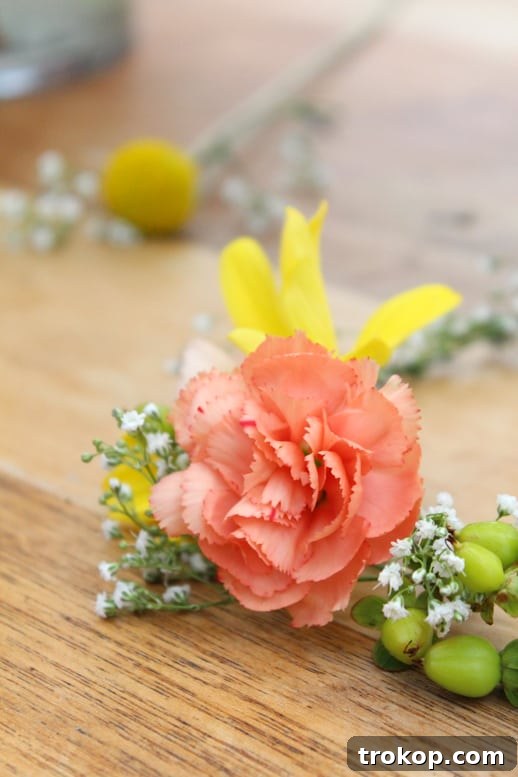
- Real-World Durability: Our own **DIY Floral Headpieces**, crafted with resilient flowers like carnations, billy buttons, berries, and baby’s breath, impressively endured an entire day in the hot Texas weather! This is a testament to the power of thoughtful flower selection and proper preparation.
Styling Your Floral Headpiece for Every Occasion
The remarkable adaptability of a **DIY floral headpiece** is one of its greatest assets. It can seamlessly transition from a whimsical everyday accessory to a statement piece for the most formal events, always adding a unique and personalized flair.
- Weddings and Bridal Parties: For brides seeking a softer, more natural aesthetic, a floral headpiece offers a breathtaking alternative or complement to a traditional veil. Bridesmaids can wear coordinating crowns, creating a cohesive and beautifully organic look that ties the bridal party together. Match the flower types and colors to the wedding’s theme and palette.
- Proms and Graduations: A flower crown provides a youthful, elegant, and decidedly modern accessory that perfectly complements a prom gown without the stiffness of a tiara. Customize it with flowers that match your dress color or celebrate your school’s colors.
- Music Festivals and Concerts: Embrace the ultimate bohemian and free-spirited vibe with a lush, vibrant flower crown. These are iconic accessories at outdoor music events, instantly elevating your festival attire and adding to the joyous atmosphere.
- Photo Shoots: Floral headpieces are a beloved element in photography. They significantly enhance portraits, maternity shoots, engagement photos, and whimsical fashion editorials, adding softness, color, and a touch of fantasy to any image.
- Garden Parties, Brunches, and Summer Gatherings: Add an irresistible touch of natural charm to your daytime events. A more delicate, perhaps asymmetrical, crown can beautifully complement a sundress, flowy attire, or smart casual wear, perfect for outdoor celebrations.
- Everyday Wear: Don’t limit the magic of flower crowns to special occasions! A simple half-crown, a strategically placed cluster of blooms, or a single statement flower can instantly elevate a casual outfit. They pair wonderfully with simple, relaxed hairstyles or a classic braided updo, injecting a dose of whimsical charm into your daily look.
Experiment with different placements: a full circle crown sitting on top, a semi-circle across the forehead, nestled into the back of an updo, or diagonally across your head for an unexpected angle. The possibilities are truly endless, allowing you to beautifully express your unique individual style.
DIY Floral Headpiece (Quick Overview)
1 hr
1 hr
DIY
Beauty
Equipment
- Wire cutters
- Needle nose pliers
Materials
- Flowers of your choice
- Floral wire
- Wire twig (optional for aesthetics)
Instructions
-
Create a sturdy wire loop slightly larger than your head, twisting the ends securely. This accounts for the bulk of added flowers.
-
Trim filler flowers/foliage stems to 1.5-2 inches. Attach small clusters to the base loop using 1.5-inch floral wire, wrapping securely and overlapping.
-
For larger blooms, thread 3-4 inch floral wire through the base. Position the flower on the loop and twist the wire ends tightly around the base. Use needle-nose pliers to tuck in sharp wire ends.
-
Continue adding blooms and foliage to achieve your desired fullness. For a rustic look or to conceal wire, wrap a wire twig around the base. Perform a final check for tucked-in wire ends.

Discover More Captivating Floral DIY Projects
Loved the experience of crafting your own **DIY Floral Headpiece**? The world of floral and craft DIYs is brimming with inspiring projects waiting for you to explore! Dive into more creative endeavors and bring additional botanical beauty into your life and home with these related ideas:
- DIY Polka Dot Floppy Hat
- Cute Halloween Ideas: DIY Halloween Wigs & Lashes Costumes
- How To Make A DIY Fresh Flower Love Sign
- How To Make A DIY Floral Chandelier Garland
Easy Floral DIY’s
DIY Fresh Flower Gift Box
DIY Geometric Floral Pendants
DIY Paper Flower Backdrop
DIY Giant Paper Flower Bouquet
Our Floral Tablescape In Palm Springs
We are always thrilled to see your unique creations! Don’t forget to share your amazing **DIY Floral Headpiece** designs with our community on Instagram. Be sure to use the hashtag #sugarandclothloves so we can admire and celebrate your blooming masterpieces! Looking for even more home decor or fashion DIY inspiration? You can find all of our tutorials and ideas right here!