
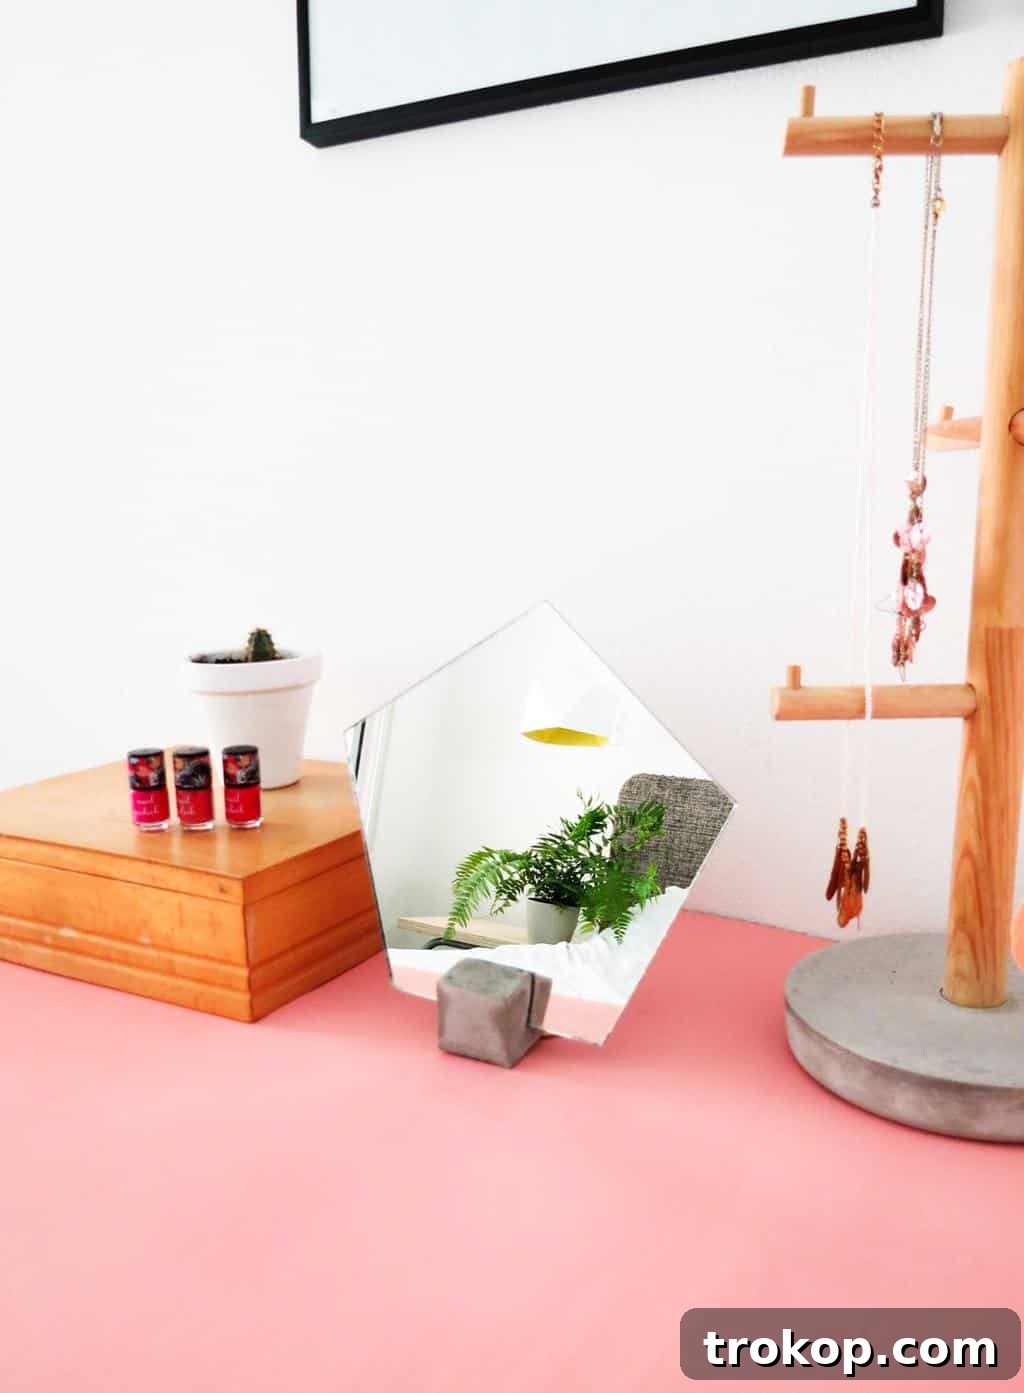
Are you tired of cluttered countertops and vying for space in a busy bathroom? Imagine a dedicated beauty zone, a tranquil corner where your morning routine feels less like a race and more like a moment of self-care. This DIY Concrete Vanity Mirror is not just a stylish addition to your decor; it’s a practical solution designed to bring order and elegance to your everyday. Its dual functionality allows it to seamlessly integrate into any room, providing a perfect reflection and a chic focal point.
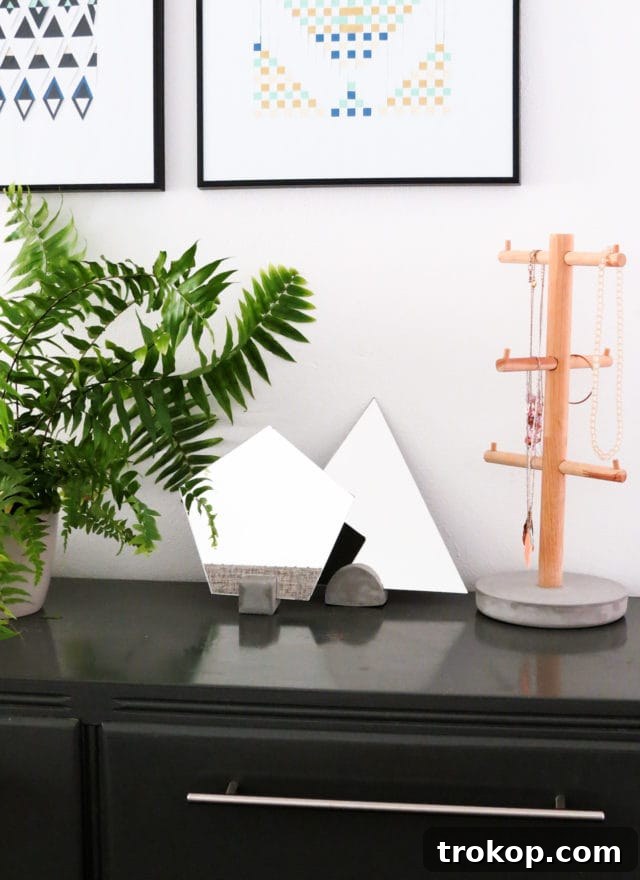
Mornings often feel like a frantic rush, a race against the clock even when we wake up early. One of the most significant changes we’ve made to streamline our routine is keeping our daily essentials organized and readily accessible. In homes with a single shared bathroom, like ours, setting up a personal beauty station in the bedroom has been a game-changer. This allows for a more relaxed preparation, with everything perfectly laid out without the constant battle for sink space or counter real estate.
The dream of a dedicated vanity space has always been alluring, but for many, including myself, a full-sized beauty station simply isn’t feasible due to space constraints. This challenge sparked a creative approach: transforming a compact corner of our dresser into a highly functional yet stylish vanity. The centerpiece of this transformation? A sleek, modern, and surprisingly simple-to-create DIY Concrete Vanity Mirror.
This project offers an ideal solution for anyone navigating tight quarters who still desires a touch of sophistication and structure in their daily routine. The choice of concrete as a material wasn’t arbitrary; we’ve previously experimented with its versatility in projects like our DIY hanging concrete monogram sign and a DIY concrete tray. Its inherent properties lend themselves perfectly to creating a modern industrial aesthetic, adding a unique, tactile dimension to the mirror’s base. This material provides both durability and a contemporary edge, ensuring your vanity mirror stands out as a bespoke piece of home decor. Are you ready to infuse your space with this distinctive style? Keep reading for the full step-by-step guide to making your own!
Why Choose Concrete for Your DIY Mirror?
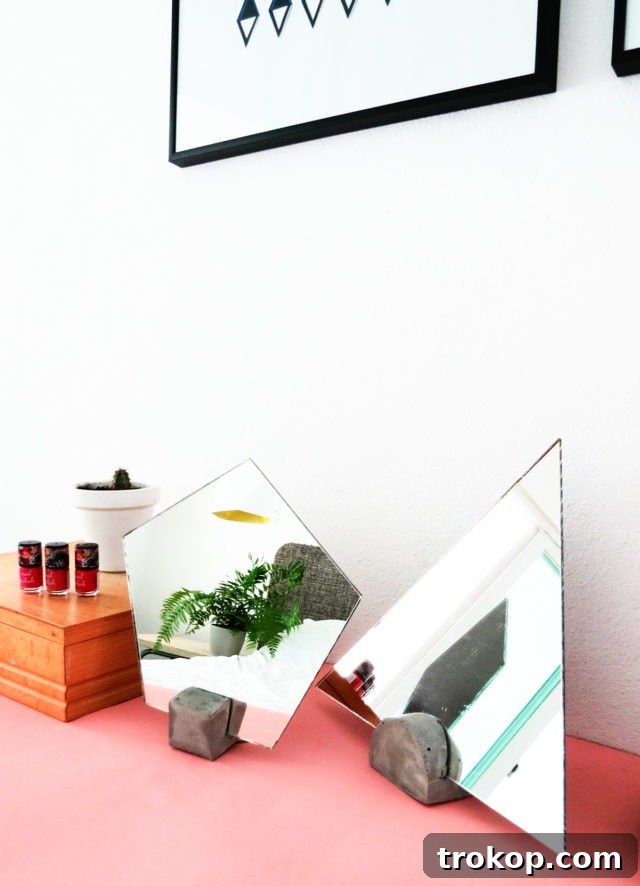
Concrete, often associated with heavy construction, has found its way into modern home decor thanks to its distinctive aesthetic and remarkable versatility. Opting for a concrete base for your DIY vanity mirror brings several compelling advantages. Firstly, it offers an effortlessly chic, industrial-minimalist look that complements a wide range of interior styles, from Scandinavian to urban loft. Its raw, textured finish provides a striking contrast to the smooth, reflective surface of the mirror, creating a visually interesting piece.
Beyond its aesthetic appeal, concrete is incredibly durable. Once cured, it provides a robust and stable base, ensuring your mirror stands securely. It’s also surprisingly customizable. While often seen in shades of grey, concrete can be tinted with pigments to match any color scheme, or even embedded with decorative elements for a unique terrazzo effect. This allows you to truly personalize your vanity mirror, making it a reflection of your individual style. Furthermore, working with lightweight concrete mixes makes this DIY project accessible even for beginners, offering a rewarding experience as you craft a truly unique and long-lasting item for your home.
Materials and Tools Needed for Your Concrete Vanity Mirror
Before diving into this exciting DIY project, gather all your materials and tools to ensure a smooth and efficient process. Having everything at hand will prevent interruptions and make the crafting experience more enjoyable. Here’s a detailed list of what you’ll need:
- Mirror: Choose a geometric shaped mirror or a round mirror, ideally around 8 inches in diameter or side length. The size will dictate the scale of your concrete base.
- Lightweight Concrete Mix: A lightweight mix is easier to work with and results in a less heavy finished product. Read the package instructions carefully for mixing ratios.
- Repurposed Package Container: This will serve as your concrete mold. A Tetra Pak carton (like those for milk or juice) is excellent due to its smooth, plastic-lined interior, which prevents concrete from sticking and makes demolding effortless. Alternatively, any smooth, clean, plastic-lined container of appropriate dimensions can work. Ensure it’s thoroughly cleaned and dry before use.
- Scissors: Sharp scissors are essential for precise cutting of your mold material.
- Ruler: For accurate measurements to ensure your mold is perfectly square and proportioned.
- Hot Glue Gun and Glue Sticks: Used to securely assemble your mold. Gluing flaps on the outside helps maintain a smooth interior surface for your concrete.
- Masking Tape: Crucial for holding your mirror in place during the concrete pouring and setting process. Don’t skimp on the tape – stability is key!
- Sandpaper: Various grits (e.g., medium to fine) for smoothing any rough edges or imperfections on your cured concrete base.
- Mixing Bucket & Stirring Stick: For preparing your concrete mix according to manufacturer instructions.
- Protective Gear: Gloves and potentially a dust mask for safety when handling concrete mix and sanding.
How to Make a Concrete DIY Vanity Mirror: Step-by-Step Guide
Follow these detailed steps to create your stylish and functional concrete vanity mirror. Precision and patience are your best tools in this project!
1 — Design and Prepare Your Mold for the Mirror Base
The foundation of your concrete vanity mirror is the mold, which will shape its sturdy base. Start by carefully deconstructing your chosen repurposed container (e.g., a Tetra Pak carton) by cutting it open to create a flat, workable sheet. This sheet will be the blueprint for your mold.
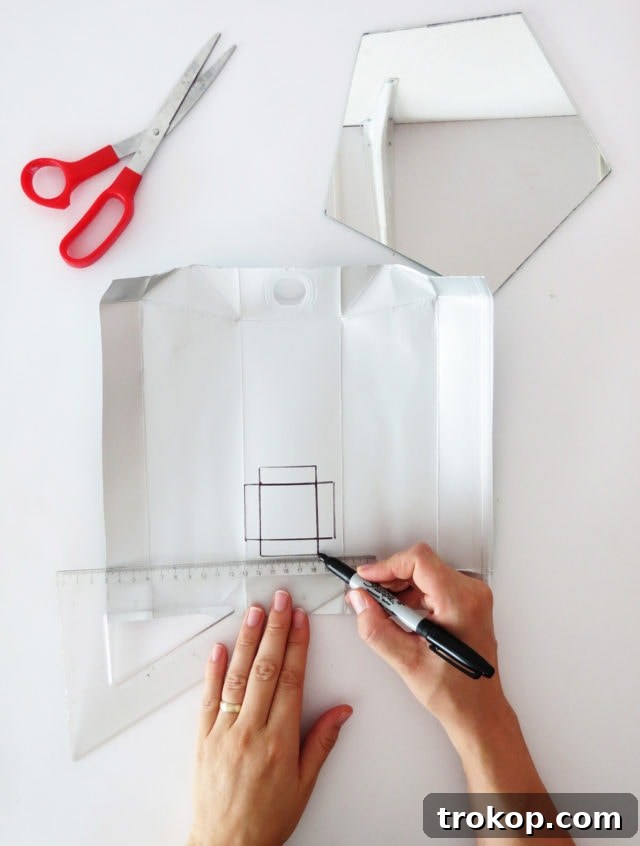
Using your ruler, draw a 2-by-2-inch square. This square will form the bottom of your mirror’s base. To facilitate assembly, add small flaps to each side of this square. Next, draw a long rectangle measuring 8 inches in length and 2 inches in height. This rectangle will form the four walls of your cube-shaped base. Remember to add an extra flap at one end of this rectangle; this will be used to secure the two ends of the rectangle together, forming a continuous wall.
2 — Cut and Fold the Mold Components
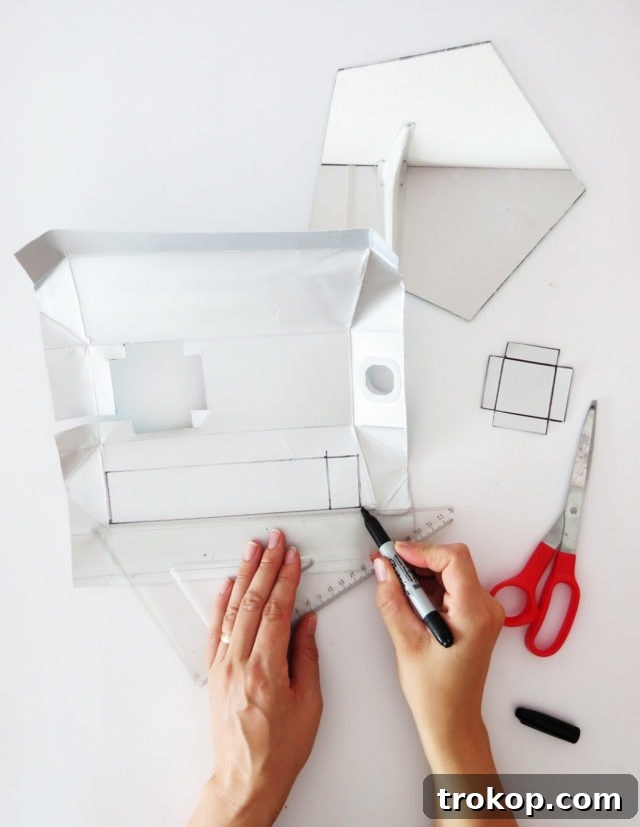
With your design now meticulously drawn, it’s time to bring it to life. Carefully cut out both the square base and the long rectangular piece using your sharp scissors. Once cut, take the long rectangle and accurately fold it into four equal sections lengthwise. These folds will define the four sides of your cube, creating crisp, clean edges for your concrete base. Ensure your folds are precise, as this will impact the final shape and neatness of your concrete.
3 — Assemble Your Mold Securely
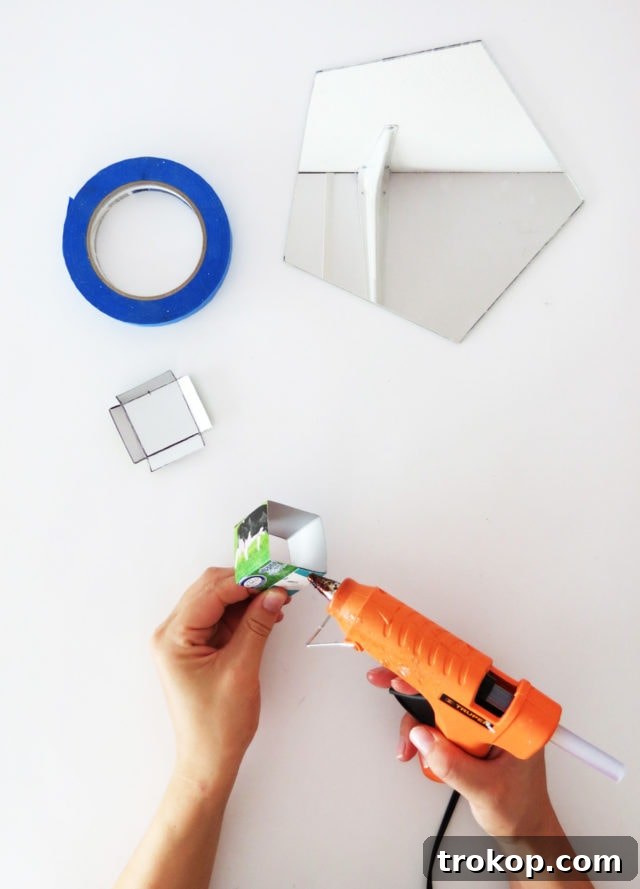
Now, let’s assemble the individual components into a functional mold. Using your hot glue gun, carefully attach the base square to the folded side walls. Make sure to glue the flaps on the *outside* of the cube. This seemingly small detail is crucial, as it ensures the interior surface of your mold remains smooth and uninterrupted, which in turn will give your concrete base a much cleaner, more professional finish.
4 — Create Notches for Mirror Insertion
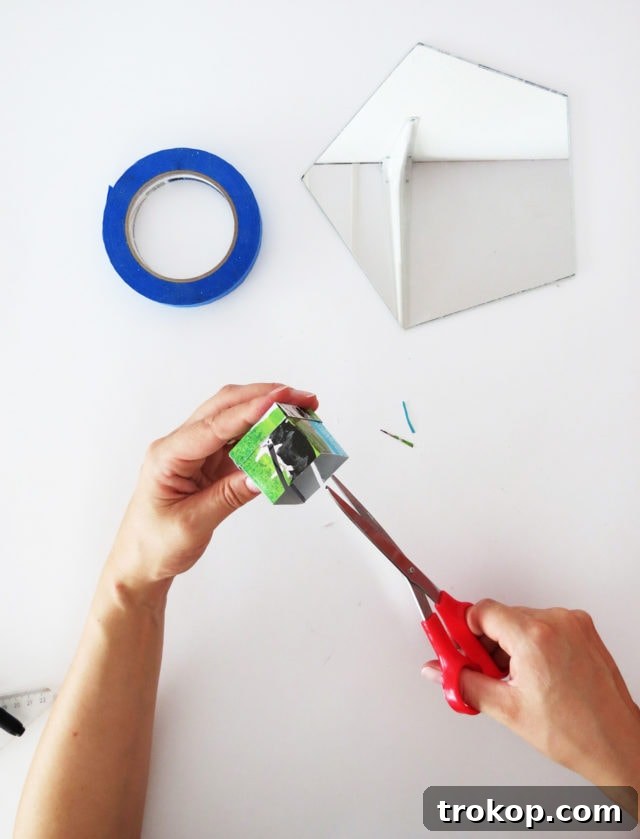
Before pouring the concrete, you need to prepare the mold to hold your mirror upright. Using your scissors, carefully cut two diagonal notches on opposite sides of the cube mold. These notches should be positioned centrally and be wide enough to snugly accommodate the thickness of your mirror. The goal is to create a secure slot where the mirror can stand upright and stable once the concrete has been poured and set. Take your time to measure and cut these notches accurately to ensure a perfect fit for your mirror.
5 — Position and Secure the Mirror
With the notches ready, it’s time to insert your mirror into the mold. Gently slide the mirror into the diagonal slots, ensuring it is perfectly centered and standing upright within the cube. This step is critical for the alignment of your finished product. Once the mirror is in position, use a generous amount of masking tape to secure it firmly in place. Wrap the tape around the mirror and the mold, creating a stable support structure. Do not be shy with the tape – the more secure the mirror, the less likely it is to shift or tilt when you pour the concrete, ensuring a straight and aesthetically pleasing result.
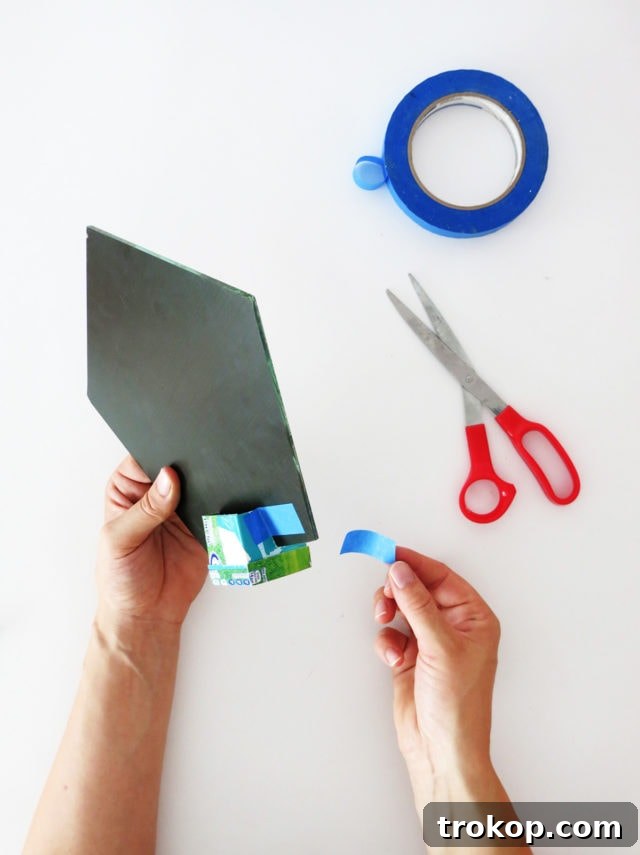
6 — Mixing and Pouring the Concrete
Now for the exciting part – working with concrete! Begin by mixing your lightweight concrete according to the specific instructions provided on its packaging. Achieving the right consistency is vital; aim for something akin to thick pancake batter – pourable but not too watery. Once mixed, hold the mirror firmly in its taped position and carefully, yet steadily, pour the prepared concrete mix into the mold.
As you pour, ensure the mold is filled evenly. Periodically check behind the mirror to confirm there are no hidden gaps or air pockets forming, which could weaken the base or create an uneven surface. It is paramount that the mirror remains in a perfectly vertical position as the concrete begins to set. Leaning the entire assembly gently against a wall can provide additional stabilization. If you have any doubts about the mirror’s stability, add more layers of masking tape. Preventing any movement during this crucial setting phase is essential for a clean and professional outcome.
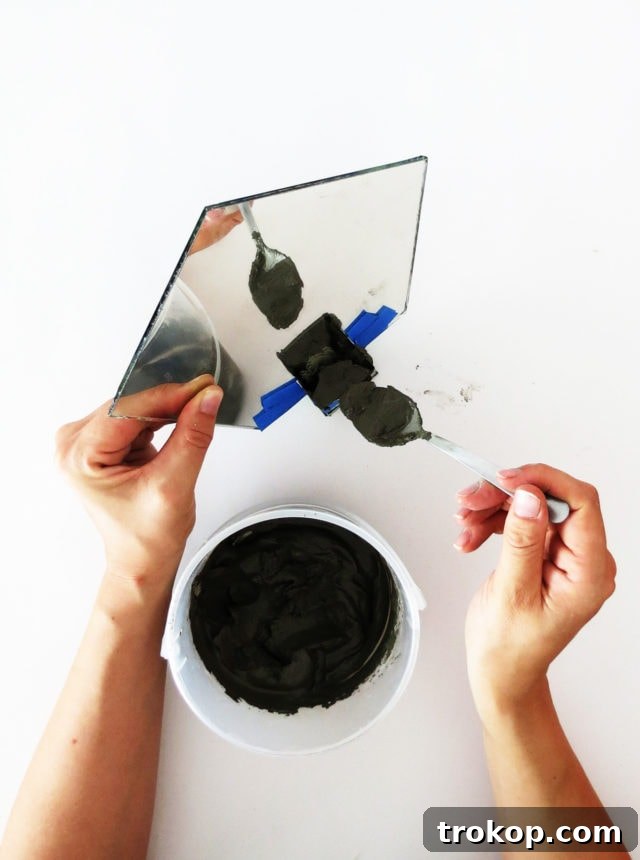
7 — Curing and Demolding
Patience is a virtue, especially when working with concrete. Allow the concrete to cure fully, which typically takes between 24 to 48 hours, though this can vary depending on the specific concrete mix used and environmental conditions. Resist the urge to handle or demold your project before it has completely hardened. Once you are certain the concrete is dry and solid, gently and carefully remove the mold. Take your time during this step to avoid damaging the newly formed concrete base or the mirror.
8 — Finishing Touches and Display
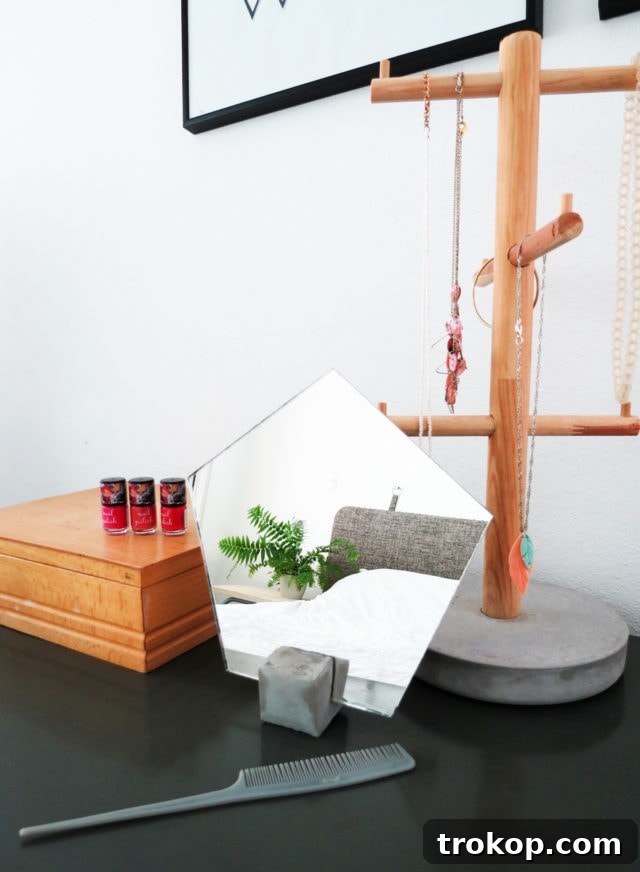
After demolding, inspect your concrete base for any rough edges or minor imperfections. Use sandpaper (starting with a medium grit and moving to a finer one) to smooth these areas, creating a clean and refined finish. Once sanded, rinse off any residual dust with water and allow it to dry. For added durability and to enhance its appearance, you can apply an optional concrete sealant, which will also reduce dust shedding. If you desire a specific color or texture, consider applying a pigmented topcoat. Finally, give the mirror surface a thorough cleaning to remove any smudges or concrete residue. Your beautifully crafted DIY concrete vanity mirror is now complete and ready to take pride of place on your dresser, desk, or any spot that could benefit from its modern charm and functional elegance!
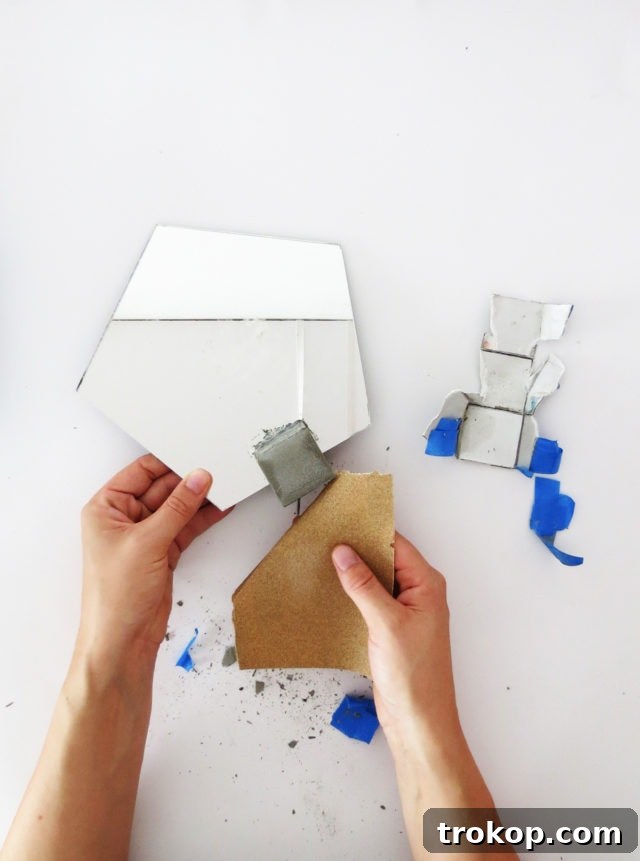
Expert Tips for a Flawless Finish and Long-Lasting Durability
To ensure your DIY concrete vanity mirror project is a resounding success and lasts for years to come, keep these professional tips in mind:
- Achieve the Right Concrete Mix Consistency: The success of your concrete finish largely depends on the mix. Aim for a thick, yet pourable consistency, similar to pancake batter. If the mix is too watery, your concrete might develop cracks or dry unevenly, compromising its strength and appearance. Too thick, and it will be hard to pour and settle around the mirror.
- Tap Out Air Bubbles for a Smooth Surface: After pouring the concrete into the mold, gently tap the entire mold assembly on your work surface for several minutes. This vibration helps release trapped air bubbles. For any stubborn bubbles near the edges or surface, use a toothpick or thin wire to carefully poke and pop them. This crucial step contributes to a smoother, more polished look for your concrete base.
- Allow Full Curing Time – Don’t Rush It!: Patience is paramount! The curing process for concrete is essential for it to reach its maximum strength and durability. Resist the temptation to demold or handle the concrete base before it has fully cured, which is typically at least 24–48 hours. Depending on humidity and temperature, it might even take longer. Premature handling can lead to cracks, breakage, or an imperfect finish.
- Finish with Finesse for a Professional Look: Once fully cured and demolded, use fine-grit sandpaper (e.g., 220-grit or higher) to meticulously smooth the surface of your concrete, paying special attention to the edges. This creates a refined, touchable finish. For enhanced durability, water resistance, and to prevent any concrete dust from shedding, consider sealing the concrete with a clear matte or satin sealant. Apply a thin, even coat according to the product instructions.
- Unleash Your Creativity with Customization: Make your mirror truly unique! Before pouring, you can add a few drops of concrete pigment to the mix to achieve a desired color. For a textured or luxurious look, consider pressing small decorative stones, colored glass fragments, gold leaf, or even terrazzo-style chips into the wet concrete surface. Ensure they are fully embedded to prevent them from falling out later.
- Prioritize Safety While Working: Concrete dust can be an irritant, and wet concrete can be caustic. Always work in a well-ventilated area to minimize inhalation of dust. Wear protective gloves when mixing, pouring, and sanding concrete to protect your skin. A dust mask is also recommended, especially during the sanding phase.
- Consider Your Mirror Choice: While an 8-inch diameter mirror is suggested, you can adapt the mold dimensions for different sizes or shapes. Ensure your mirror is of good quality and adequately protected from concrete splashes during pouring.
- Clean Up Promptly: Concrete can be tough to remove once it dries. Clean your tools, mixing containers, and any spills immediately with water.

Frequently Asked Questions About Concrete DIY Projects
Embarking on a DIY concrete project can raise a few questions. Here are some common queries and their answers to help you feel more confident:
- Q: What type of concrete mix should I use?
A: For smaller decorative projects like this mirror base, a “lightweight” or “fine” concrete mix is ideal. These mixes typically contain finer aggregates, resulting in a smoother finish and reduced weight, making them easier to handle and less prone to cracking for delicate items. Avoid heavy-duty structural concrete mixes for this purpose. - Q: How long does concrete take to fully dry?
A: While concrete might feel hard to the touch after 24 hours, it typically takes 24 to 48 hours to be sufficiently cured for demolding. However, concrete continues to gain strength over several days, and sometimes weeks, reaching its full hardness. It’s best to follow the specific curing recommendations on your chosen concrete mix packaging. - Q: Can I use a different type of mold?
A: Absolutely! The key is a container with smooth, non-porous sides that won’t stick to the concrete and can be easily removed. Plastic containers, silicone molds, or even forms lined with plastic sheeting can work. Just ensure the material is sturdy enough to hold the wet concrete without deforming and has a release agent if needed (though plastic-lined cartons usually don’t). - Q: Is this concrete mirror base durable? Will it chip easily?
A: When properly mixed and cured, lightweight concrete forms a very durable and sturdy base. While any concrete can chip or crack if subjected to extreme force, for everyday use as a vanity mirror base, it should hold up exceptionally well. Applying a sealant can further protect the surface and enhance its longevity. - Q: Can I customize the mirror’s shape or size?
A: Yes, the dimensions of the mold and mirror can be adjusted to suit your preferences. If you choose a significantly larger or heavier mirror, you might want to create a larger, heavier concrete base for increased stability. Ensure your mold design is robust enough for your chosen mirror.
More DIY Beauty & Home Projects to Explore
Loved creating this modern concrete vanity mirror? Dive into more exciting DIY projects to personalize your space and express your creativity. From elegant organizational tools to unique accessories, there’s always something new to craft:
- Leather Hexagon DIY Vanity Tray: Keep your essentials tidy with a chic, handmade tray.
- Sand Art DIY Sugar Scrub: Create beautiful, layered sugar scrubs that double as bathroom decor.
- Patterned DIY No Sew Neckerchief: Add a touch of flair to your outfit with an easy-to-make accessory.
- DIY Pom Pom Slippers: Cozy and cute slippers for ultimate comfort around your home or studio.
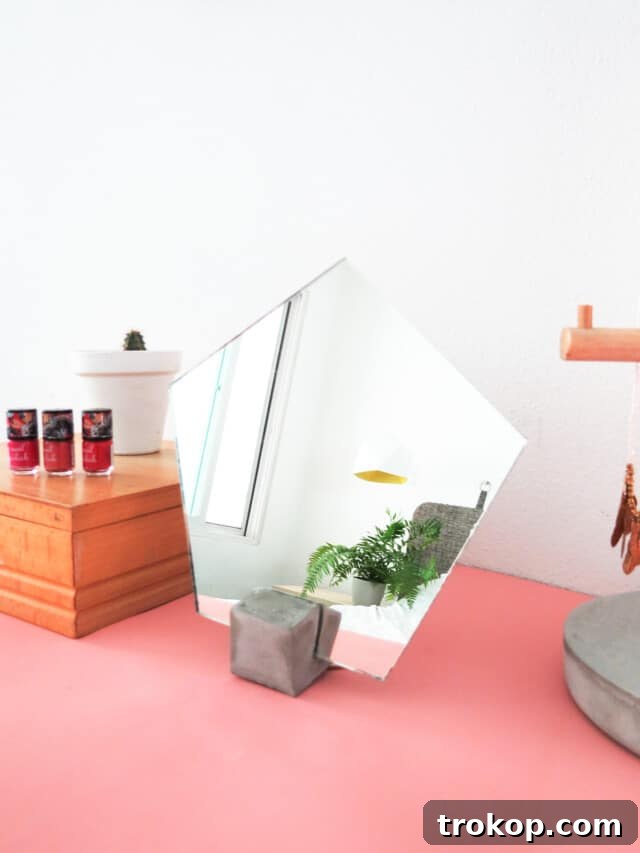
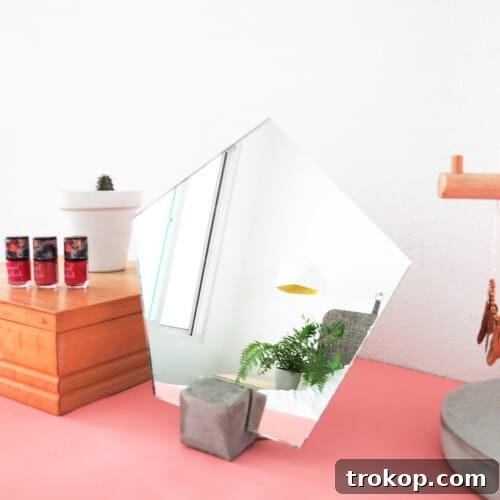
Concrete DIY Vanity Mirror
Build a modern DIY concrete vanity mirror with a custom cement base in just a few simple steps. Durable, stylish, and fully customizable, this project is perfect for adding a touch of industrial chic to your vanity setup.
| Active Time | 1 hr |
| Dry Time | 1 day |
| Total Time | 1 day 1 hr |
| Course | DIY |
| Category | Mirrors |
Equipment
- Scissors
- Ruler
- Hot glue gun and glue sticks
- Masking tape
- Sandpaper
- Repurposed package container (for mold)
- Mixing bucket
- Stirring stick
- Protective gloves
- Dust mask (optional, but recommended)
Materials
- 1 mirror (approx. 8 inches diameter/side)
- Lightweight concrete mix
Instructions
-
Measure your mold for your mirror base: Carefully cut open your repurposed container to create a flat sheet you can work with. Using a ruler, draw a 2-by-2-inch square for the base of your mold, adding small flaps to each side to help with assembly. Then, draw a rectangle measuring 8 inches long by 2 inches high to form the sides of the cube. Add an extra flap at one end of the rectangle for securing the sides together.
-
Cut your mold: Cut out both shapes and fold the long rectangle into four equal sections lengthwise to form the cube’s walls, ensuring crisp edges.
-
Assemble your mold: Use a hot glue gun to attach the base and sides together, gluing the flaps on the outside. This will help create a smooth finish for the concrete surface. Next, use scissors to cut two diagonal notches on opposite sides of the cube. These notches should be wide enough to allow you to slide the mirror into place once the concrete has set.
-
Insert the mirror: Slide the mirror into the notches of your cube mold, making sure it’s centered and standing upright. Use ample masking tape to secure the mirror firmly in place. It’s important that the mirror stays steady and perfectly vertical while you pour the concrete.
-
Pour the concrete: Following the instructions on your concrete packaging, mix the concrete to a thick, pourable consistency. Then, holding the mirror firmly, carefully pour the mixed concrete into the mold. Be sure to fill the mold evenly, checking behind the mirror to ensure there are no gaps or air pockets. Keep the mirror in a vertical position as the concrete sets, leaning it gently against a wall can help stabilize it. Add extra tape if needed to prevent movement.
-
Cure and de-mold: Once the concrete is fully dry (usually after 24–48 hours, depending on the mix), gently and carefully remove the mold.
-
Finish the surface: Sand any rough edges for a cleaner finish and rinse off any dust with water. Allow to dry. Add optional sealant and pigmented topcoat for enhanced durability, color, or texture. Finally, clean the mirror surface thoroughly, and your DIY vanity mirror is ready to be proudly displayed.

25 Best Clear Stadium Bags for Concerts, Sports & Events
Stay stylish and compliant with the best clear stadium bags…
Continue Reading25 Best Clear Stadium Bags for Concerts, Sports & Events
31 Best Beach Bags for Your Summer Essentials
From tote bags to straw bags, stay organized and chic…
Continue Reading31 Best Beach Bags for Your Summer Essentials
Our 41 Favorite Amazon Women’s Swimsuits
Get ready to hit the beach or pool in style…
Continue ReadingOur 41 Favorite Amazon Women’s Swimsuits
Leather Hexagon DIY Vanity Tray
Keep yourself organized and in style with this Leather Hexagon…
Continue ReadingLeather Hexagon DIY Vanity Tray