
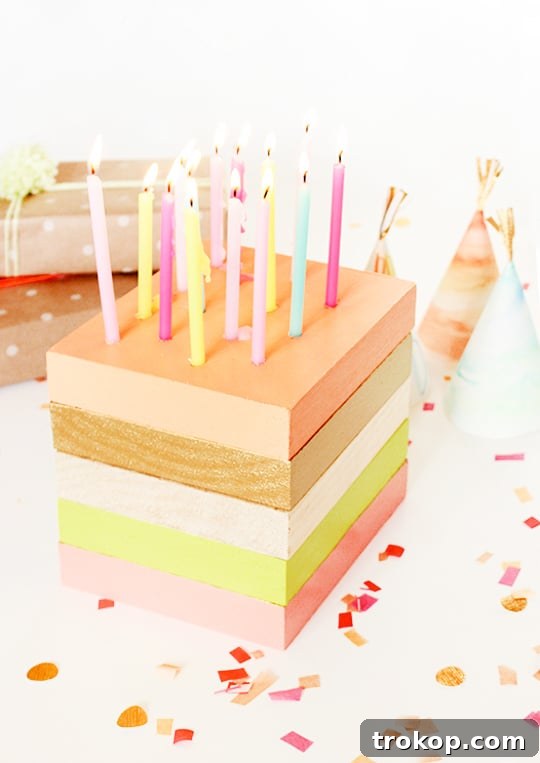
Transform your celebrations with a touch of timeless charm! This DIY Wooden Birthday Cake isn’t just a party centerpiece; it’s a versatile, reusable decor item that brings warmth and a unique handcrafted feel to any gathering. Whether it’s adding festive cheer to a birthday bash or creating a cozy, ambient glow for an evening soiree, this project offers endless possibilities. Forget the hassle of constantly buying new decorations – craft a lasting piece that you’ll cherish for years to come.
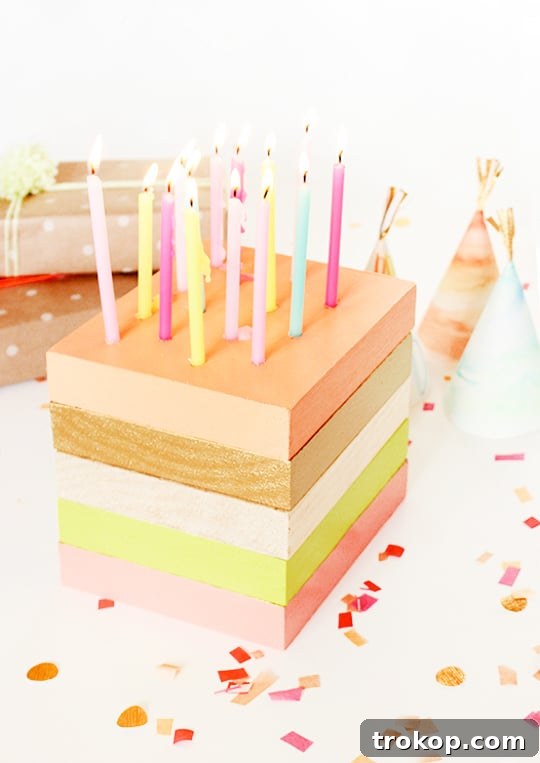
Hello, fellow DIY enthusiasts! Carisa from Camp Pretty is here to guide you through creating a super simple yet incredibly impactful party piece. This painted wood birthday cake doubles as a charming DIY candle holder, perfect for infusing your events with a personalized and elegant touch. And the best part? You don’t need advanced woodworking skills to bring this vision to life. This project is a quick weekend endeavor that results in a magnificent, long-lasting staple centerpiece for all your special occasions.
Imagine this beautiful wooden creation gracing your party table, perhaps elevated on a DIY cake stand, casting a soft, inviting glow across the room. It’s more than just decor; it’s a statement of style and ingenuity.
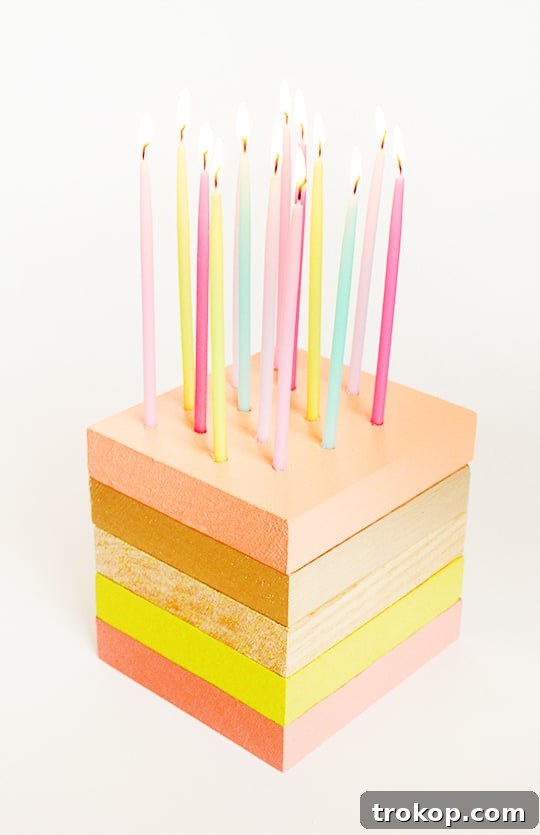
Table of Contents
Why Choose a DIY Wooden Birthday Cake?
In a world saturated with single-use party items, a DIY wooden birthday cake stands out as a beacon of sustainability and style. Opting for a handcrafted wooden centerpiece offers numerous advantages:
- **Durability and Reusability:** Unlike traditional cakes or fragile decorations, this wooden creation can be brought out year after year, saving you time, money, and waste. It’s a treasured family heirloom in the making.
- **Unique Aesthetic:** The natural warmth of wood combined with your chosen paint colors provides a unique, rustic-chic appeal that’s hard to replicate with store-bought items. It adds an authentic, personal touch to any event.
- **Customization Potential:** From vibrant hues to muted pastels, or even leaving some wood exposed for a minimalist look, the design possibilities are endless. You can tailor it to any party theme, holiday, or home decor style.
- **A Fantastic Conversation Starter:** Guests will undoubtedly be intrigued by this charming centerpiece, leading to conversations about your crafting skills and the story behind its creation.
- **Allergy-Friendly Alternative:** For those with dietary restrictions or allergies, a wooden cake offers the celebratory symbolism without the edible concerns, making it inclusive for all guests.
- **Versatile Functionality:** Beyond being a “cake,” its primary function as a multi-candle holder means it provides genuine ambiance, transforming any space into a cozy and inviting environment.
This project is an investment in beautiful, sustainable decor that will make your celebrations truly memorable.
Materials and Tools Needed to Make a DIY Wooden Birthday Cake
Gathering your supplies is the first exciting step to bringing your wooden birthday cake to life. You’ll find most of these items readily available at your local hardware store or craft shop.
Wood boards — We recommend using 5/8 inch pine boards. Pine is a popular choice for DIY projects due to its affordability, ease of cutting, and smooth surface, which takes paint beautifully. You can choose to have your boards pre-cut or cut them yourself to your desired dimensions. For a classic tiered cake look, aim for boards of varying sizes, with each layer slightly smaller than the one below it. However, for a more modern, jumbled stack, uniform boards work perfectly.
Paint — Select colors that complement your party theme or home decor. Acrylic craft paints work well and come in a vast array of colors. For a more sophisticated finish, consider chalk paint for a matte look or even wood stain for a natural, rustic feel. Remember, the quality of your paint will impact the final appearance and durability.
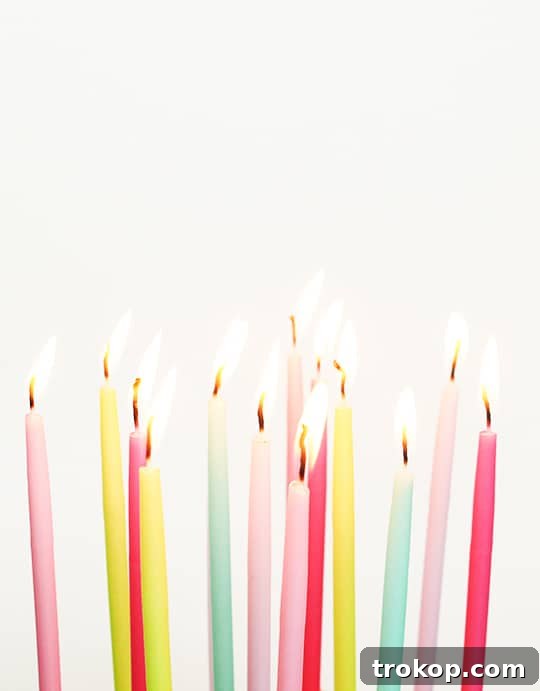
Mini taper candles — These small, elegant candles are ideal for creating a delicate, celebratory glow. Choose colors that match or contrast with your paint scheme for added visual interest. Always ensure you have enough for your desired number of holes.
Drill and drill bit — A standard electric drill will do the trick. The drill bit size is crucial and should correspond to the base diameter of your mini taper candles. Commonly, a 1/4″ or 5/16” drill bit will work, but it’s always best to measure your specific candles to ensure a snug fit. A drill press can offer more precision if available, but a hand drill is perfectly adequate.
Wood glue — Any strong wood adhesive will work to securely bond your layers. Look for glues that offer a quick setting time and strong bond for a durable finished product.
How to Make a DIY Wooden Birthday Cake
Let’s get crafting! This step-by-step guide will walk you through the process, ensuring a smooth and enjoyable DIY experience.
Preparation and Planning
Before you begin, ensure your workspace is clean, well-ventilated, and protected with a drop cloth. Lay out all your materials and tools. Decide on the arrangement of your wooden boards. If you’re aiming for a perfectly tiered cake look, make sure your boards are cut to ascending sizes (e.g., largest at the bottom, smallest at the top). If you prefer a more whimsical, “jumbled” stack, simply use boards of similar or identical sizes and arrange them playfully. For the best results, a light sanding of all board edges and surfaces can help the paint adhere more smoothly, though it’s optional for a more rustic look.
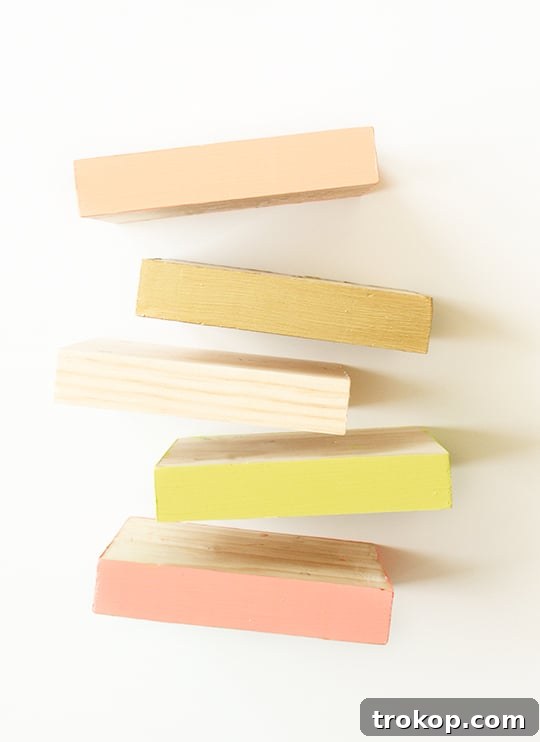
Step 1: Paint Your Wooden Layers
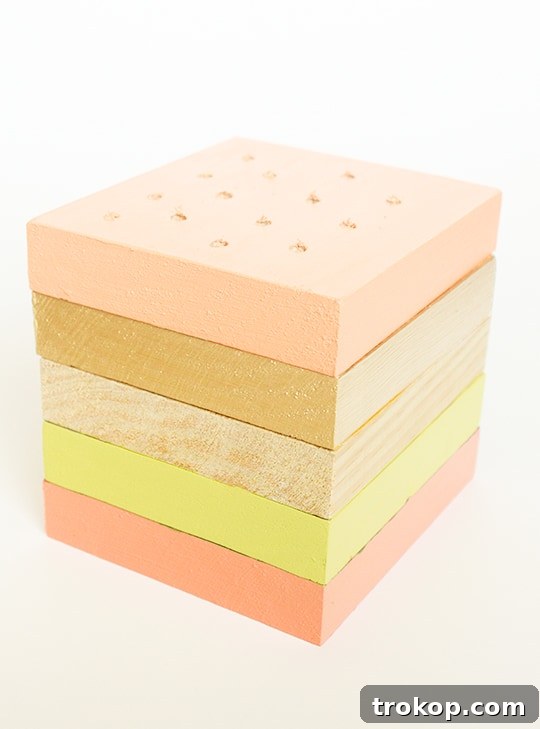
Begin by painting each board. We focused on the ends of each board to give the illusion of layers of frosting, much like a real cake. Apply 2-3 coats of paint as needed, allowing ample drying time between each coat to achieve full, opaque coverage. The number of coats may vary depending on the paint type and color you choose. For a unique touch, consider leaving one or more boards unpainted to showcase the beautiful natural wood grain, adding an organic element to your design.
Alternatively, you could opt to stain the ends instead of painting for a different aesthetic. If you’re creating a stack, remember that the entire top surface of the uppermost board will be visible, so make sure to paint (or stain) its whole top side thoroughly. Experiment with different color combinations – a rainbow of colors for a playful birthday, or elegant neutrals for a sophisticated ambiance. This is where your creativity truly shines!
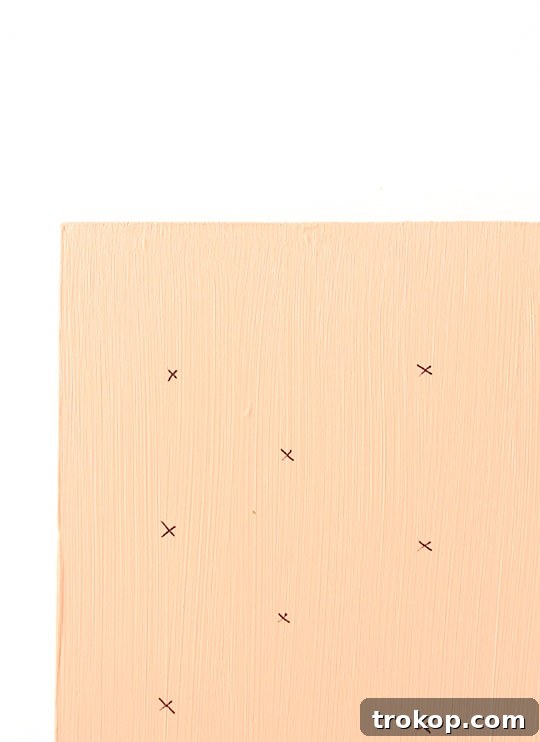
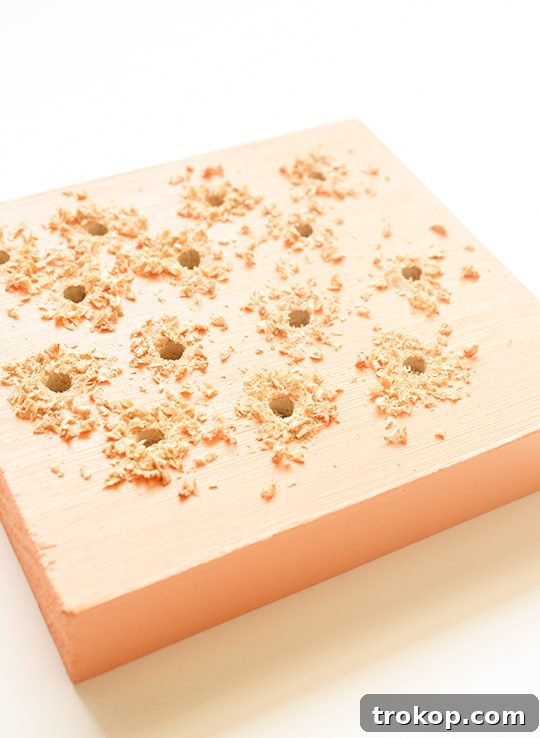
Step 2: Mark Candle Placements
Once all the paint is completely dry, it’s time to decide on the placement of your candles. On the top board, carefully arrange your mini taper candles to visualize the layout. Use a pencil to make small, clear marks where you plan to drill each hole. For symmetrical spacing, you can use a ruler to measure and evenly distribute the marks. Consider patterns like a straight line, a circle, or a random cluster, depending on the look you desire.
Step 3: Drill the Candle Holders
With your marks in place, take your drill and the appropriate drill bit (1/4″ or 5/16″, depending on your candle size). Carefully drill straight down into each marked spot. We drilled approximately 1/4 inch deep, which provides a secure hold for most mini taper candles. You can adjust the depth based on how far you want your candles to sit within the wood. Ensure you hold the drill steady and straight to create clean holes. A useful tip: you can certainly do the drilling before painting if you prefer; it works perfectly well either way!
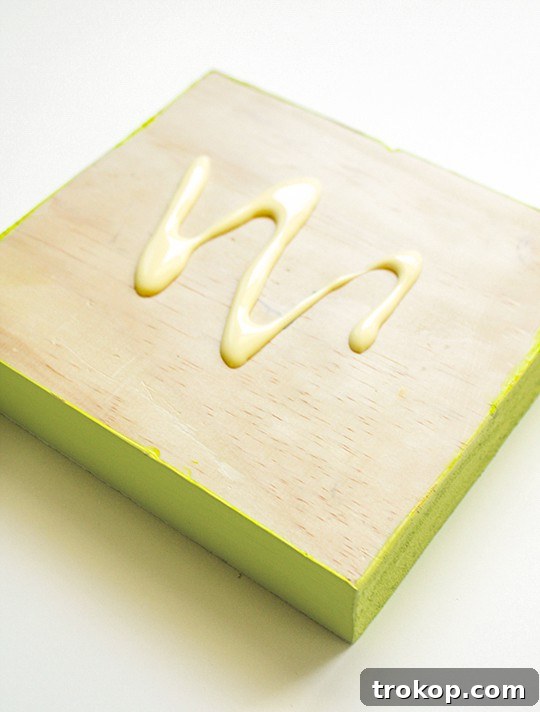
Step 4: Assemble Your Wooden Cake
Now it’s time to bring your layers together! Apply wood glue to the top surface of each board (except the very top one, of course). You don’t need excessive amounts of glue; a simple zig-zag pattern or a few dots in the corners will suffice to create a strong bond. Carefully place each subsequent board on top, aligning them as desired. If you want a more precise stack, use clamps to hold the boards firmly together while the glue dries, ensuring even pressure. Allow the glue to cure completely according to the manufacturer’s instructions. Once dry, clean up any excess glue that may have squeezed out.
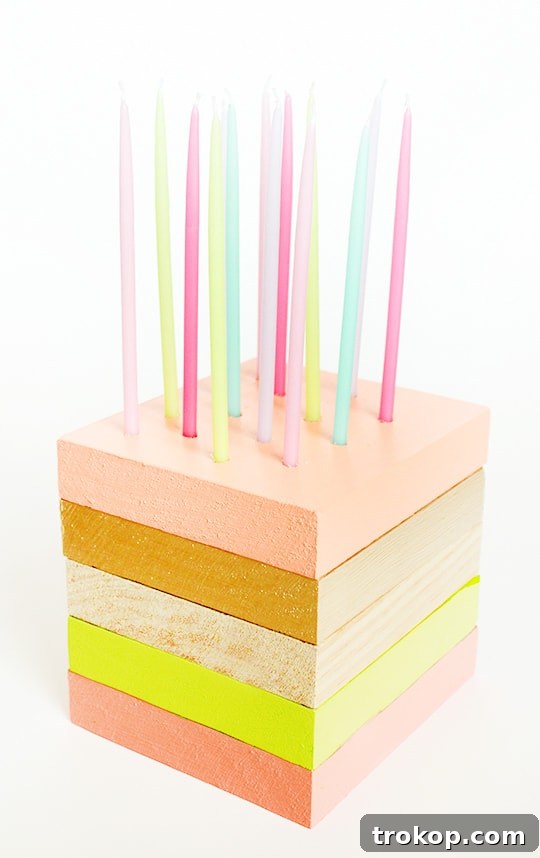
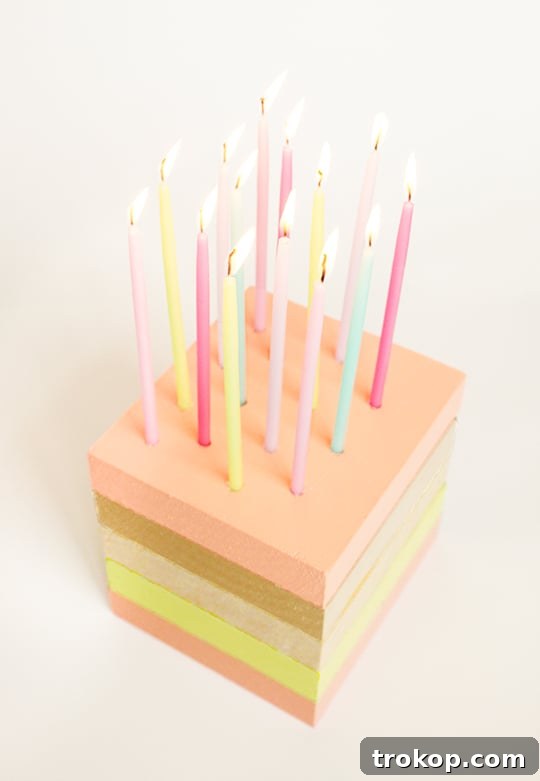
With your wooden birthday cake fully assembled and the glue dry, simply insert your mini taper candles into the drilled holes, light them, and enjoy the magical ambiance you’ve created! Always ensure you have a fire-safe surface beneath your wooden cake when candles are lit, and never leave burning candles unattended.
Creative Variations and Customization
One of the best aspects of this DIY wooden birthday cake project is its adaptability. Here are some ideas to spark your imagination and help you customize your creation even further:
- Paint Techniques:
- Ombre Effect: Paint each layer a slightly different shade of the same color for a sophisticated gradient.
- Distressed Look: Apply a base coat, then a top coat, and lightly sand areas to reveal the underlying color for a vintage feel.
- Stenciling: Use stencils to add numbers, letters, or intricate patterns to the sides or top of your wooden cake.
- Glitter or Metallic Accents: Add a touch of sparkle with glitter paint or metallic accents on the edges for extra glam.
- Wood Selection:
- Different Wood Types: While pine is easy to work with, consider oak, maple, or even reclaimed wood for different grain patterns and textures.
- Round Wood Slices: Instead of square or rectangular boards, use various sized round wood slices for a more traditional cake shape or a rustic, natural look.
- Embellishments:
- Faux Flowers or Greenery: Hot glue small faux flowers, berries, or greenery around the base or on top for a botanical touch.
- Ribbons and Twine: Wrap decorative ribbons or rustic twine around each layer for added texture and color.
- Personalized Engravings: If you have access to a wood-burning tool or a laser engraver, you could add names, dates, or special messages.
- Small Figurines: Adorn the top with small wooden animals, mini flags, or other theme-appropriate figurines.
- Candle Alternatives:
- LED Taper Candles: For ultimate safety and reusability, use battery-operated LED taper candles. They mimic real flames without the fire hazard, making them perfect for homes with children or pets.
- Votive Holders: If your drilled holes are larger, you could place small glass votive holders or tea lights for a different kind of glow.
Don’t be afraid to mix and match these ideas to create a truly unique centerpiece that reflects your personal style and the spirit of your celebration.
Beyond Birthdays: Versatile Decor
While designed as a birthday cake, this wooden candle holder’s elegant simplicity means it can serve countless decorative purposes throughout the year. Its reusable nature makes it an incredibly sustainable choice for various occasions:
- Holiday Centerpiece:
- Christmas: Paint it in festive reds and greens, or silver and gold, and adorn with tiny ornaments or pine sprigs for a cozy holiday feel.
- Easter: Pastel colors, small faux eggs, and spring blooms can transform it into a charming Easter display.
- Halloween: Darker paints, mini pumpkins, and spooky accents can make it a unique haunted centerpiece.
- Seasonal Home Accent:
- Spring: Use light colors and floral embellishments to welcome the season.
- Summer: Bright, bold colors with seashells or citrus slices can evoke a sunny vibe.
- Fall: Earthy tones, small gourds, and autumn leaves create a warm, inviting display.
- Everyday Decor: Place it on a mantelpiece, bookshelf, or coffee table as a permanent decorative feature. Its sculptural form adds an artistic touch even without candles.
- Wedding or Baby Shower Decor: Paint it in soft, romantic colors or baby-themed pastels. It can be a beautiful and memorable alternative to traditional centerpieces, especially when paired with elegant floral arrangements.
- Dinner Party Ambiance: Use it as a sophisticated candle holder for any dinner party, providing a warm and inviting glow that enhances the dining experience.
This DIY wooden birthday cake is truly a versatile piece that adapts to your evolving decor needs, proving that handmade items can be both beautiful and highly functional.
About Our Guest Contributor
We extend our gratitude to Carisa from Camp Pretty, a talented art director and designer based in Minneapolis. Carisa lives and breathes all things pretty, constantly envisioning her next DIY project, party plan, or paper craft. Alongside her husband Adam, daughter June, and dog Riley, she brings her creative passion to life through inspiring designs and delightful handmade creations. Her vision for combining functionality with aesthetic appeal truly shines in this project.
More Easy Woodworking Projects
If you thoroughly enjoyed crafting this DIY Wooden Birthday Cake and are eager for more woodworking adventures, you’re in luck! Here are a few more beginner-friendly DIY projects that allow you to explore the beauty and versatility of wood, turning simple materials into stylish home decor:
- How to Make DIY Wooden Polaroid Displays (+ Video Tutorial): Create charming and personalized photo displays that add a rustic touch to your memories. This project is perfect for showcasing your favorite snapshots in a unique way.
- Mini Christmas Tree – DIY Wooden Christmas Tree: Craft delightful miniature wooden Christmas trees that can be used as festive decor during the holidays, adding handmade charm to any mantel or shelf.
- Ikea Hack – DIY Wooden Headboard Using Stikwood: Elevate your bedroom with a stunning, custom headboard using pre-finished wood planks. This IKEA hack transforms a basic bed frame into a high-end statement piece with minimal effort.
- Easy DIY Mid Century Modern Side Table: Build a stylish and functional side table with clean lines and a retro vibe. This project teaches basic joinery and finishing techniques for a beautiful piece of furniture.
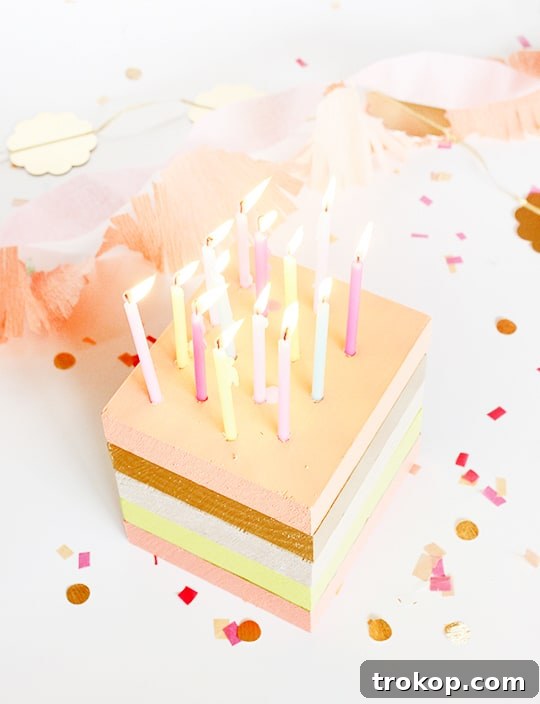
DIY Wooden Birthday Cake Decor
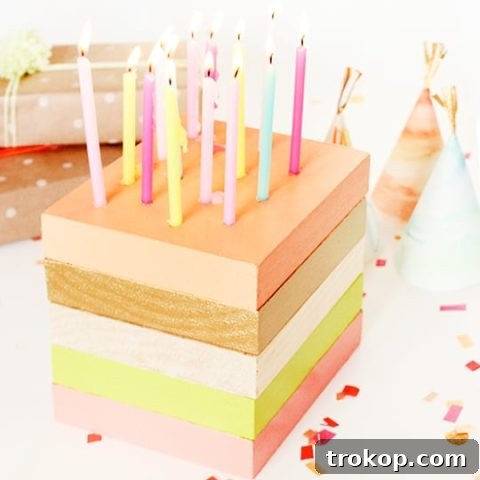
This easy tutorial will show you how to make a wooden birthday cake decor that is perfect for any celebration!
Details
- Active Time: 45 mins
- Dry Time: 1 hour
- Total Time: 1 hour 45 mins
- Course: DIY
- Category: Entertaining Decor
- Cost: $10 (approximate, varies by materials)
- Keywords: diy wooden birthday cake decor, wooden candle holder, party centerpiece
Equipment
- Drill and drill bit (1/4″ or 5/16”, depending on your candle size)
- Wood glue
Materials
- Wood boards (5/8 inch pine boards recommended)
- Paint (any color of your choice)
- Mini taper candles
Instructions
- Paint each board end. We recommend applying 2-3 coats on each board, depending on how well the paint coats, allowing it to dry thoroughly between applications. You might also choose to leave one board unpainted to highlight the natural wood grain for a rustic contrast. Optional: Consider staining the ends of the wood boards for a different look. Remember to paint the entire top surface of the board you choose for the very top of the stack.
- Mark candle placements. Once all the paint is completely dry, decide on the desired number of candles for the top layer. Use a pencil to make small, precise marks where you plan on placing each candle.
- Drill the candle holders. Using your drill and the appropriate drill bit (1/4″ or 5/16″, matched to your candle size), carefully drill straight down into each marked spot. We drilled approximately 1/4 inch deep, but you can adjust this depth based on how far you want your candles to sit securely. You can also do the drilling before painting if preferred.
- Assemble your wooden cake. Apply wood glue to the top surface of each board (except the top-most one). Place the boards together, ensuring proper alignment. A simple zig-zag pattern of glue is sufficient. Allow the glue to dry completely according to the product instructions. Once dry, insert your candles and light them safely to enjoy your beautiful, handcrafted centerpiece!
We are absolutely thrilled to see your creativity! Don’t forget to share your DIY wooden birthday cake with us on Instagram using the hashtag #sugarandclothloves. We genuinely love seeing all the unique creations you bring to life!
Looking for even more inspiration to elevate your living spaces? You can find all of our home decor tutorials and innovative ideas right here. Keep crafting, keep celebrating, and keep making your home uniquely yours!